

Before You Start
This guide will walk you through connecting Toss Payments to your Readdy project. Before you begin, make sure you have the following ready:- An active Toss Payments merchant account.
- An approved electronic payment services application. You can apply through Apply for Electronic Payments in Toss Payments. Your application must be approved before you can accept live payments.
- A Readdy project connected to Readdy Backend or Supabase.
Get Your Toss Payments Keys
1
Open the Toss Payments Developer Center
Go to the Toss Payments Developer Center, log in to your merchant account, and open “API Keys”.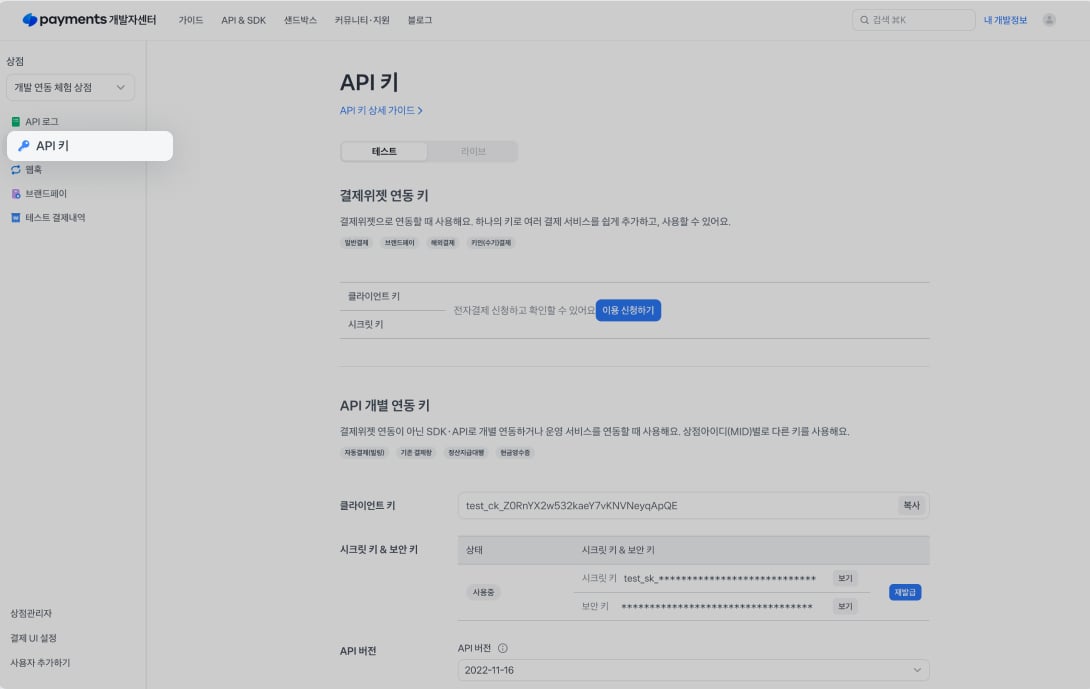
2
Choose the Environment
Select the “Test” or “Live” environment at the top of the page.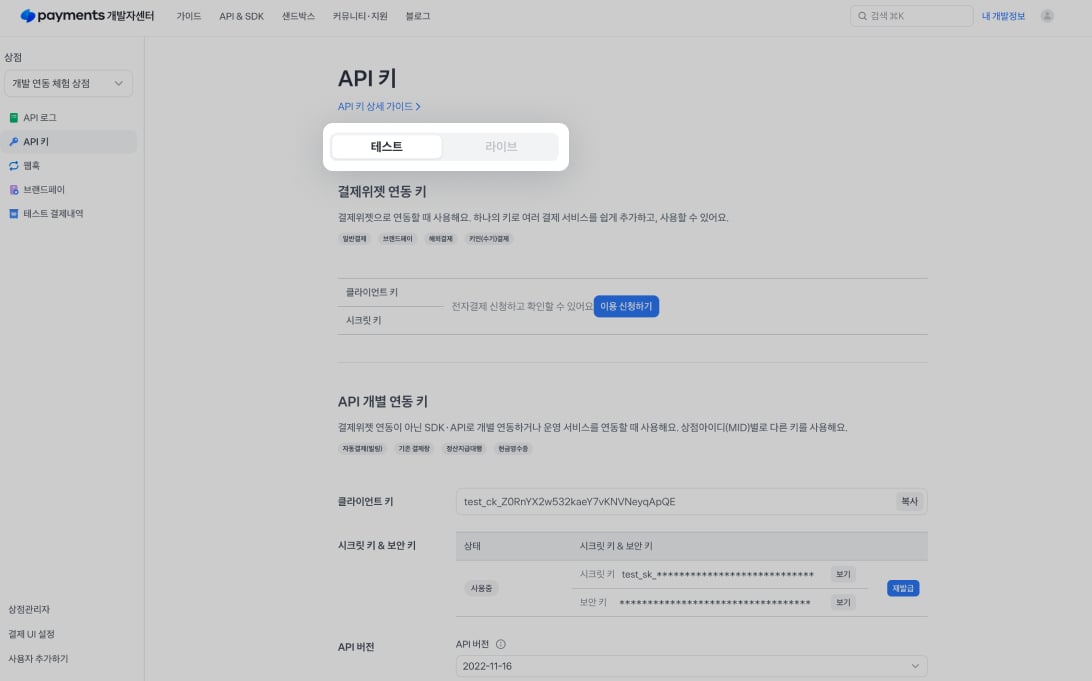
Test payments simulate authorization and do not charge the payment method, even when you enter real payment information.
3
Copy the Payment Widget Keys
Find Payment Widget integration keys (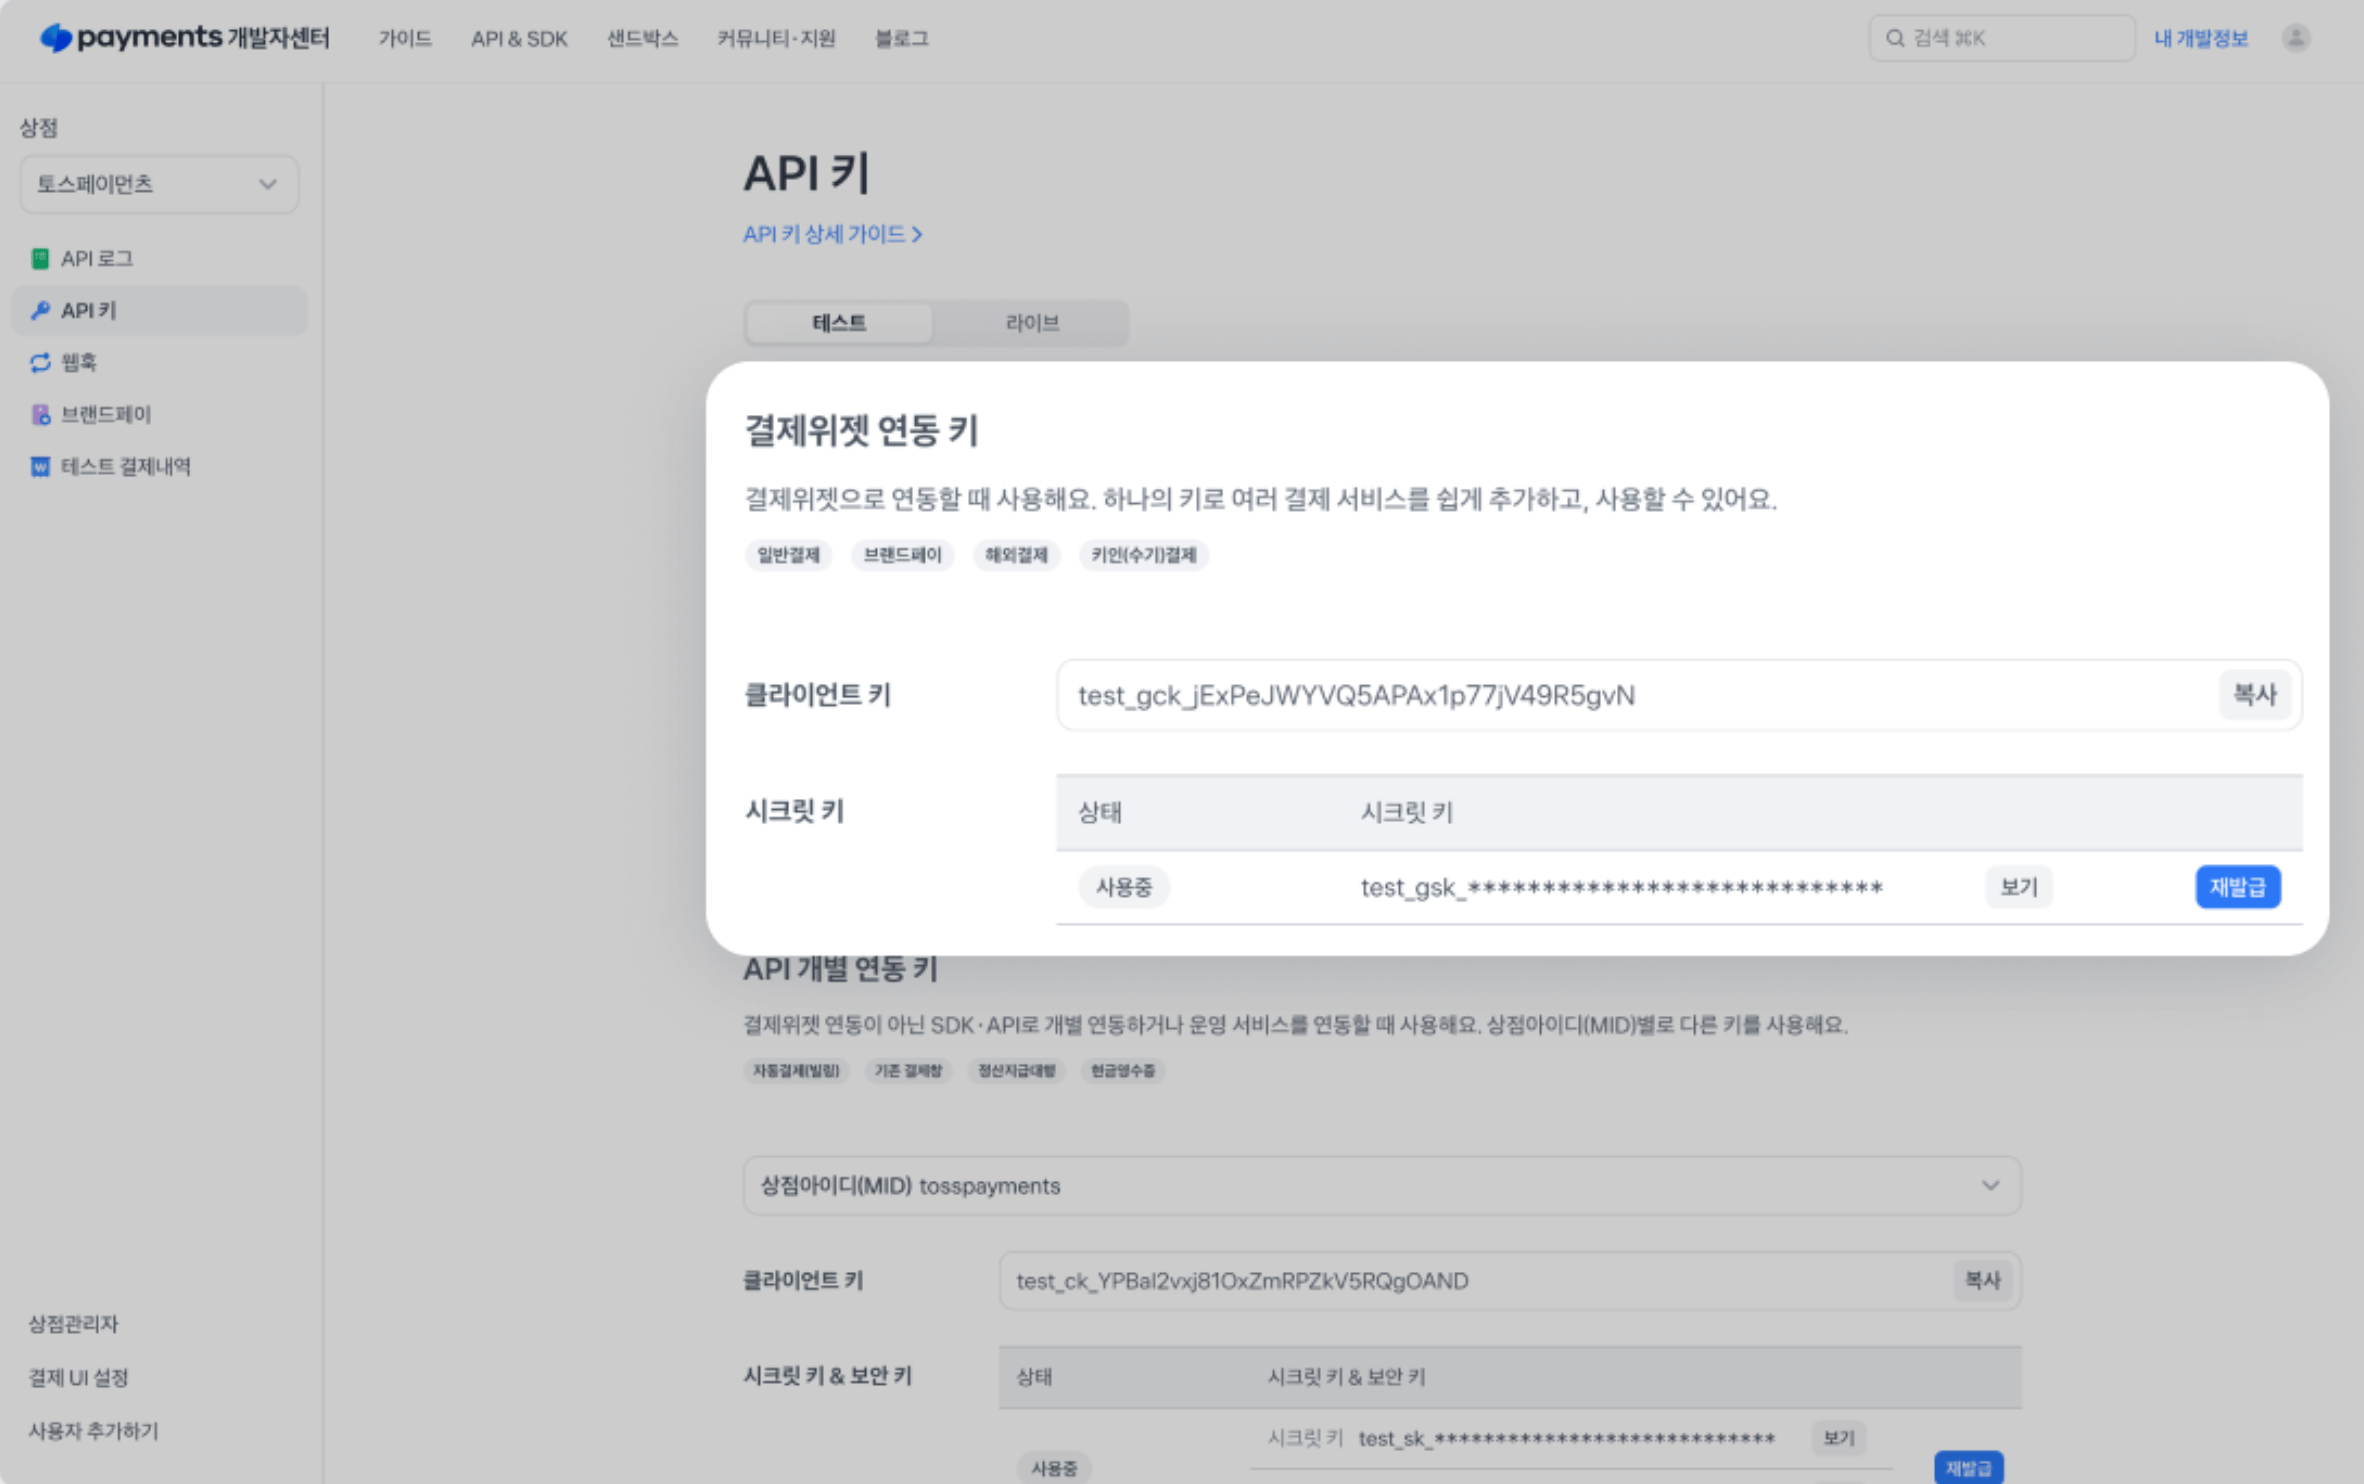
결제위젯 연동 키), then copy the Client Key and Secret Key from the same key pair.You can view your Payment Widget integration keys only after applying for Toss Payments electronic payment services. Even test keys require an application. Before applying, you can use the following public test pair:
clientKey = 'test_gck_docs_Ovk5rk1EwkEbP0W43n07xlzm'secretKey = 'test_gsk_docs_OaPz8L5KdmQXkzRz3y47BMw6'The Client Key and Secret Key must:
- Come from the same merchant ID.
- Belong to the same Payment Widget key pair.
- Both be test keys or both be live keys.
Connect Toss Payments in Readdy
1
Open the Connects Panel
In the Readdy editor, click “Connects” at the top of the screen.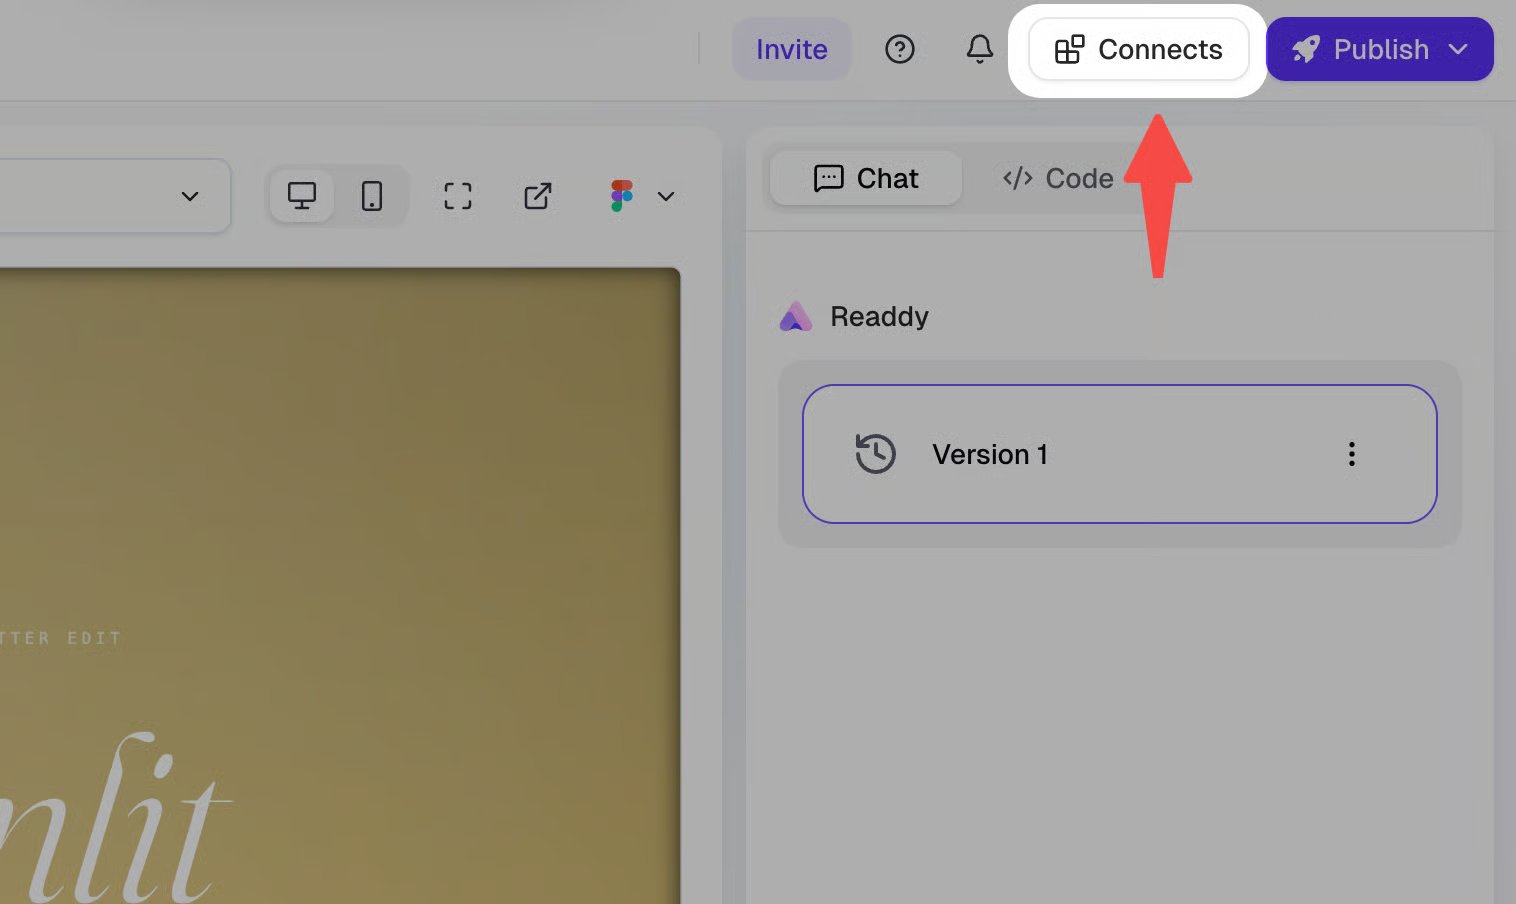
2
Select Toss Payments
Find Toss Payments in the Connects panel, then click “Connect”.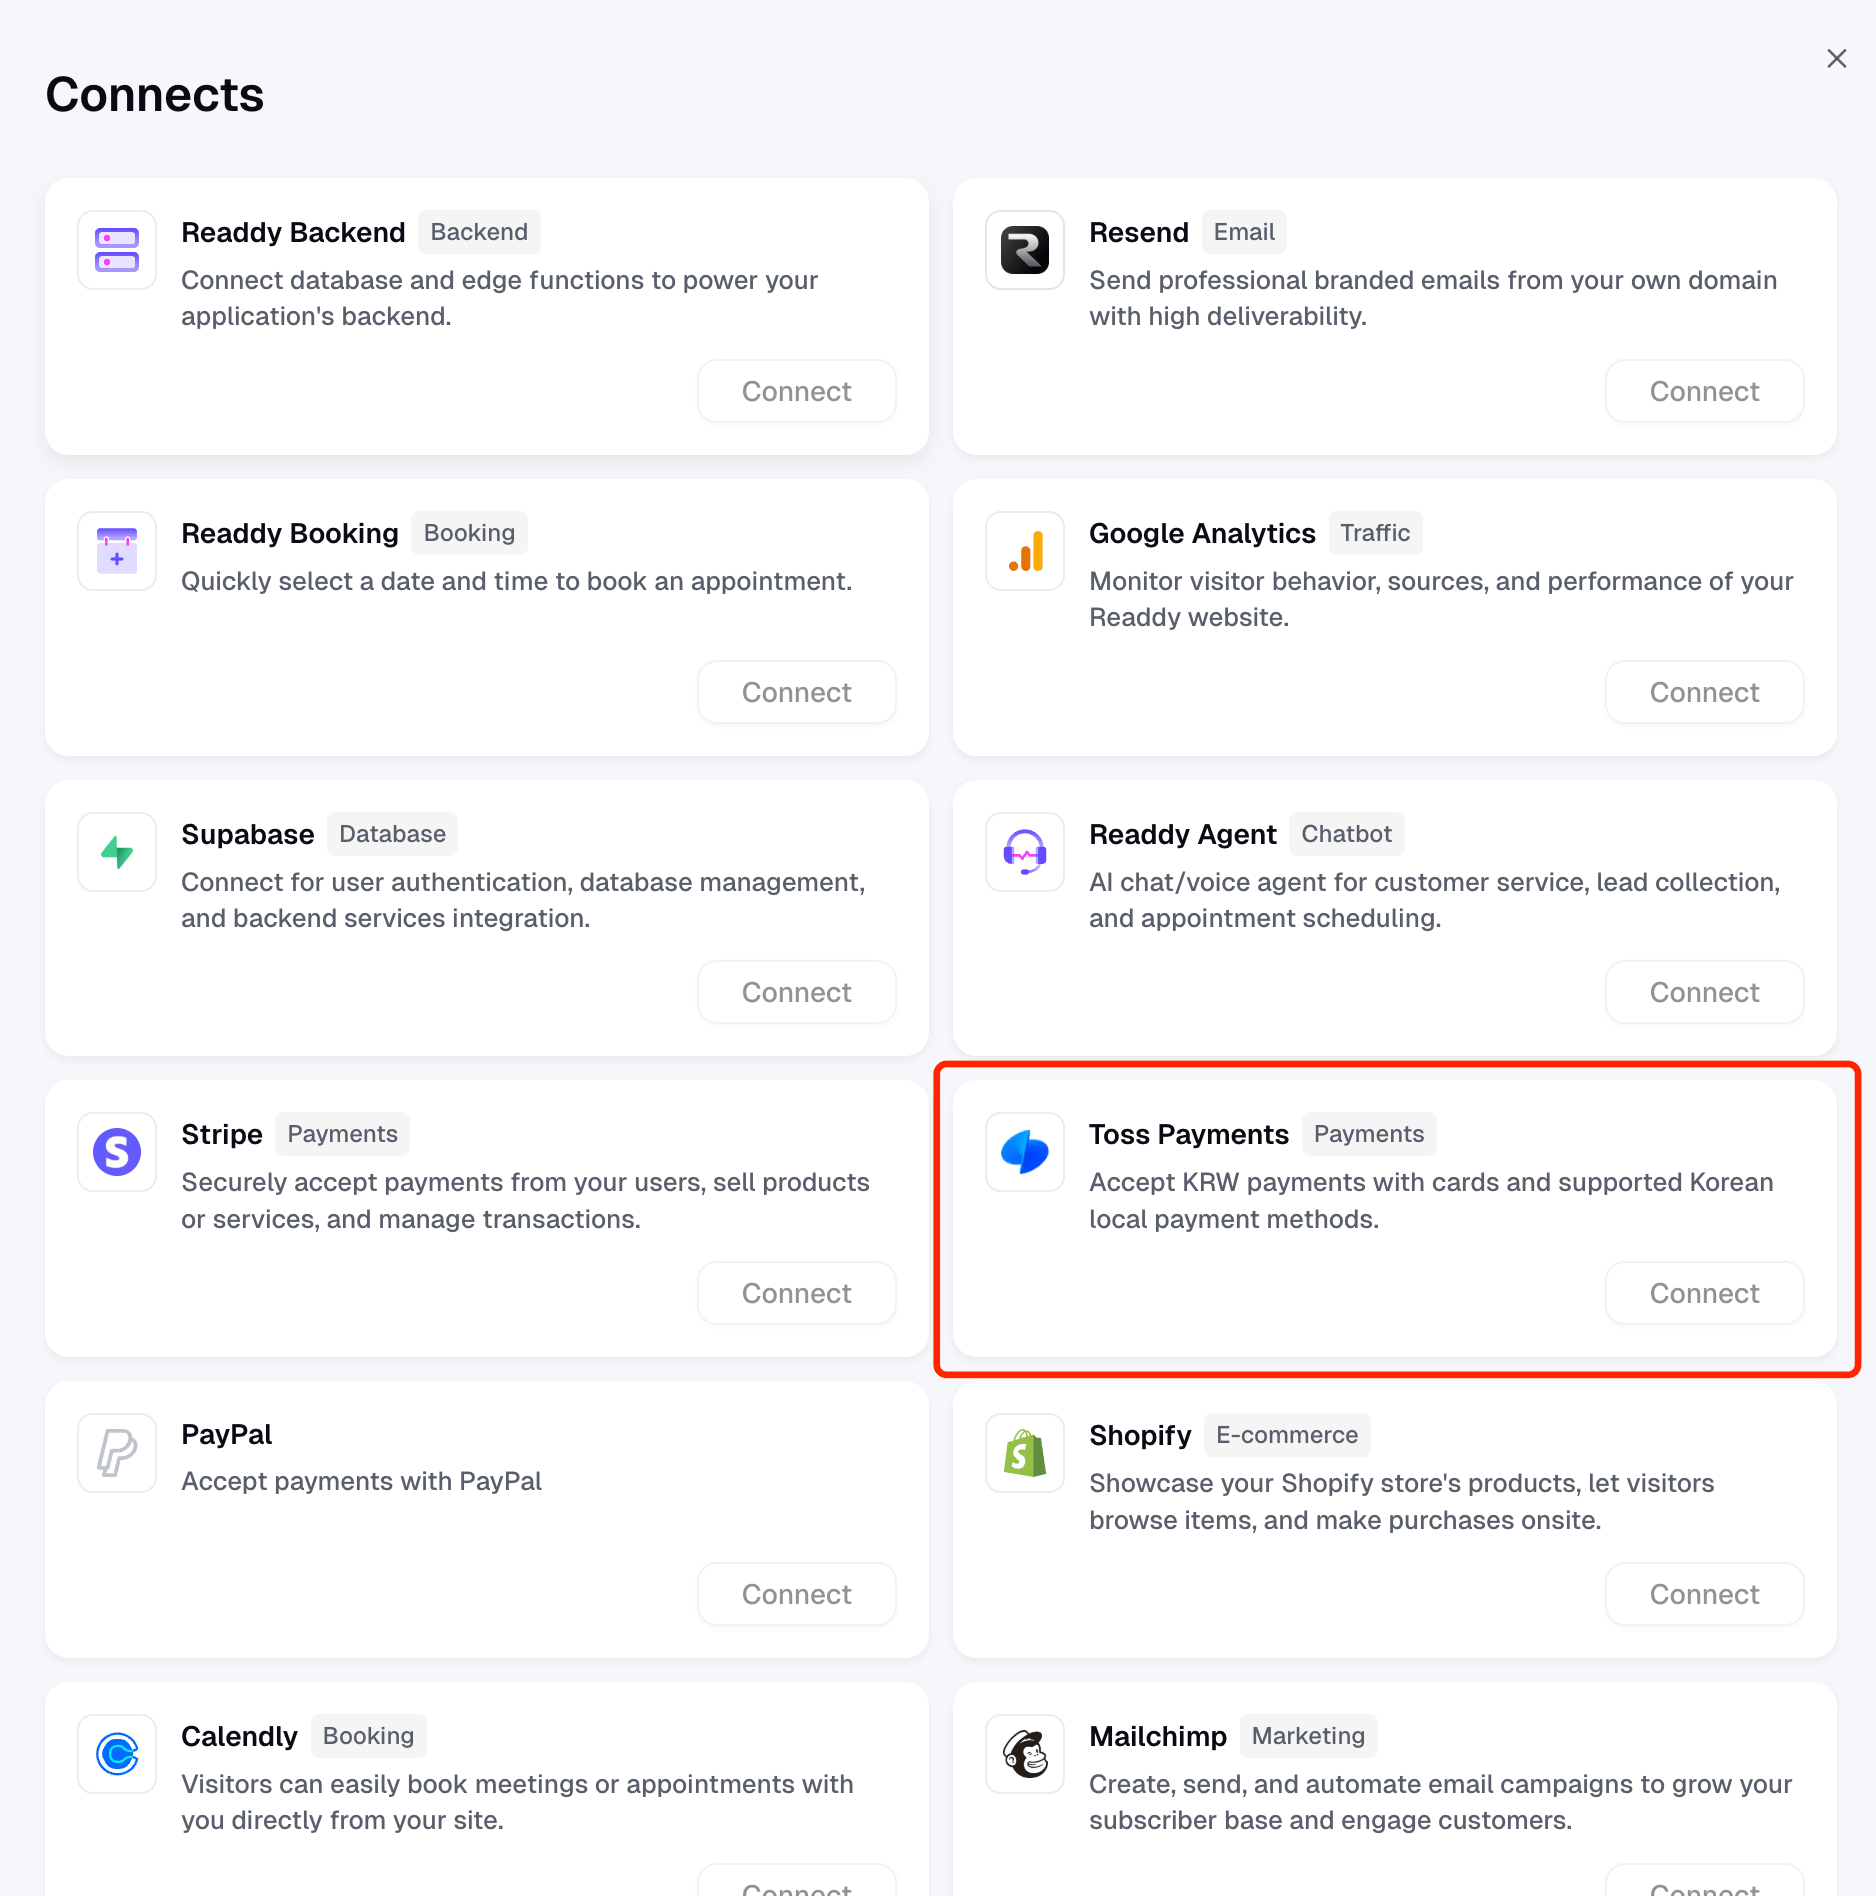
If your project does not have a connected database, Readdy asks you to connect Readdy Backend or Supabase first. Toss Payments uses the connected backend to create orders, keep the Secret Key secure, and confirm payments.
3
Enter Your Integration Keys
Paste the matching Widget Client Key and Widget Secret Key, then click “Connect”.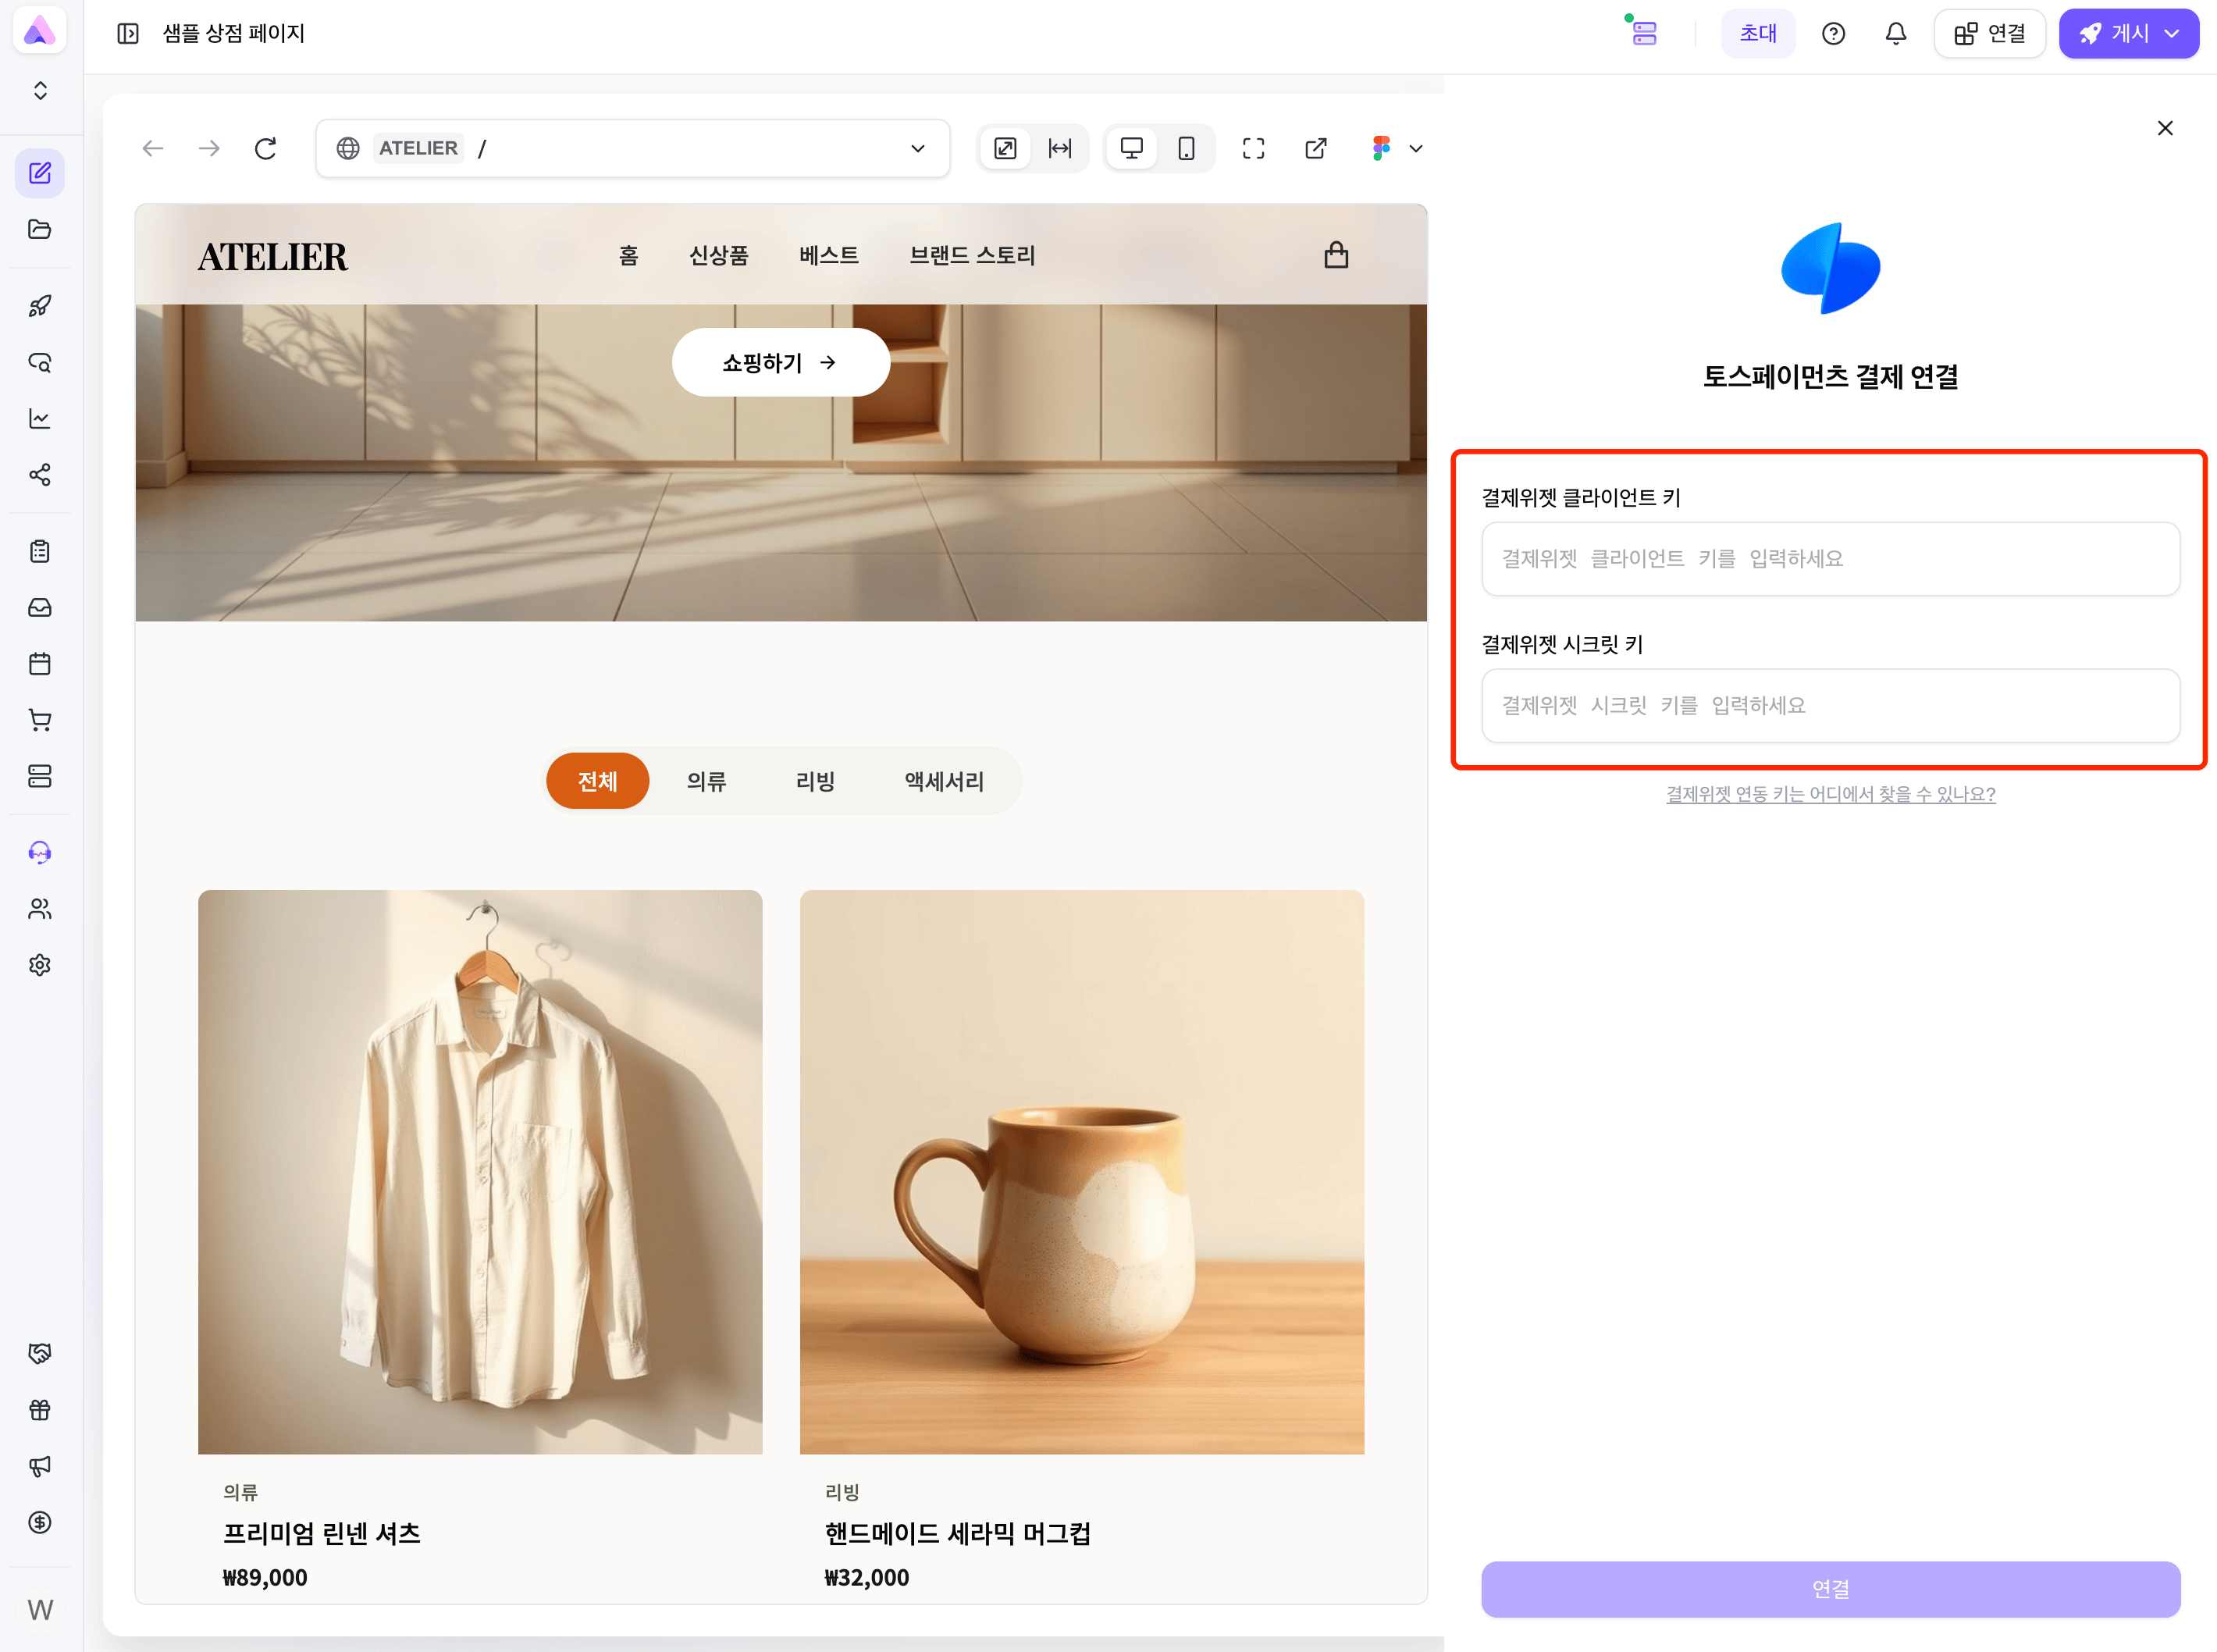
4
Confirm the Connection
Check that the panel displays “Connected” and masks both keys.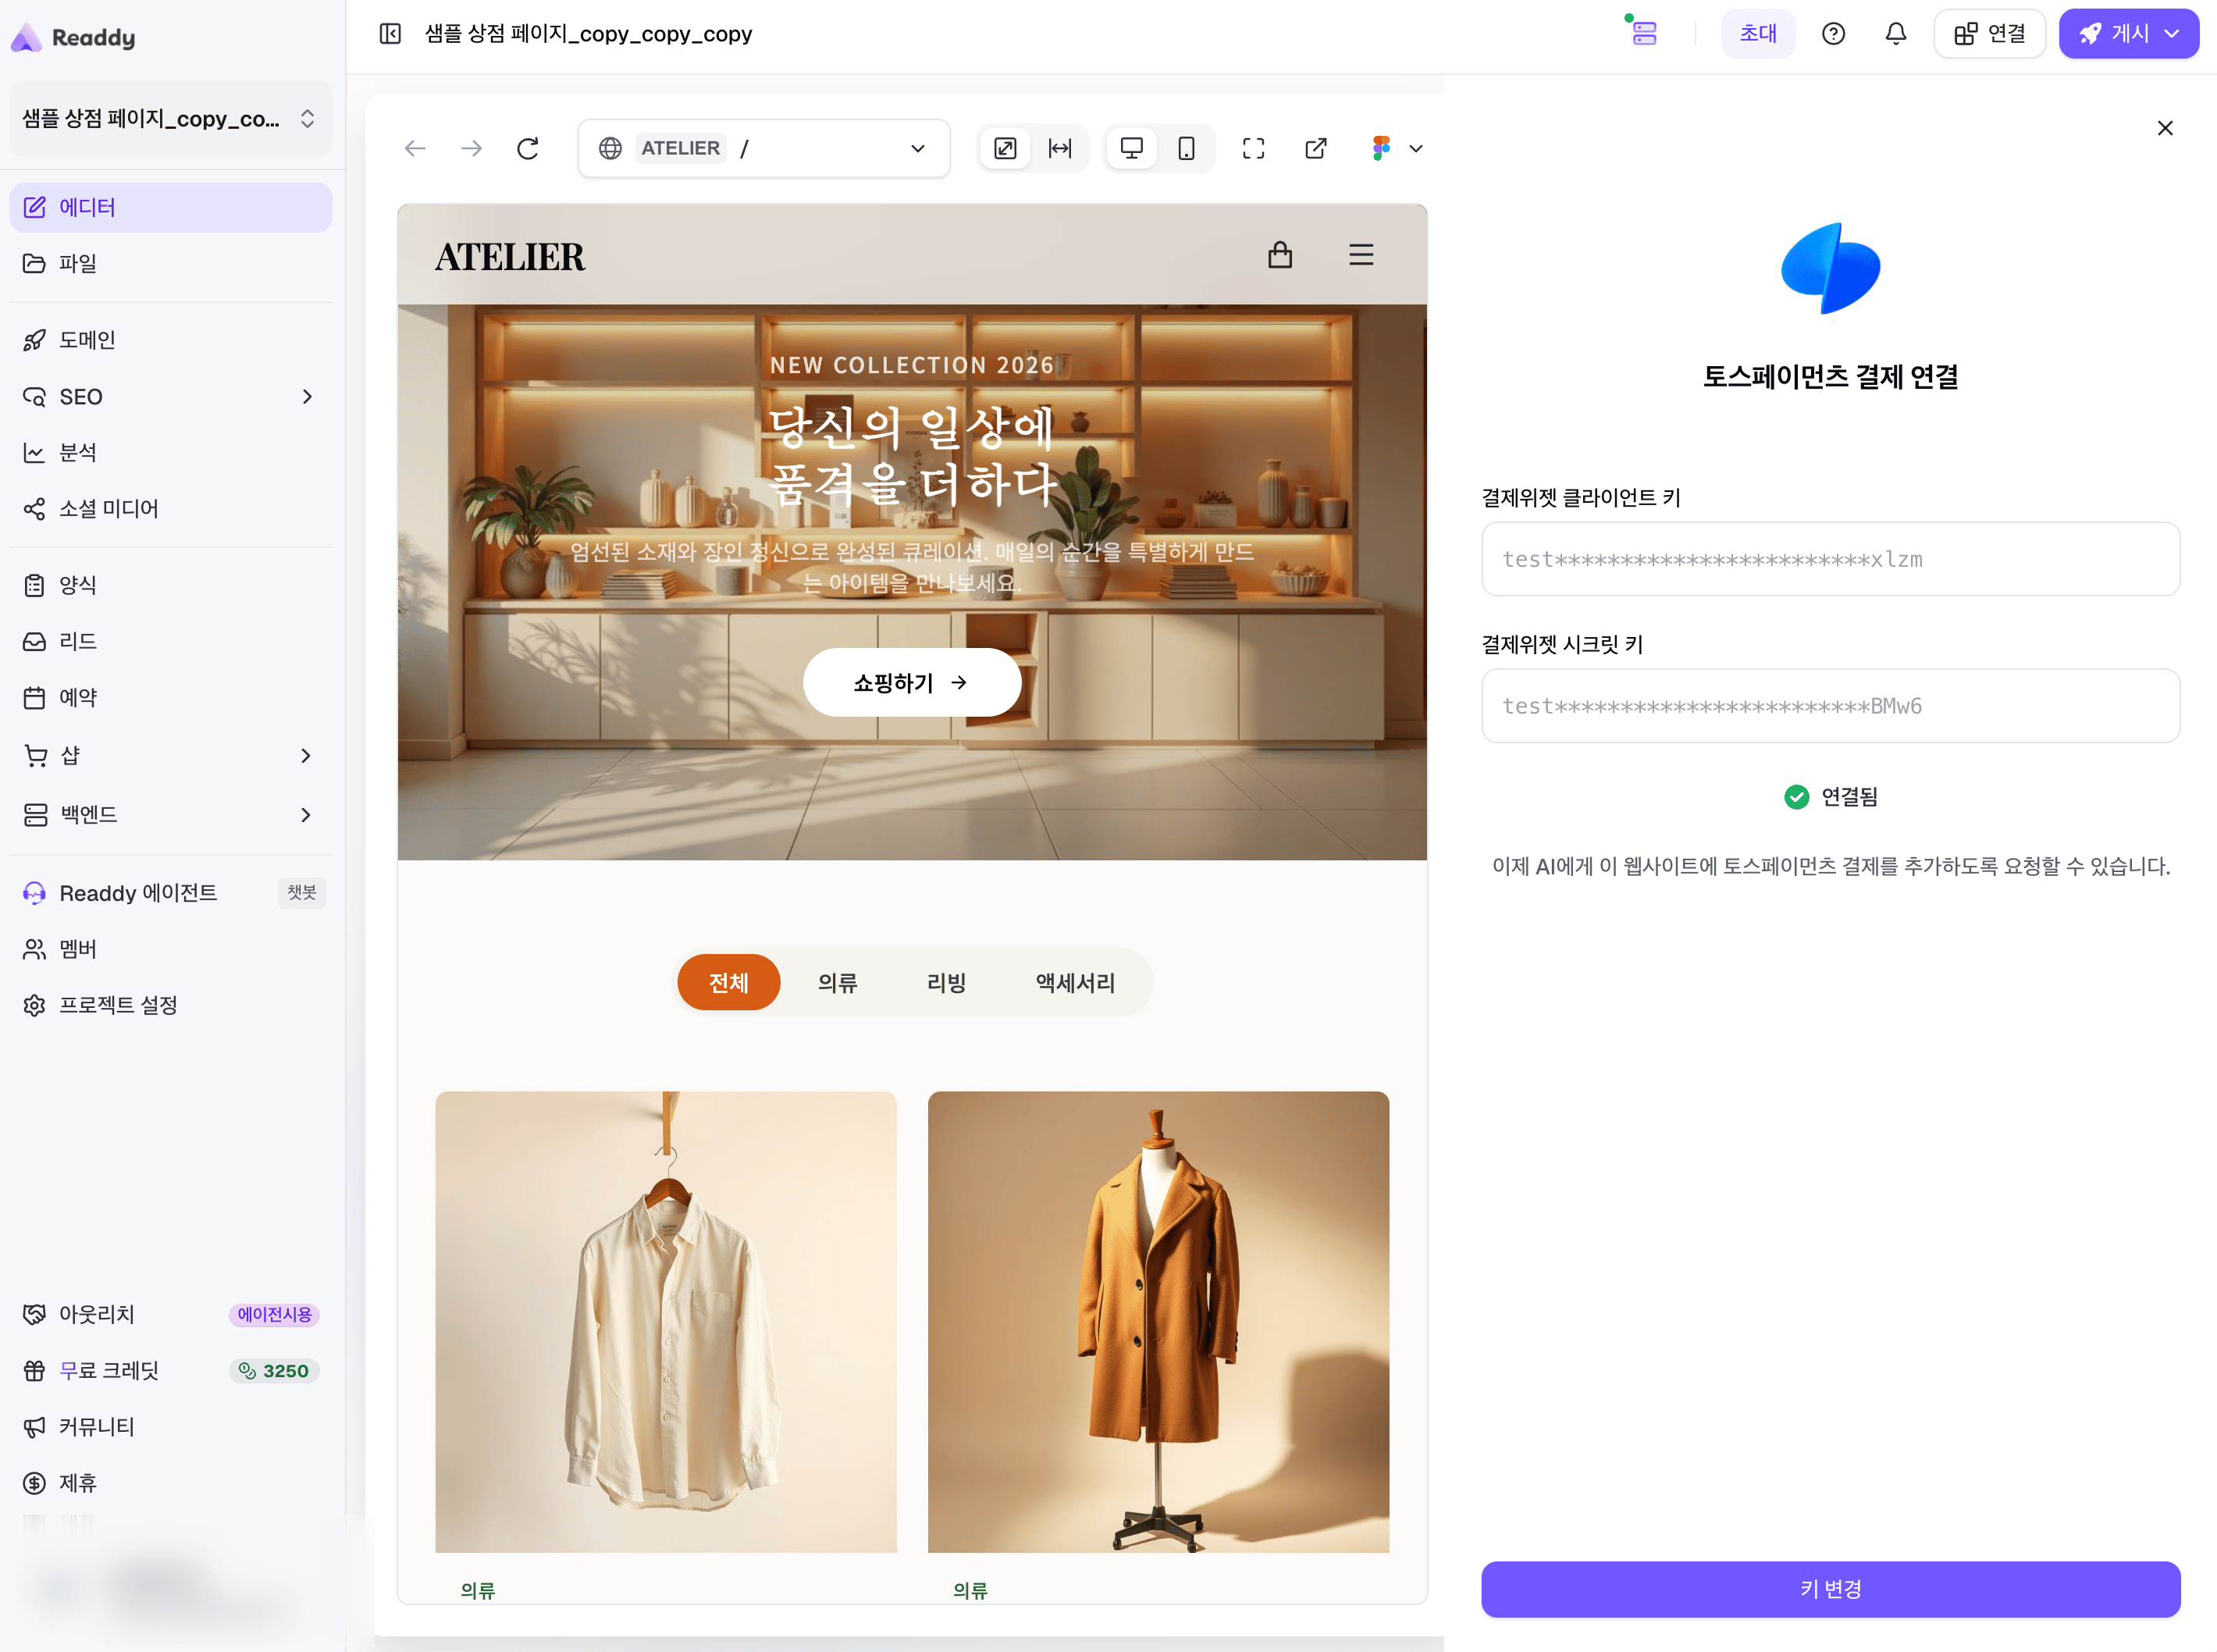
5
Ask Readdy to Add the Payment Flow
Ask Readdy AI to add a Toss Payments checkout flow to the products, cart, or checkout button on your website.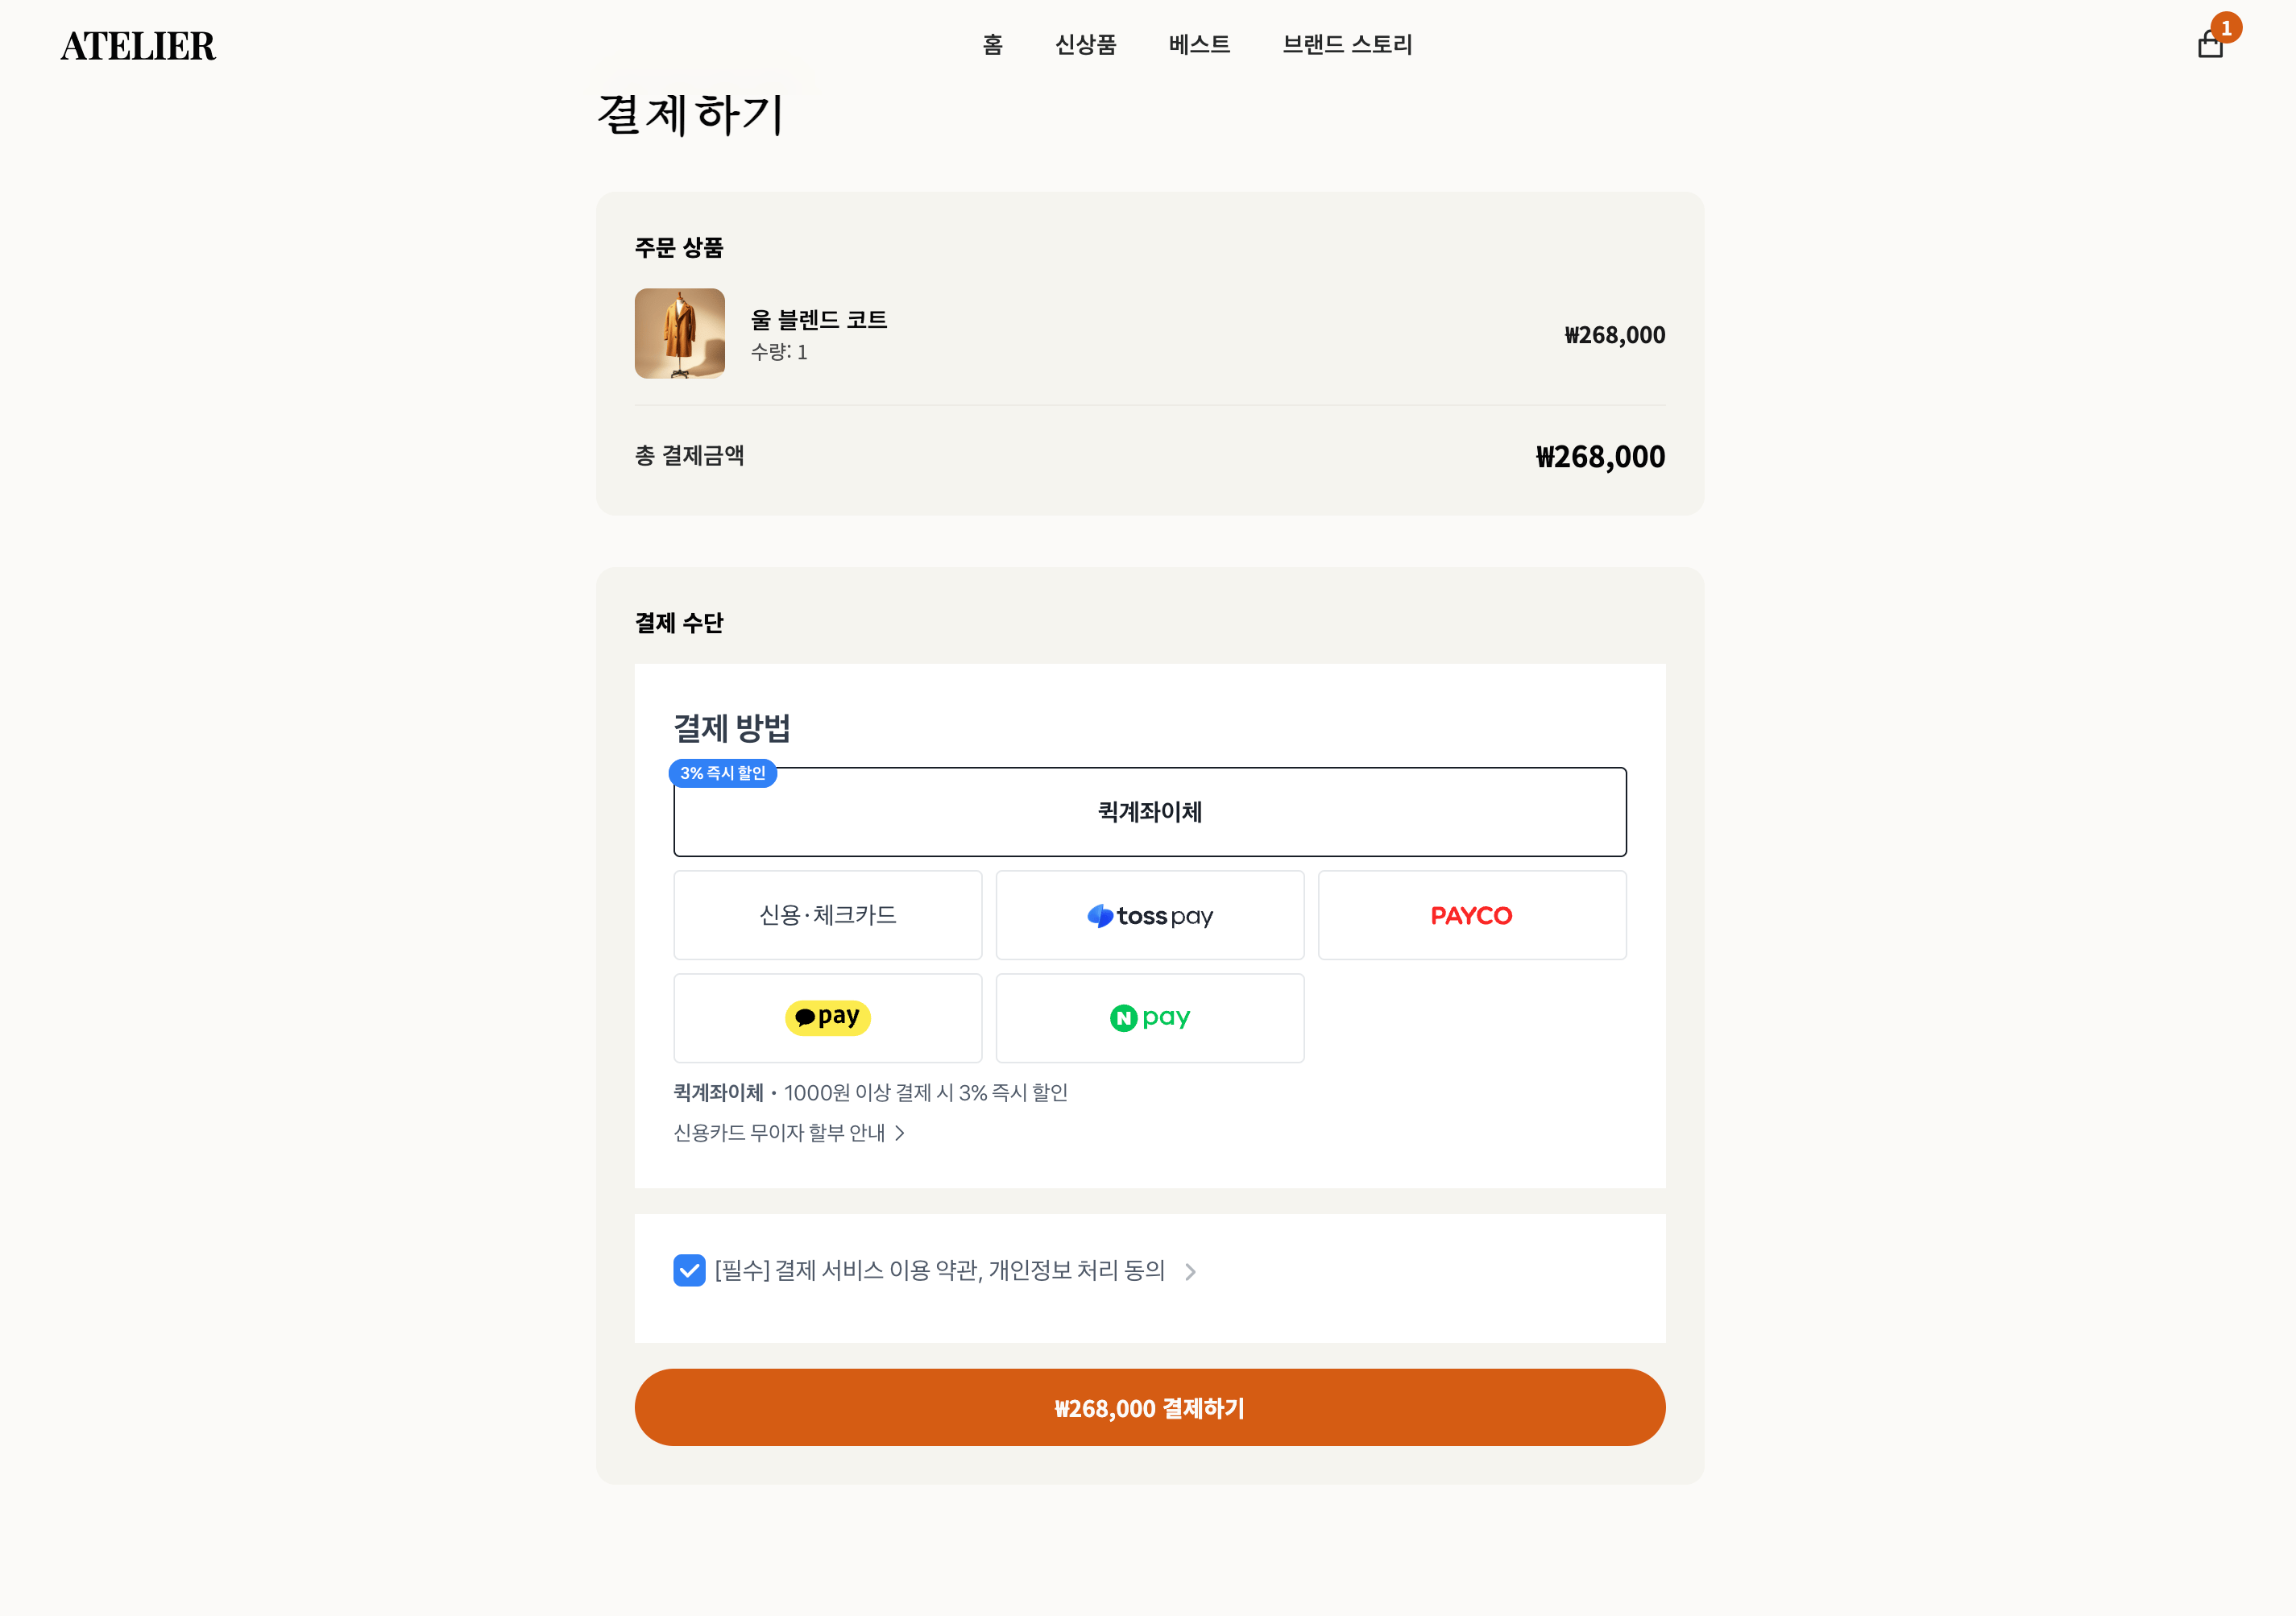
Best Practices
- Tell Readdy AI which products, cart, or checkout button should use Toss Payments.
- Use positive whole-won prices. Toss Payments currently supports one-time KRW payments in Readdy.
- Review your Toss Payments contract and Payment Widget settings to confirm which payment methods customers can use.
- Test the complete flow through your website’s share link or published URL before accepting live payments.
FAQ
Why can't I see Toss Payments in Connects?
Why can't I see Toss Payments in Connects?
Toss Payments is currently available to eligible accounts. Make sure you are signed in to the correct Readdy account. If the integration is still missing, submit a support ticket to request access.
Why does Readdy reject my keys?
Why does Readdy reject my keys?
Make sure you copied Payment Widget integration keys (
결제위젯 연동 키), not individual API integration keys. The Client Key must use a test_gck_ or live_gck_ prefix, the Secret Key must use the matching test_gsk_ or live_gsk_ prefix, and both keys must come from the same merchant ID.Why do I need to connect a database first?
Why do I need to connect a database first?
Readdy uses the connected backend to validate order amounts, create orders, protect your Secret Key, confirm payments with Toss Payments, and update the order only after payment succeeds.
Which payment methods will customers see?
Which payment methods will customers see?
Customers see the methods enabled in your Toss Payments contract and Payment Widget settings. If a payment method is missing, review your contract and Widget configuration in Toss Payments.