Manage your website’s authentication directly in Readdy without connecting a separate authentication service.
With Authentication, you can:
- Add secure account flows: create sign-up, sign-in, email verification, and password recovery experiences
- Send branded emails: connect your own SMTP provider and customize authentication email templates
- Offer Google Sign-In: connect a Google OAuth web client to your published website
- Prepare changes safely: save configuration as a Draft before activating it for your live website
Prerequisites: Connect Readdy Backend to your project before configuring Authentication. Readdy Backend and Supabase cannot be connected to the same project at the same time. Activating a new authentication configuration changes how your live website handles sign-up and sign-in. Generate and publish compatible authentication pages before activating the Draft.
How Authentication Configuration Works
Authentication settings have two states:
Use this order whenever you add or change an authentication method:
- Save the complete configuration as a Draft.
- Ask Readdy to generate or update the compatible authentication pages.
- Review the generated account flows.
- Publish the compatible website version.
- Confirm that the compatible version is published.
- Activate the Draft.
This sequence prevents a new authentication requirement from going live before your website has the pages needed to support it.
Before You Start
Make sure you have:
- A project connected to Readdy Backend
- The published URL for your website
- An account with an email provider and a verified sending domain if you want to send verification or recovery emails
- A Google Cloud project you can manage if you want to offer Google Sign-In
You do not need to prepare callback paths or Google OAuth credentials in advance. The steps below show you how to configure the return URLs and create a Google OAuth client.
Never paste an SMTP password, API key, or Google Client Secret into Chat or your website’s frontend code.
Open Authentication Settings
Open your project, expand Backend in the sidebar, and select Authentication.
Configure Your Site URL
Open URL Configuration and enter your published website URL, such as https://www.example.com.Add every allowed authentication return URL on a separate line. A typical generated website includes routes such as:Use HTTPS and make sure each URL belongs to your published domain. Click “Save Draft”. Connect Your SMTP Provider
Open SMTP and enter the host, port, username, password, Sender Email, and Sender Name from your provider.You typically need the following information from your email provider:If the page includes sending limits, choose values that are supported by your provider and appropriate for your website. Click “Save Draft” when the configuration is complete.Example: Resend SMTP settings
Use the following values after verifying your sending domain in Resend. See the Resend SMTP guide for provider-specific setup details.Create a dedicated sending key and restrict it to the required domain when your provider supports that option. Customize Your Email Templates
Open Email Templates and review the subject, HTML content, and plain-text content for each authentication email.Keep the instructions short and make the verification code or recovery action easy to find. If you restore a default template, Readdy replaces the current Draft only; the Active template remains unchanged until you activate the new configuration.
Enable Email Verification
Open Email, enable email verification, and save the setting as a Draft.When email verification is active, new users must complete the verification flow before they can finish signing in.
Generate Compatible Authentication Pages
Return to the Editor and ask Readdy to add the account flows your website needs. For example:Make sure the generated website includes routes for registration, verification, sign-in, password recovery, password reset, and authentication callbacks. Publish the Compatible Website Version
Review the generated pages and publish the latest compatible version of your website.Check that the published domain matches the website URL and allowed return URLs saved in Authentication.
Activate Email Authentication
Return to Authentication and confirm that you published a compatible authentication flow. Click “Activate Email Configuration”, then confirm the activation.The Draft becomes Active and your published website starts using the new email authentication behavior.
Copy the Google Connection Values
In Authentication, open Google. Copy the Authorized JavaScript Origin and the fixed Auth Callback URL shown by Readdy.The origin is based on your saved website URL. The callback URL is generated by Readdy and cannot be changed. Configure the Google Consent Screen
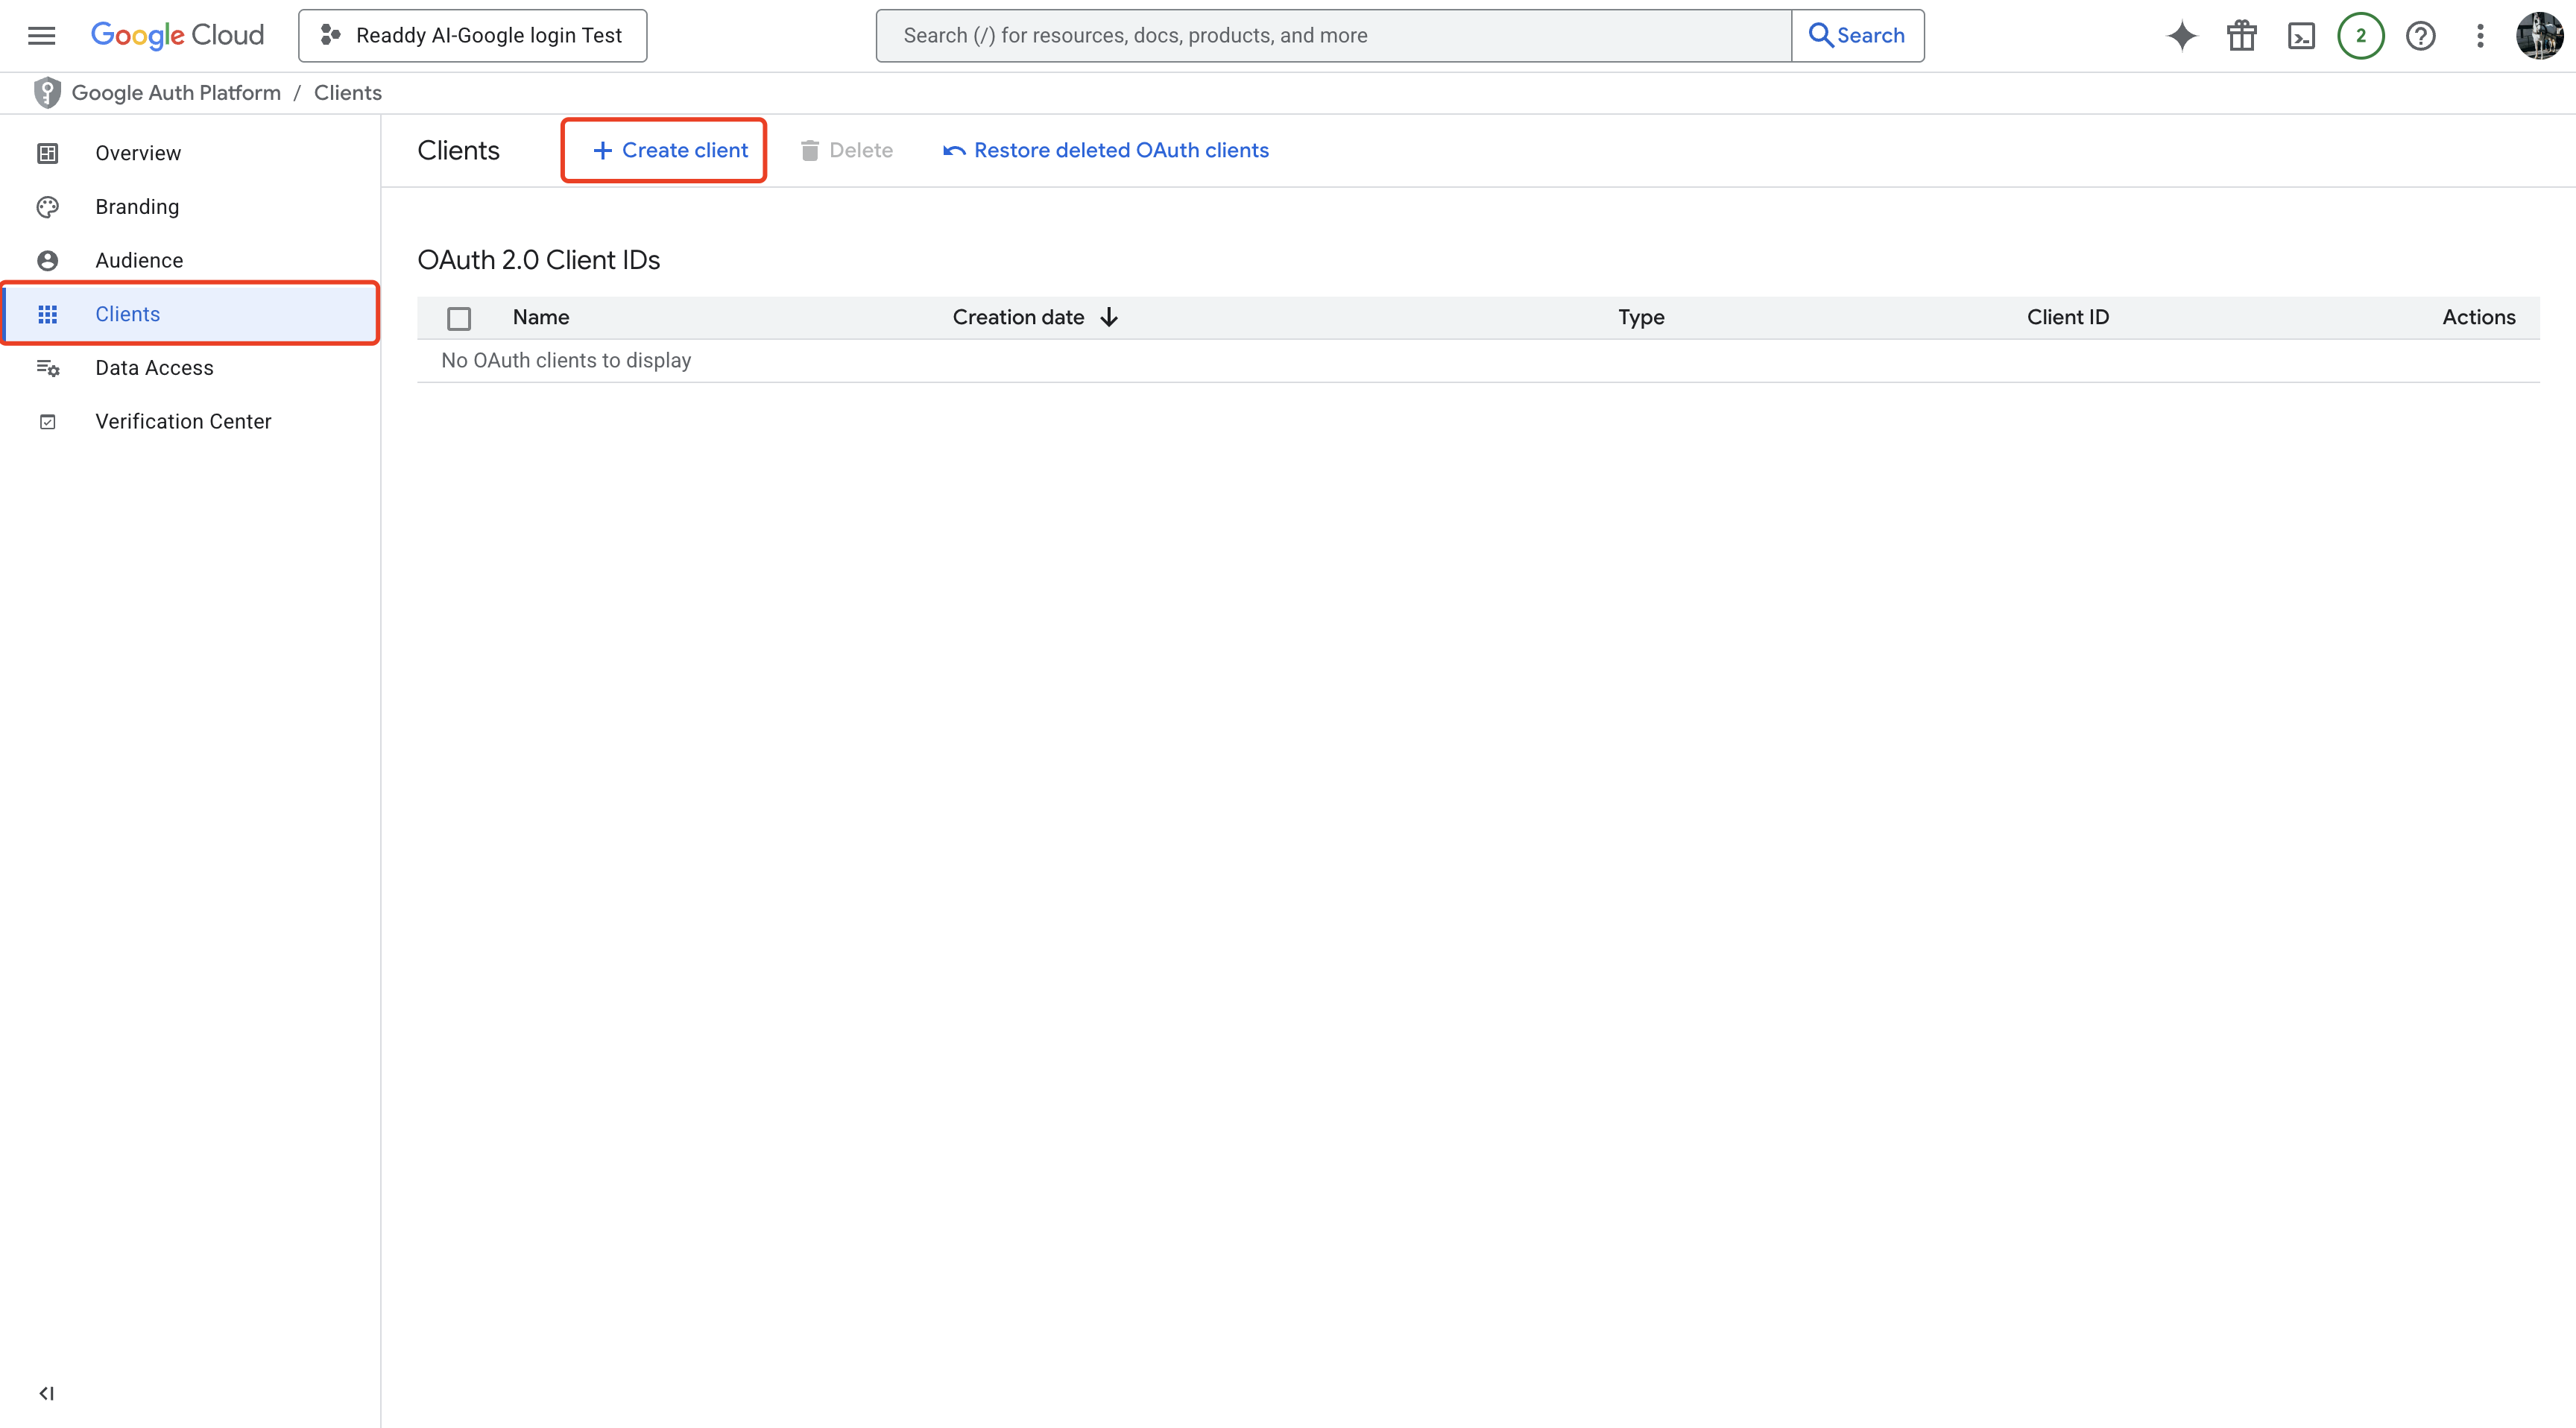
Open Google Cloud Console, select your project, and configure the OAuth consent screen under Google Auth Platform or APIs & Services.Add your app name, support email, audience, contact information, and authorized domain. For a normal sign-in flow, the openid, email, and profile scopes are usually sufficient. Create a Google OAuth Client
Create an OAuth Client ID and choose Web application as the application type.Add the value copied from Readdy to Authorized JavaScript origins, then add the Readdy callback URL to Authorized redirect URIs. Save the client and copy its Client ID and Client Secret.The origin and callback URL must match the Readdy values exactly, including https://, the domain, path, and any trailing slash.
Save the Google Credentials
Return to Authentication → Google. Paste the Client ID and Client Secret, then click “Save Draft”.Readdy stores the secret securely. After it is saved, the full secret is not displayed again.
Add Google Sign-In to Your Website
Ask Readdy to add a Continue with Google action to your sign-up and sign-in pages. Review the callback behavior and publish the compatible website version.
Enable Google Sign-In
Return to Authentication → Google, confirm that the compatible website version is published, and enable Google Sign-In.Keep advanced options at their defaults unless your OAuth implementation specifically requires them. For example, only skip the nonce check when your identity provider cannot send the expected nonce, and only allow accounts without an email address when your product supports them.
Tips and Best Practices
Use separate SMTP and Google OAuth credentials for development and production. This makes credentials easier to rotate and prevents a development change from affecting your live website.
Keep the website URL, allowed return URLs, Google JavaScript origin, and Google redirect URI synchronized whenever your published domain changes.
Include a clear way to return to sign-in or request a new code when a verification or recovery link has expired.
Troubleshooting
My saved changes do not affect the live website
Symptom: Authentication settings show your new values, but the published website still uses the previous behavior.Cause: The changes are saved as a Draft and have not been activated.How to fix:
- Generate and publish pages that support the Draft configuration.
- Return to Authentication.
- Confirm that the compatible version is published.
- Activate the Draft.
Email verification cannot be enabled
Symptom: The email verification control is unavailable or activation cannot continue.Cause: The required website URL or SMTP configuration is incomplete.How to fix:
- Save a valid published website URL and allowed return URLs.
- Complete the SMTP configuration with a verified sender.
- Save the complete configuration as a Draft.
- Publish compatible authentication pages, then activate the Draft.
Authentication emails are not arriving
Symptom: Users do not receive verification or password recovery emails.Cause: The SMTP credentials, secure port, sender domain, or provider limits may be incorrect.How to fix:
- Confirm the SMTP host, port, username, and password with your provider.
- Verify the Sender Email domain with your provider.
- Check the provider’s delivery logs and sending limits.
- Ask the recipient to check spam or junk folders.
Google displays a redirect URI mismatch
Symptom: Google displays an Error 400: redirect_uri_mismatch message.Cause: The redirect URI in Google Cloud does not exactly match the fixed callback URL shown by Readdy.How to fix: Copy the callback URL from Authentication → Google again and replace the Authorized redirect URI in your Google OAuth client.
Google Sign-In is unavailable
Symptom: The Google switch is disabled or users cannot start Google Sign-In.Cause: The URL configuration is not Active, the OAuth credentials are incomplete, or the compatible website version has not been published.How to fix:
- Activate the website URL configuration.
- Confirm the Client ID, Client Secret, origin, and callback URL.
- Publish the website version that includes Google Sign-In.
- Return to the Google settings and enable the provider.
Users return to the wrong page after authentication
Symptom: Users finish authentication but land on an unexpected page or domain.Cause: The published domain, Site URL, or allowed return URLs do not match.How to fix: Update the Site URL and allowed return URLs to match the live domain, save the changes as a Draft, publish any required page updates, and activate the Draft.
FAQ
Can I use this feature with Supabase?
This guide applies to projects using Readdy Backend. If your project uses Supabase, configure authentication in Supabase instead. A project cannot use Readdy Backend and Supabase at the same time.
Can I change an Active configuration later?
Yes. Your new values are saved as a Draft first, so the Active configuration continues working until you publish compatible pages and activate the new Draft.
Does restoring an email template change the live email immediately?
No. Restoring a default template updates the Draft only. The live email changes after you activate that Draft.
Why do I need to publish before activation?
Authentication settings and website pages work together. Publishing first ensures your live website has the routes and UI required by the new Active configuration.
Need Help?
If this guide doesn’t resolve your issue, submit a support ticket. We’re here to help!