Quick Start
- Make sure you have a Readdy Pro subscription
- Log in to Resend and create an API Key with Full Access permission
- Open the Resend configuration from the Readdy integration panel
- Paste API Key → Select a verified domain → Configure email settings → Send test → Done
Overview
Resend is a professional email delivery service. By integrating Resend with Readdy, you can send form notification emails using your own custom domain and brand identity, improving your professional image and email deliverability.Key Features
- Send notification emails from your own domain
- Customize sender name, email address, and email subject
- Support email subject variable substitution
- Real-time test email sending
Prerequisites
- Readdy Pro plan required (project does not need to be published)
- A Resend account (free sign-up: resend.com)
- A custom domain added and verified in Resend; custom domains purchased on Readdy are supported
Entry Points
You can access the Resend configuration through: 1. Connects Panel — Click the Connects button in the project editor to find the Resend card.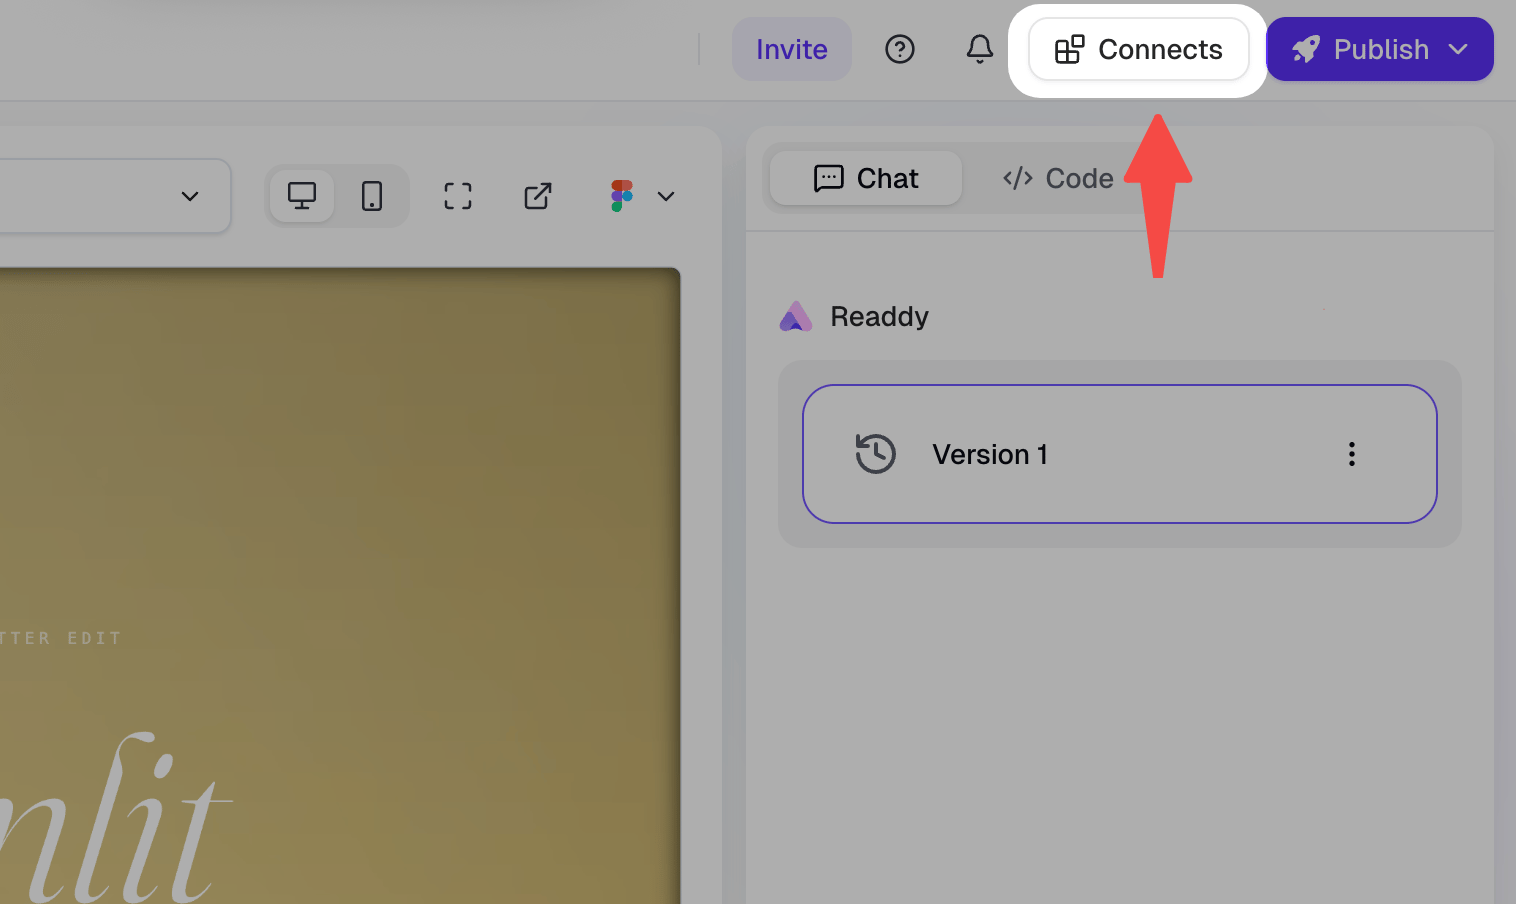
Click the Connects button
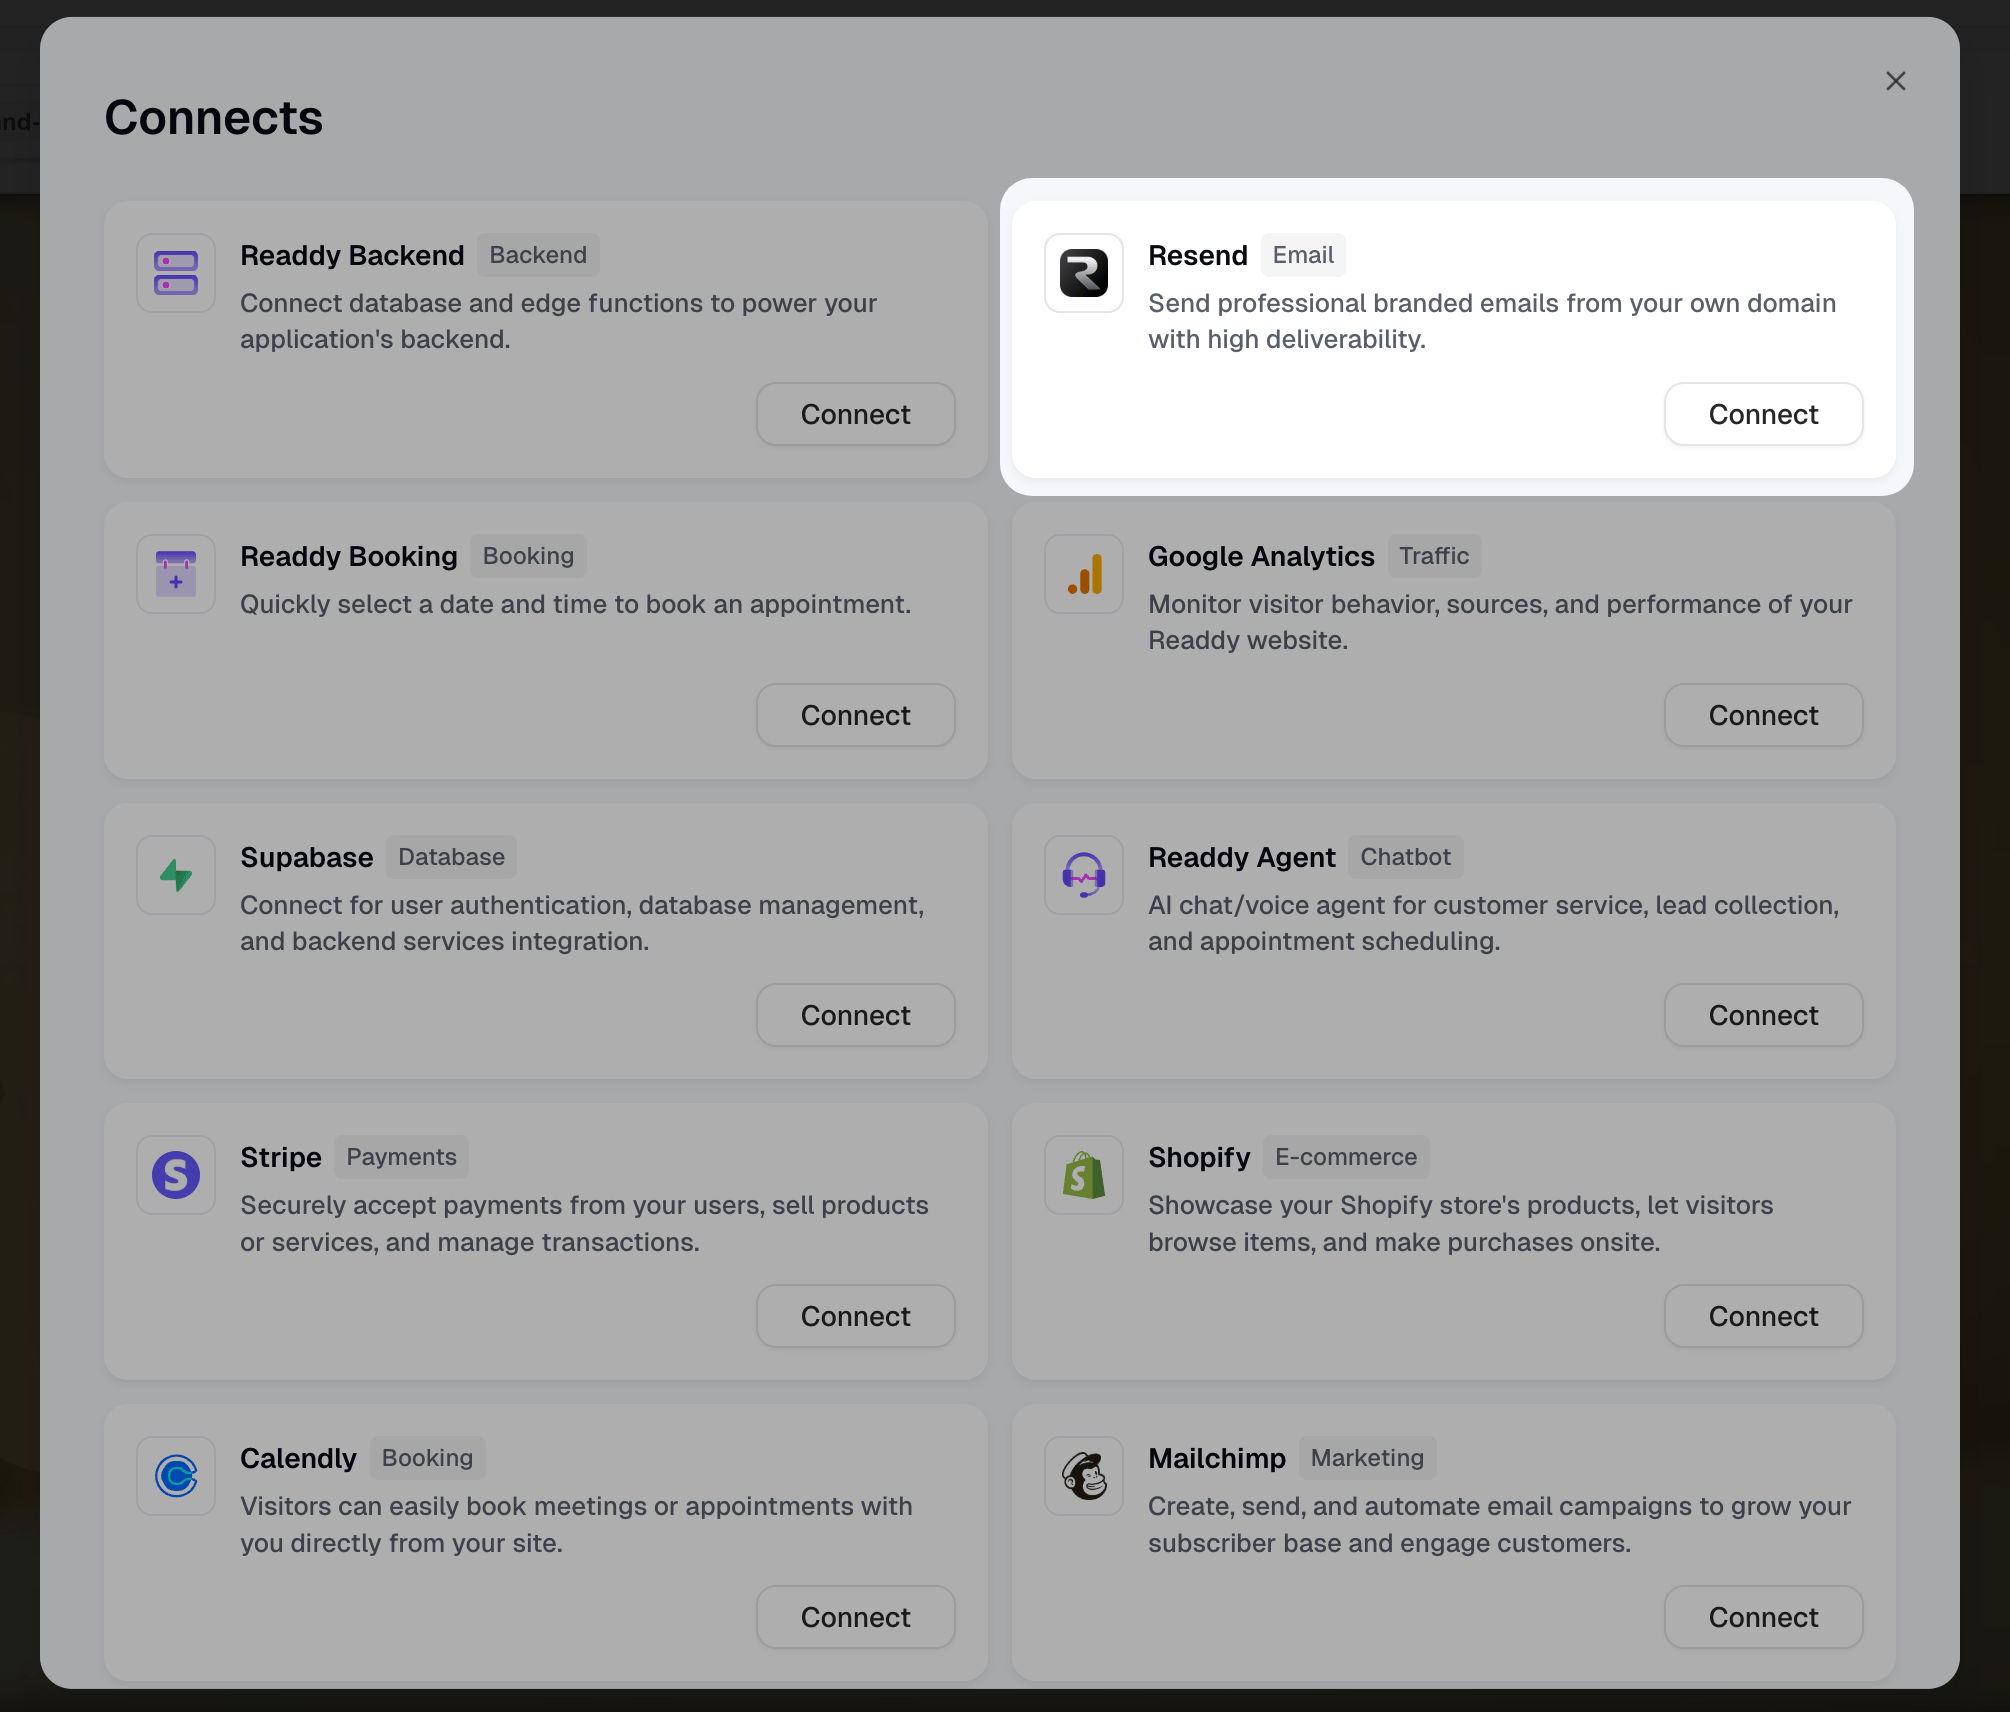
Resend in the Connects panel
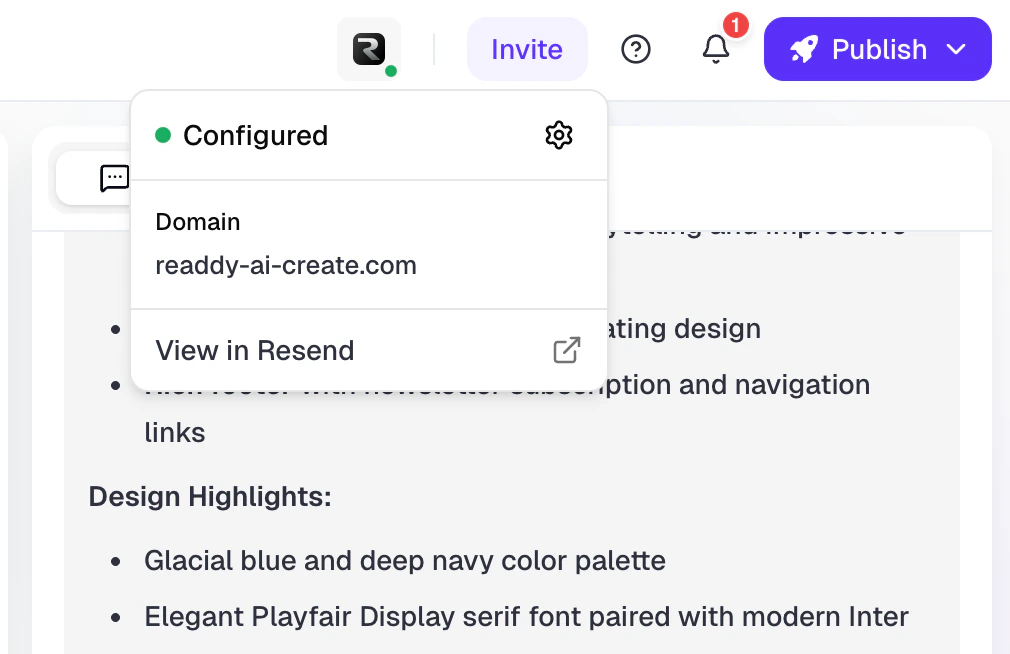
Resend status indicator and dropdown menu in the TopBar
Configuration Steps
Resend configuration consists of 4 steps: API Key → Domain Selection → Email Settings → Test Send.Step 1: Enter API Key
re_), paste it in the Readdy Resend configuration panel, and click “Next” — the system will automatically validate the Key.The configuration panel includes a tutorial video to help you quickly learn how to create an API Key in Resend.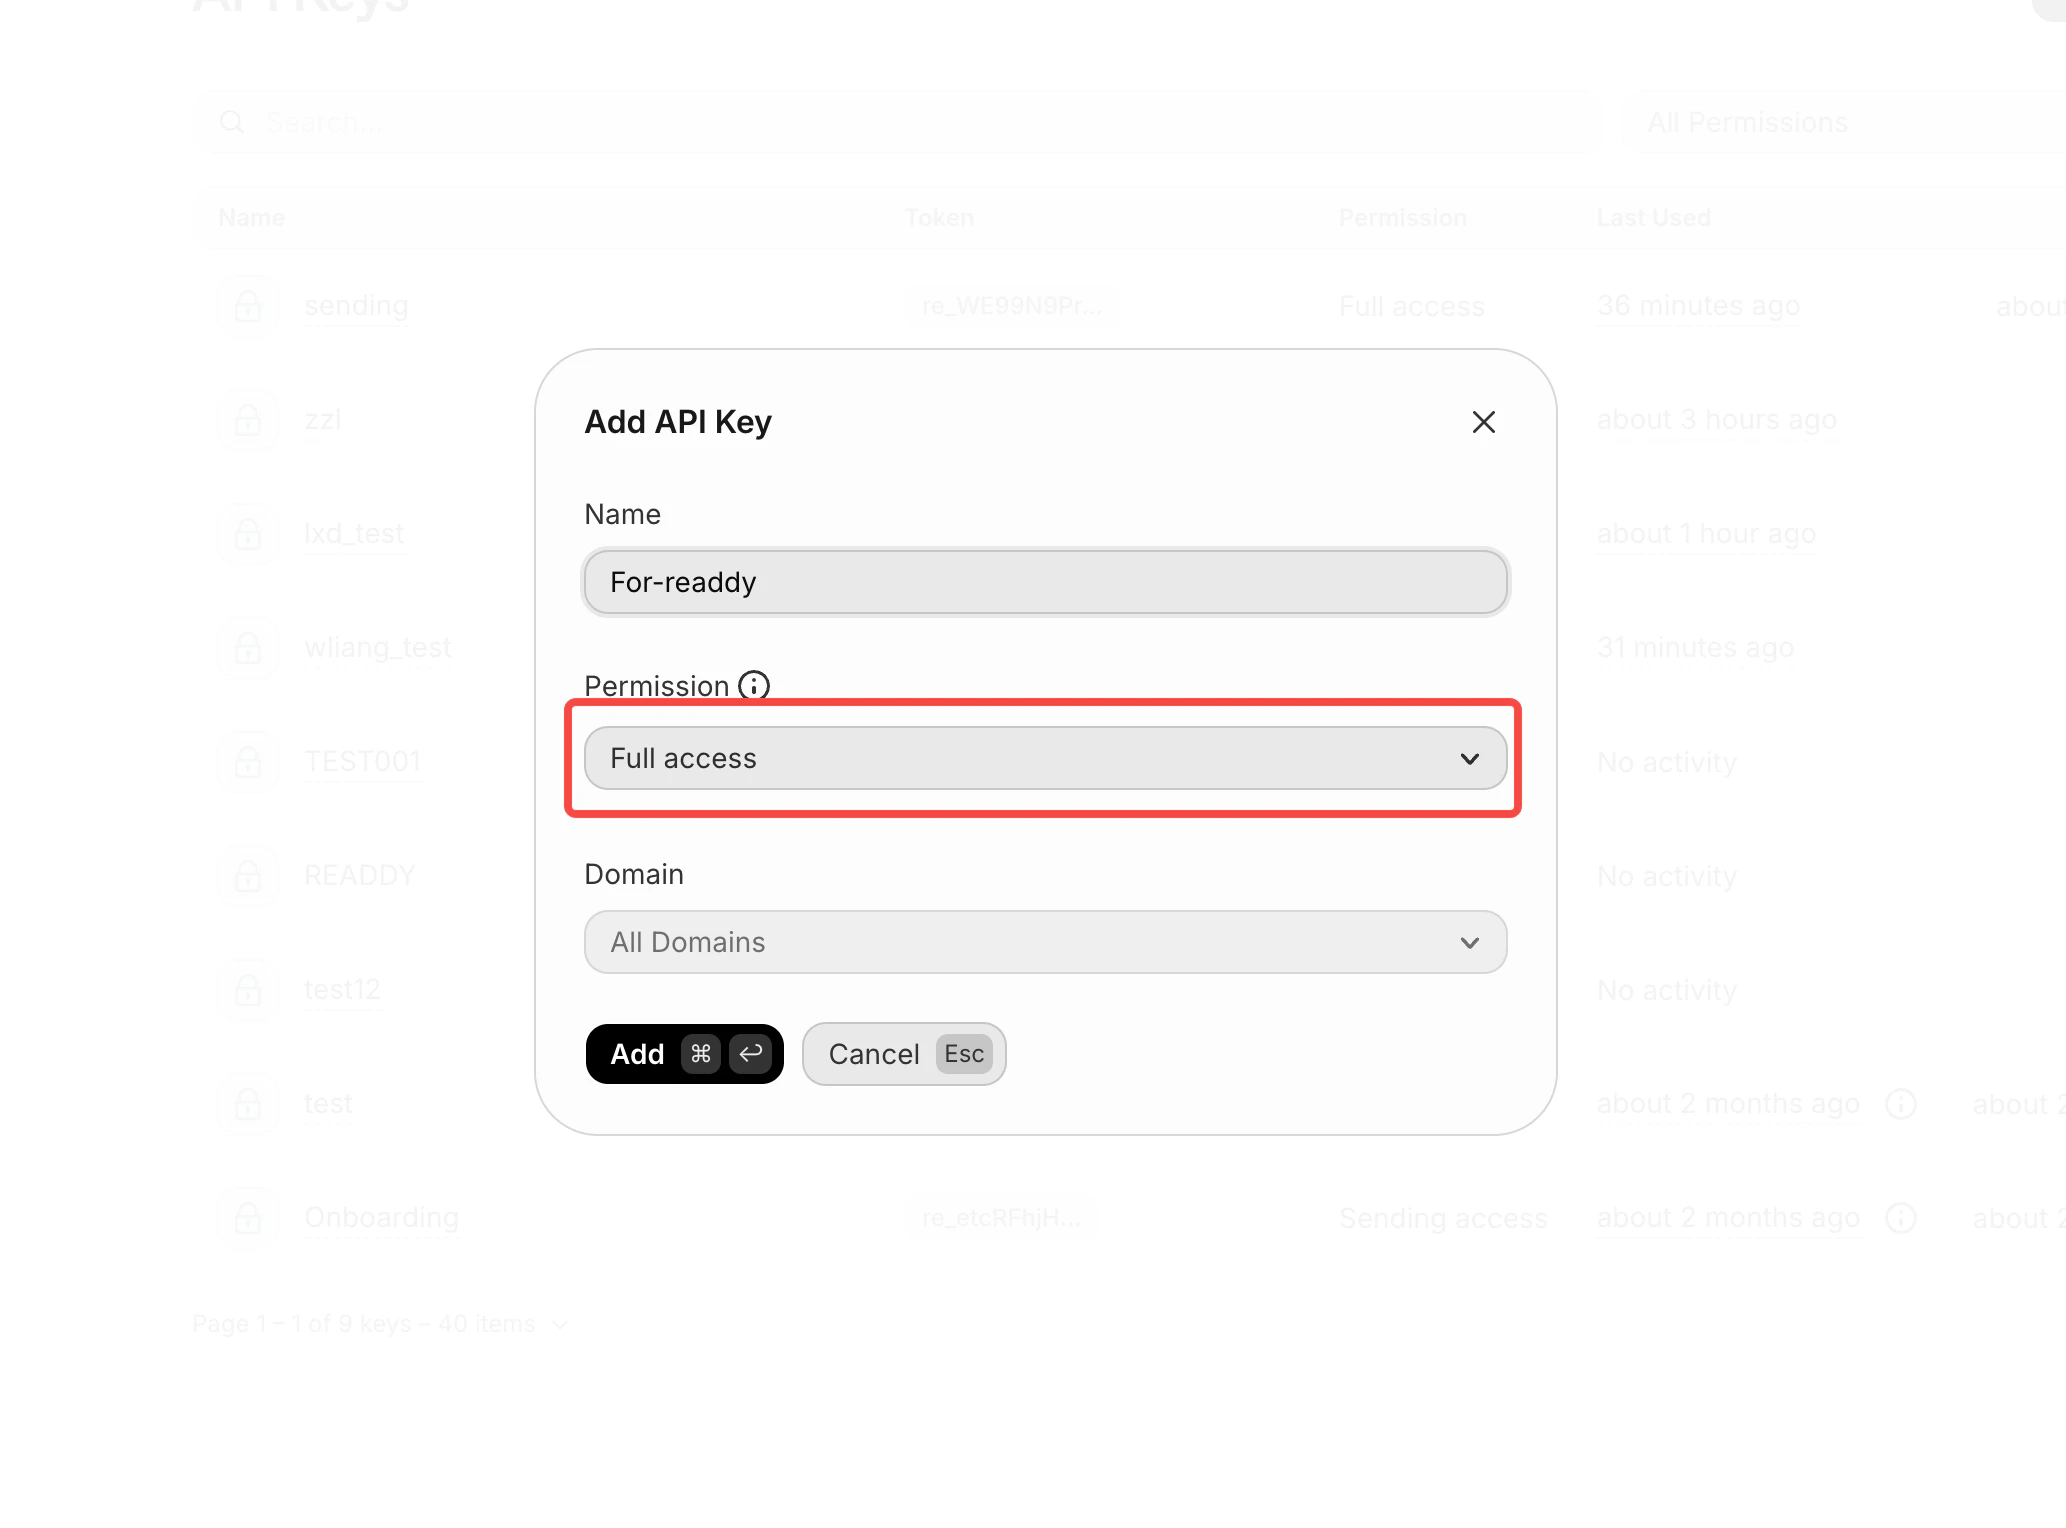
Resend Console API Key creation page — select “Full Access” permission
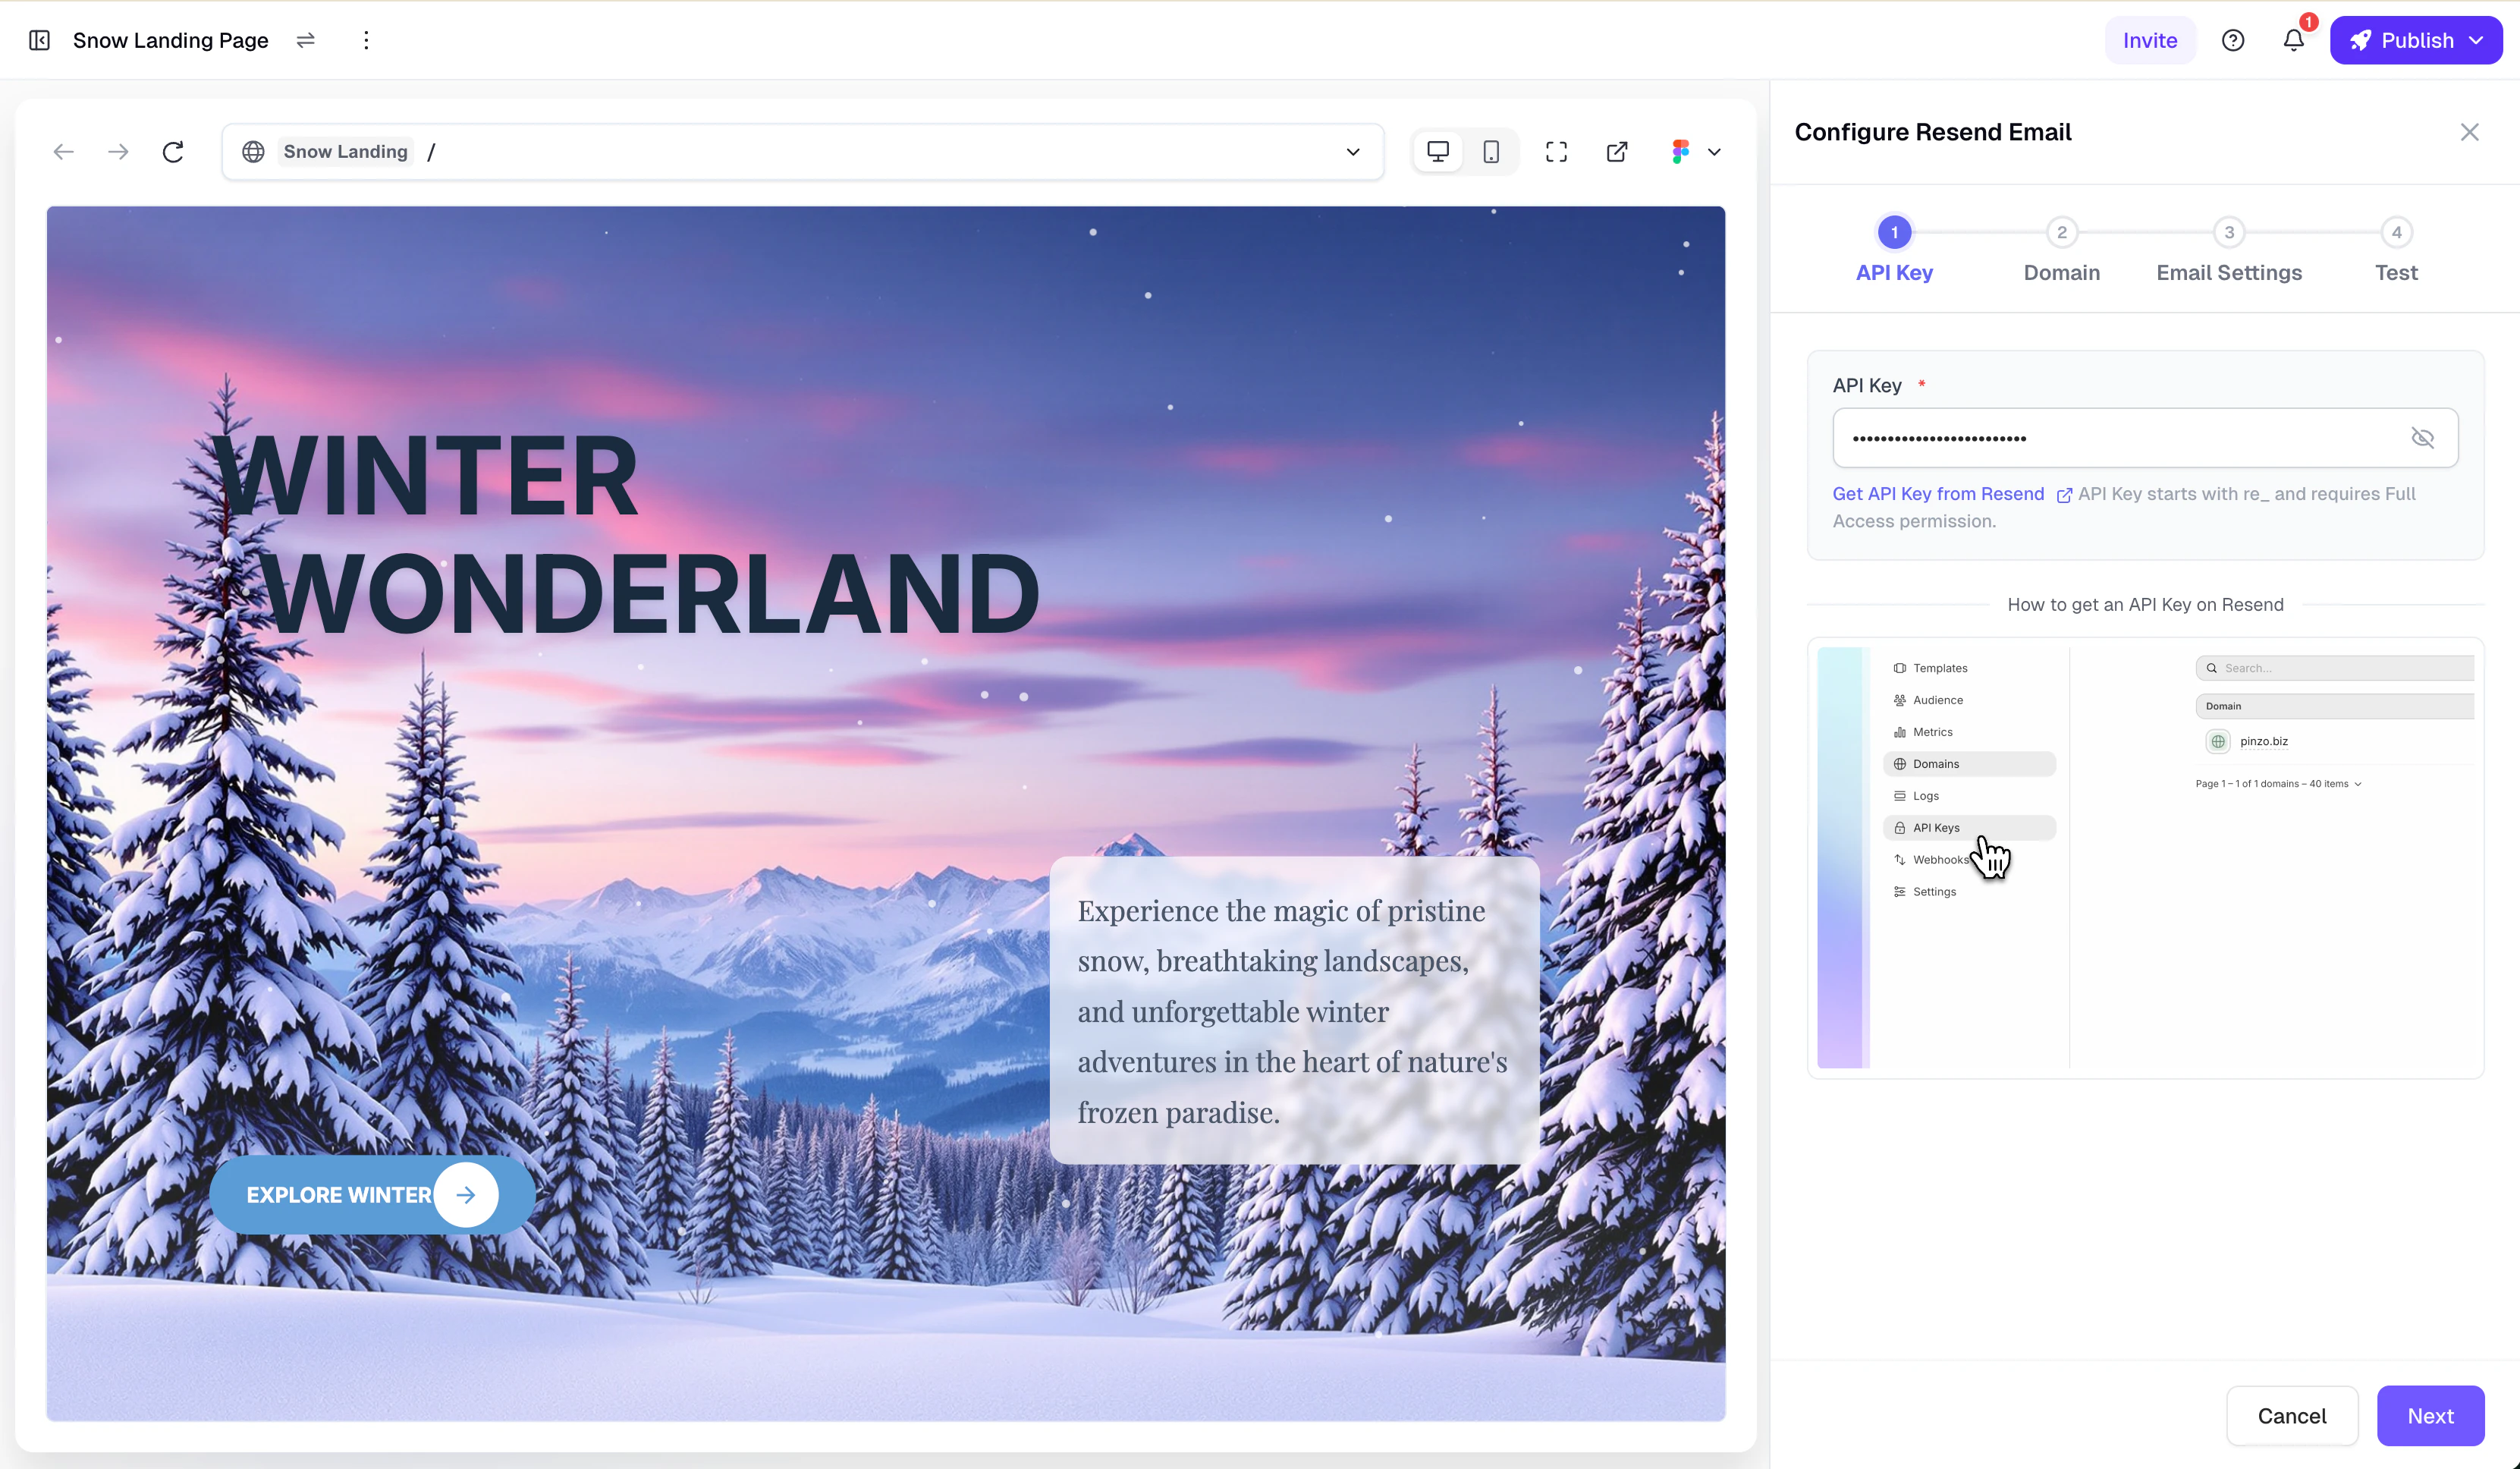
API Key input step in Readdy
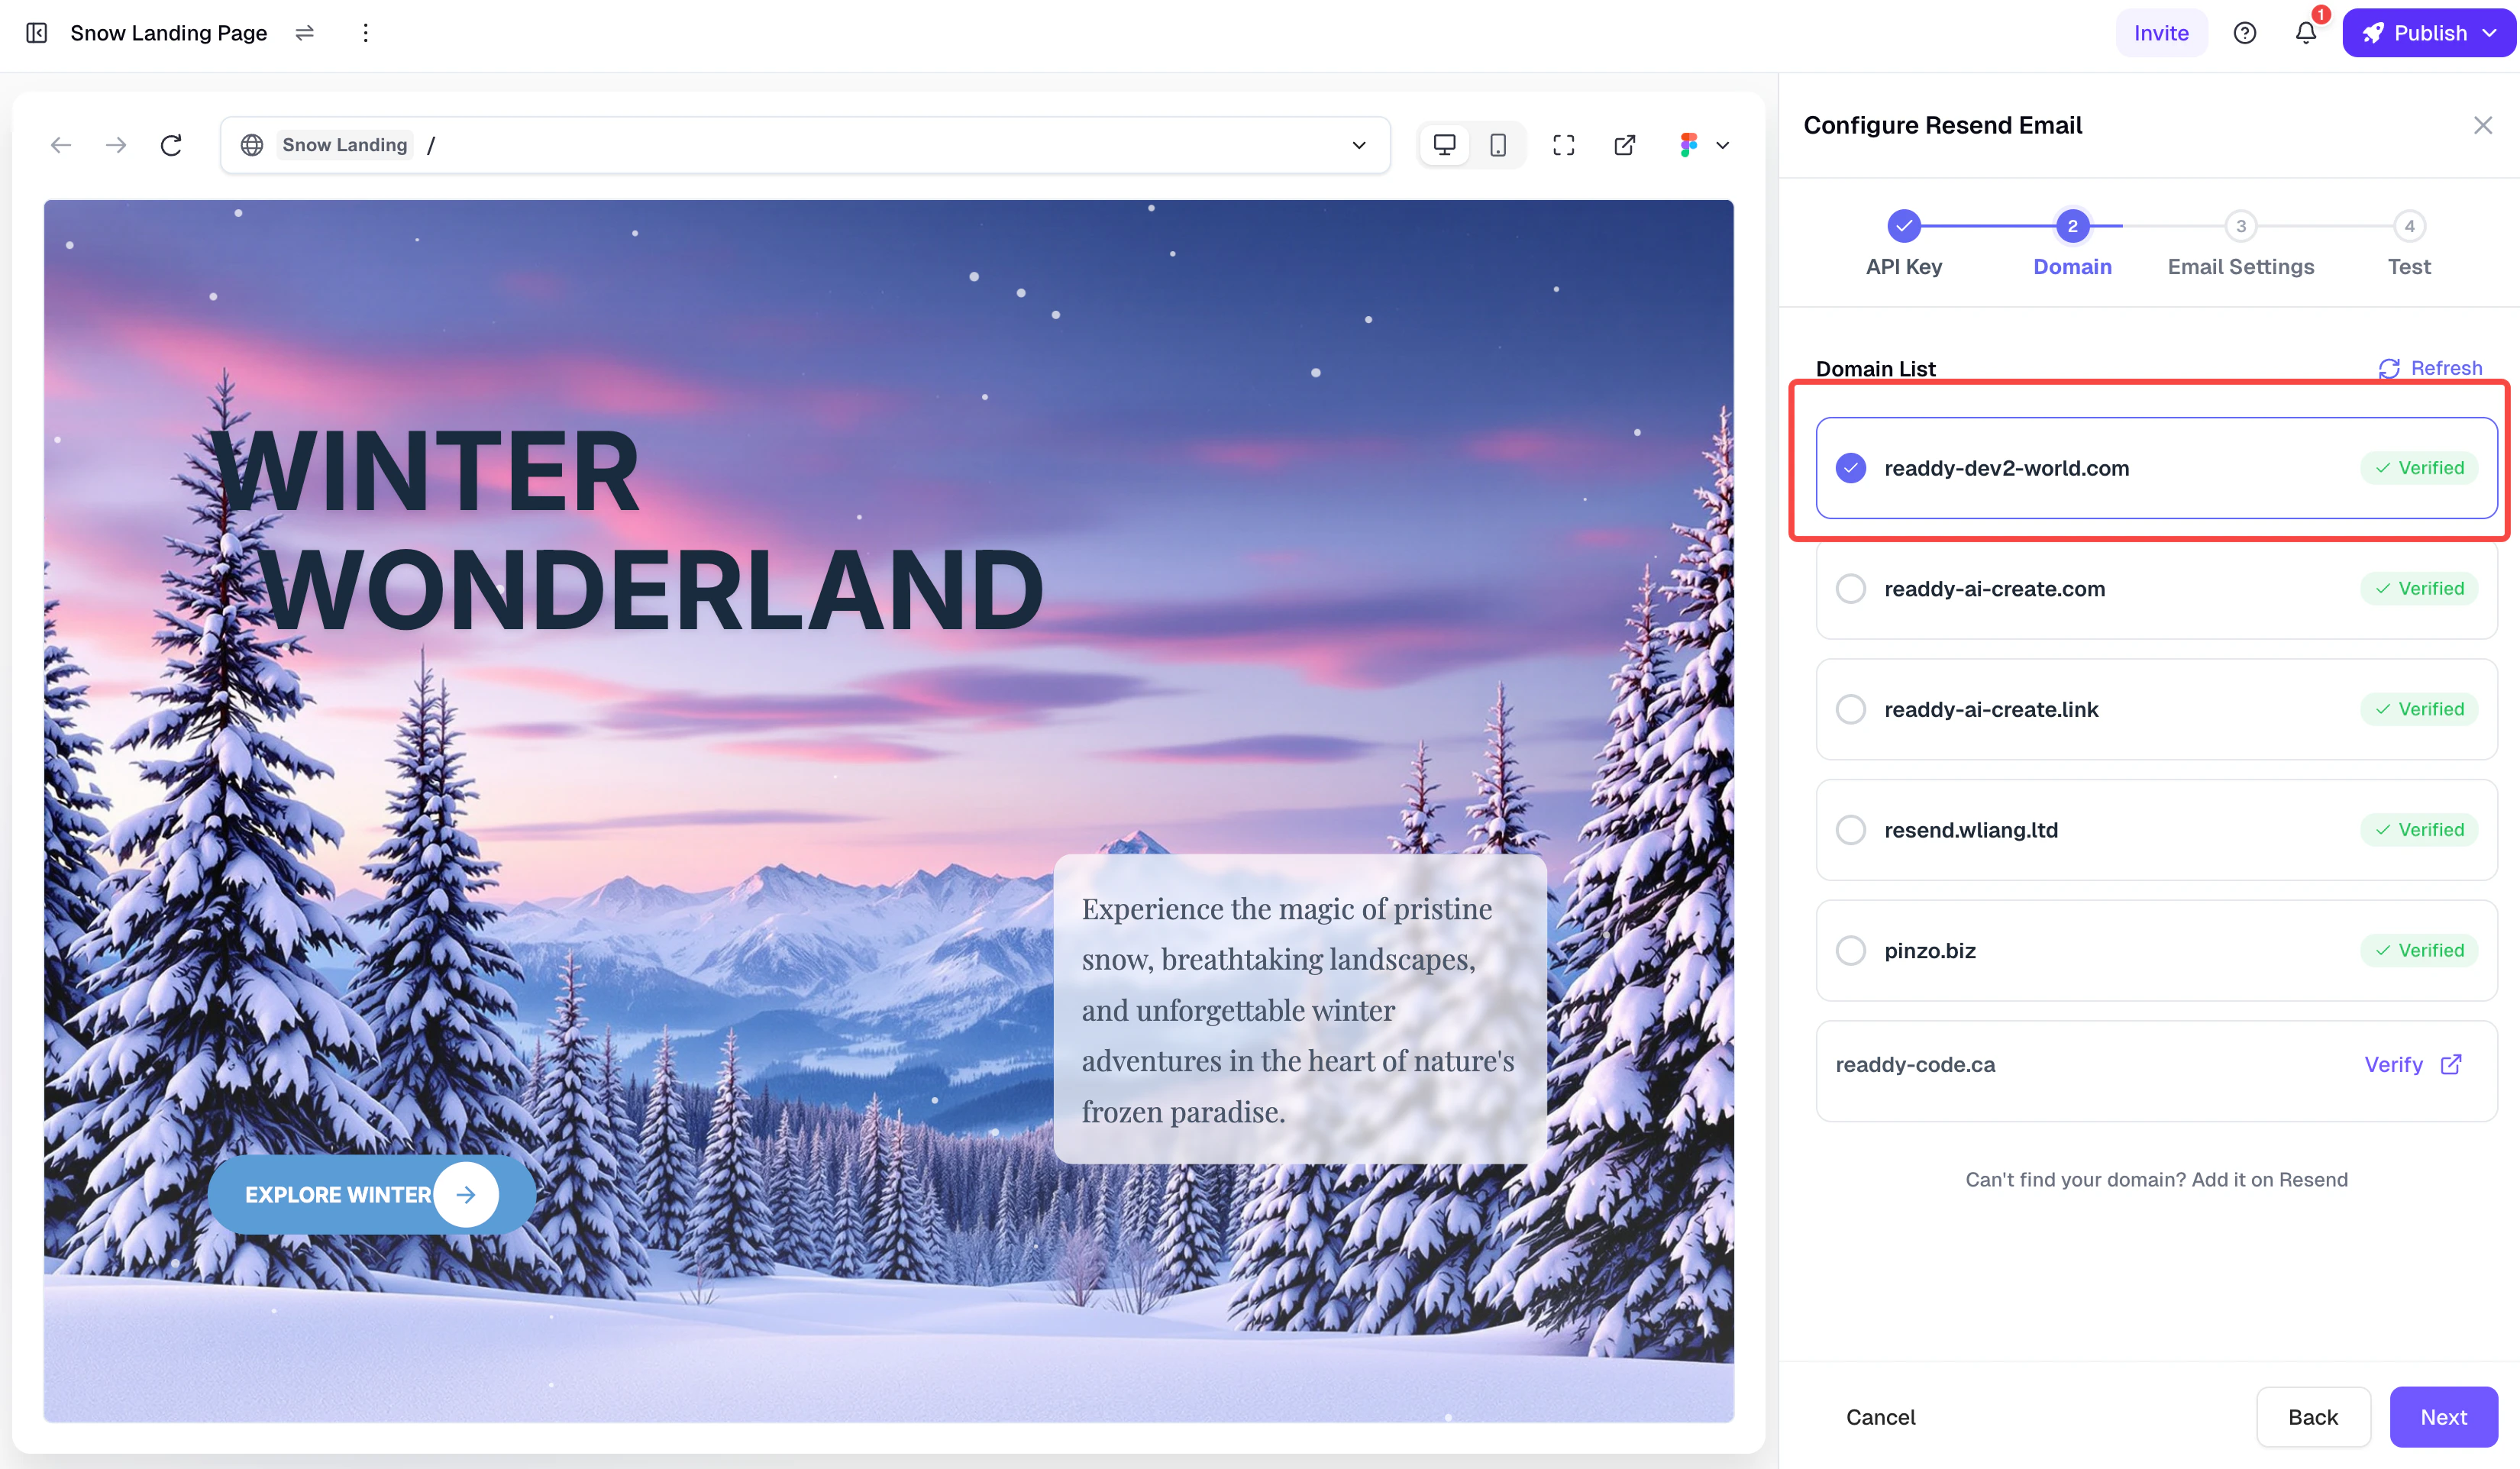
Step 2: Select Domain
- Verified domains — Displayed with a green “Verified” badge; click to select directly
- Custom domains bound in Readdy (unverified) — Support one-click verification; see details below
- Other domains (added only in Resend, unverified) — Click “Verify” to go to the Resend Console, where you need to manually add DNS records to complete verification
One-Click Verification for Readdy Domains
One-Click Verification for Readdy Domains
- Add your domain in the Resend Console and go to the DNS Records configuration page
- You do not need to manually add DNS records — simply click the “I’ve added the records” button at the bottom of the page
- Return to the Readdy Resend configuration panel
- Find the domain in the domain list and click the “Verify” button next to it
- Readdy will automatically configure all required DNS records (DKIM, SPF, DMARC, etc.) for you
- Once verification is complete, click the Refresh button to update the domain status
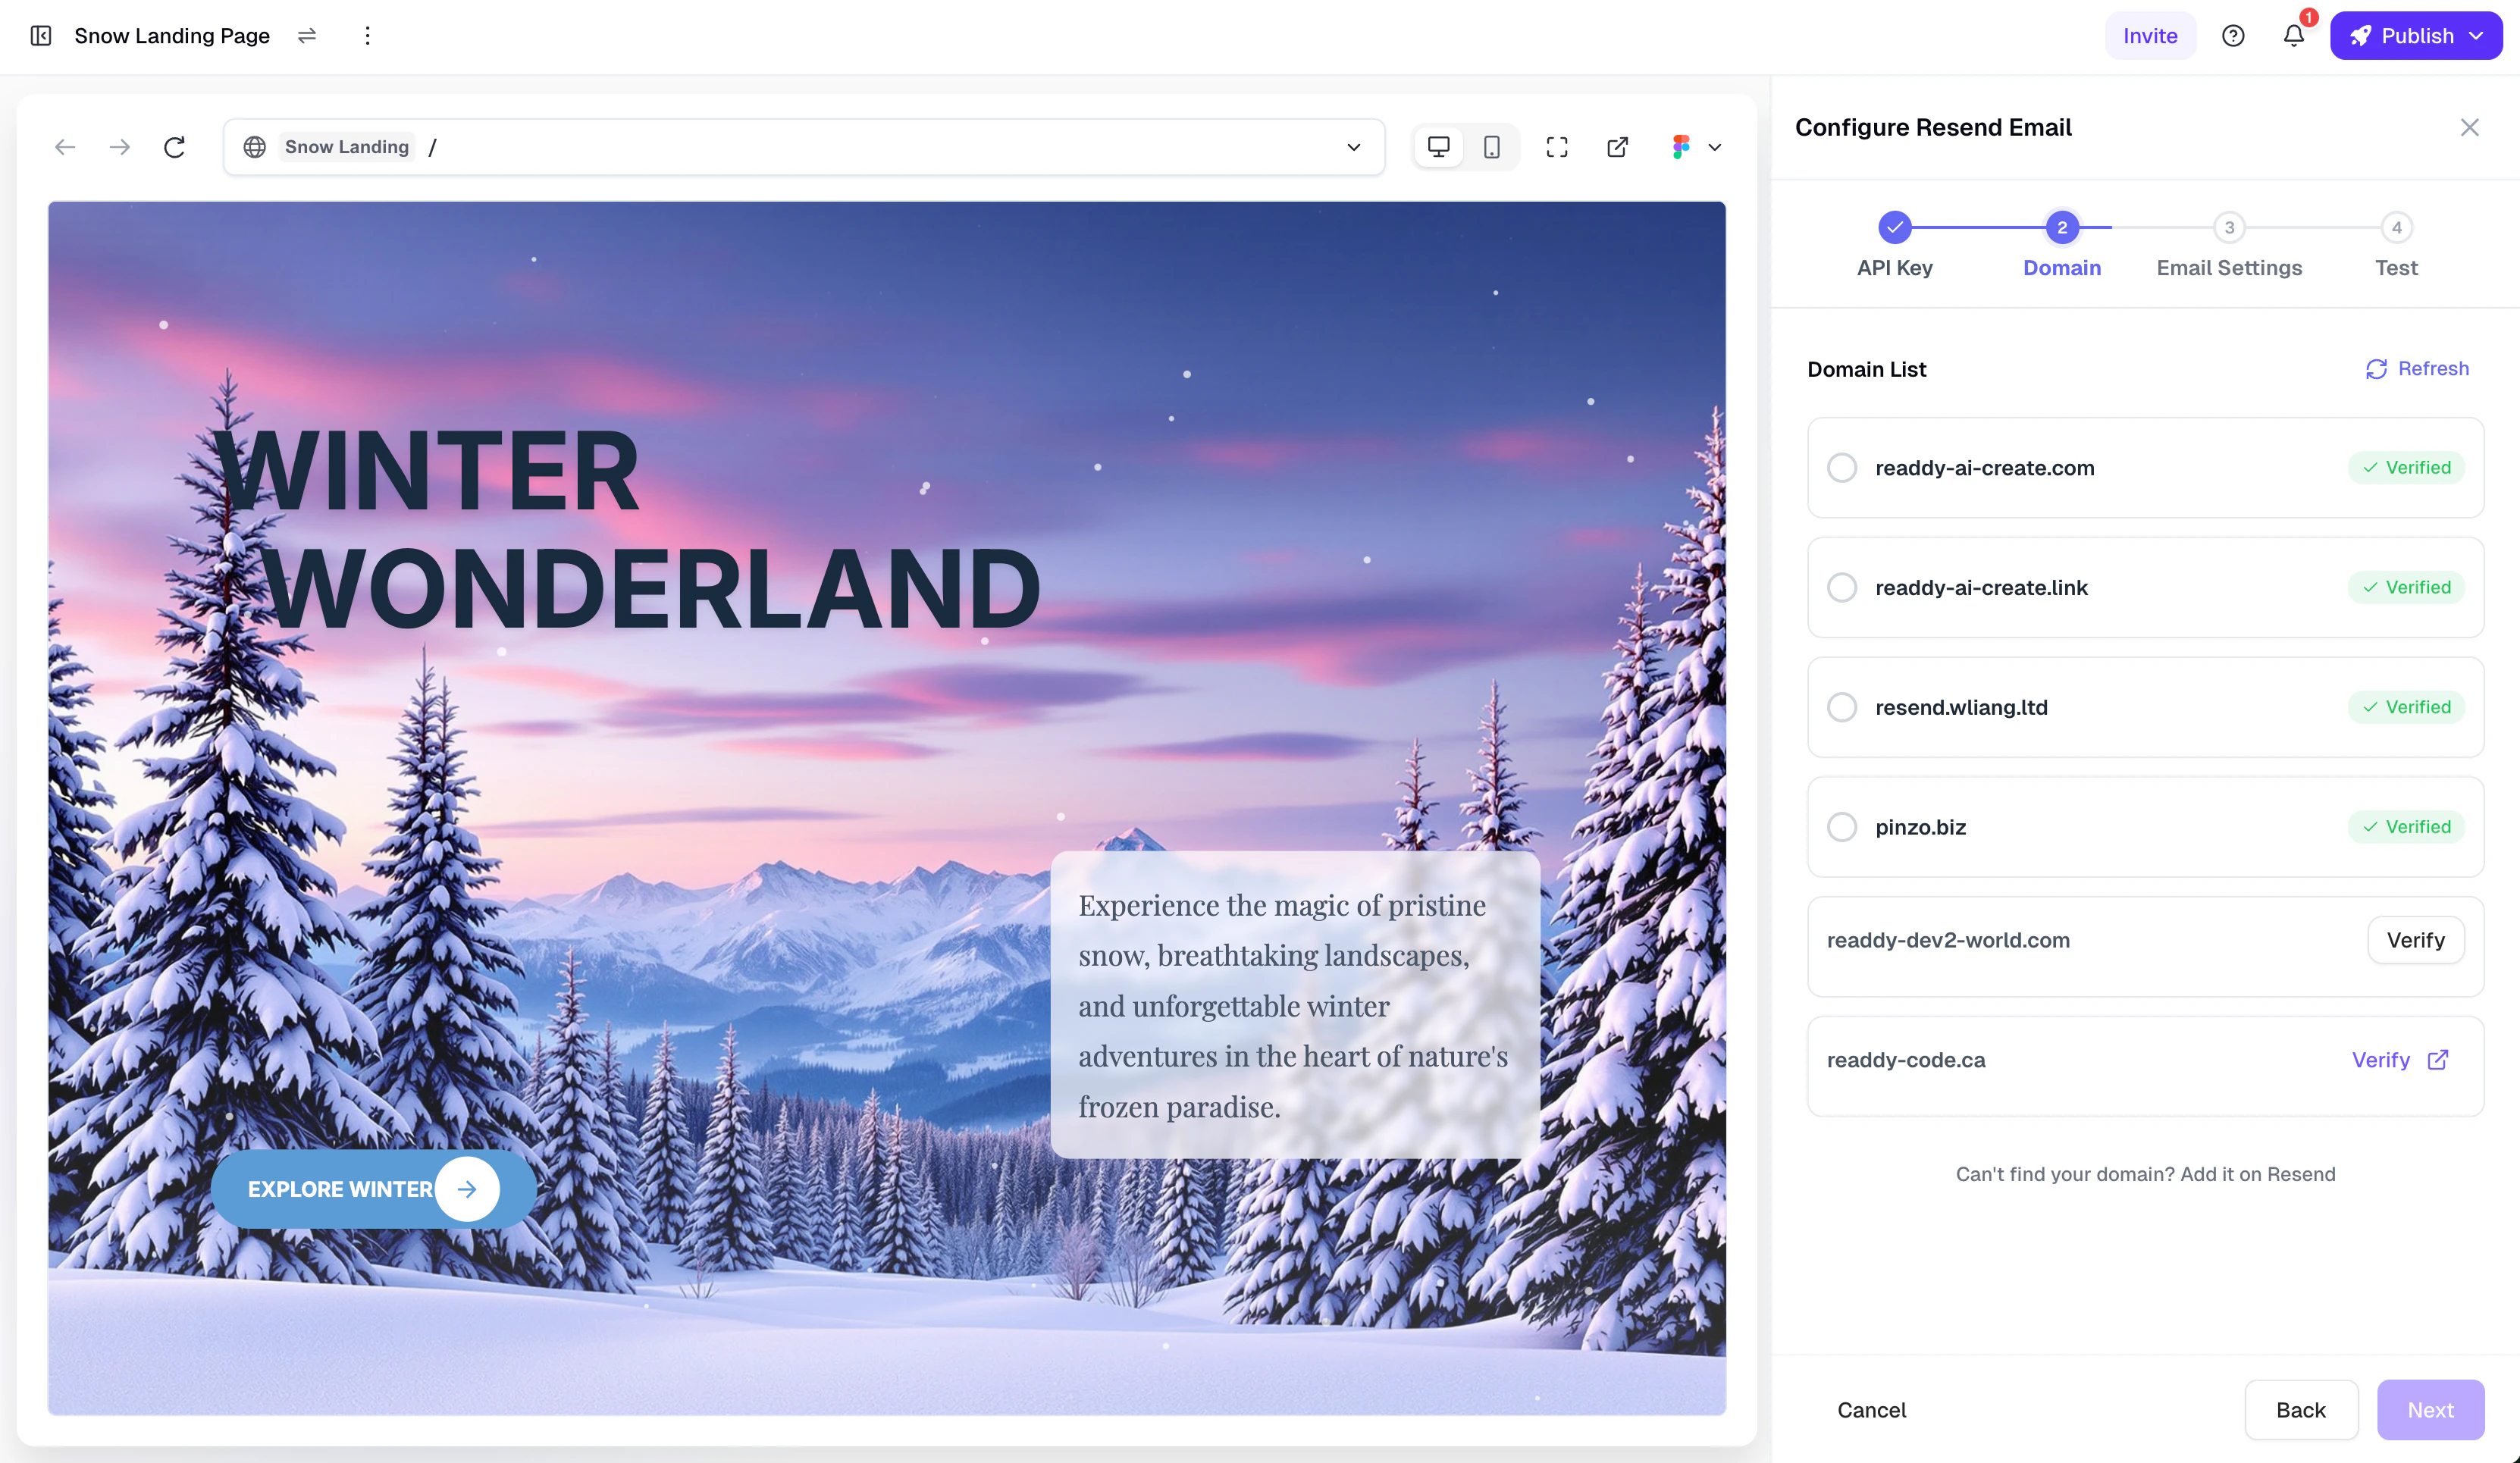
Domain selection list in Readdy
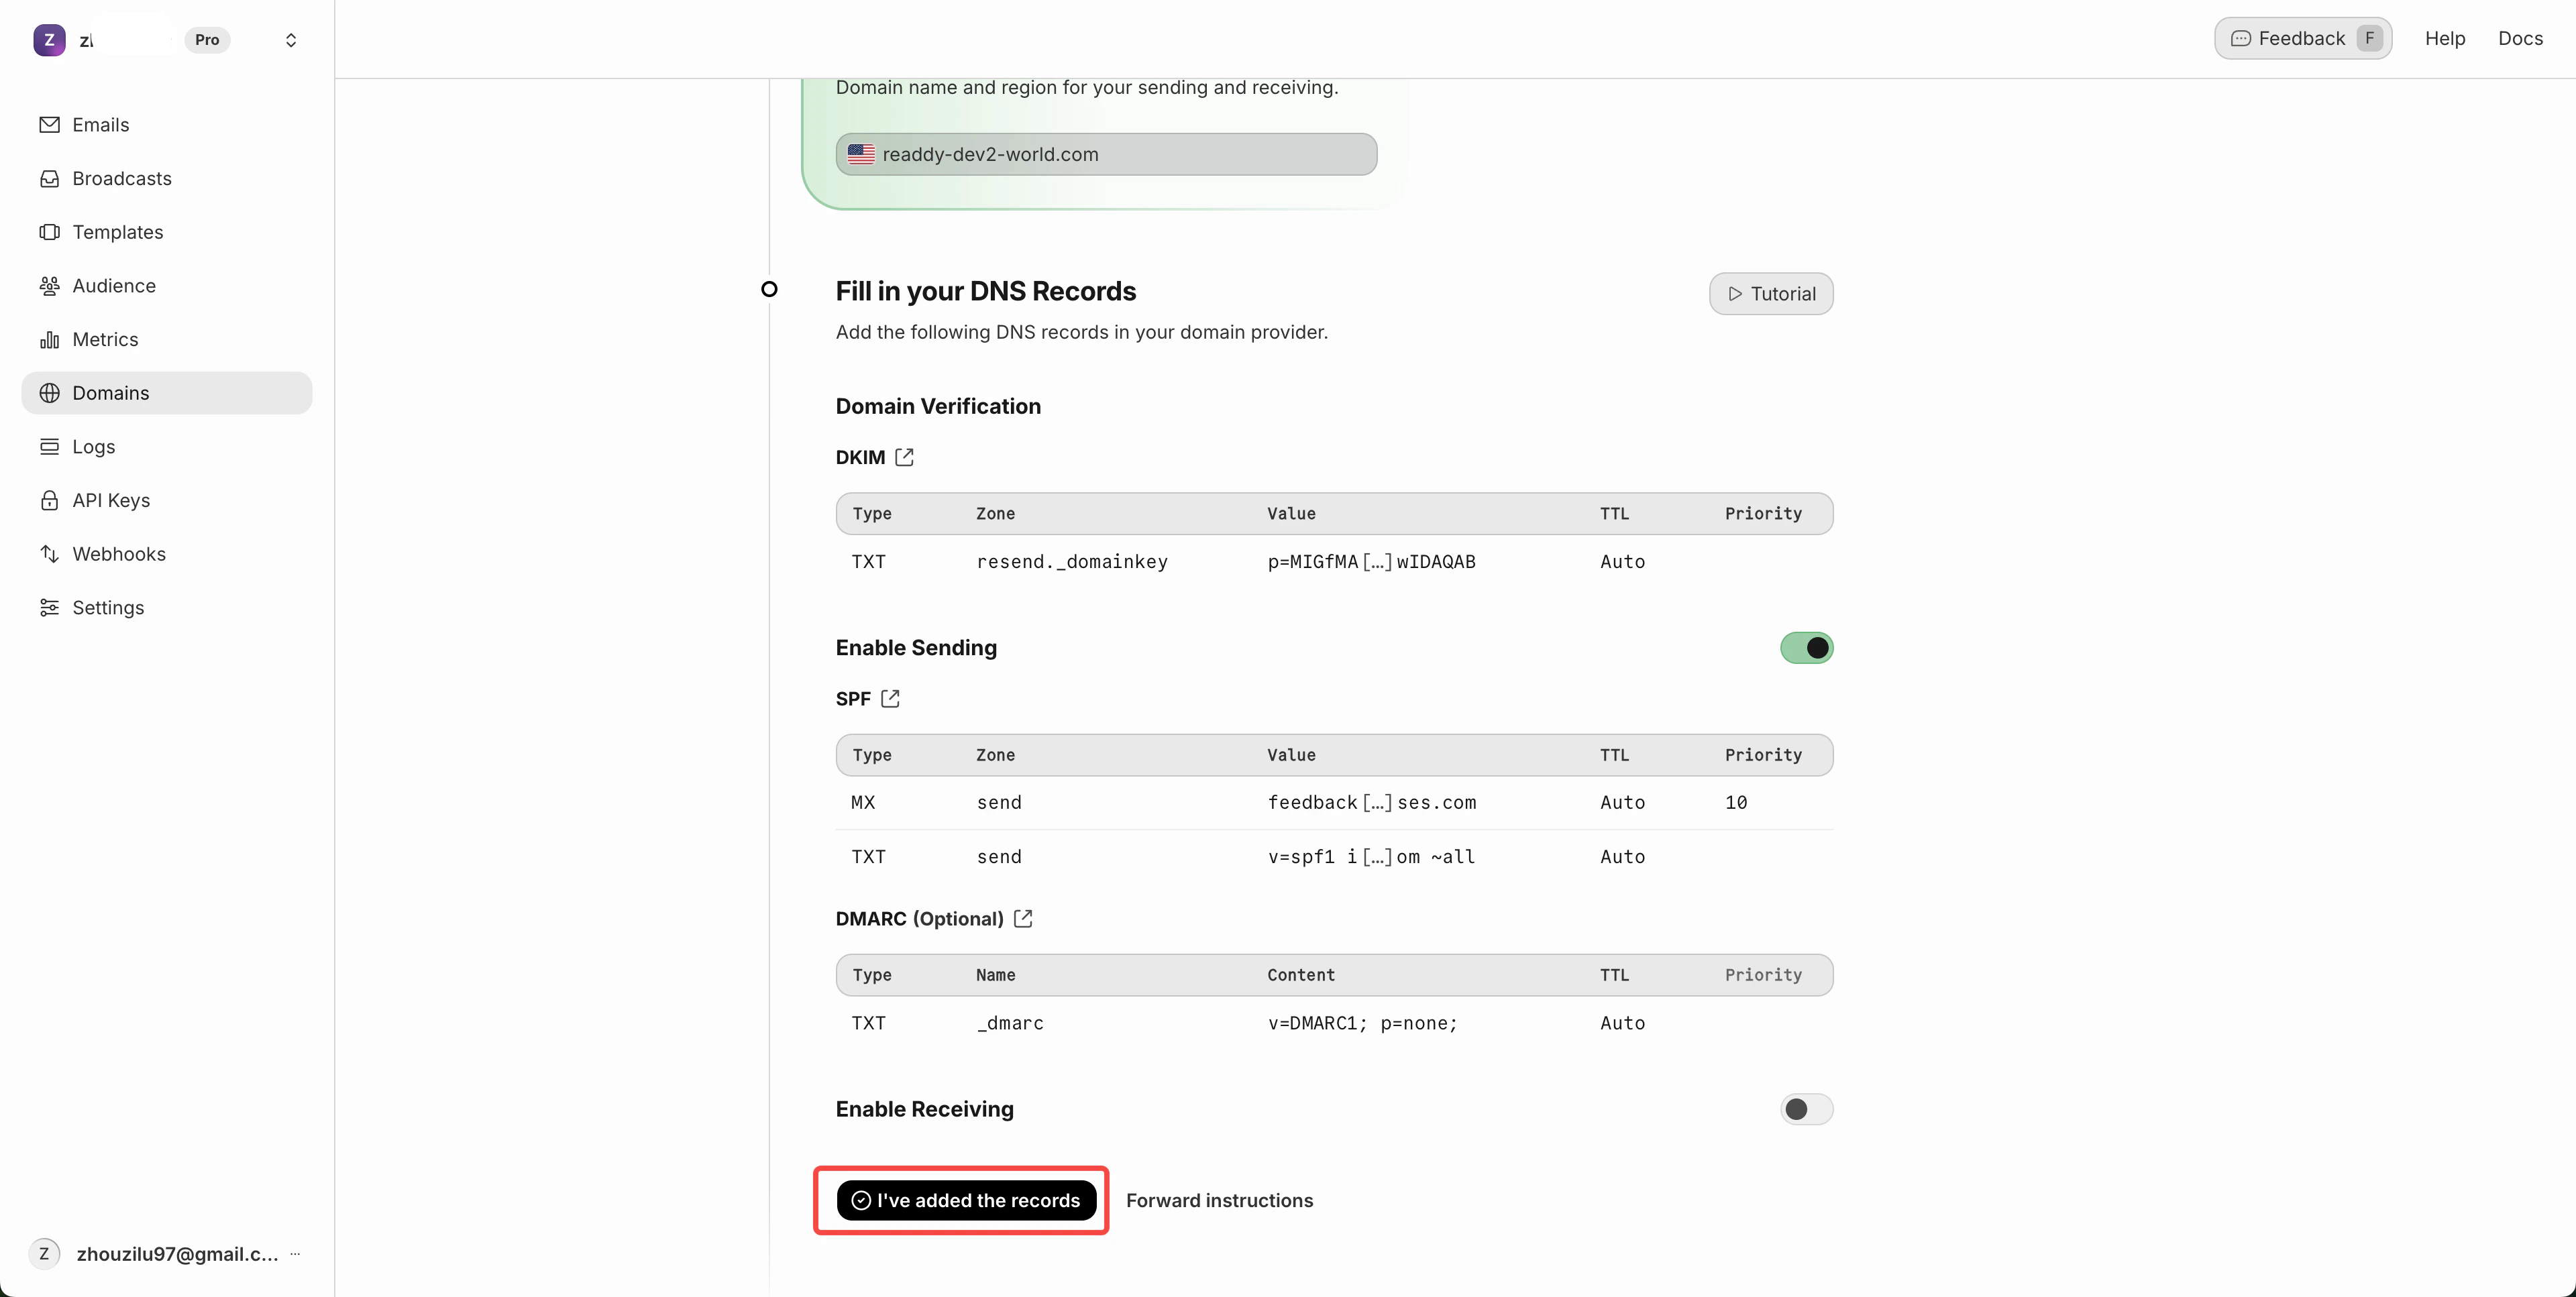
Resend DNS Records page — click “I’ve added the records”
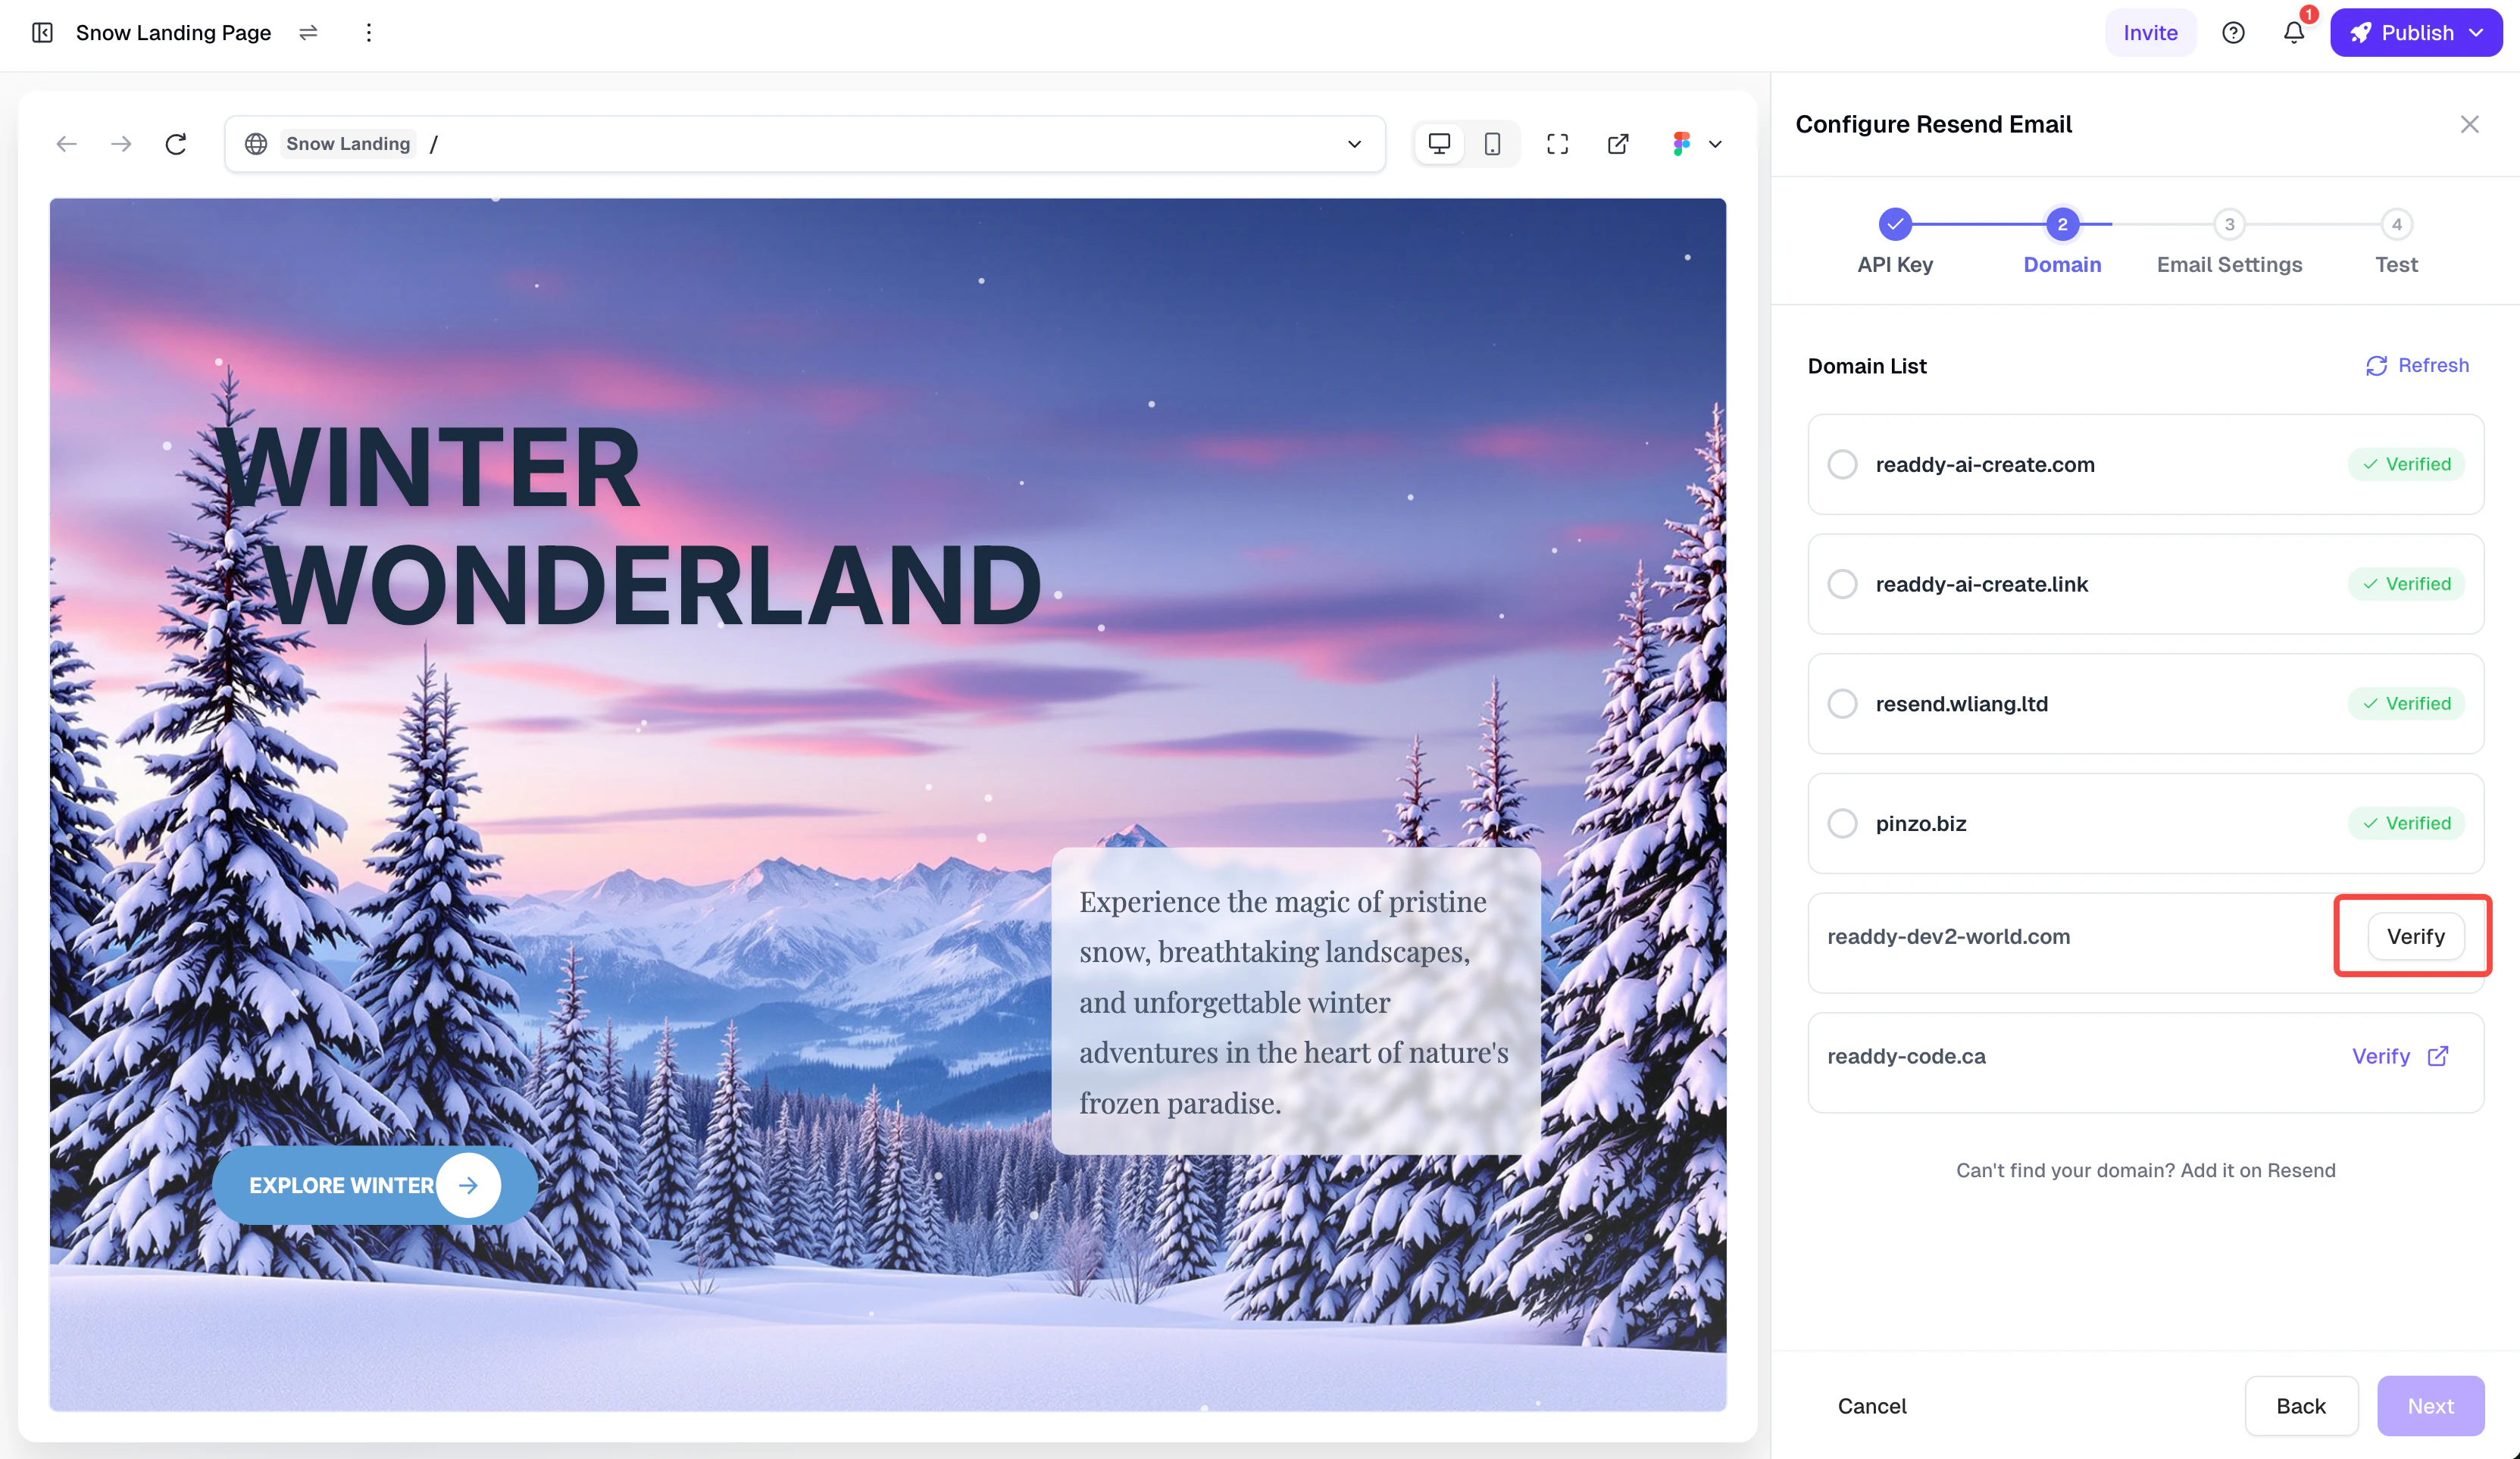
Click “Verify” button in Readdy
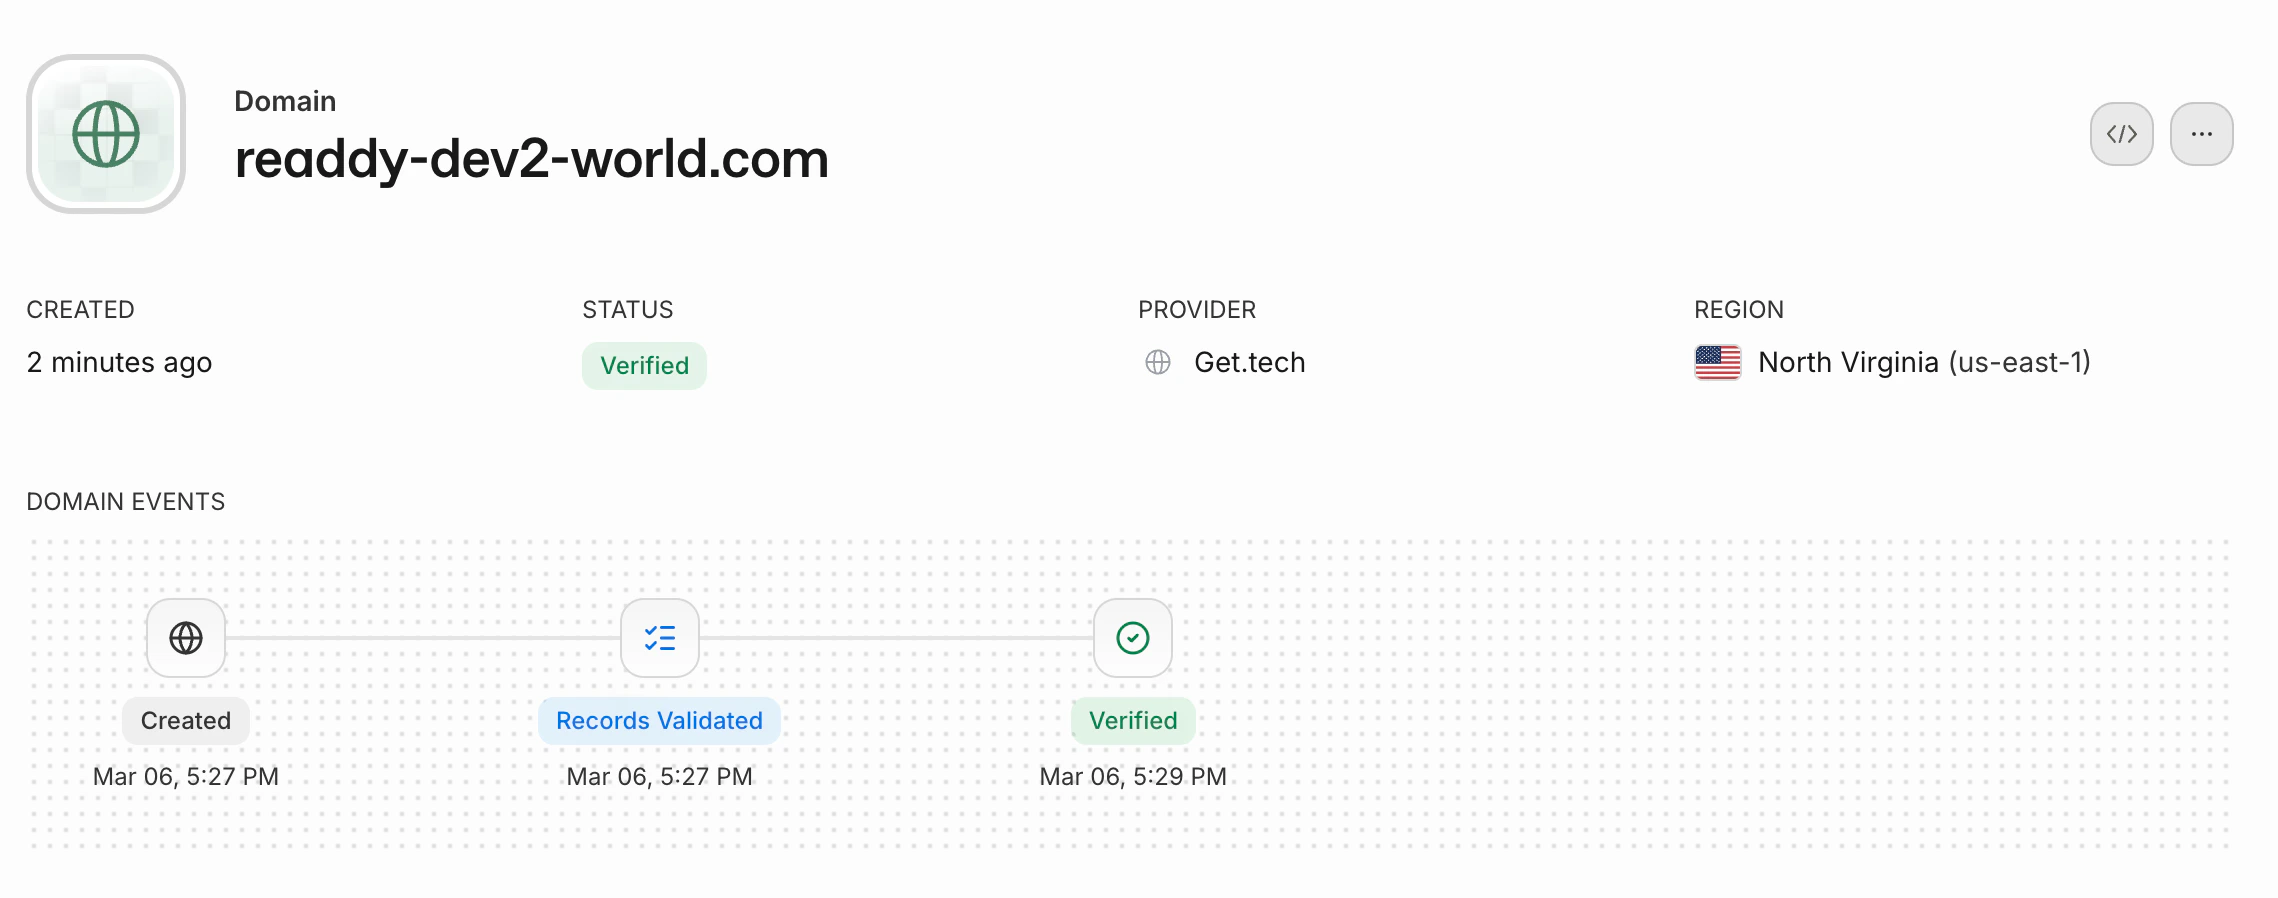
Domain verified in Resend Console
Domain now shows as verified in Readdy
Step 3: Configure Email Settings
- Sender Name (required) — The display name recipients will see, e.g. “Your Company Name”, up to 50 characters
- Sender Email (required) — Enter the email prefix; the system will automatically append the selected domain. For example, entering
notificationresults innotification@yourdomain.com. The default prefix isnotification - Email Subject (required) — Supports the following variables:
- Project name
- Form name
- Submission time
- Reply-To Address (optional) — The address where user replies will be sent. If left empty, the sender email is used
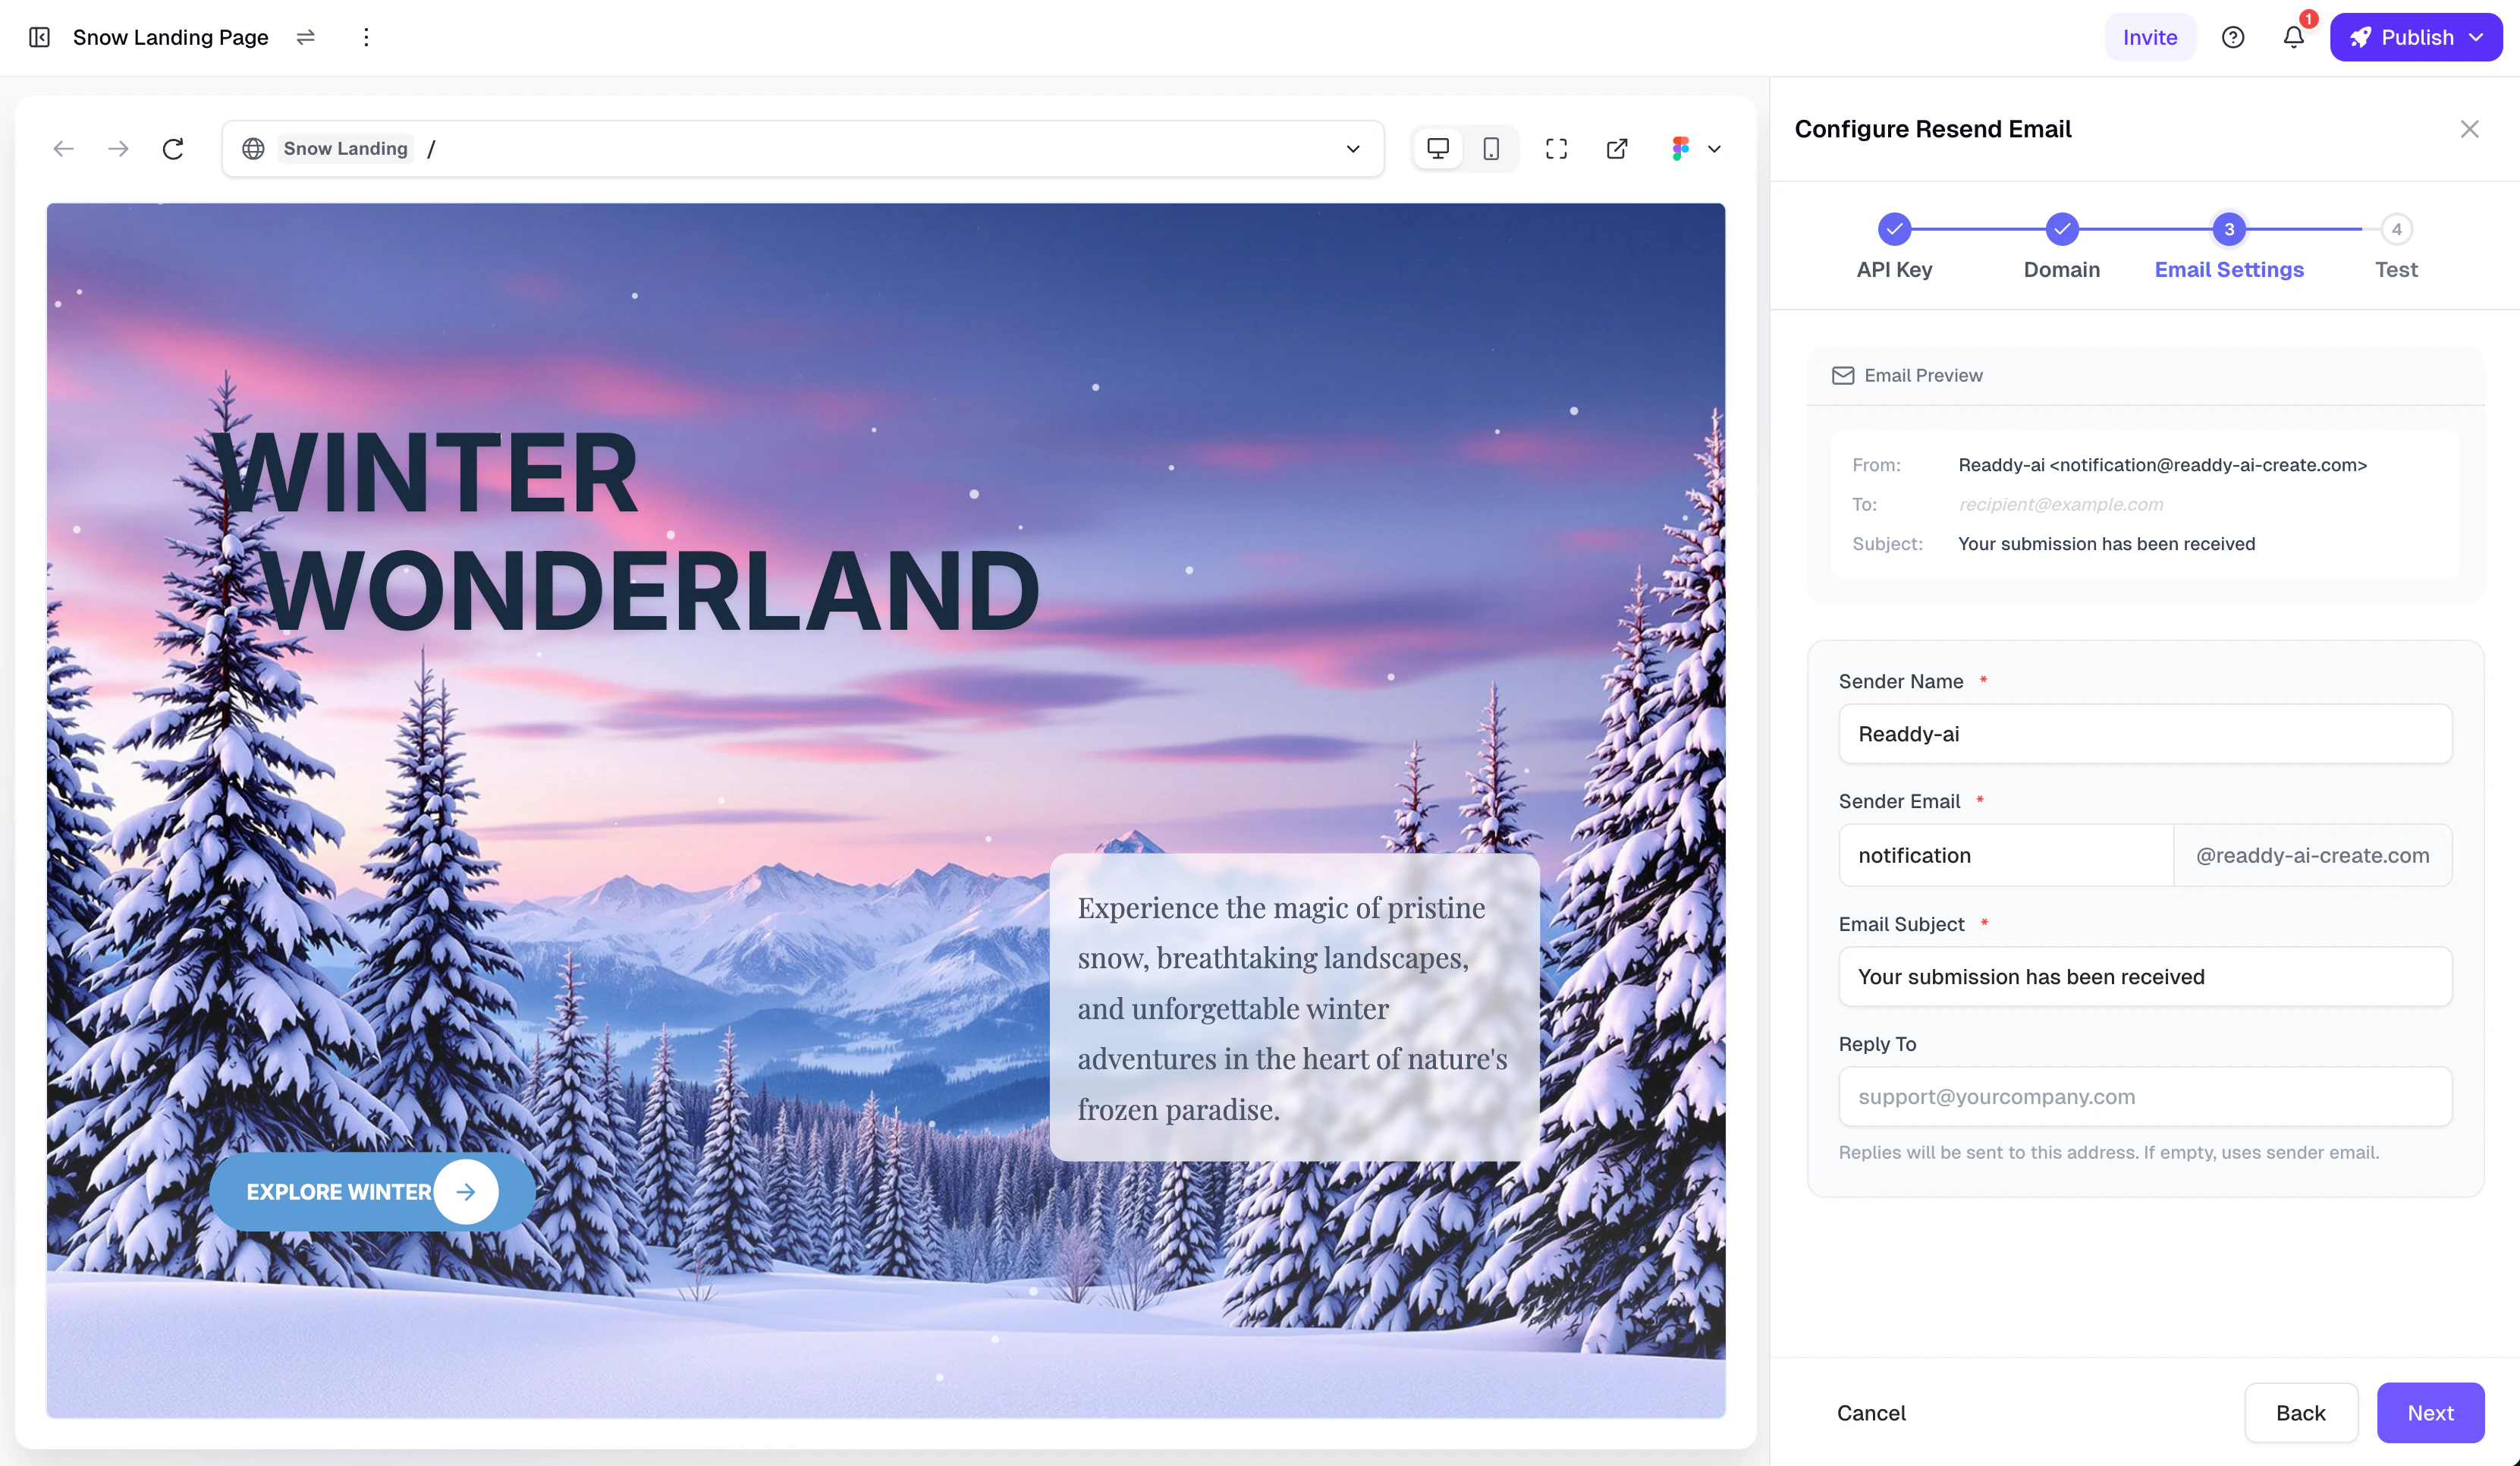
Email configuration page with real-time preview area
Post-Connection Management
After configuration is complete, you enter the “Connected” state. In the configuration panel, you can:- View configuration summary — API Key (masked), domain, and email settings details
- Switch domain — Click the “Switch” button on the domain card to select a different verified domain
- Modify email settings — Click the “Modify” button on the email settings card to change sender, subject, etc.
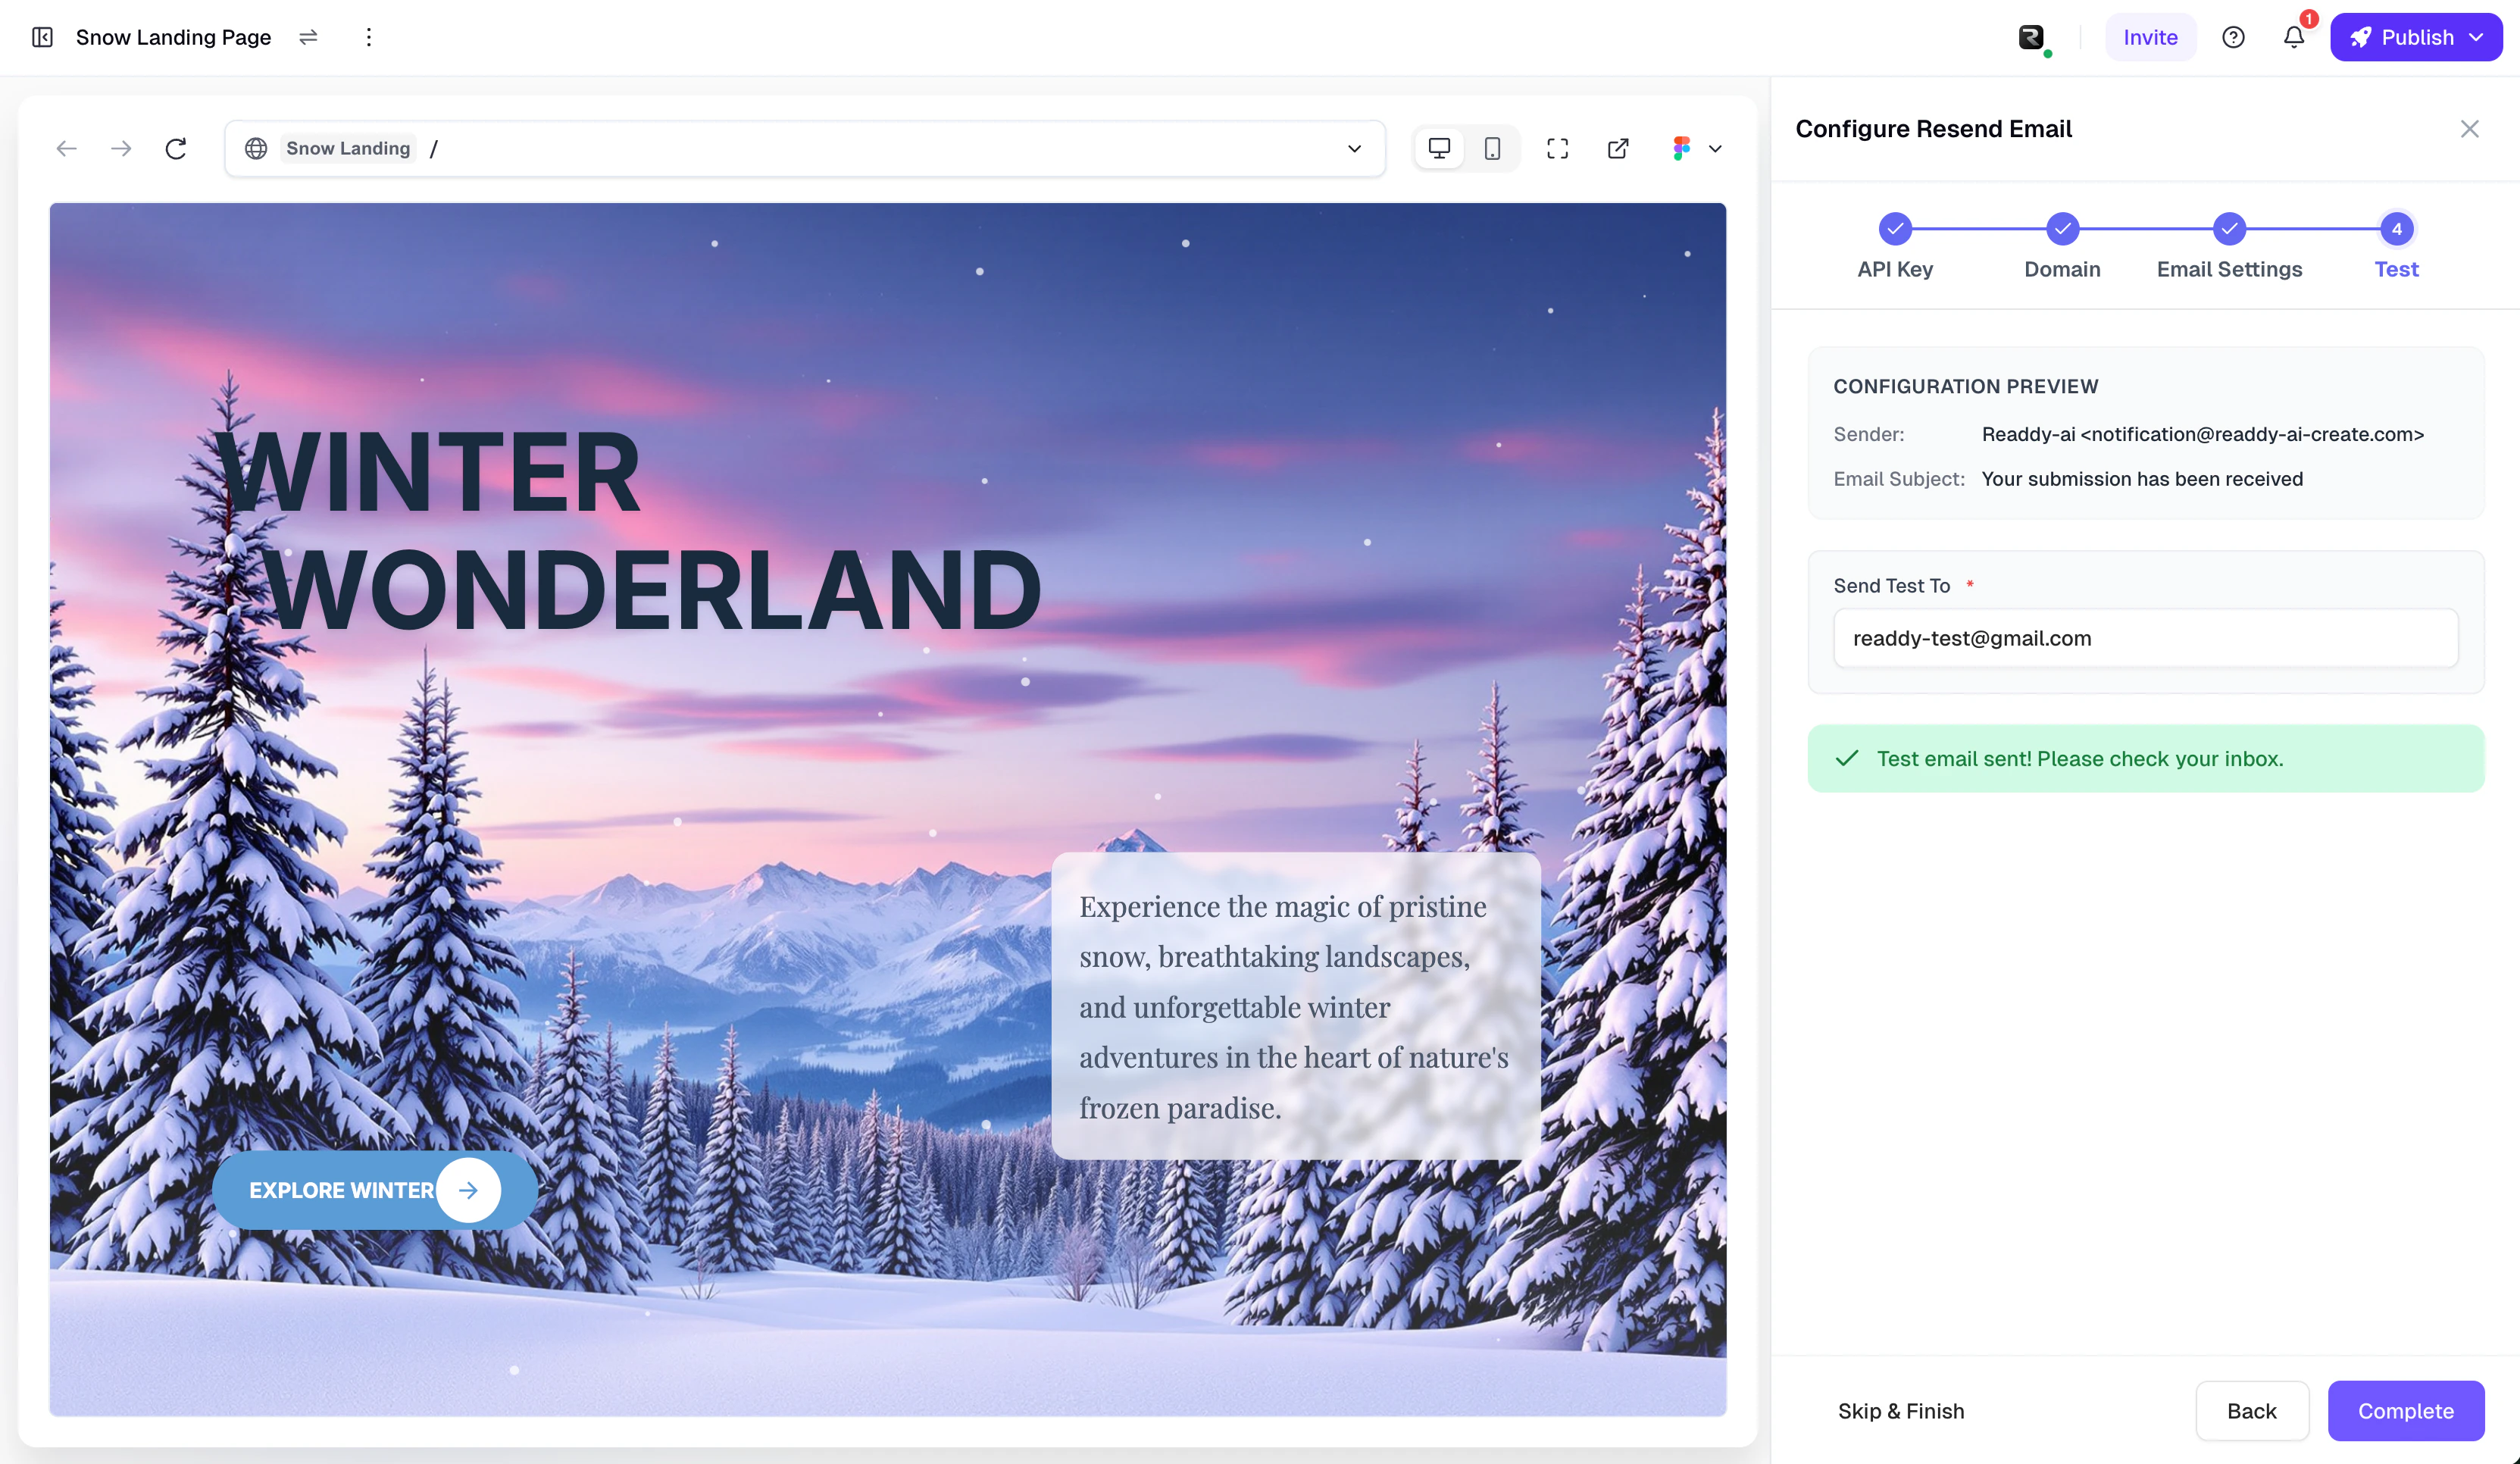
- Send test email — Click the “Send Test Email” button to verify your configuration at any time
- Refresh status — Click the refresh button in the top-right corner to get the latest configuration status
- Disconnect — Click the “Disconnect” link at the bottom
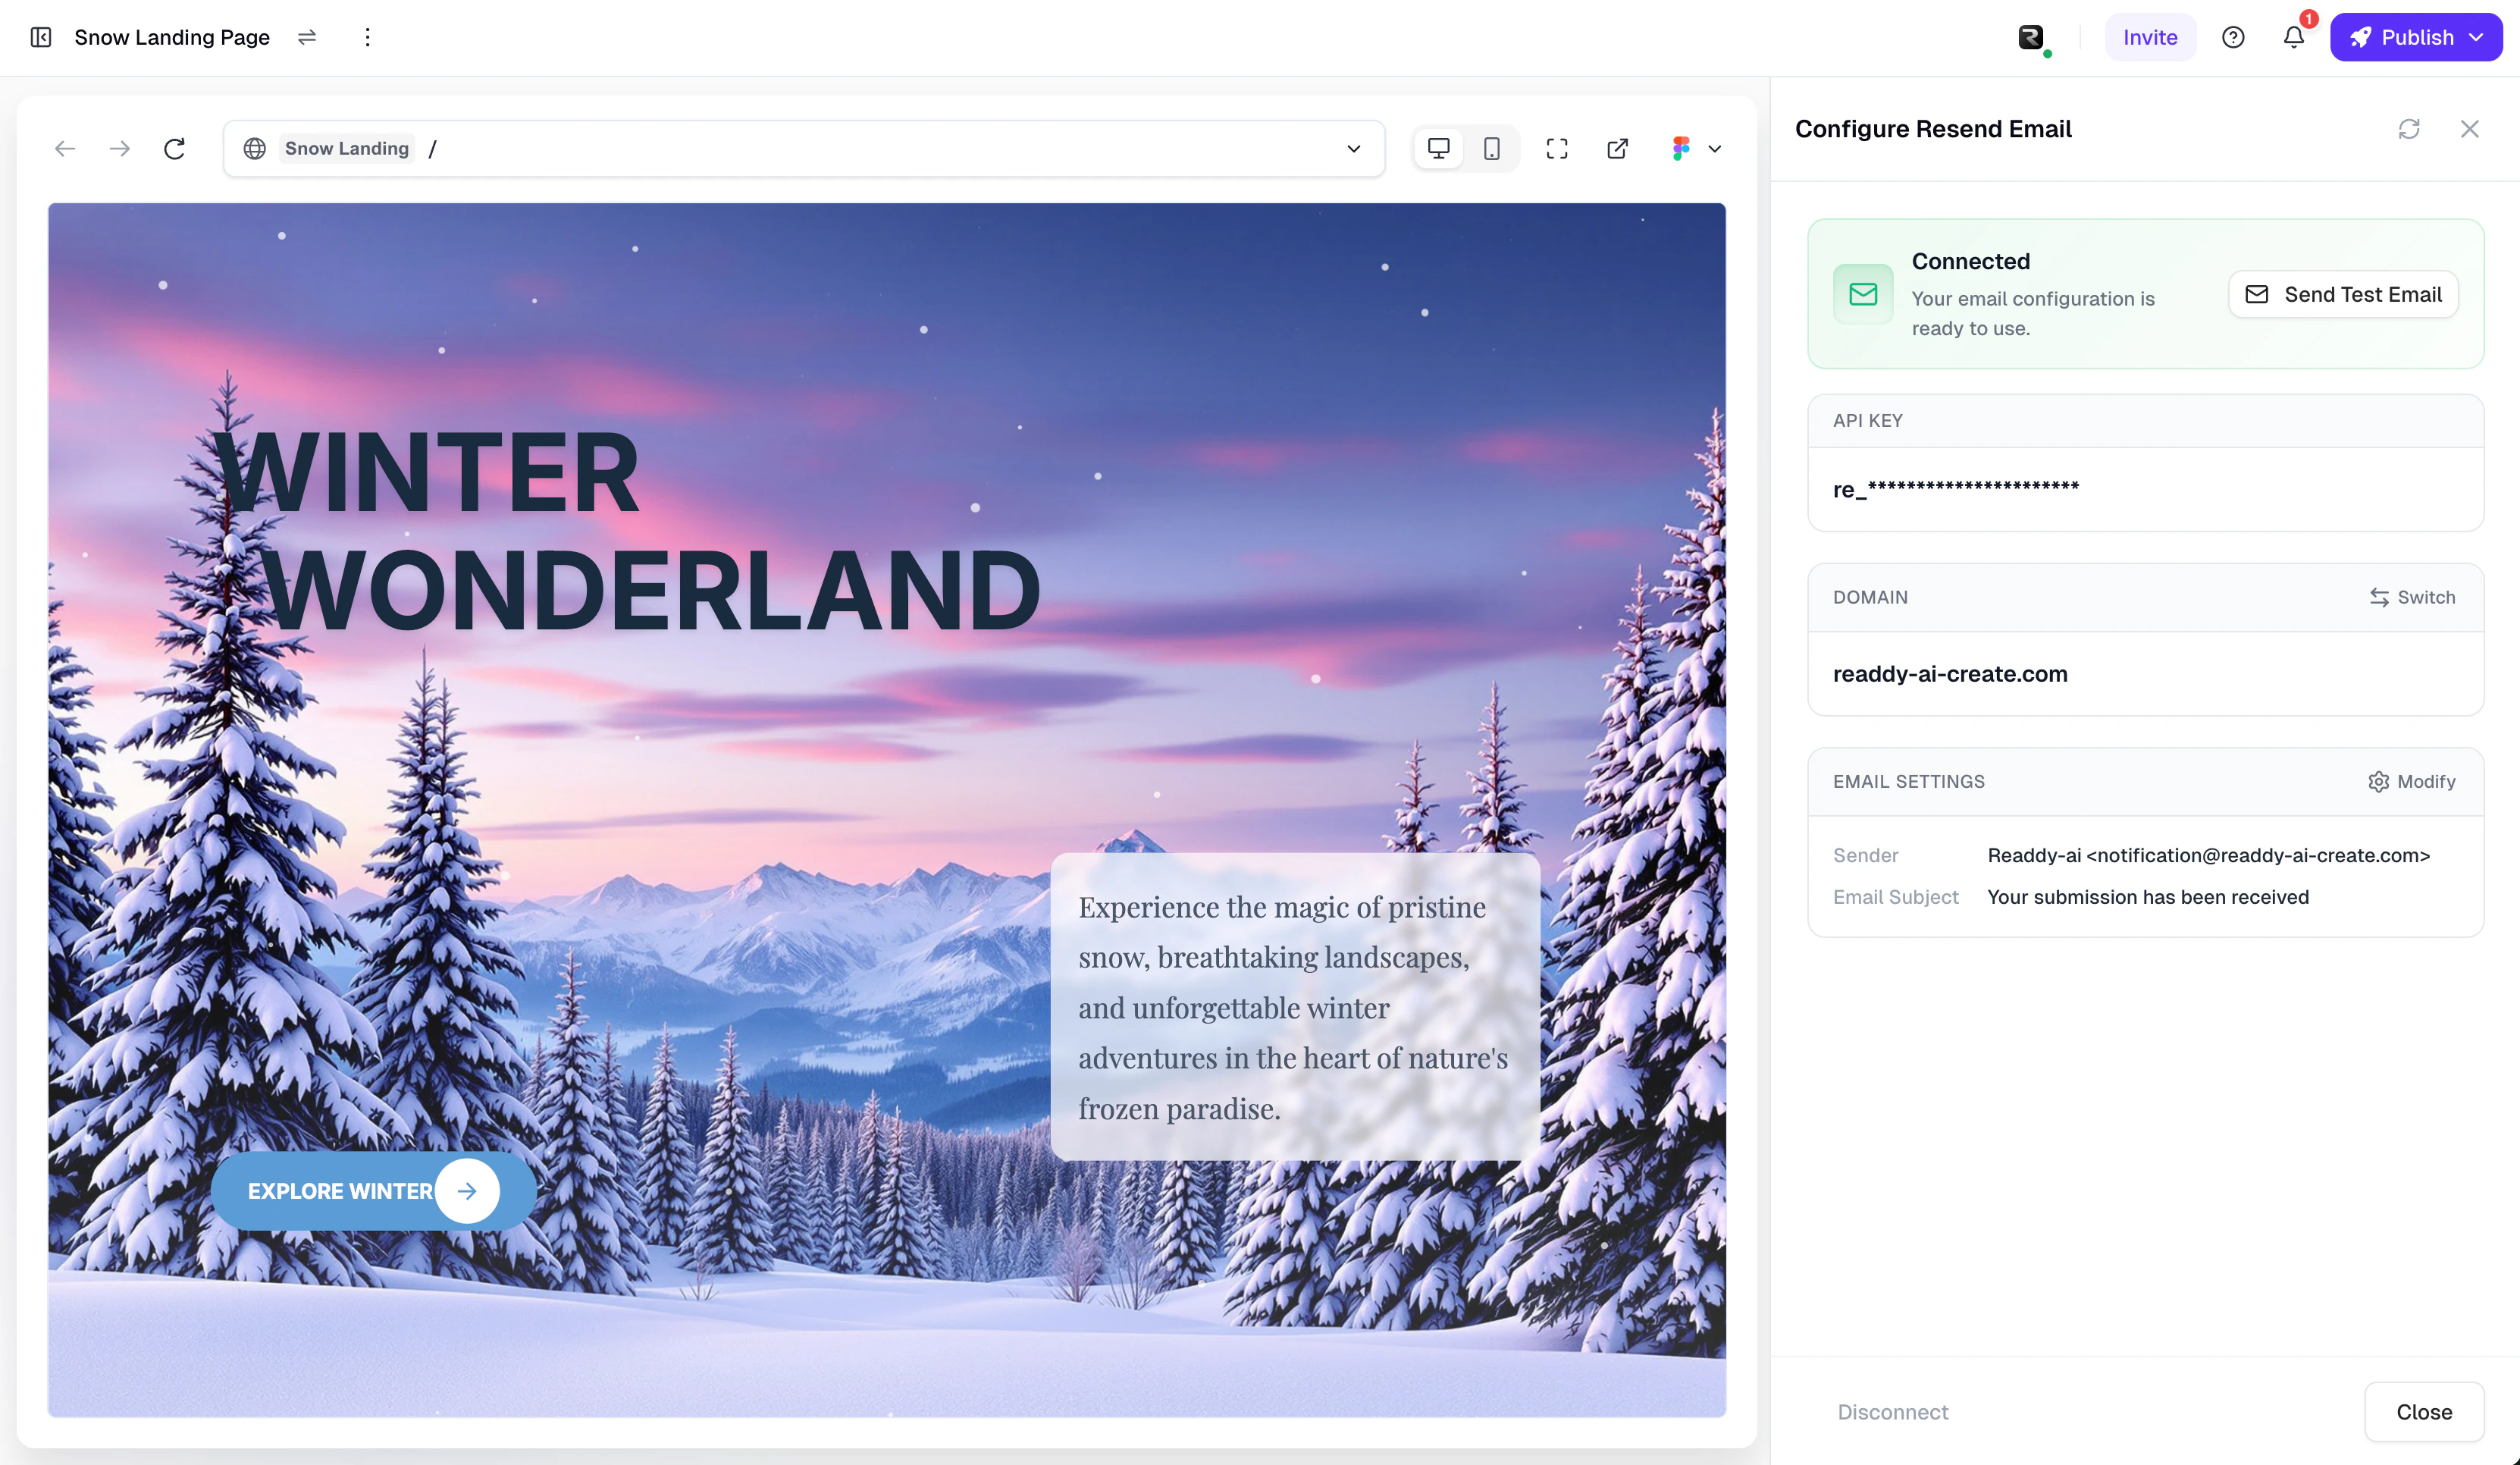
Connected state configuration management panel
Brand Email Toggle
In Project Settings > Notification Settings, you can use the “Brand Email” toggle to control whether Resend is used to send notification emails:- On — Send emails using your configured brand domain and information
- Off — Send emails using Readdy’s default method
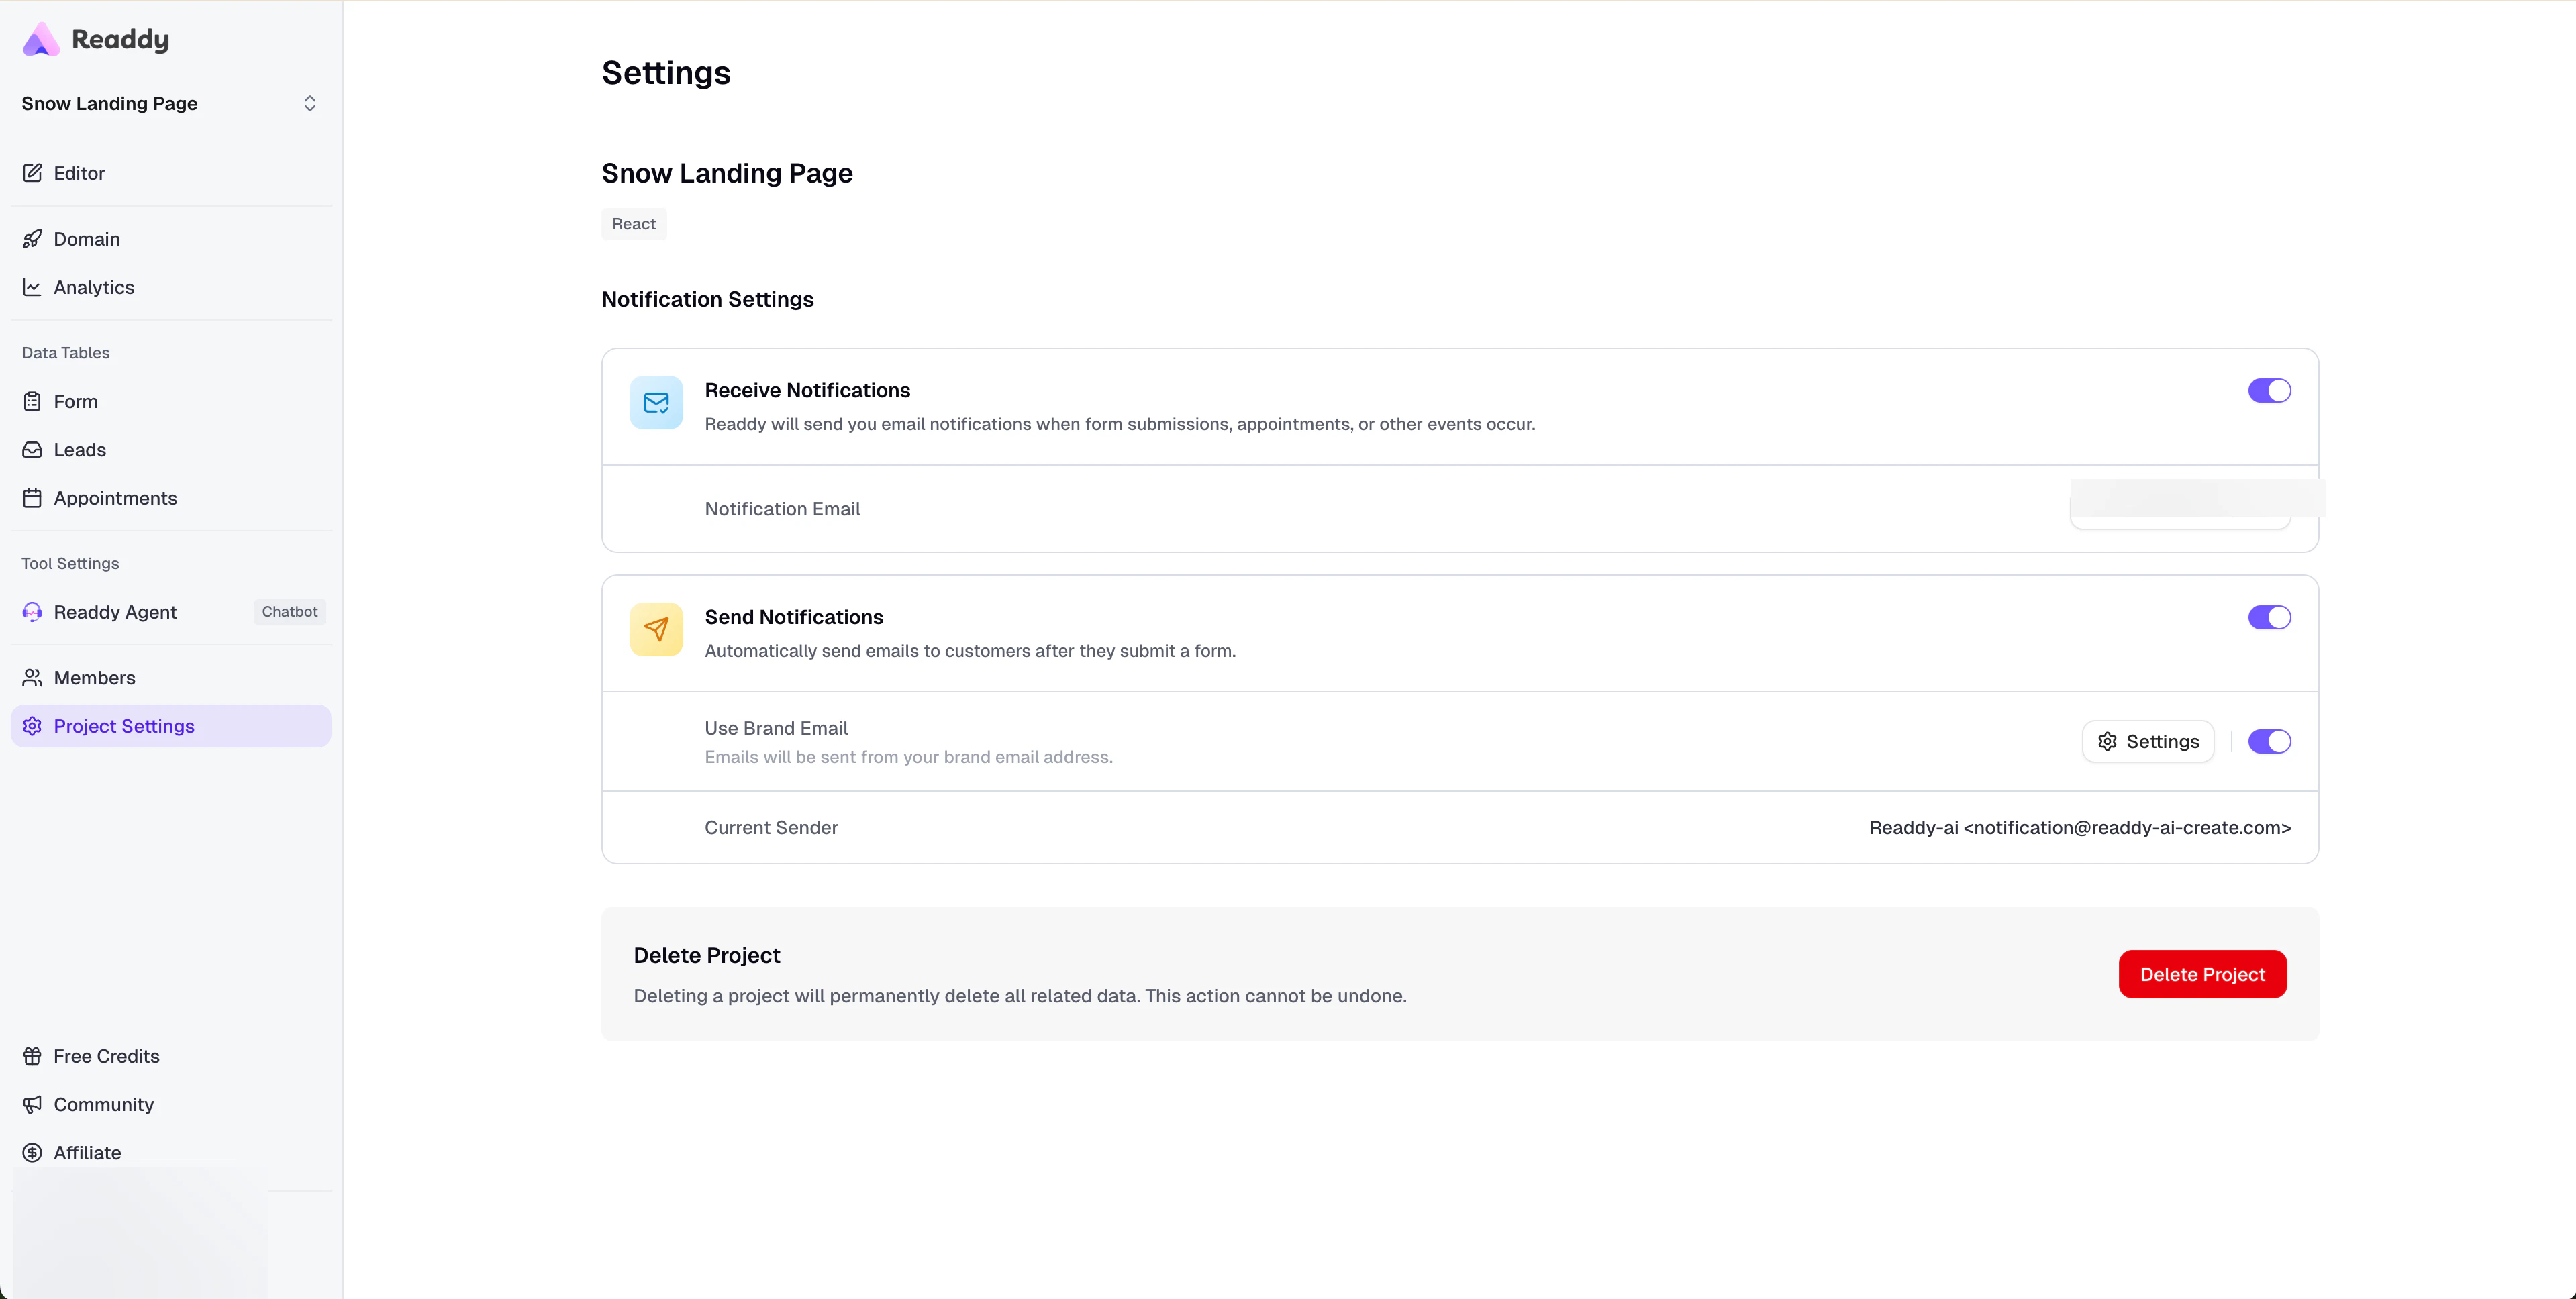
Brand Email toggle in Notification Settings
Error State Handling
Invalid API Key
Invalid API Key
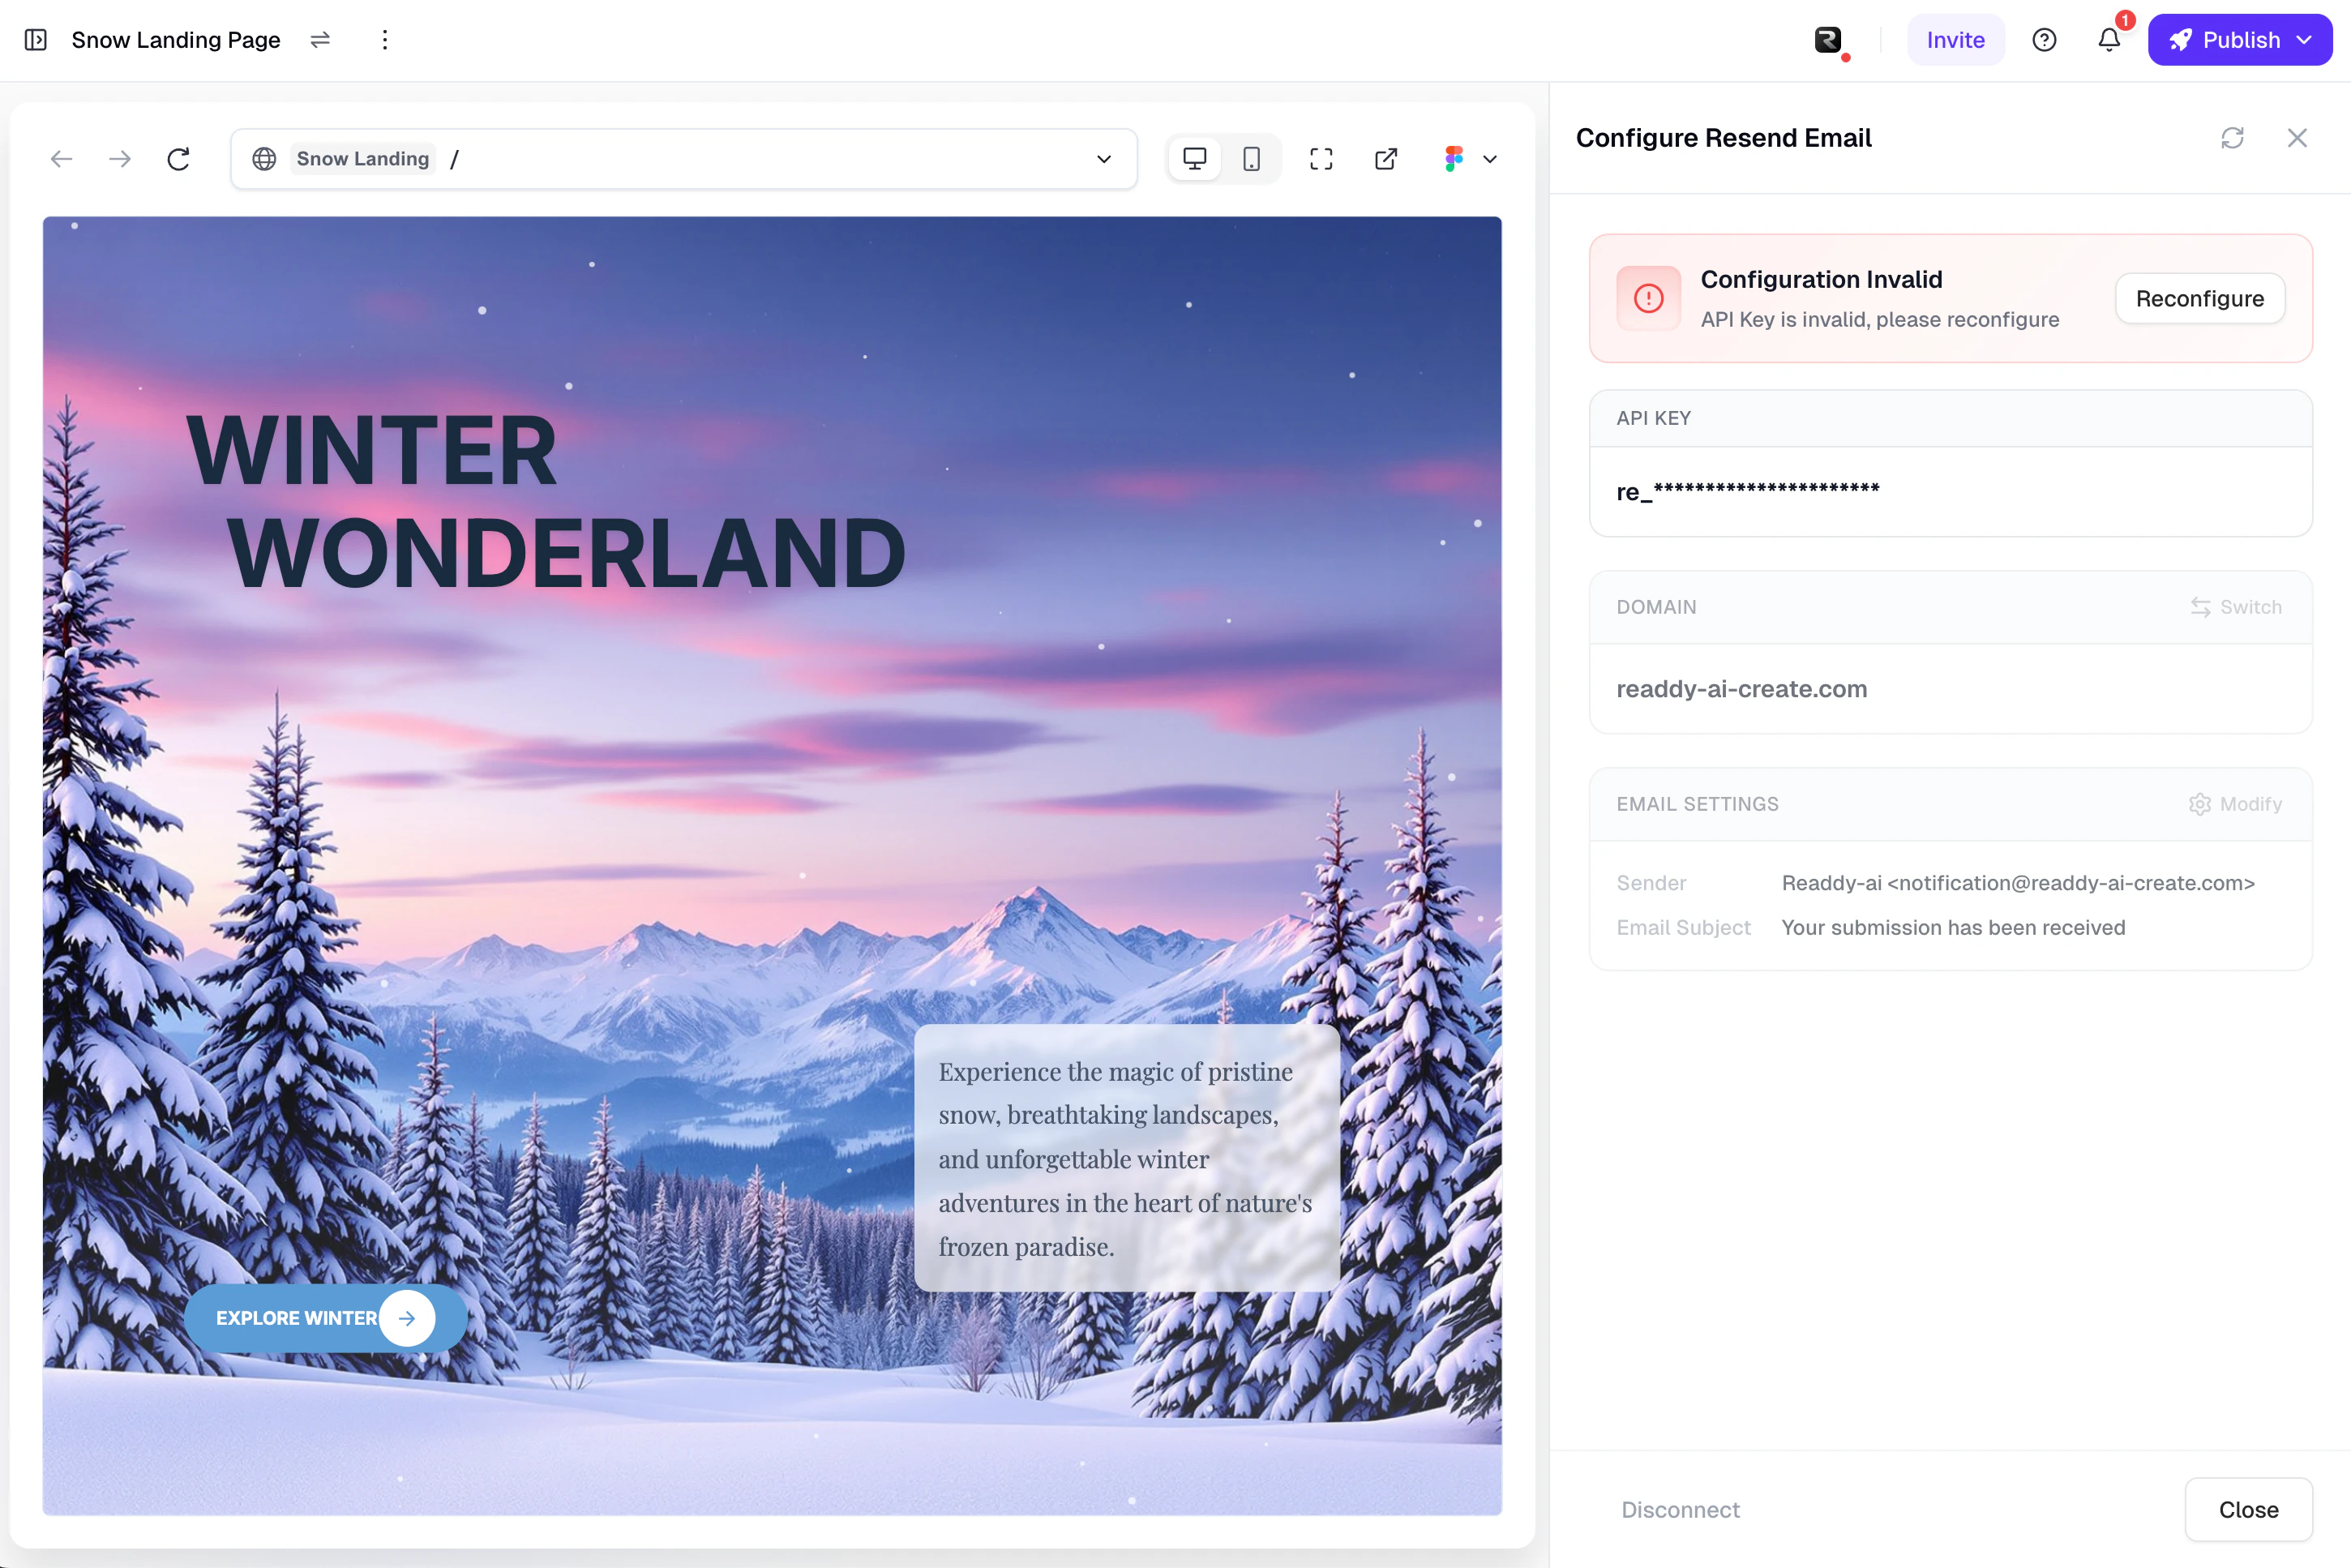
Invalid API Key error state
Domain Removed
Domain Removed

Domain Removed error state
Quota Exceeded
Quota Exceeded

Quota Exceeded error state
FAQ
Can I use Resend without publishing my project?
Can I use Resend without publishing my project?
What permission should I select for the API Key?
What permission should I select for the API Key?
What should I do if the domain list is empty?
What should I do if the domain list is empty?
- Confirm that the API Key has Full Access permission
- Confirm that you have added and verified a domain in the Resend Console
- Click the refresh button on the domain list to reload
- If it is still empty, click the “Add Domain” button to go to the Resend domain management page
What should I do if the test email fails to send?
What should I do if the test email fails to send?
| Error | Cause | Solution |
|---|---|---|
| Invalid API Key | API Key was deleted or has insufficient permissions | Click “Reconfigure” and create a new Full Access API Key |
| Domain Removed | Domain was deleted in the Resend Console | Go to Resend and check the domain status |
| Rate Limited | Too many sends in a short period | Wait a few minutes and click “Retry” |
| Quota Exceeded | Resend monthly sending quota exceeded | Upgrade your Resend plan or wait for the quota to reset |
| Send Failed | Other reasons | Click “Retry”; if the issue persists, check domain verification status and API Key permissions |
What happens after disconnecting?
What happens after disconnecting?
- Notification emails will revert to Readdy’s default sending method
- The sender will display as a Readdy email address instead of your brand email
- The API Key will be removed from Readdy, but your Resend account will not be affected
- You can reconfigure at any time
Why are Readdy subdomains not supported?
Why are Readdy subdomains not supported?
xxx.readdy.ai) are not domains you own and cannot be added or verified in Resend. Please bind your own custom domain in Readdy before using this feature.Need Help?
Contact Support
- Ask AI: Available in your project
- Readdy Support: Submit a support ticket