GitHub Overview
What is GitHub?
GitHub is the world’s leading platform for version control and code collaboration. By connecting your GitHub account to Readdy, you can establish a seamless code sync workflow between Readdy’s AI-powered website builder and your local development environment.What can you do after integrating GitHub with Readdy?
- Push — Push your Readdy project code to a GitHub repository at any time
- Pull — Pull the latest code from GitHub to create a new version in Readdy
- Clone — Clone the repository to your local machine and develop with your favorite IDE
Permissions
GitHub integration availability depends on your project role:| Action | Owner | Editor | Viewer |
|---|---|---|---|
| View GitHub entry and status | ✅ | ✅ | ❌ |
| Connect / Disconnect GitHub | ✅ | ❌ | ❌ |
| Push / Pull sync | ✅ | ❌ | ❌ |
| Error handling (re-authorize, etc.) | ✅ | ❌ | ❌ |
- Owner — Full GitHub integration permissions, including connecting, syncing, disconnecting, and error handling.
- Editor — Can only view GitHub connection status. Cannot perform any actions.
- Viewer — GitHub entry and connection status are hidden by default.
Authorization
Connecting GitHub takes just a few steps. You’ll need a GitHub account — if you don’t have one, you can sign up for free.Open the GitHub Panel
You can open the GitHub panel in two ways: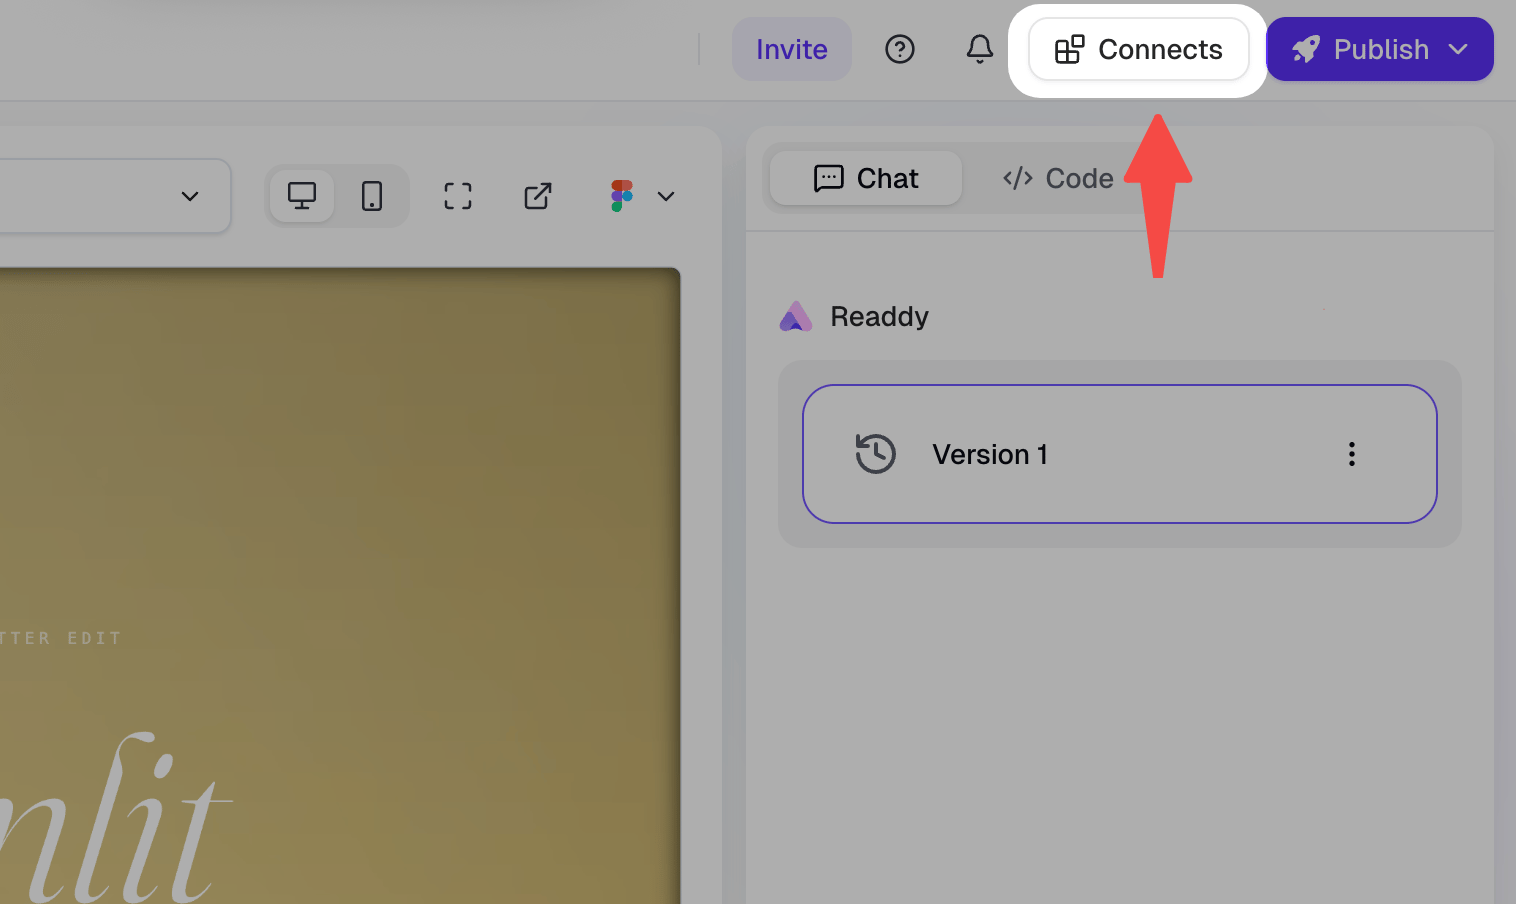
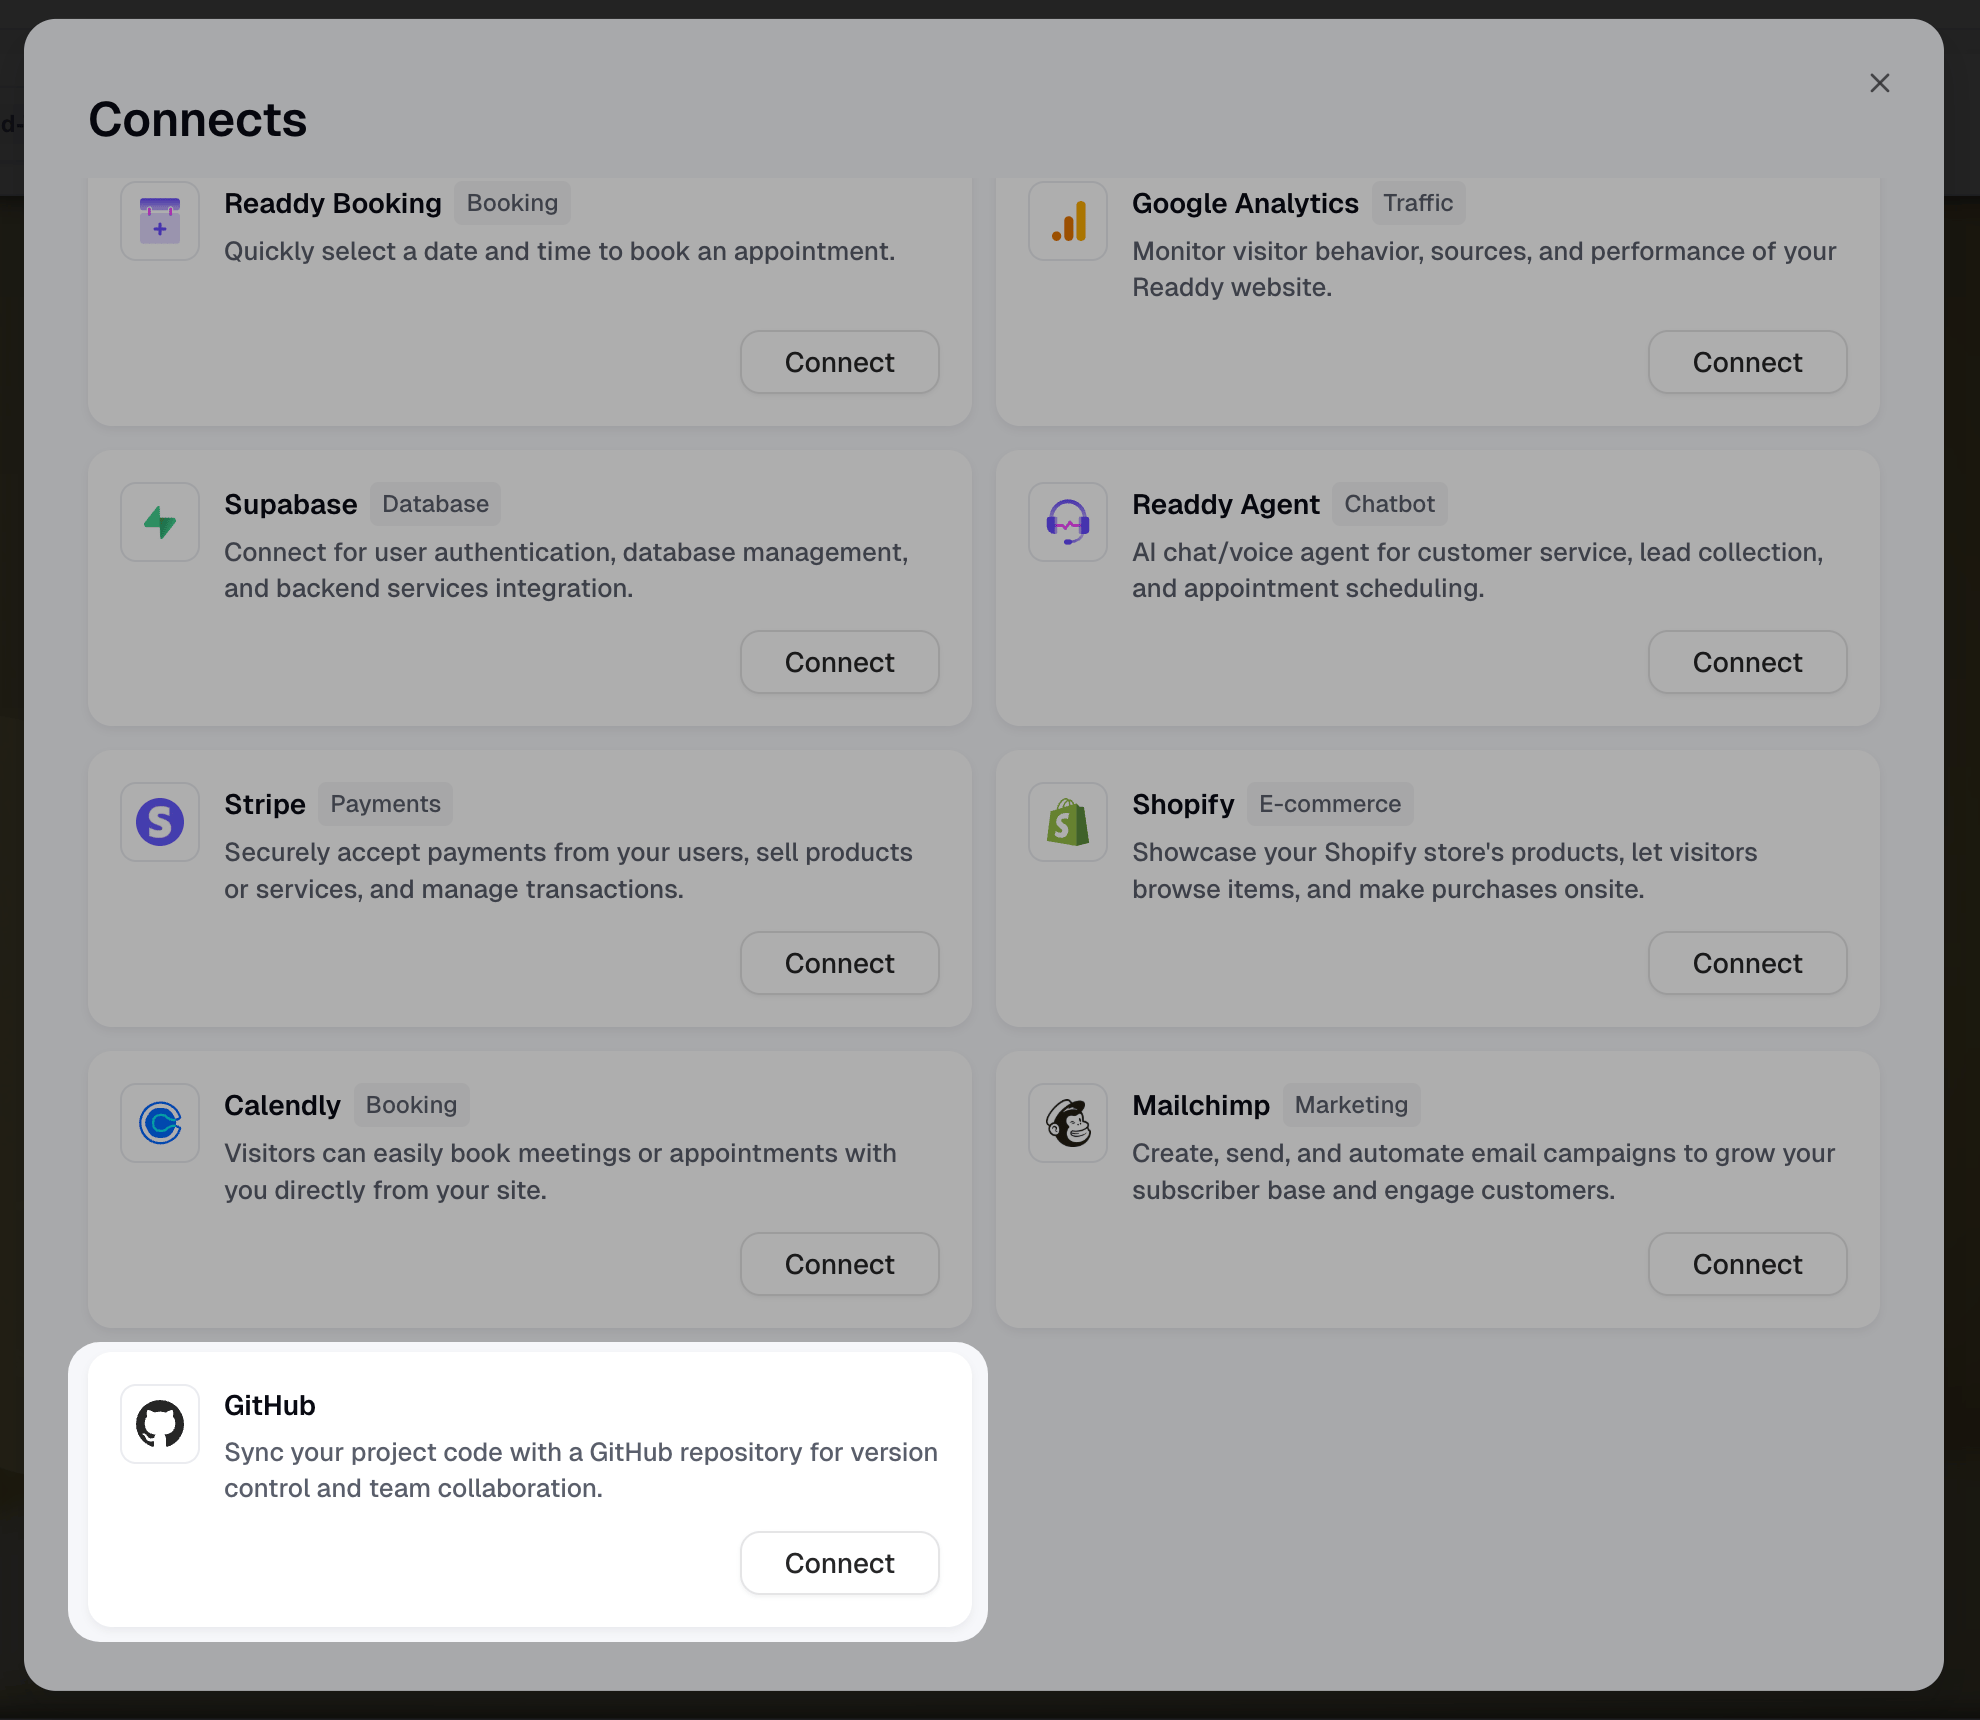
- Click the Connects button in the top navigation bar, then select GitHub.
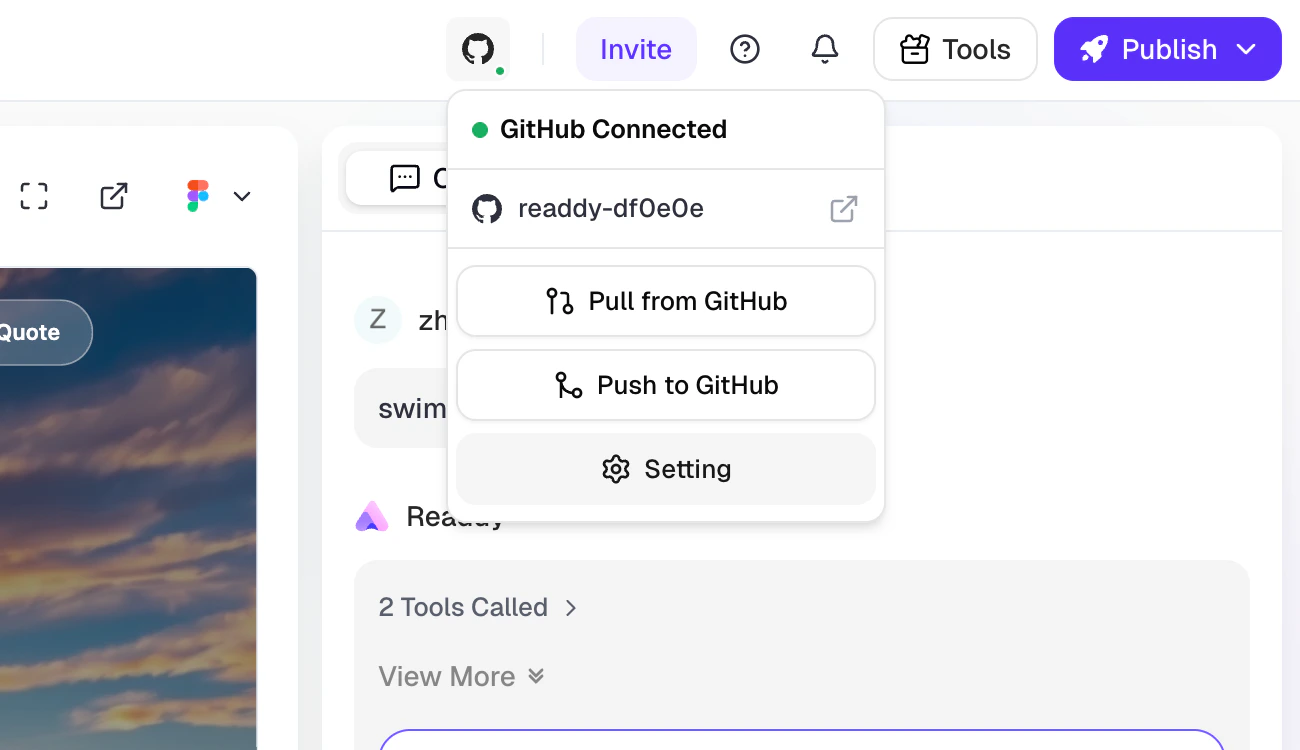
- After connecting, click the GitHub icon in the top navigation bar for quick access.
Authorize the Connection
- In the GitHub panel, click the “Connect GitHub” button.

- A new browser window will open, redirecting you to the GitHub authorization page.
- Install the Readdy GitHub App on your GitHub account or organization. You can choose to grant access to all repositories or select specific ones.
- Once authorization is complete, the window will close automatically and the Readdy panel will update.

Create a Repository
After authorization, Readdy will guide you to create a repository for the current project:

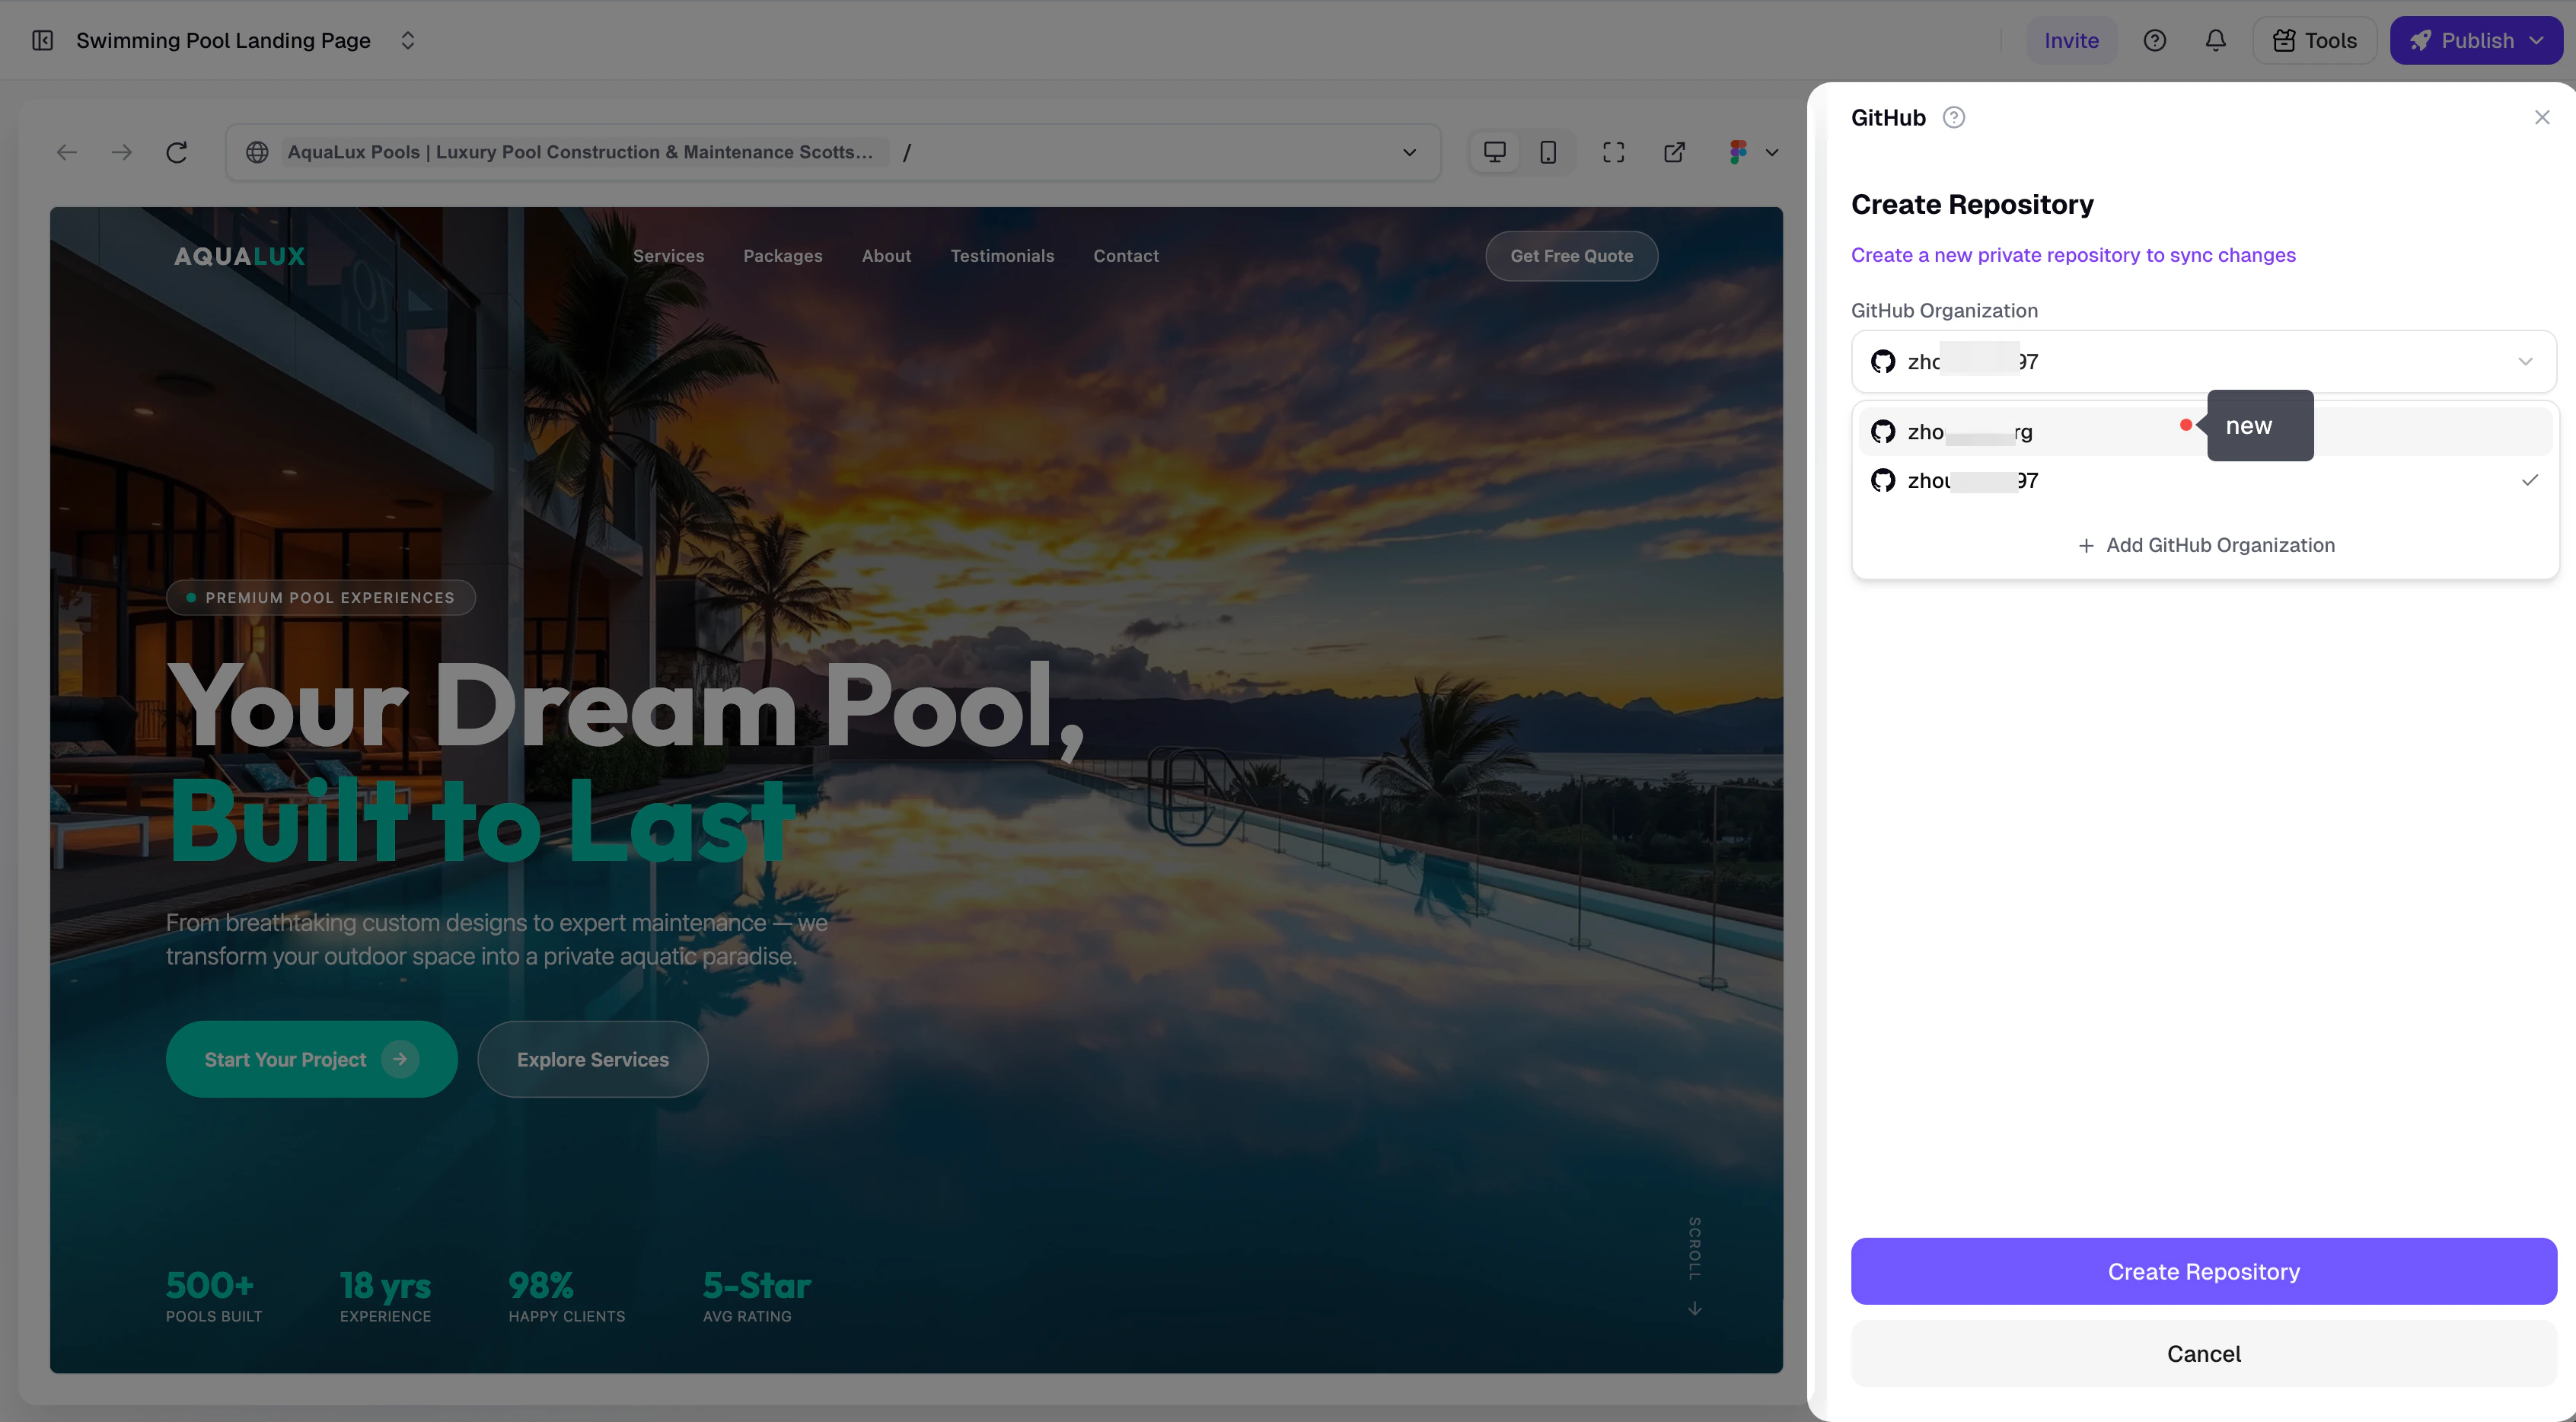
- Select a GitHub Organization (or personal account) from the dropdown.
- Click “Create Repository”.
- Readdy will automatically create a private repository and bind it to the project.
Adding a new GitHub Organization
If the organization you need is not in the dropdown, click ”+ Add GitHub Organization” to install the Readdy GitHub App on that organization.If the organization has already installed the Readdy GitHub App, you will not see the installation page. Instead, you will be taken directly to the App settings page.The “Save” button is disabled by default. To activate it, toggle the Repository access option — for example, switch to “Only select repositories” and then back to “All repositories” — then click “Save” to complete the authorization.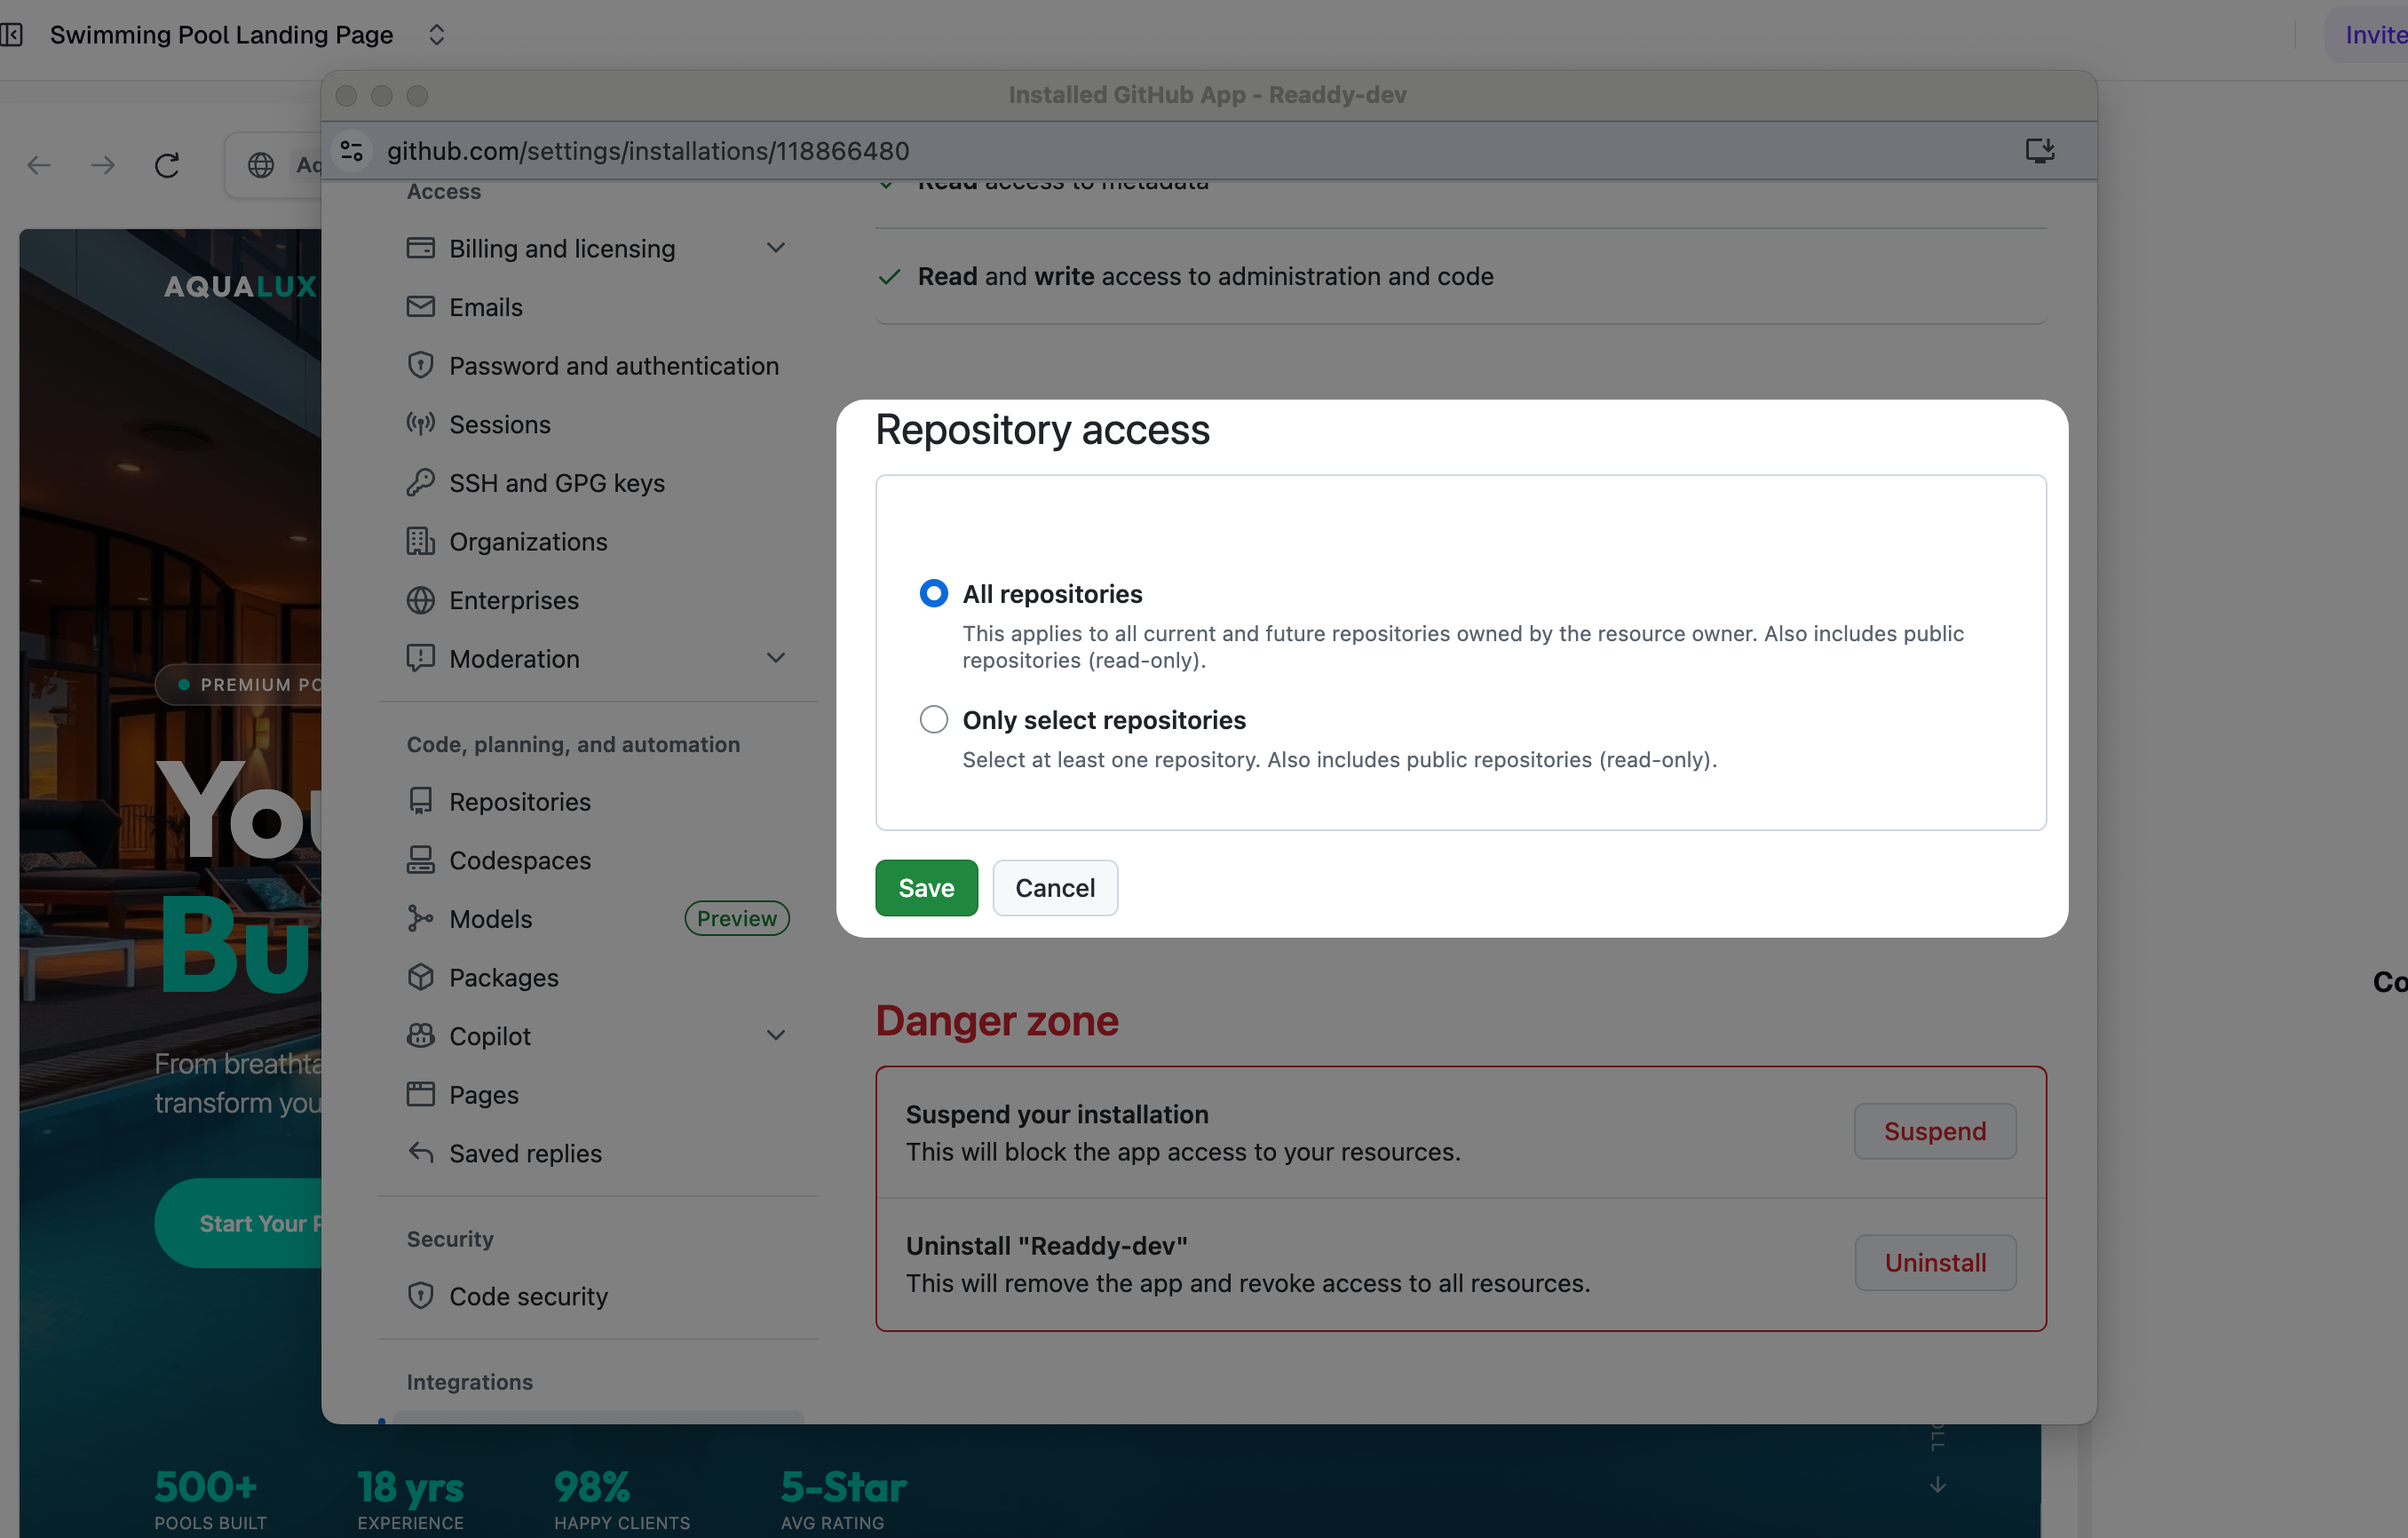
Code Sync
Code synchronization between Readdy and GitHub is manually triggered — it does not sync automatically. Each Push or Pull requires you to click the button and confirm the action. Only the project Owner can perform sync operations. You can trigger Push and Pull from two places:- The action buttons at the bottom of the GitHub panel
- The GitHub icon dropdown menu in the top navigation bar

Push to GitHub
Push uploads the currently selected Readdy project version to the main branch of the connected GitHub repository. After confirming the push:- The panel and toolbar will display a “Pushing…” status badge (e.g.,
Pushing… · V12). - A success notification will appear when the push is complete.
- Push details — including the repository URL and commit SHA (before and after) — will be recorded in the version’s message history.


Pull from GitHub
Pull fetches the latest code from the main branch and creates a new version in Readdy. After confirming the pull:- The panel will display a “Pulling…” status badge.
- Once complete, Readdy will automatically create a new version and switch to it.
- Pull details — including the repository URL and commit SHA — will be recorded in the message history.

Pull creates a new version in your project. Before pulling, make sure the code on GitHub’s main branch is what you want to sync into Readdy.
Sync Status
In collaborative scenarios, both Owner and Editor can see the current sync progress in real time in the GitHub panel and the top navigation bar icon. While a Push or Pull is in progress, sync buttons are temporarily disabled to prevent conflicts.Cloning the Repository
Once connected, the GitHub panel provides clone commands for local development. Three formats are supported:| Method | Example |
|---|---|
| HTTPS | https://github.com/org/repo-name.git |
| SSH | git@github.com:org/repo-name.git |
| GitHub CLI | gh repo clone org/repo-name |

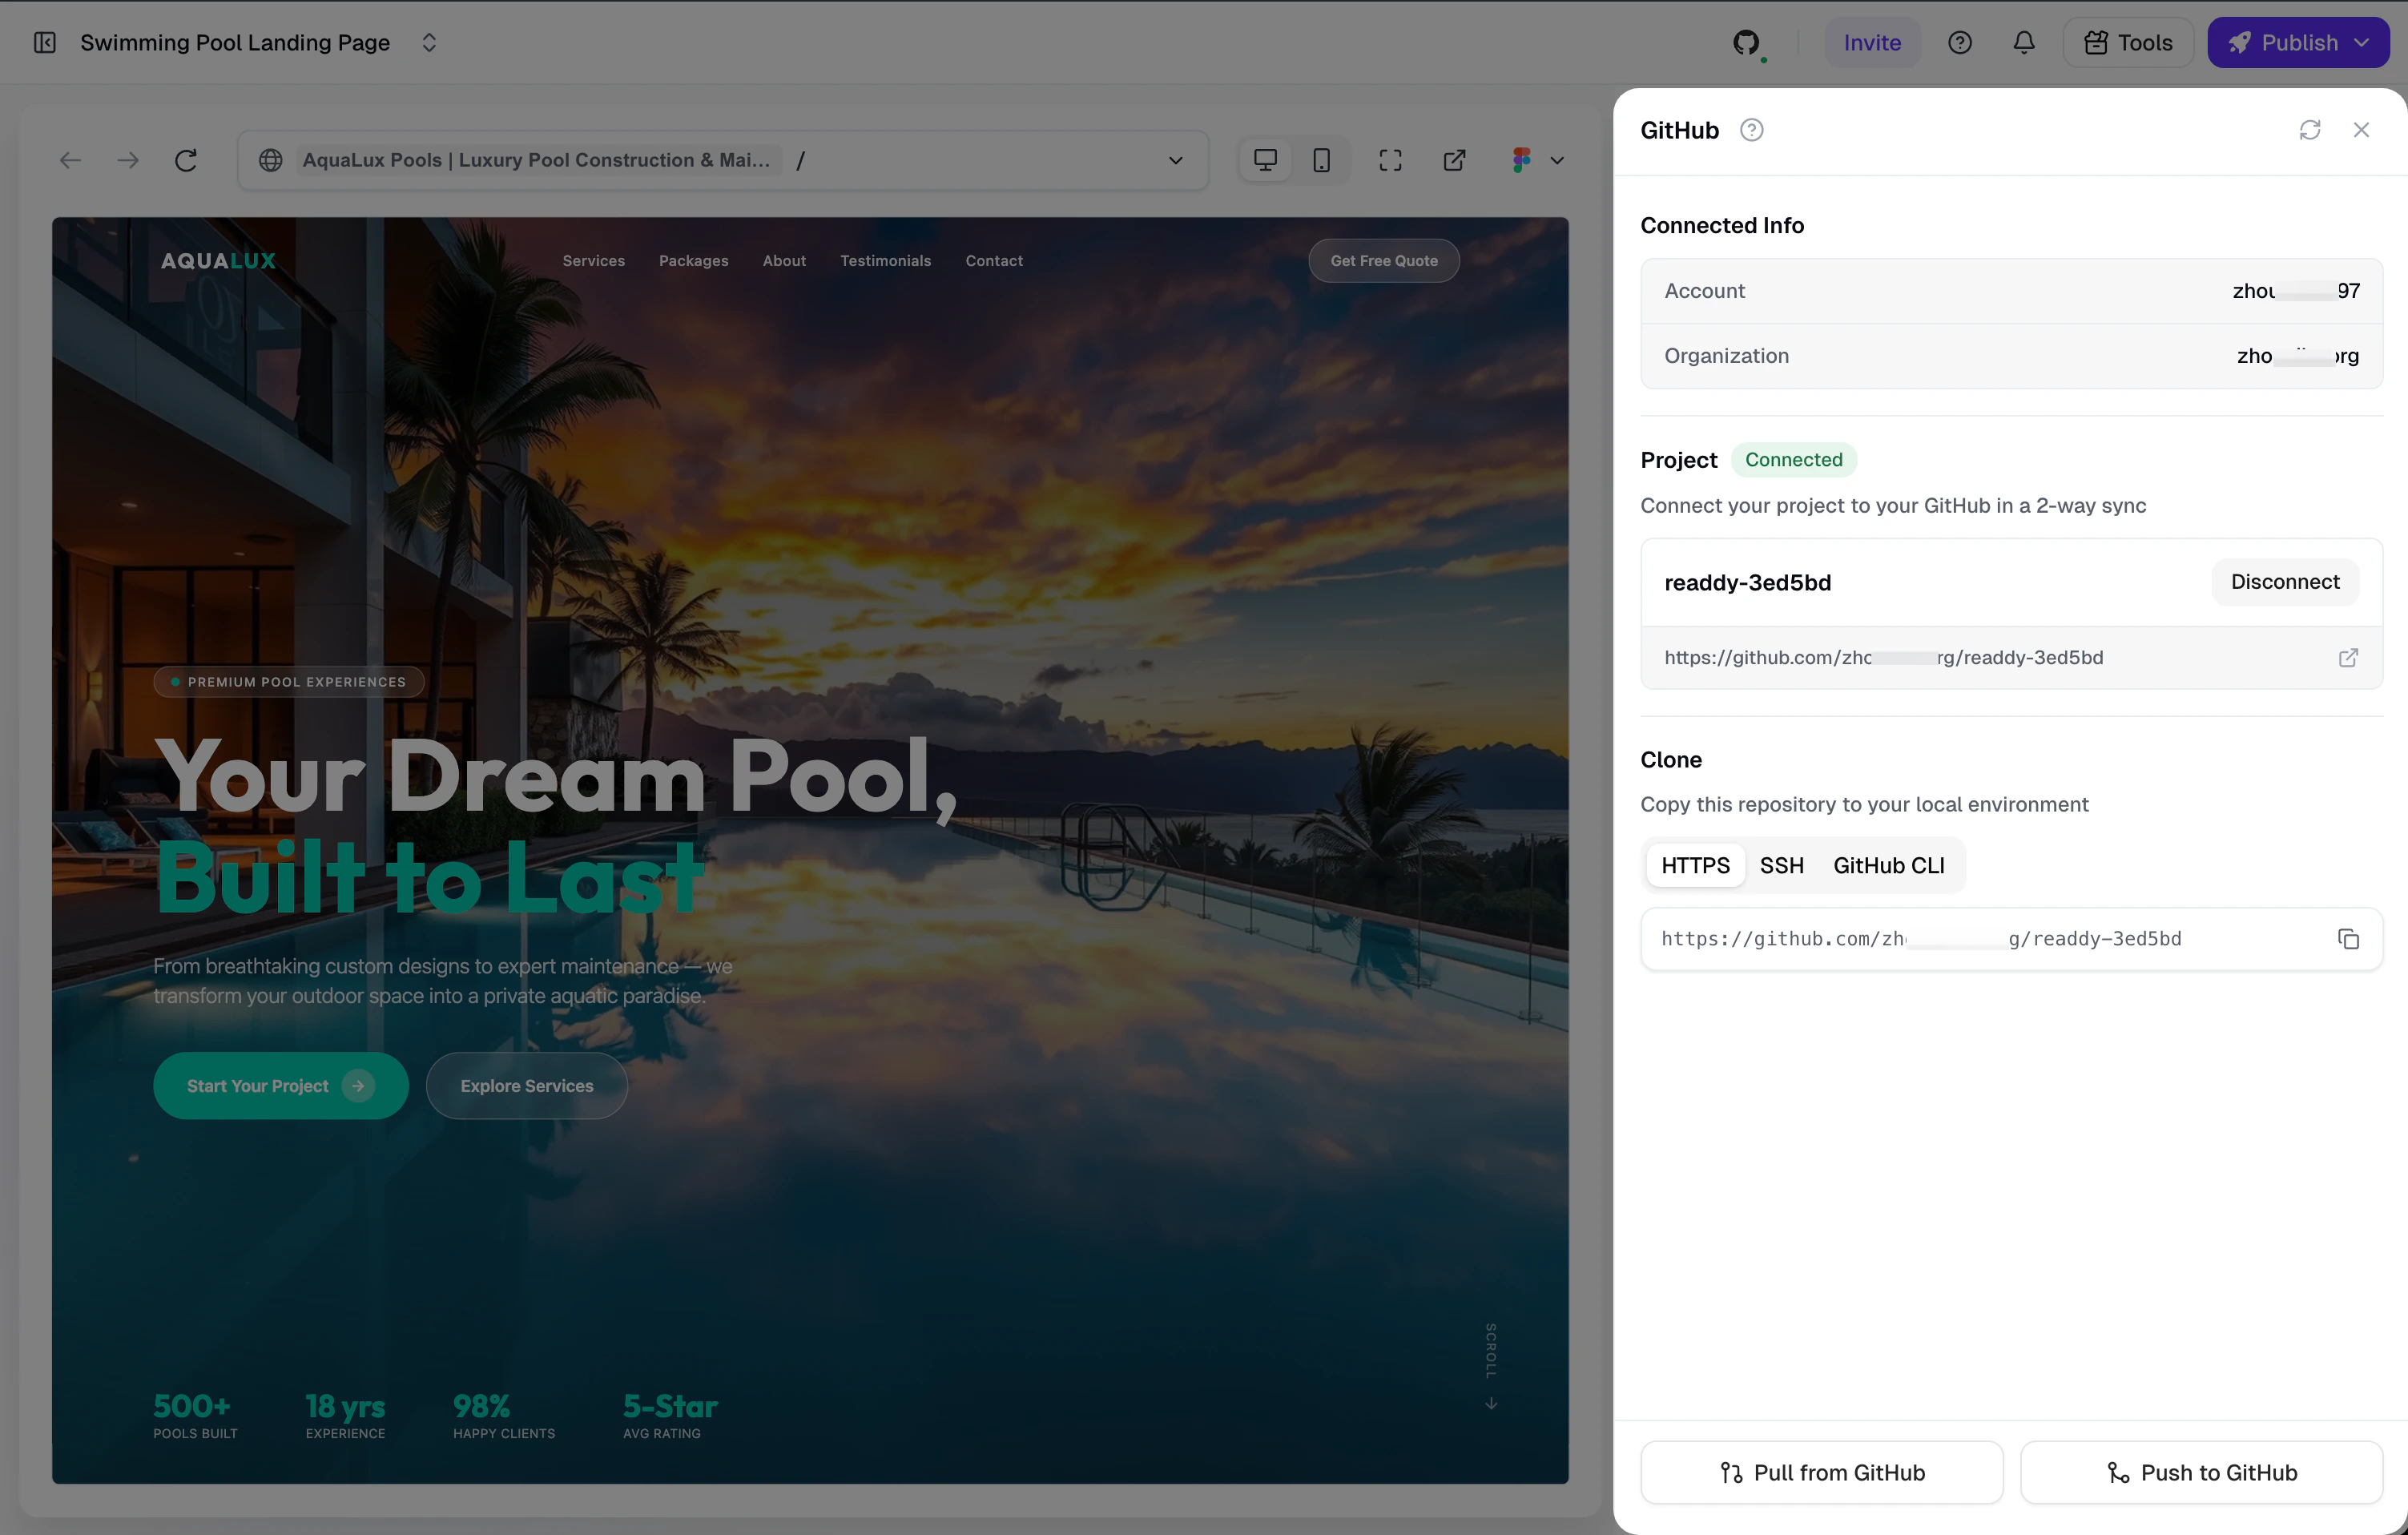
Viewing Connection Details
Owner and Editor can view the following connection details in the GitHub panel:- Account — The connected GitHub account name
- Organization — The organization (or account) that owns the repository
- Repository — The linked repository name and URL (click to open on GitHub)
- Status badge — A green “Connected” badge indicates a healthy connection
Disconnecting
Disconnect Repository
To unbind the current project from its GitHub repository:- In the GitHub panel, find the repository card and click “Disconnect”.
- Confirm in the dialog that appears.
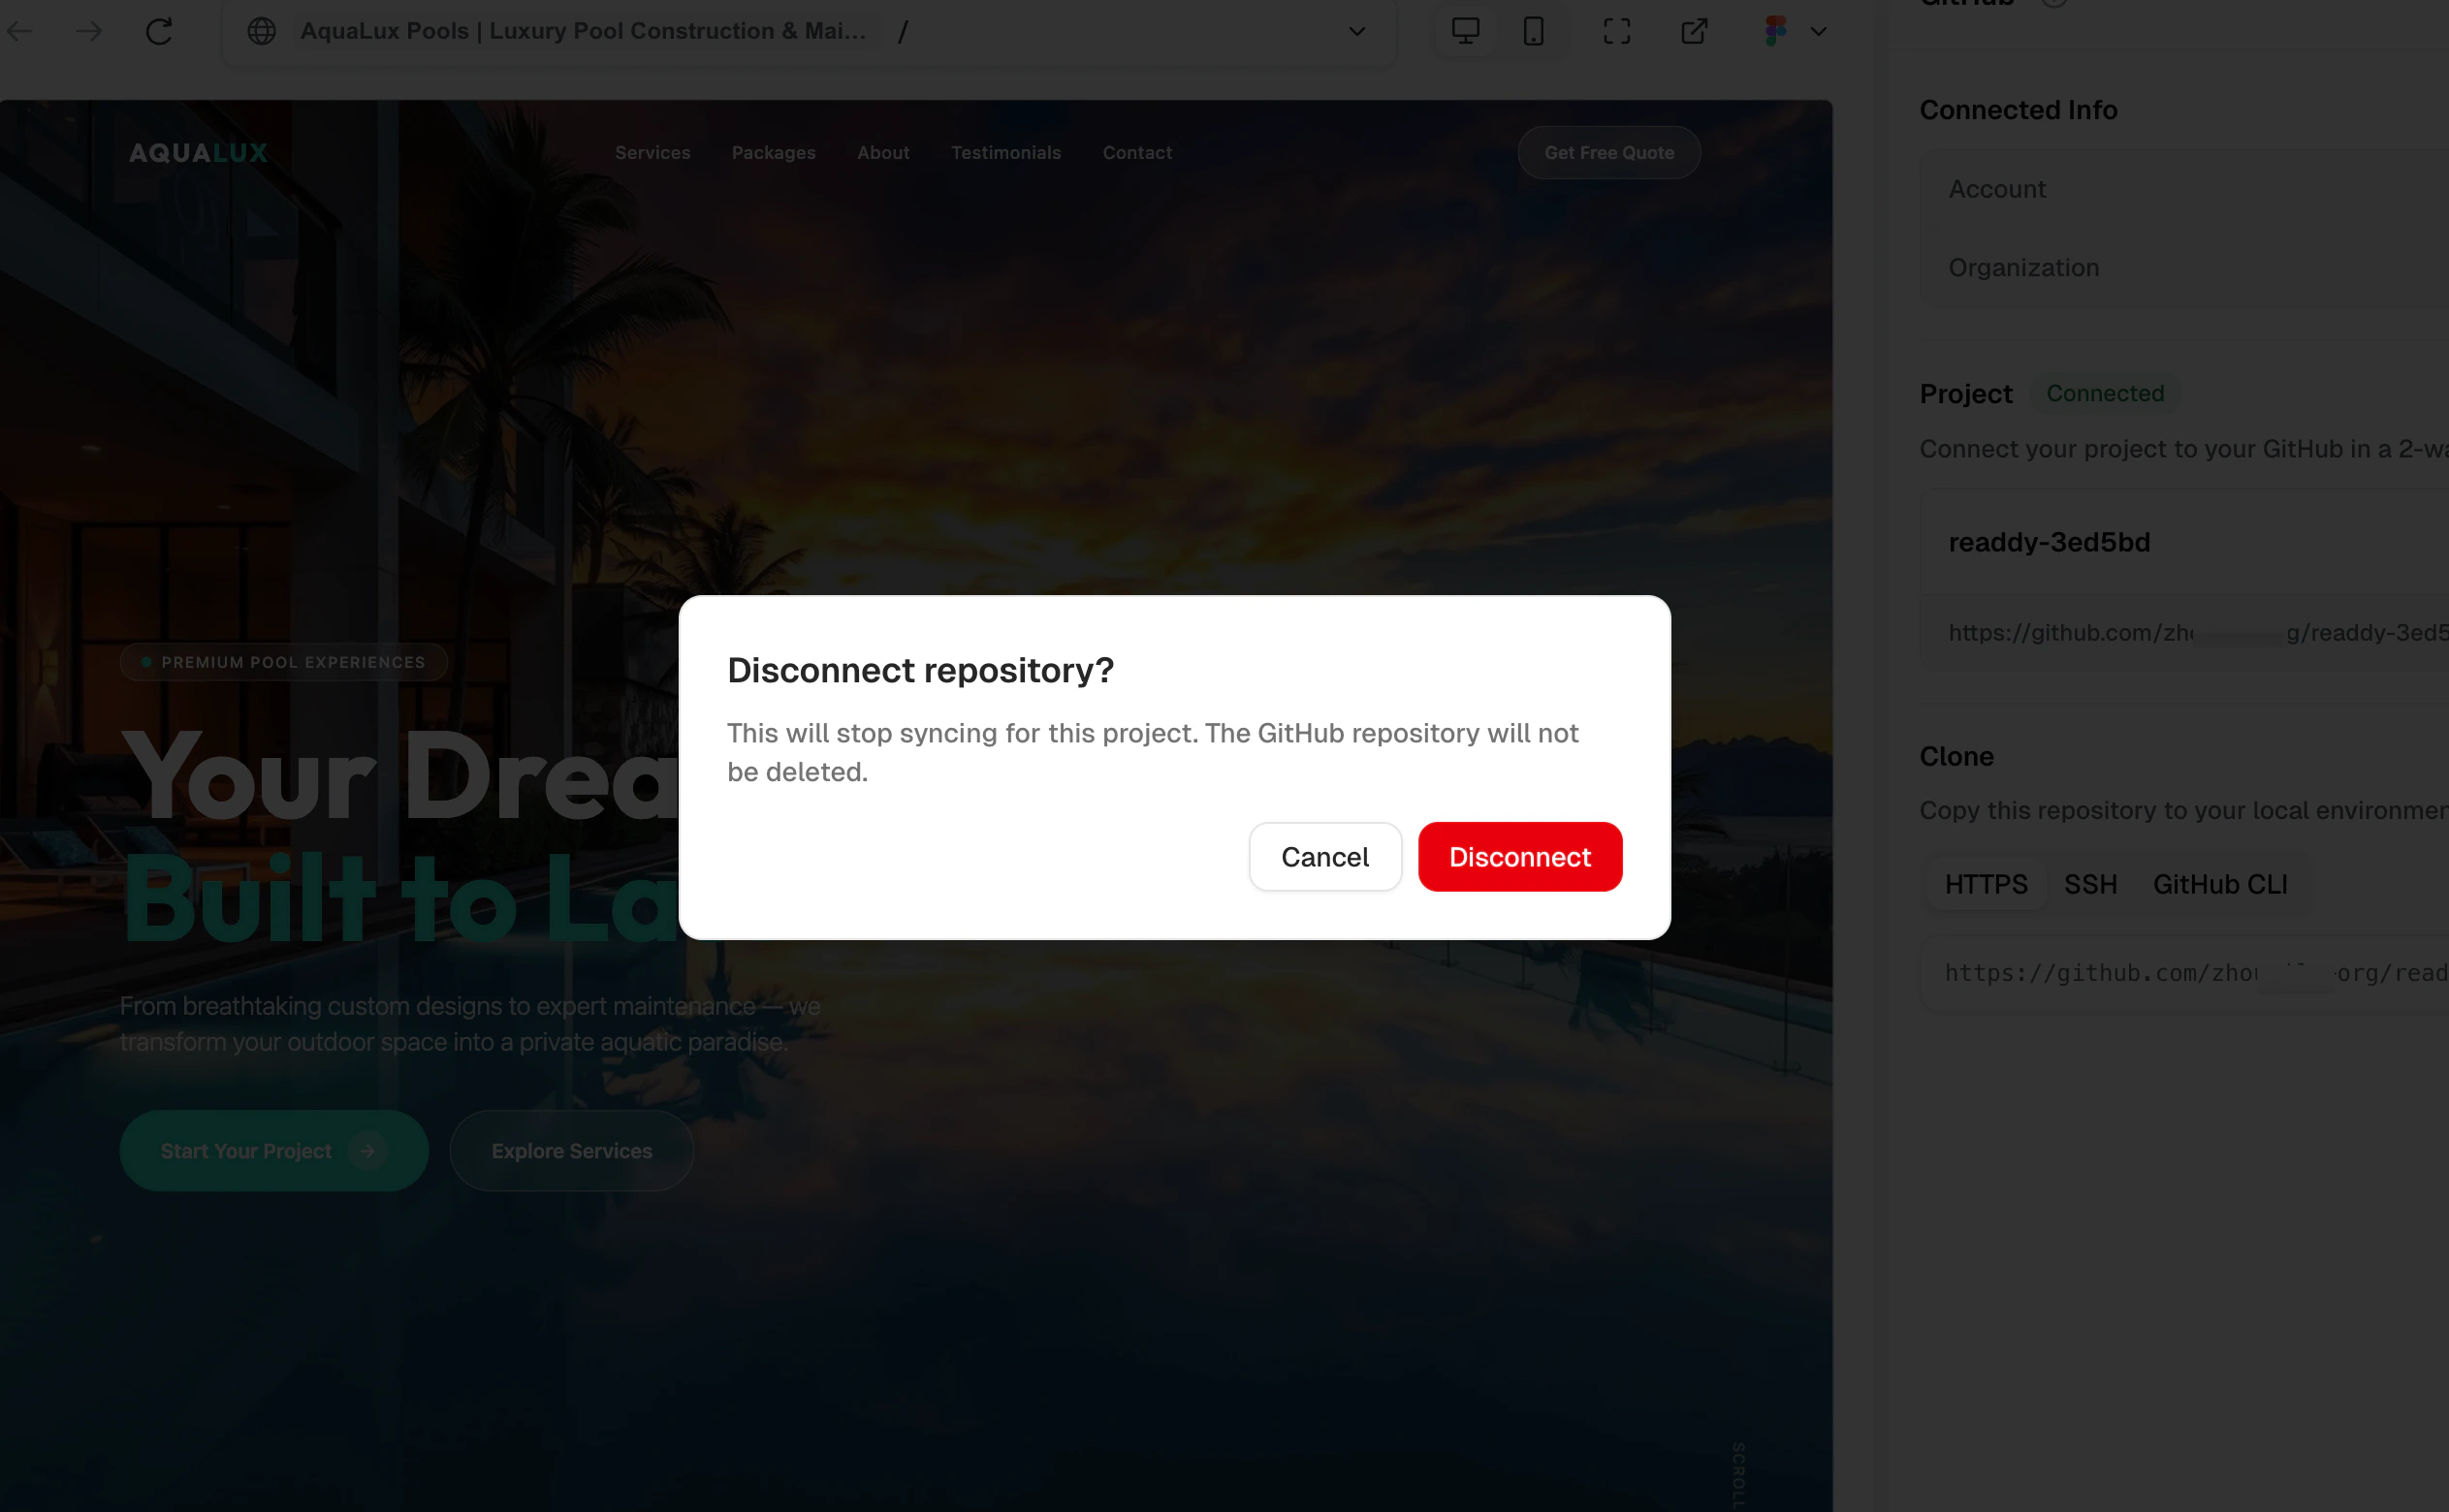
- The GitHub repository will not be deleted — you can still access it on GitHub.
- If you reconnect GitHub later, a new repository will be created for this project. The previous repository will not be reused.
Switch GitHub Account
Readdy does not currently support switching GitHub accounts from within the product. To switch to a different GitHub account:- Go to github.com in your browser, sign out of the current account, and sign in with the account you want to switch to.
- Return to Readdy and start the GitHub connection flow — for example, click “Connect GitHub” — and complete authorization. The flow uses the GitHub account currently signed in in your browser, so Readdy updates the linked GitHub account to the one you switched to.
After switching accounts and reconnecting, Readdy will create a new repository for the project. The previous repository will not be deleted.
Troubleshooting
When a GitHub connection issue occurs, the panel will automatically display the corresponding error message and an action button. Below are all possible error scenarios and how to resolve them.GitHub authorization expired
GitHub authorization expired
GitHub App removed
GitHub App removed
What you’ll see: After the App is uninstalled on GitHub, use the steps below to reconnect your organization and repository.Cause: The Readdy GitHub App has been uninstalled from your GitHub account or organization.What you can do when the app is removed (Owner):
- Select another organization and create a repository
- Click ”+ Add GitHub Organization” to open the GitHub App installation flow again
- If you have no organizations available, the initial setup panel is shown
GitHub App suspended
GitHub App suspended
Symptom: The panel displays a “GitHub App suspended” message.Cause: The Readdy GitHub App installation has been suspended on GitHub (via the “Suspend” action in the App’s settings page).How to fix:
- Click “Restore GitHub Access” in the panel.
- You will be redirected to the GitHub App installation page.
- Select the affected organization and unsuspend (reactivate) the App in its settings.
Organization access blocked
Organization access blocked
Symptom: The panel displays an “organization access blocked” message.Cause: The GitHub organization’s policies have changed — for example, SSO enforcement, Approved Apps restrictions, or you have been removed from the organization or lost the required permissions.How to fix:
- Click “Reconnect GitHub” in the panel.
- You will be redirected to the GitHub App installation page.
- Select the organization and complete the installation — this re-establishes both the App installation and OAuth authorization in one step.
- Return to Readdy, select the organization, and create a new repository.
If your organization enforces SSO or restricts third-party app access, you may need an organization admin to approve the Readdy GitHub App before you can proceed.
Repository not found or access denied
Repository not found or access denied
Symptom: The panel displays a “repository not found” or “repository access denied” message.Cause: The connected GitHub repository has been deleted, or Readdy’s access to the repository has been revoked (e.g., the App’s repository permissions were changed).How to fix:
- Click “Disconnect” in the panel to unbind the current repository.
- You will be taken back to the Create Repository page.
- Select an authorized organization and create a new repository.
Push or Pull failed
Push or Pull failed
Possible causes:
- Unstable network connection
- GitHub service temporarily unavailable
- Authorization token has expired
- Check your network connection.
- Click the refresh button (↻) in the panel header to reload the connection status.
- If authorization has expired, follow the steps in “GitHub authorization expired” above to reconnect.
- If the issue persists, wait a moment and try again.
Best Practices
- Push regularly — After important version iterations, push to GitHub promptly to keep a backup.
- Verify before pulling — Pull creates a new version. Make sure the code on GitHub’s
mainbranch is what you expect before pulling. - Coordinate with collaborators — Push/Pull status is broadcast in real time. Avoid triggering sync operations simultaneously with other team members.
- Develop locally — Clone the repository to your local machine, make changes with your preferred IDE and tools, push to GitHub, then Pull from Readdy to sync the updates back.