

A HAR file records the network requests your browser makes while the issue occurs. Keep Chrome DevTools open until you export the file.
How to Export a HAR File
1
Open the page where you encountered the issue
You can open it directly in the editor, use “Share” to open it in a browser tab, or visit the published website.
2
Open Chrome DevTools
Right-click anywhere on the published page, then select “Inspect” to open Chrome DevTools.
3
Select the Network Tab
Click “Network” in Chrome DevTools.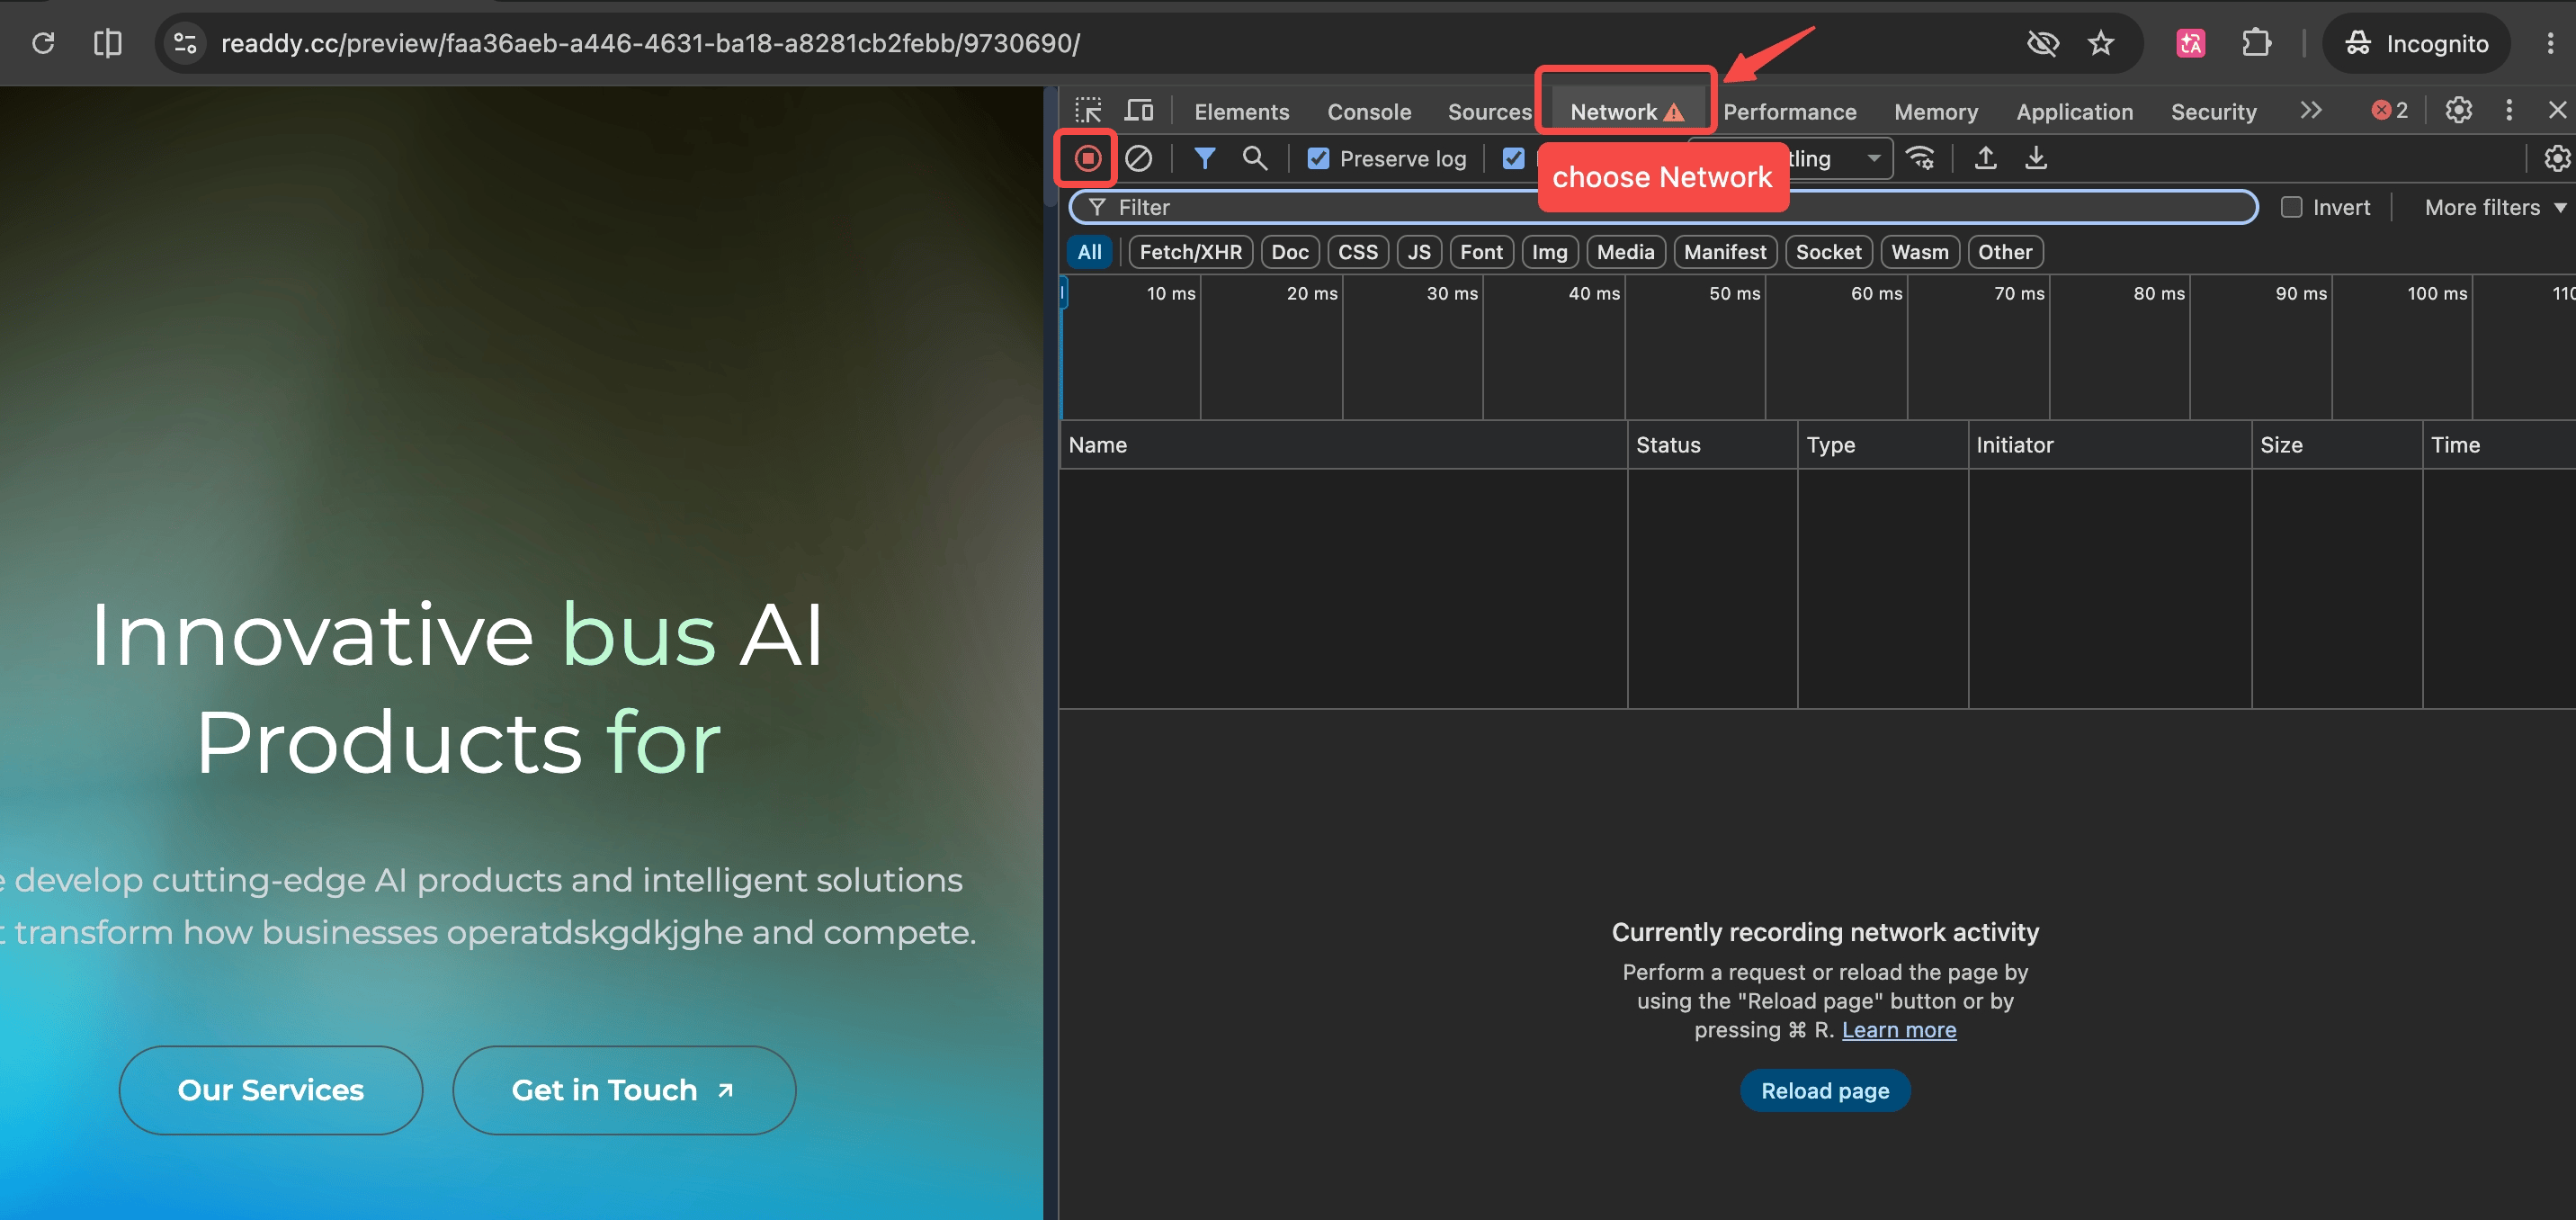
4
Enable Disable Cache
Select “Disable cache” in the Network panel.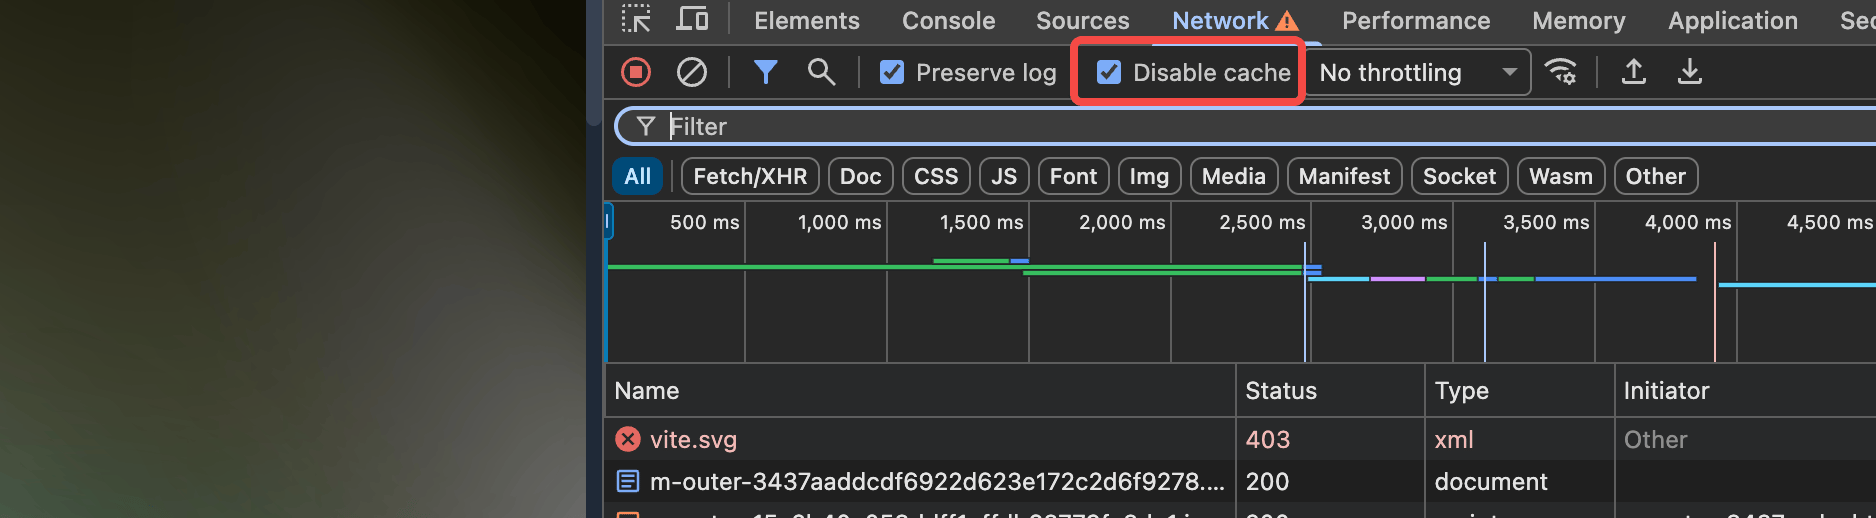
5
Confirm Network Recording Is Active
Make sure the Record button is red. If it is gray, click it to start recording network activity.
6
Enable Preserve Log
Select “Preserve log” so requests remain available while you reproduce the issue.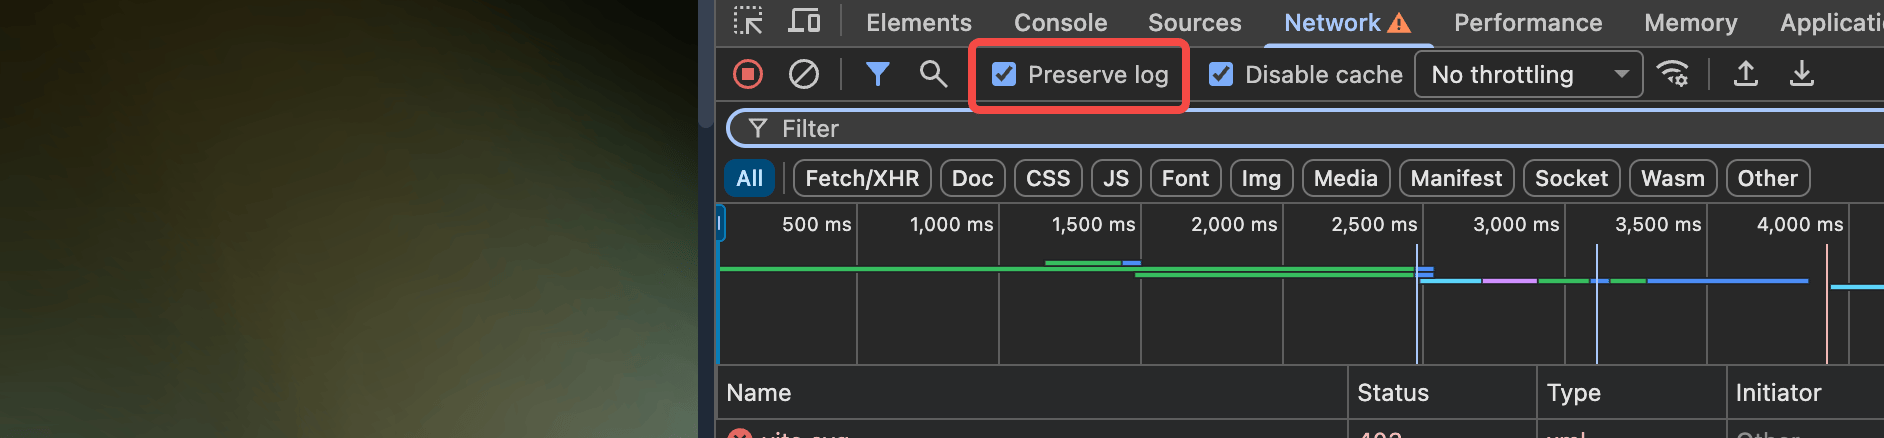
7
Clear Previous Requests
Click “Clear” to remove any requests that were recorded before you started.
8
Reproduce the Issue and Export the HAR File
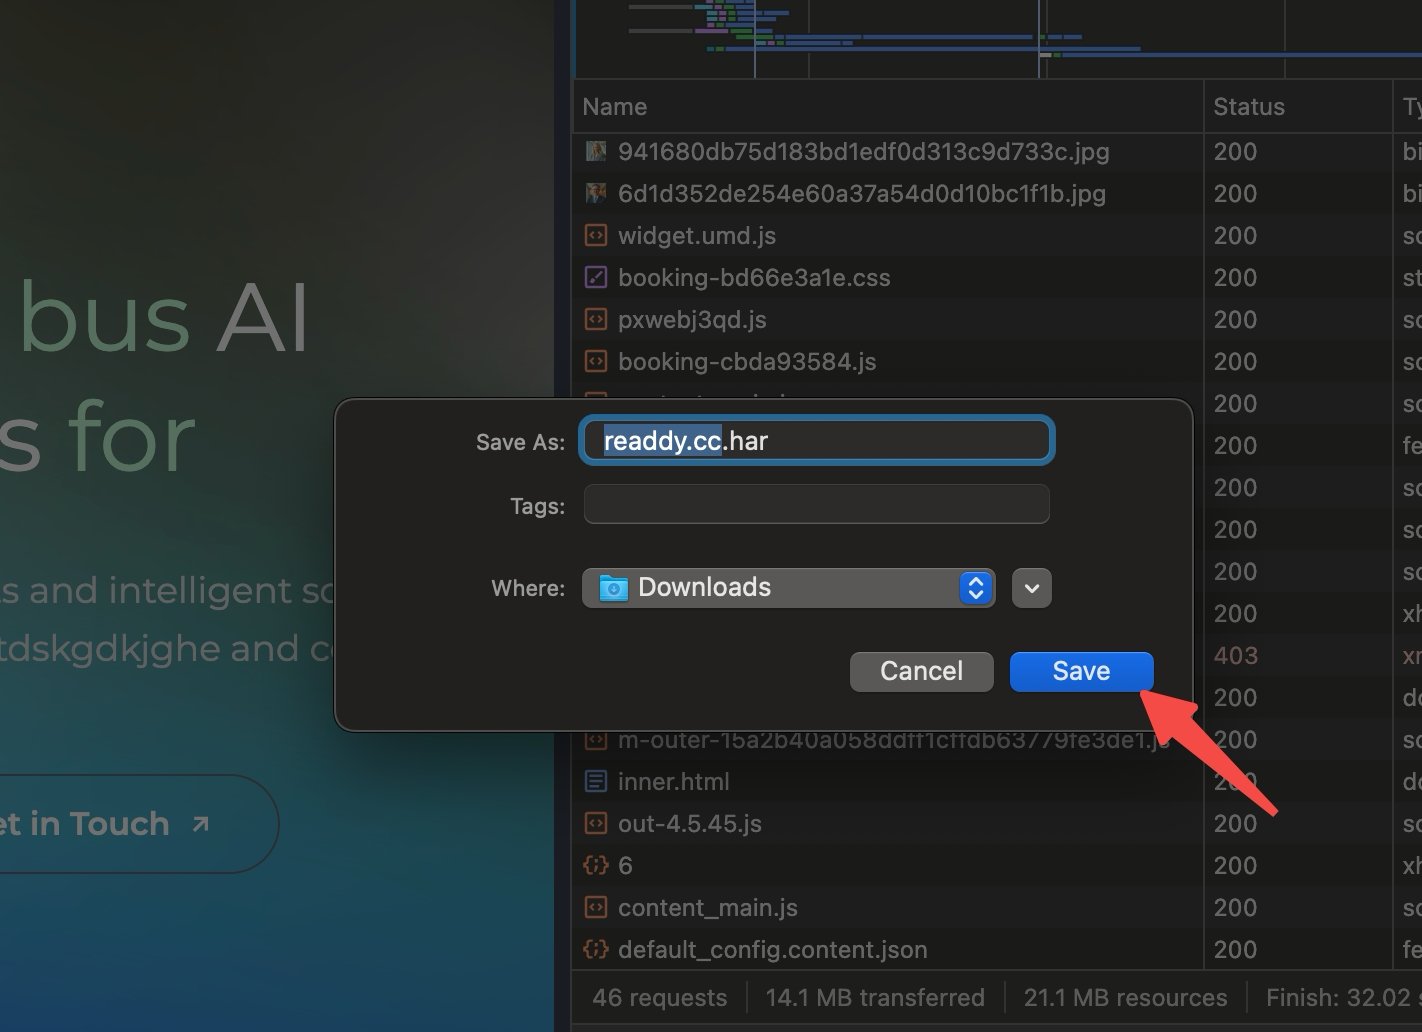
Refresh the page and reproduce the issue. Then click “Export HAR” to download the file and save it to your computer.
FAQ
Do I need to use Chrome?
Do I need to use Chrome?
This guide uses Chrome DevTools. Use Chrome to make sure the labels and controls match the steps shown here.
What should I do after I save the HAR file?
What should I do after I save the HAR file?
Attach the file to your support ticket and include a short description of the issue and the steps you took before it occurred.