Client Billing helps agencies collect payments from clients without leaving the Readdy white-label workflow. You connect Stripe, create the products or services you want to bill for, send payment requests, and let clients complete checkout from their branded Client Portal. With Client Billing, you can:
  • Centralize client payments: Manage payment requests, drafts, payment status, and client checkout from the White Label workspace.
  • Reuse products and services: Create products once, add one-time or recurring prices, and reuse them across client payment requests.
  • Support client self-service: Clients can open Payments in the Client Portal, complete Stripe Checkout, and access billing information and invoices.
  • Keep billing tied to client work: Select an existing Client before sending a payment request, so each request is linked to the right client record.
Client Billing is available on Agency Pro plans and above. Readdy charges a 2% transaction fee for each successful payment processed through Client Billing. Stripe may also charge its own processing fees.

Before you start

Before you use Client Billing, make sure you have:
  • A Readdy plan that includes Client Billing
  • A Stripe account that can accept payments
  • At least one Client created in your workspace
  • Products or services you want to bill clients for
  • Stripe Tax configured if you want to use automatic tax calculation
Client Billing currently uses Stripe as the payment gateway. If Stripe is not connected, you cannot create products or send payment requests.

How It Works

1

Navigate to Client Billing

Go to White Label → Client Billing in the workspace sidebar.The Client Billing menu contains three areas: Payments, Products & Services, and Payment Gateway.
2

Connect Stripe

Open Payment Gateway, agree to the Client Billing Payment Terms, then click “Connect Stripe”.
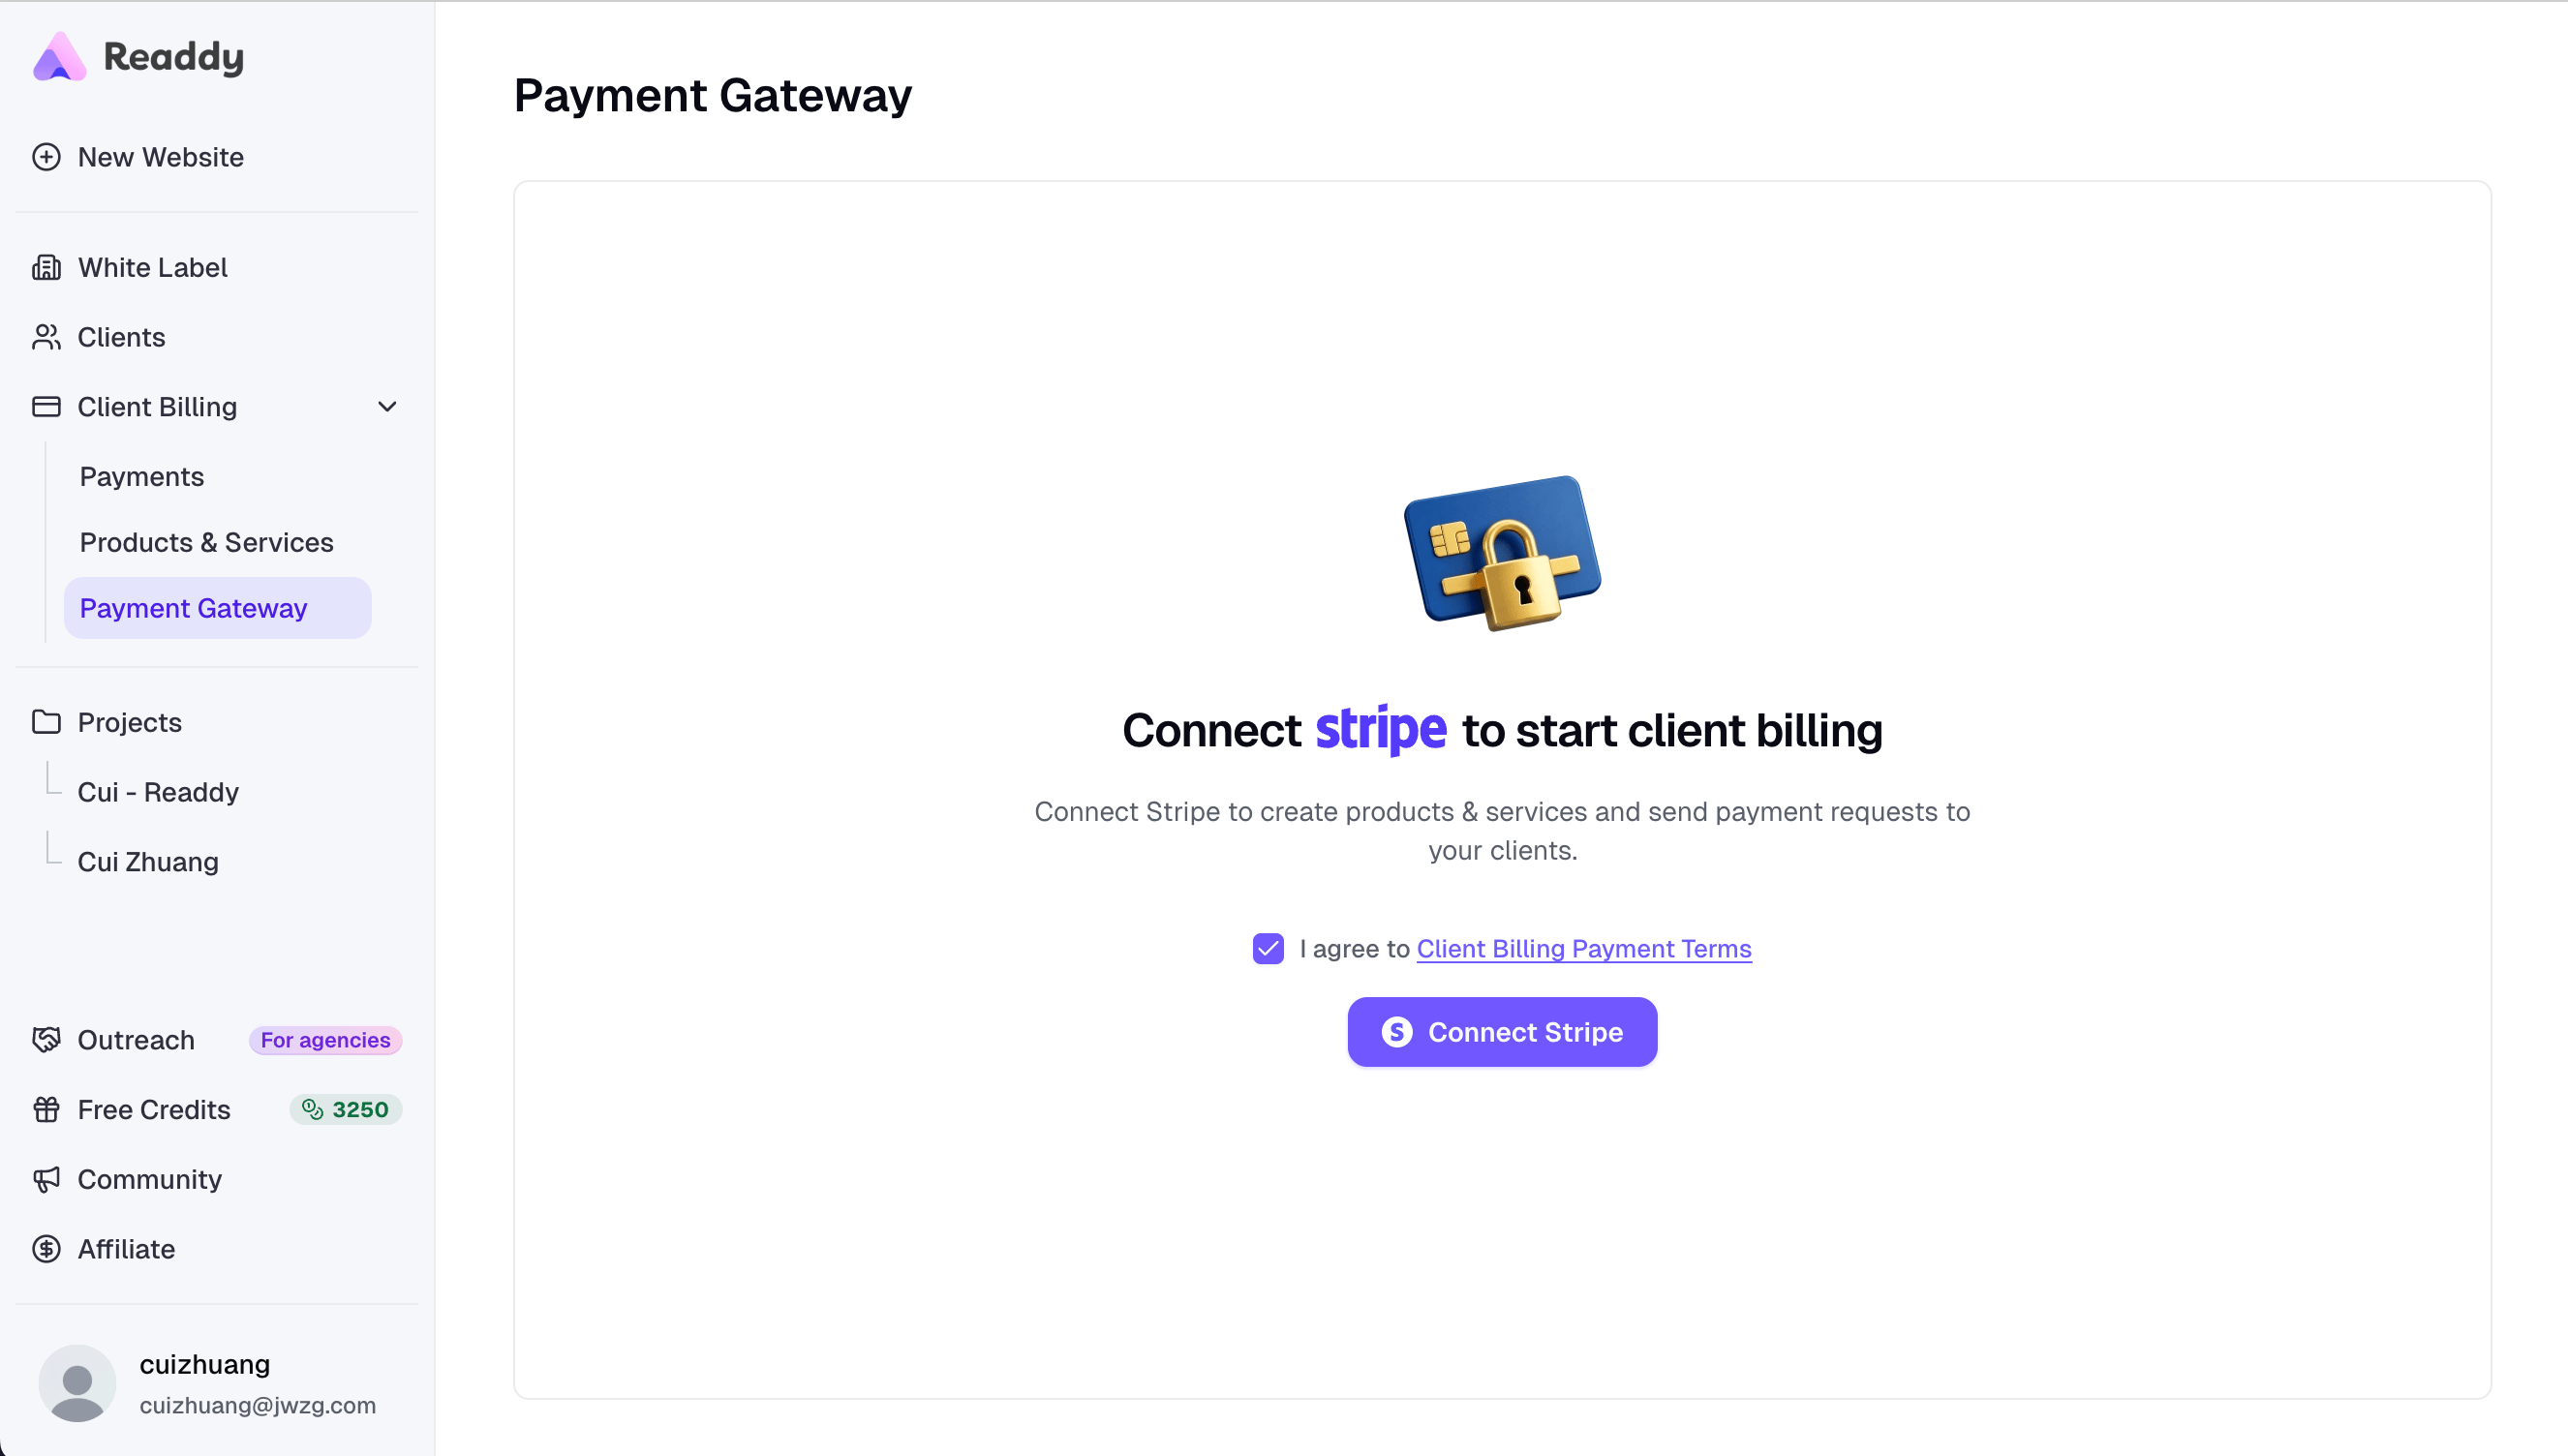
Payment Gateway page showing the terms checkbox and Connect Stripe button
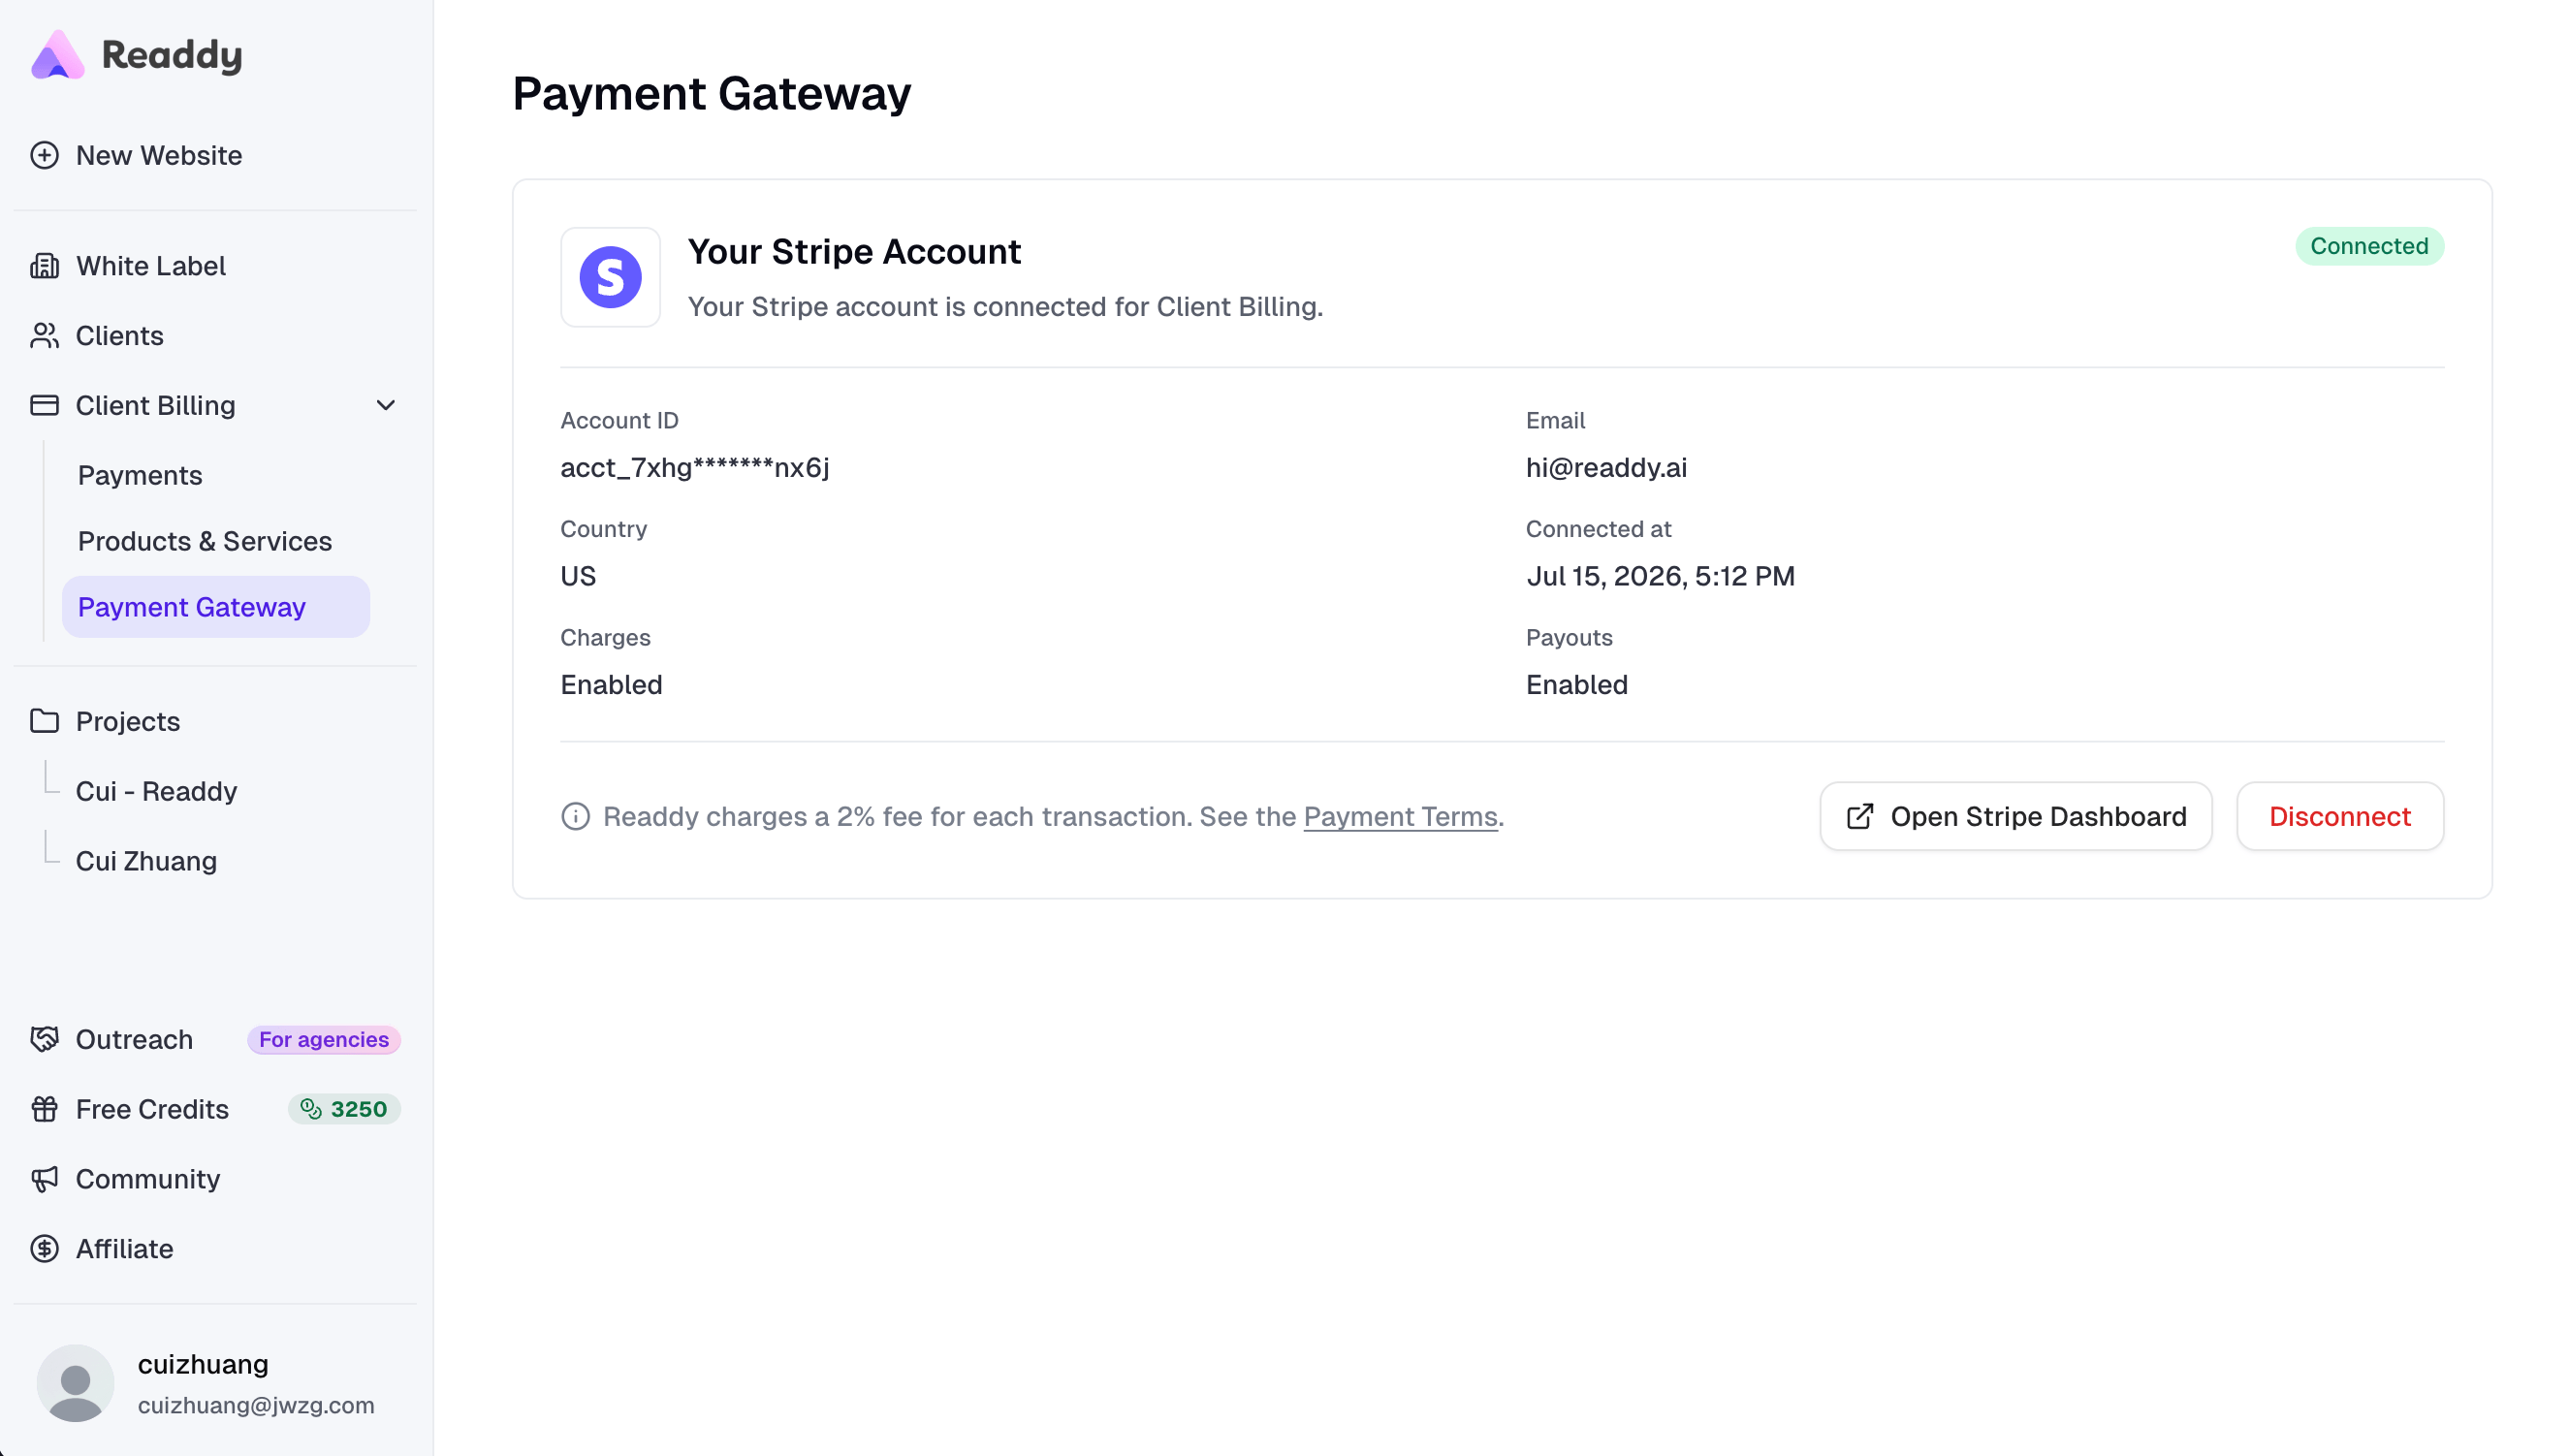
Readdy redirects you to Stripe to authorize the connection. If you have multiple Stripe accounts, choose the account you want to connect. After authorization, the page returns to Readdy automatically. Confirm that your Stripe account status is Connected.
Payment Gateway page showing a connected Stripe account with charges and payouts enabled
3

Add Products and Services

Open Products & Services. If your Stripe account already has products and prices, they appear in the list automatically.
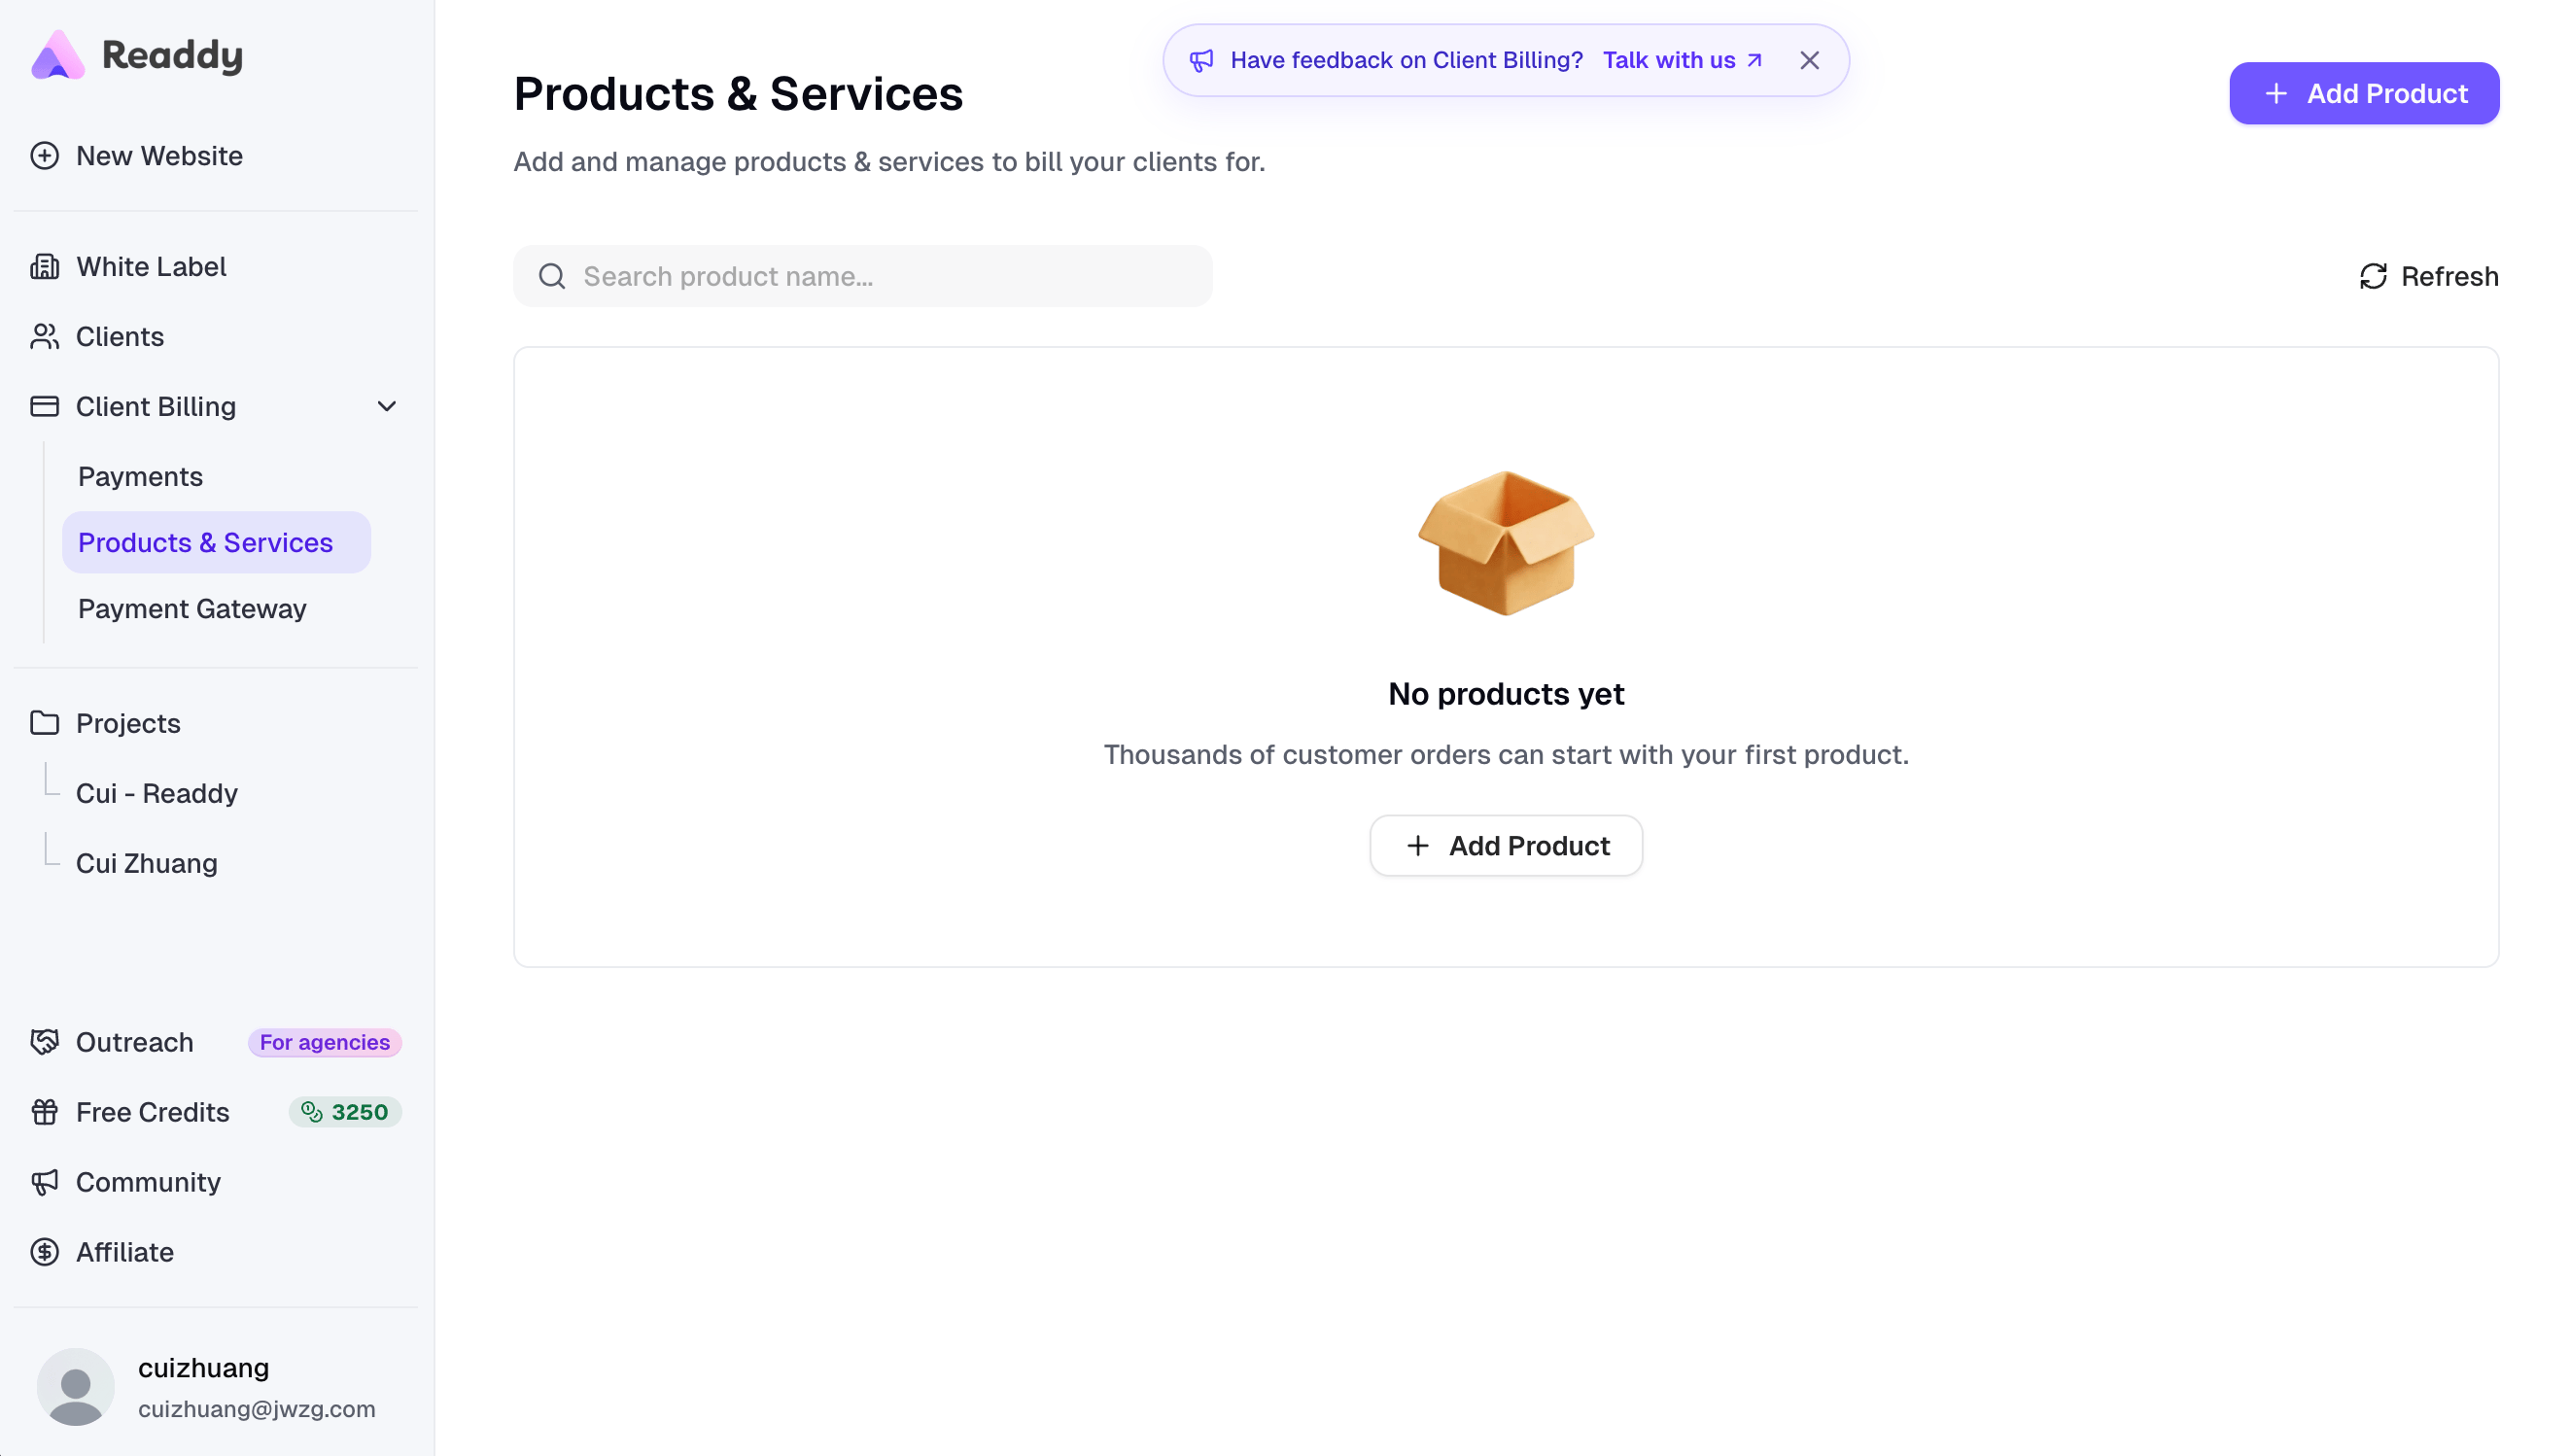
Products and Services page showing the empty product list and Add Product button
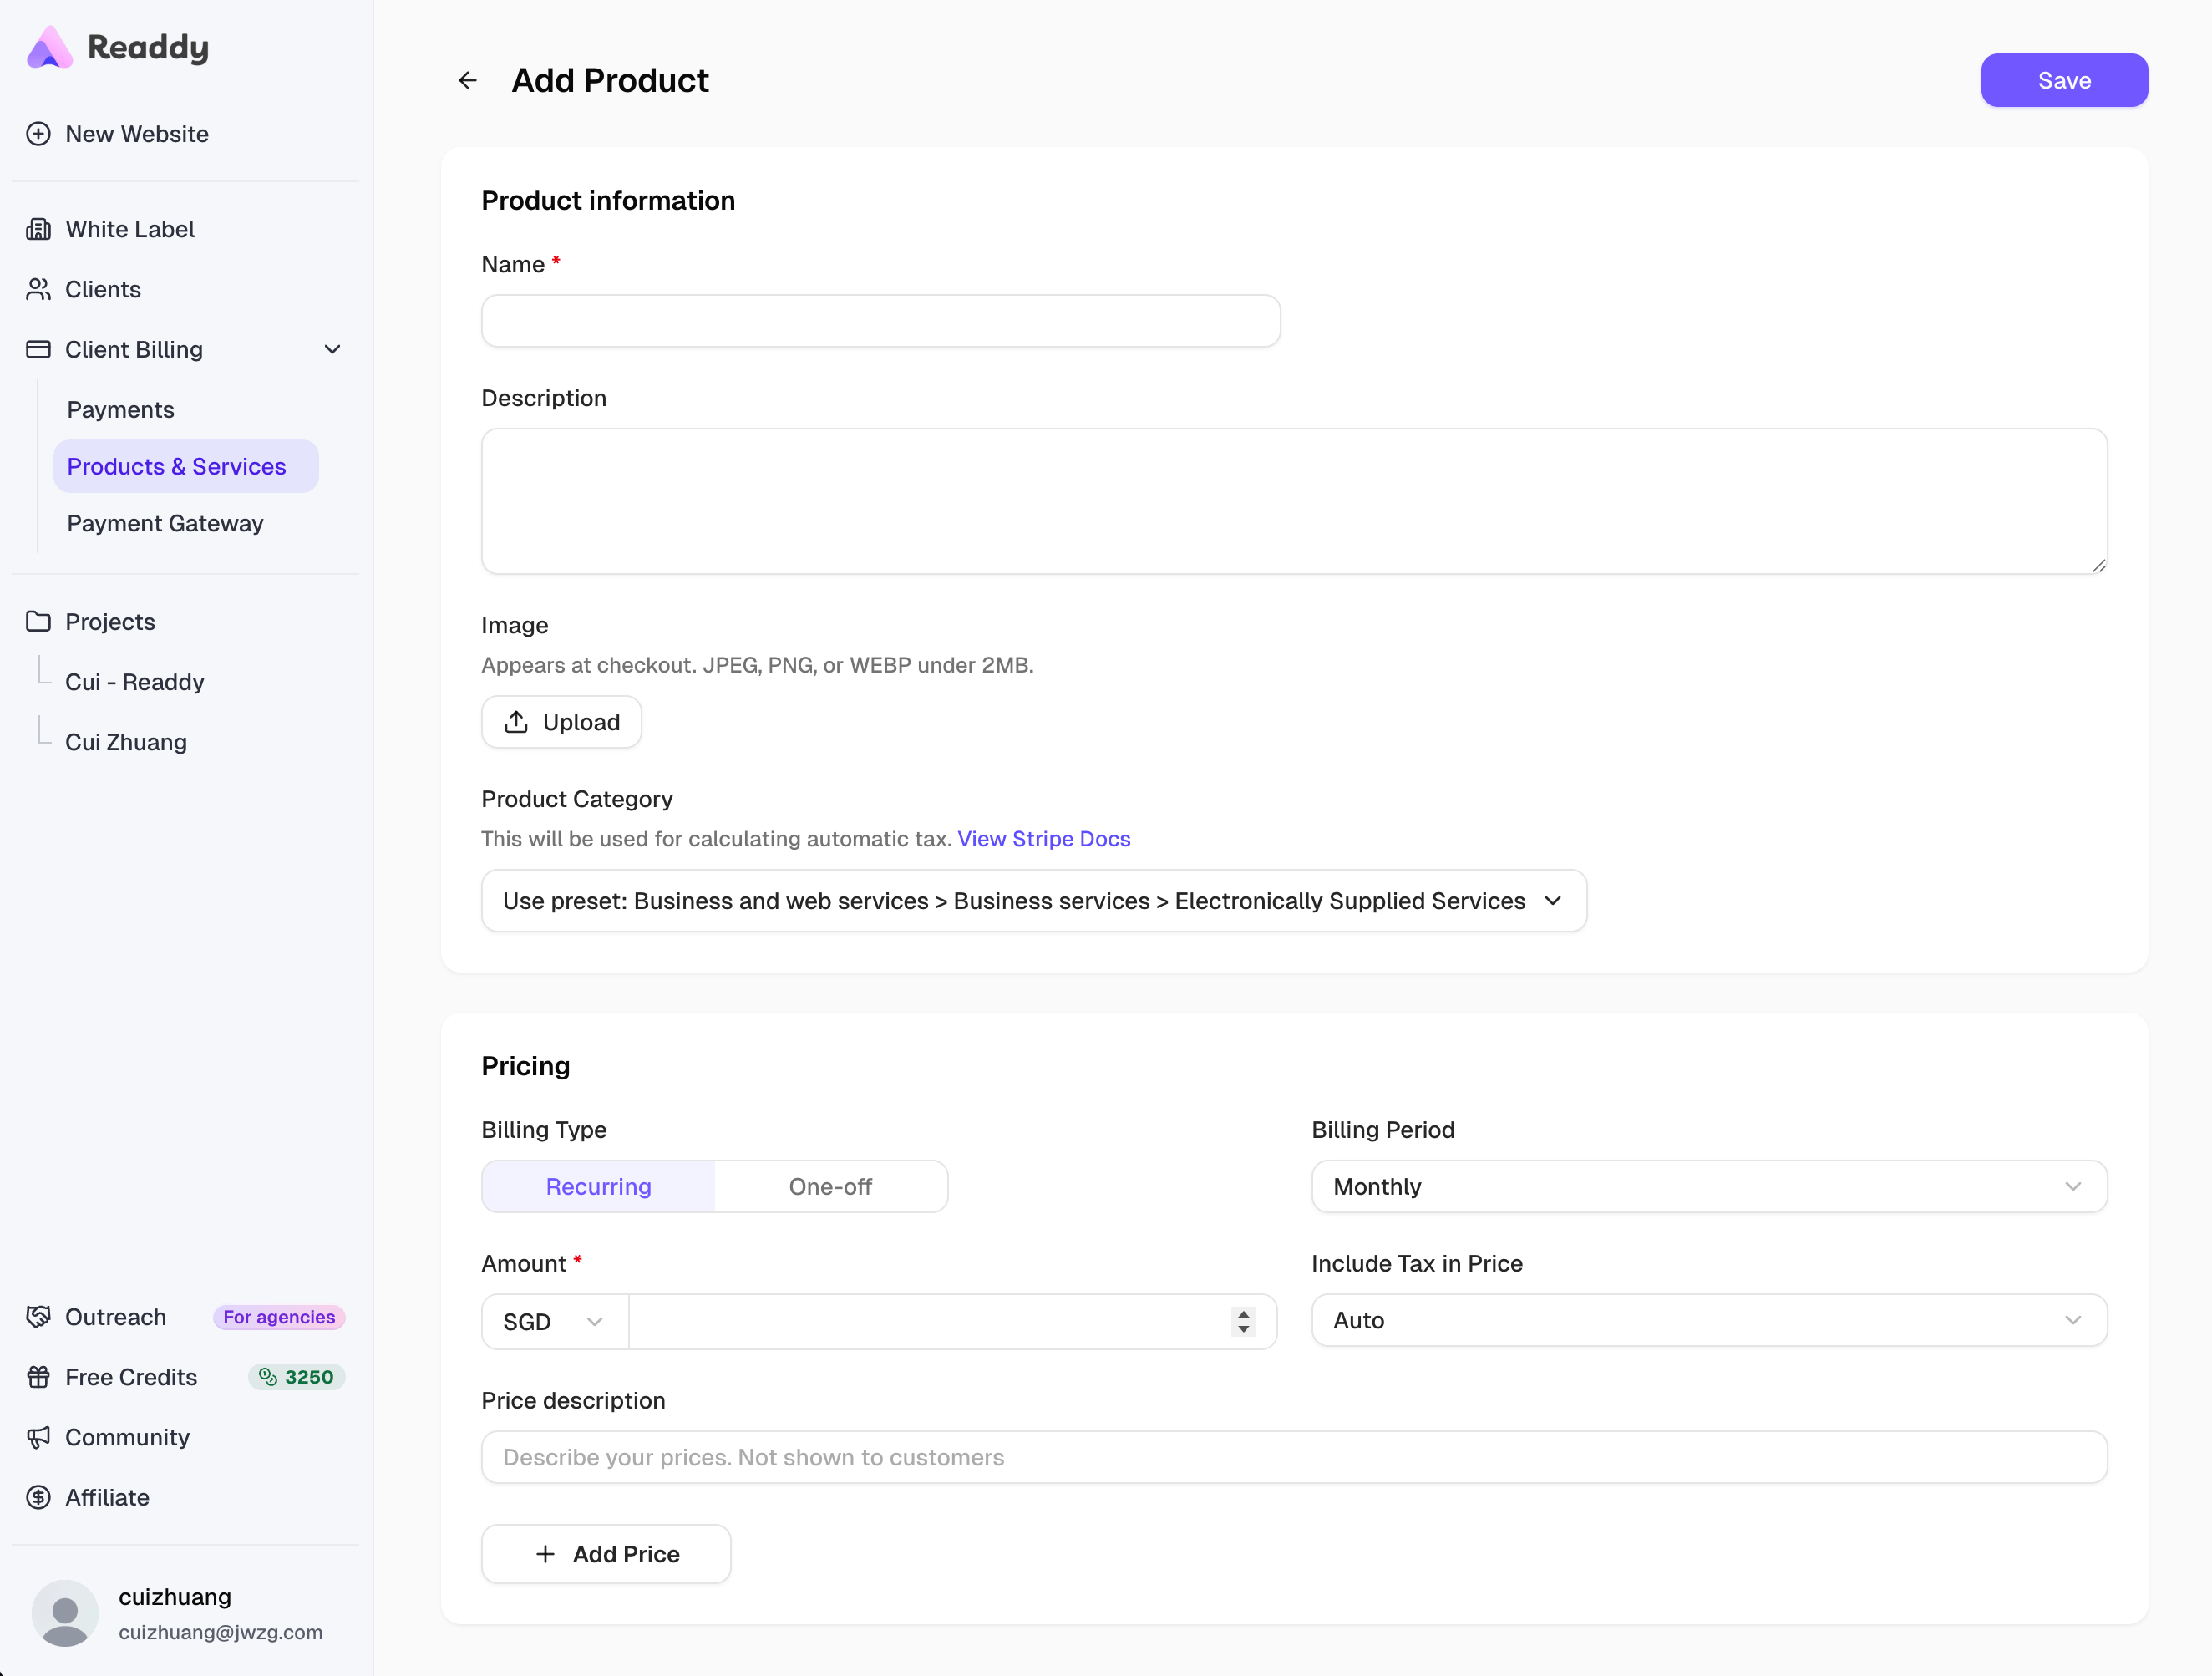
To create a new product, click “Add Product”.Add the product name, description, optional image, product category for tax, and at least one price. A price can be One-off or Recurring.
Add Product page showing product information, category, and pricing fields
4

Create a Payment Request

Open Payments, then click “Create Payment Request”.
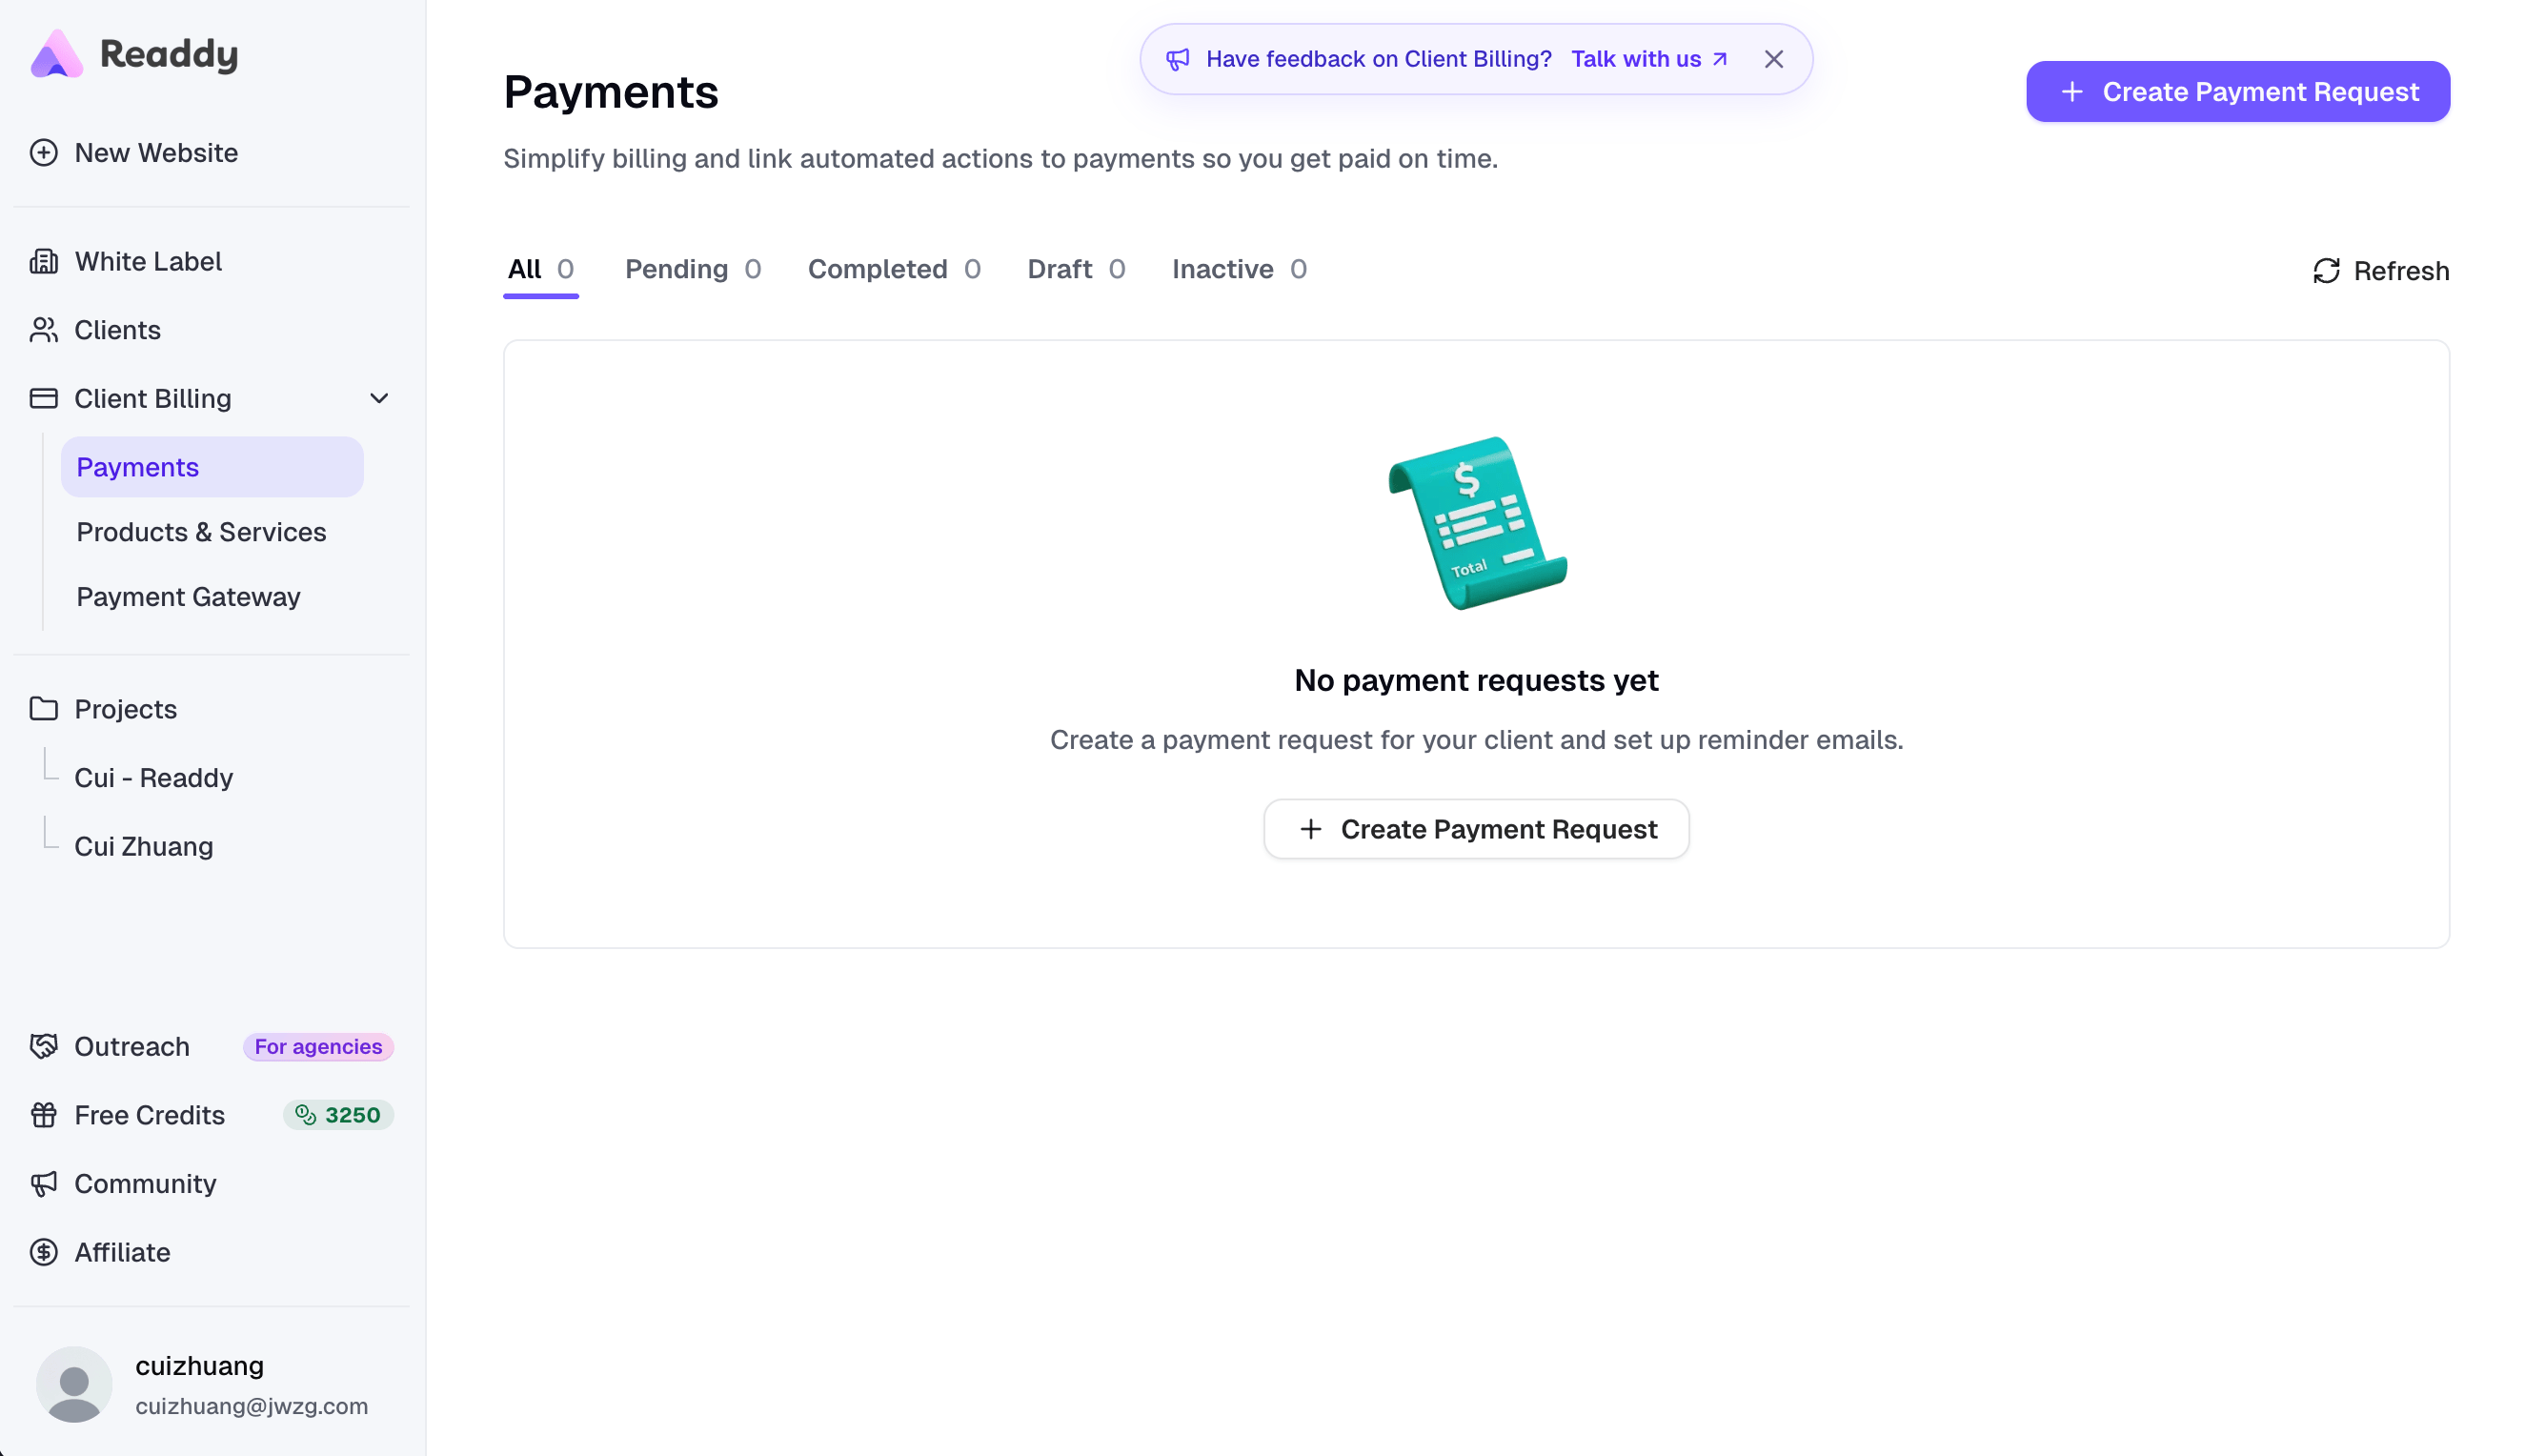
Payments page showing the empty payment request list and Create Payment Request button
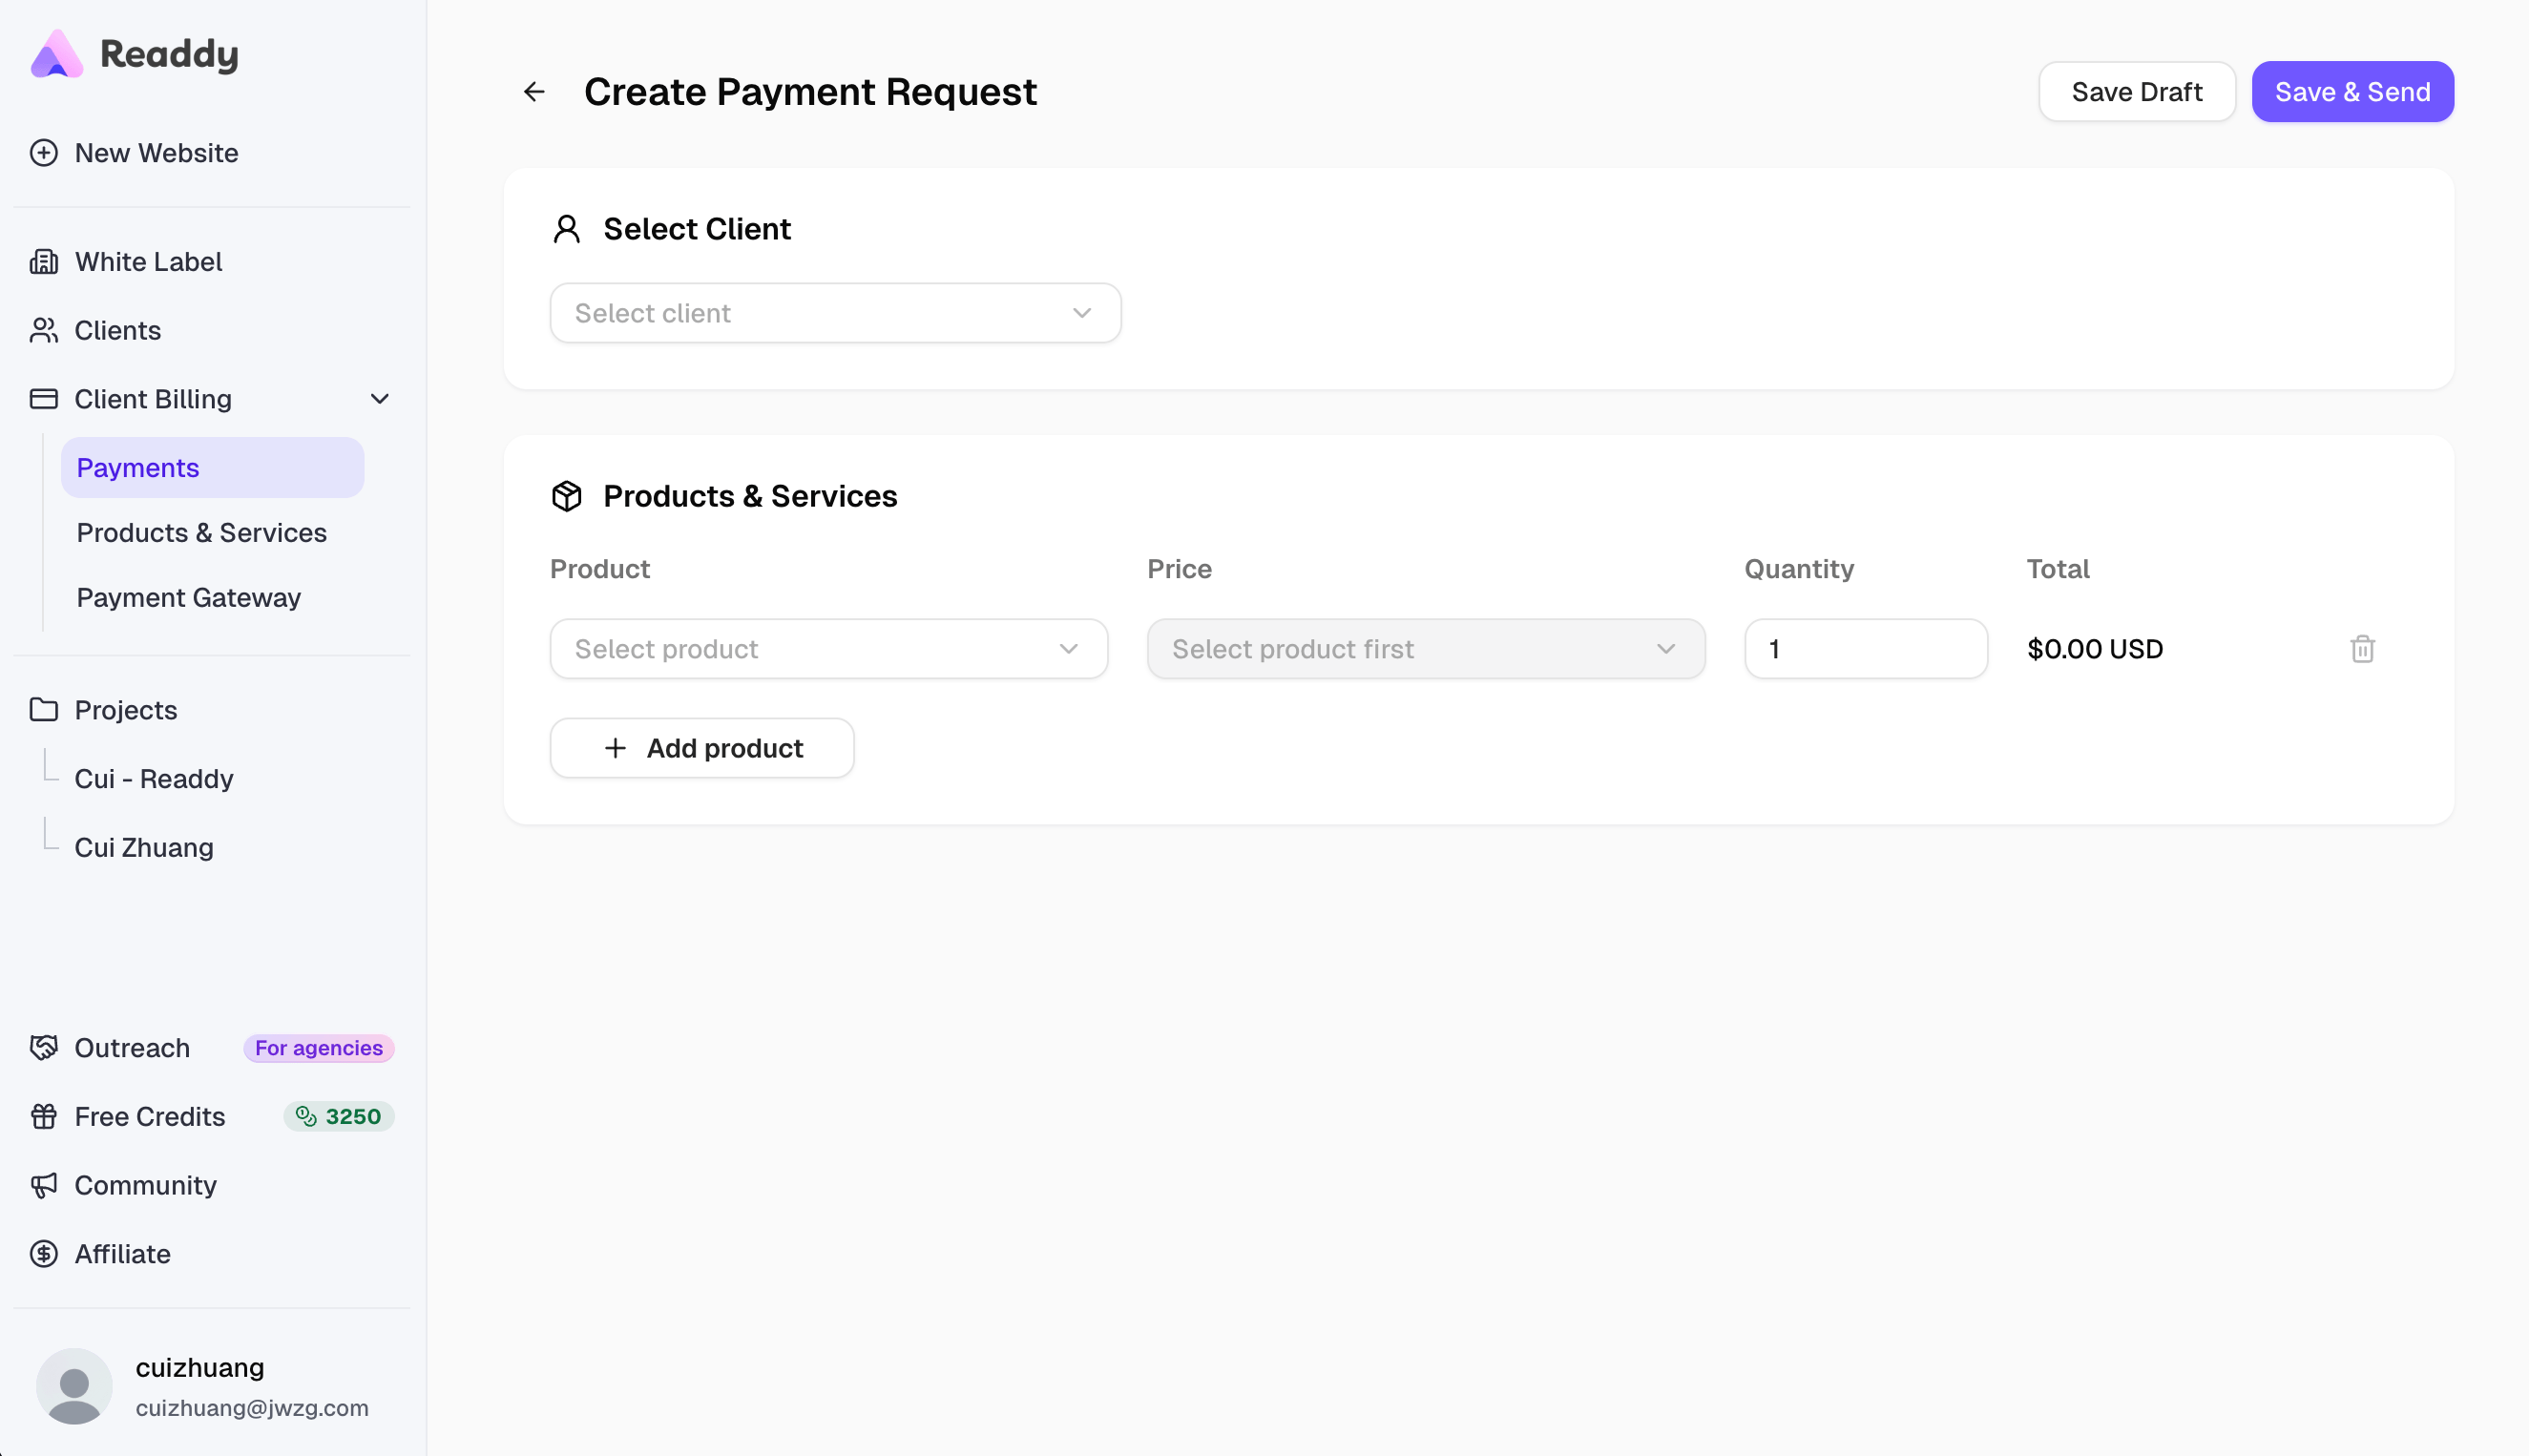
Select the client and products or services that you want to bill for, then click “Save & Send”.
Create Payment Request page showing client selection, product rows, and Save and Send action
5

Ask the Client to Pay

After the payment request is sent successfully, the new request appears in the Payments list with a Pending status.
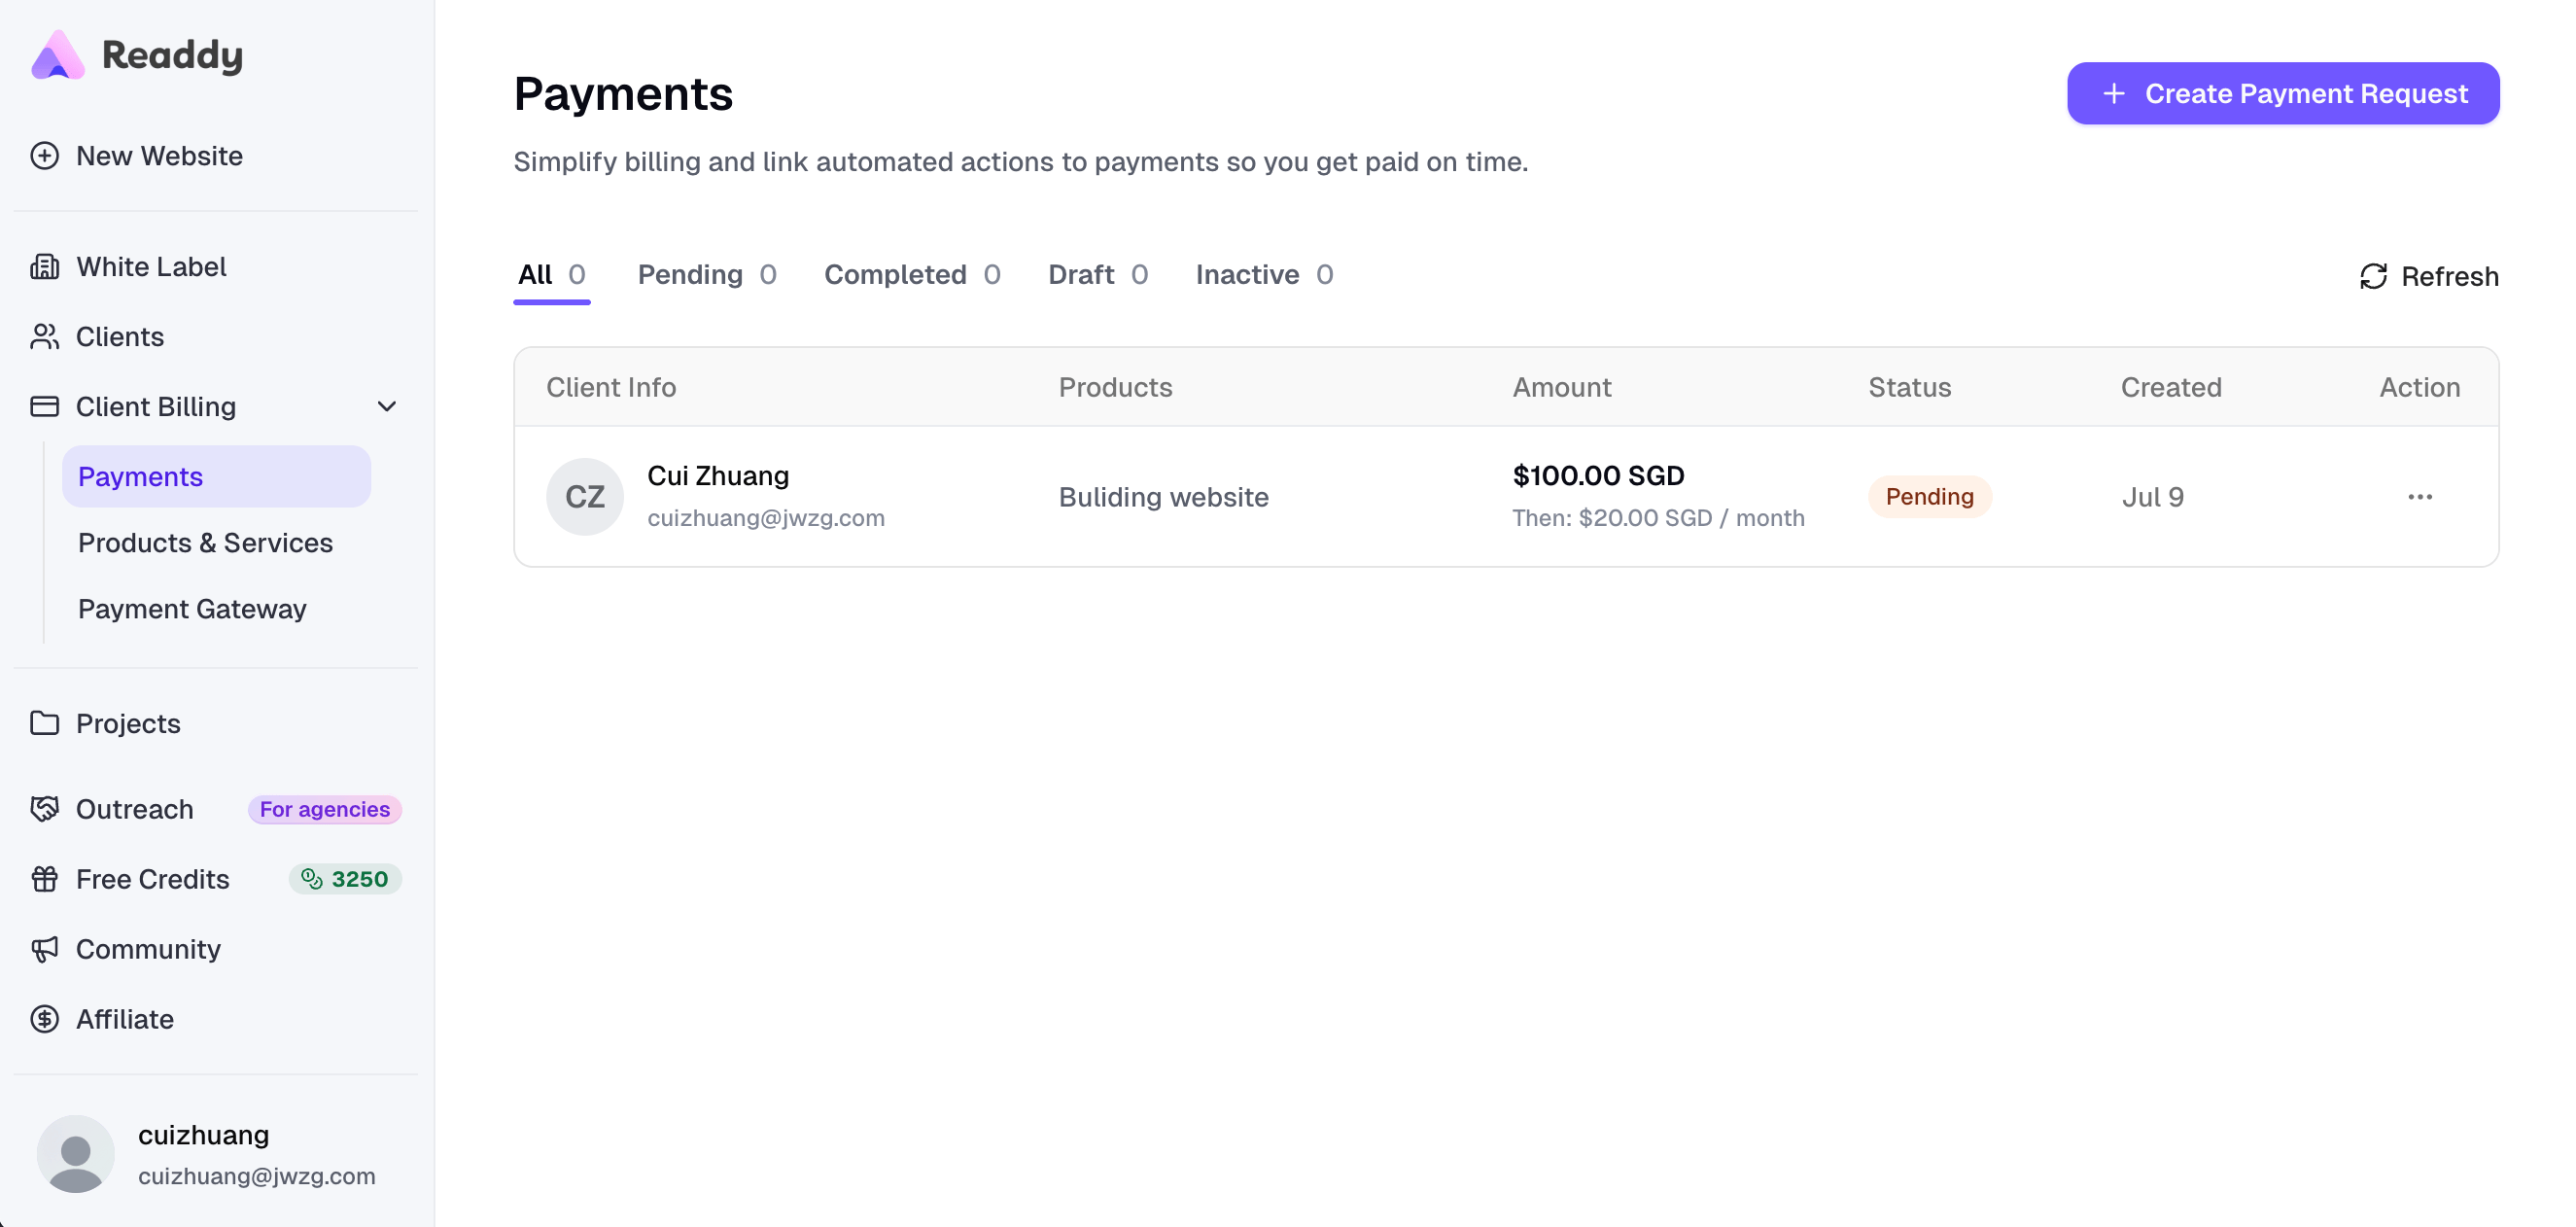
Payments list showing a pending payment request for a client
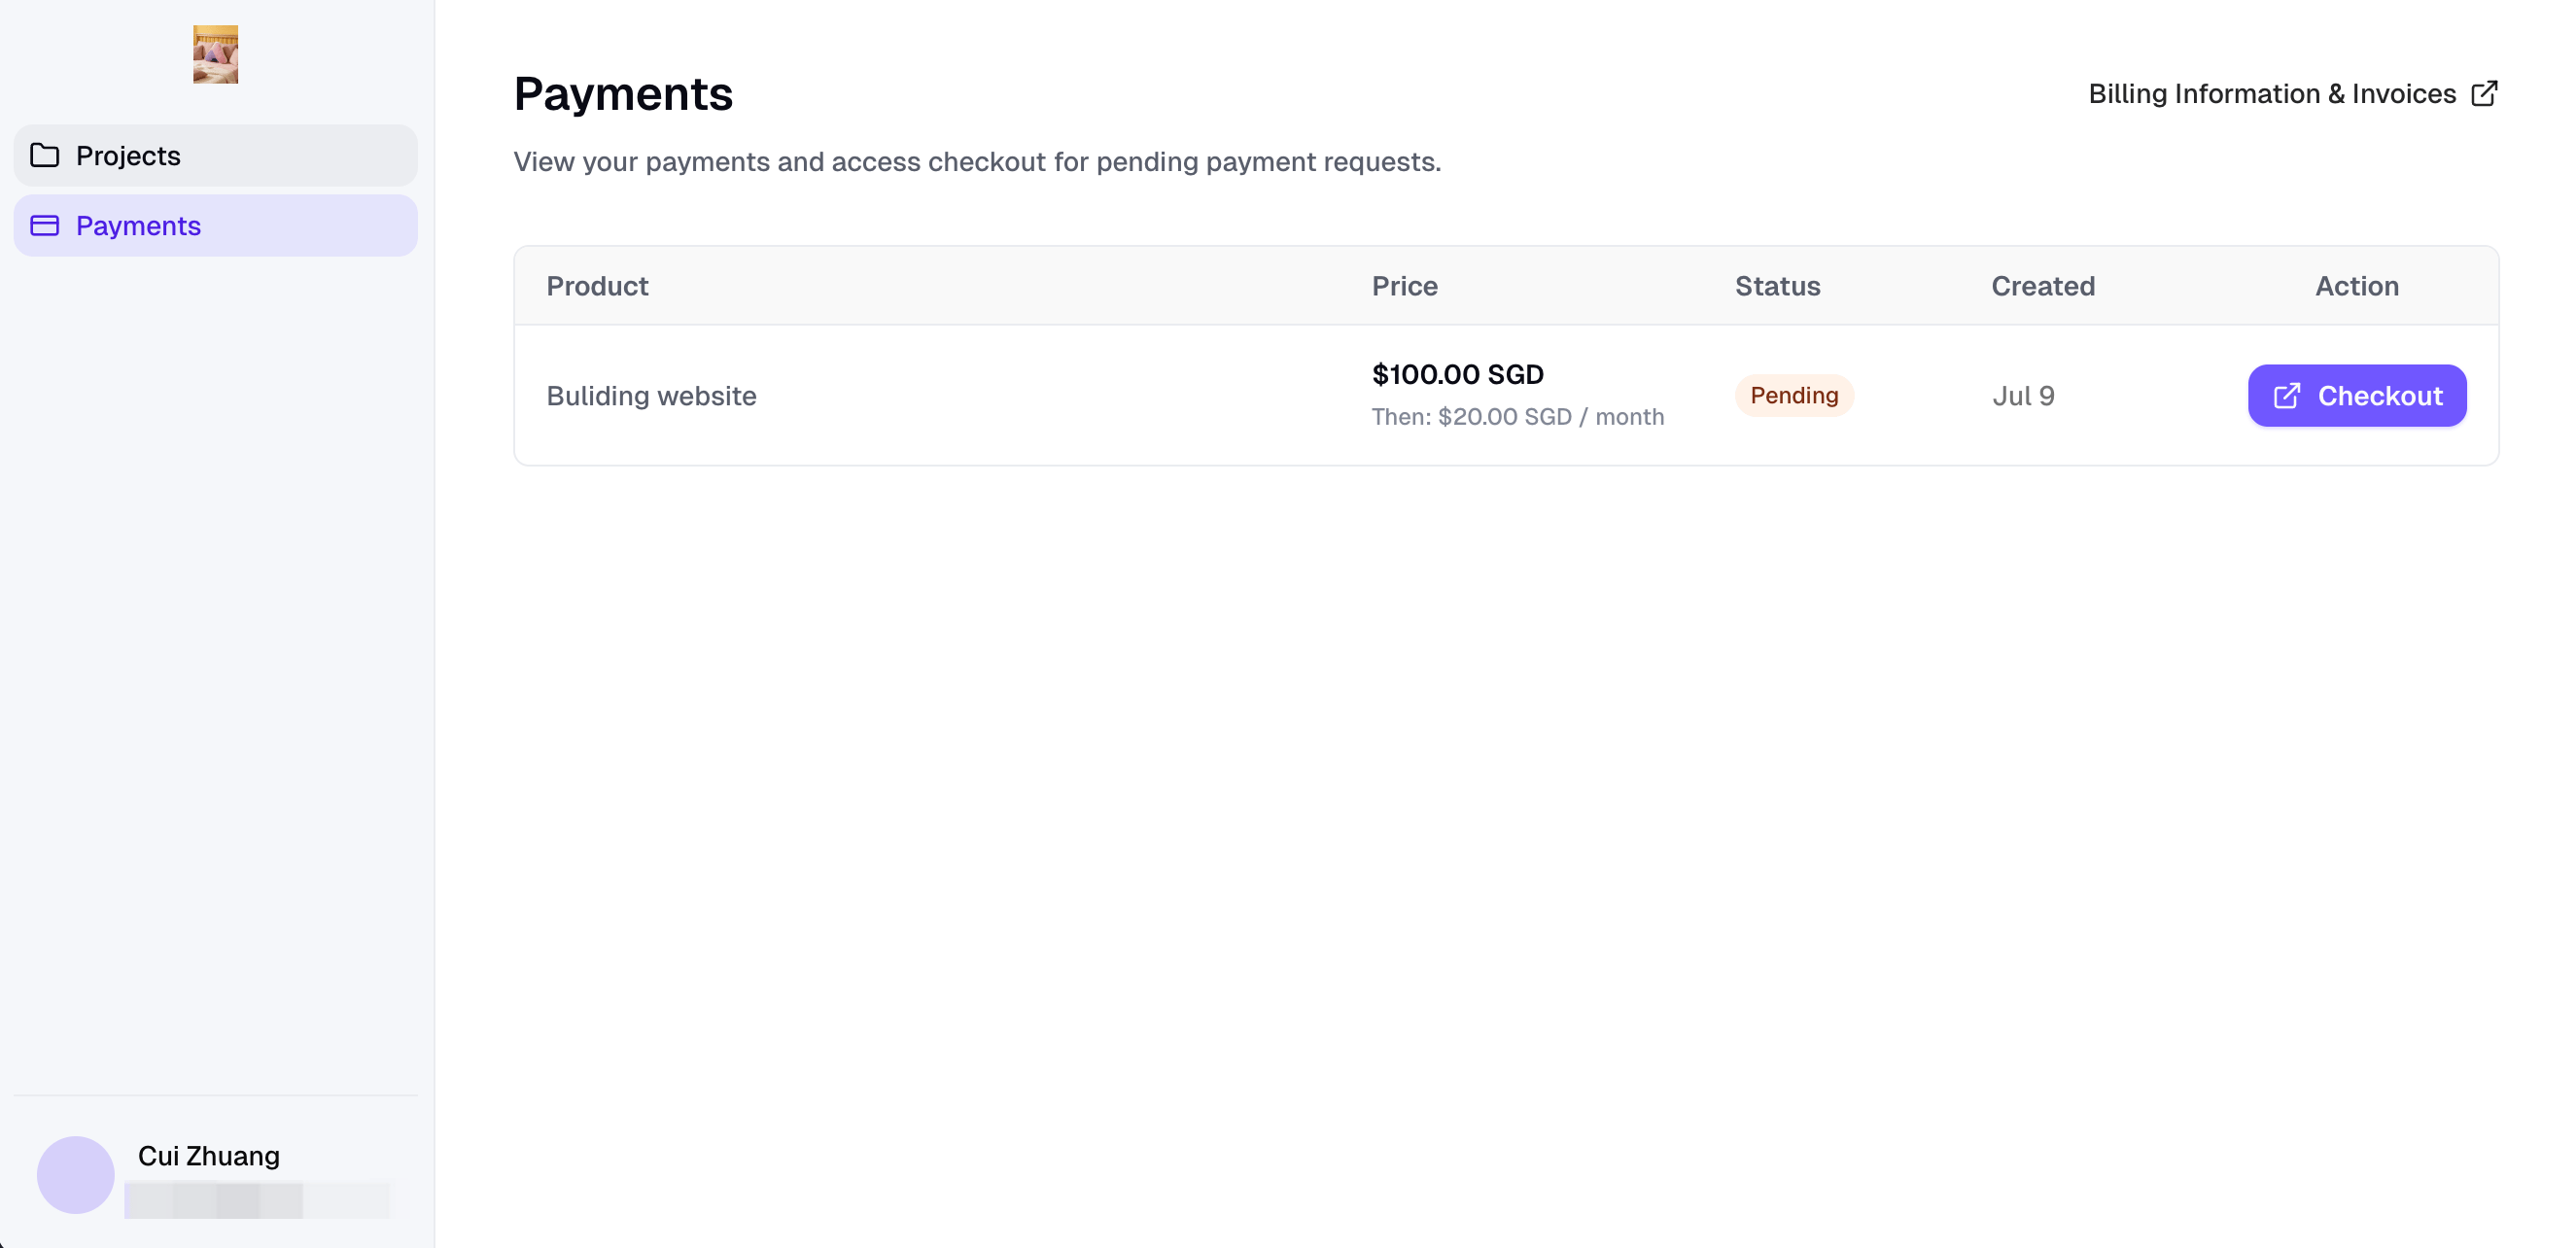
Ask your client to sign in to the Client Portal, go to Payments, and click “Checkout” to complete payment through Stripe.
Client Portal Payments page showing a pending request with the Checkout button

Need Help?

If this guide doesn’t resolve your issue, submit a support ticket. We’re here to help!