Supabase Overview
What is Supabase?
Supabase is a powerful and user-friendly Backend-as-a-Service platform built on PostgreSQL. It provides developers with a complete suite of backend tools needed for modern application development, including:- 🌐 Database (PostgreSQL) - Powerful relational database with real-time data synchronization
- 🔐 Authentication - Complete user login and registration system supporting multiple login methods
- 🗂️ Storage - Secure file storage service for managing images, documents, and other resources
- ⚡ Edge Functions - Serverless cloud functions for handling complex backend logic
Integrating Supabase with Readdy
Once you connect Supabase to your Readdy project, you can add Database, Authentication, Storage, and Edge Functions to your projects. Zero coding needed - Readdy executes automatically.Supabase Pricing
Supabase offers a generous free tier that’s sufficient for prototyping and small to medium projects. If you need more powerful features or resources in the future, you can upgrade to the corresponding paid plans in Supabase. At this stage, you can experience the Supabase and Readdy integration at zero cost!Authorization
Connecting Supabase with Readdy requires just a simple click. Since Supabase is a separate platform, you’ll need a Supabase account. Don’t worry - Readdy will guide you through the entire process. Supabase offers a free tier, so you can add it to your project at no cost initially.Step 1: Connect
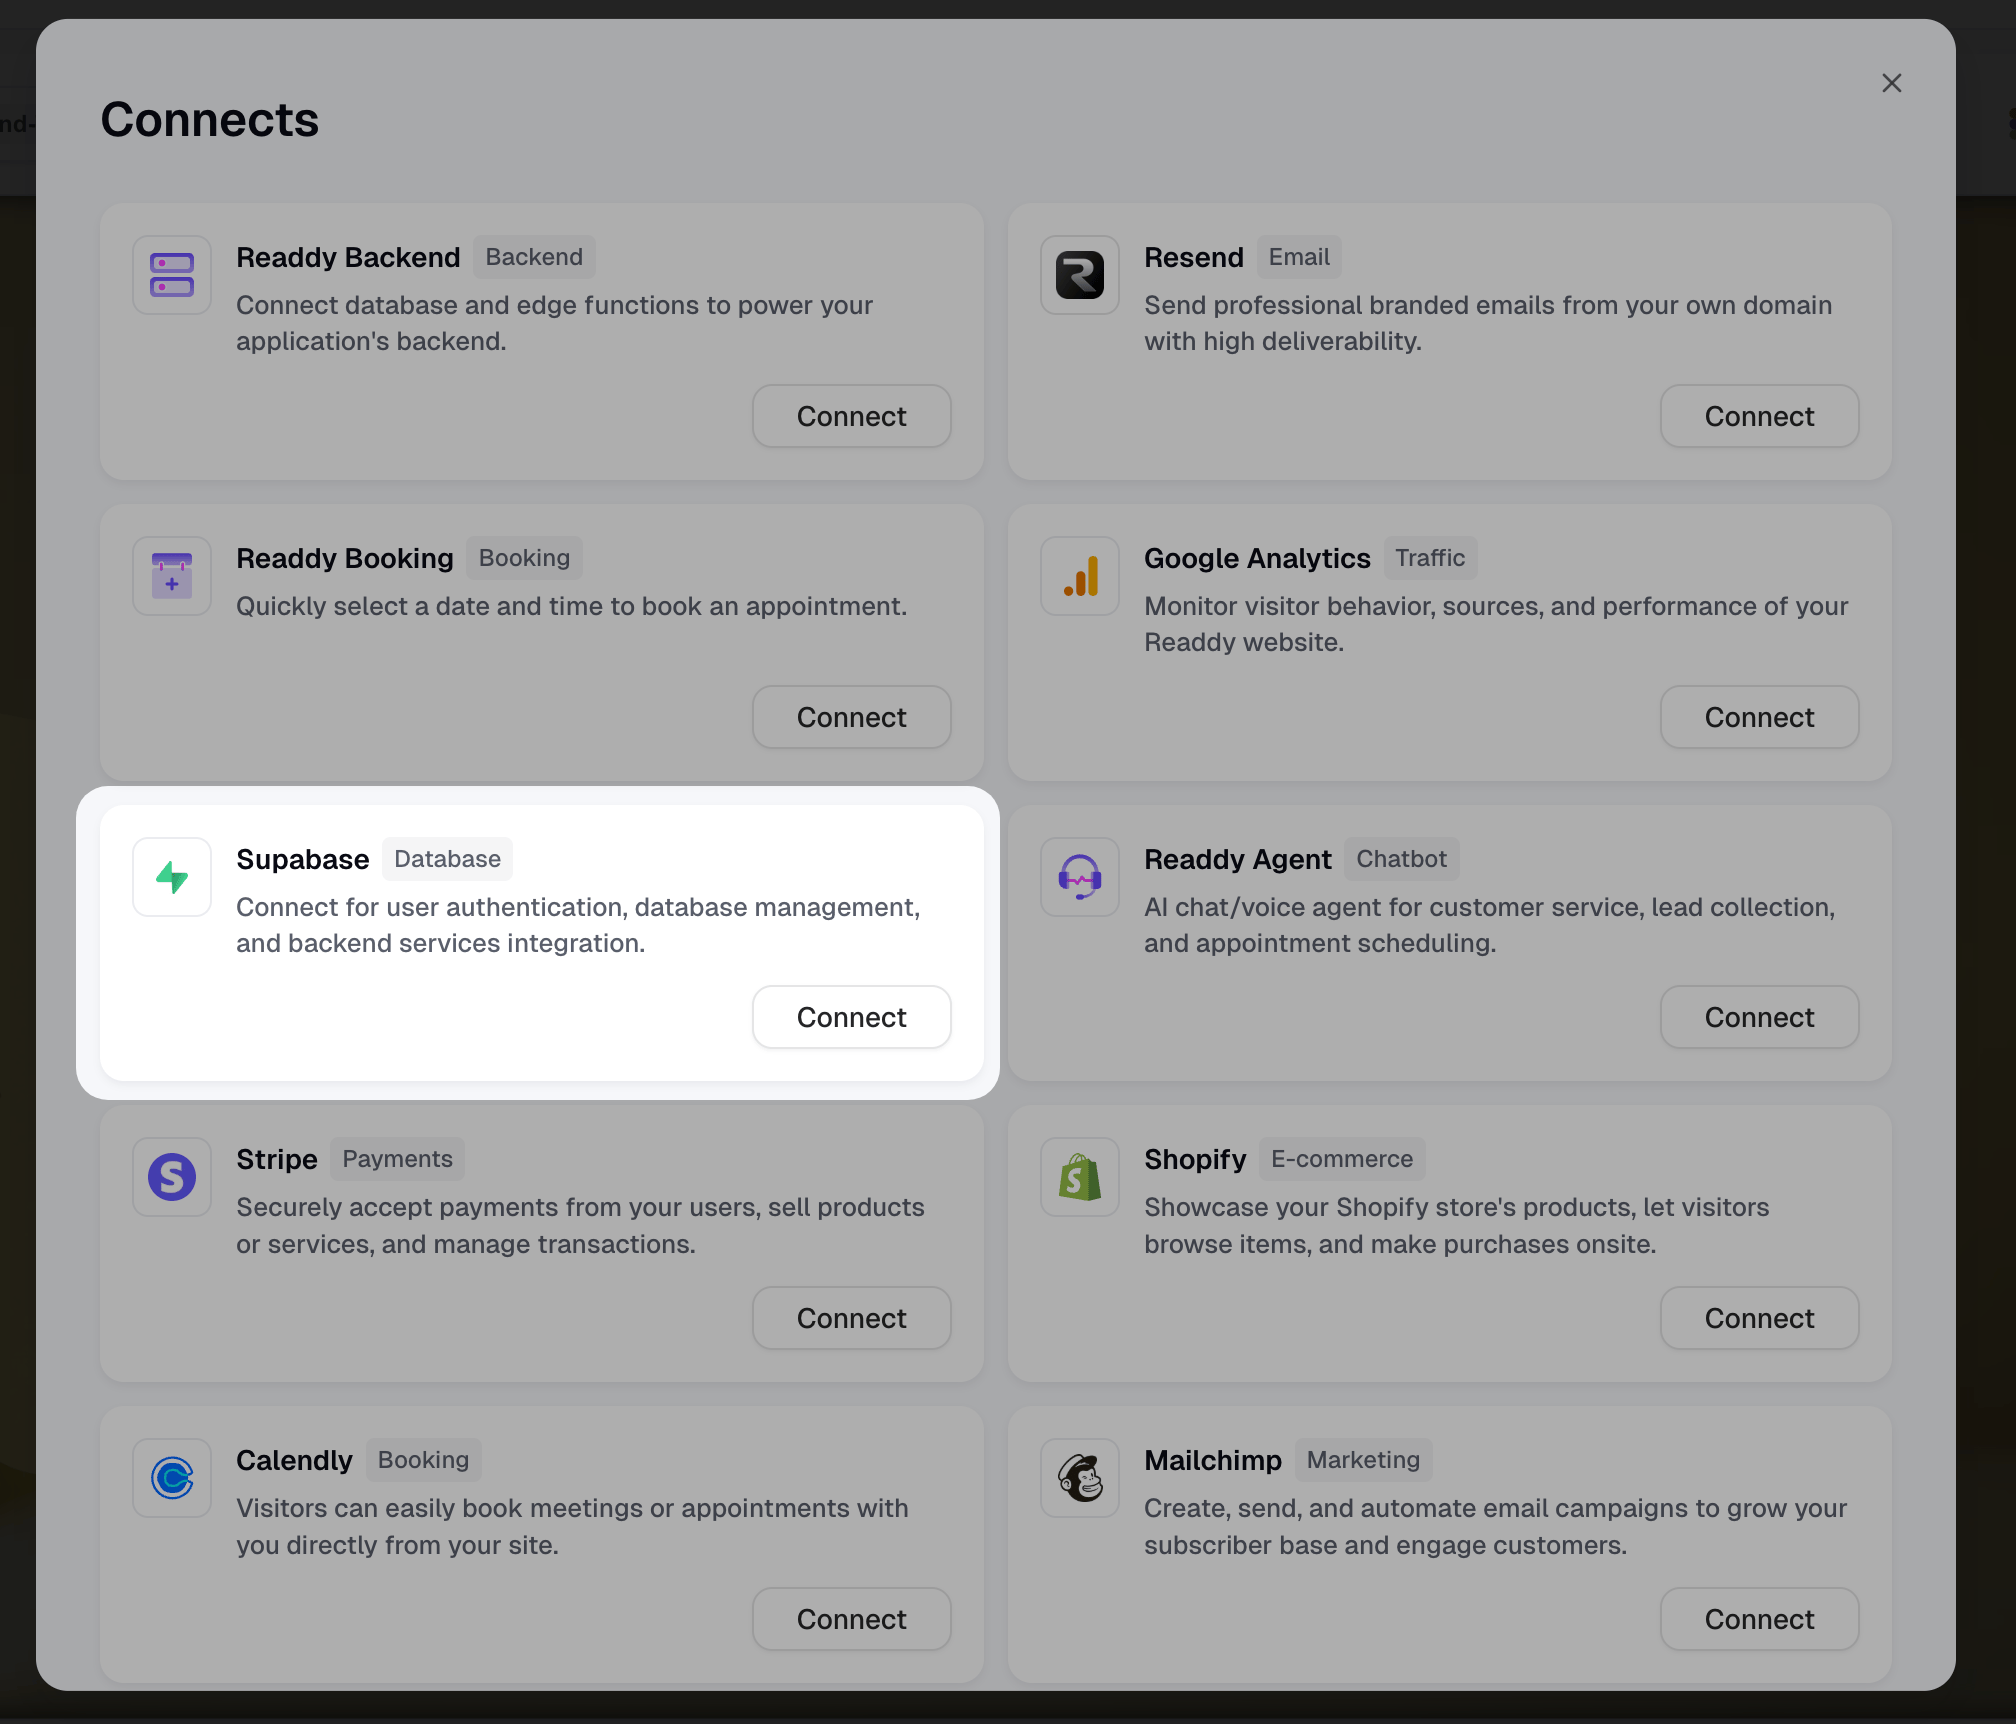
In Readdy, click the Connects button at the top, then select Supabase.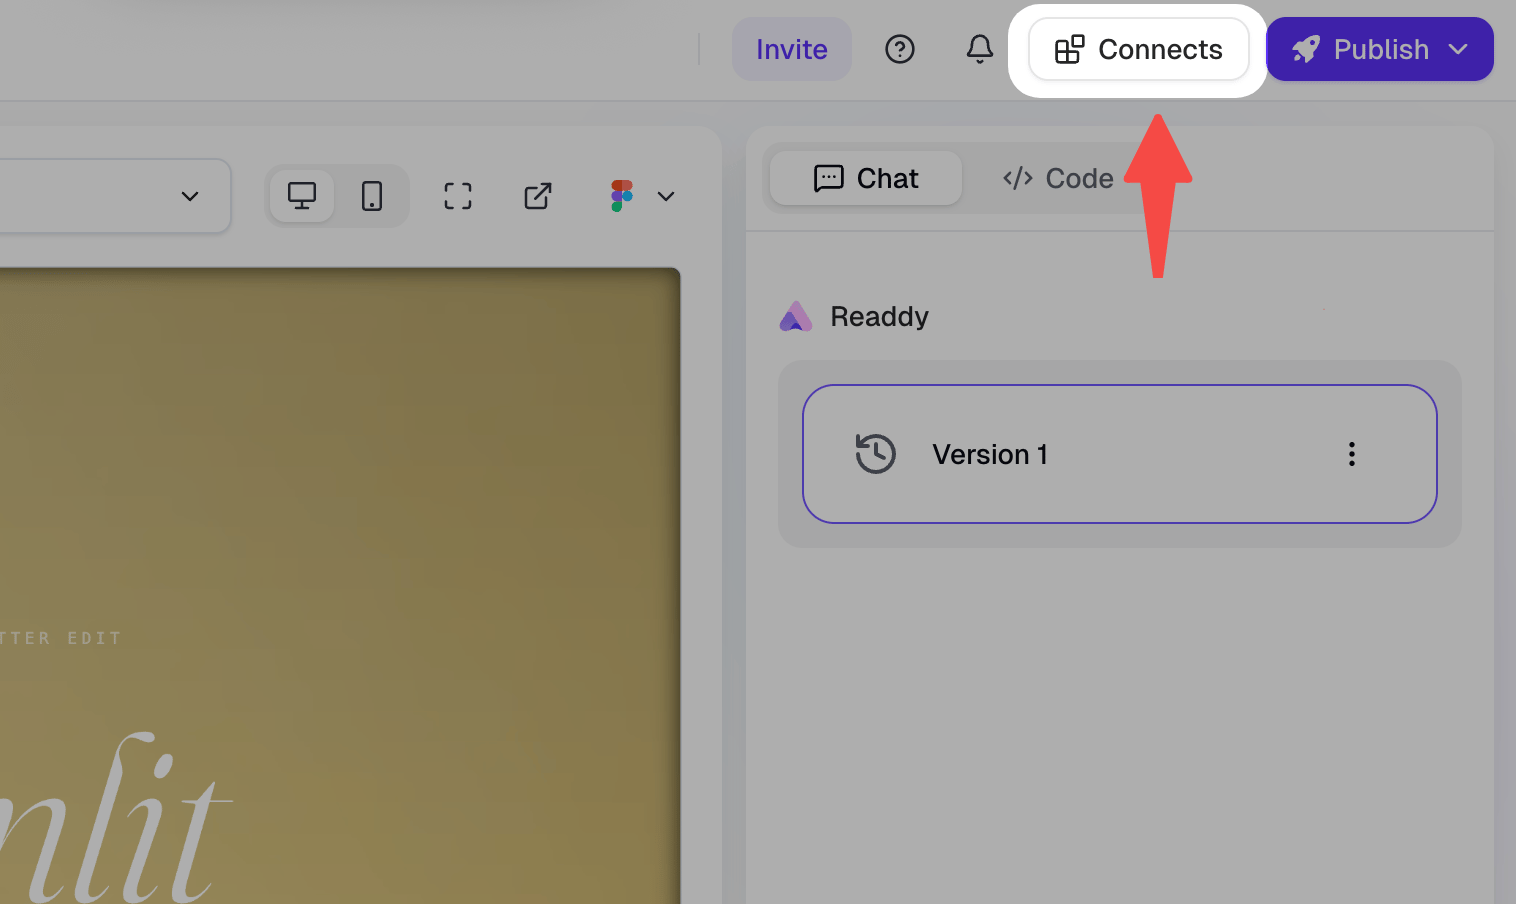
Step 2: Configure
If you haven’t logged into your Supabase account, please sign in or register first.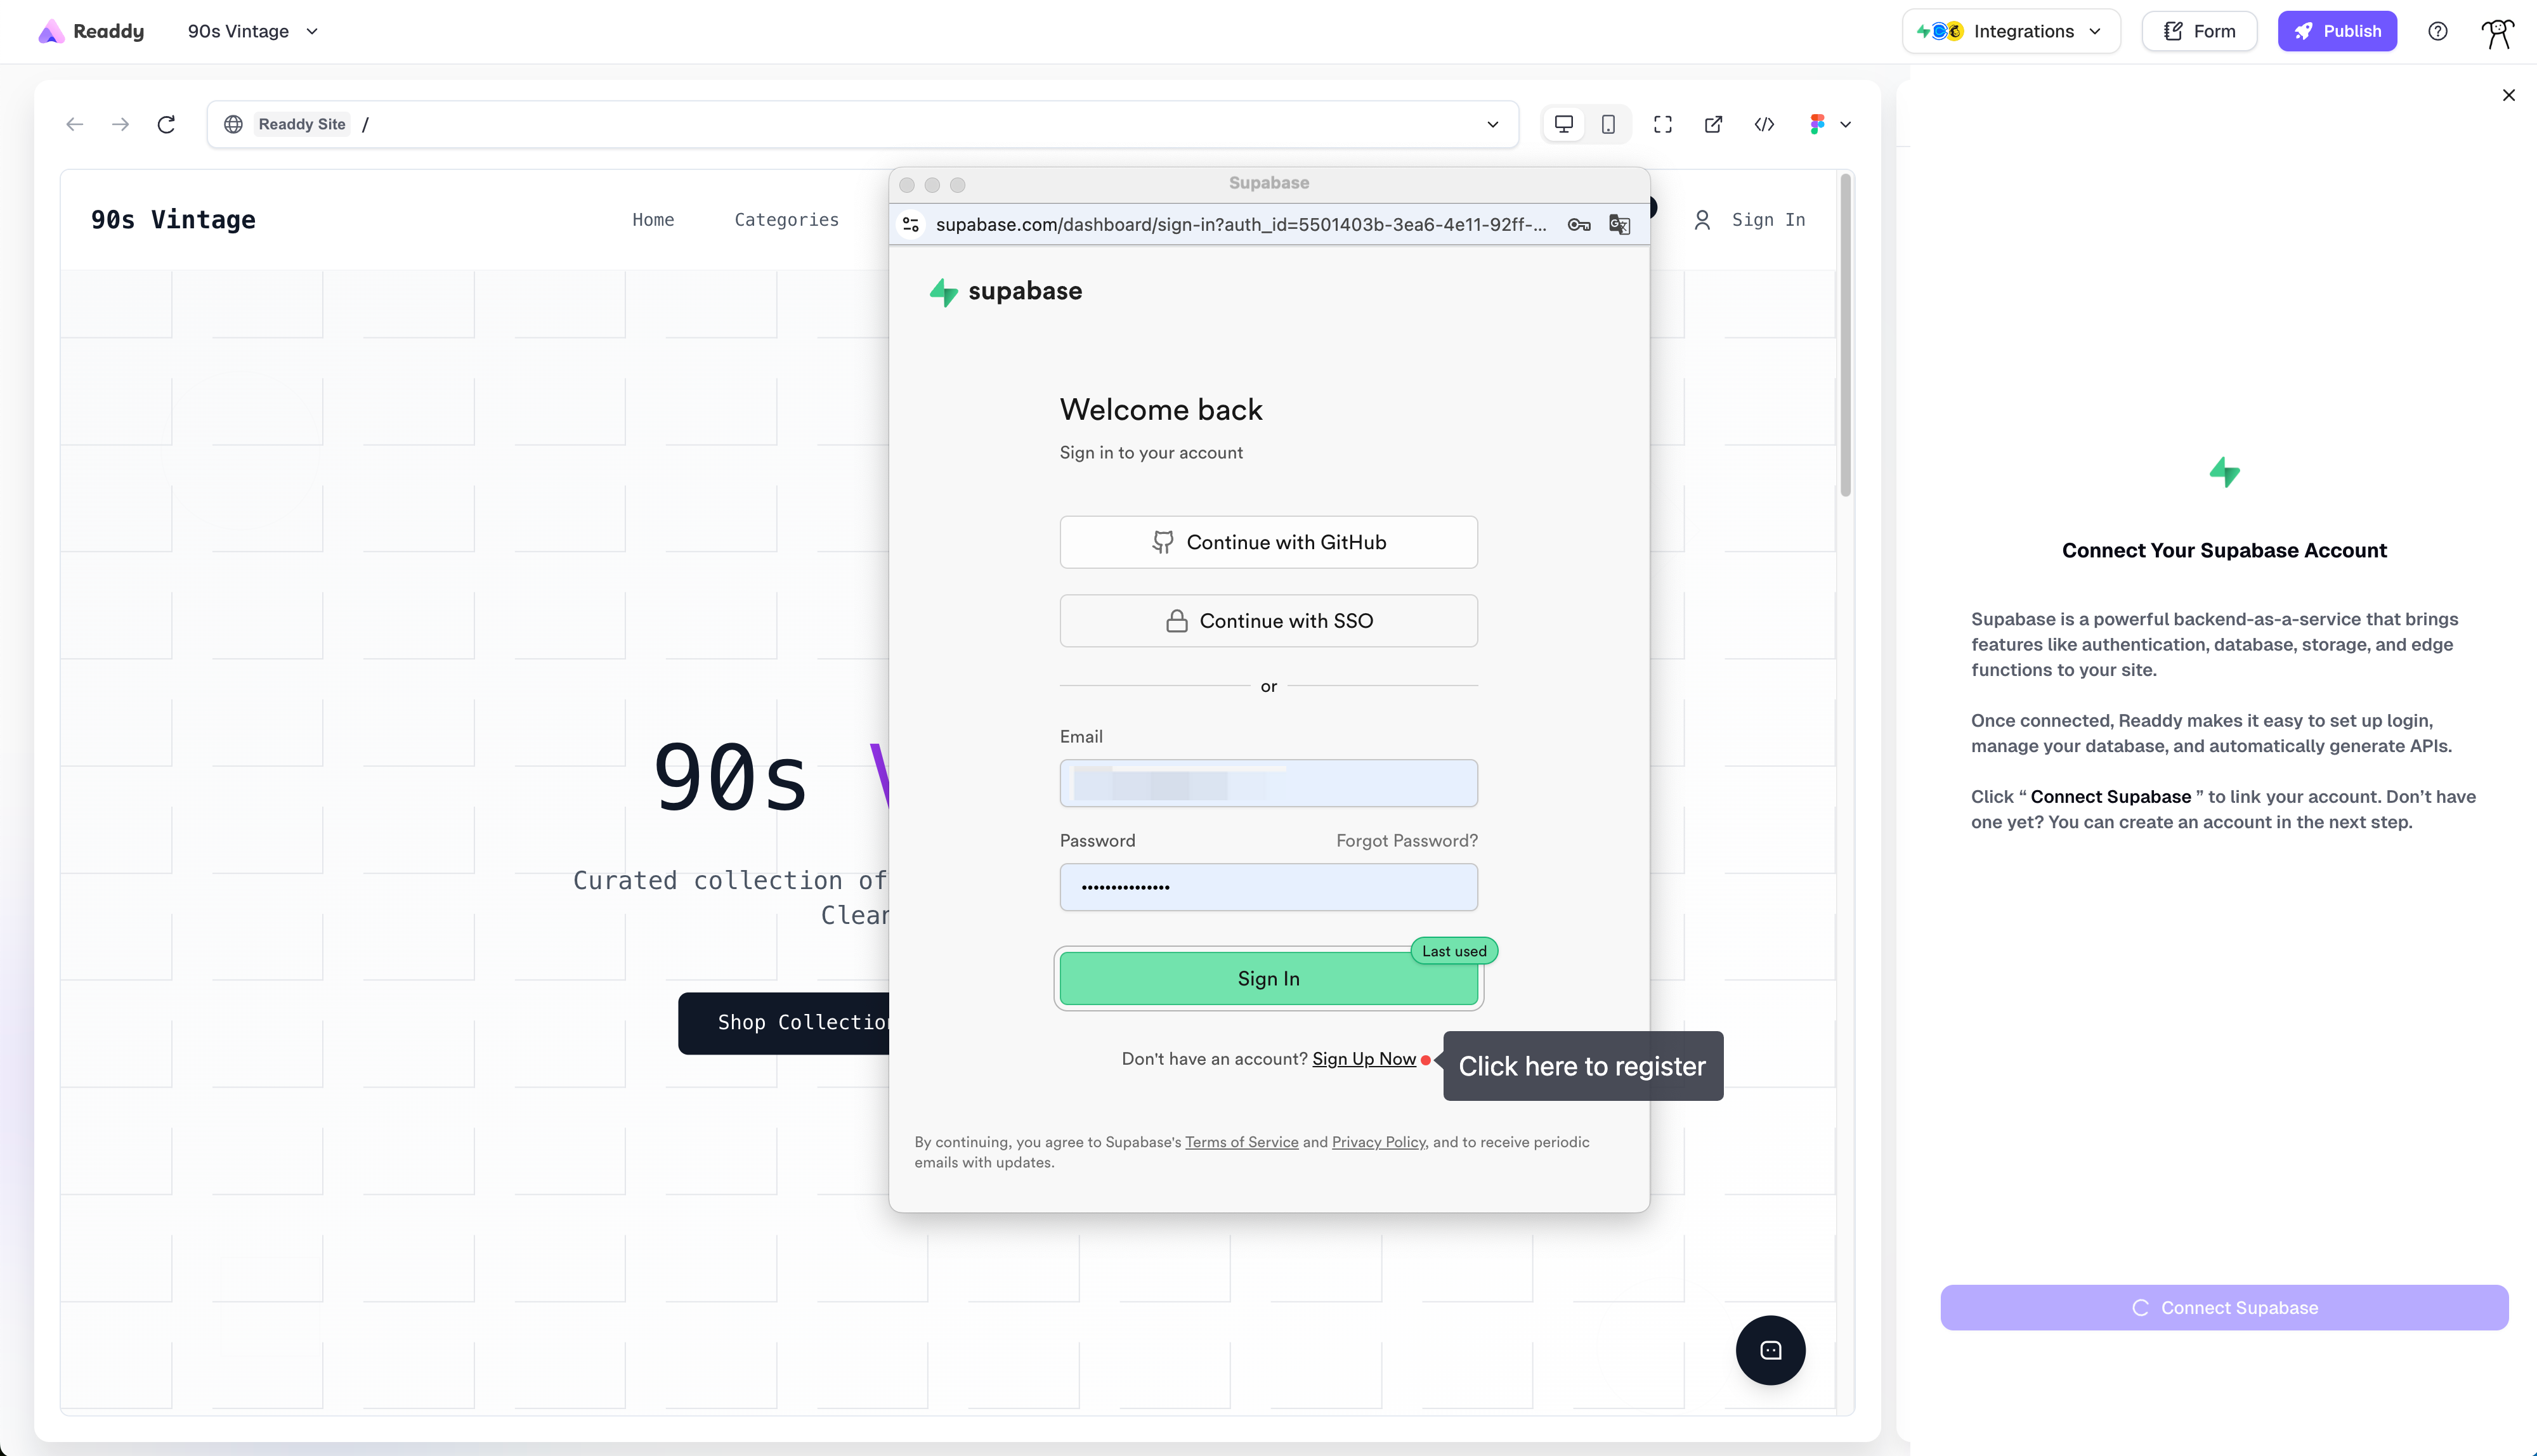
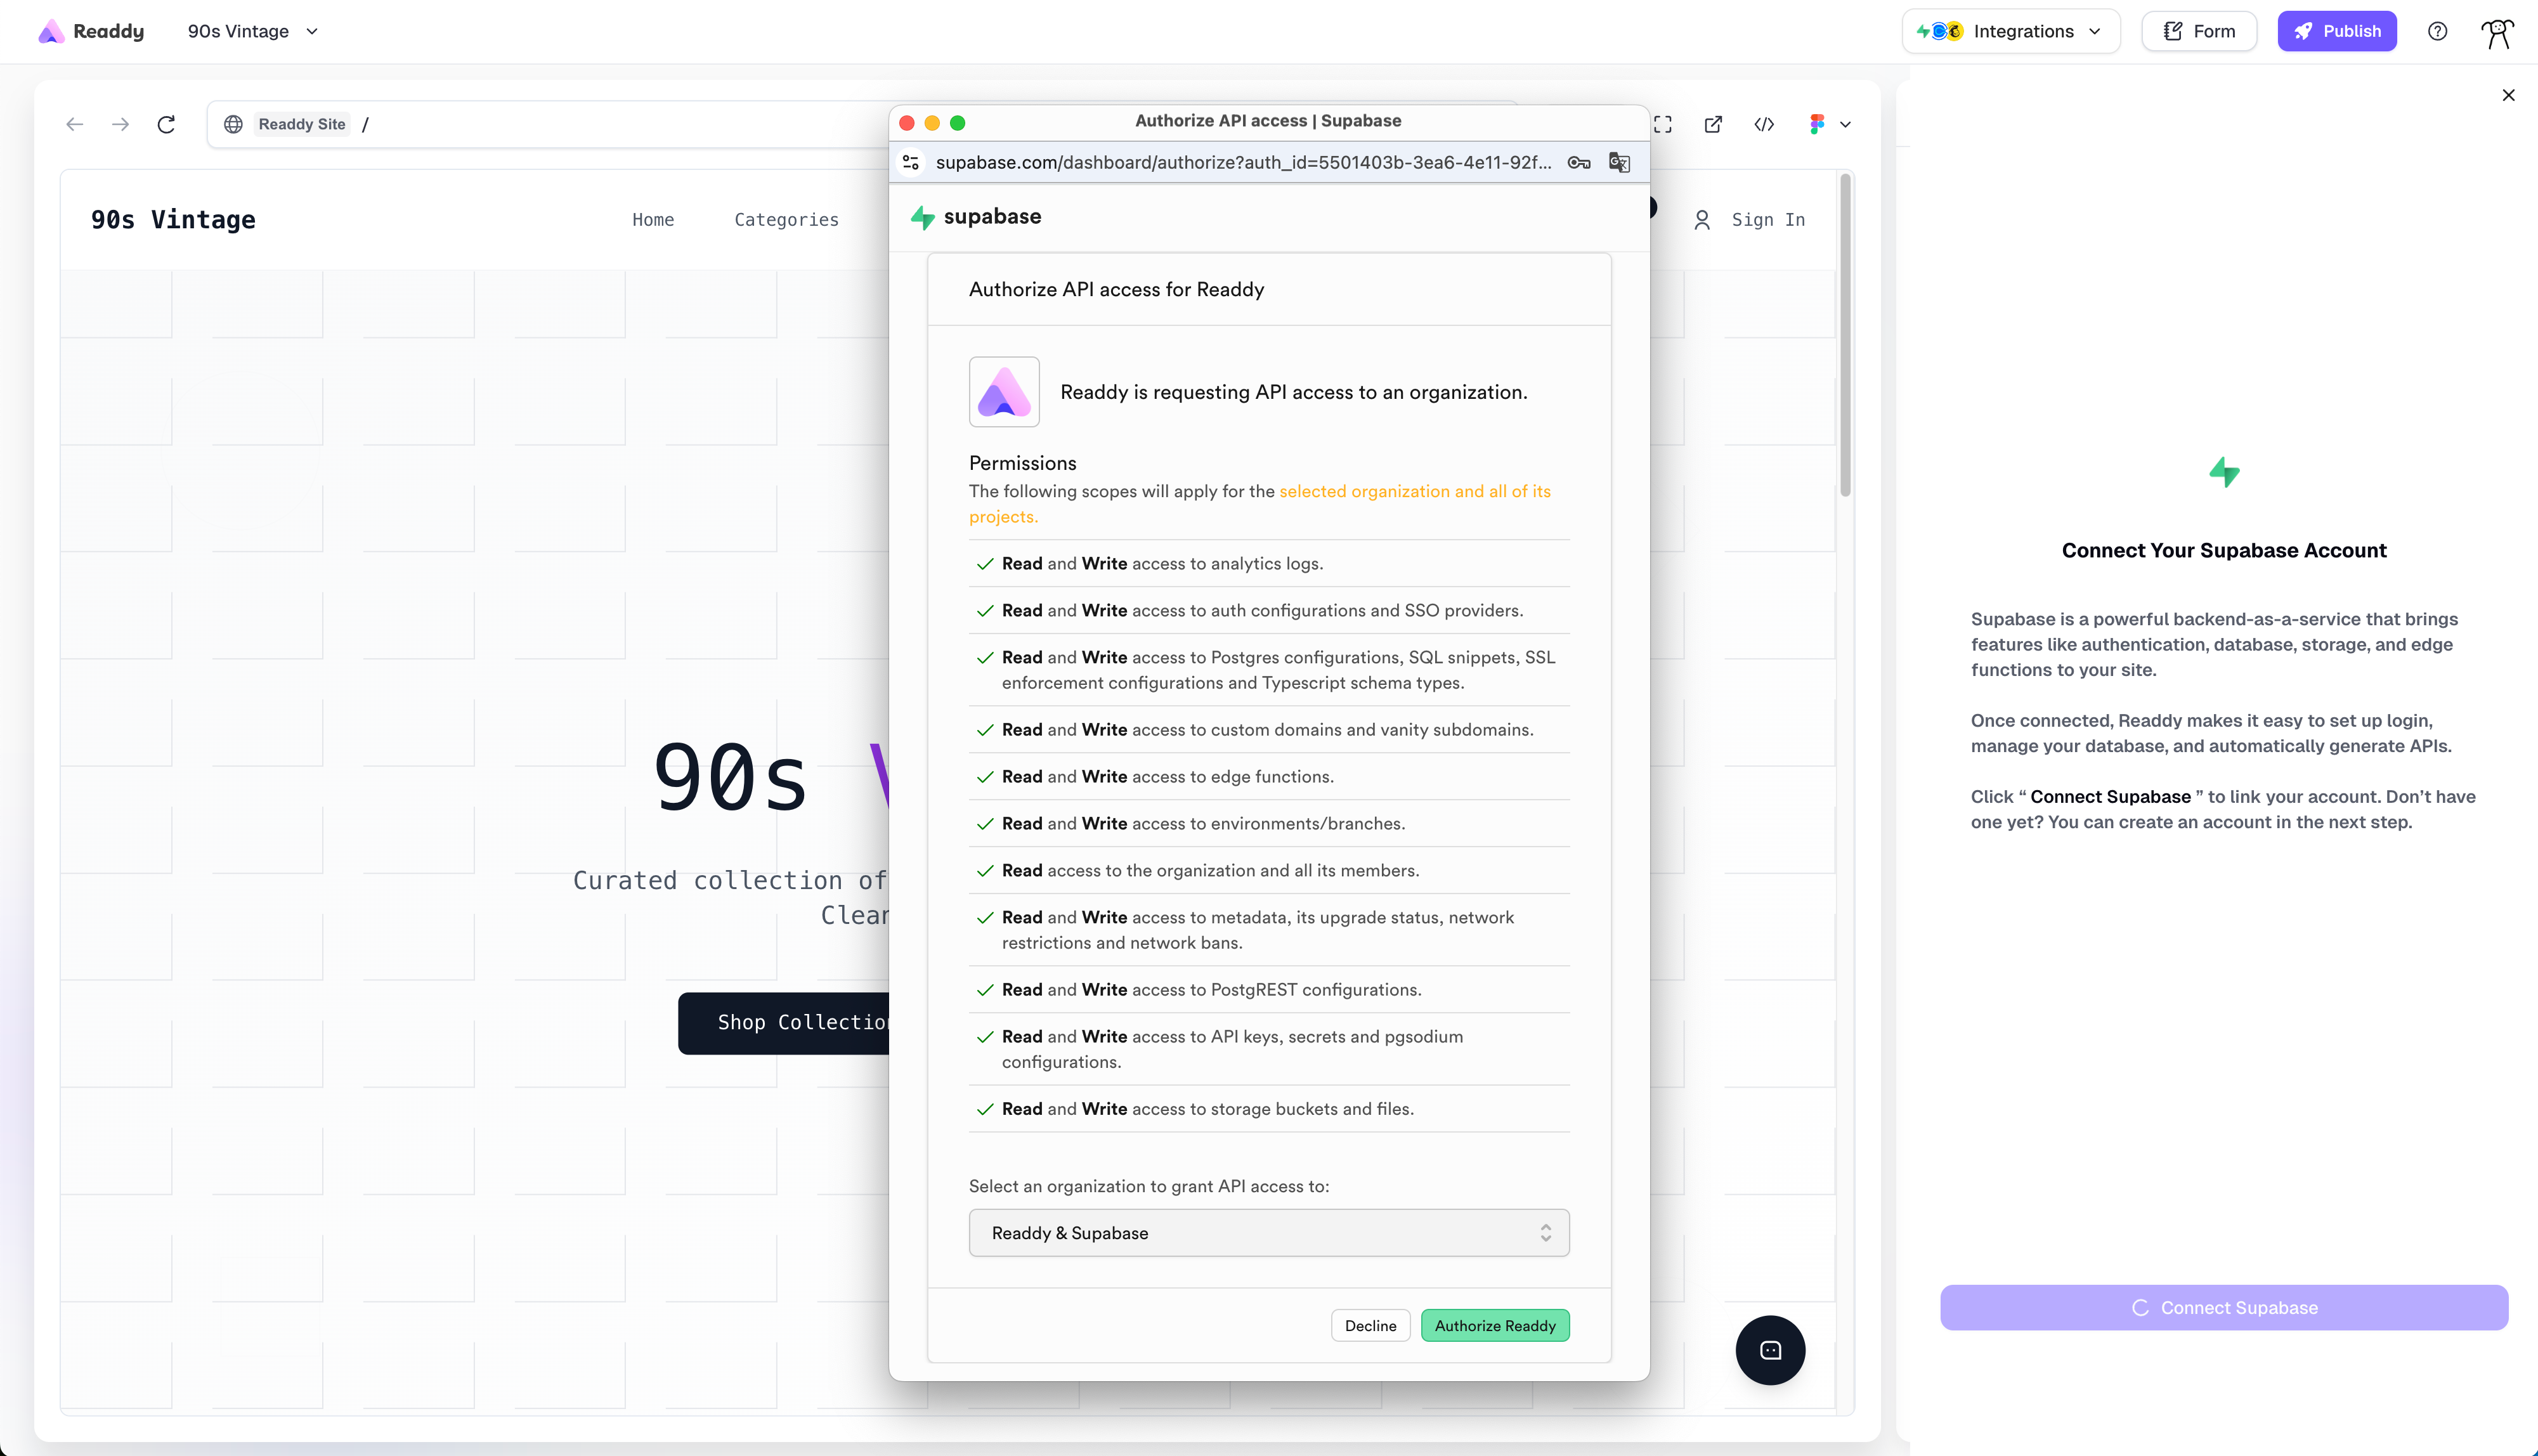
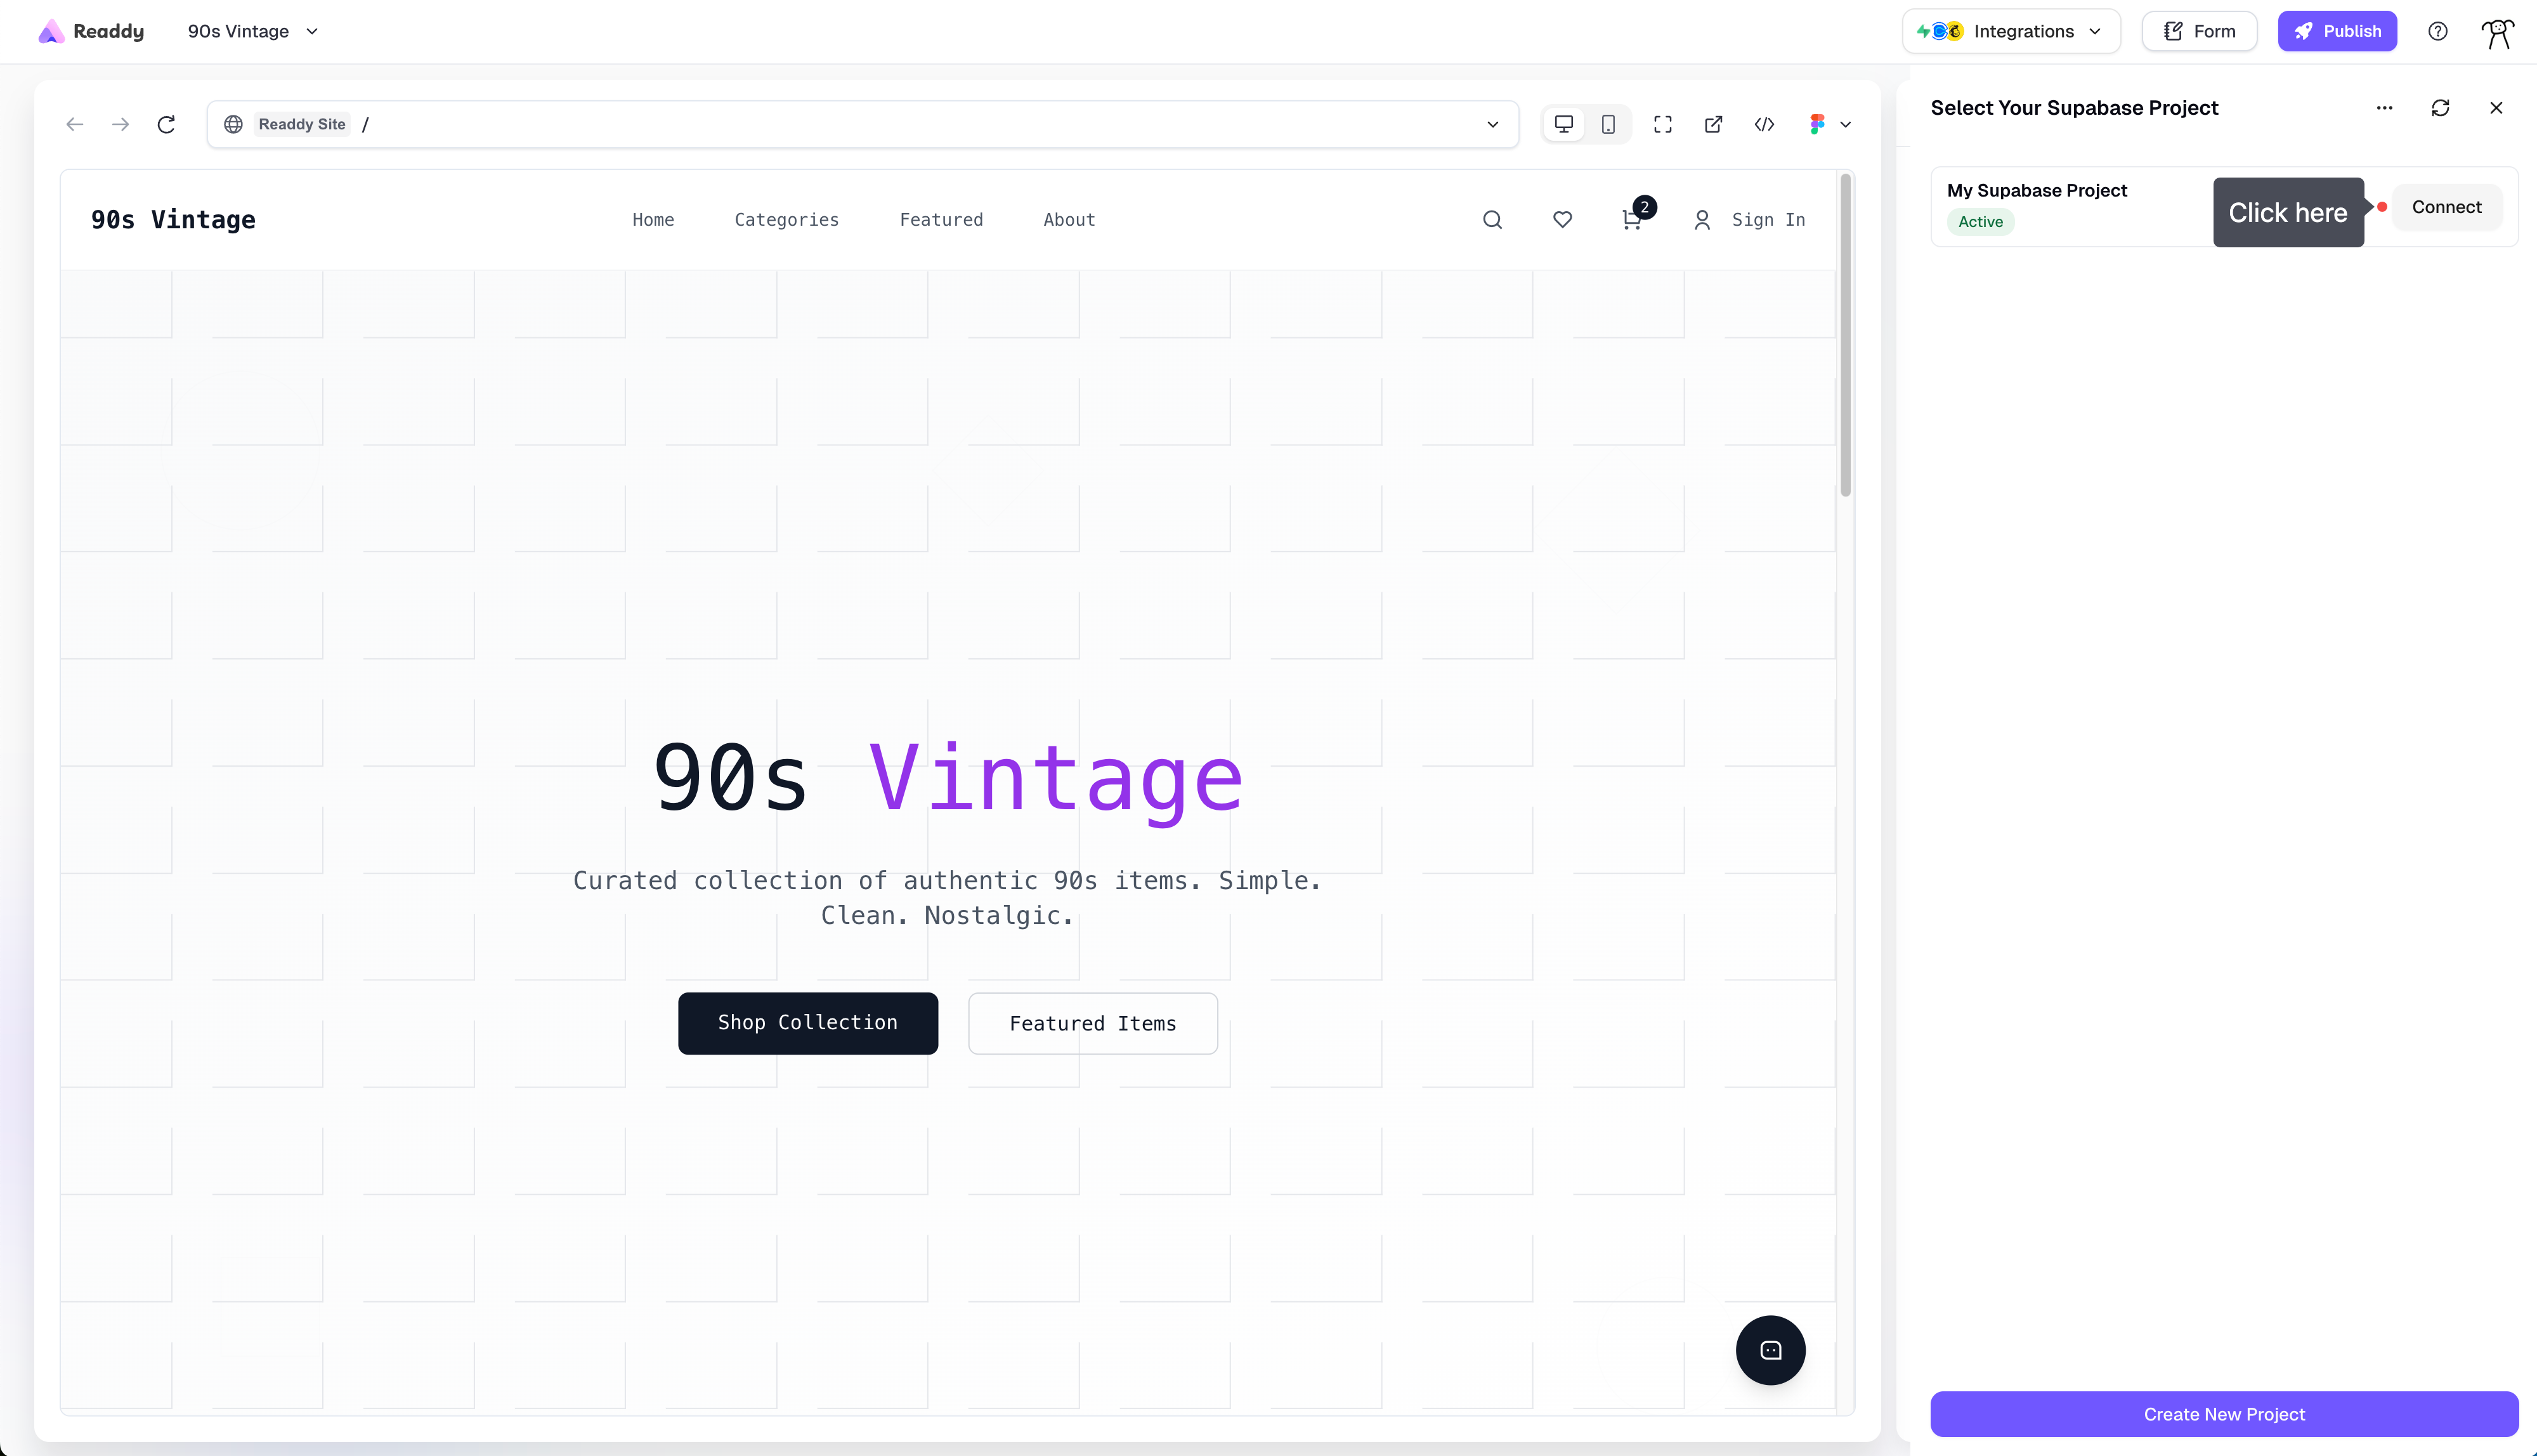
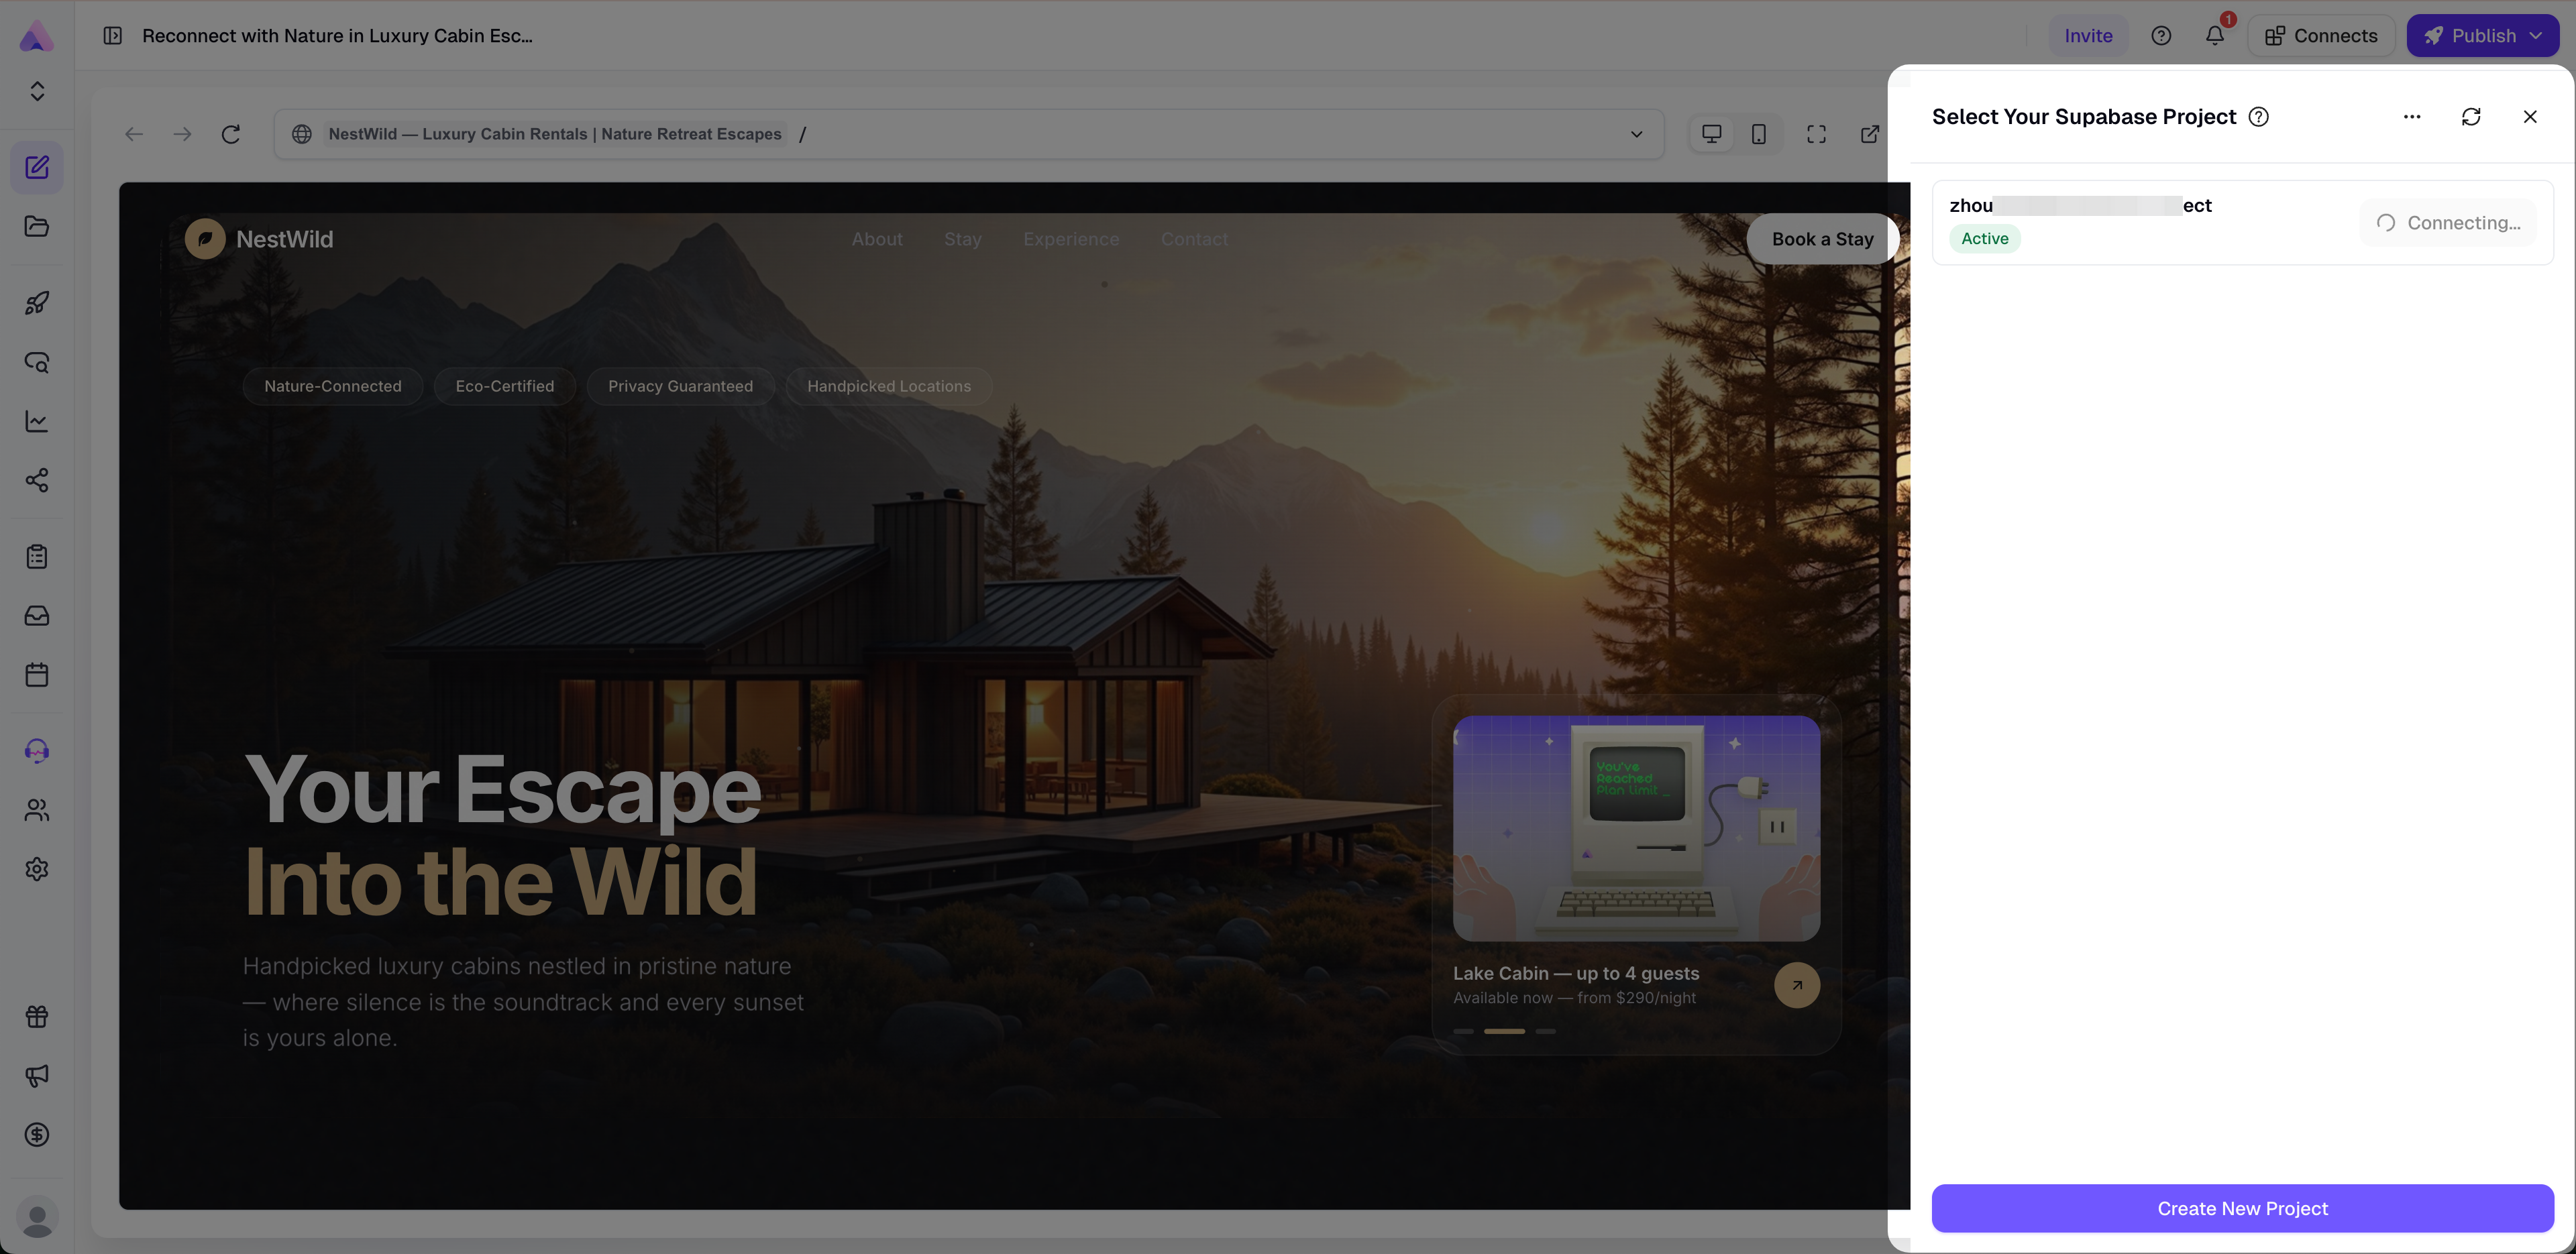
- Click “Connect” to connect the project
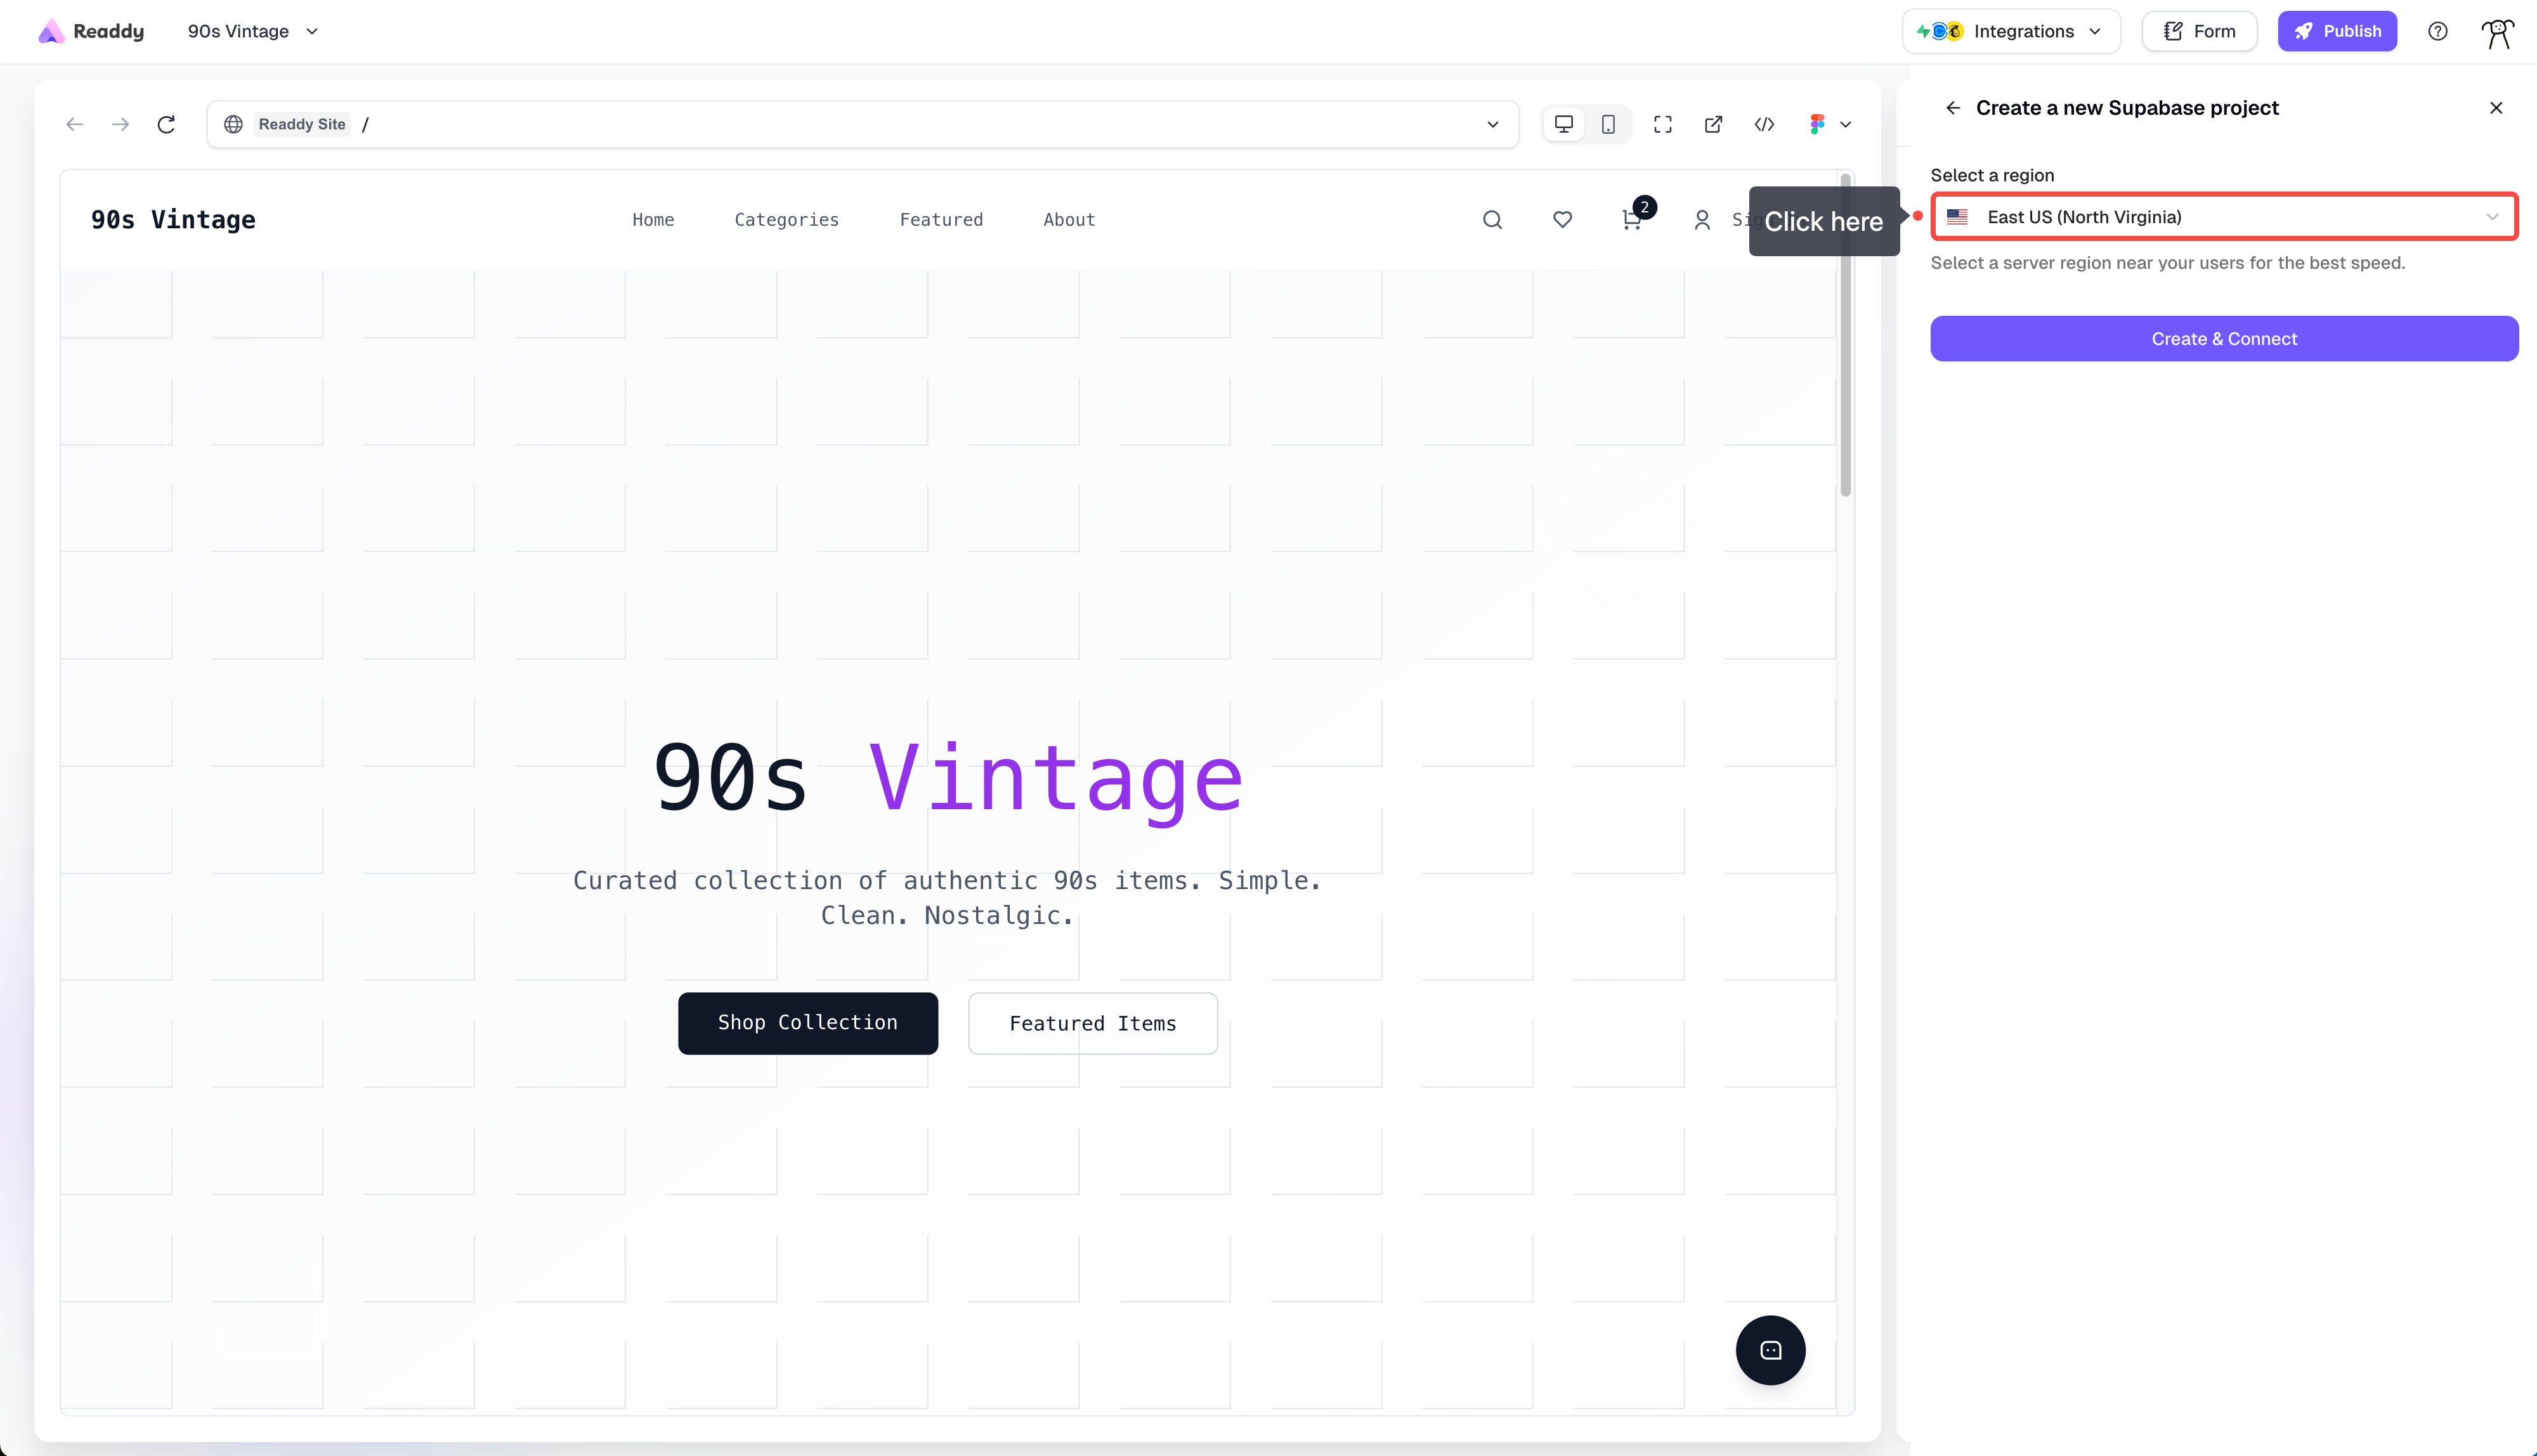
- When creating a new project, you’ll first need to select a region. Choose one closest to your user base for optimal performance.
Building with Supabase
Integrating Supabase with Readdy is incredibly simple. Here are specific examples of integrating Supabase functionality into your project.User Login
Email/Password
After connecting Supabase to your Readdy project, you can directly add Supabase’s authentication system to your project through conversation. Example prompt:- In your app: After executing the above prompt, a login/registration page will be generated in your Readdy project for user authentication operations.
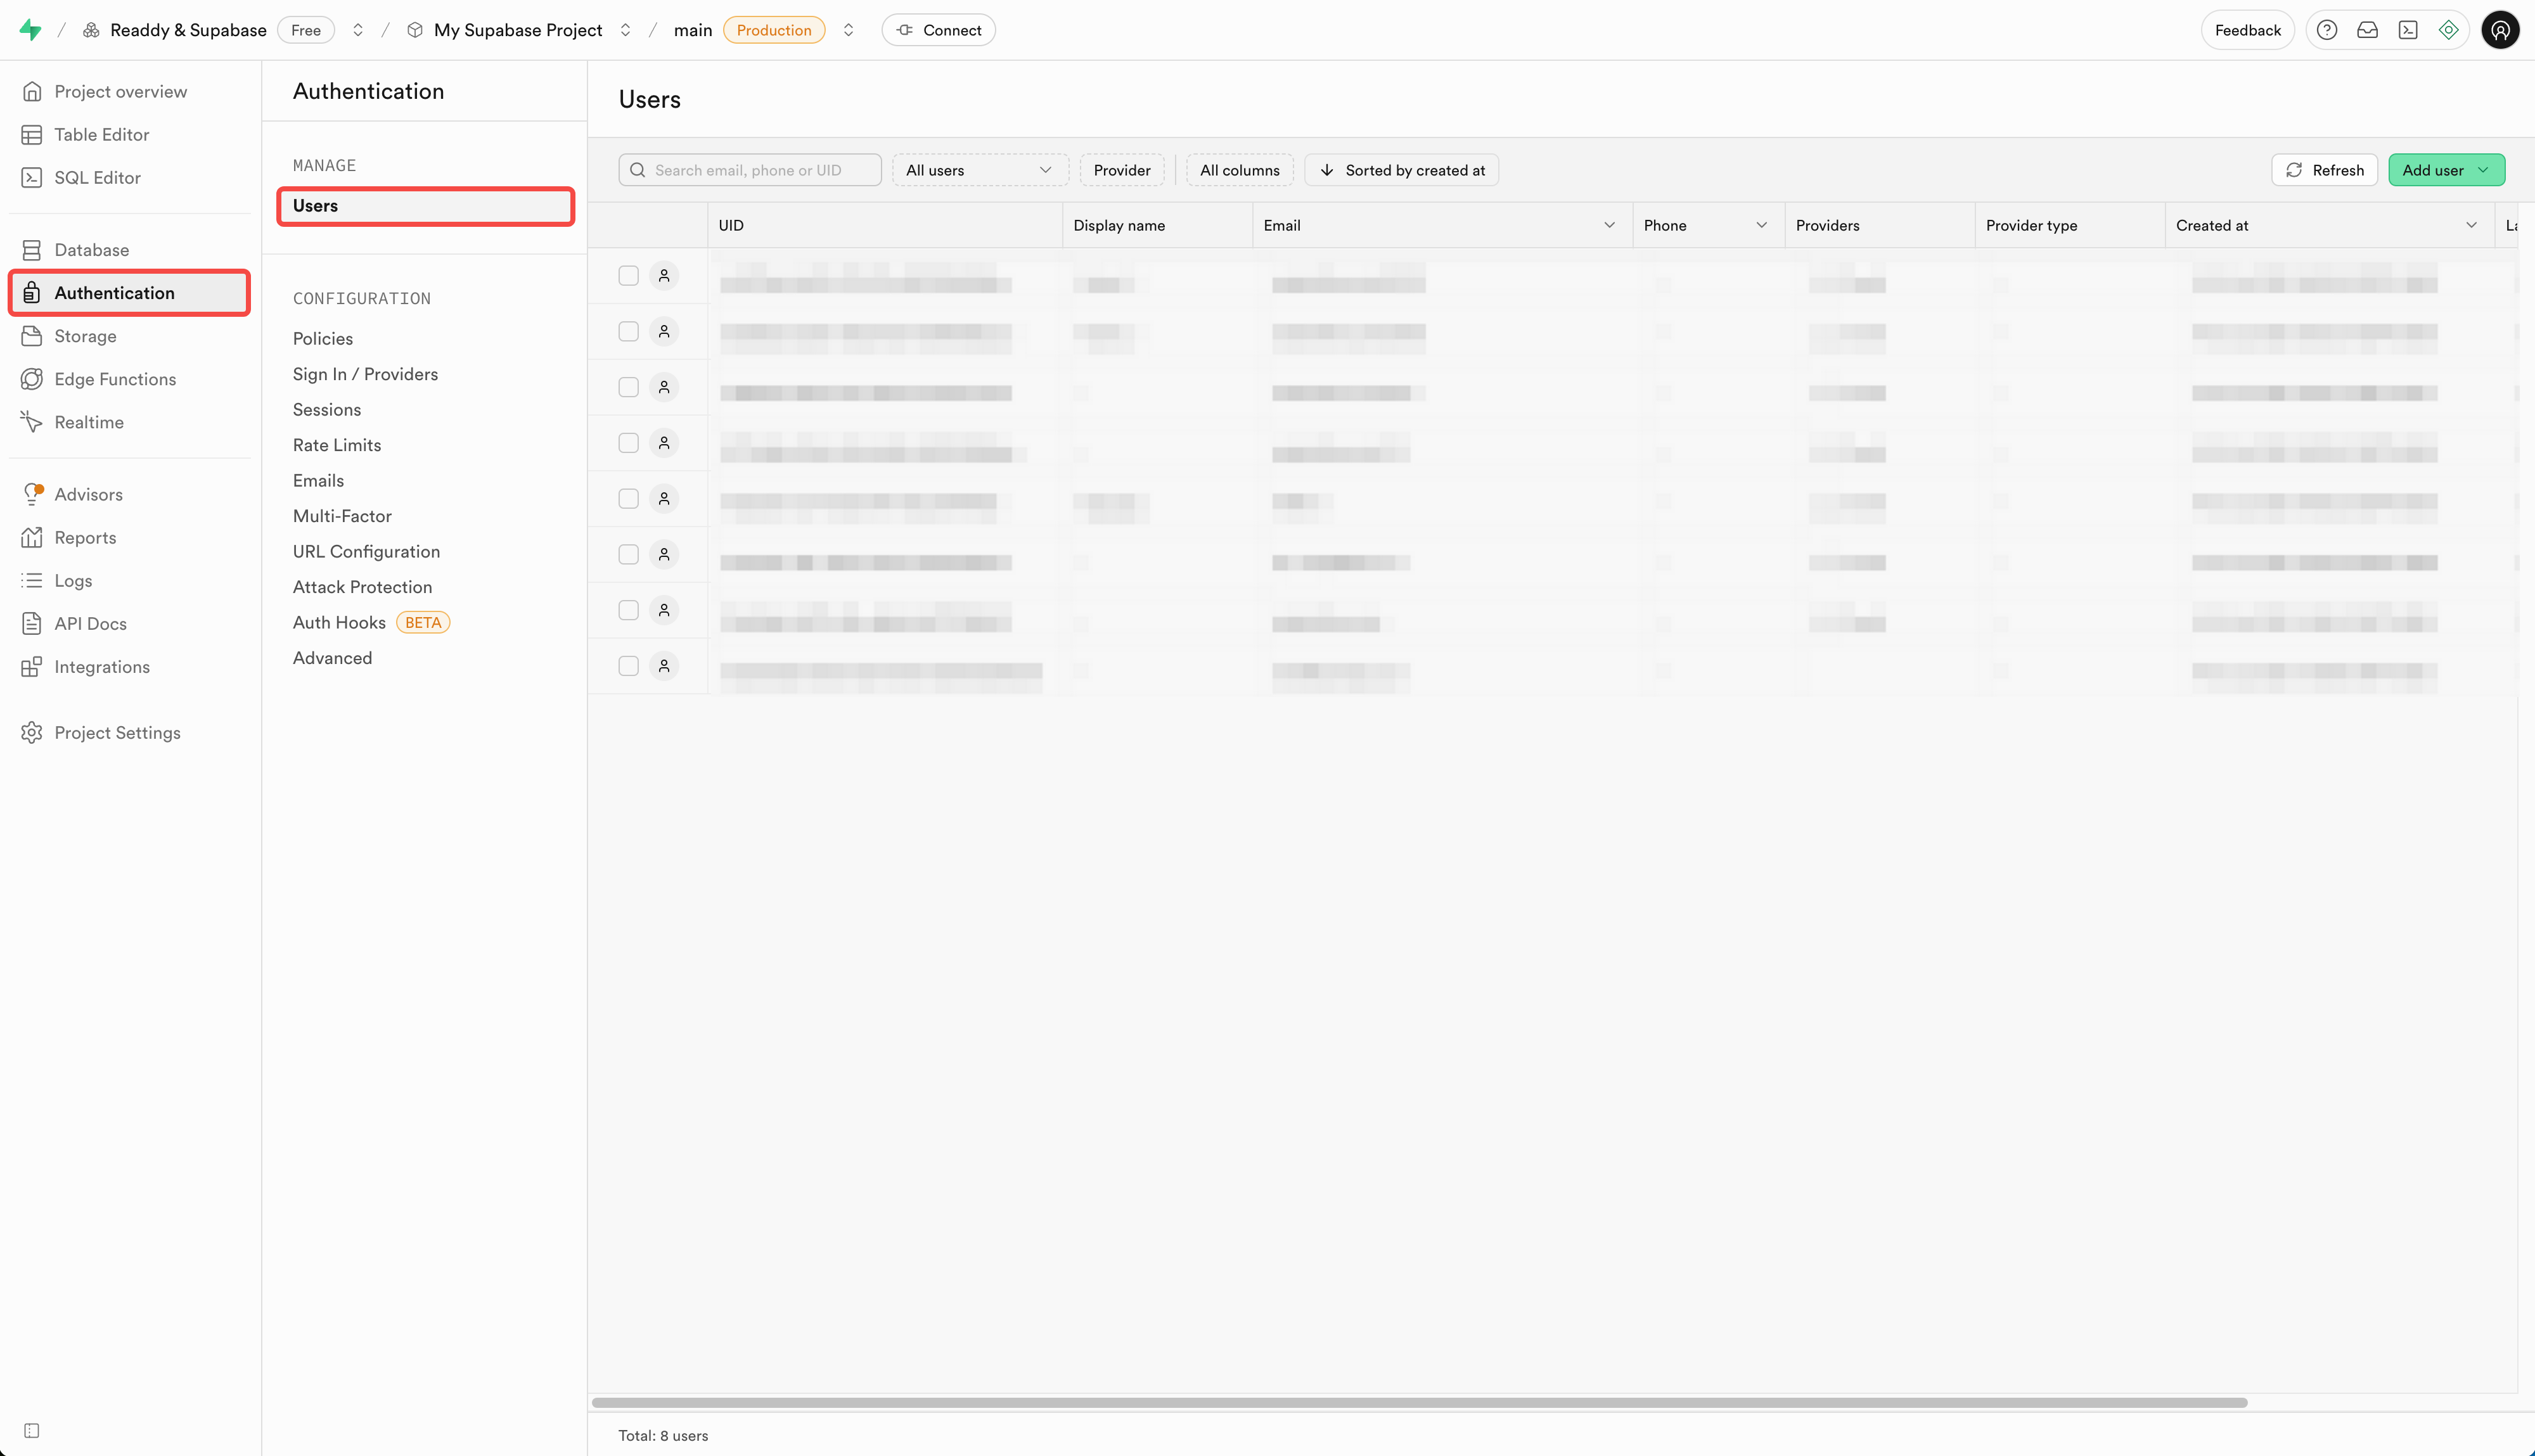
- Supabase user table: In your Supabase project dashboard, you can find Authentication > Users to view all registered users.
In Supabase, you can also configure whether registered users need email verification. The setting page is in Authentication > Sign In / Providers, select Auth Providers > Email. During development and testing, you can disable “Confirm email” for more testing, but it’s recommended to enable this setting before production release to ensure user authenticity.Before publishing your website, you need to configure Redirect URLs in Supabase’s Authentication > URL Configuration. The format should be: https://*.yourdomain.com/**, where *.yourdomain is the domain name you fill in when publishing your website.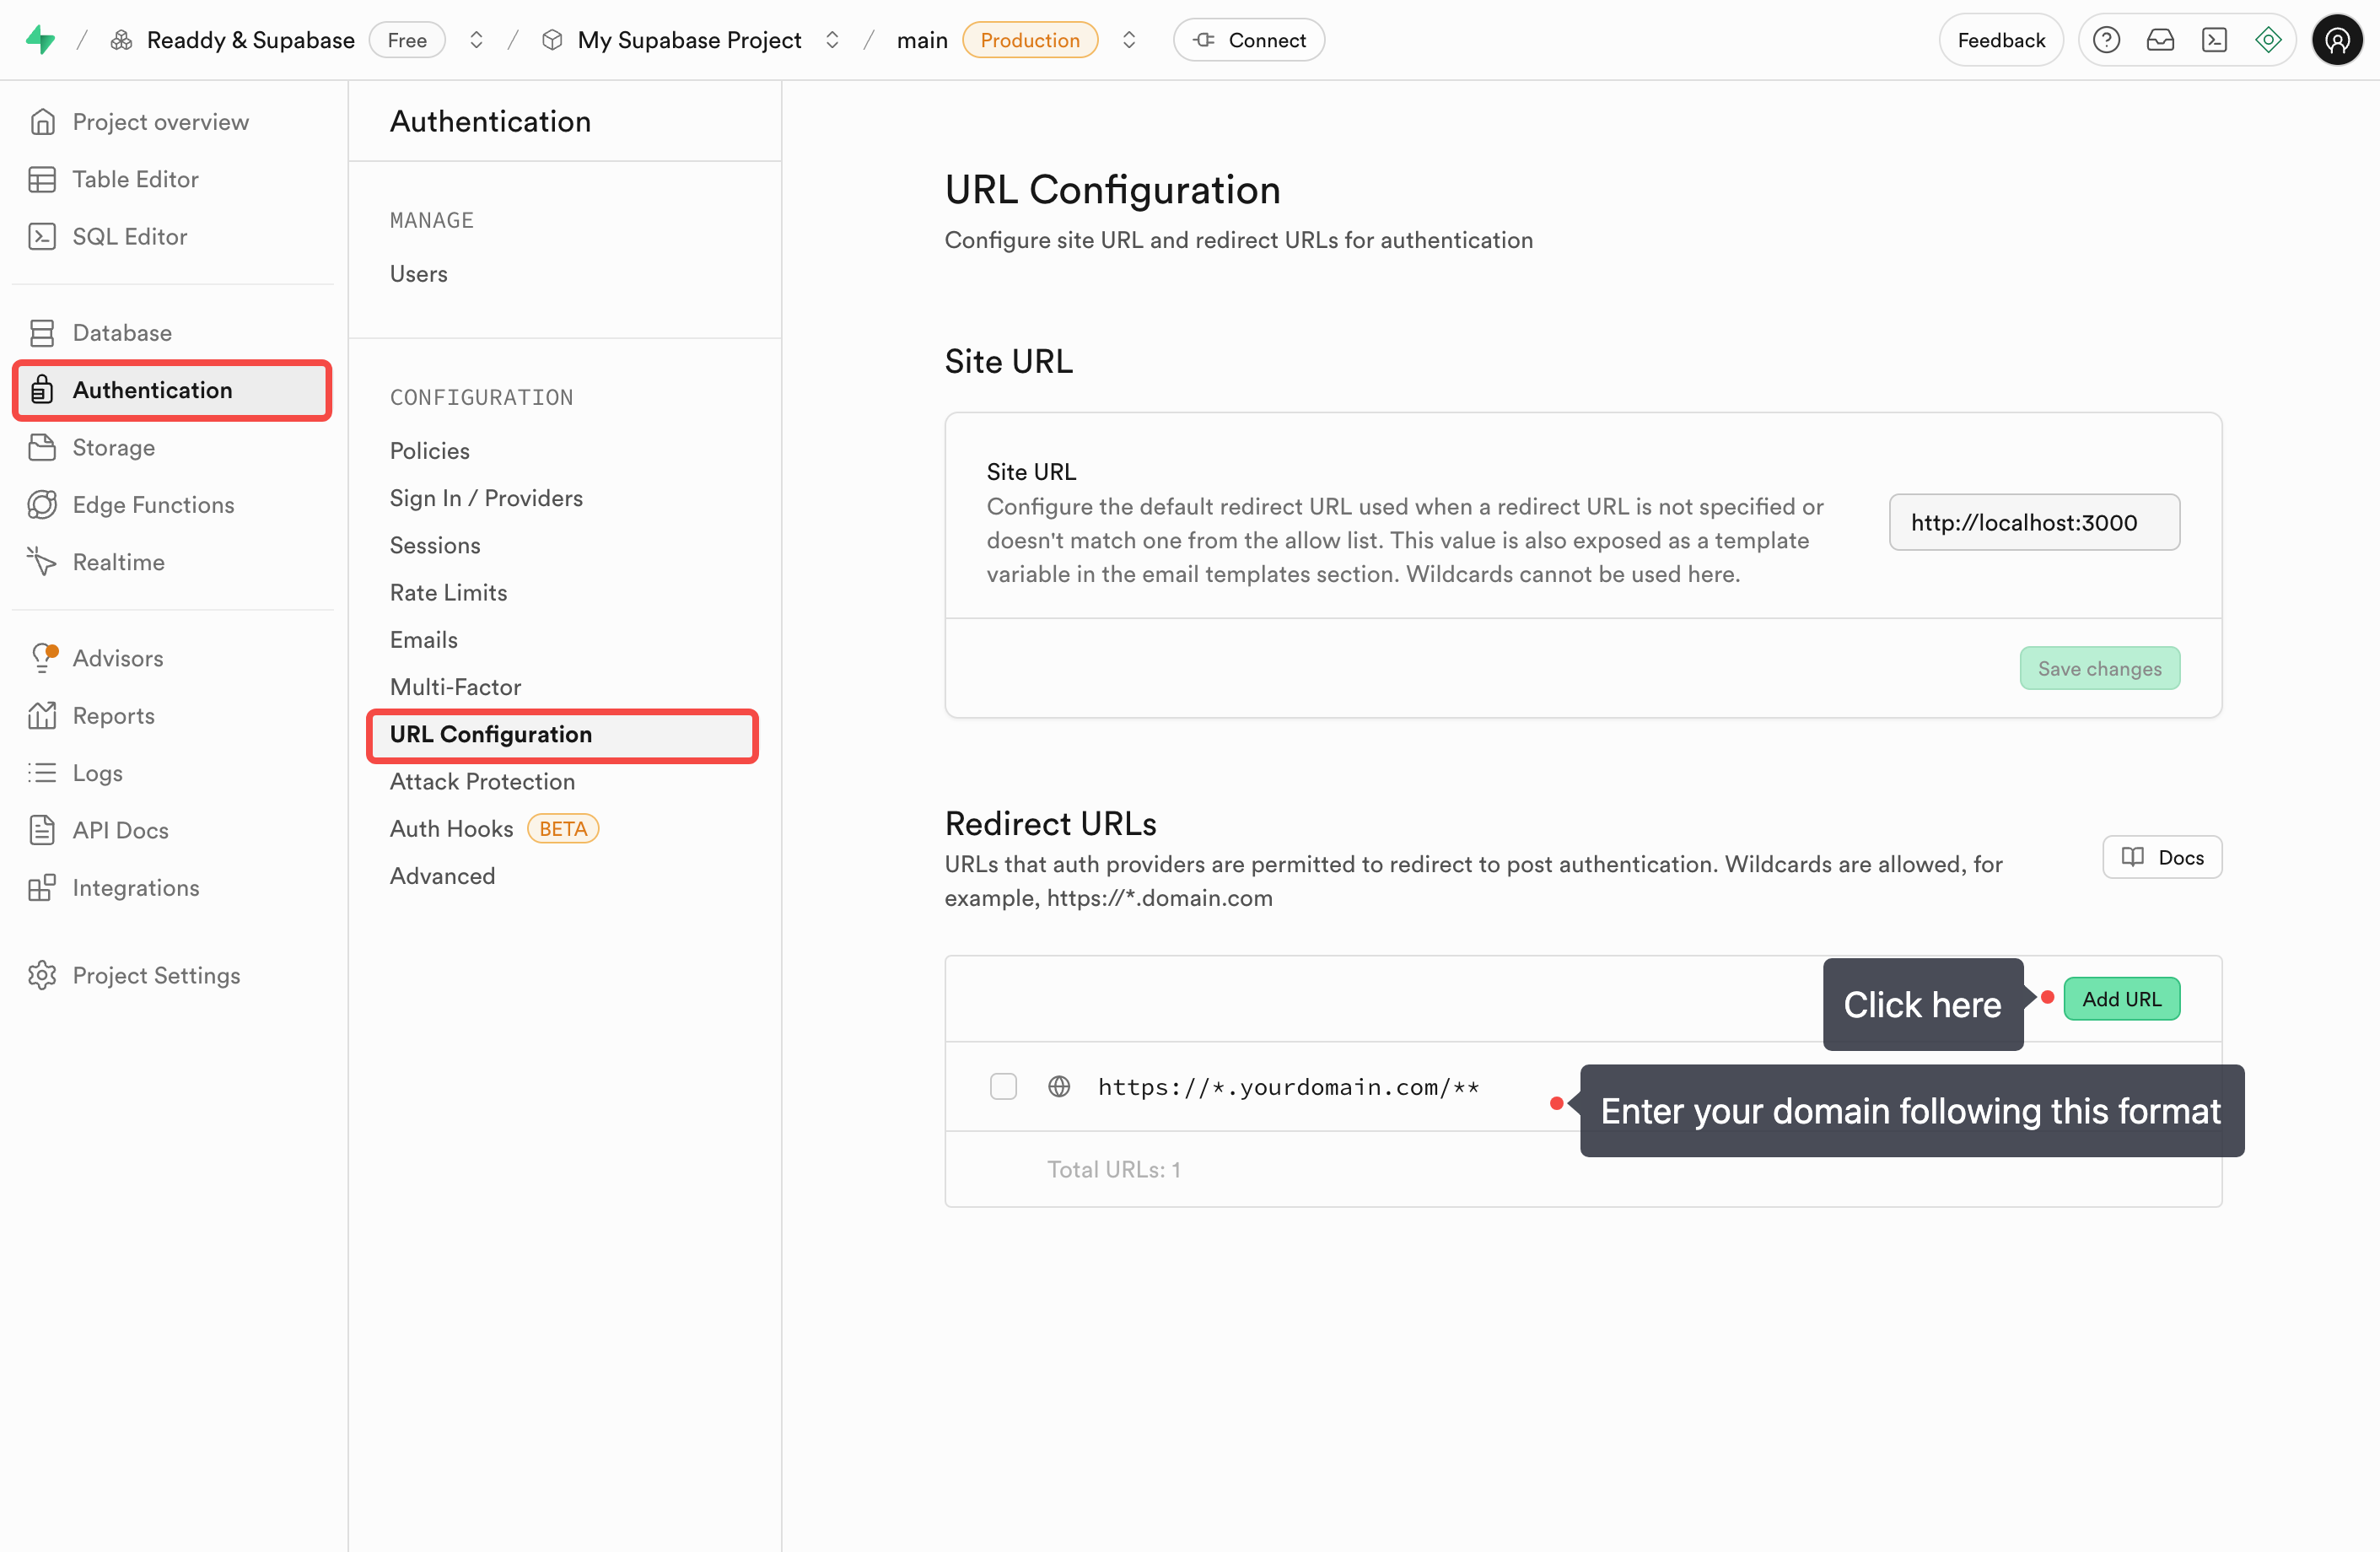
Third-Party Login
Supabase also provides social media login/registration options, such as Google, Twitter, and Apple.- Enable login methods in Supabase: In Sign In / Providers > Auth Providers, enable the required providers. Follow Supabase’s guidance to configure and save the necessary information.

- Add login methods in Readdy project: After completing the above configuration, you can add corresponding login methods through conversation. For example:
Database
In your product, besides login/registration, database reading and writing might also be necessary. For example:- Saving user contact information to database tables.
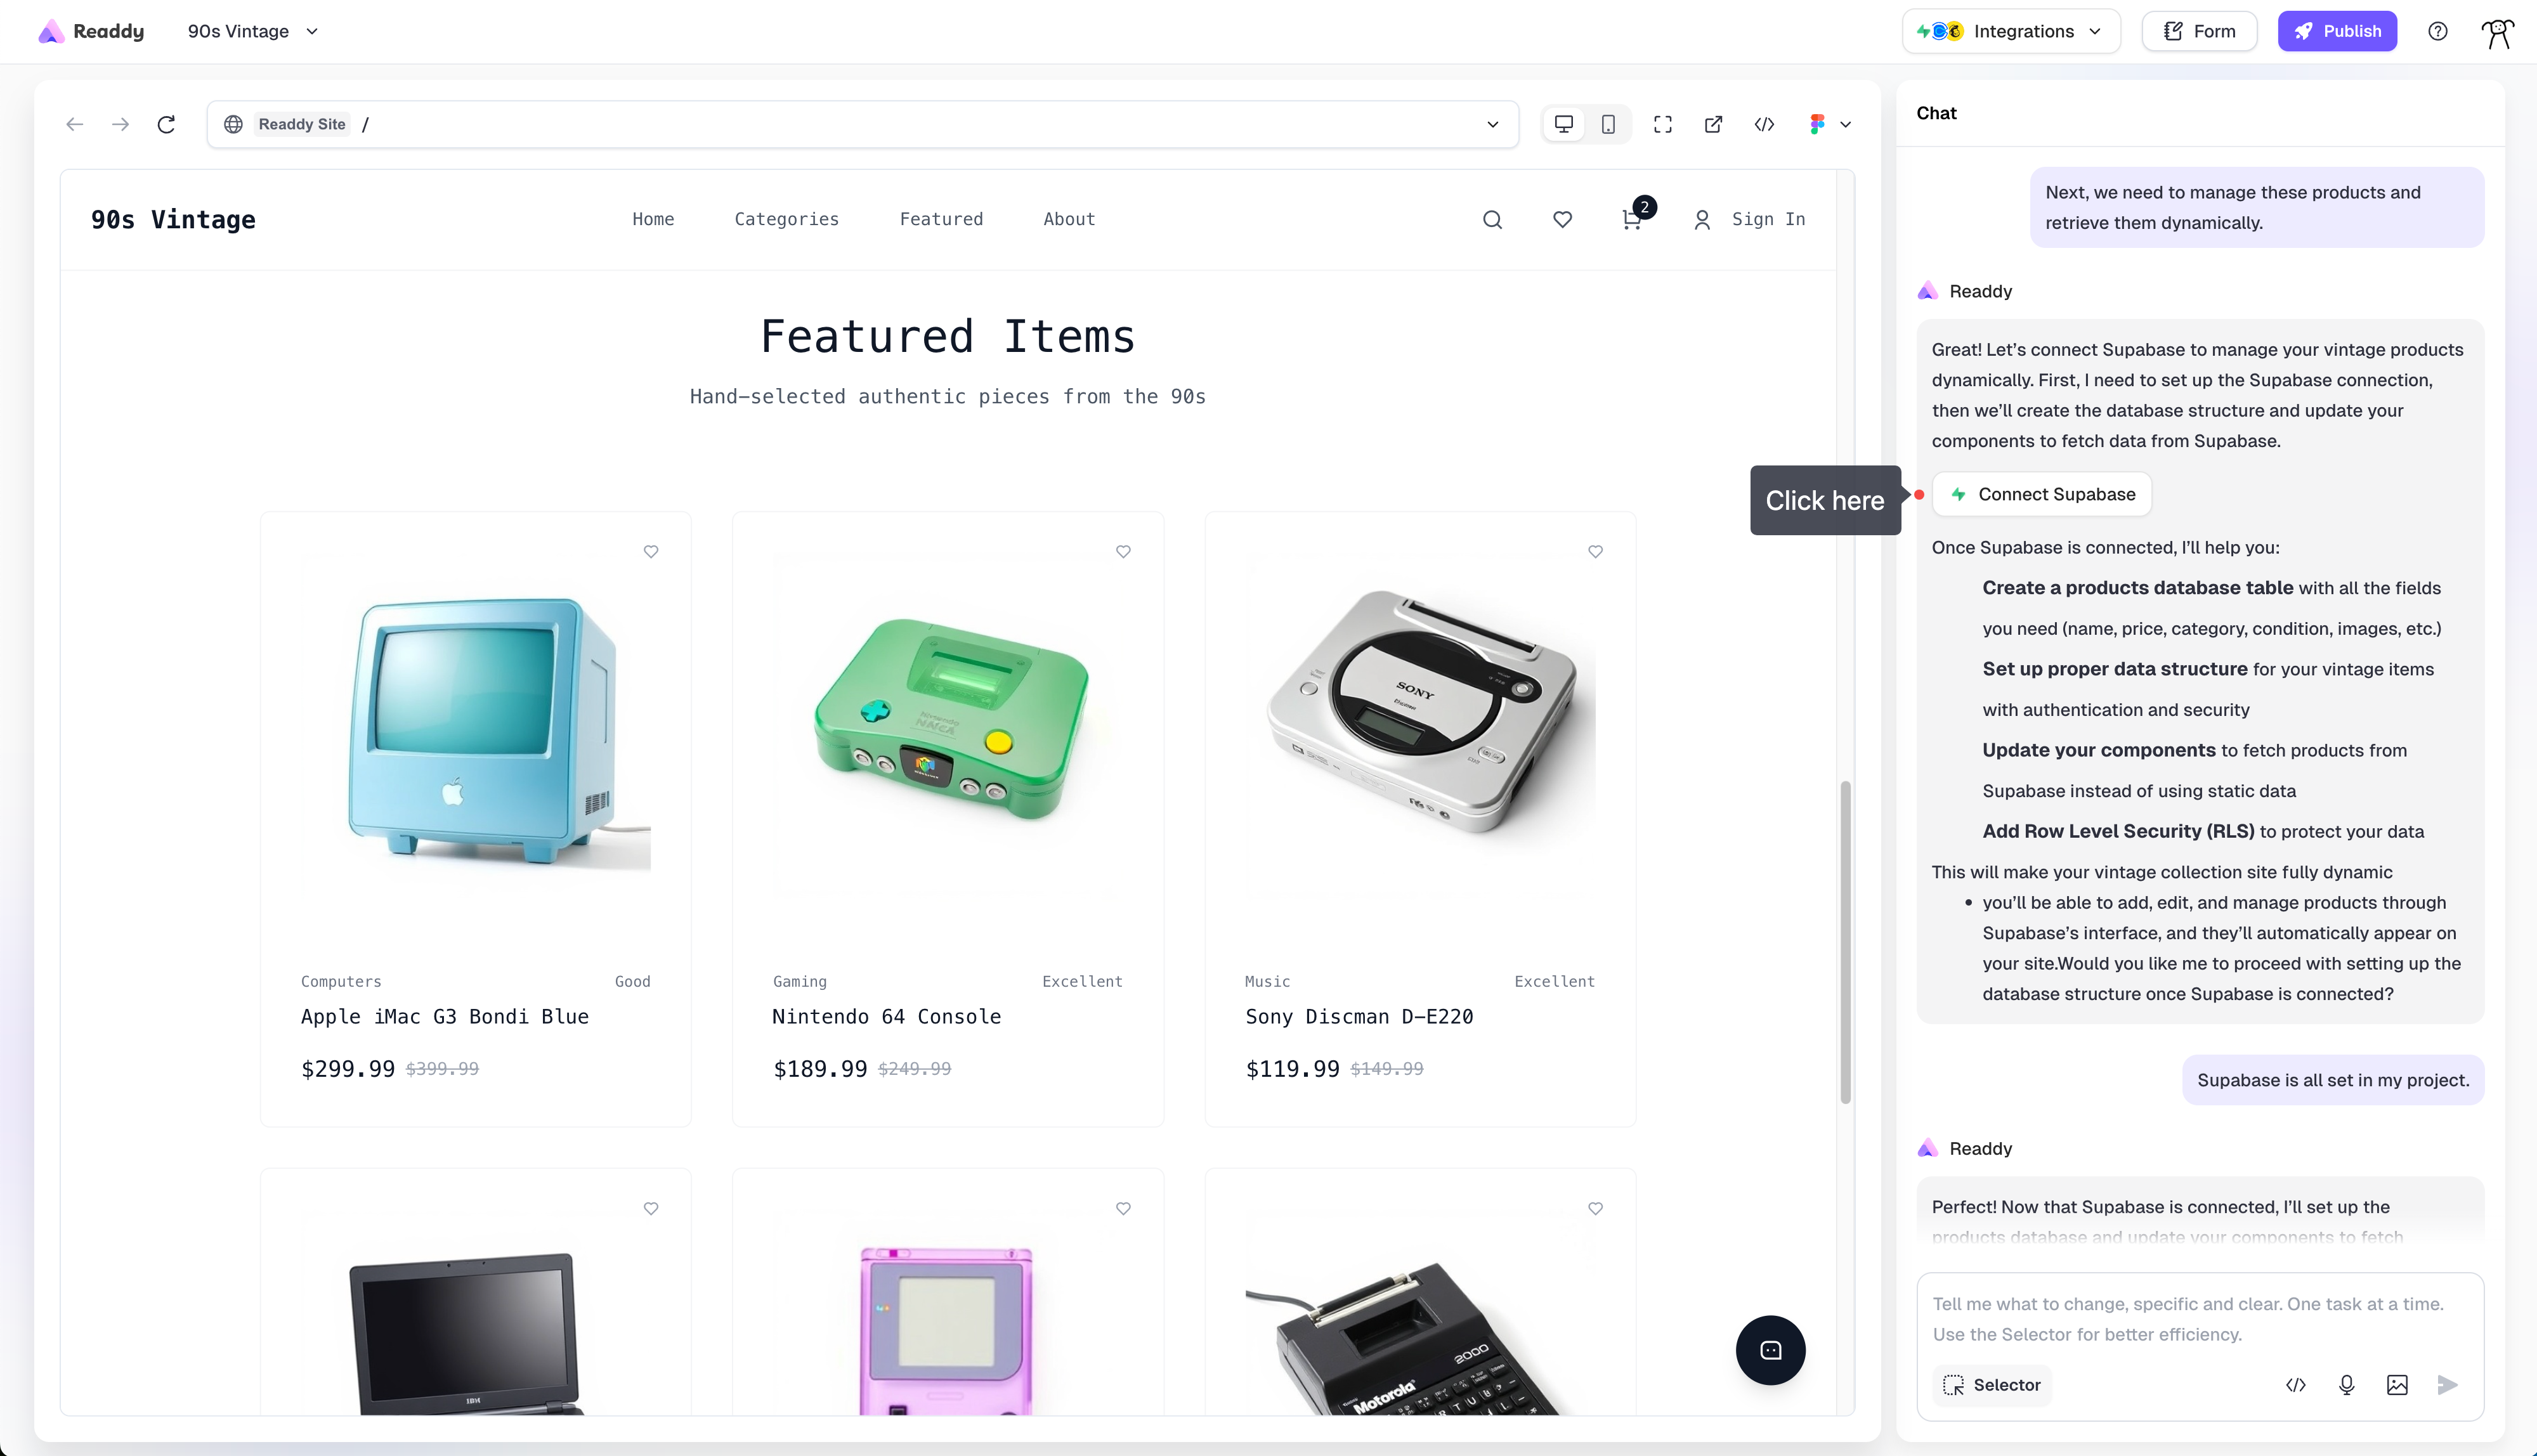
- Dynamically retrieving product information from database tables.
- Create data tables in Readdy: You can create data tables and product tools through conversation. For example:
- Automatic implementation: After receiving the request, Readdy will automatically implement the related UI and logic, generate database operation SQL, and automatically sync to Supabase for table creation and modification operations.
SQL is automatically generated by AI. To avoid dangerous operations from AI errors, the SQL will block dangerous operations like deleting tables/fields or clearing tables. If you need to delete tables or fields, you can do so in Supabase’s Table Editor.
Row Security Policy Check: Before launching your product, make sure to check the row security policies of your data tables. Row security policies define which users can read and write each row of data in the database.
When generating, Readdy AI will also create relatively secure row security policy requirements. However, for greater security, please make sure to check in Supabase’s Authentication > Policies before release.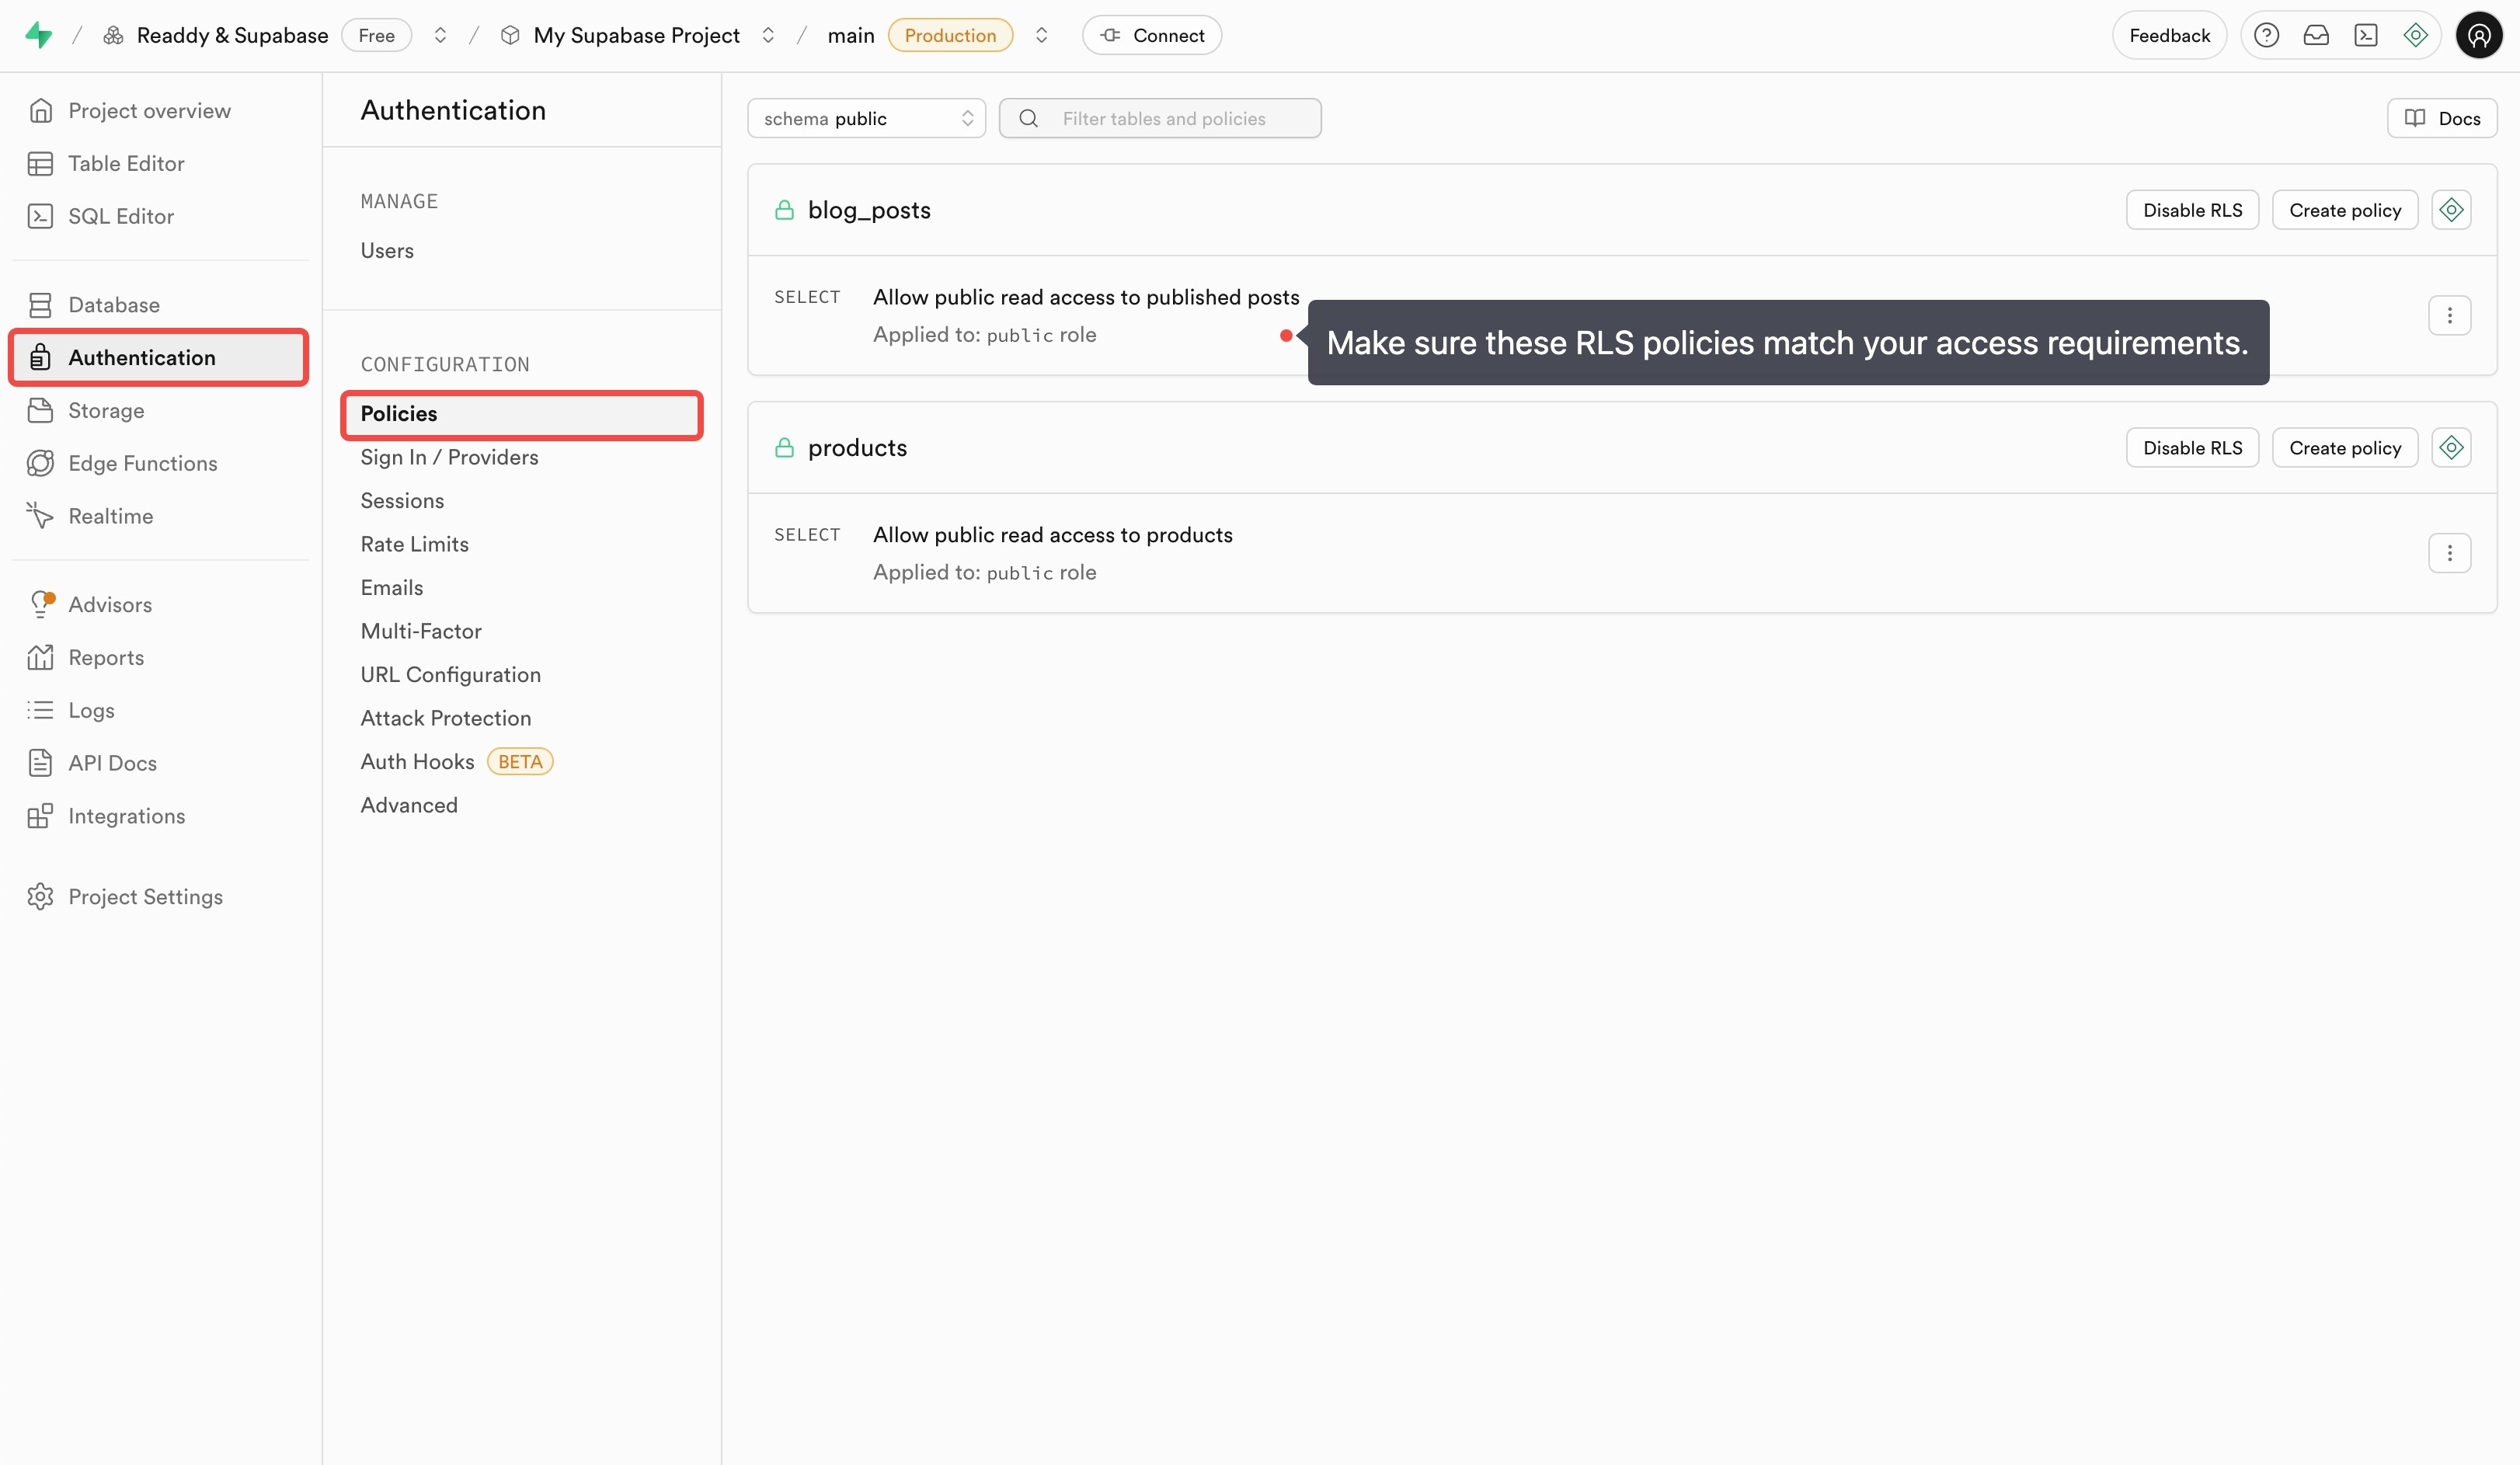
Edge Functions
In some product logic, you might need backend logic to help complete your product. For example:- Stripe payments: Process subscription payments, one-time purchases, and refunds
- AI service integration: Generate content, analyze images, or provide chatbot functionality
- Complex processing logic: Calculate pricing, process bulk data, or generate reports
- Third-party integrations: Send emails, SMS notifications, or sync with CRM systems
For API keys used in functions, make sure to save them securely in Edge Functions > Secrets in the Supabase dashboard to ensure key security. Do not directly input keys to AI in conversations.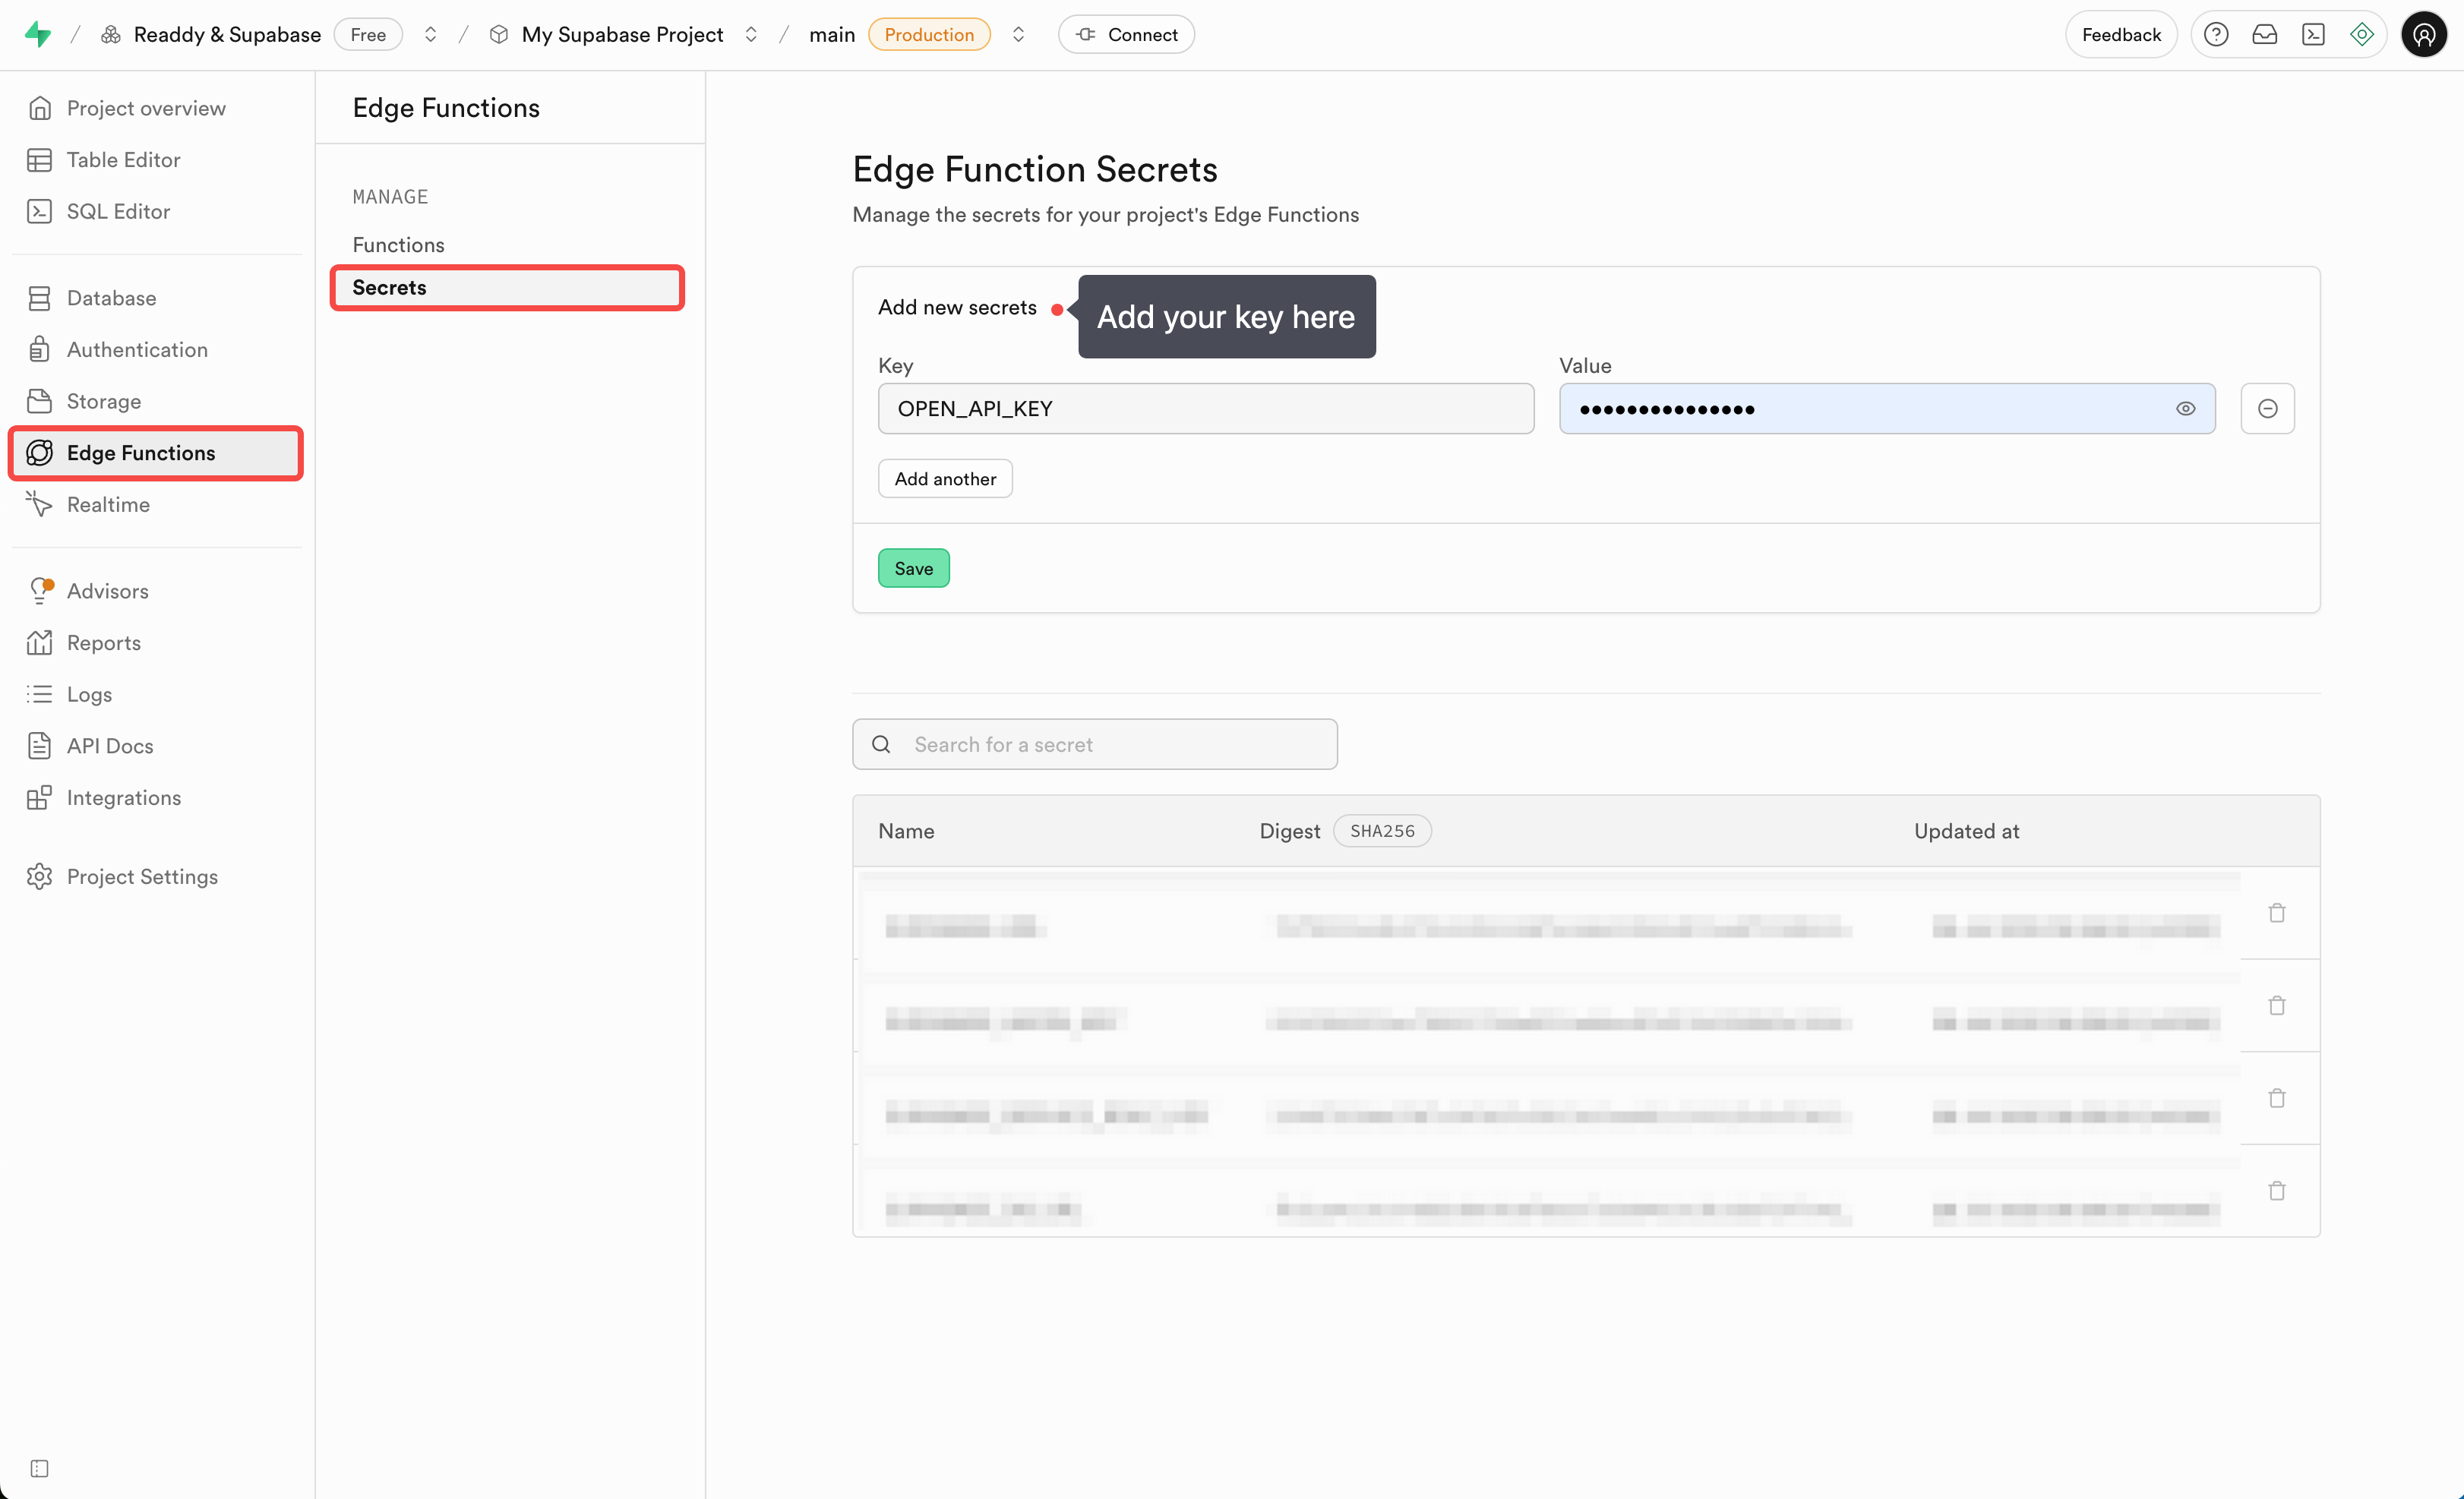
File Storage
Supabase provides 1GB of file storage space for storing images, PDFs, and other files. For example, if your application needs users to upload avatars or files. You can add a file upload component through conversation in Readdy, which will upload files to Supabase Storage. Your product pages will also use these file links for display.Switch or Remove a Supabase Account Connection
Unless necessary, we generally do not recommend switching Supabase accounts. After switching, you will usually need to re-check project bindings, authentication, database, Storage, Edge Functions, and related integrations, which can take additional time to verify.
When You Might Need This
- You want to connect the current Readdy project to a different Supabase account
- The current Supabase authorization was granted to the wrong account and needs to be redone
- The current Readdy project is connected to the wrong Supabase project
- Account ownership has changed and a new Supabase admin account should be used
Steps
If you want to switch to another Supabase account, or stop using the current one with Readdy, follow these steps:Step 1: Remove the Readdy app in Supabase
First, sign in to the Supabase account that is currently connected. You can access it here: Supabase DashboardGo to Settings > OAuth Apps > Authorized apps, find the authorized Readdy app, and remove it.If you plan to switch to another Supabase account, complete this step first, then sign out and sign in to the target account.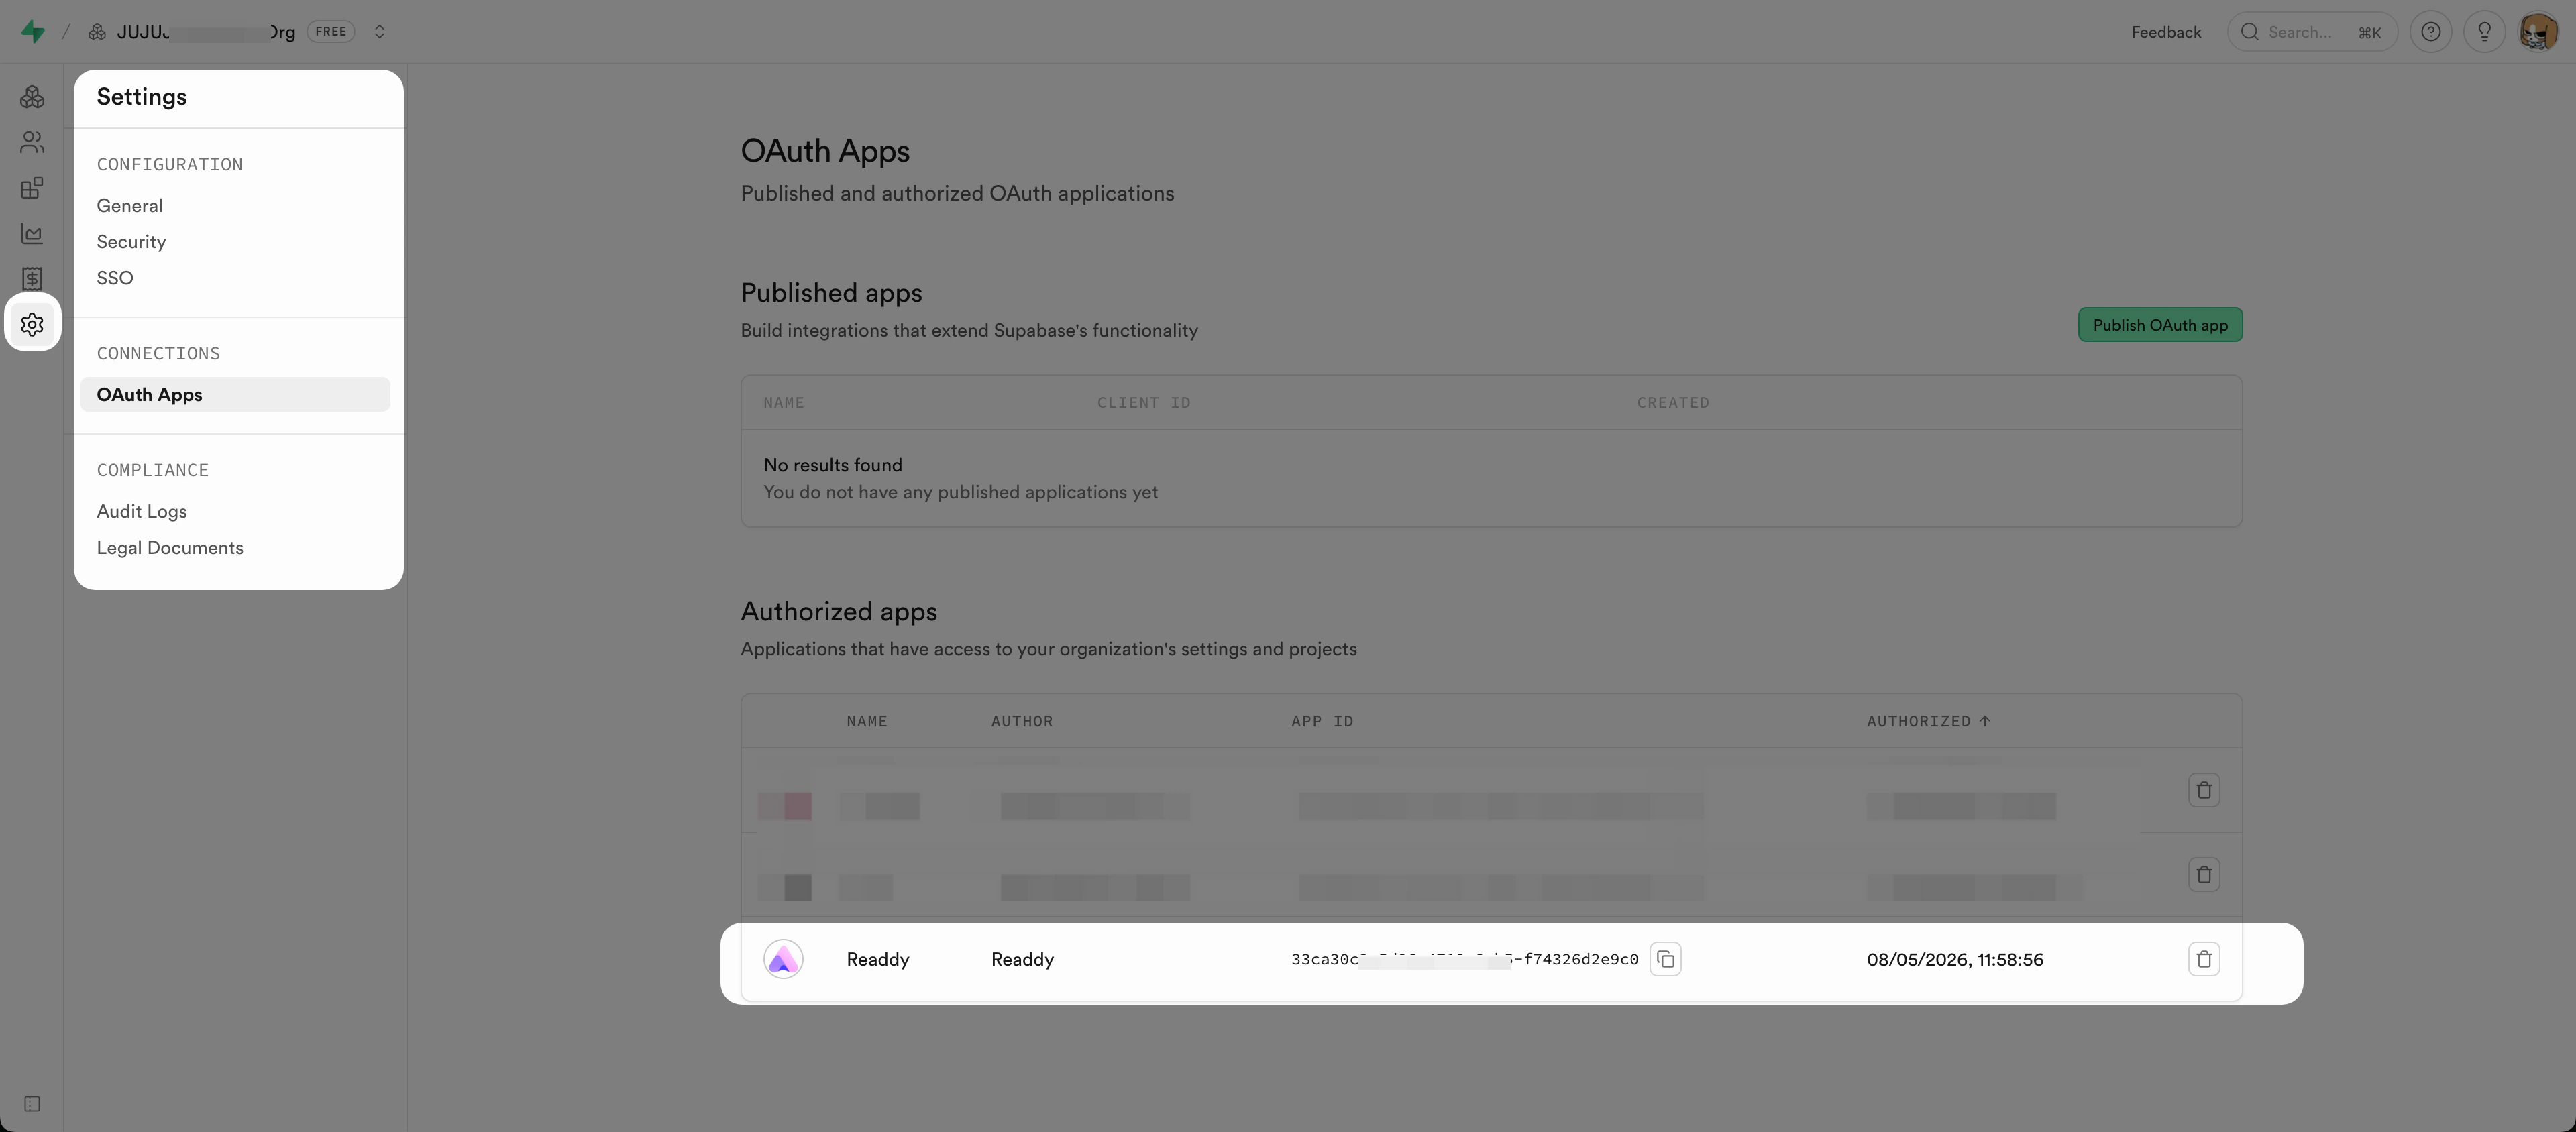
Step 2: Return to Readdy and reconnect
After removing the app, return to Readdy, refresh the current page, then click Connect Supabase to start the connection flow again.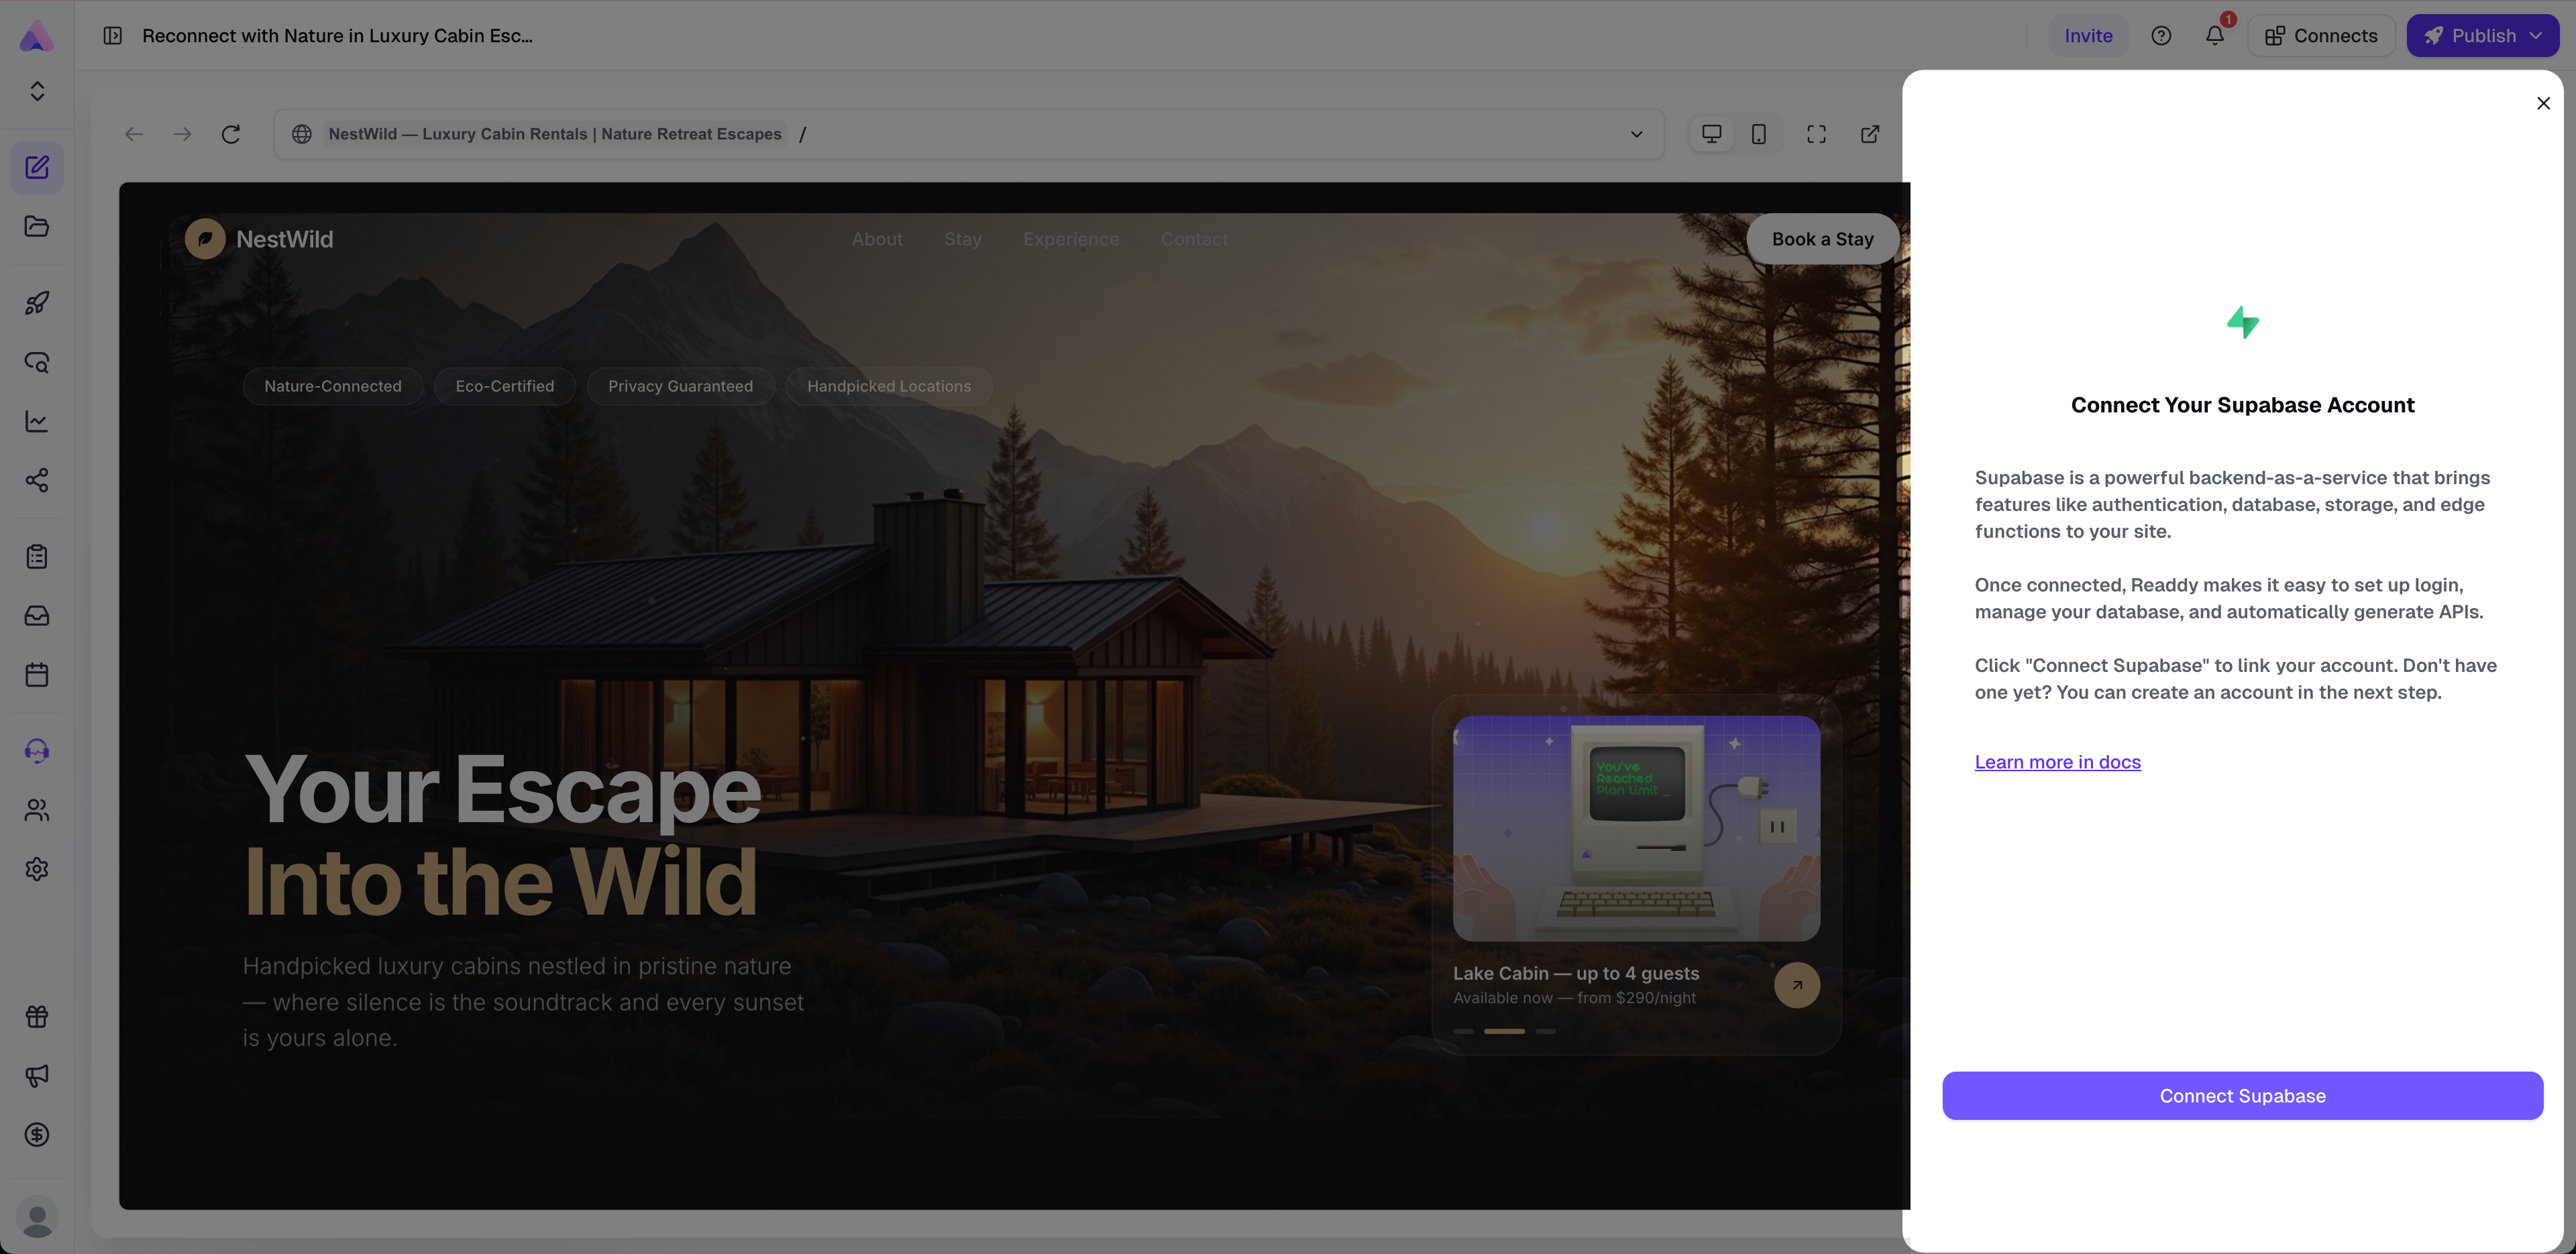
If Readdy does not immediately show the reconnect state after you return, refreshing the page usually fixes it.
Step 3: Choose an organization and authorize
On the Supabase authorization page, select the Organization you want to authorize, then click Authorize Readdy.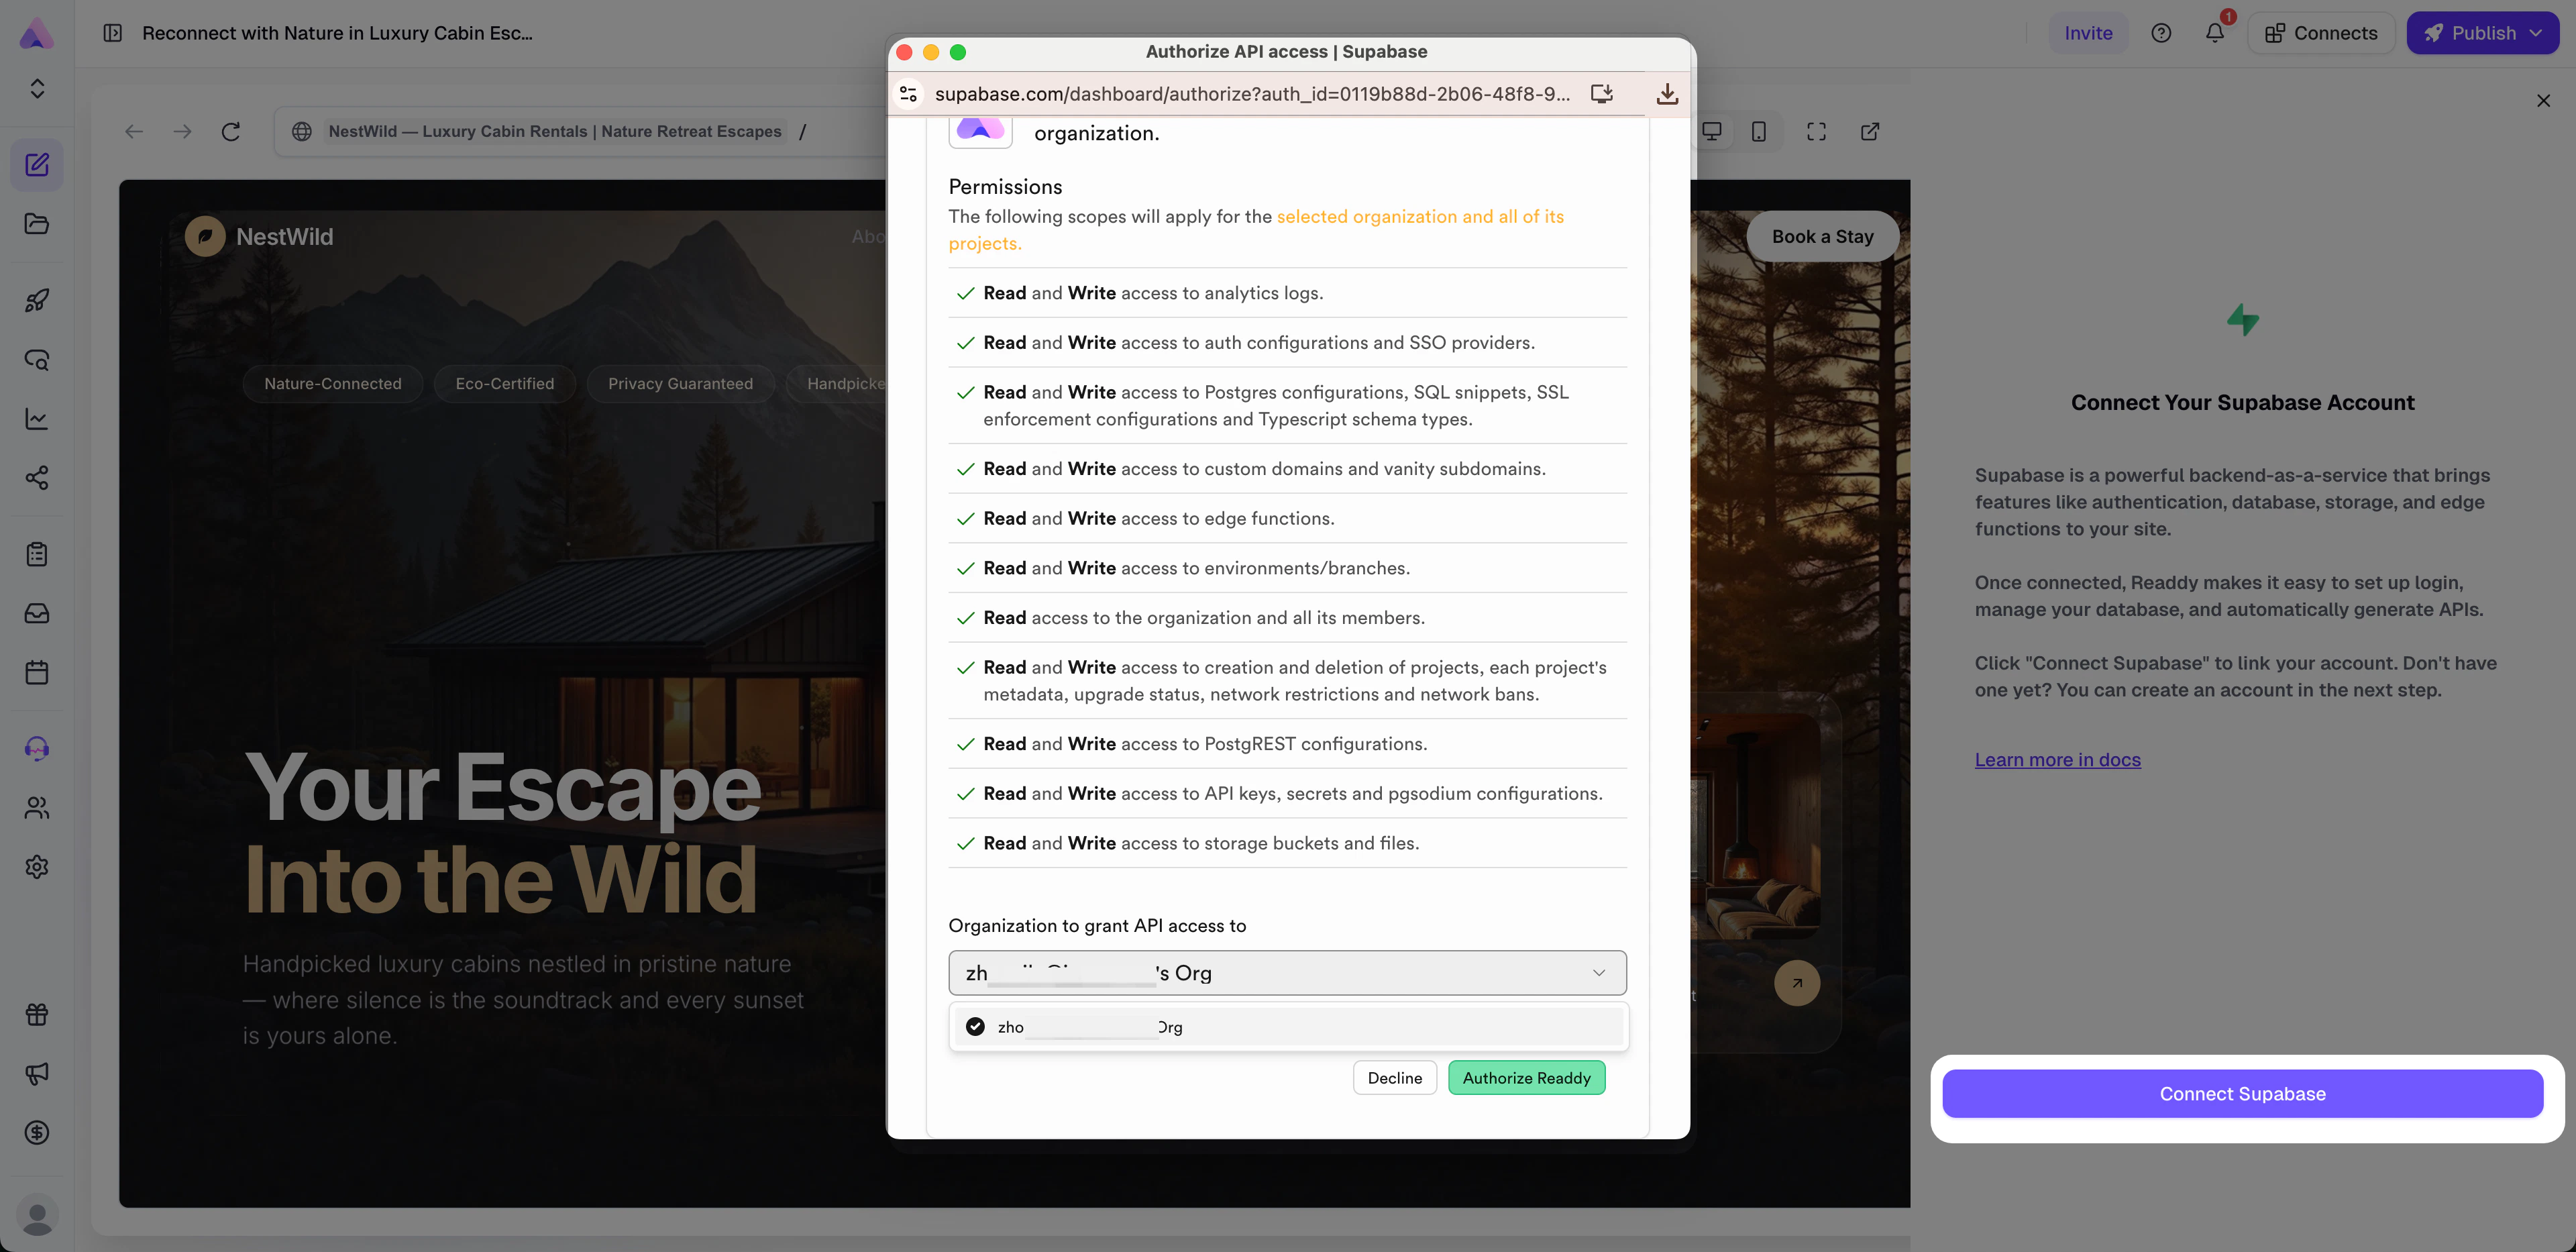
Simply signing out of Supabase in the browser and switching to another account is usually not enough to trigger the full reconnection flow in Readdy. You need to first remove the authorized Readdy app from the original Supabase account.
The Supabase dashboard UI may change over time. Please use the actual labels and navigation shown in your Supabase account if they differ slightly from this guide.
Important Notes
- After switching accounts or removing authorization, any Readdy features that depend on Supabase may be affected, including user sign-in / sign-up, database reads and writes, form submissions, file uploads to Supabase Storage, Edge Functions, and integrations that rely on Supabase, such as Stripe, PayPal, and Resend.
- Switching accounts or removing authorization will not automatically delete existing database tables, auth users, Storage files, Edge Functions, or Secrets in Supabase.
- If you reconnect to a different Supabase project, existing data and configuration will not be migrated automatically. Please verify the migration status yourself.
- After reconnecting, we recommend checking Redirect URLs, Auth Providers, RLS Policies, Storage Buckets, Edge Functions, and Secrets again to make sure everything is configured correctly.
- Under the current credit rules, authorizing a Supabase account itself does not consume credits. However, connecting or switching a specific Supabase project may consume credits.