What you need before you start
Accounts & project info- A Google Cloud account (to create the OAuth app)
- A Supabase project (you can create a new one; the free tier is fine)
- A Readdy project (to build and publish your site)
- Before going live, prepare links to your Privacy Policy and Terms of Service to add to the Google consent screen.
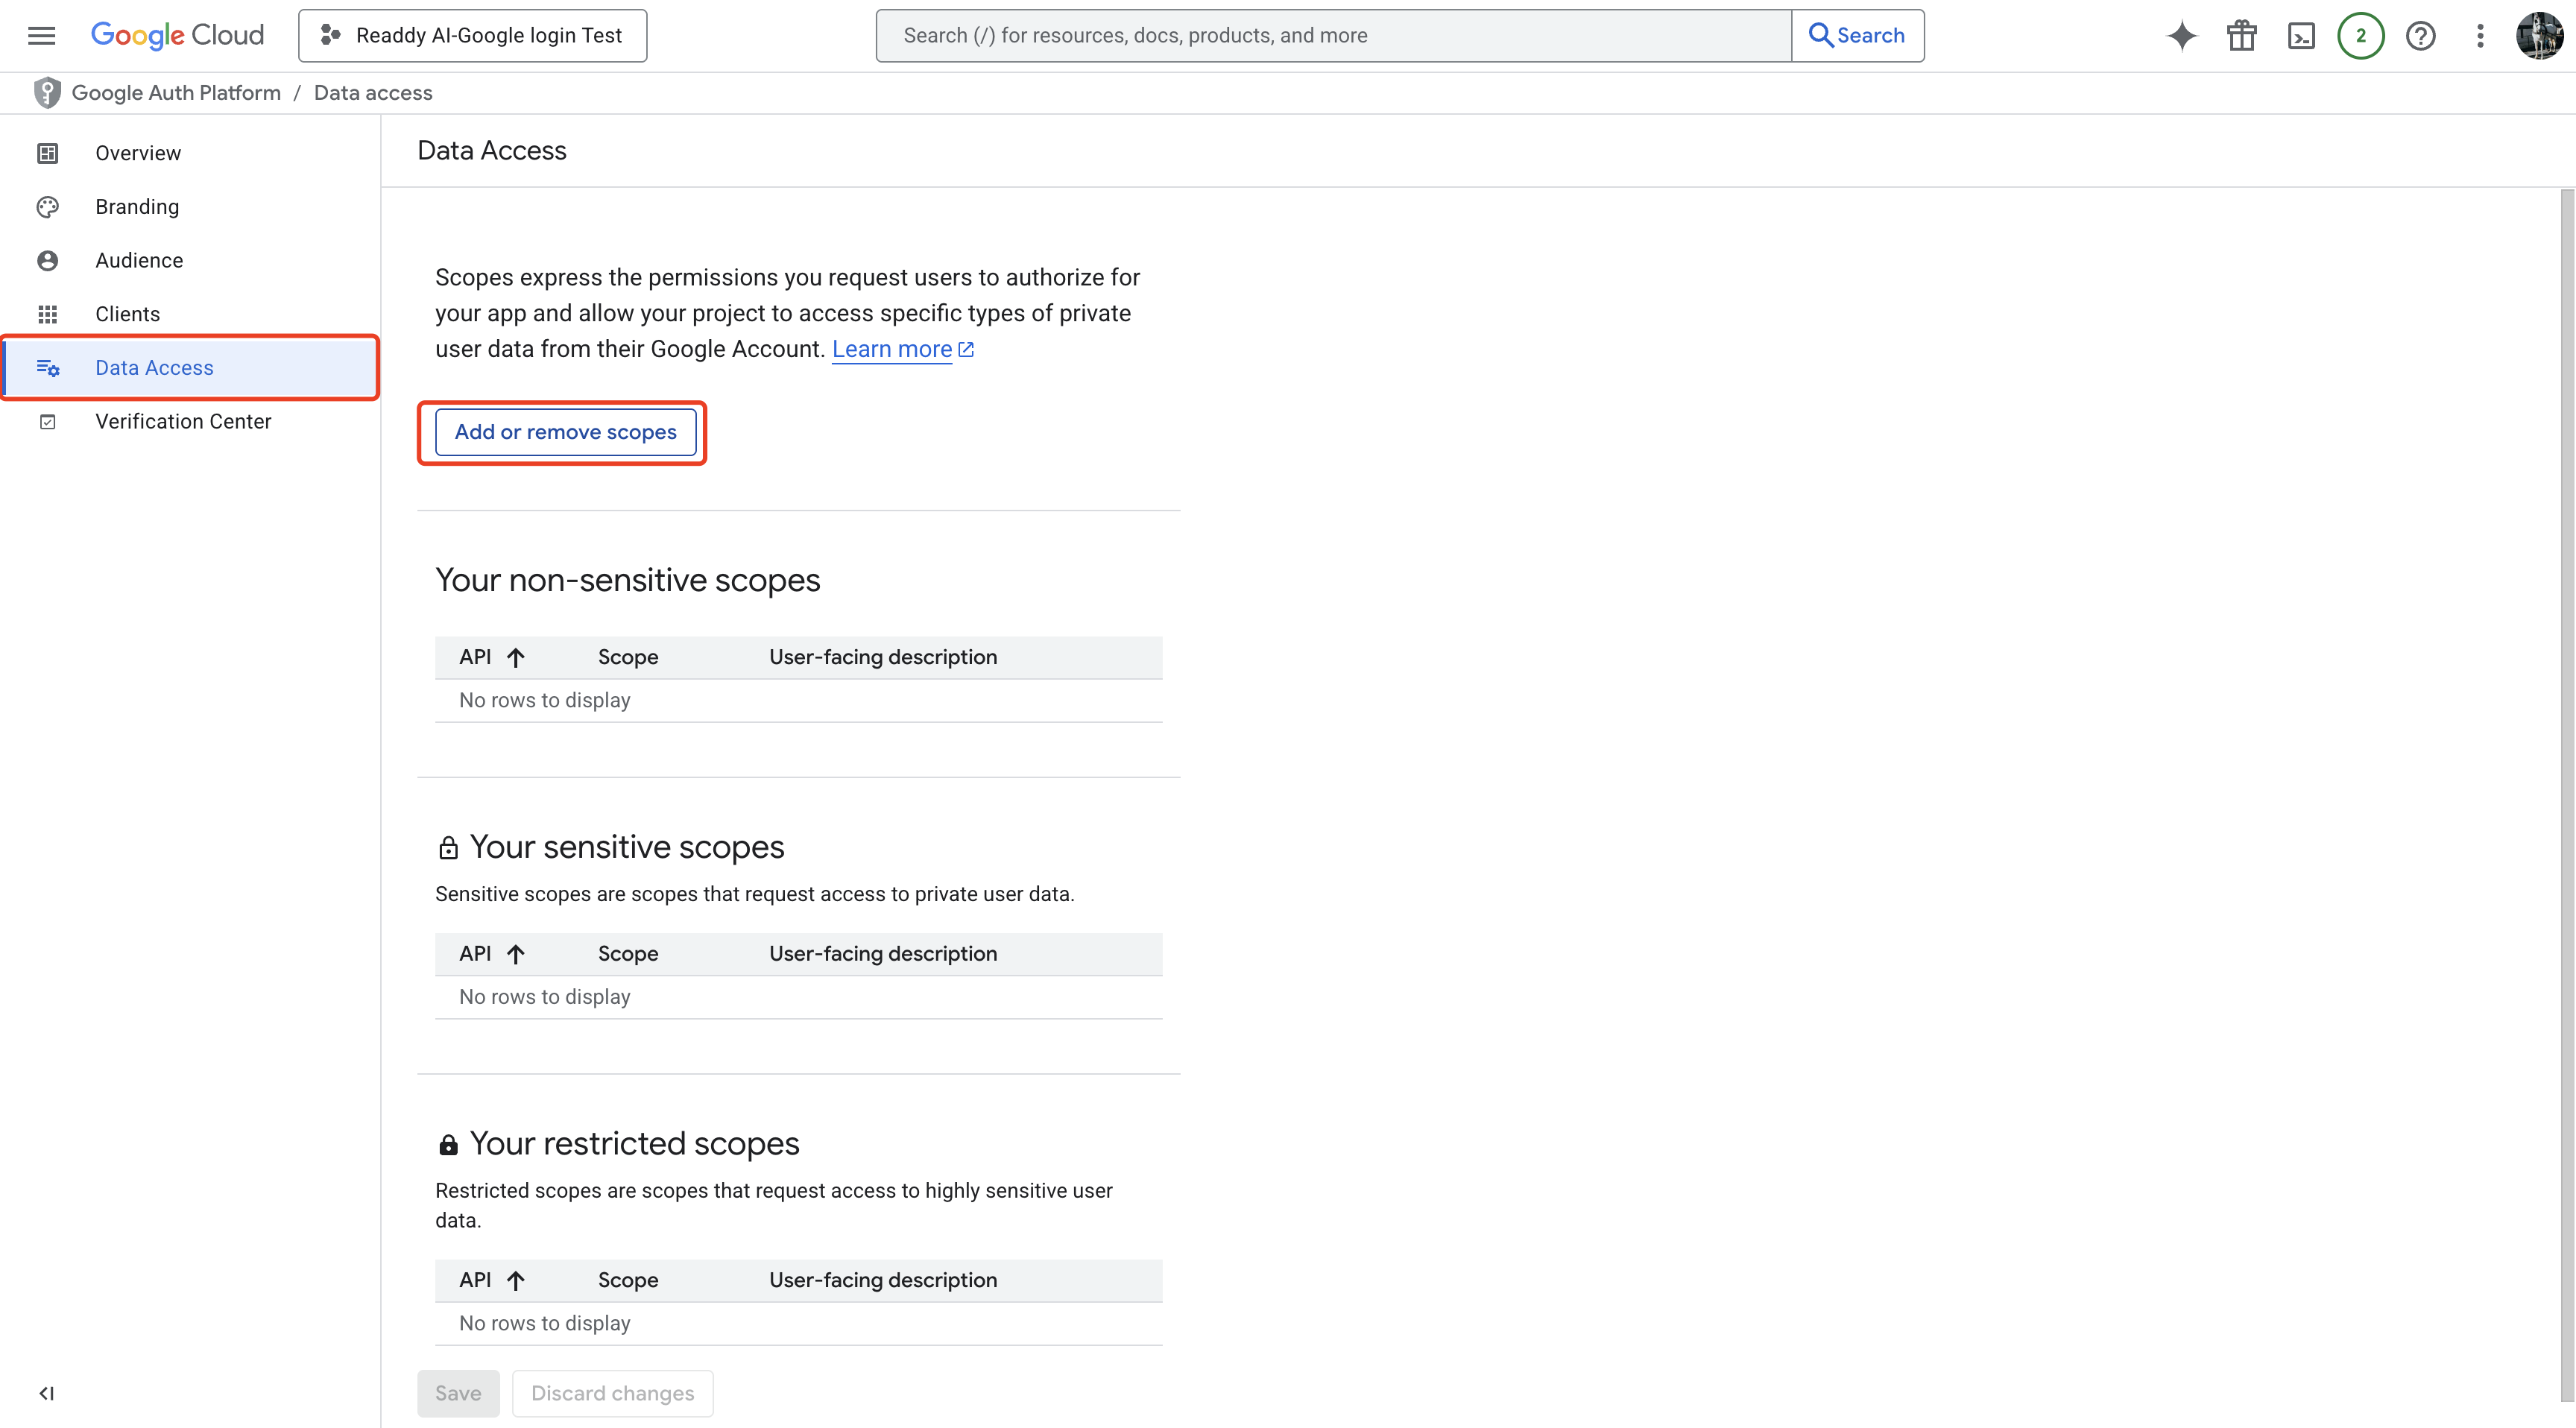
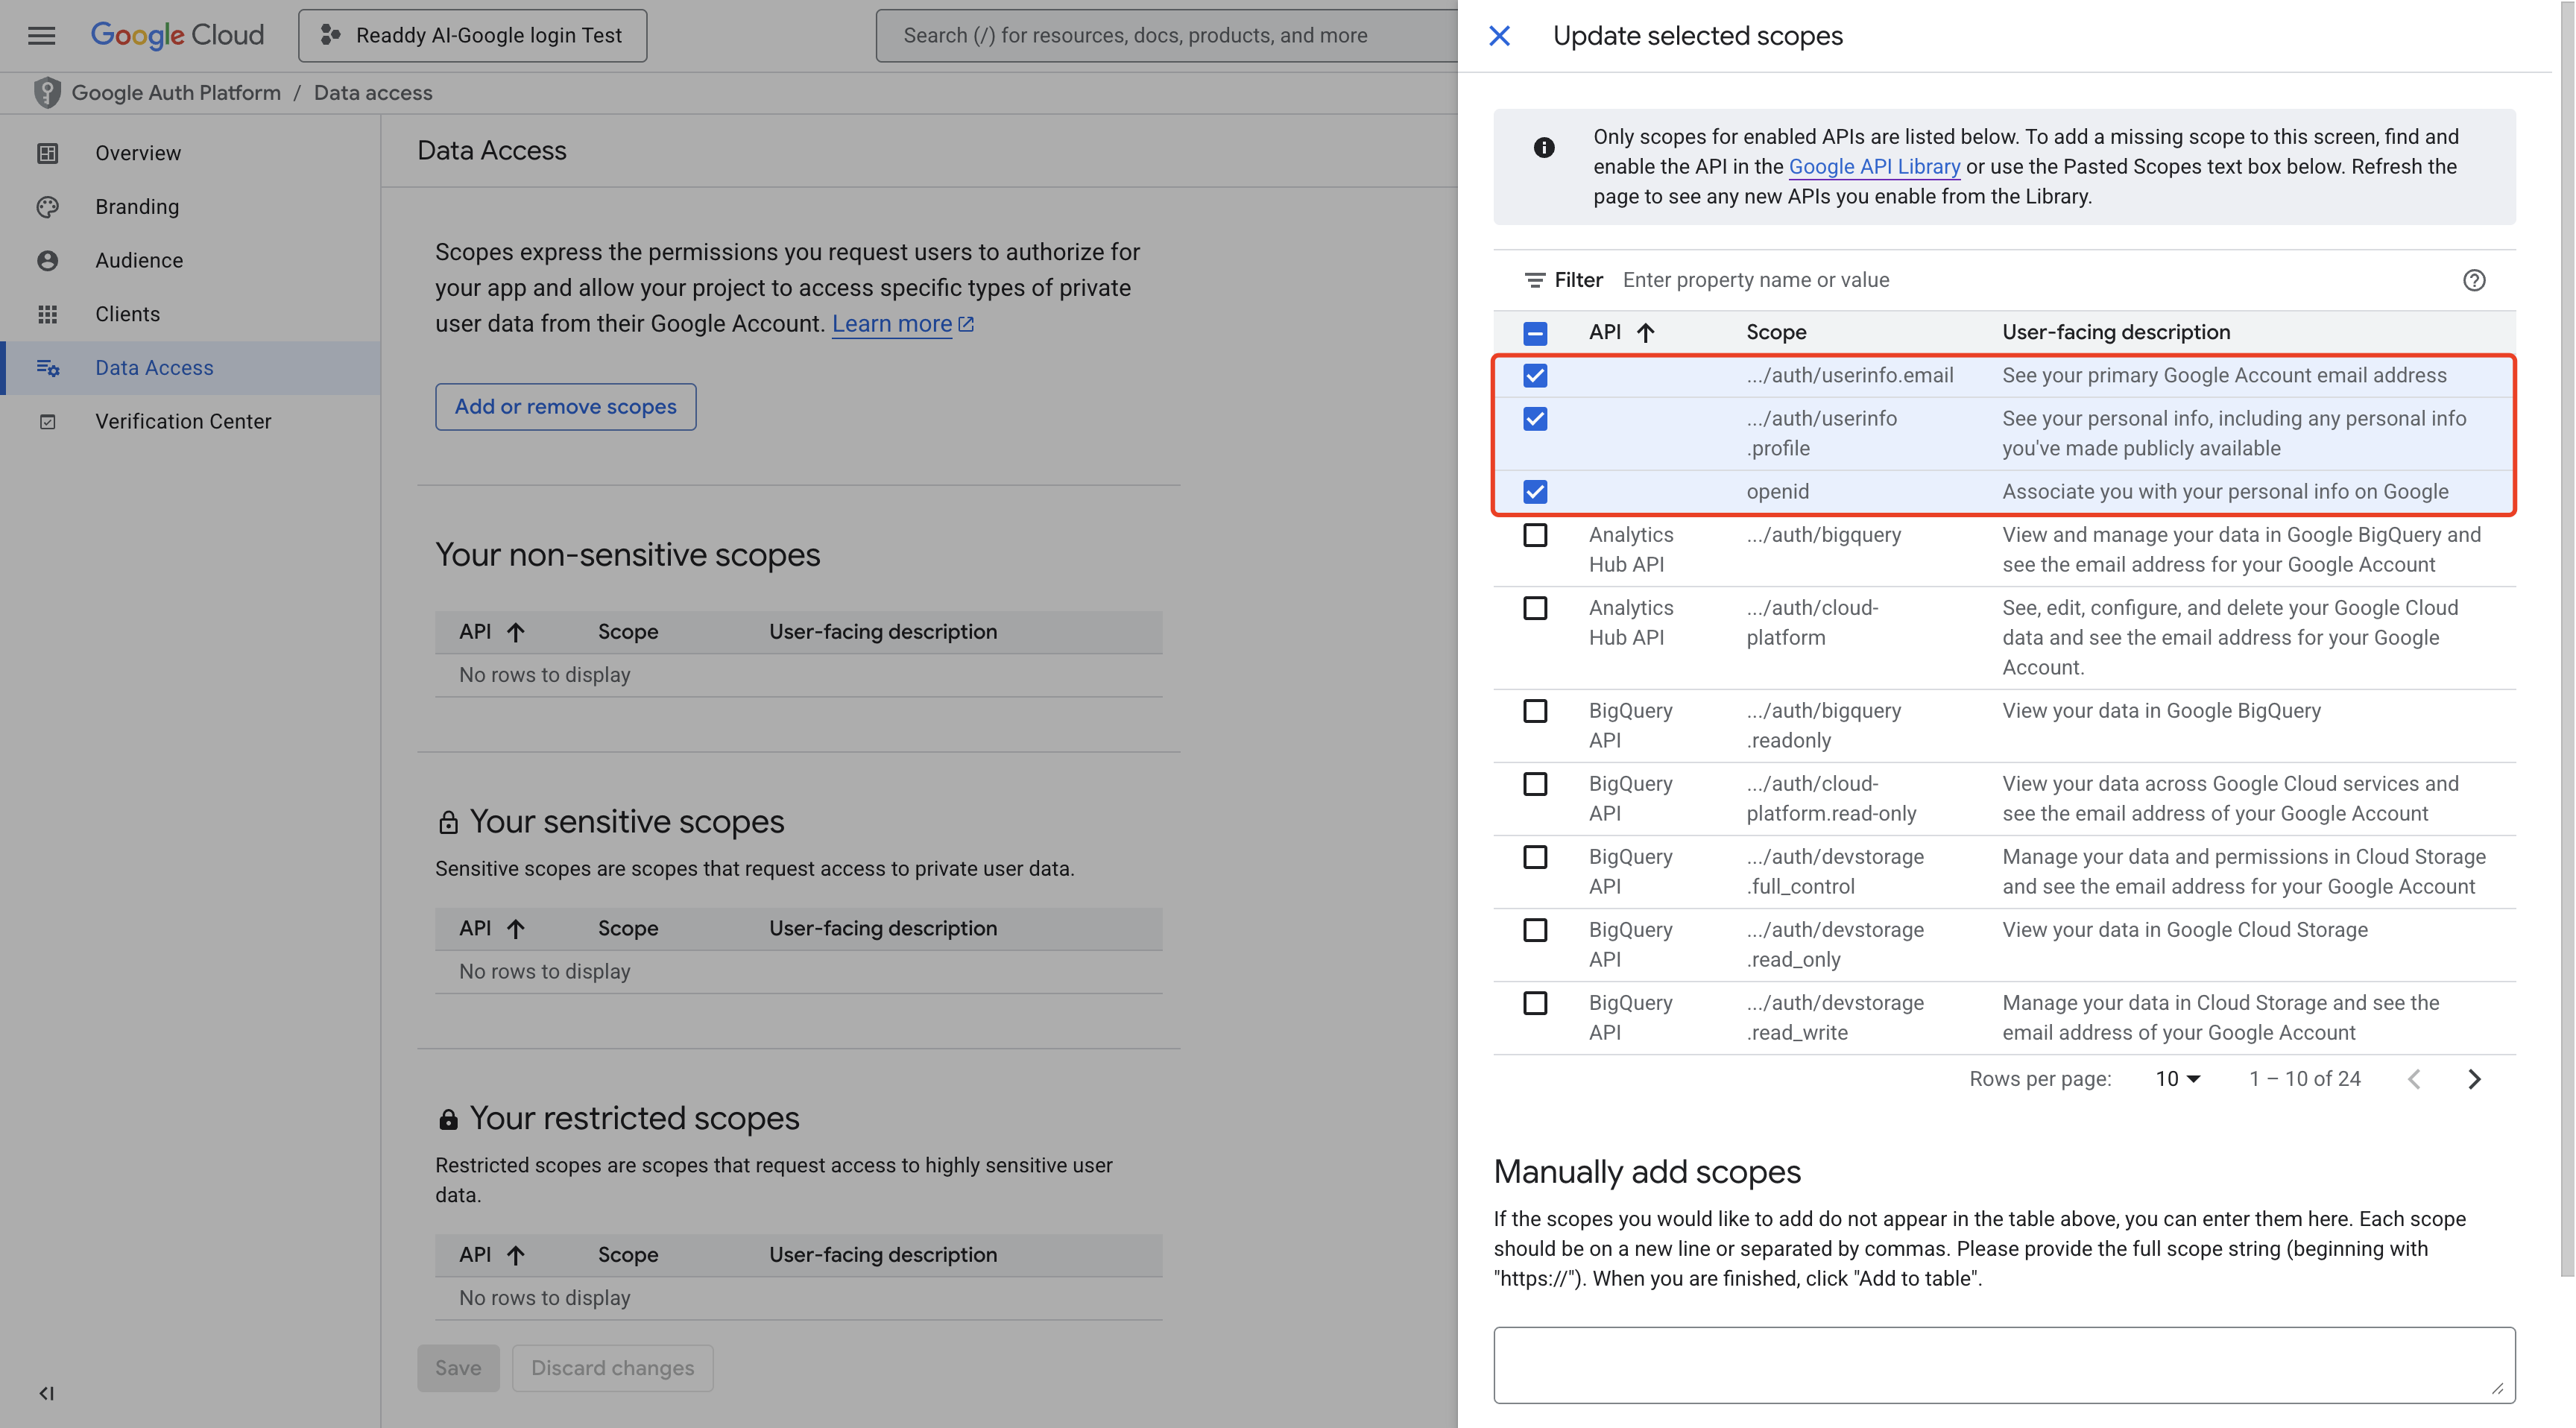
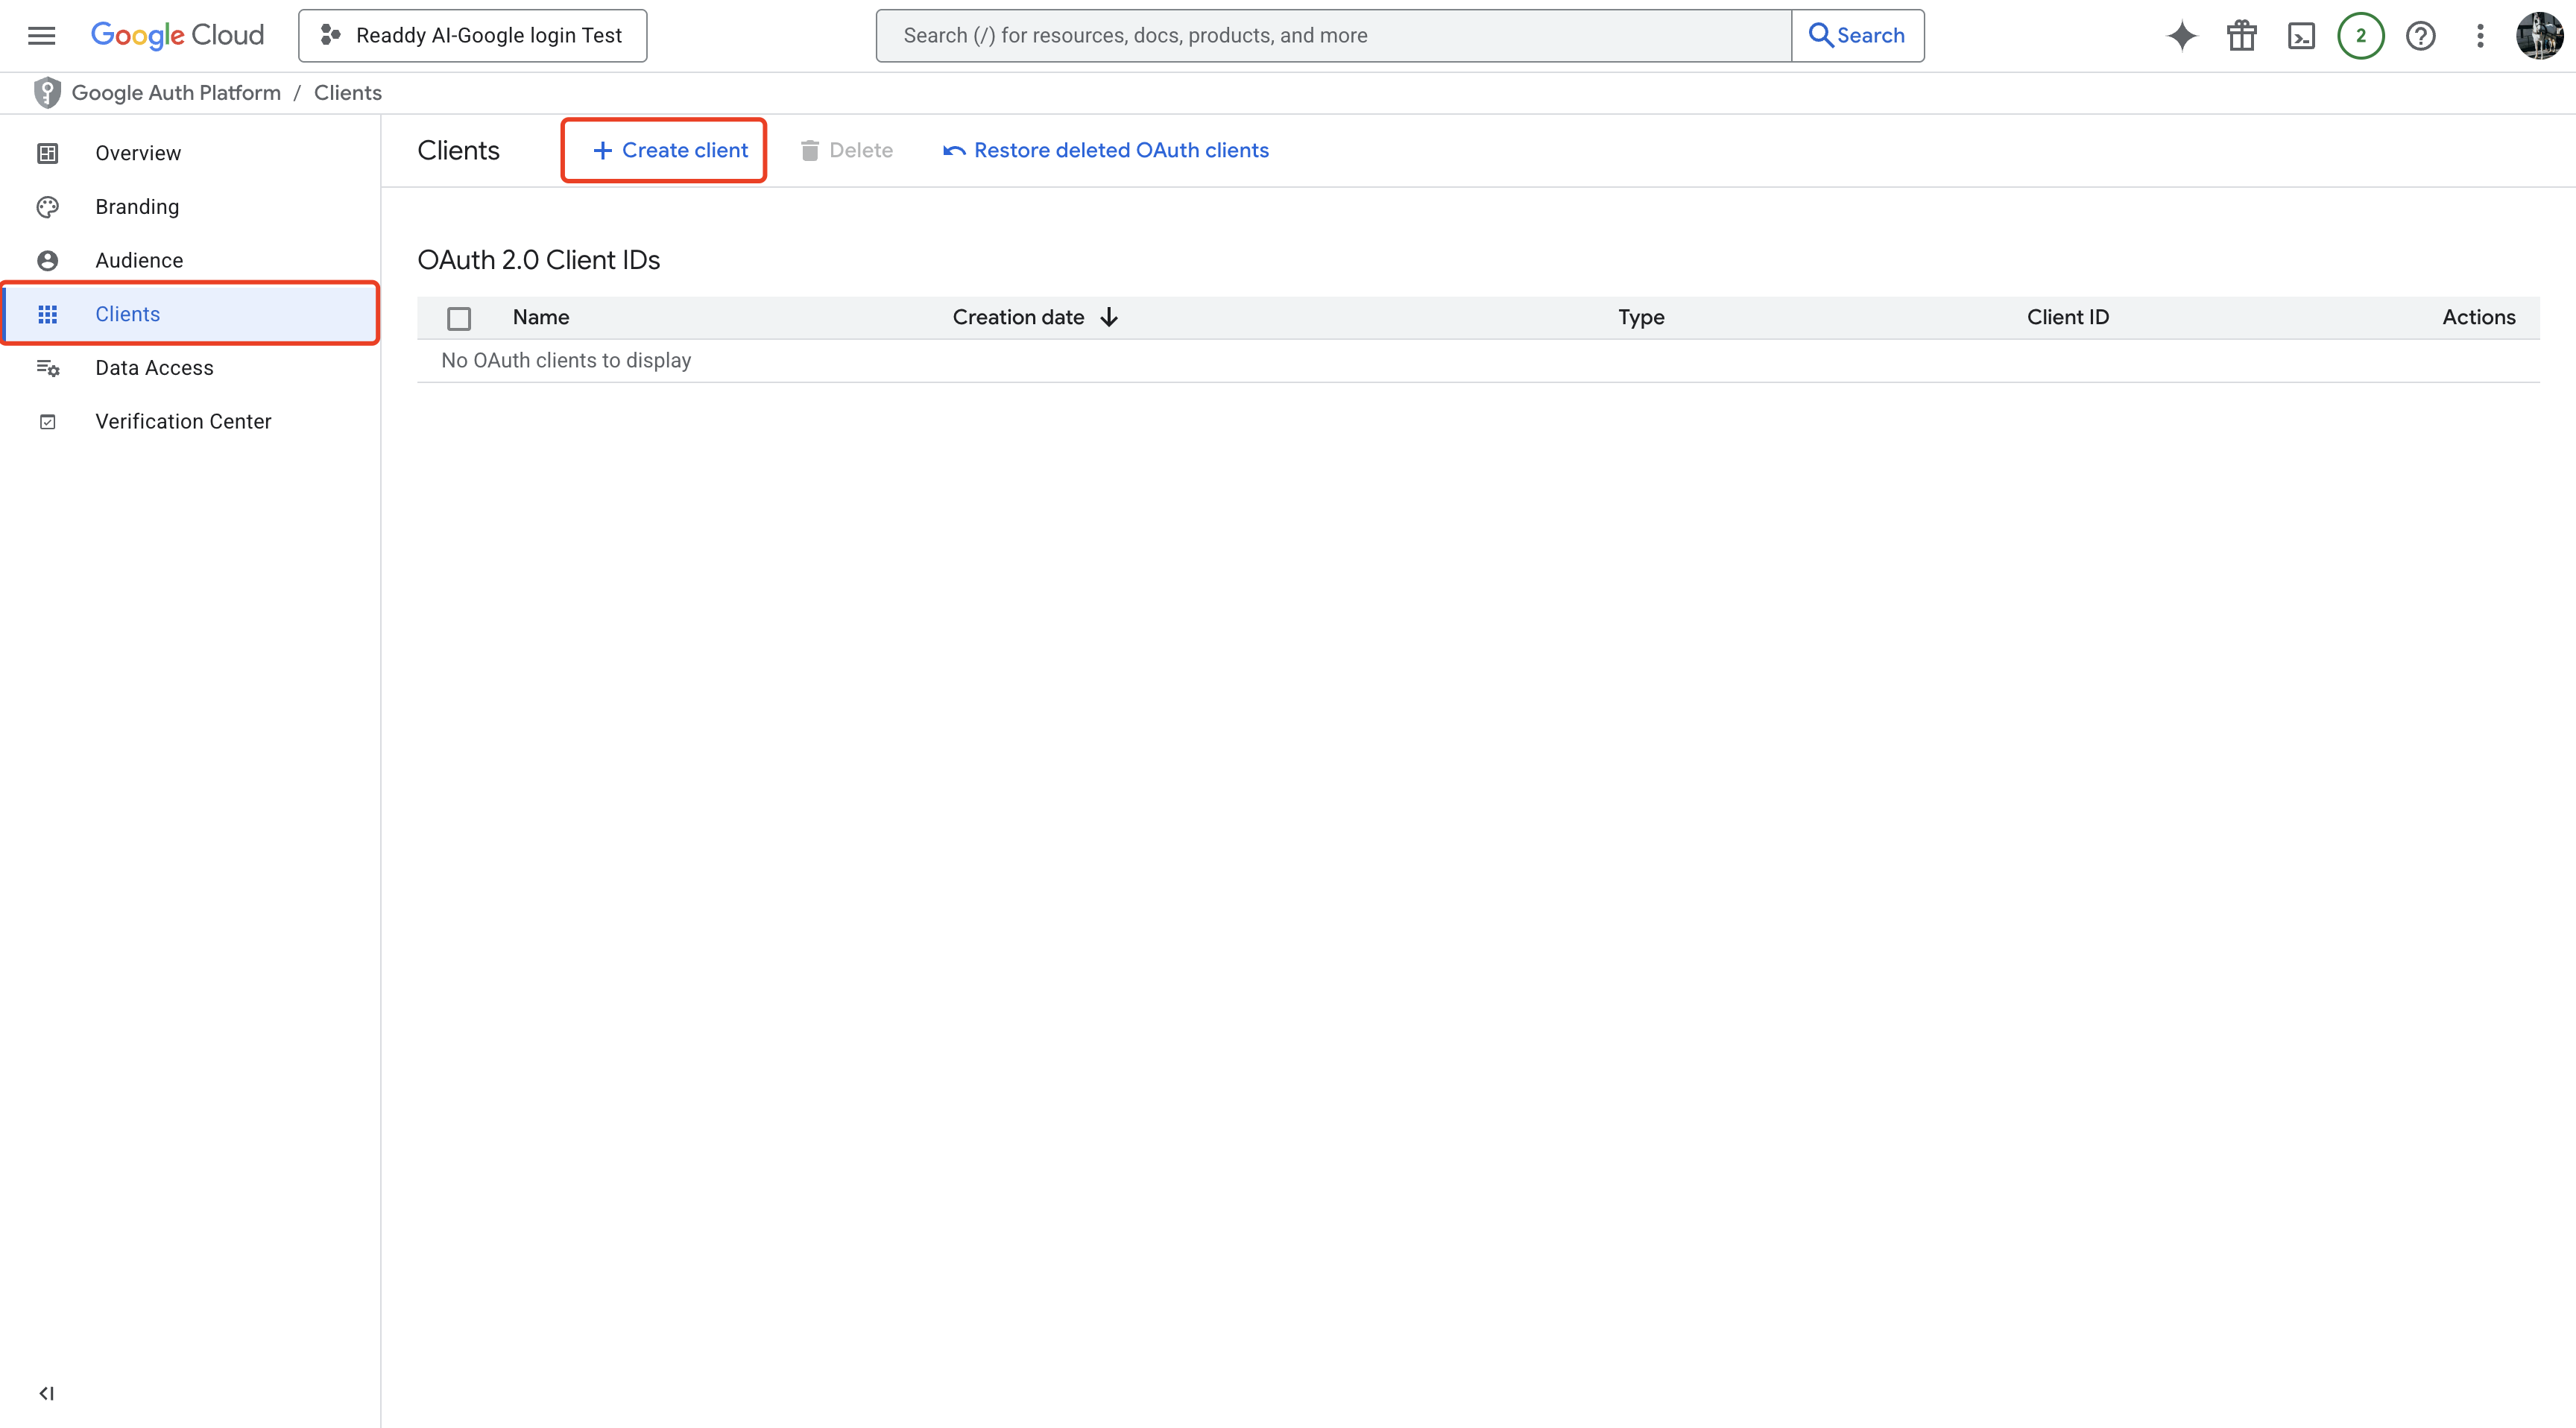
Create and configure OAuth in Google Cloud
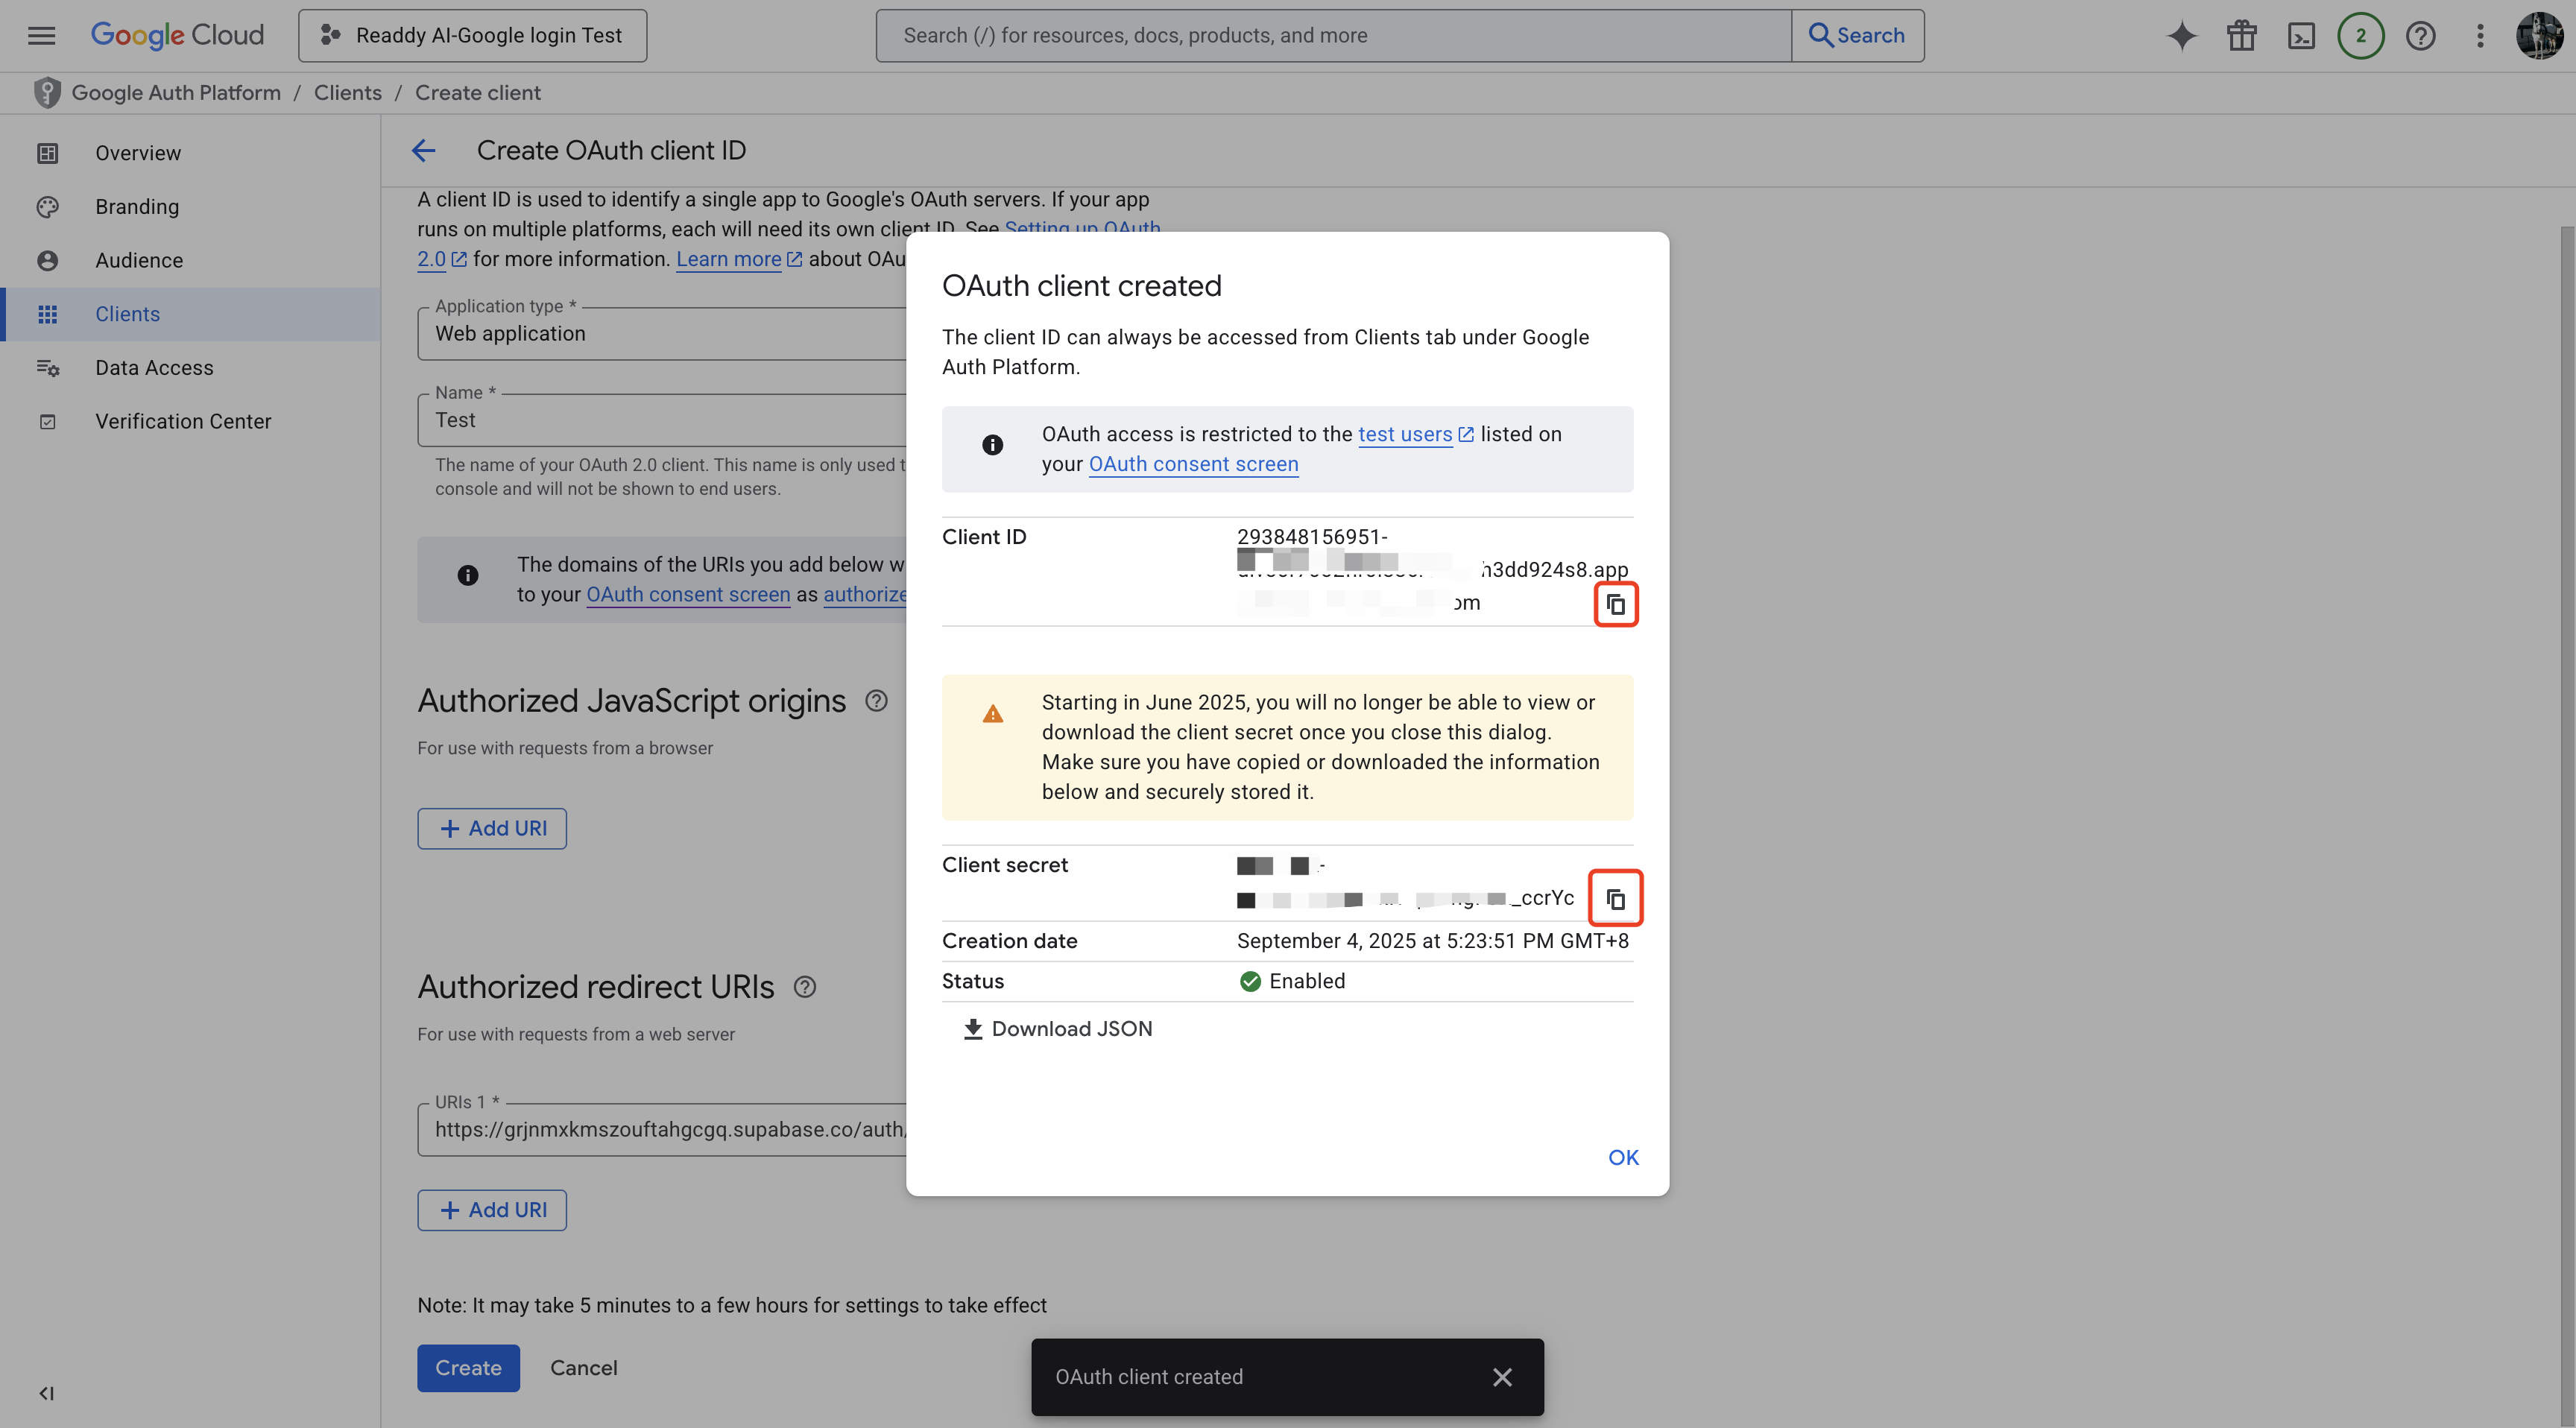
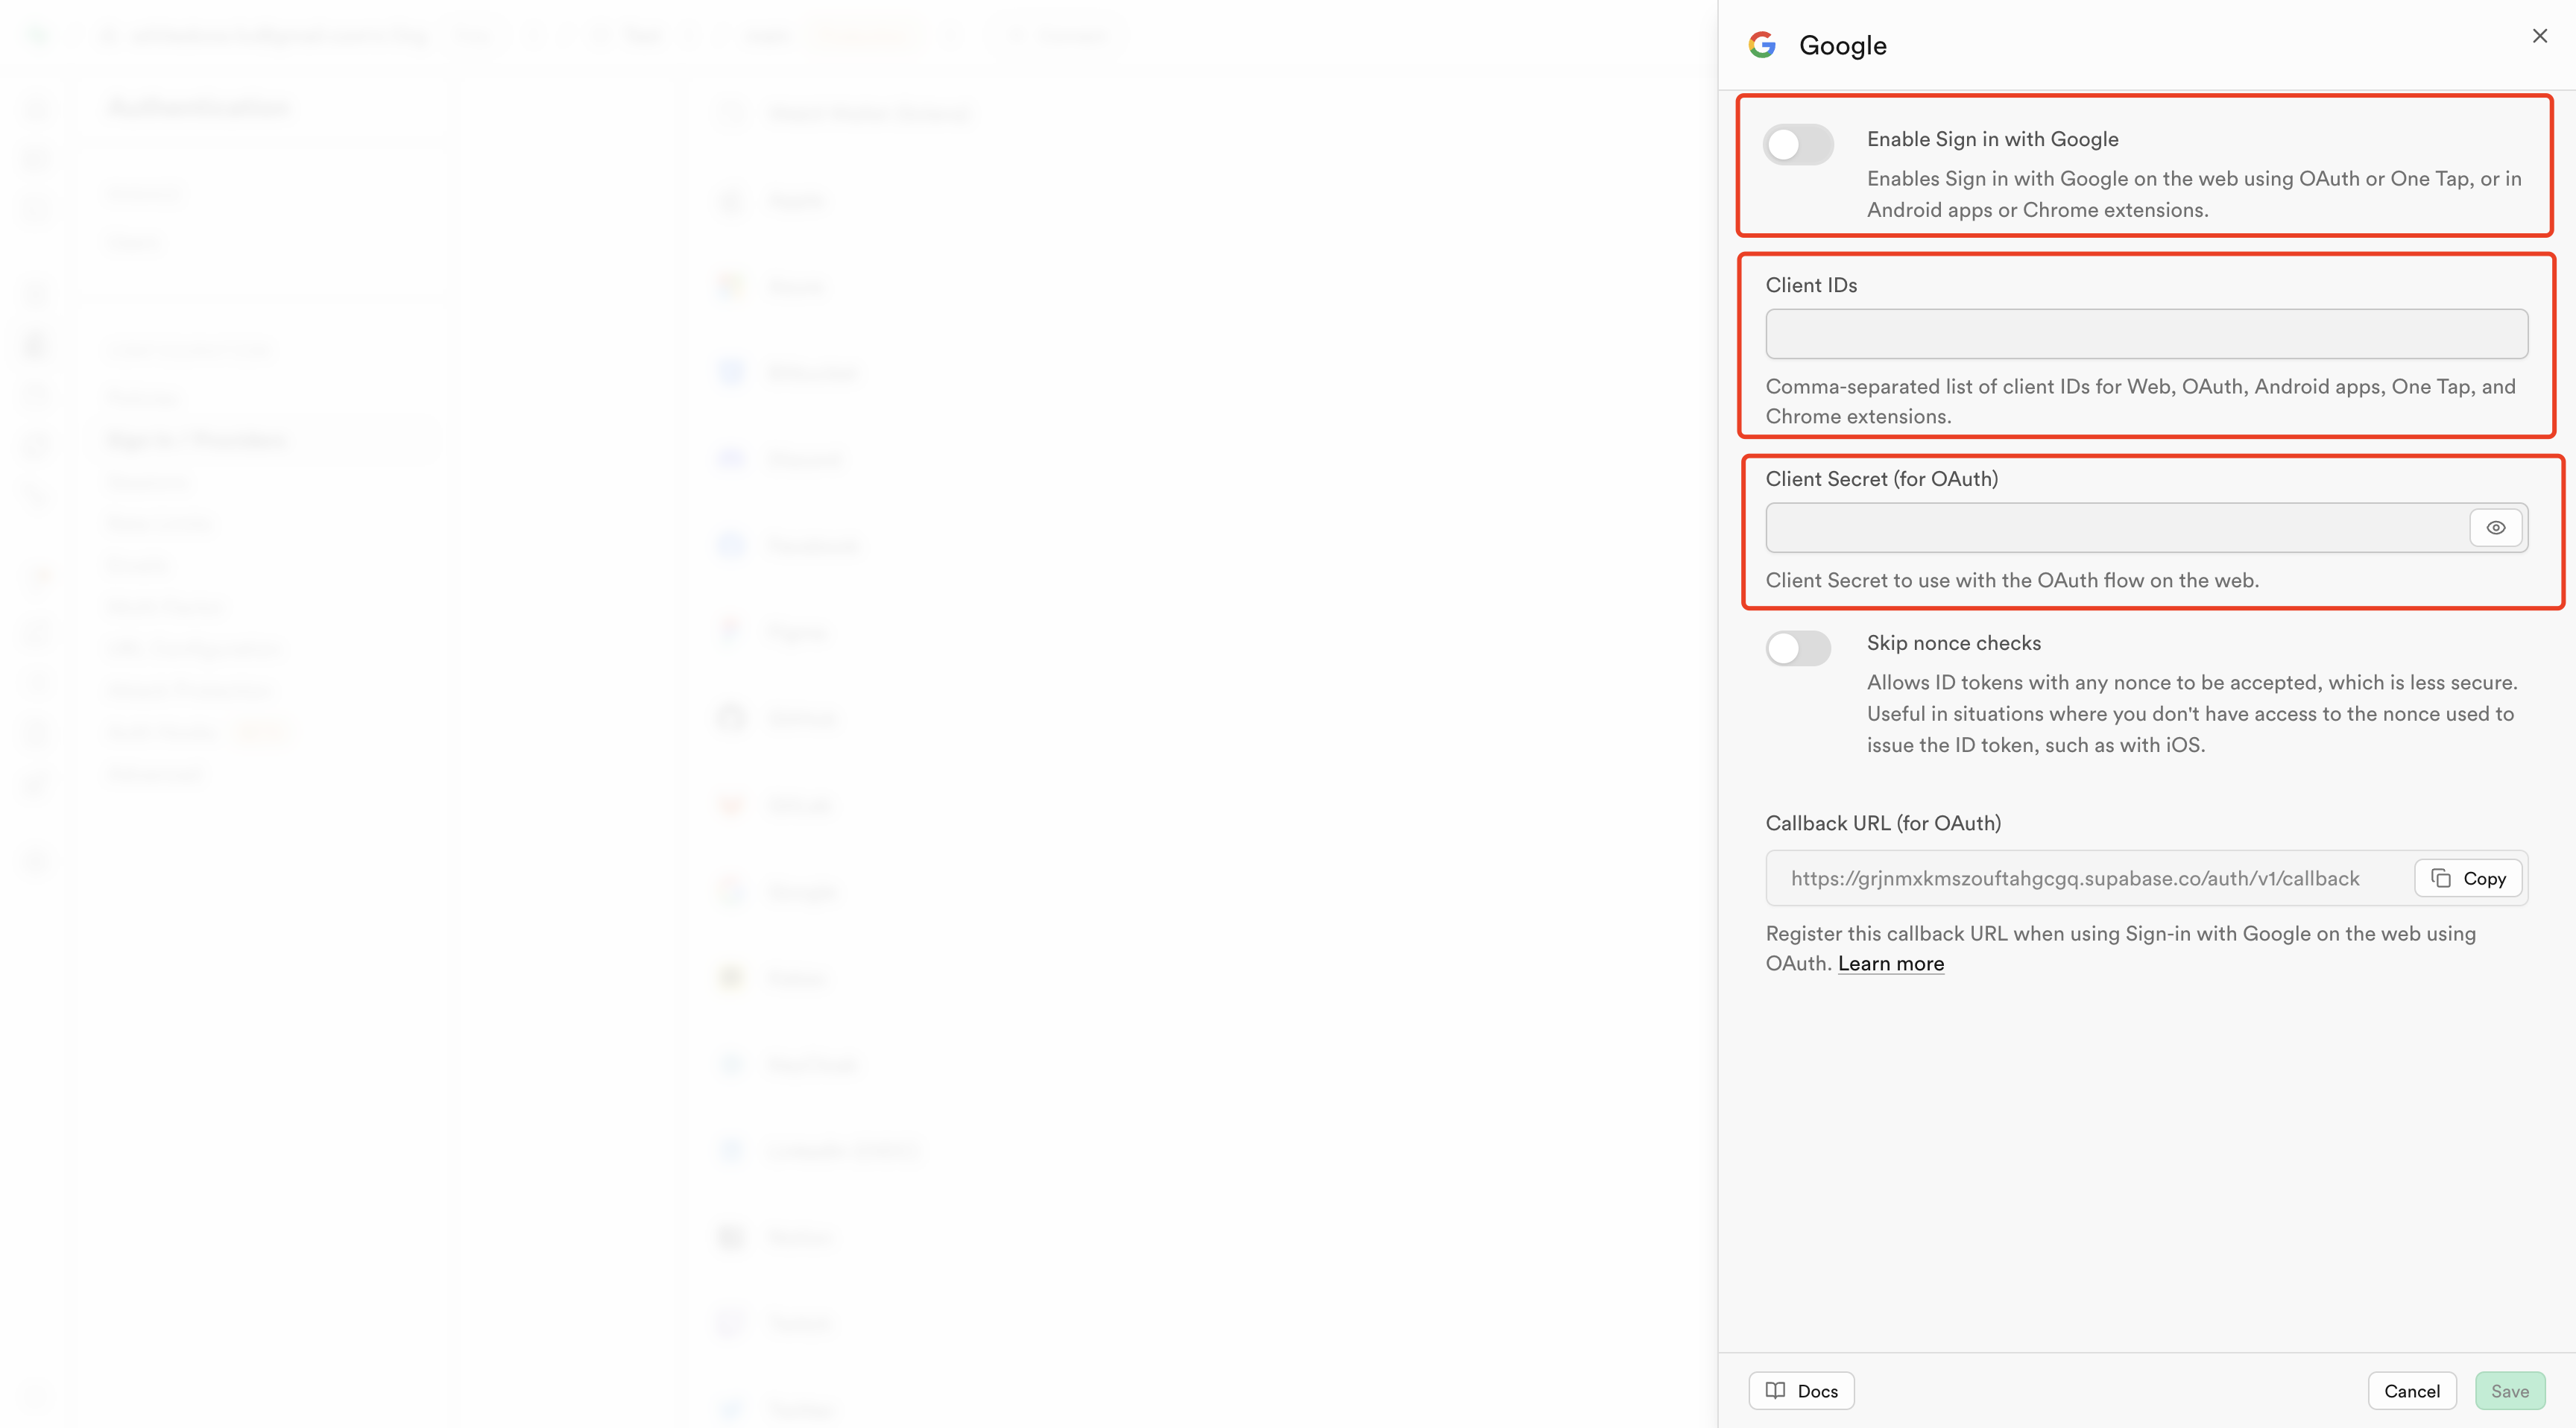
Goal: Obtain the Client ID and Client Secret, allow sign-in from your site, and hand off the OAuth callback to Supabase.Step 1: Create a Google Cloud Platform project
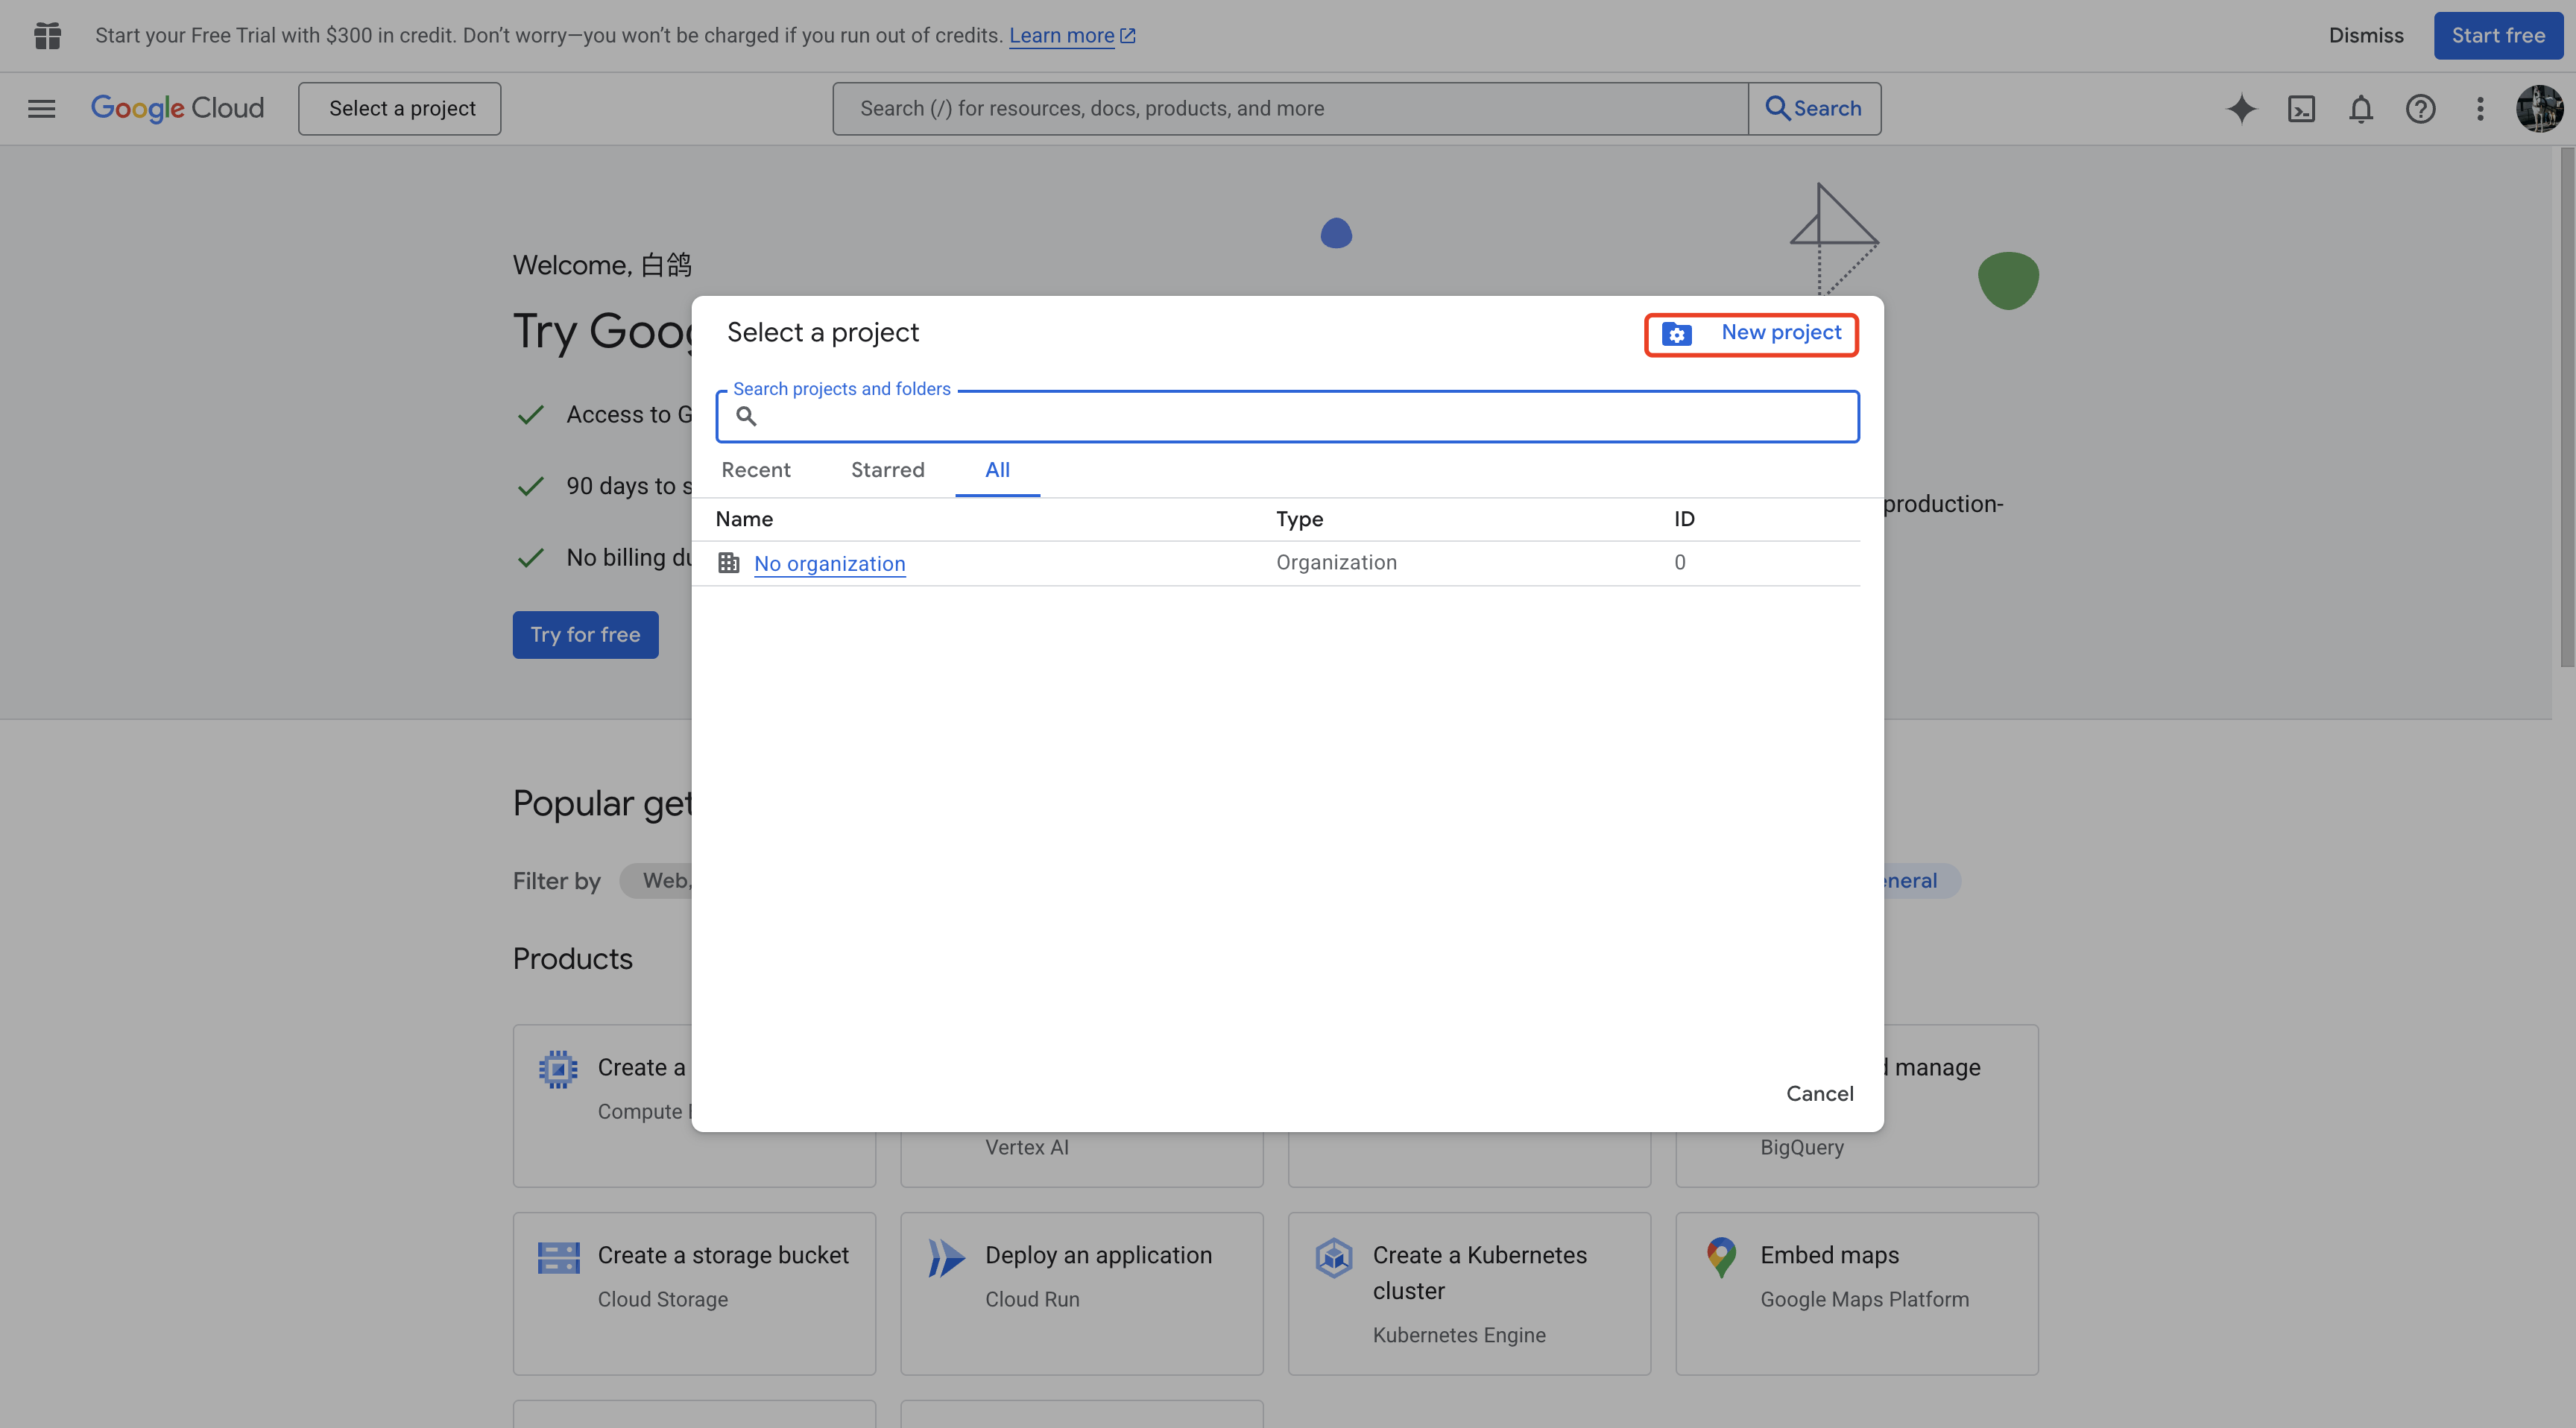
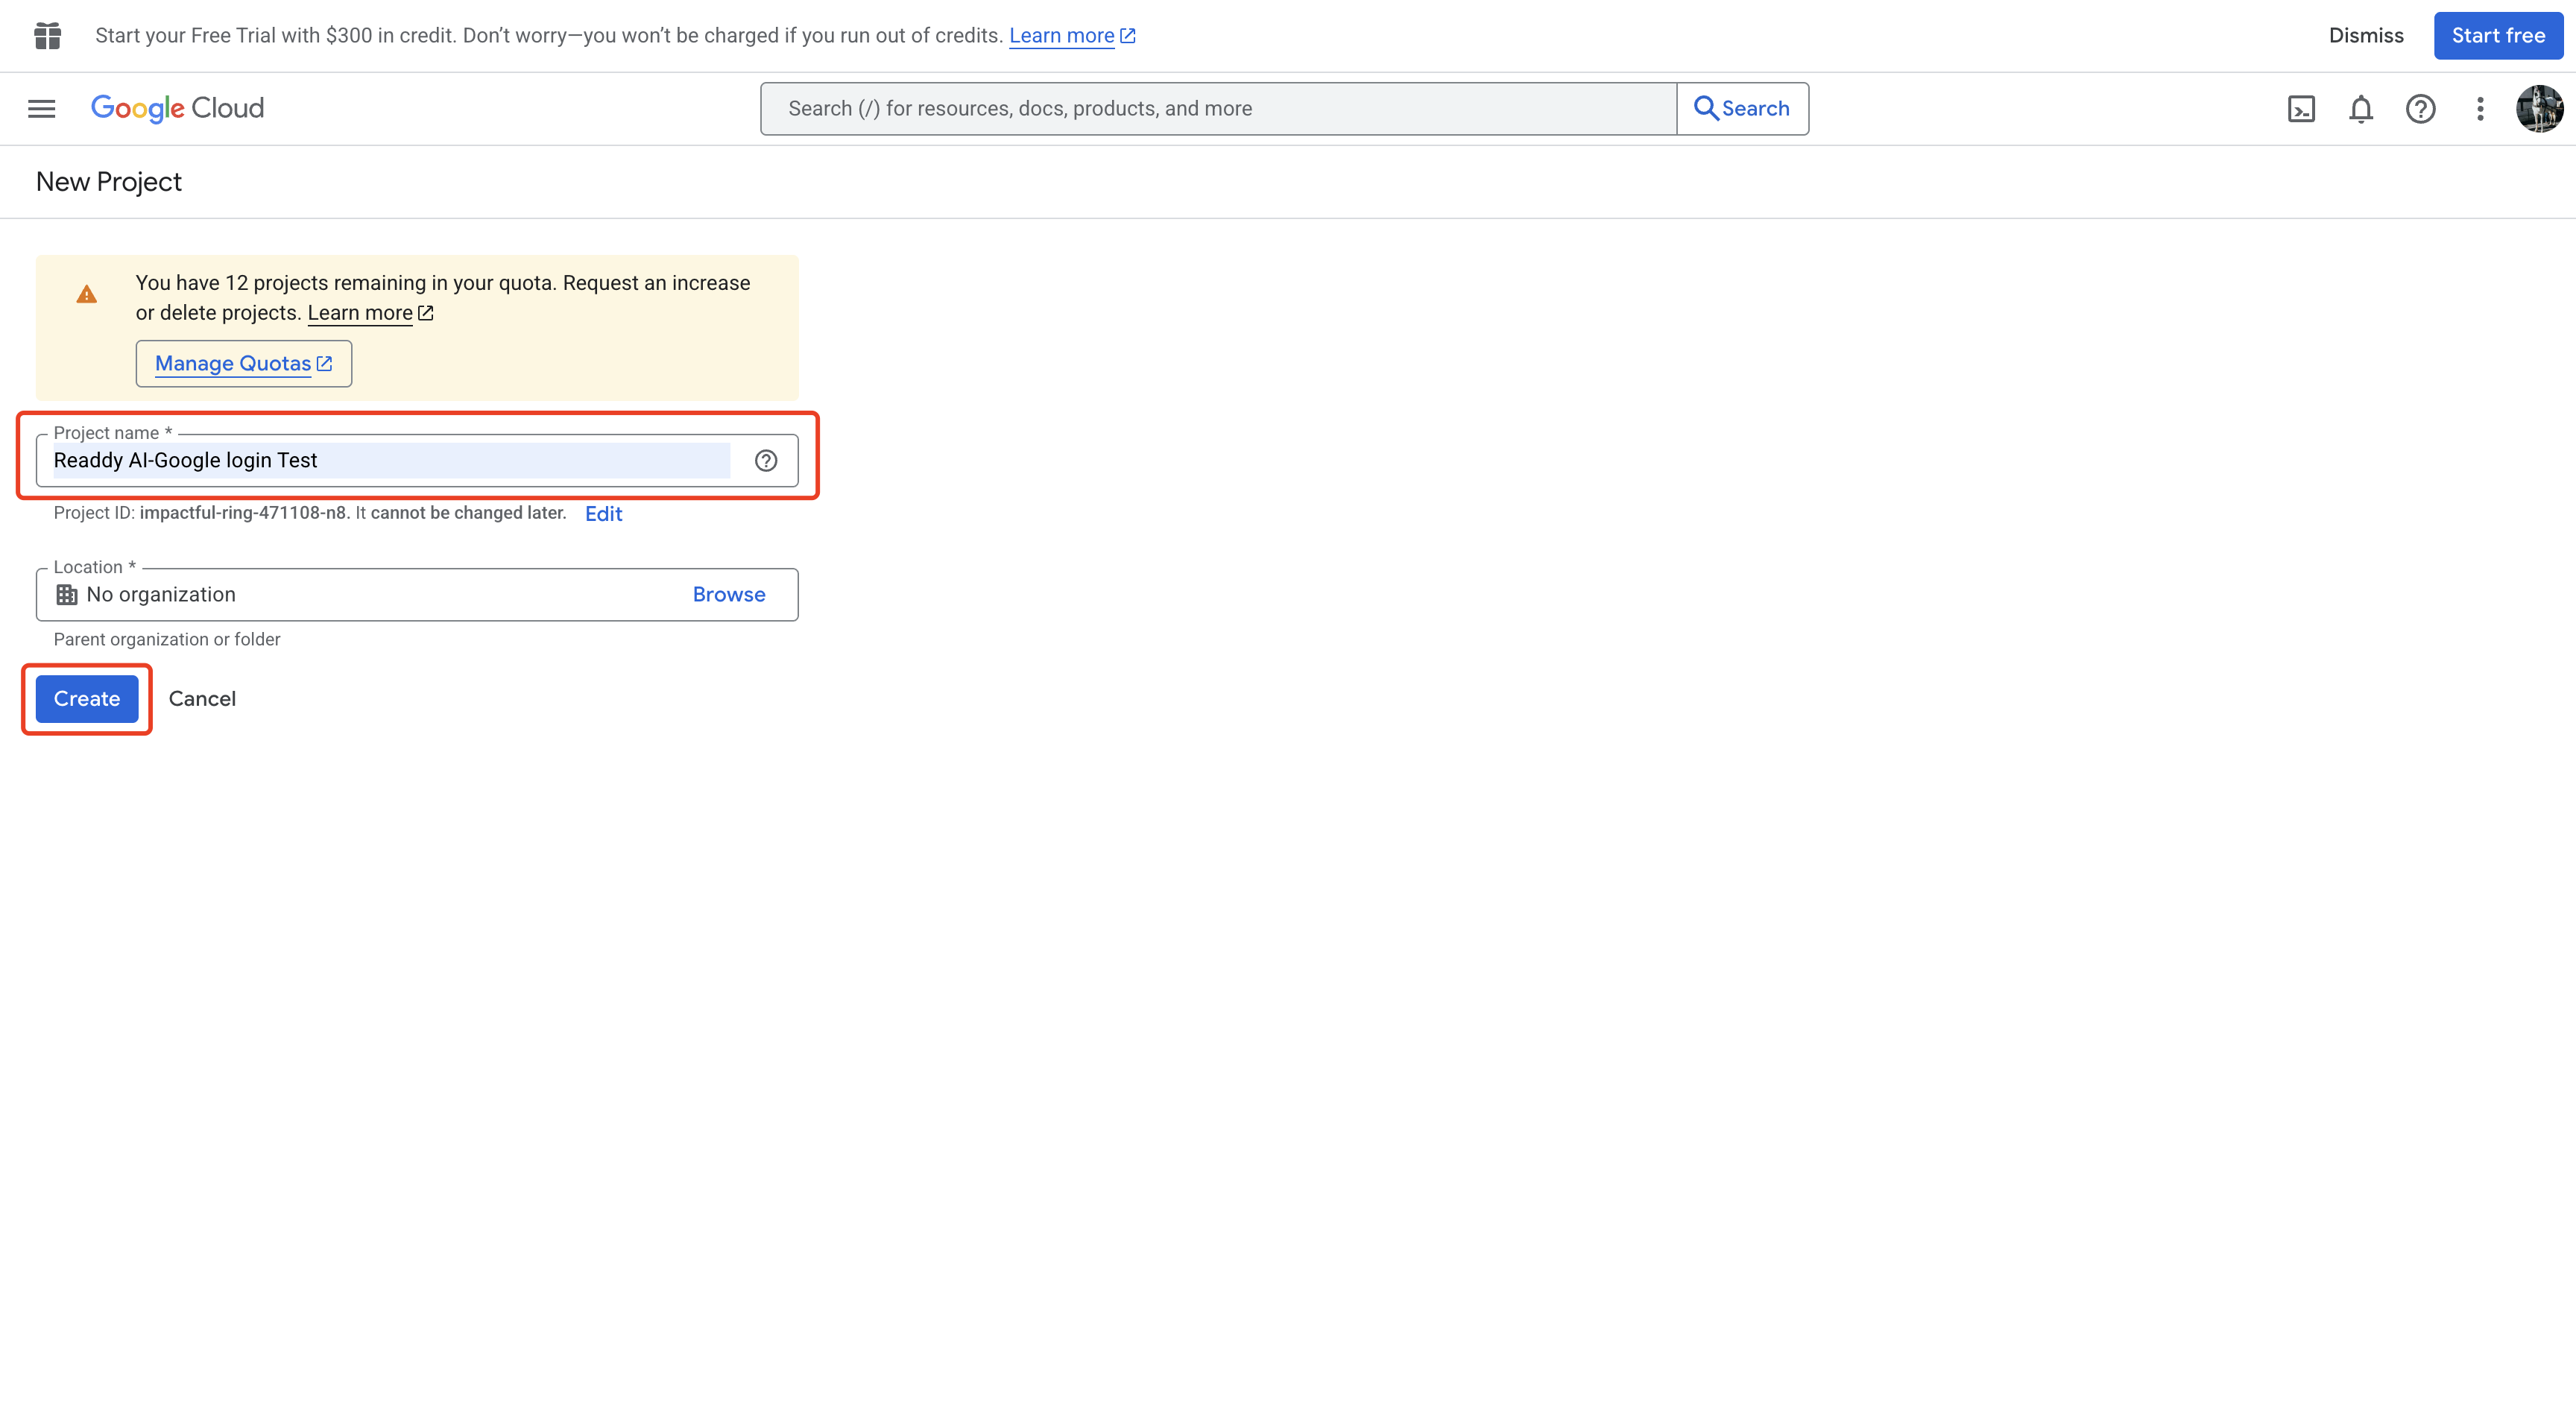
Open Google Cloud Console and sign in to your Google account.Click the project selector at the top → click “New Project” → enter a Project name → Create.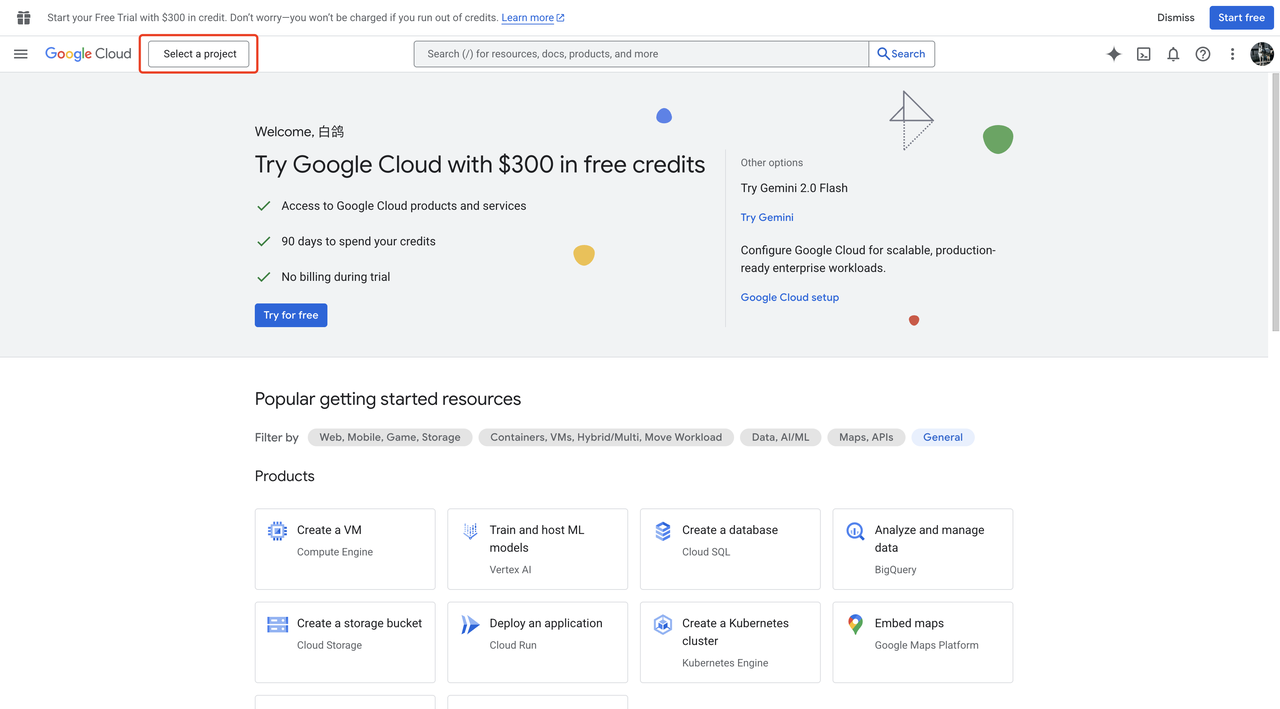
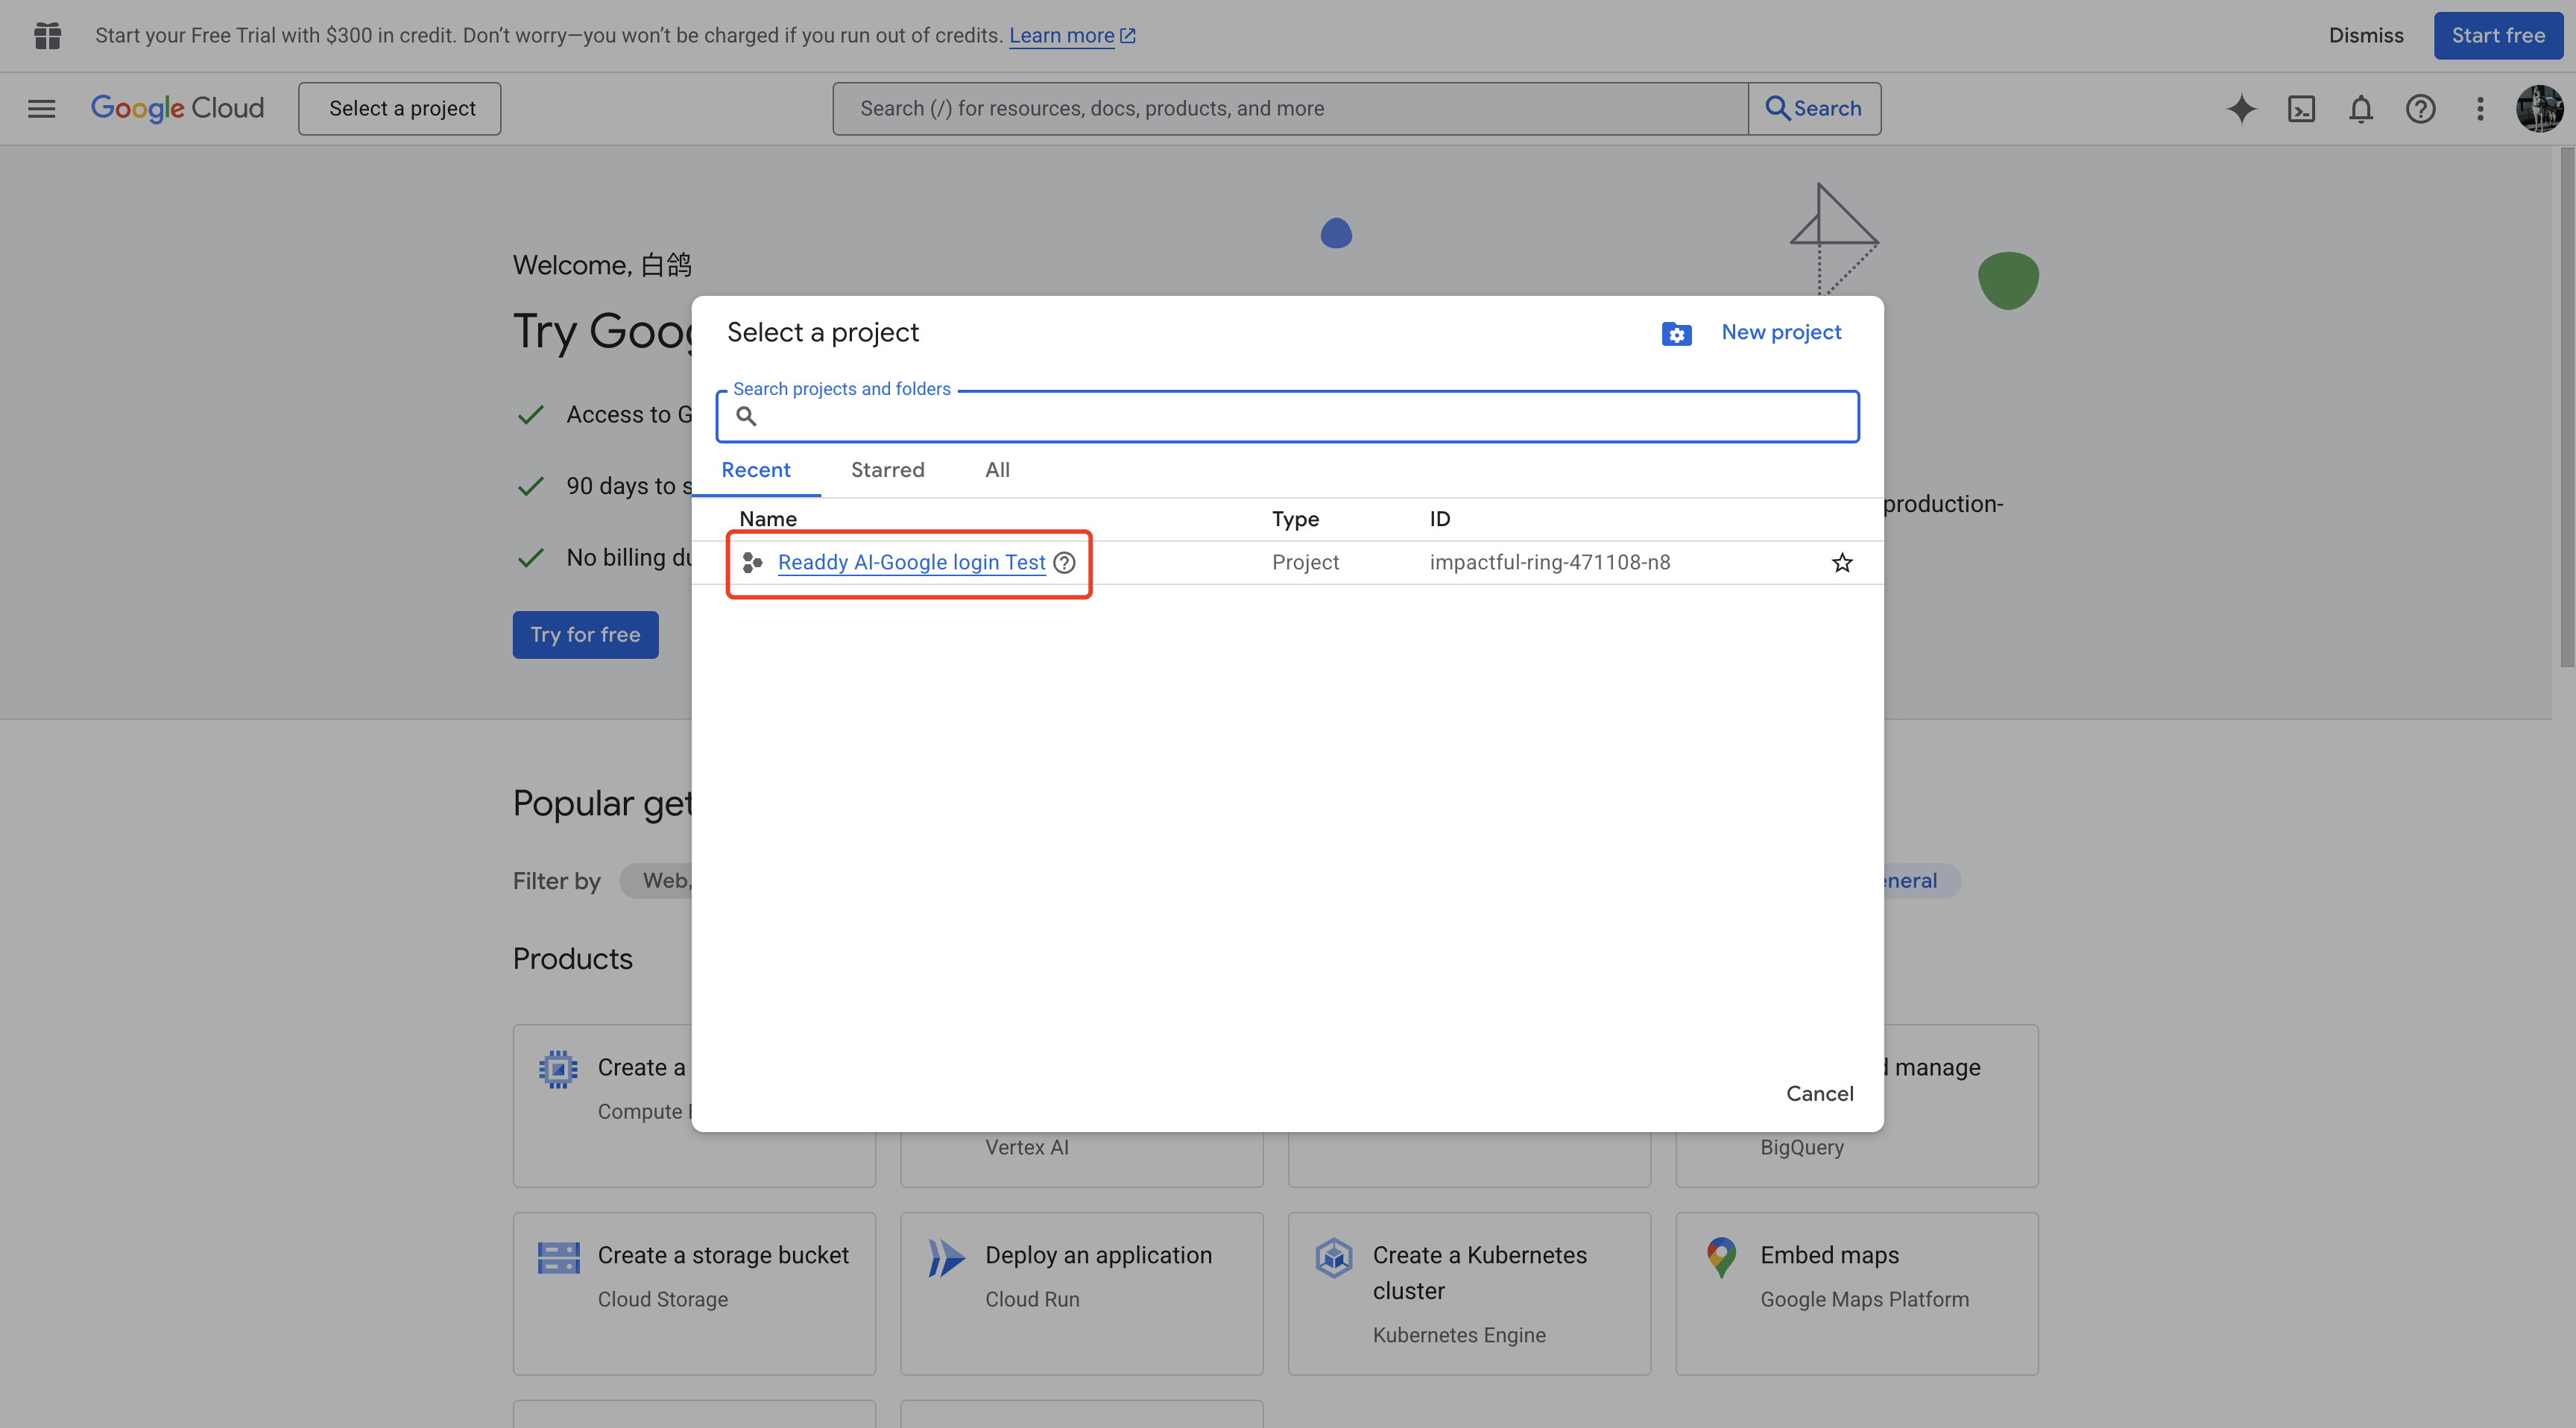
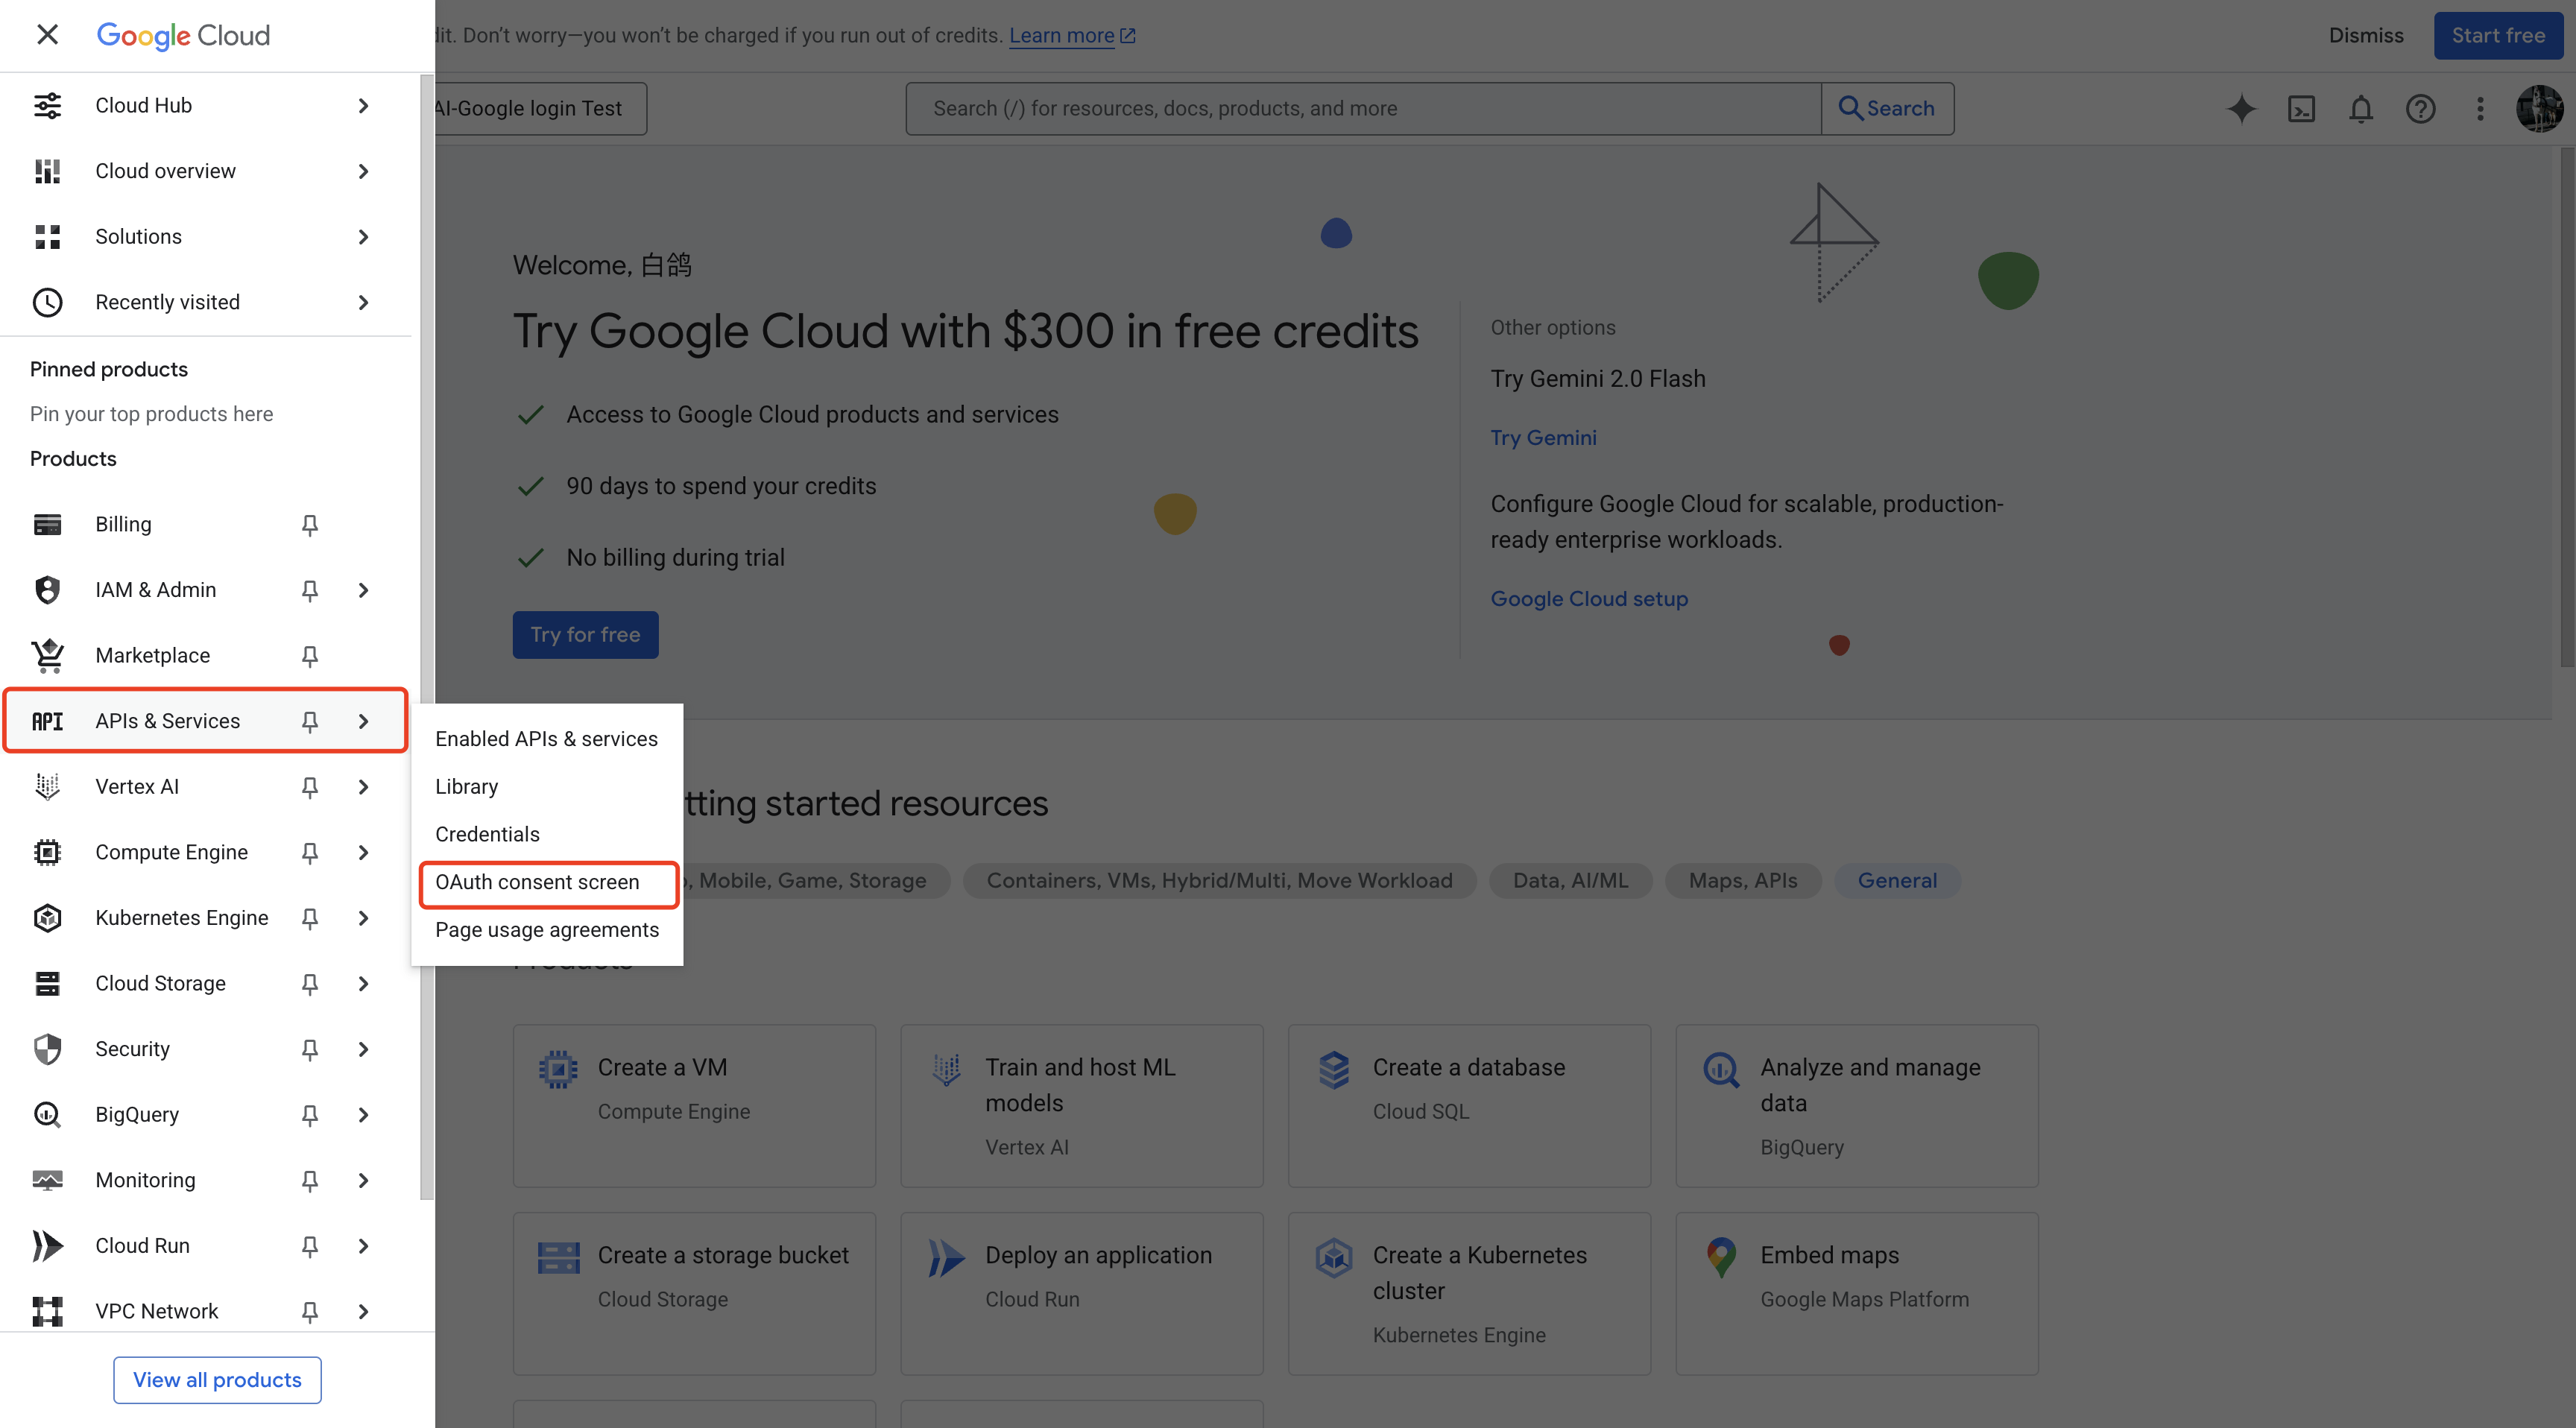
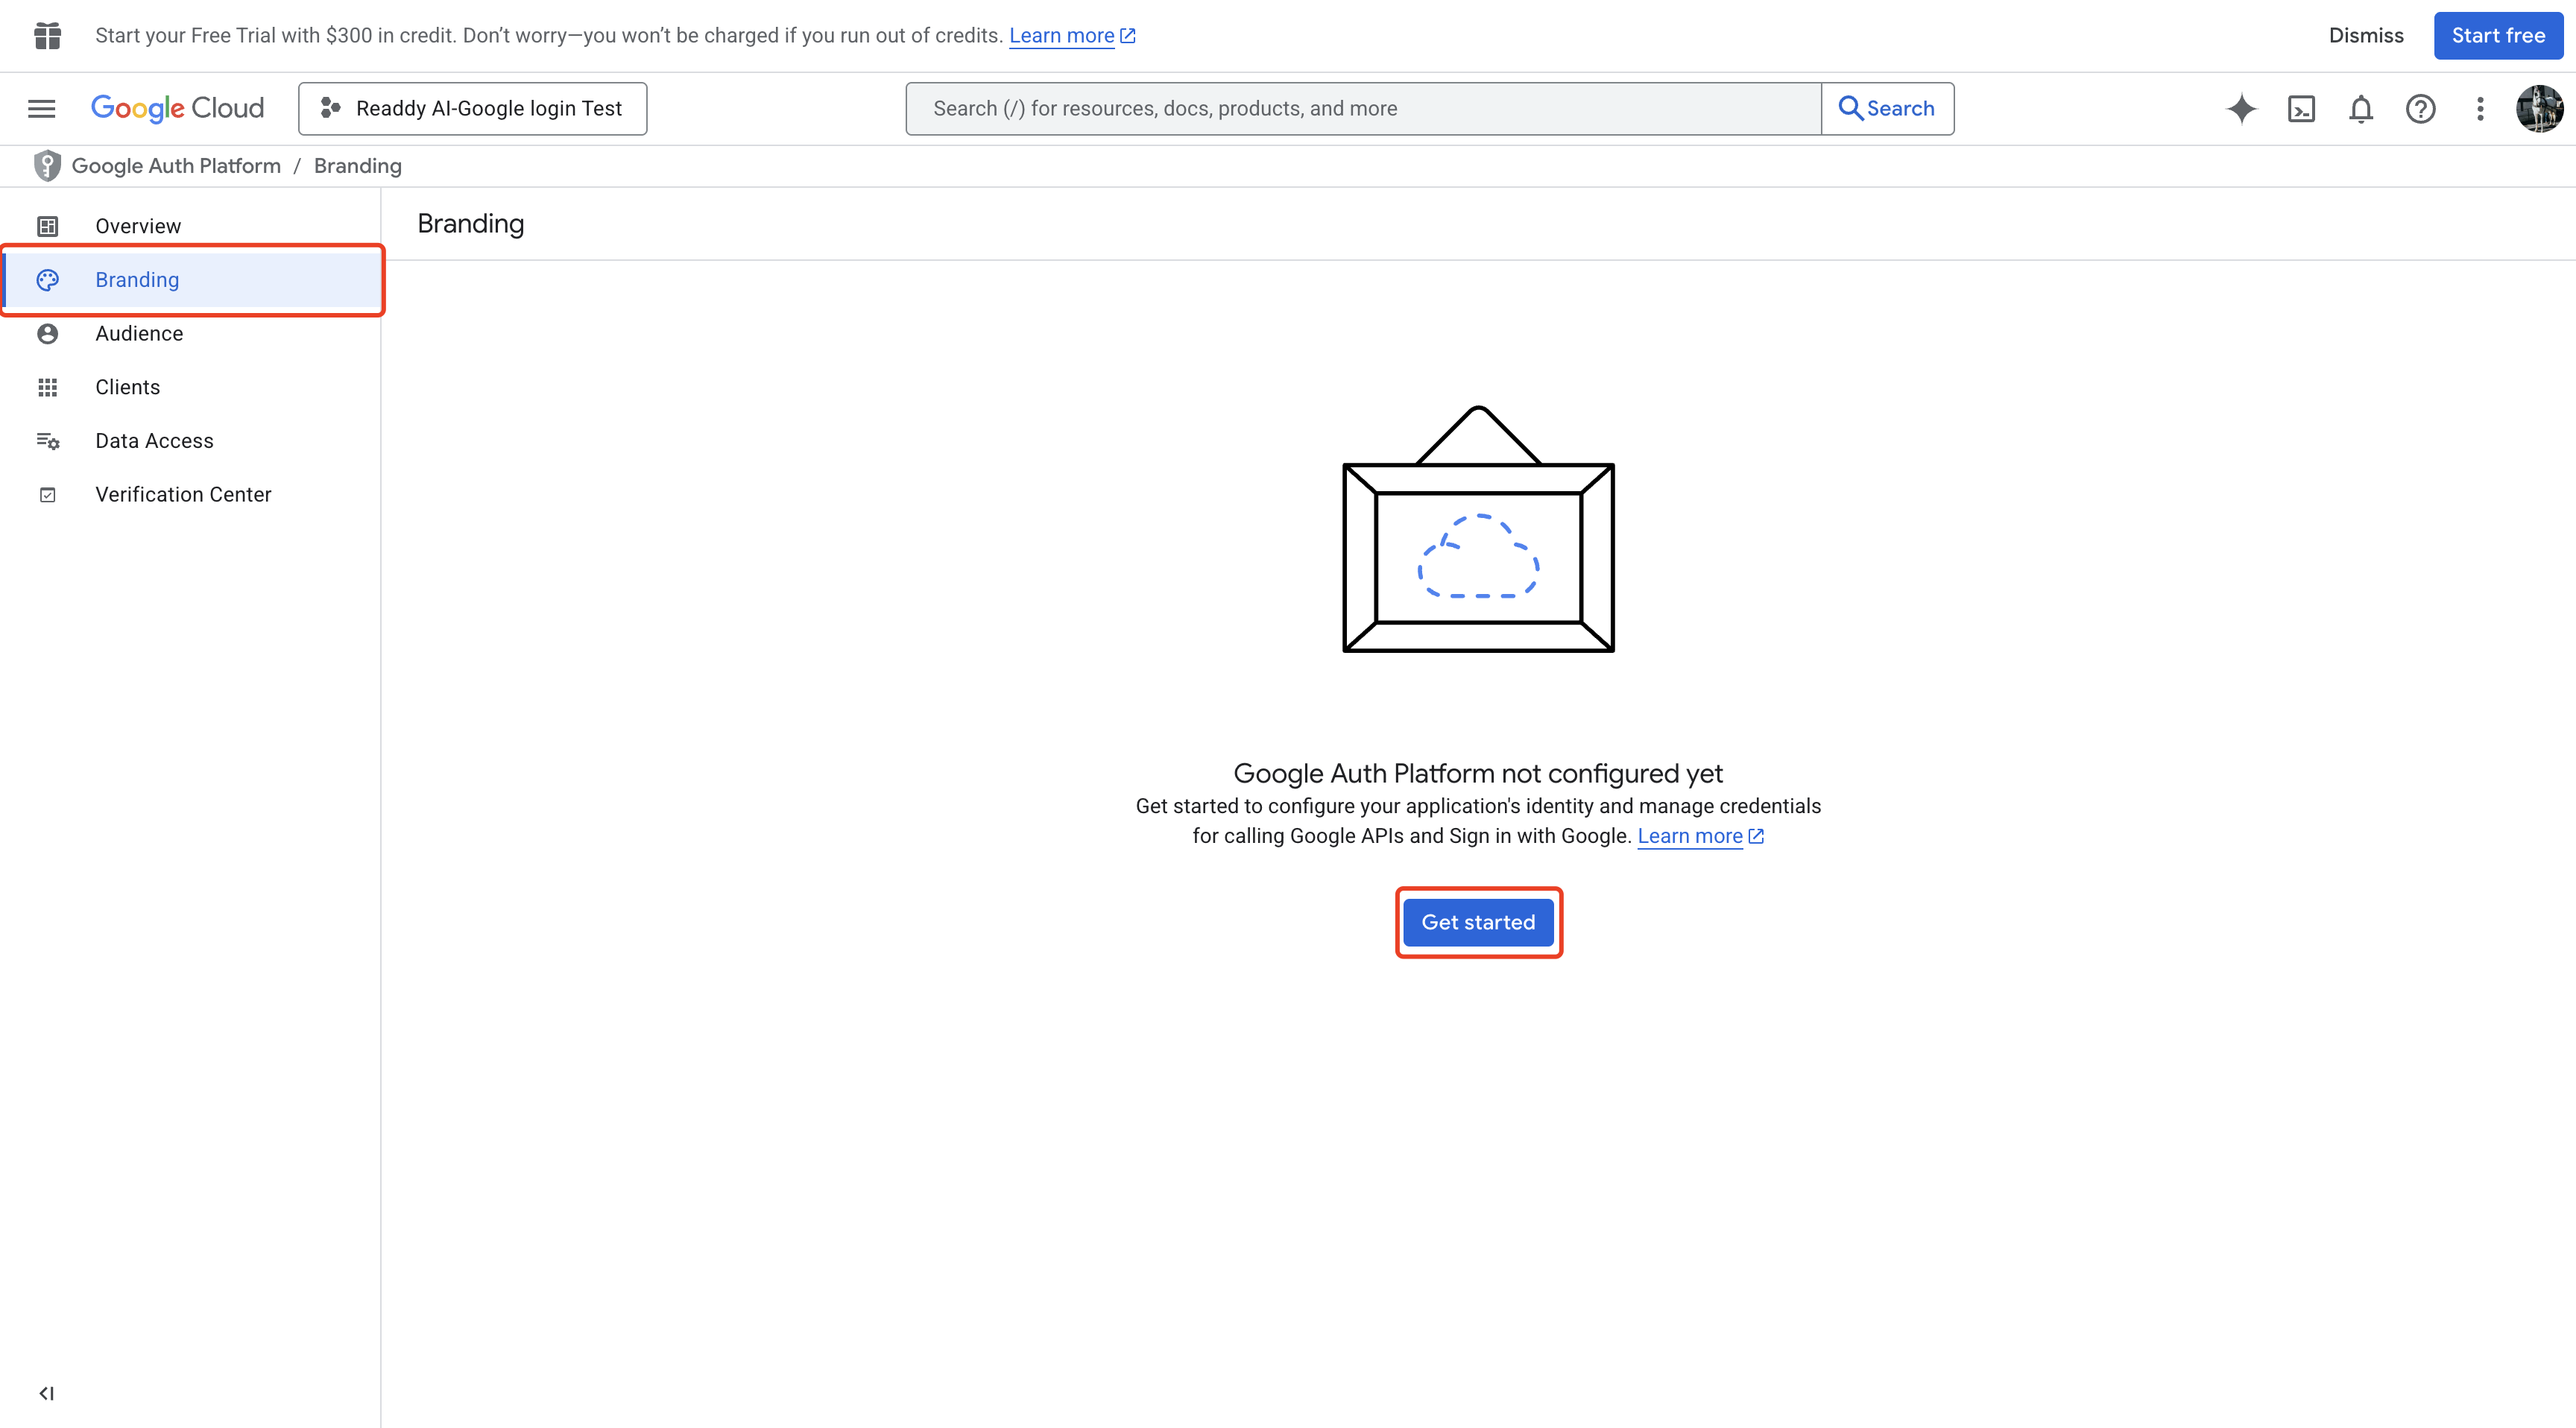
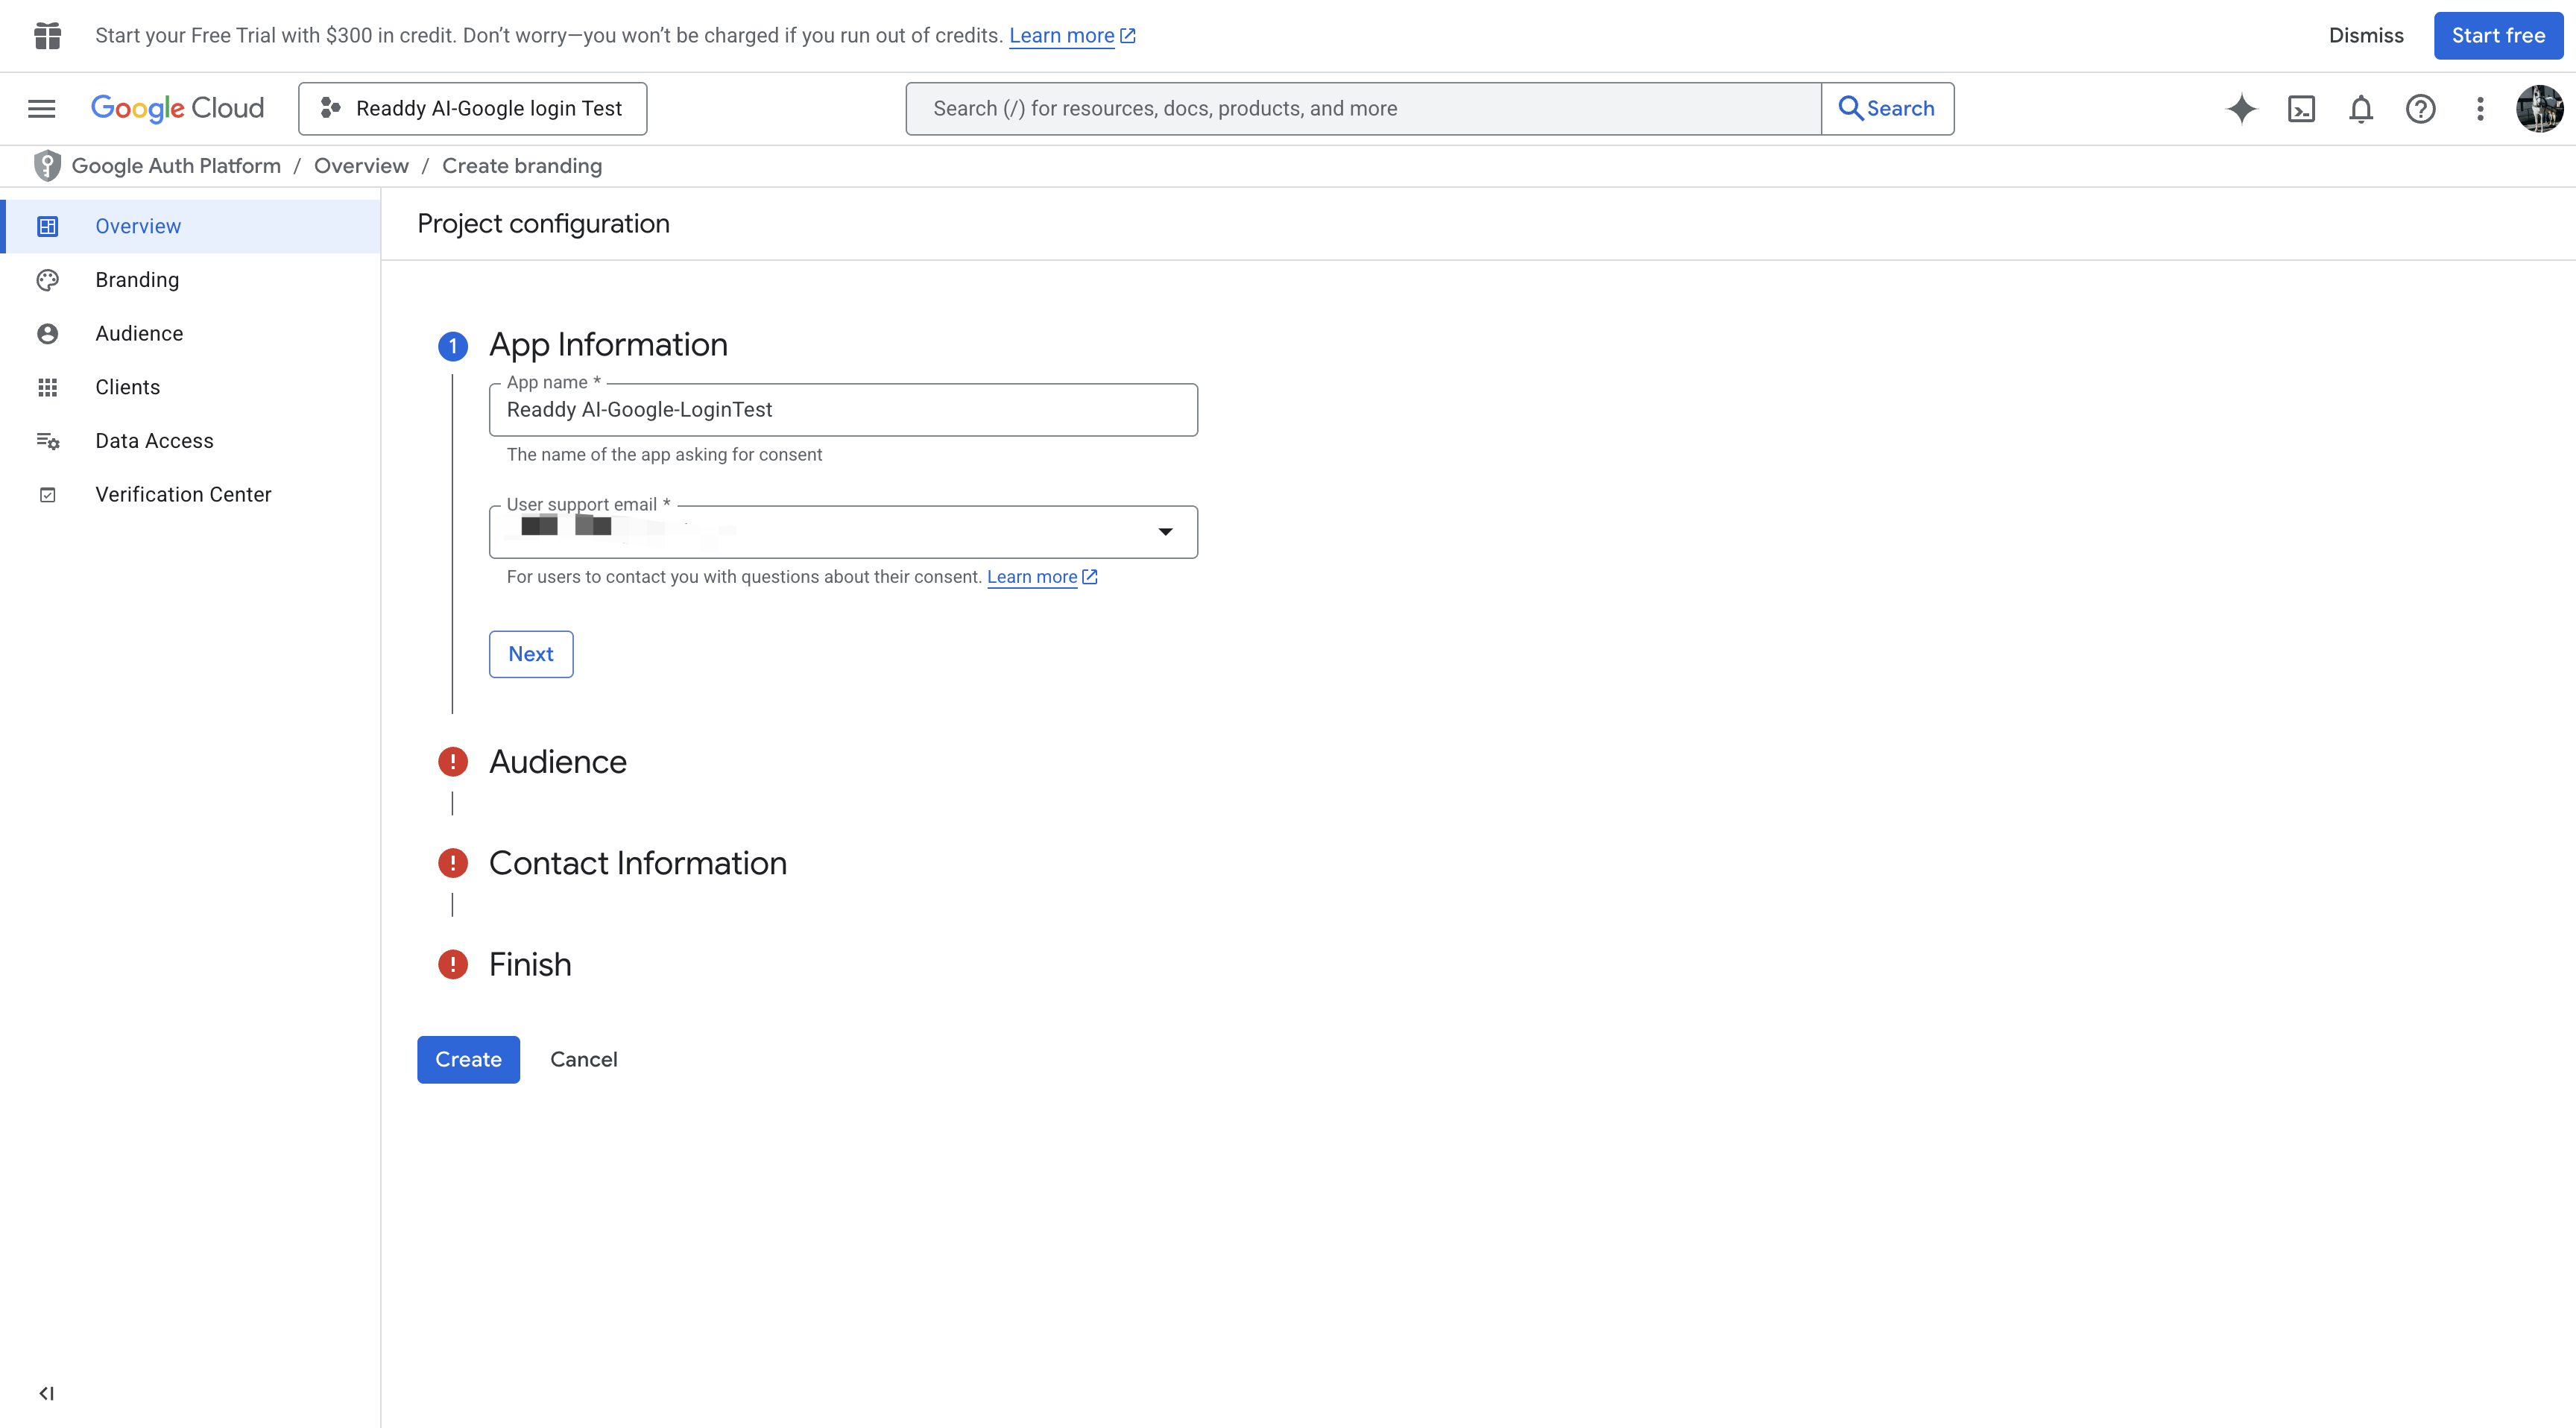
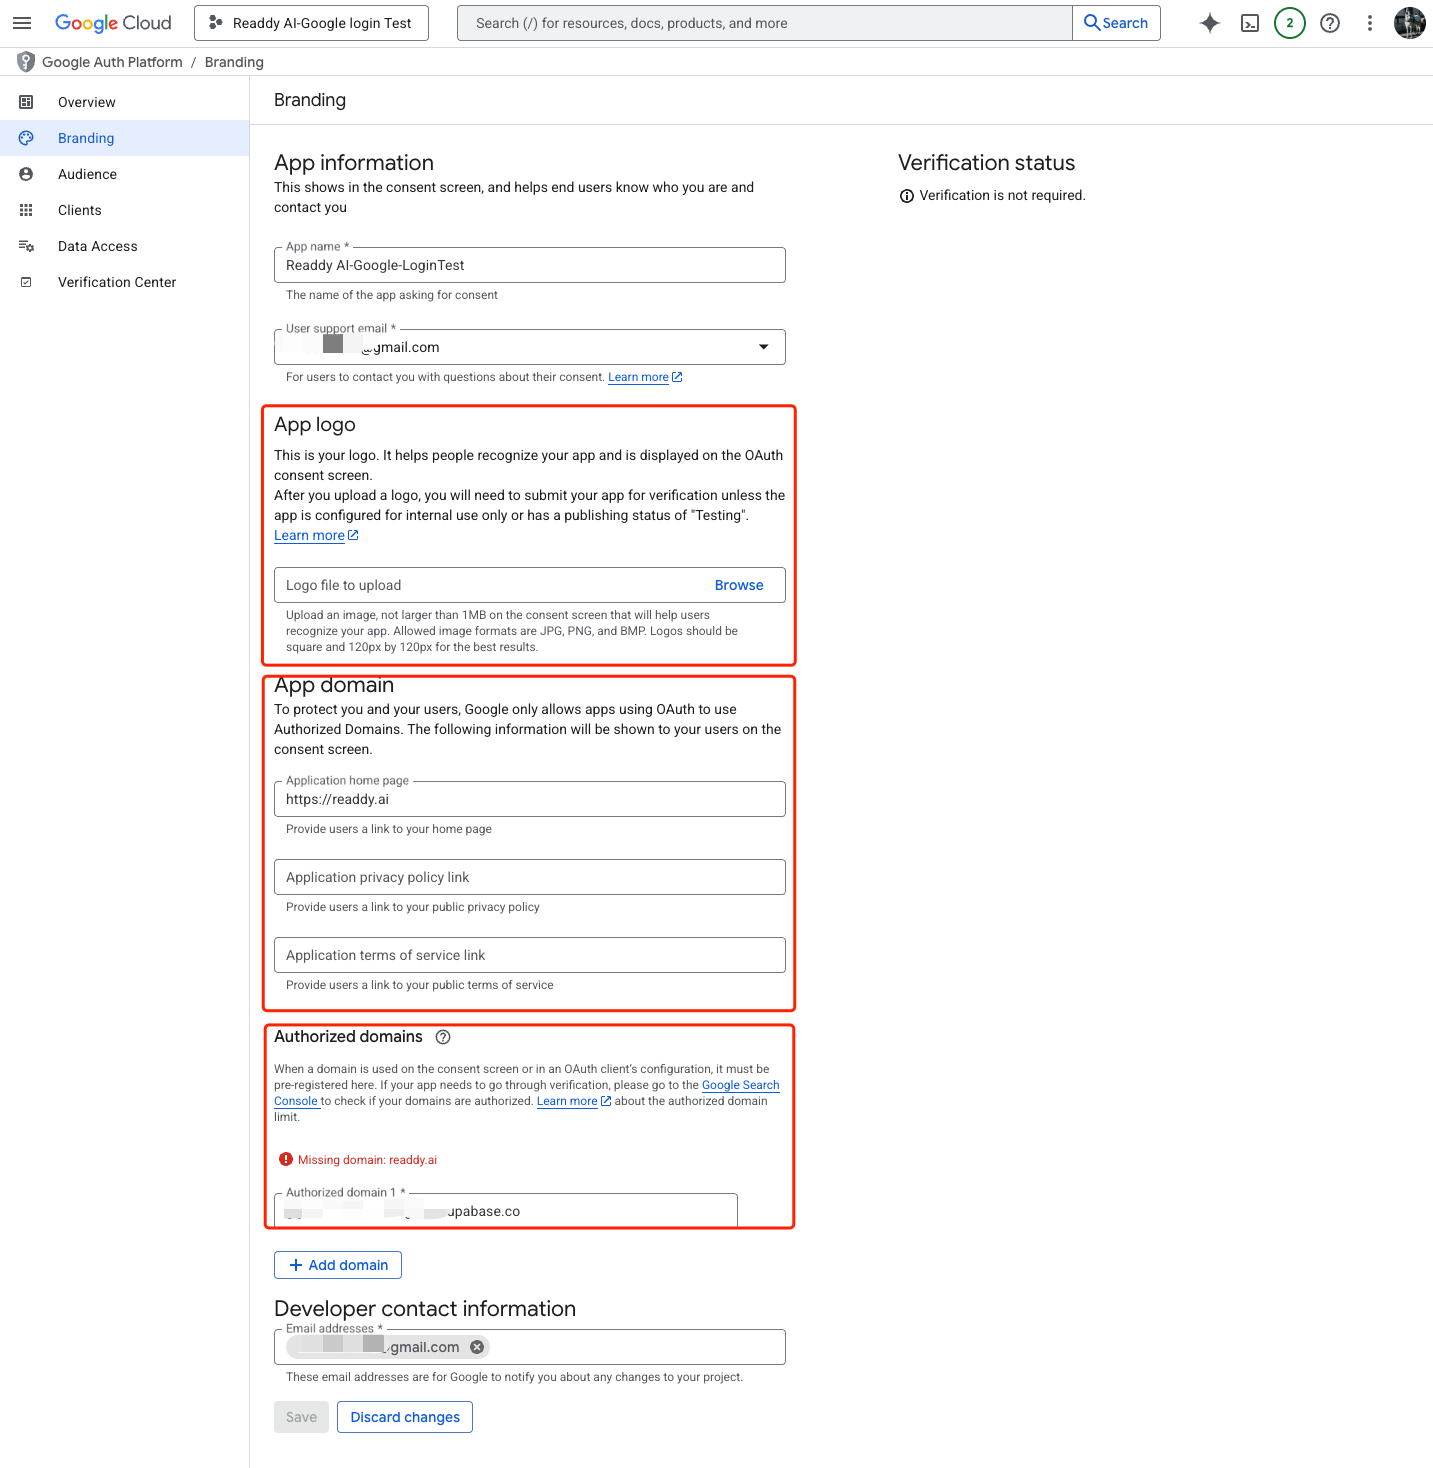
Step 2: Configure the OAuth consent screen
Click Select project.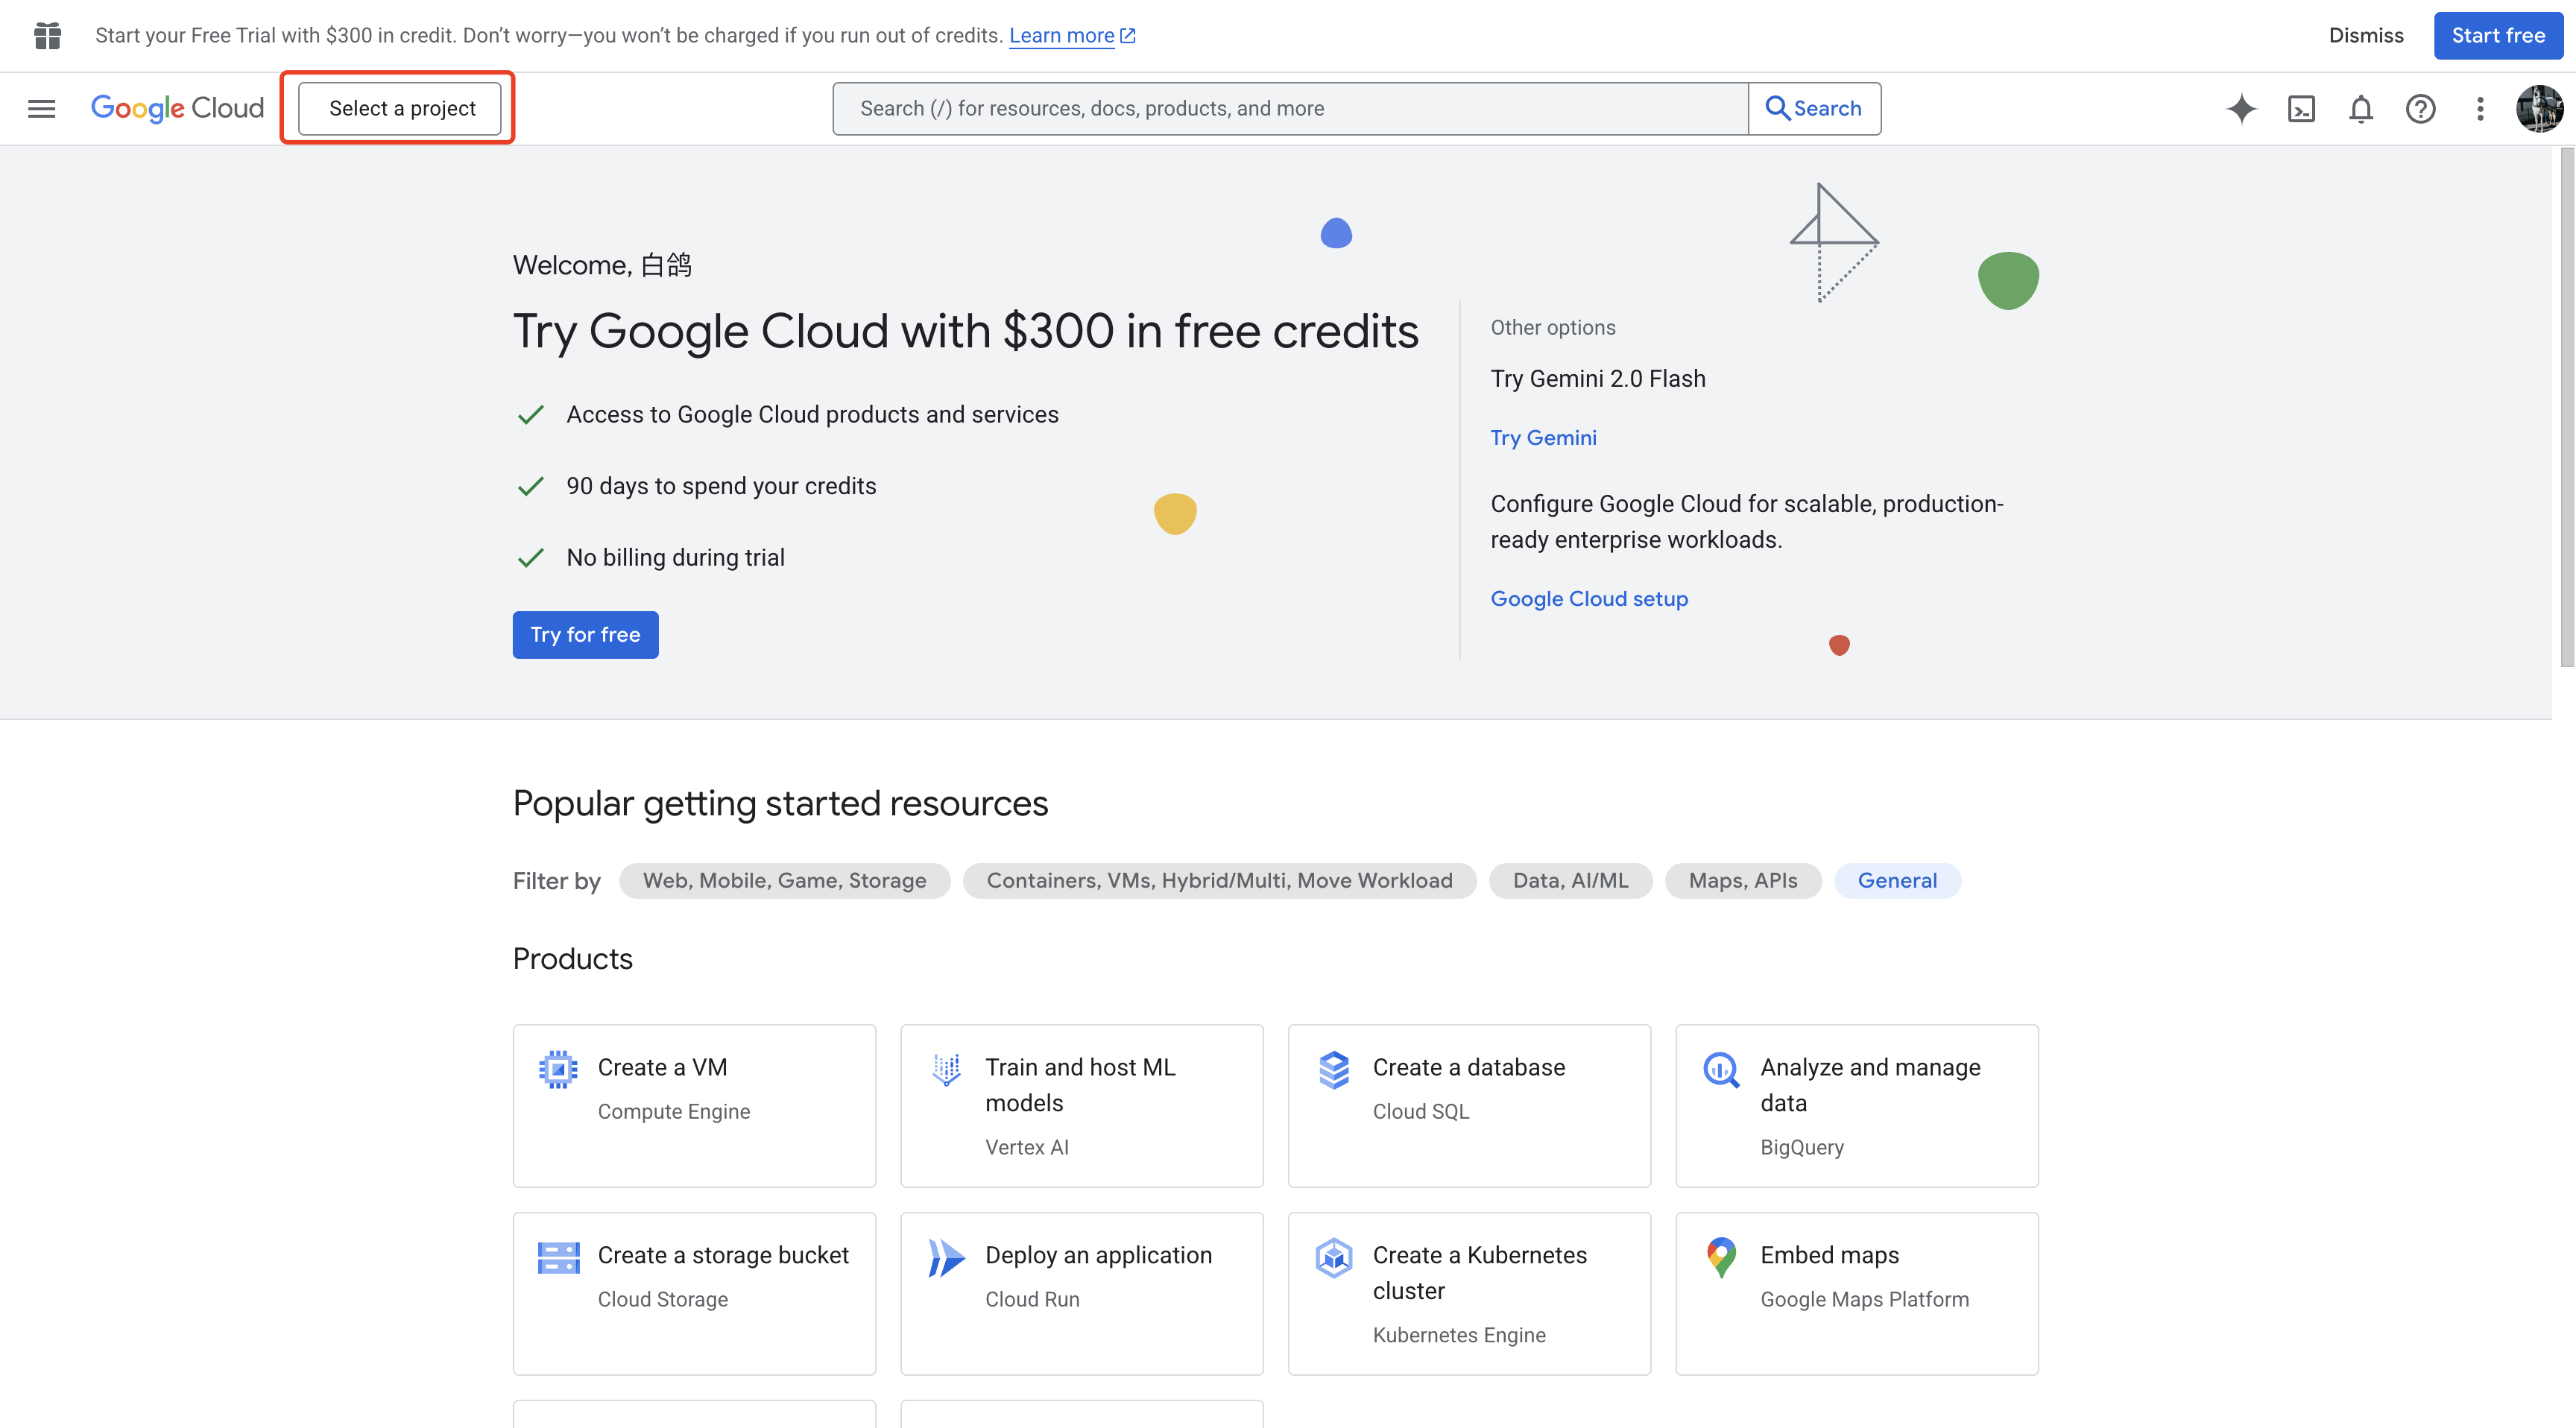
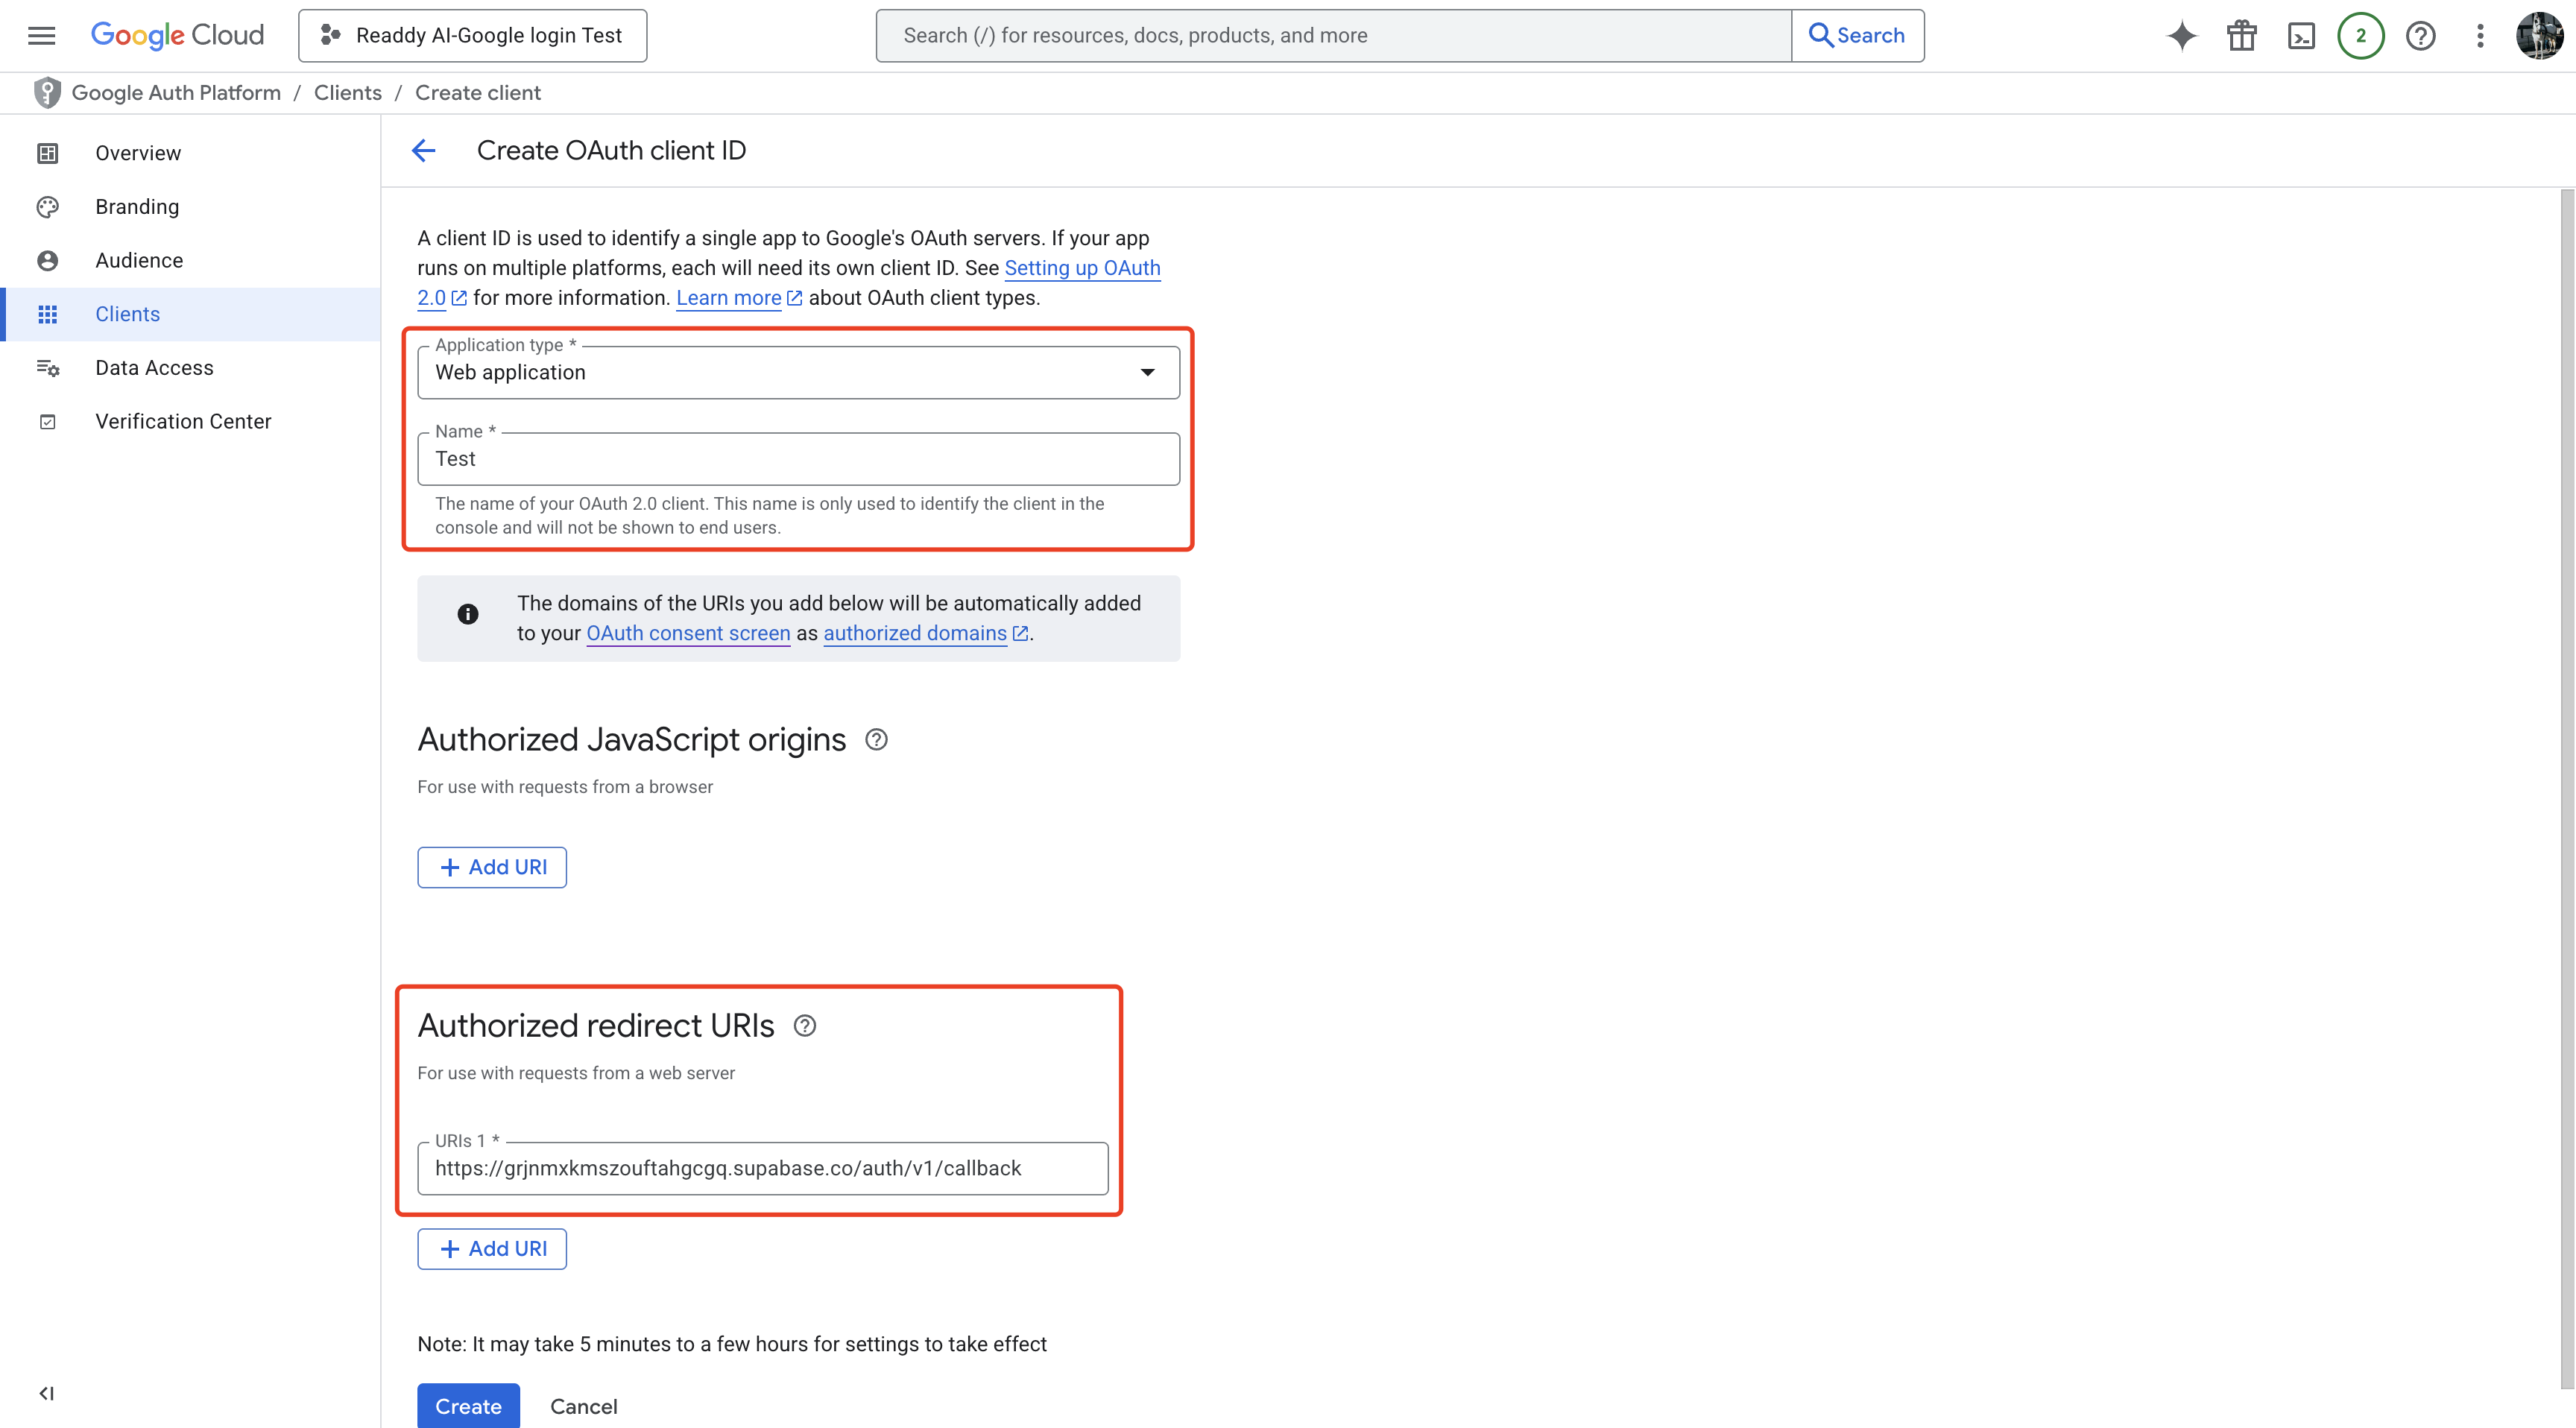
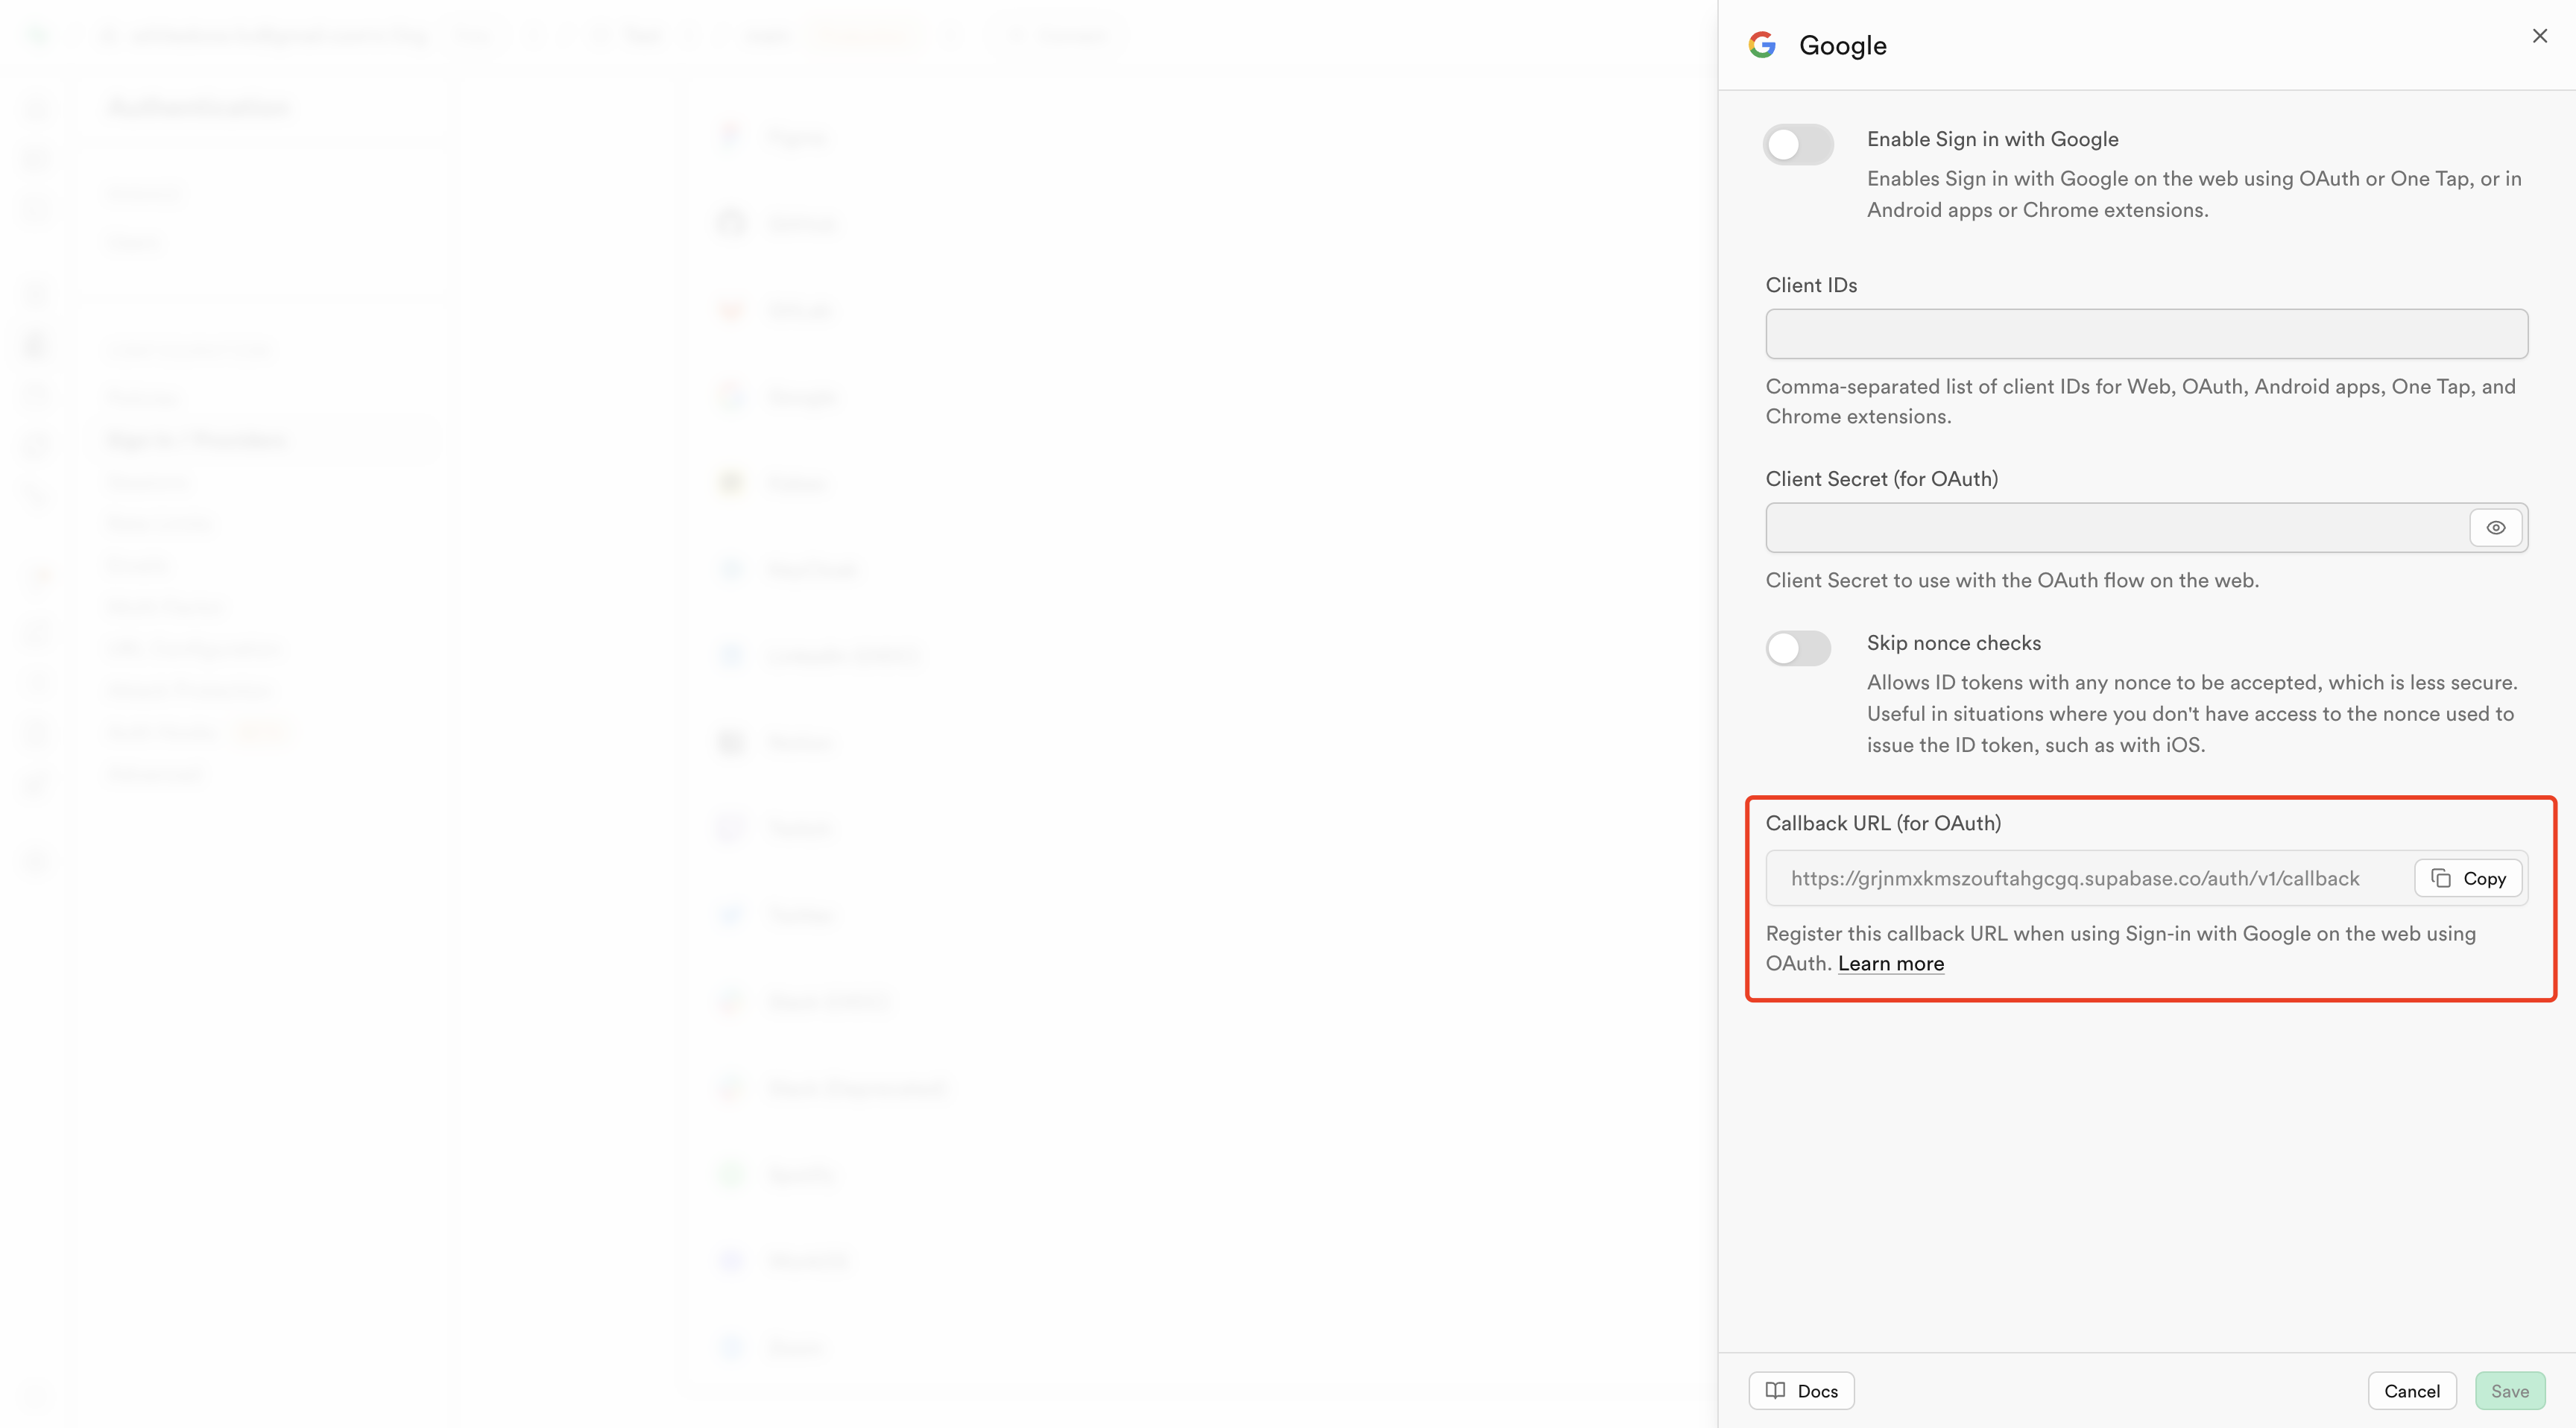
How to get the Authorized redirect URIs
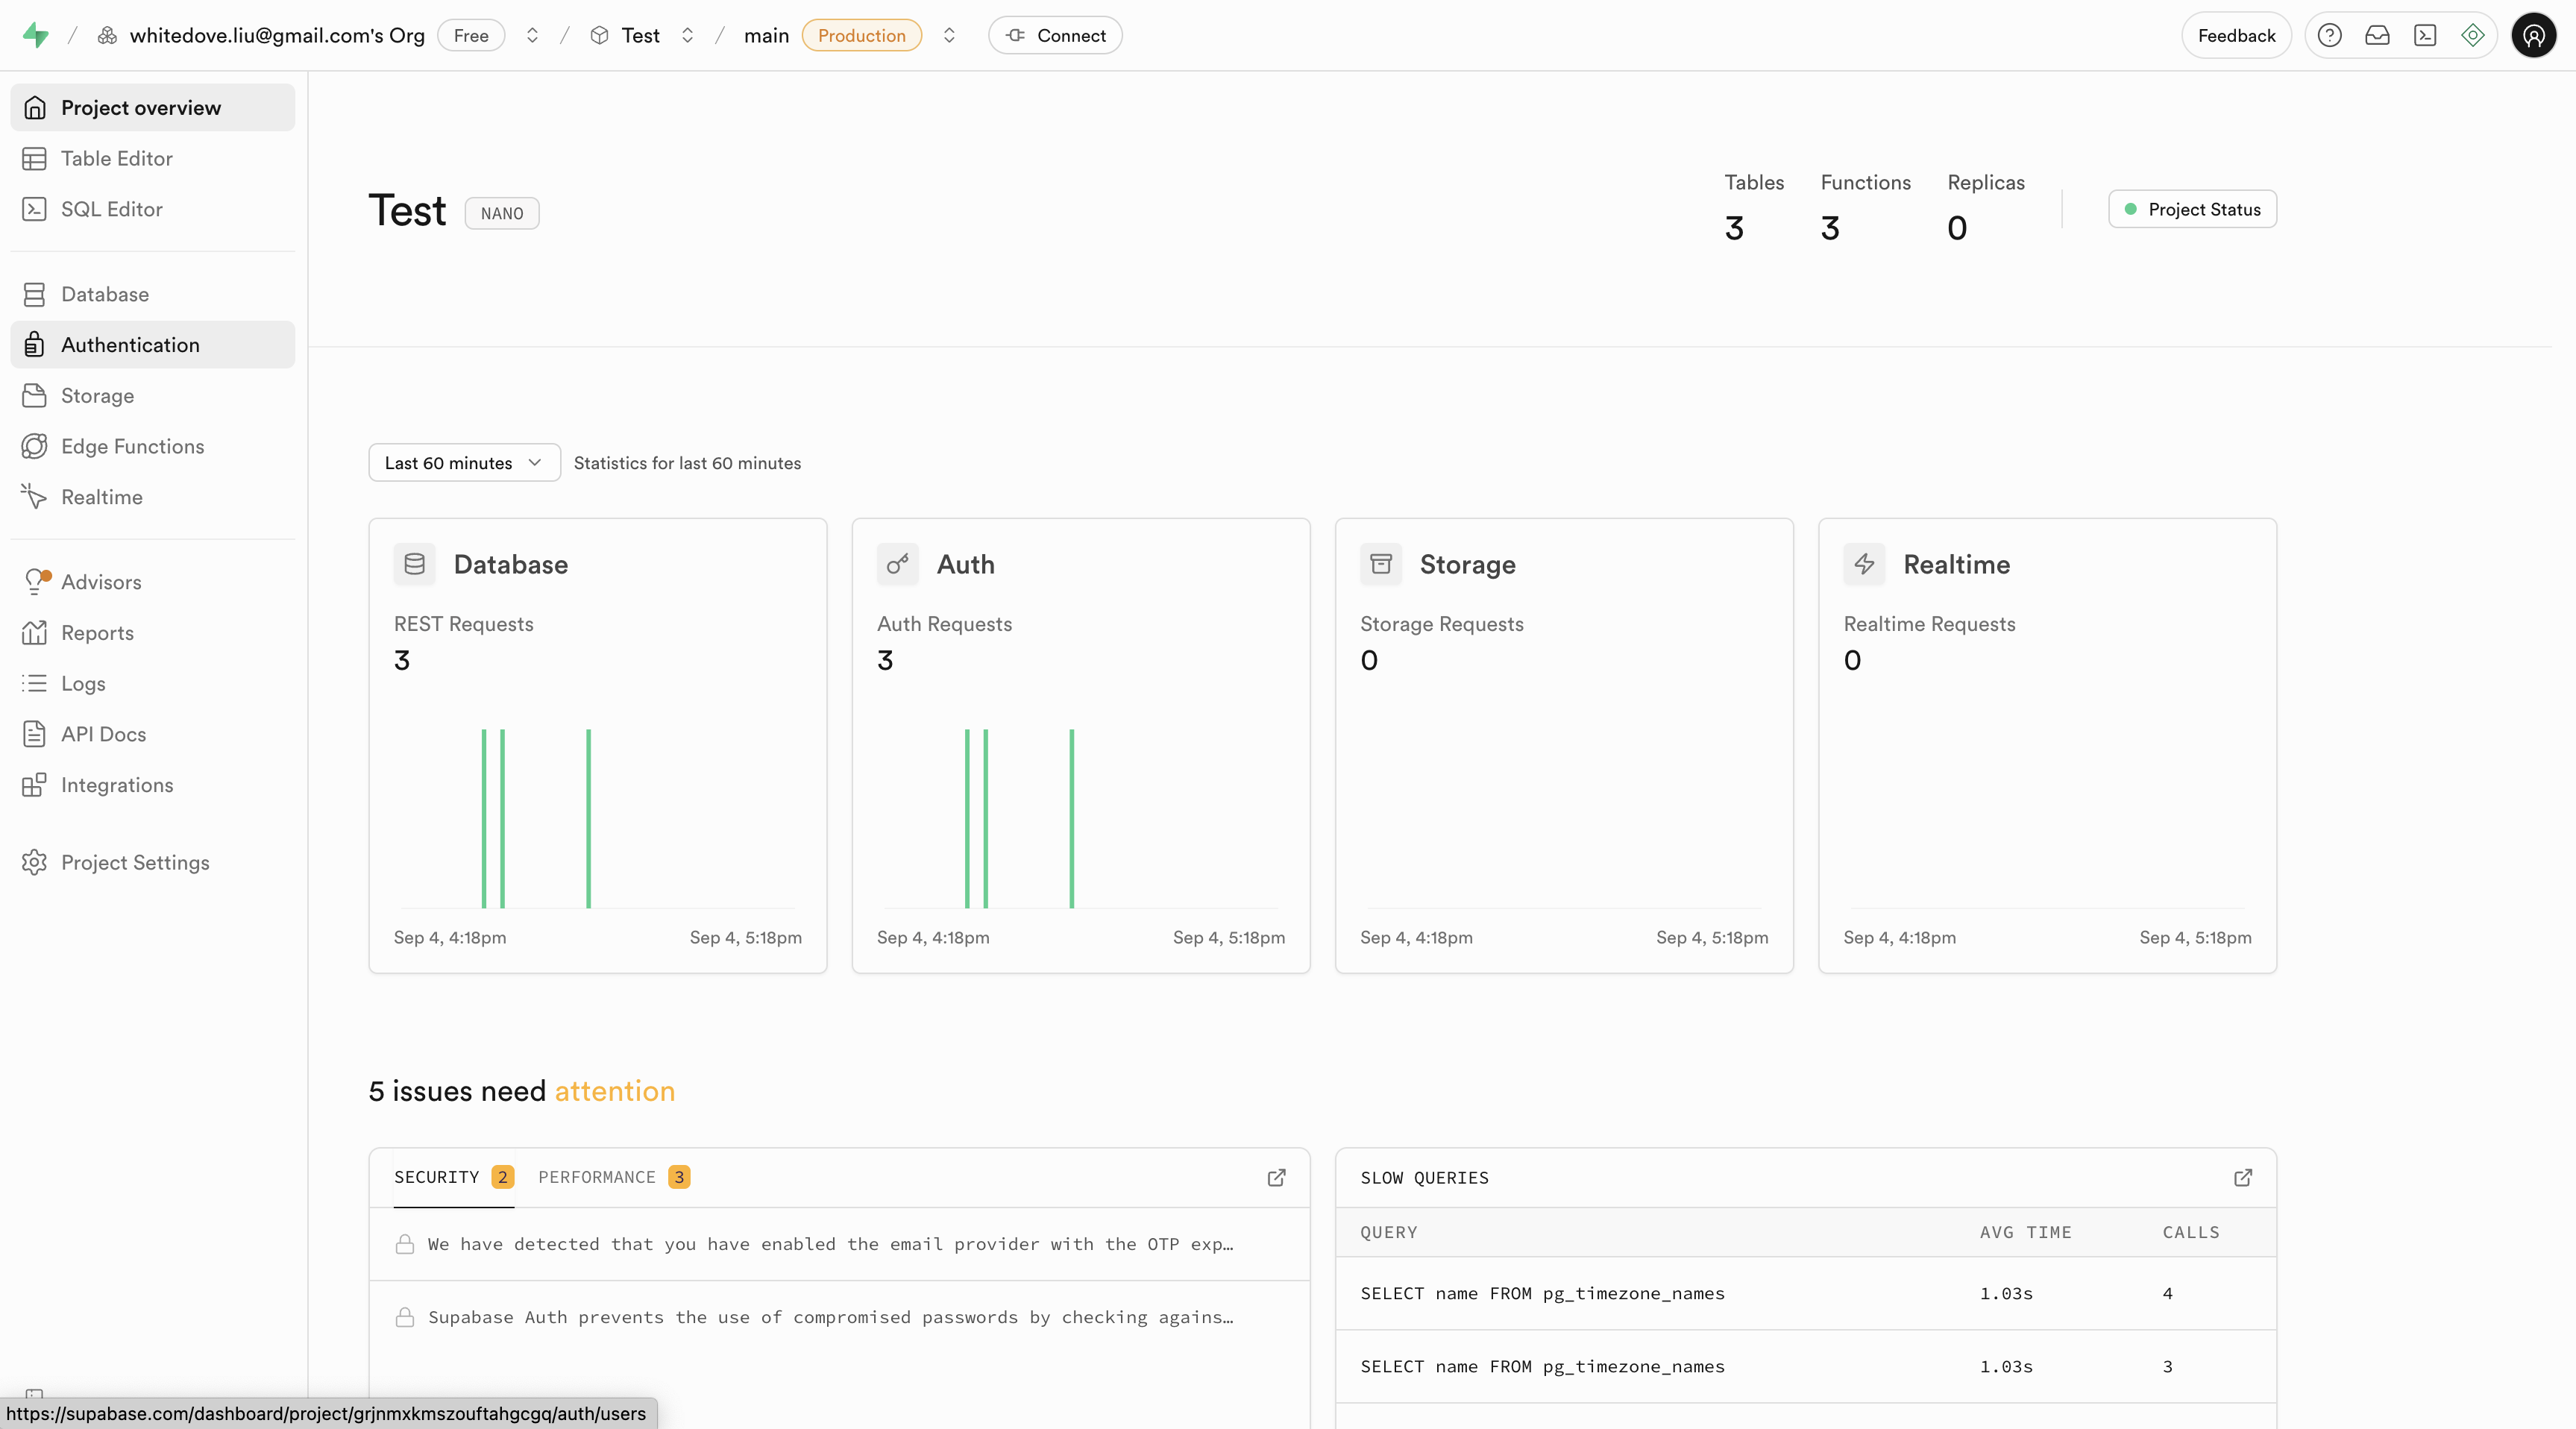

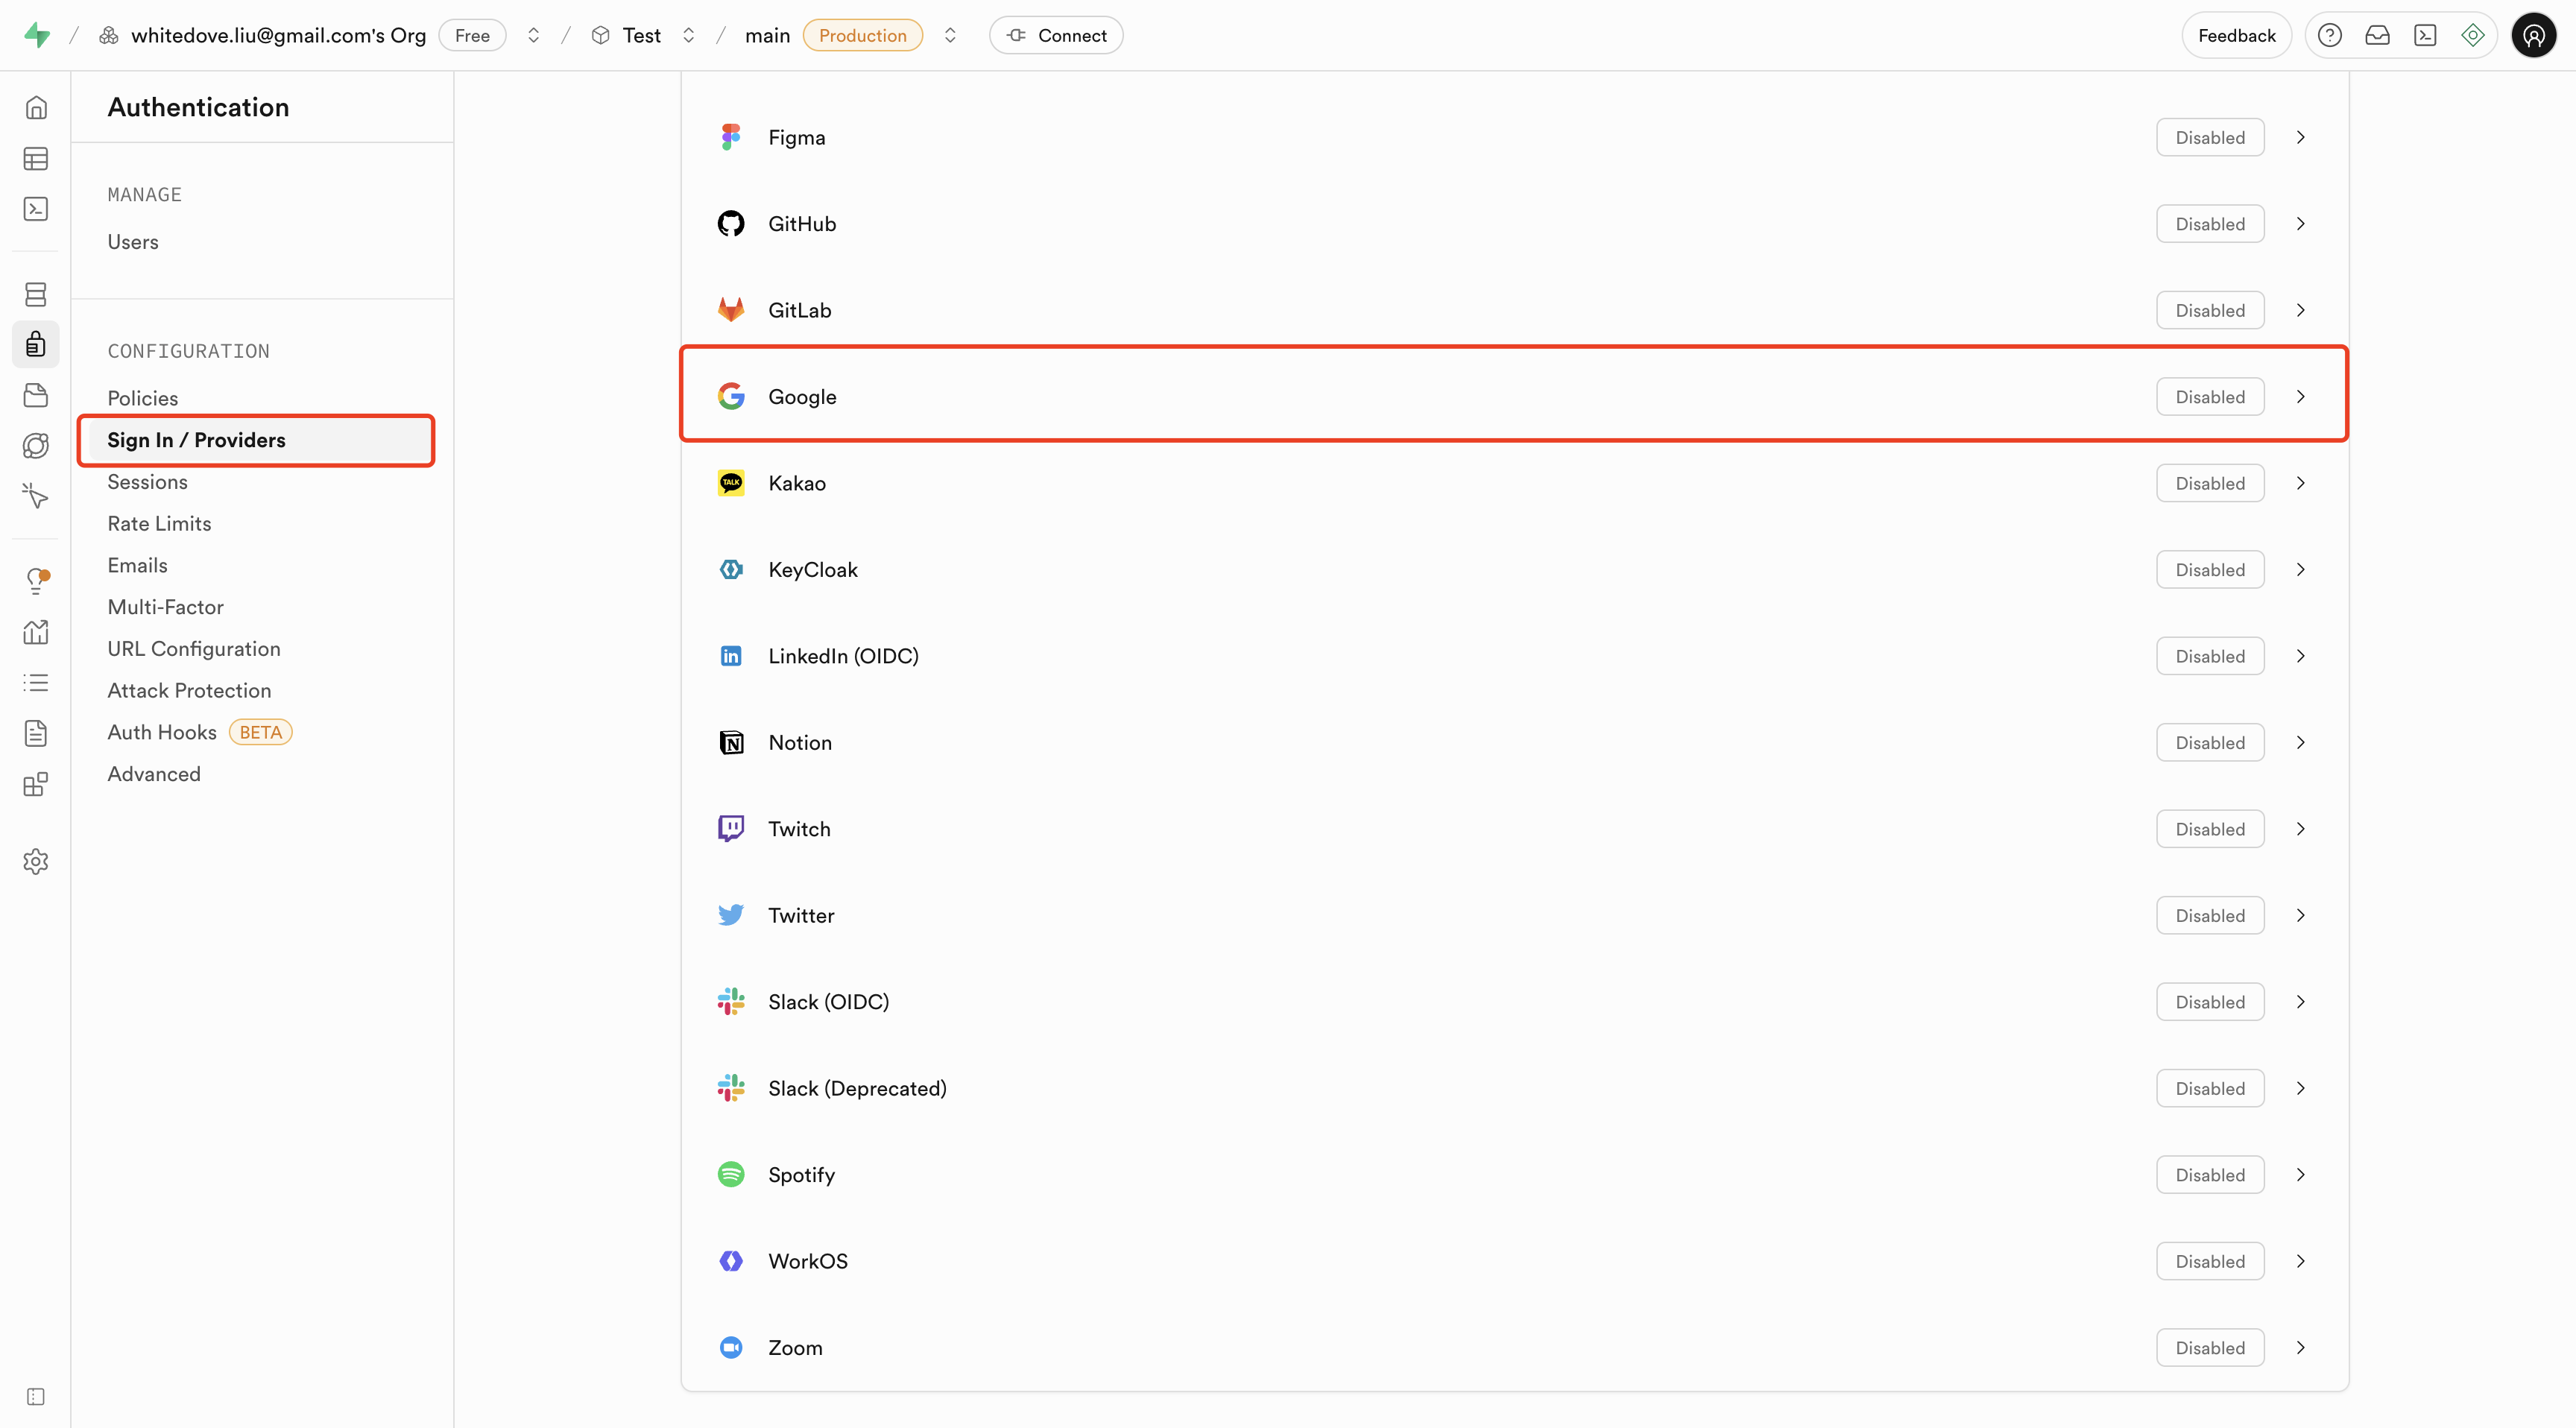
Enable Google Sign-In in Supabase
Step 1: Access Supabase Dashboard
Open the Supabase Dashboard and enter your project.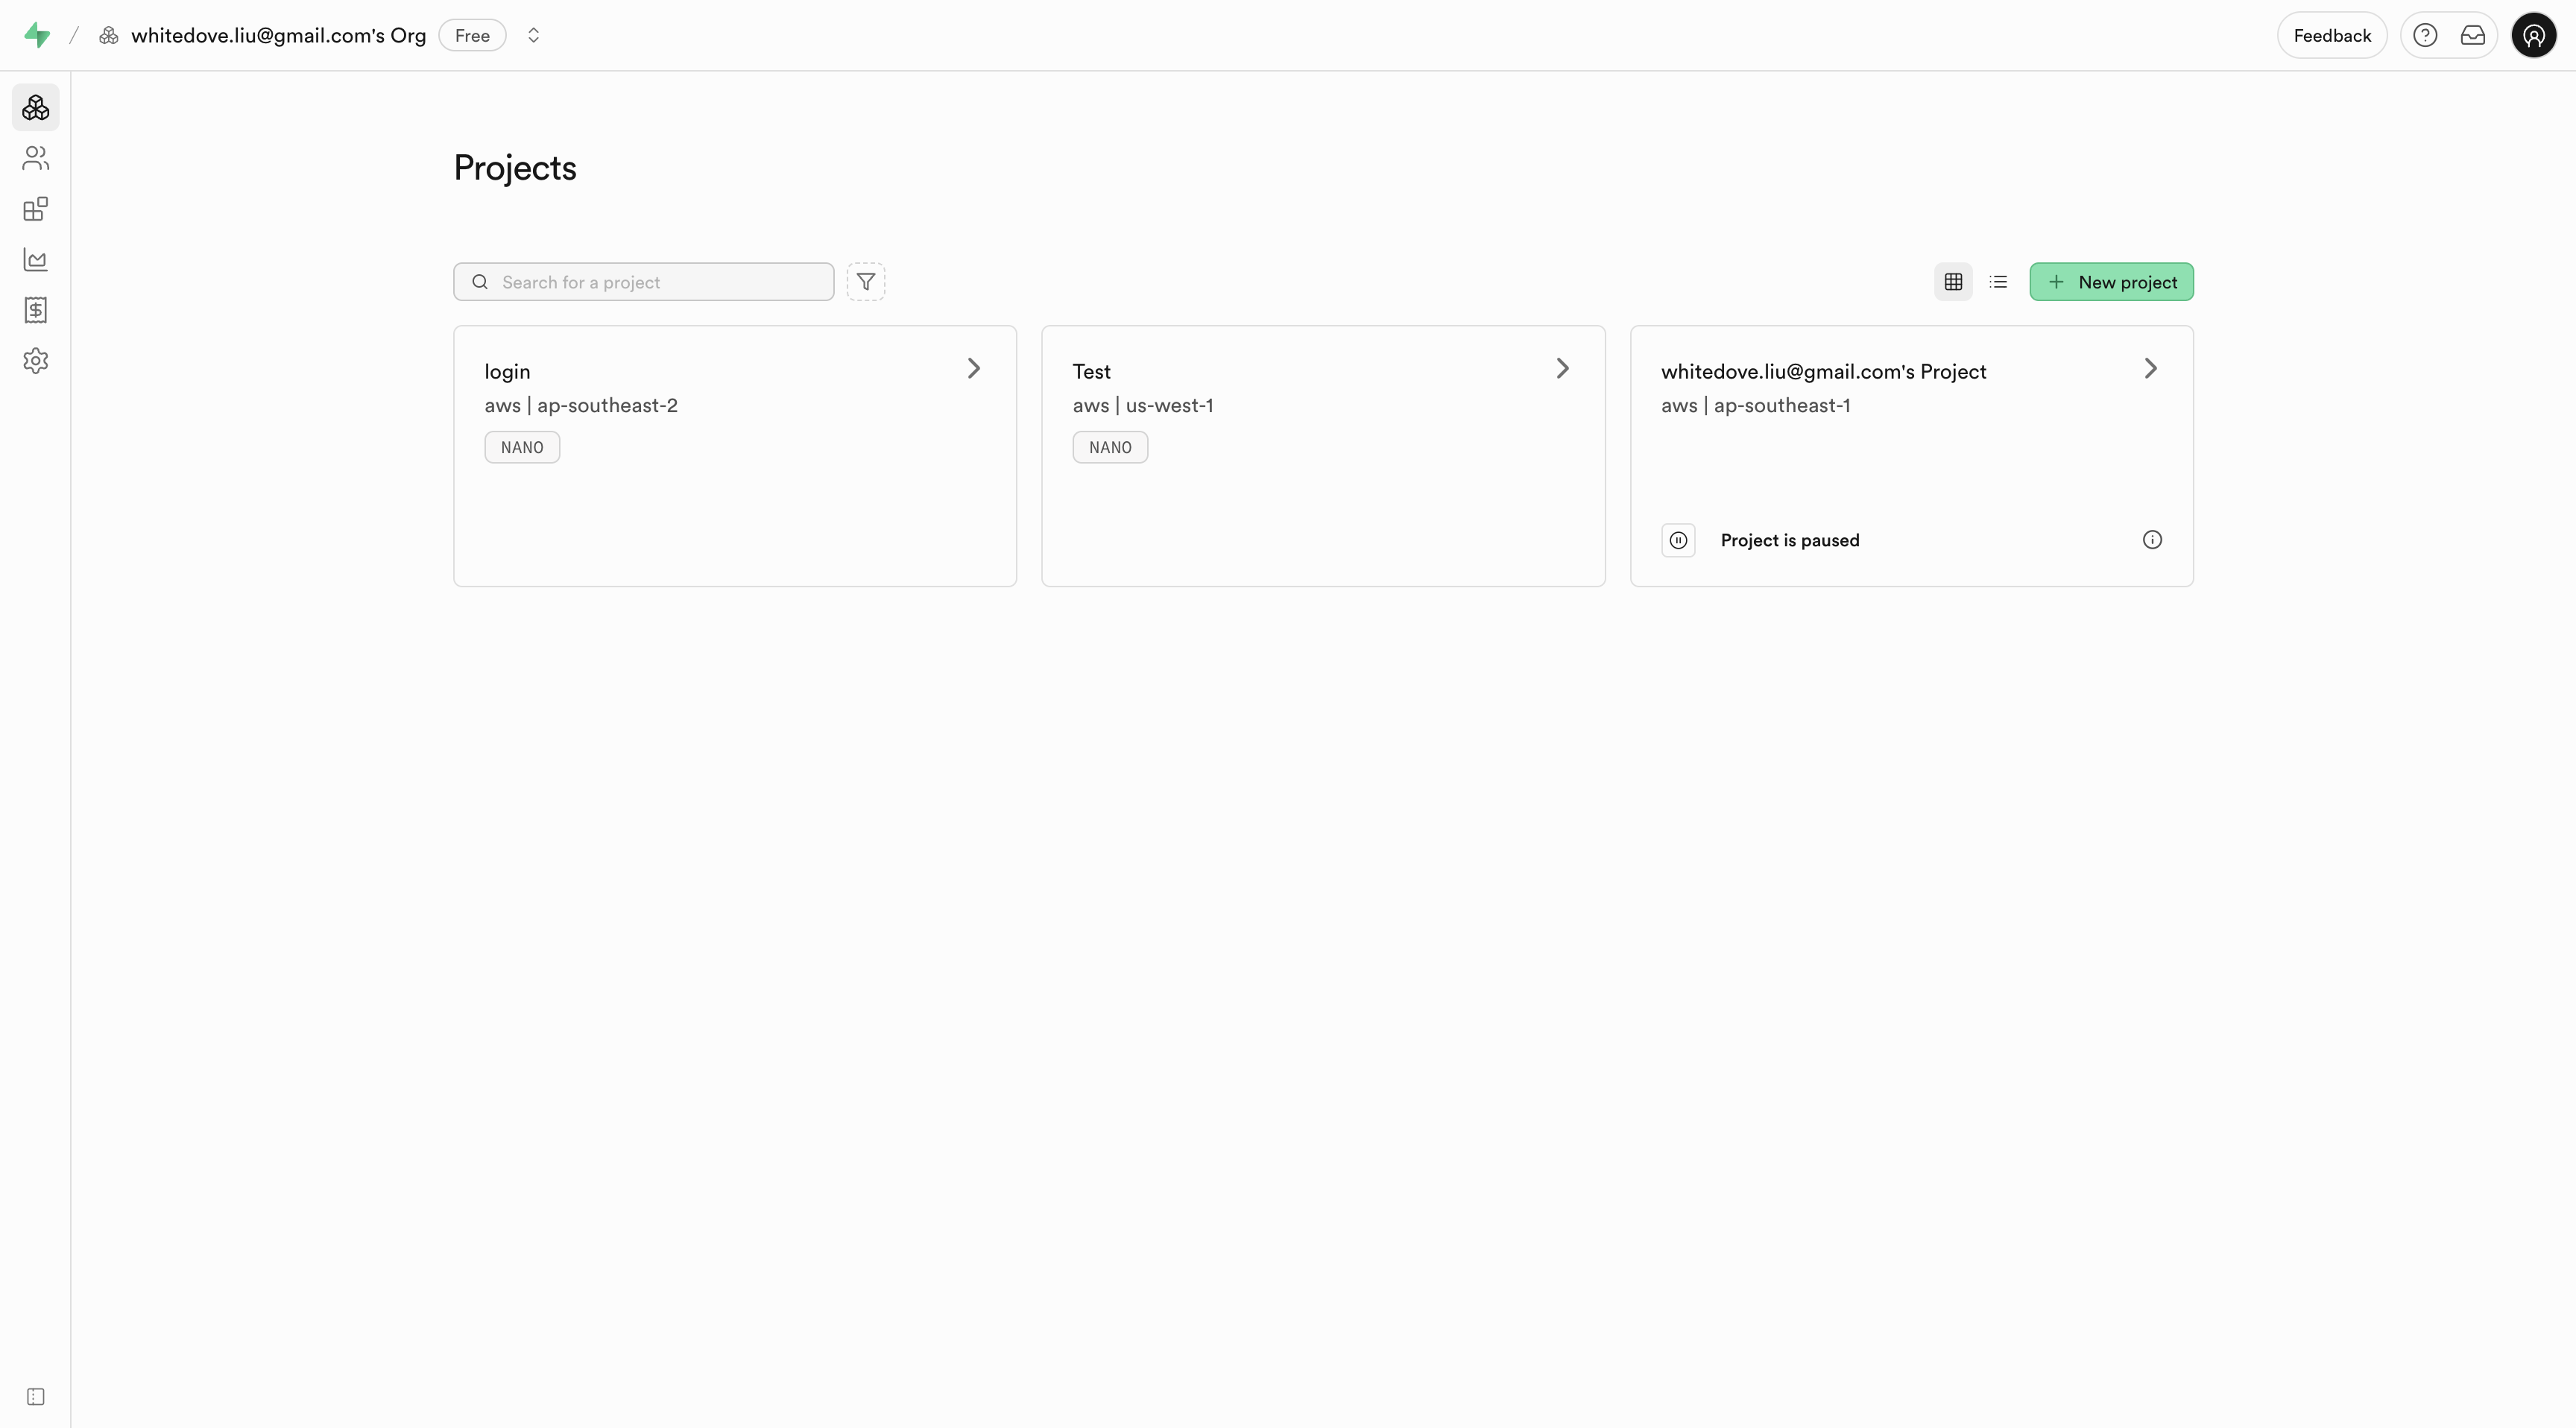
Connect Supabase inside Readdy
Goal: Link your Readdy project to your Supabase project and generate a page with Google Sign-In.Step 1: Connect Supabase
Connect your Supabase project to Readdy. See “How to connect Supabase” in Readdy for detailed instructions.
Step 2: Generate login/registration UI
In Readdy, enter the following prompt:This will generate the necessary UI components for Google Sign-In.
Step 3: Test the integration
In Readdy, click Share Link and open the site’s login page → click “Continue with Google” → choose an account and authorize.After a successful login, you should be redirected back to the SITE URL.In Supabase → Authentication → Users, you should see the newly created user record.
Troubleshooting
Common Issues
Common Issues
Issue: “Error 400: redirect_uri_mismatch”
- Solution: Make sure the callback URL in Google Cloud exactly matches the one in Supabase (including https/http and trailing slashes)
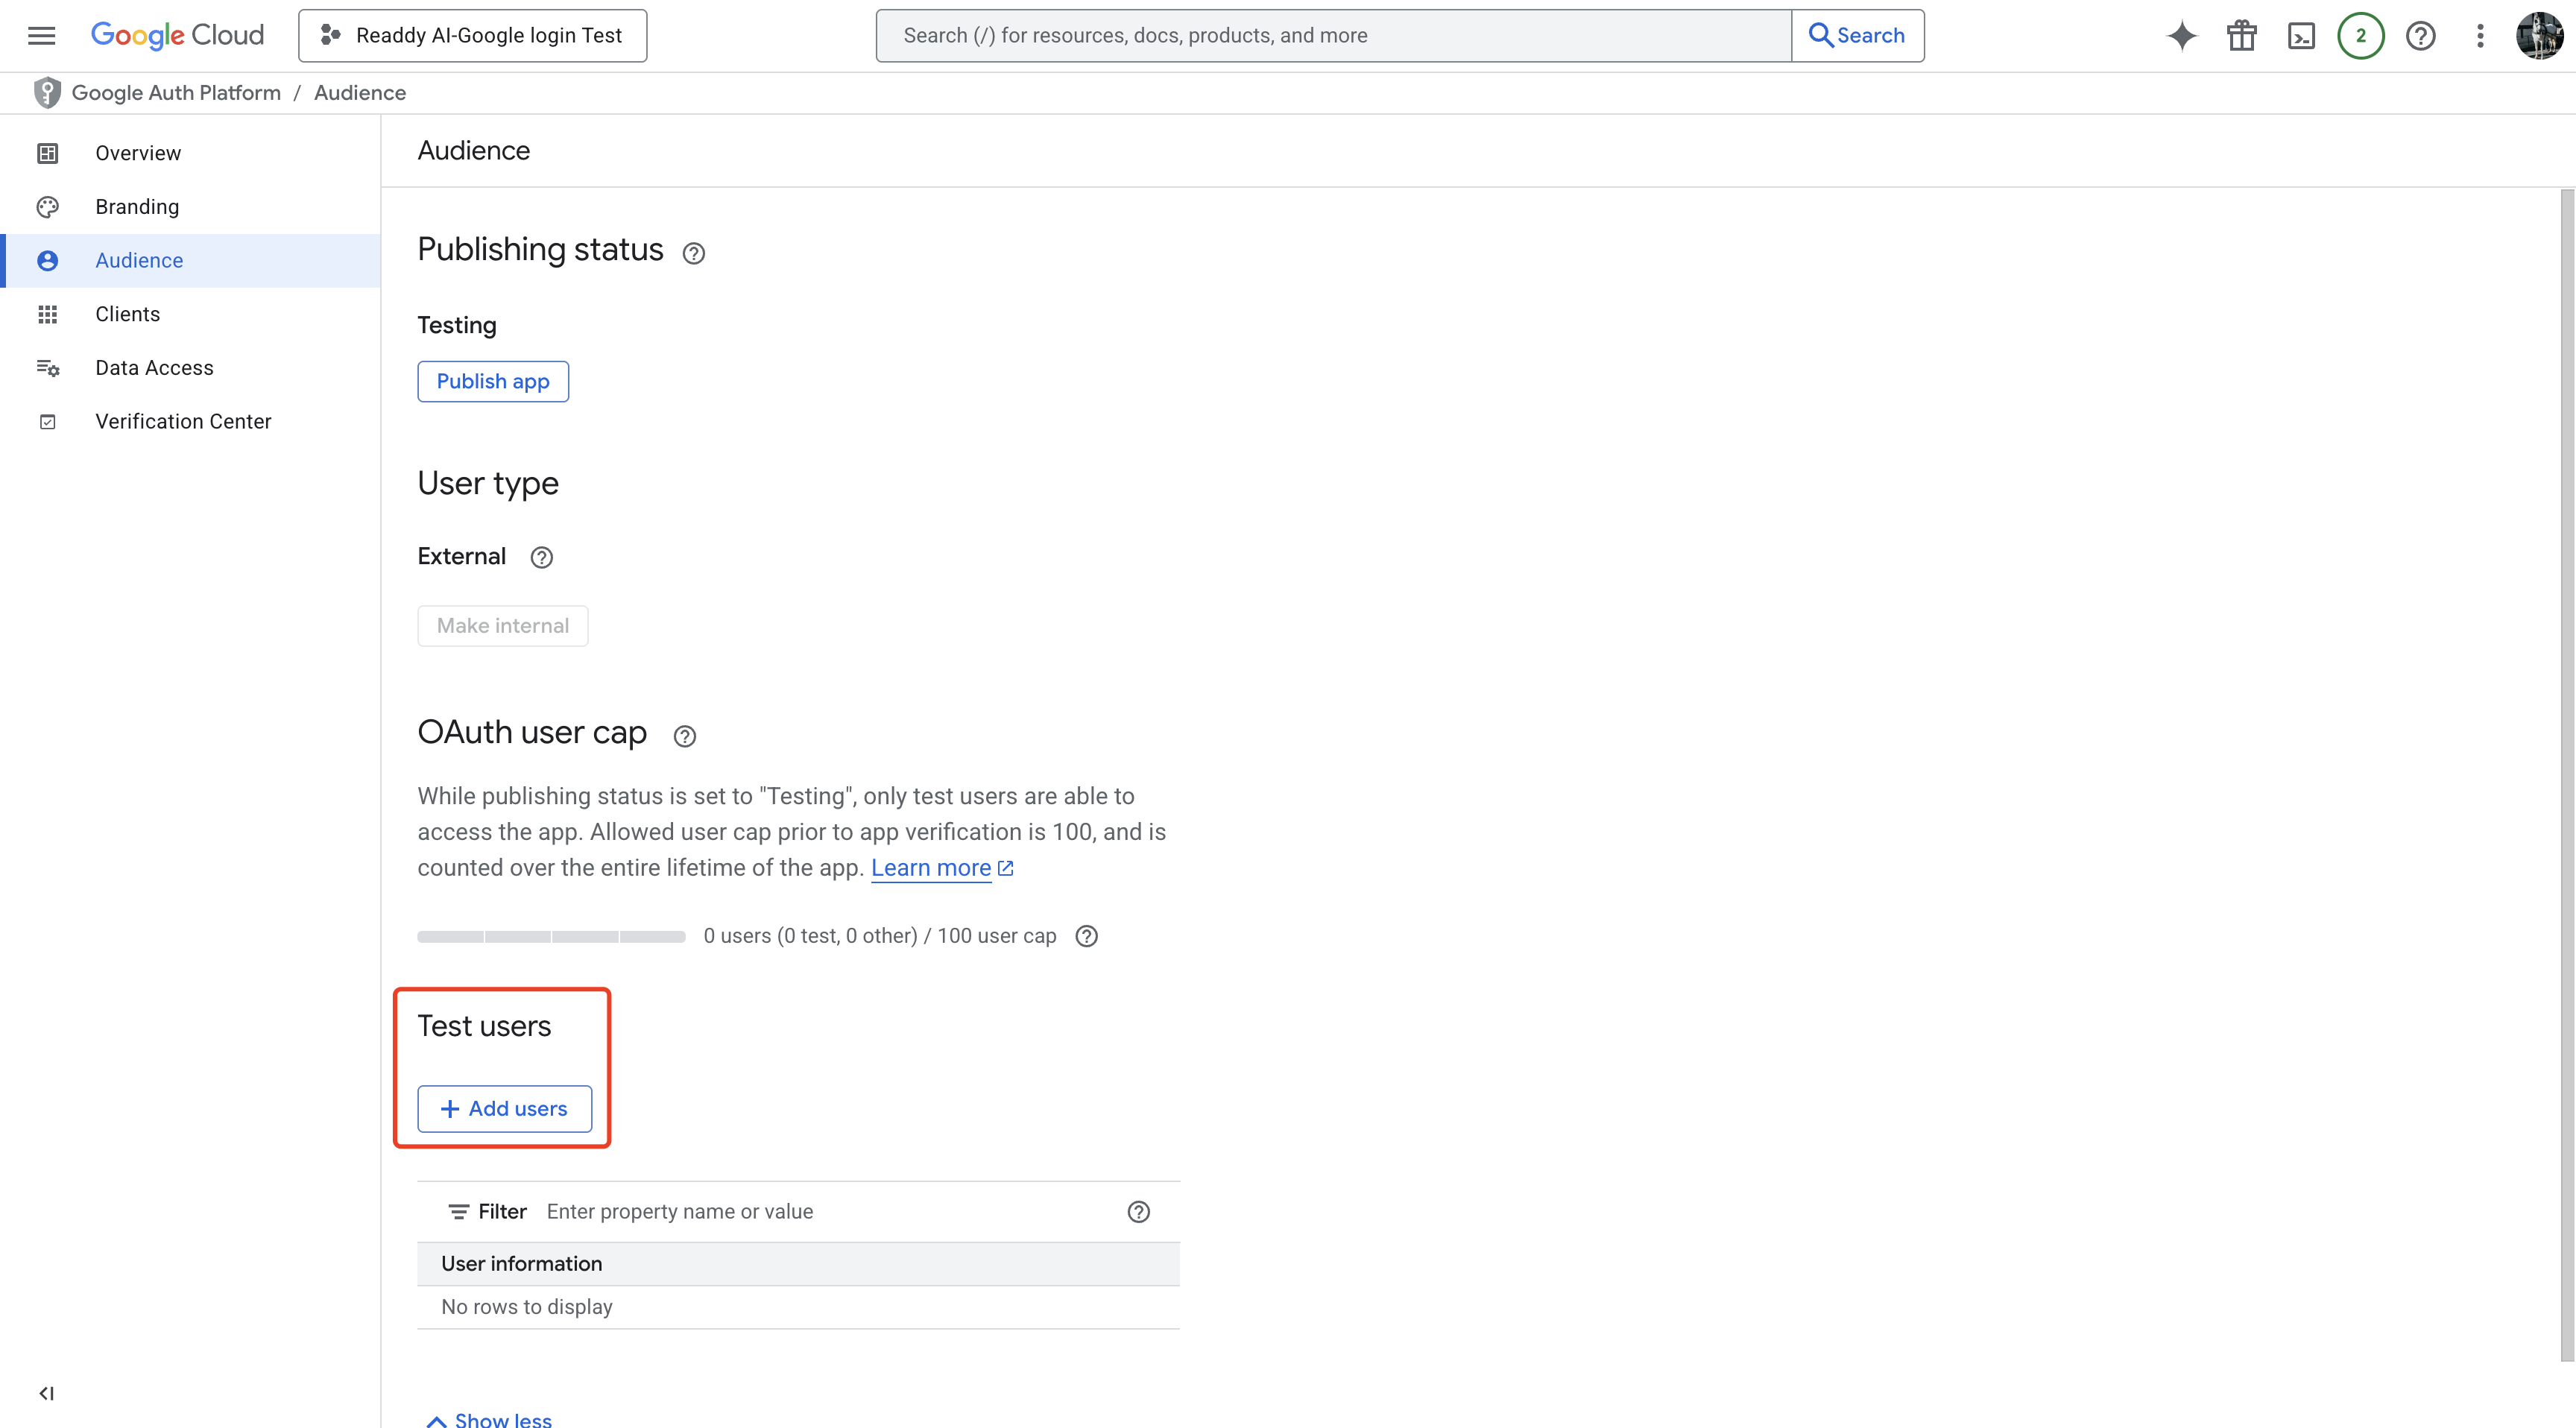
- Solution: This is normal during development. Click “Advanced” → “Go to [app name] (unsafe)” to continue testing
- Solution: Check that you’re using the same Supabase project in both the Google Cloud configuration and Readdy connection
Next Steps
Next Steps
Once Google Sign-In is working:
- Add user profile management - Allow users to update their profile information
- Implement role-based access control - Set up different user permissions
- Set up email notifications - Send welcome emails and notifications
- Configure additional OAuth providers - Add Facebook, Twitter, or other login options