Feature Highlights
- Quickly improve search information: Configure page titles, descriptions, and keywords to enhance indexing effectiveness.
- Intelligent SEO generation: Supports AI‑assisted optimization to improve content quality with low effort.
- Google search preview: See how your webpage appears in search results in real time.
- Technical SEO files: Preview core files like
sitemap.xmlandrobots.txtto strengthen foundational SEO.
New to SEO? This guide walks you step‑by‑step from start to finish.
How to Use the SEO Configuration Feature
1. Access the Configuration Page
Click the “SEO Configuration” button in the top navigation bar of the website editor to open the configuration panel.
2. Choose a Configuration Method (First‑time Use)
When using for the first time, choose one of the following methods to get started: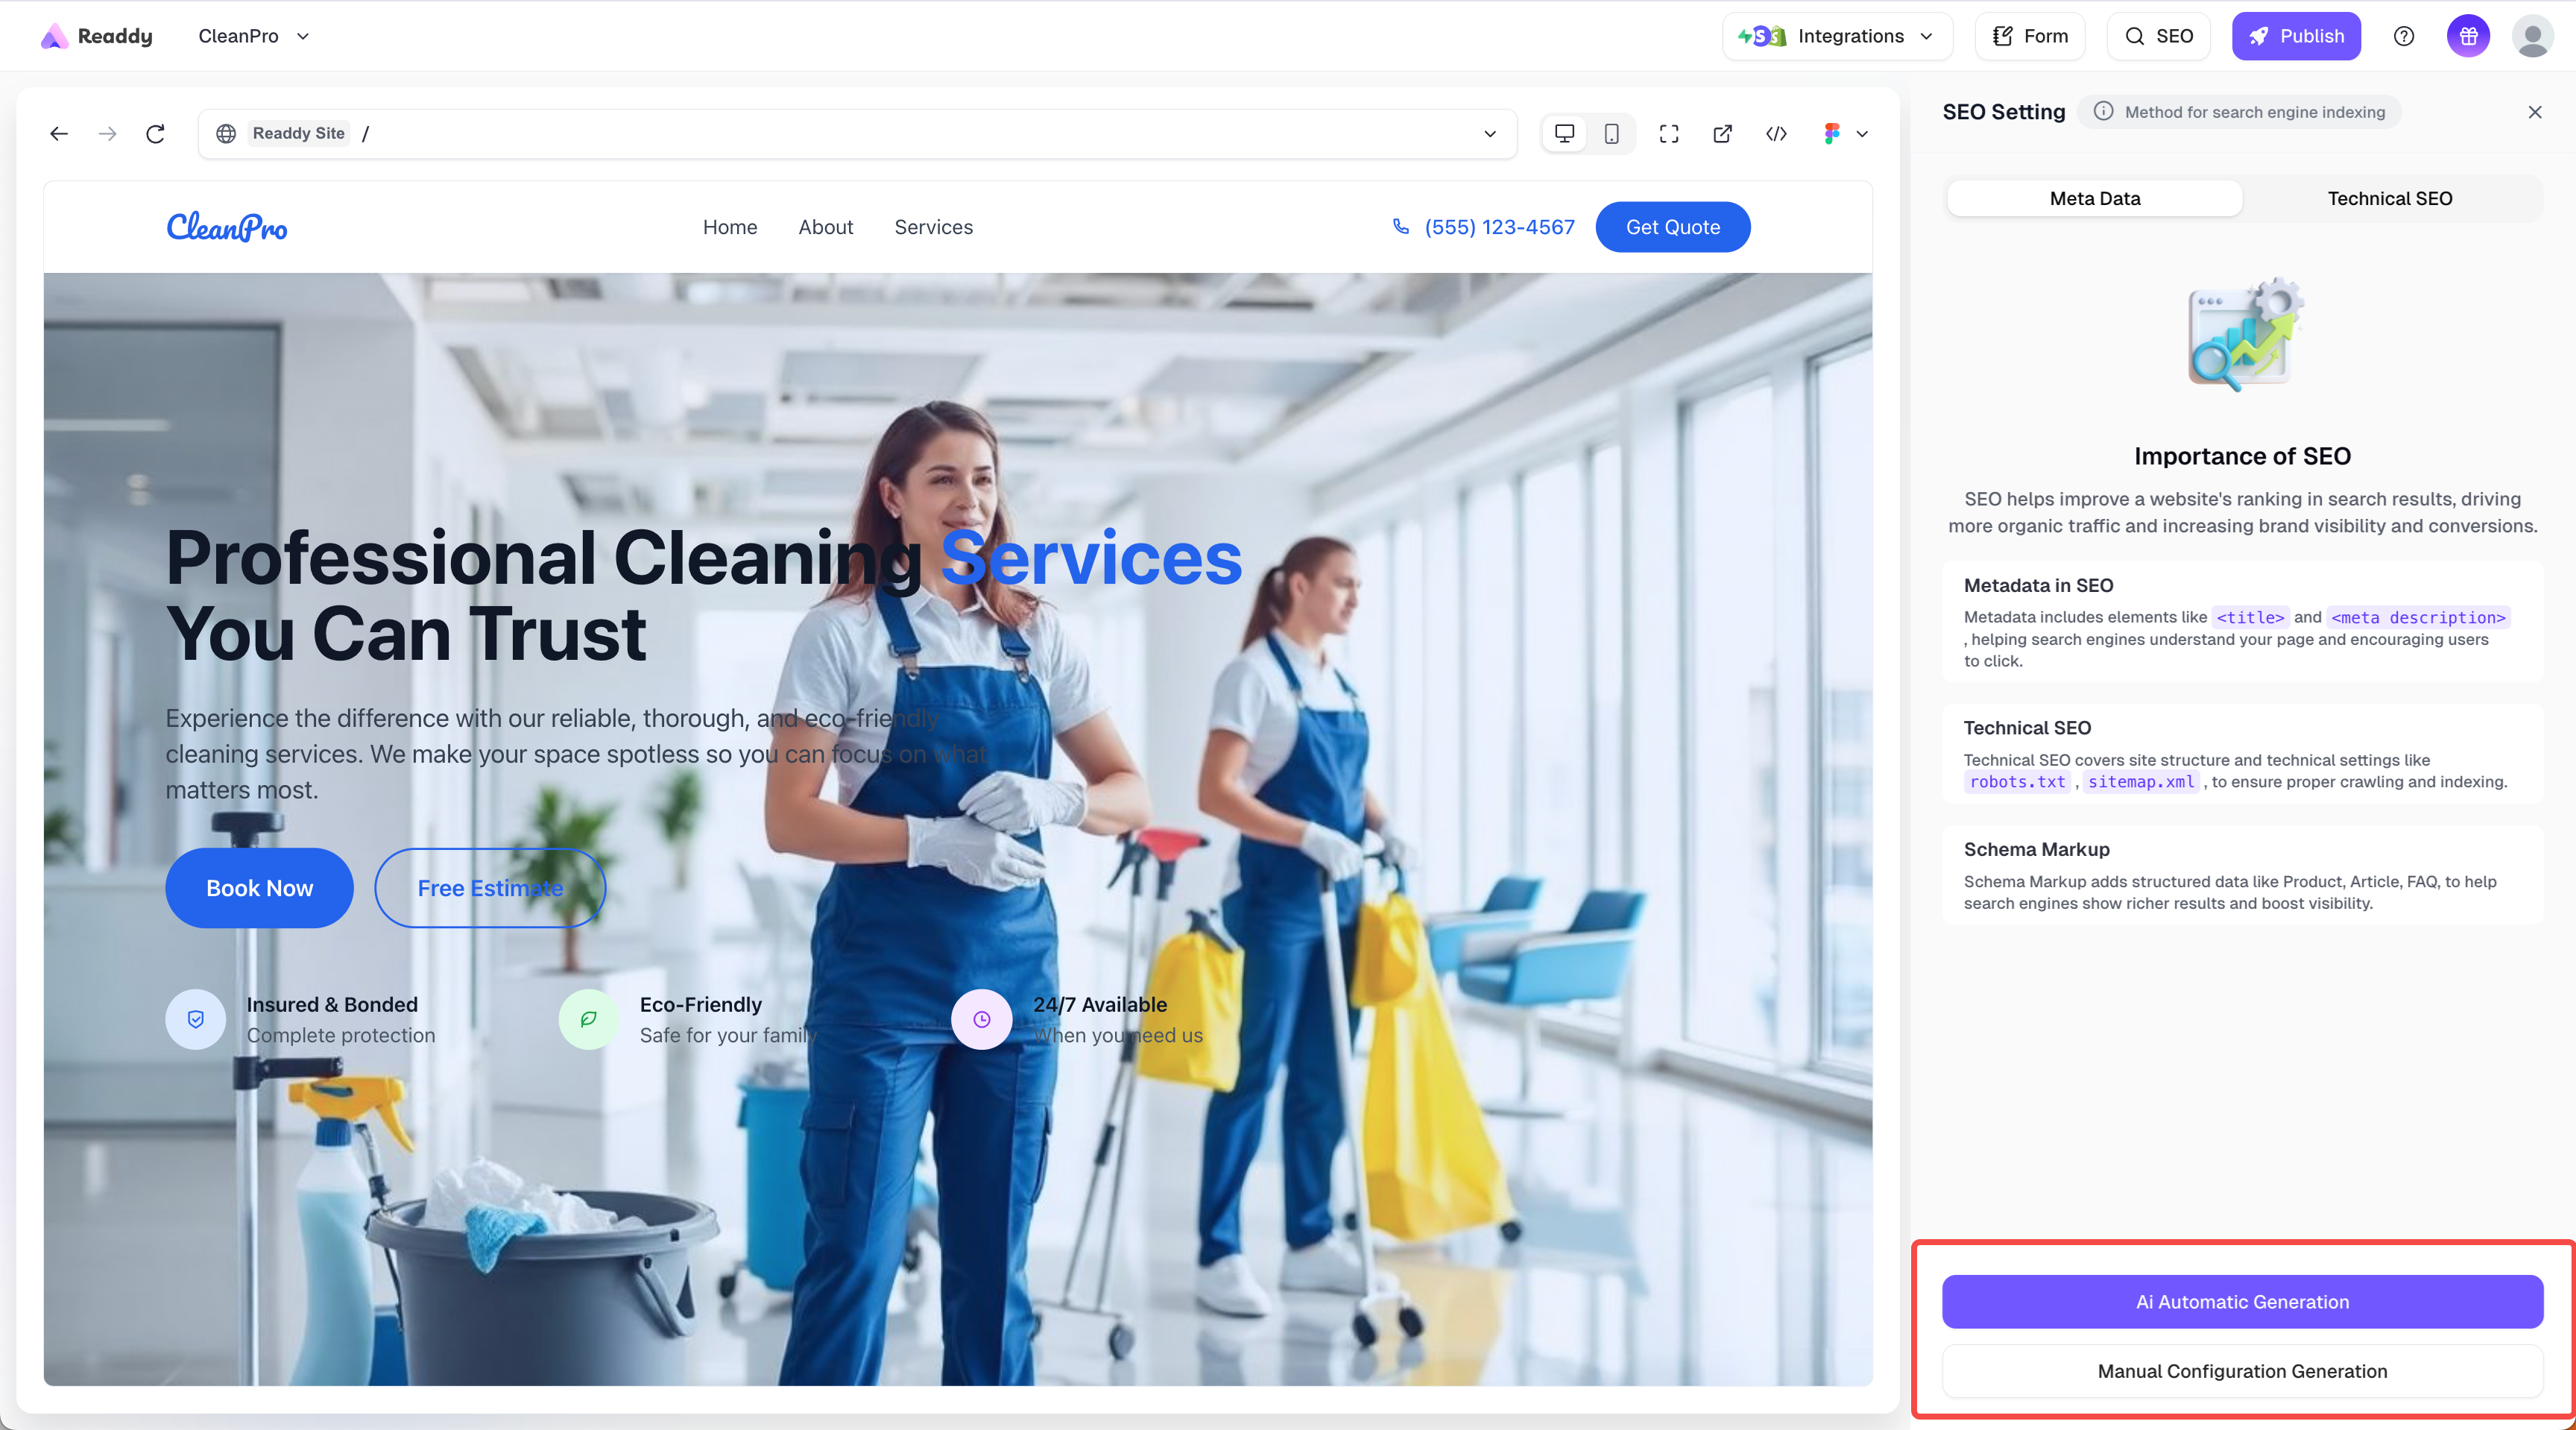
AI Auto‑generation

AI Auto‑generation

Manual configuration then optimization
- AI auto‑generation: The system automatically optimizes page SEO information. Best for quick setup.
- Manual configuration then optimization: Manually fill page information and then let the system assist with optimization. Best if you have specific content requirements.

3. Configure Meta Data (Page Basic Information)
In the configuration panel, you can set the following for each page:| Settings | Notes |
|---|---|
| Title | The page title shown in search results. Keep it concise and clear. |
| Description | A brief summary that encourages clicks. |
| Keywords | Page‑related keywords to improve search relevance. |
| Indexable | Controls whether this page can be indexed by search engines. |
| Favicon | The small icon shown in browser tabs. |
| Structured Data (Schema Markup) | Preview only. If not generated, click the one‑click generate button. |
4. Preview Technical SEO Files
You can also check whether your site has generated the following files:
- sitemap.xml: Helps search engines crawl your website structure.
- robots.txt: Defines crawling rules for search engines.
5. Complete Configuration and Generate SEO Content

- After finishing configuration, click Generate in the bottom‑right corner. The system will automatically organize and optimize your SEO settings.
- Upon success, your website will have more comprehensive search optimization information.
6. Tips
7. FAQs
Why can't I see the latest title/description in search results?
Why can't I see the latest title/description in search results?
Search engines update with a delay. After generating SEO and publishing, they need time to recrawl and update. You can submit your sitemap to speed up indexing.
What if Technical SEO hasn't been generated?
What if Technical SEO hasn't been generated?
First confirm your content is complete. If it’s still missing, click the one‑click generate button. You can preview results in the panel after generation.
How to Get Your Site Indexed by Google
What is Google Search Engine Indexing?
Google search engine indexing refers to the process where Google’s crawler programs discover, analyze, and add your website content to Google’s search database. Once your site is indexed, users can find your website through Google searches. This is a crucial step for improving website visibility and gaining organic traffic.Steps to Follow
-
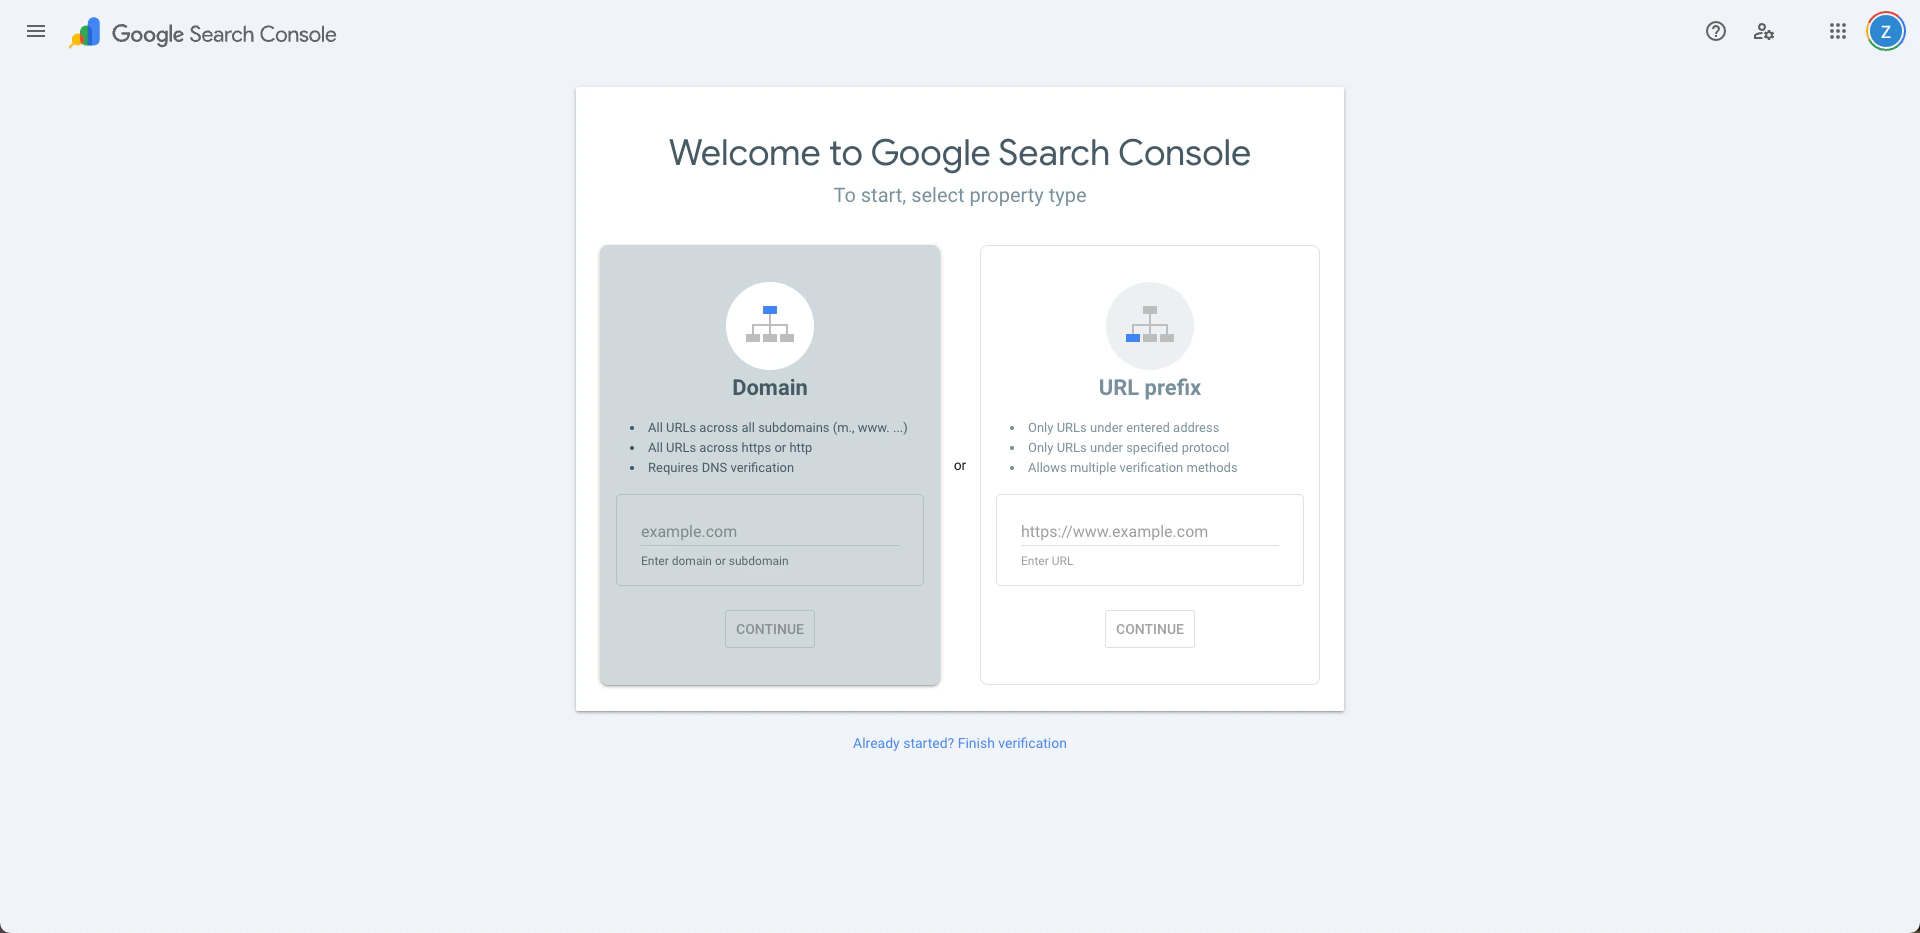
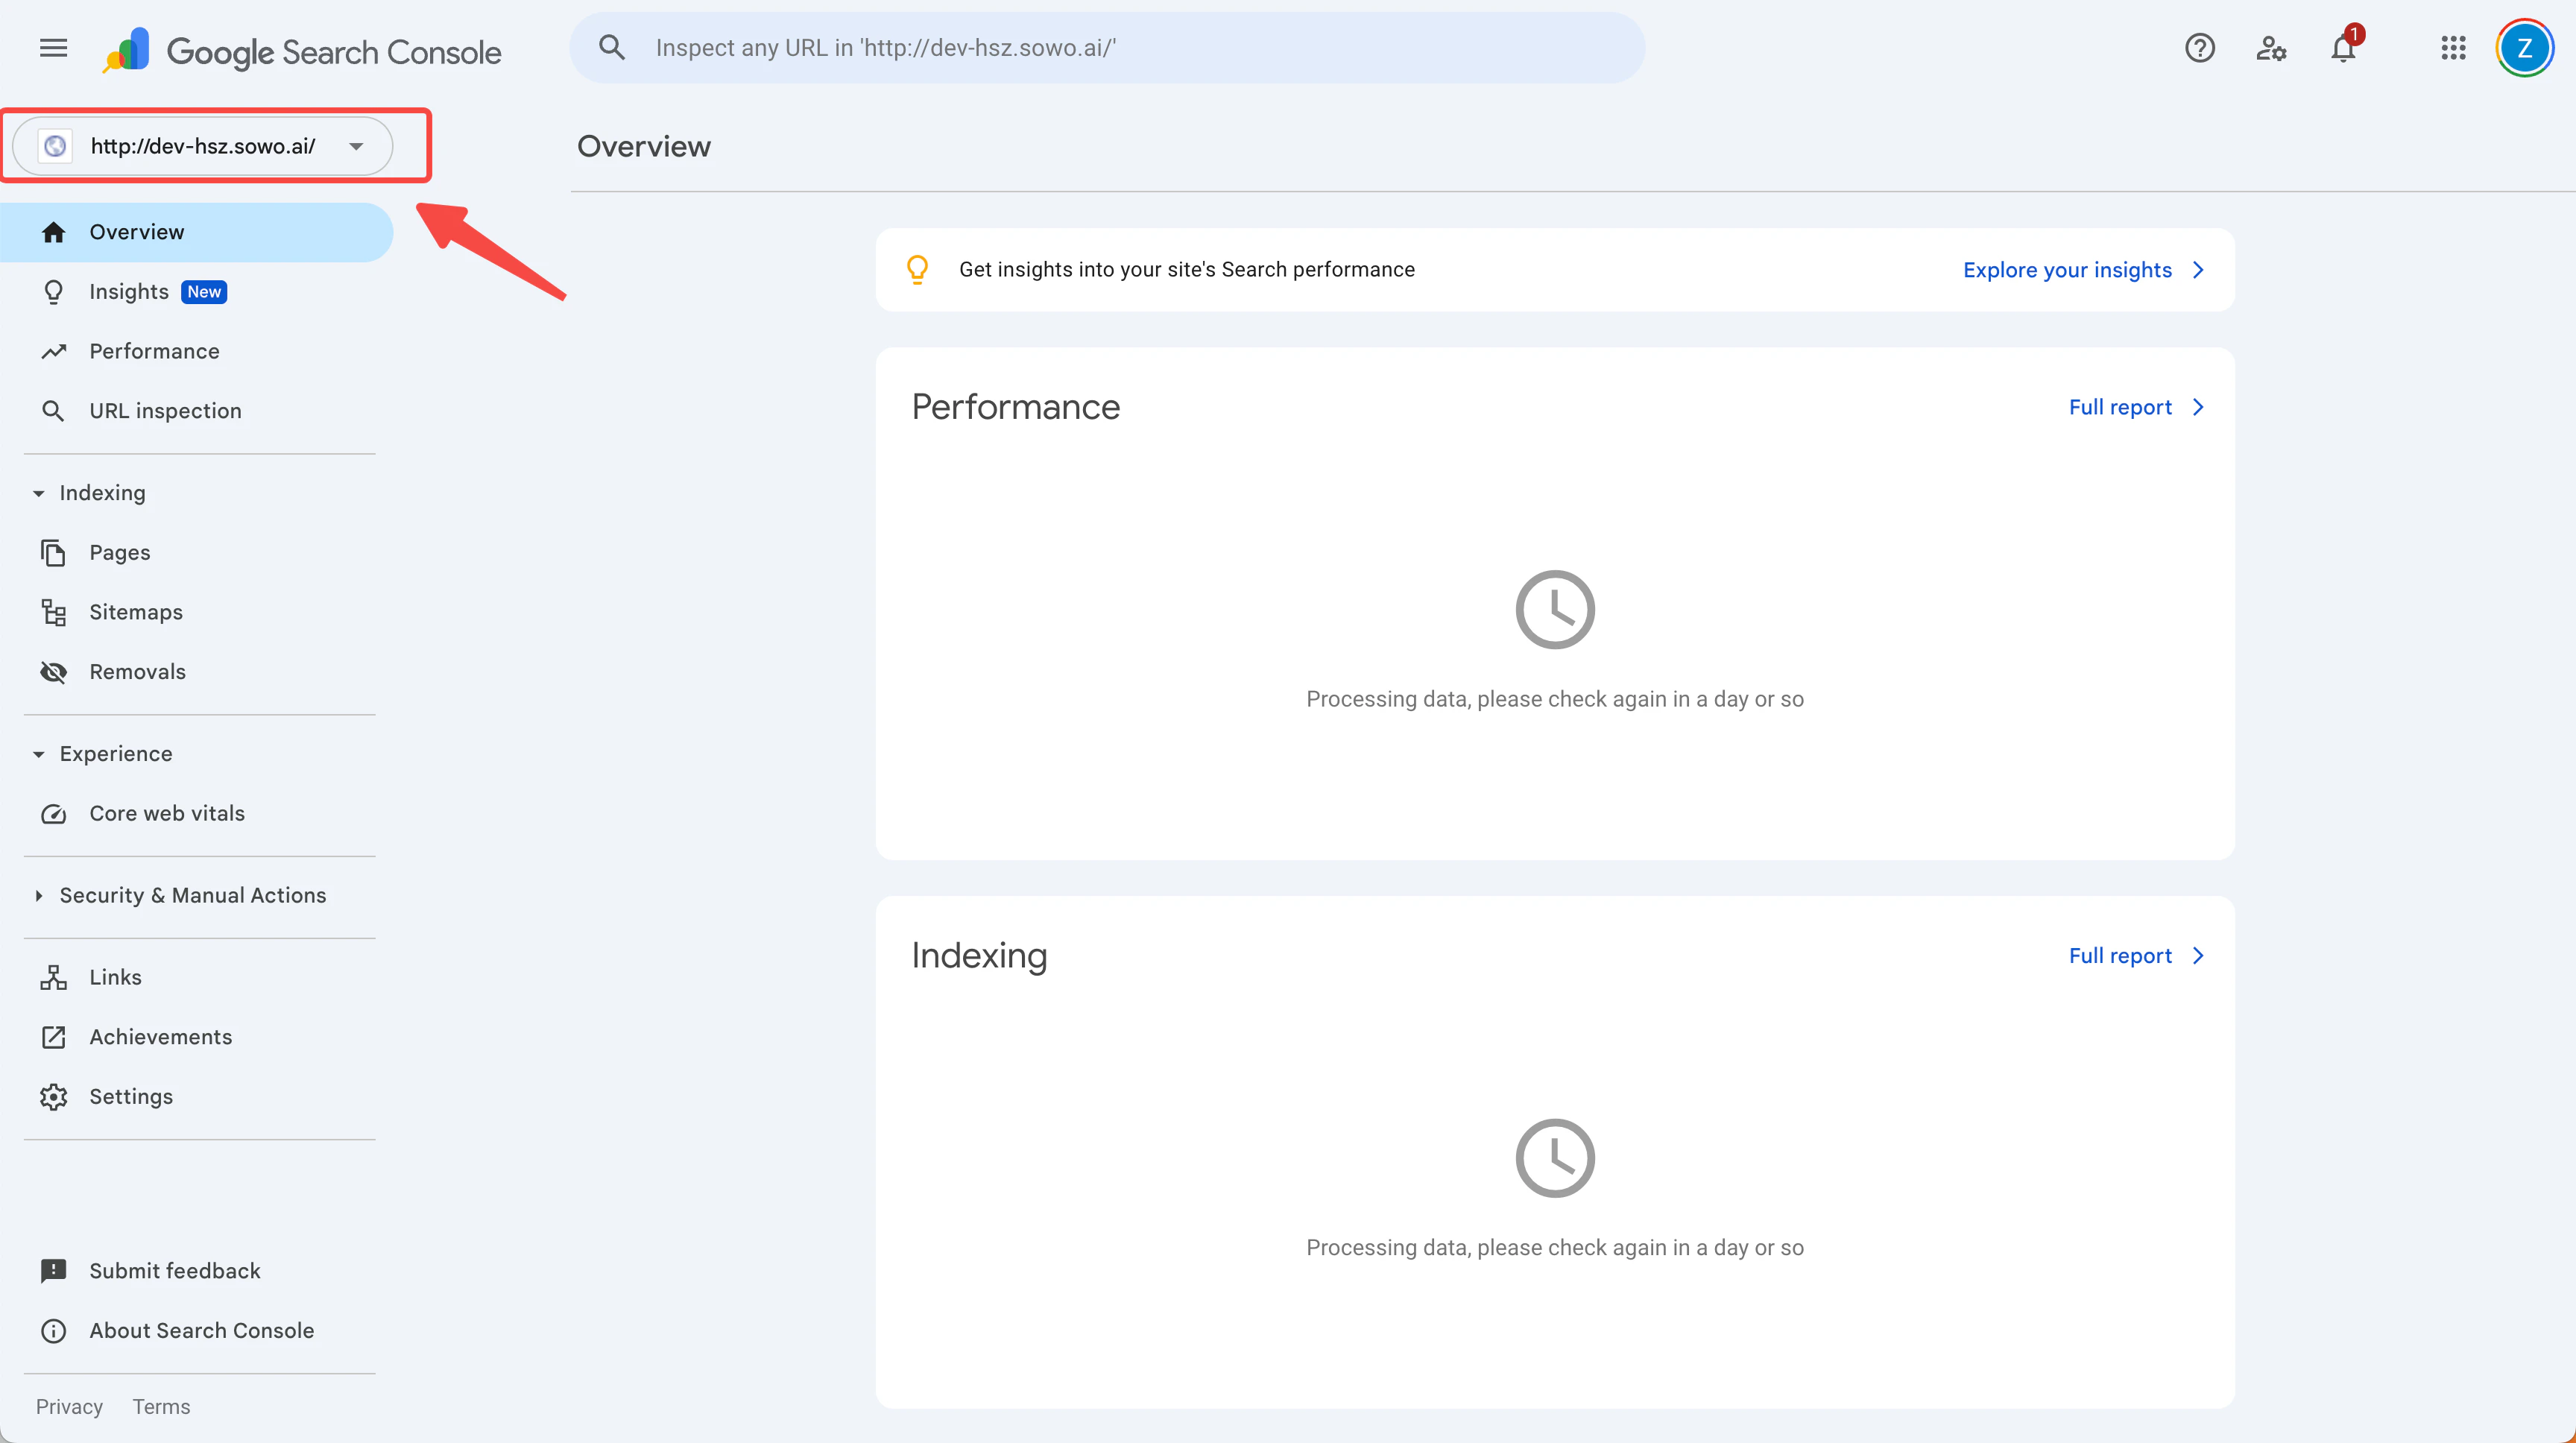
Access Google Search Console
First, you need to access Google Search Console and log in with your Google account.
-
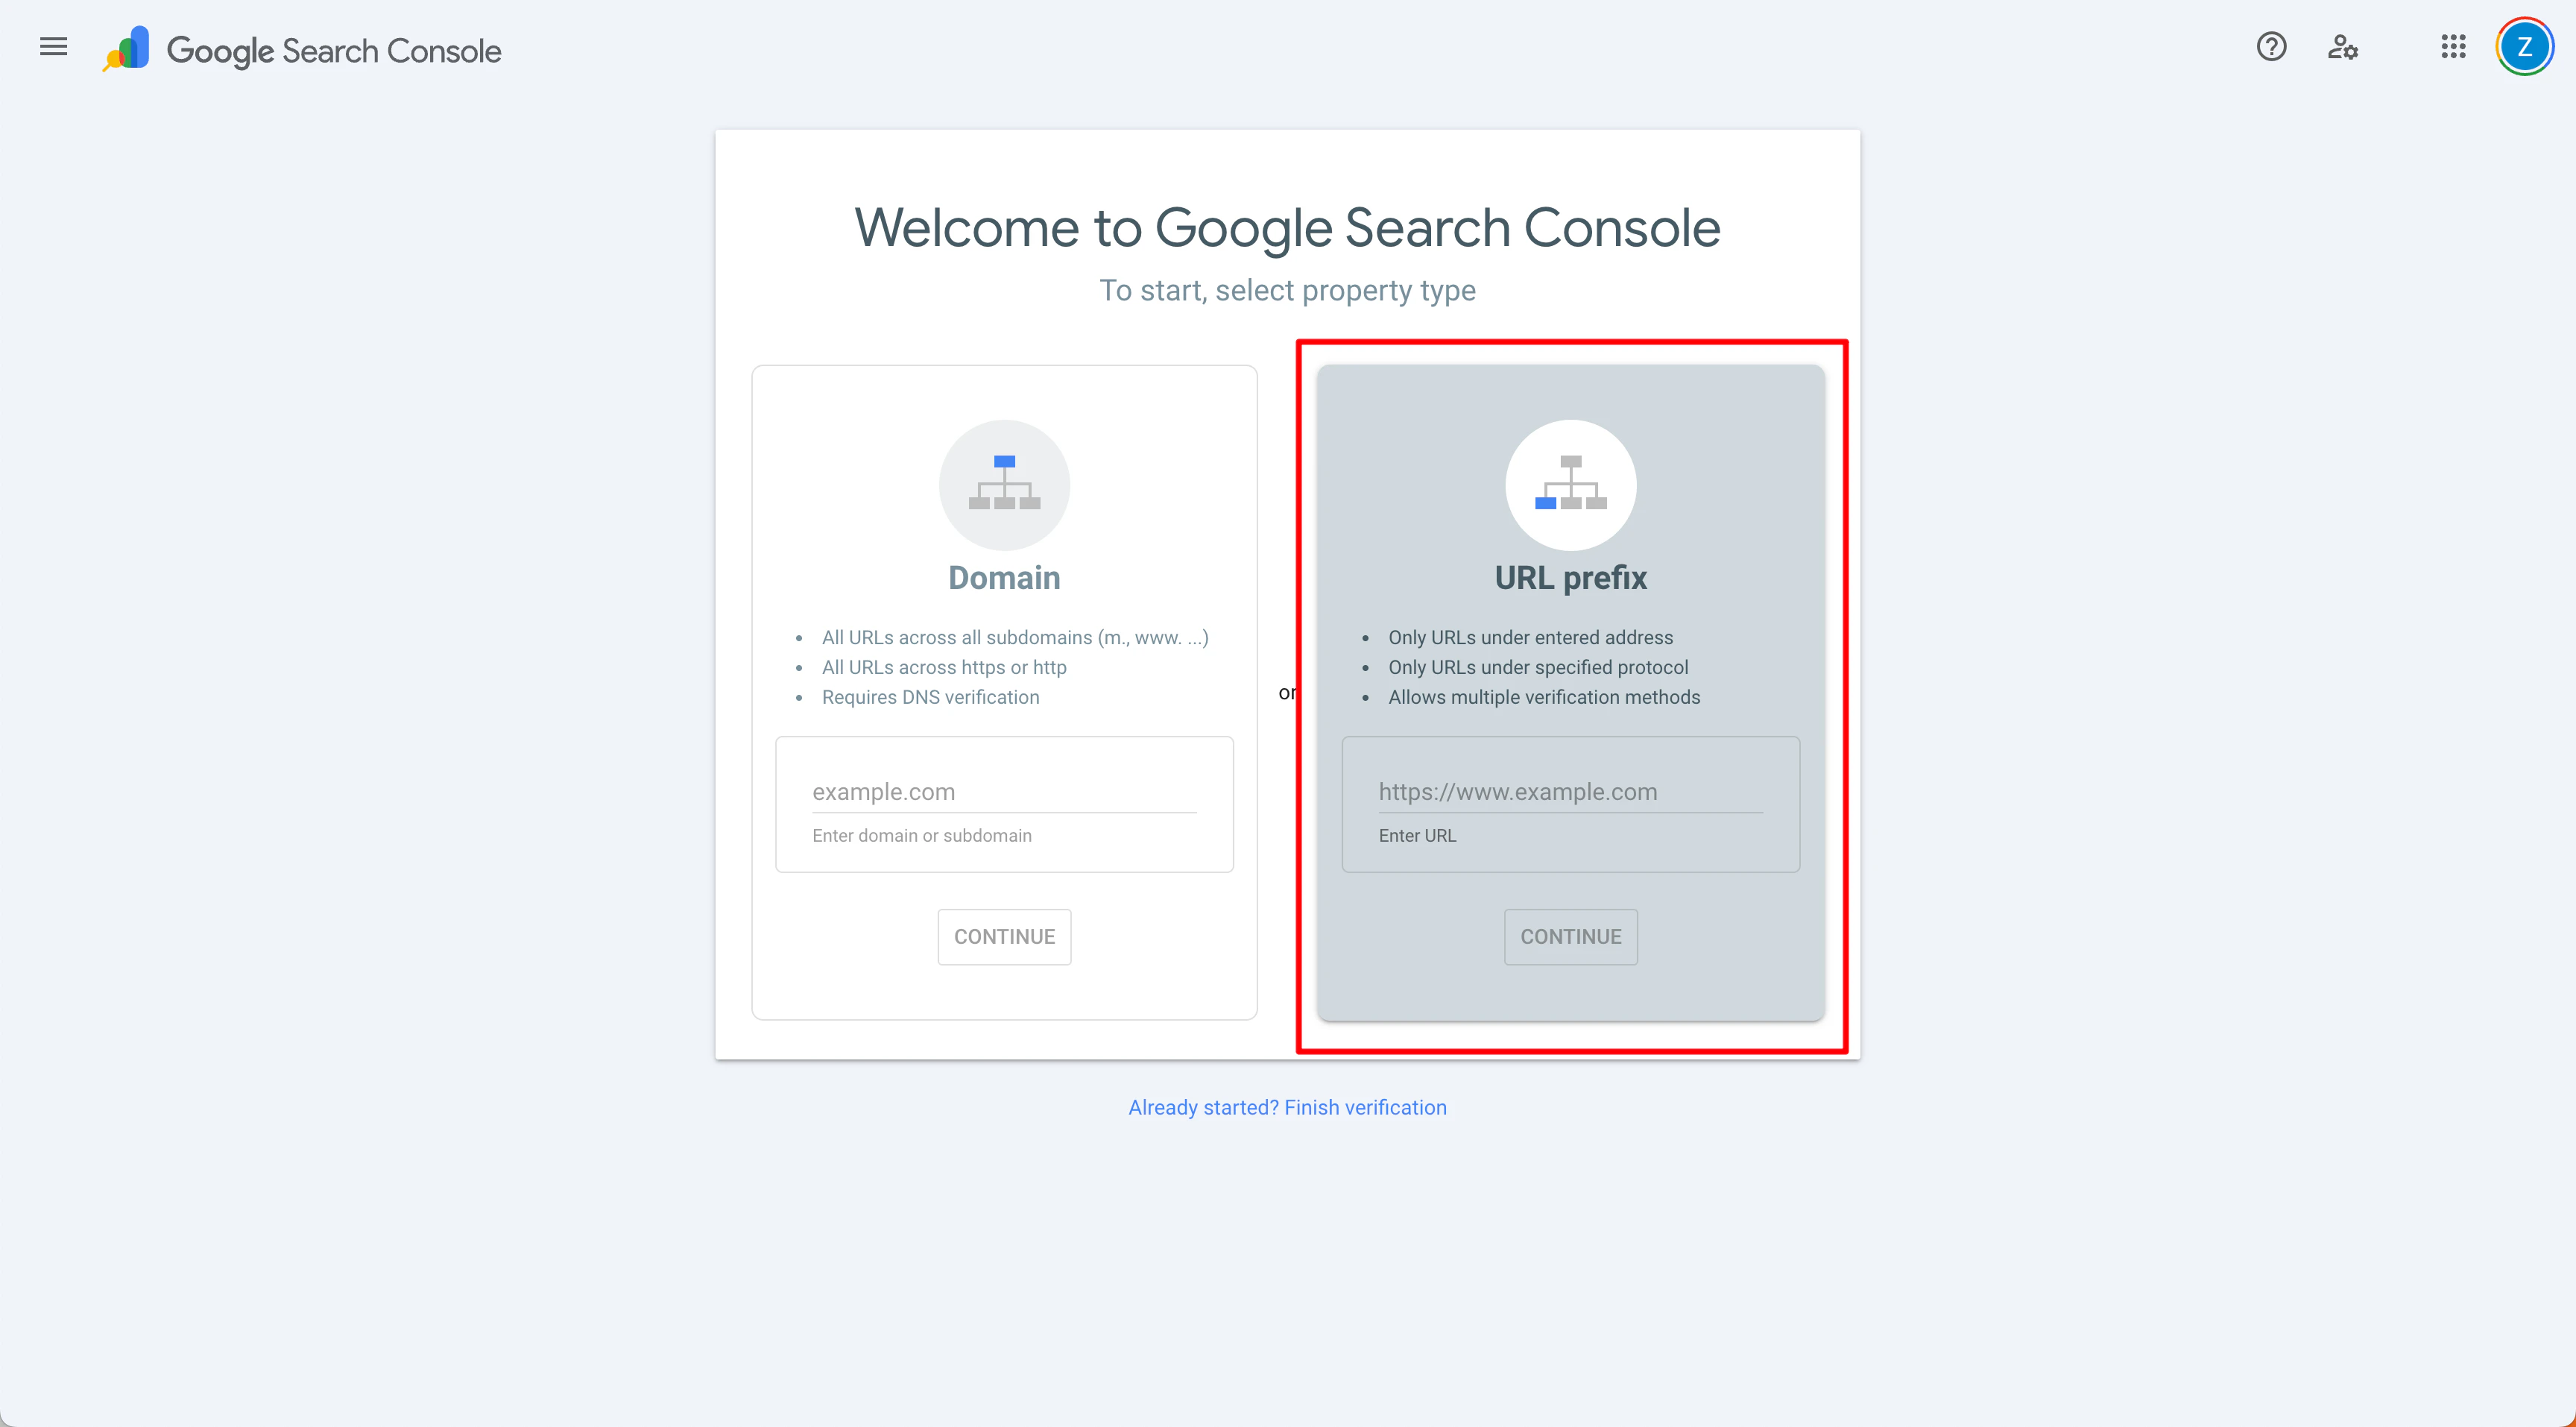
Select the “URL prefix” connection method.
After entering the interface, select the “URL prefix” connection method.
- What is URL Prefix?
URL Prefix is a verification method that allows you to verify all pages under a specific URL prefix. For example, if you verify
https://yourdomain.com, all sub-pages under that domain will be included.
- What is URL Prefix?
URL Prefix is a verification method that allows you to verify all pages under a specific URL prefix. For example, if you verify
-
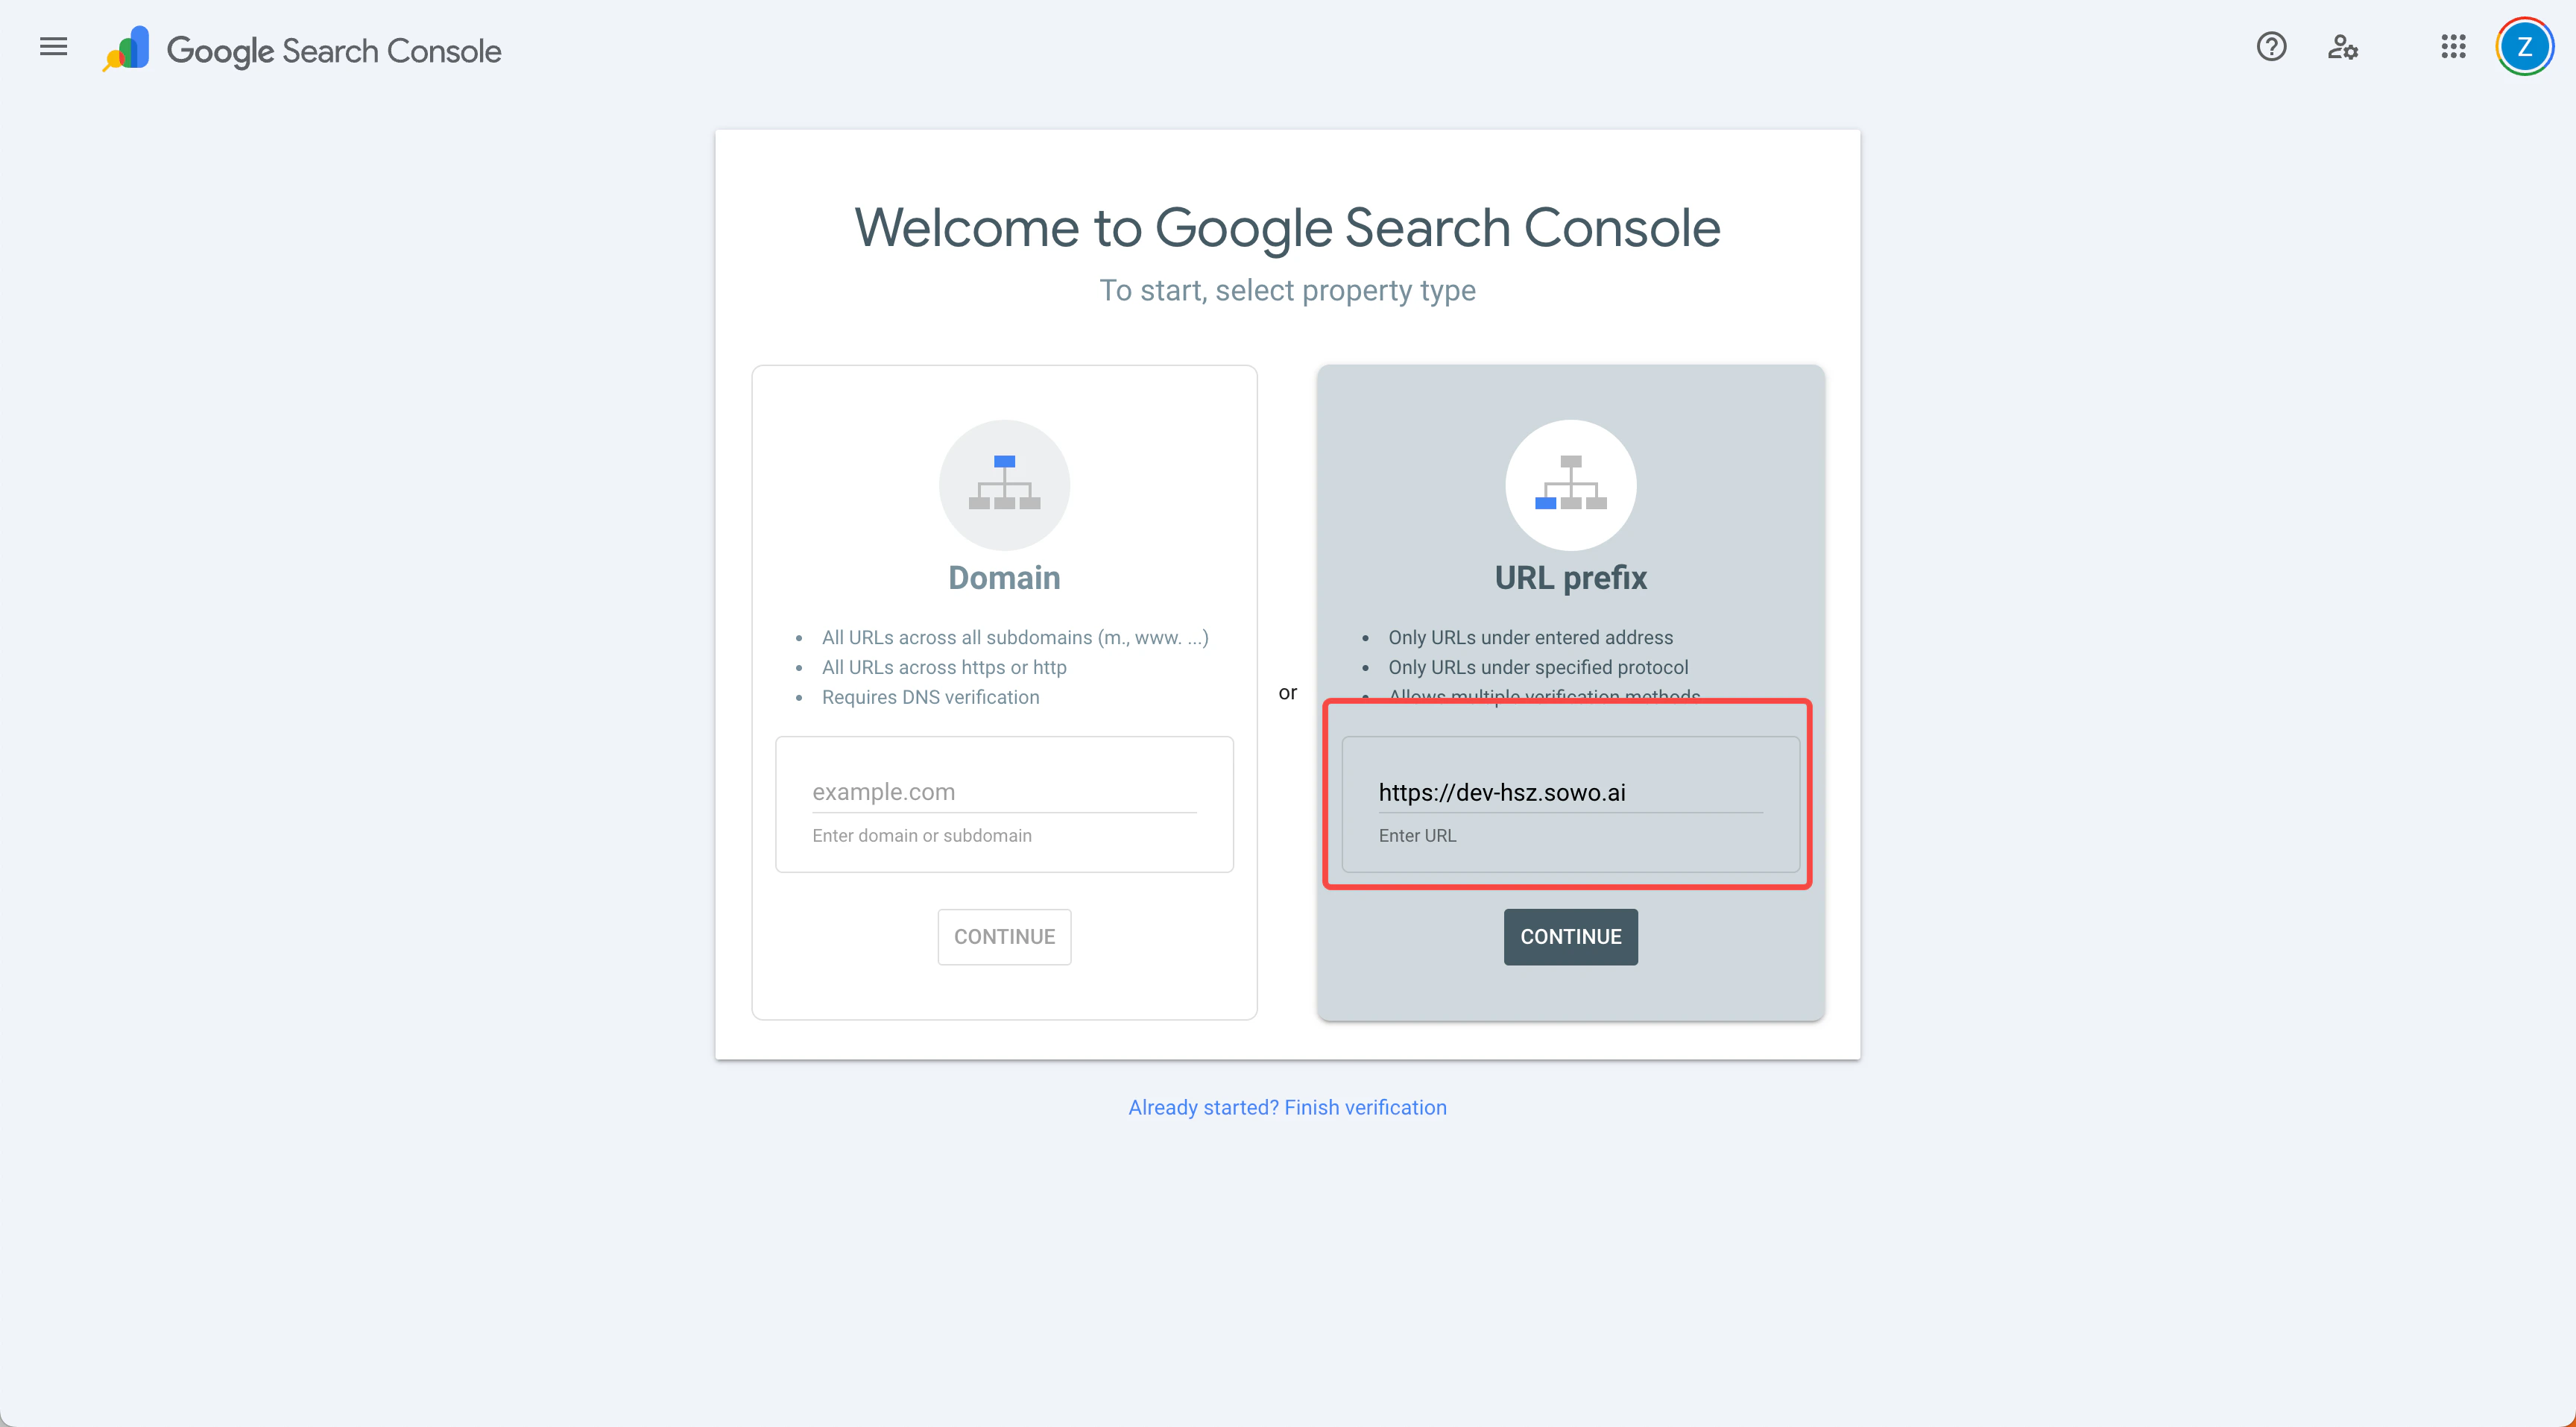
Enter your website address
Enter your website address in the input field, then click the “Continue” button.
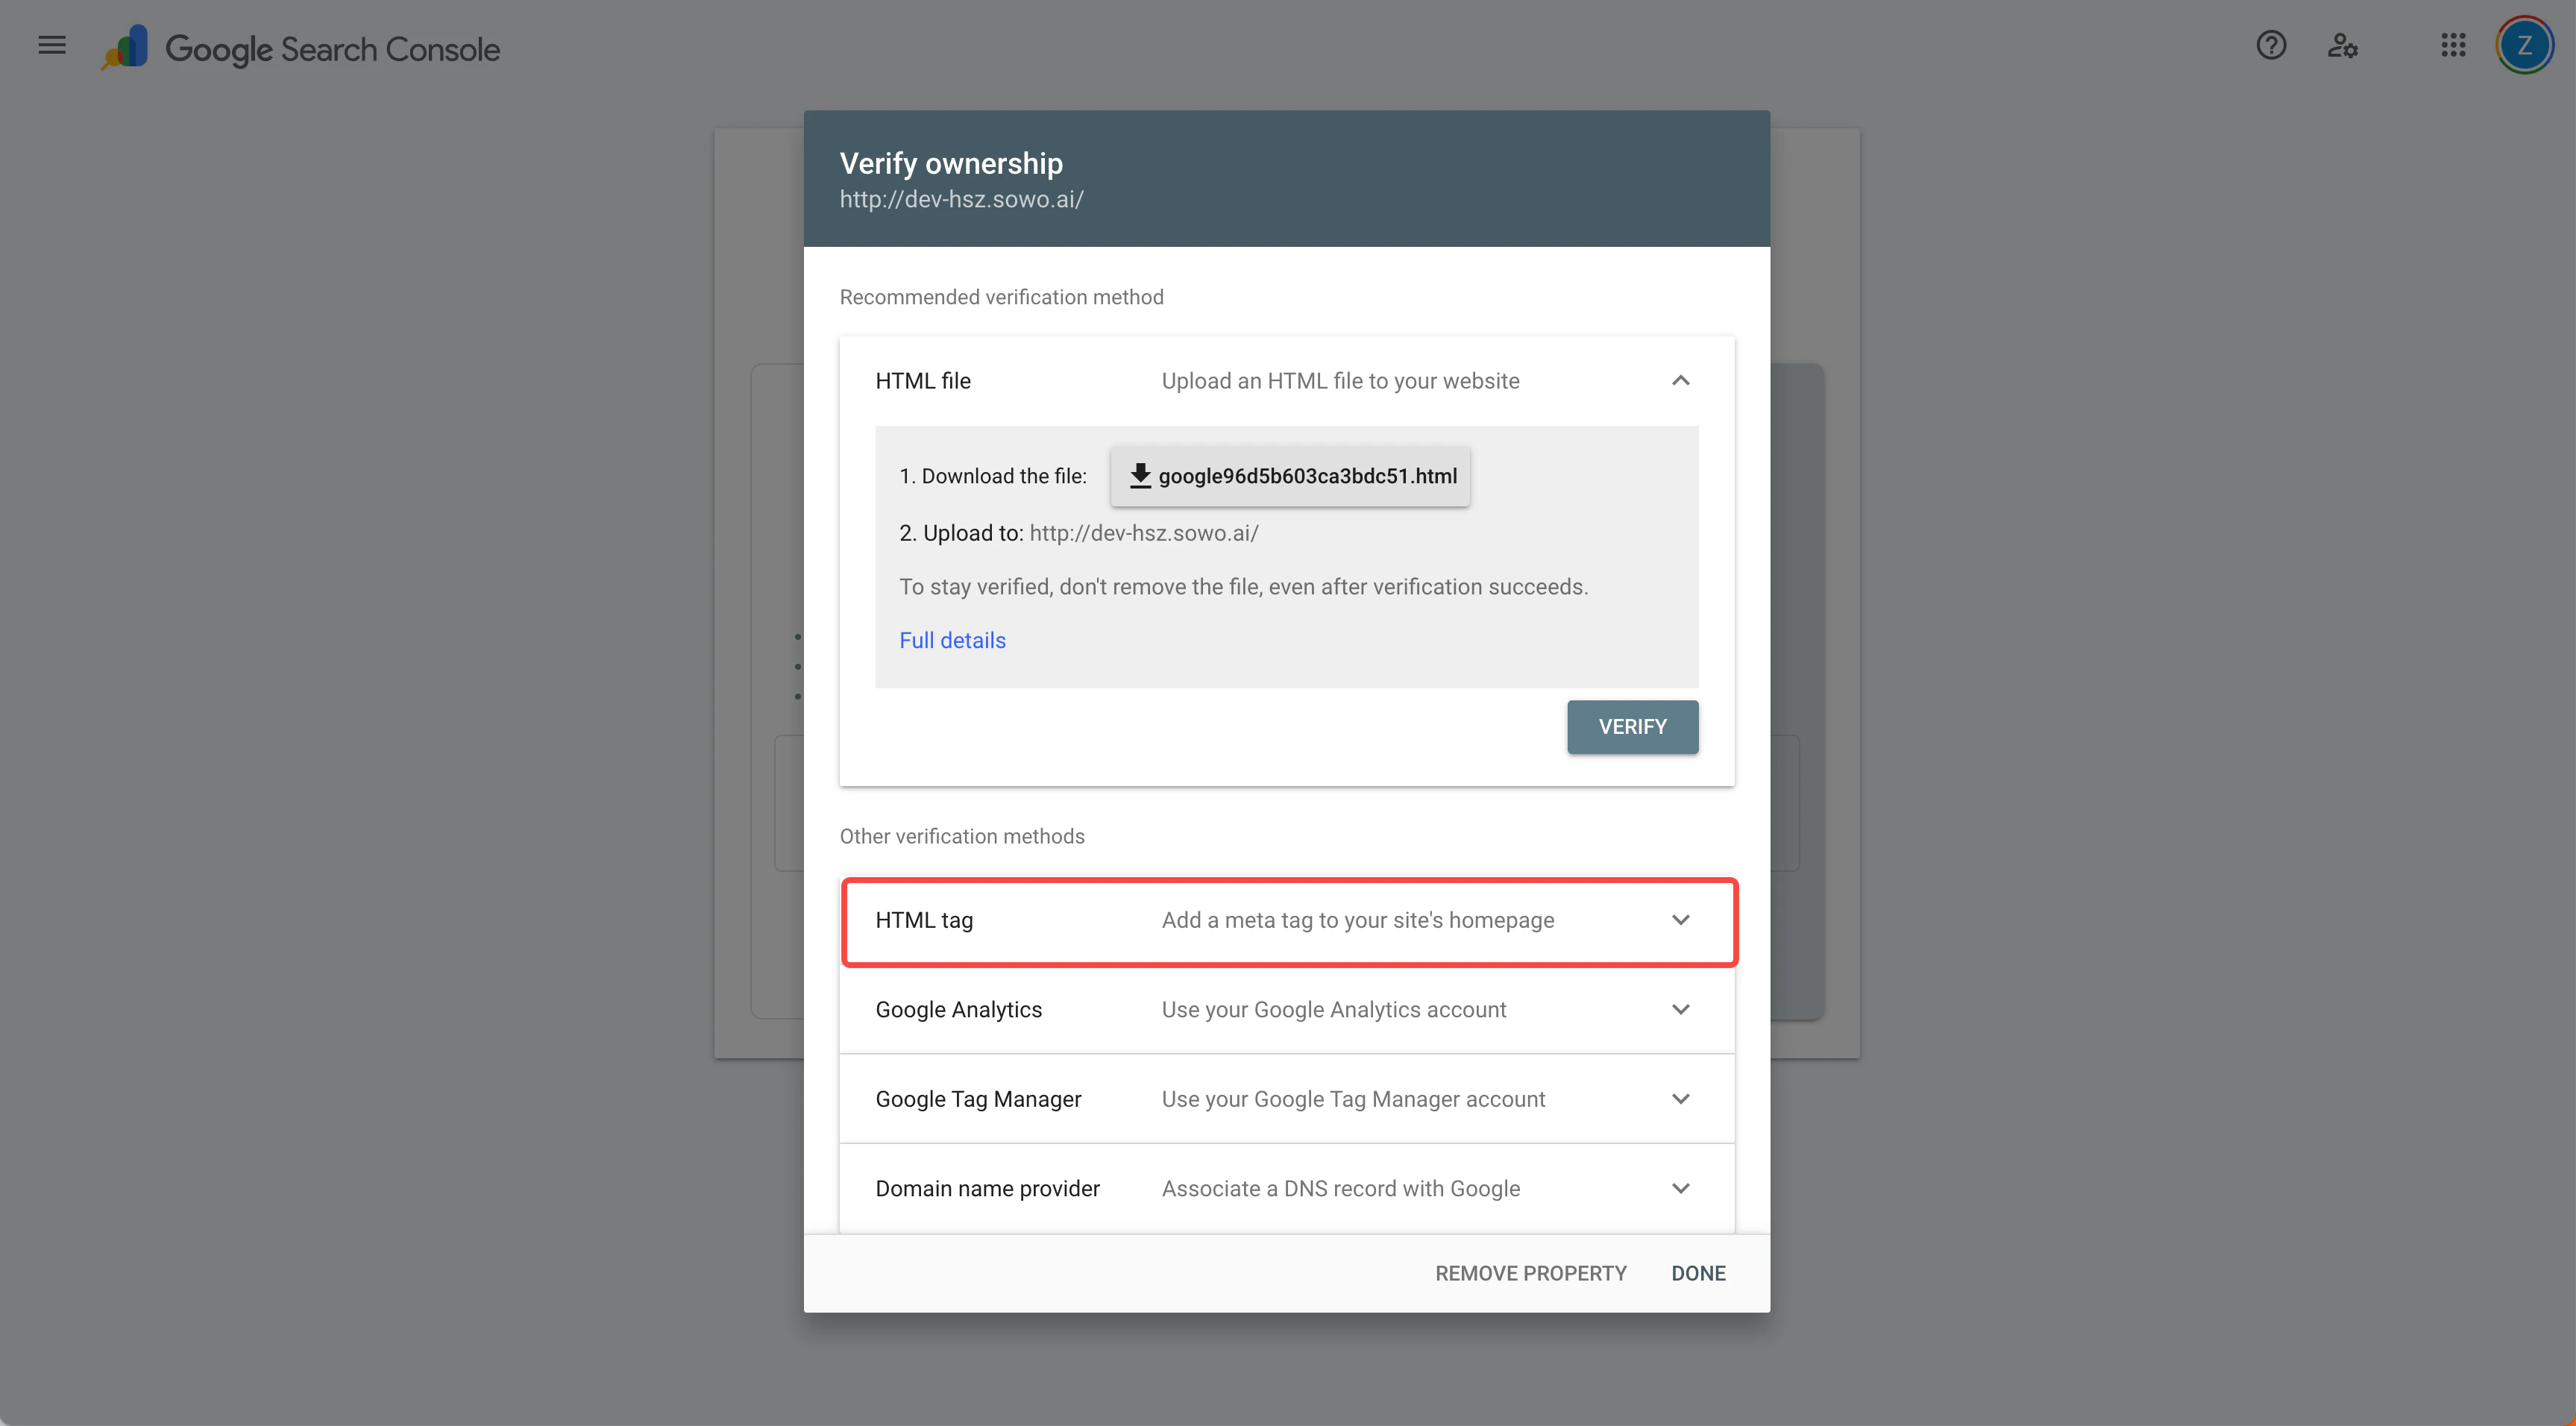
-
Select the HTML tag verification method
Select the HTML tag verification method to confirm website ownership.
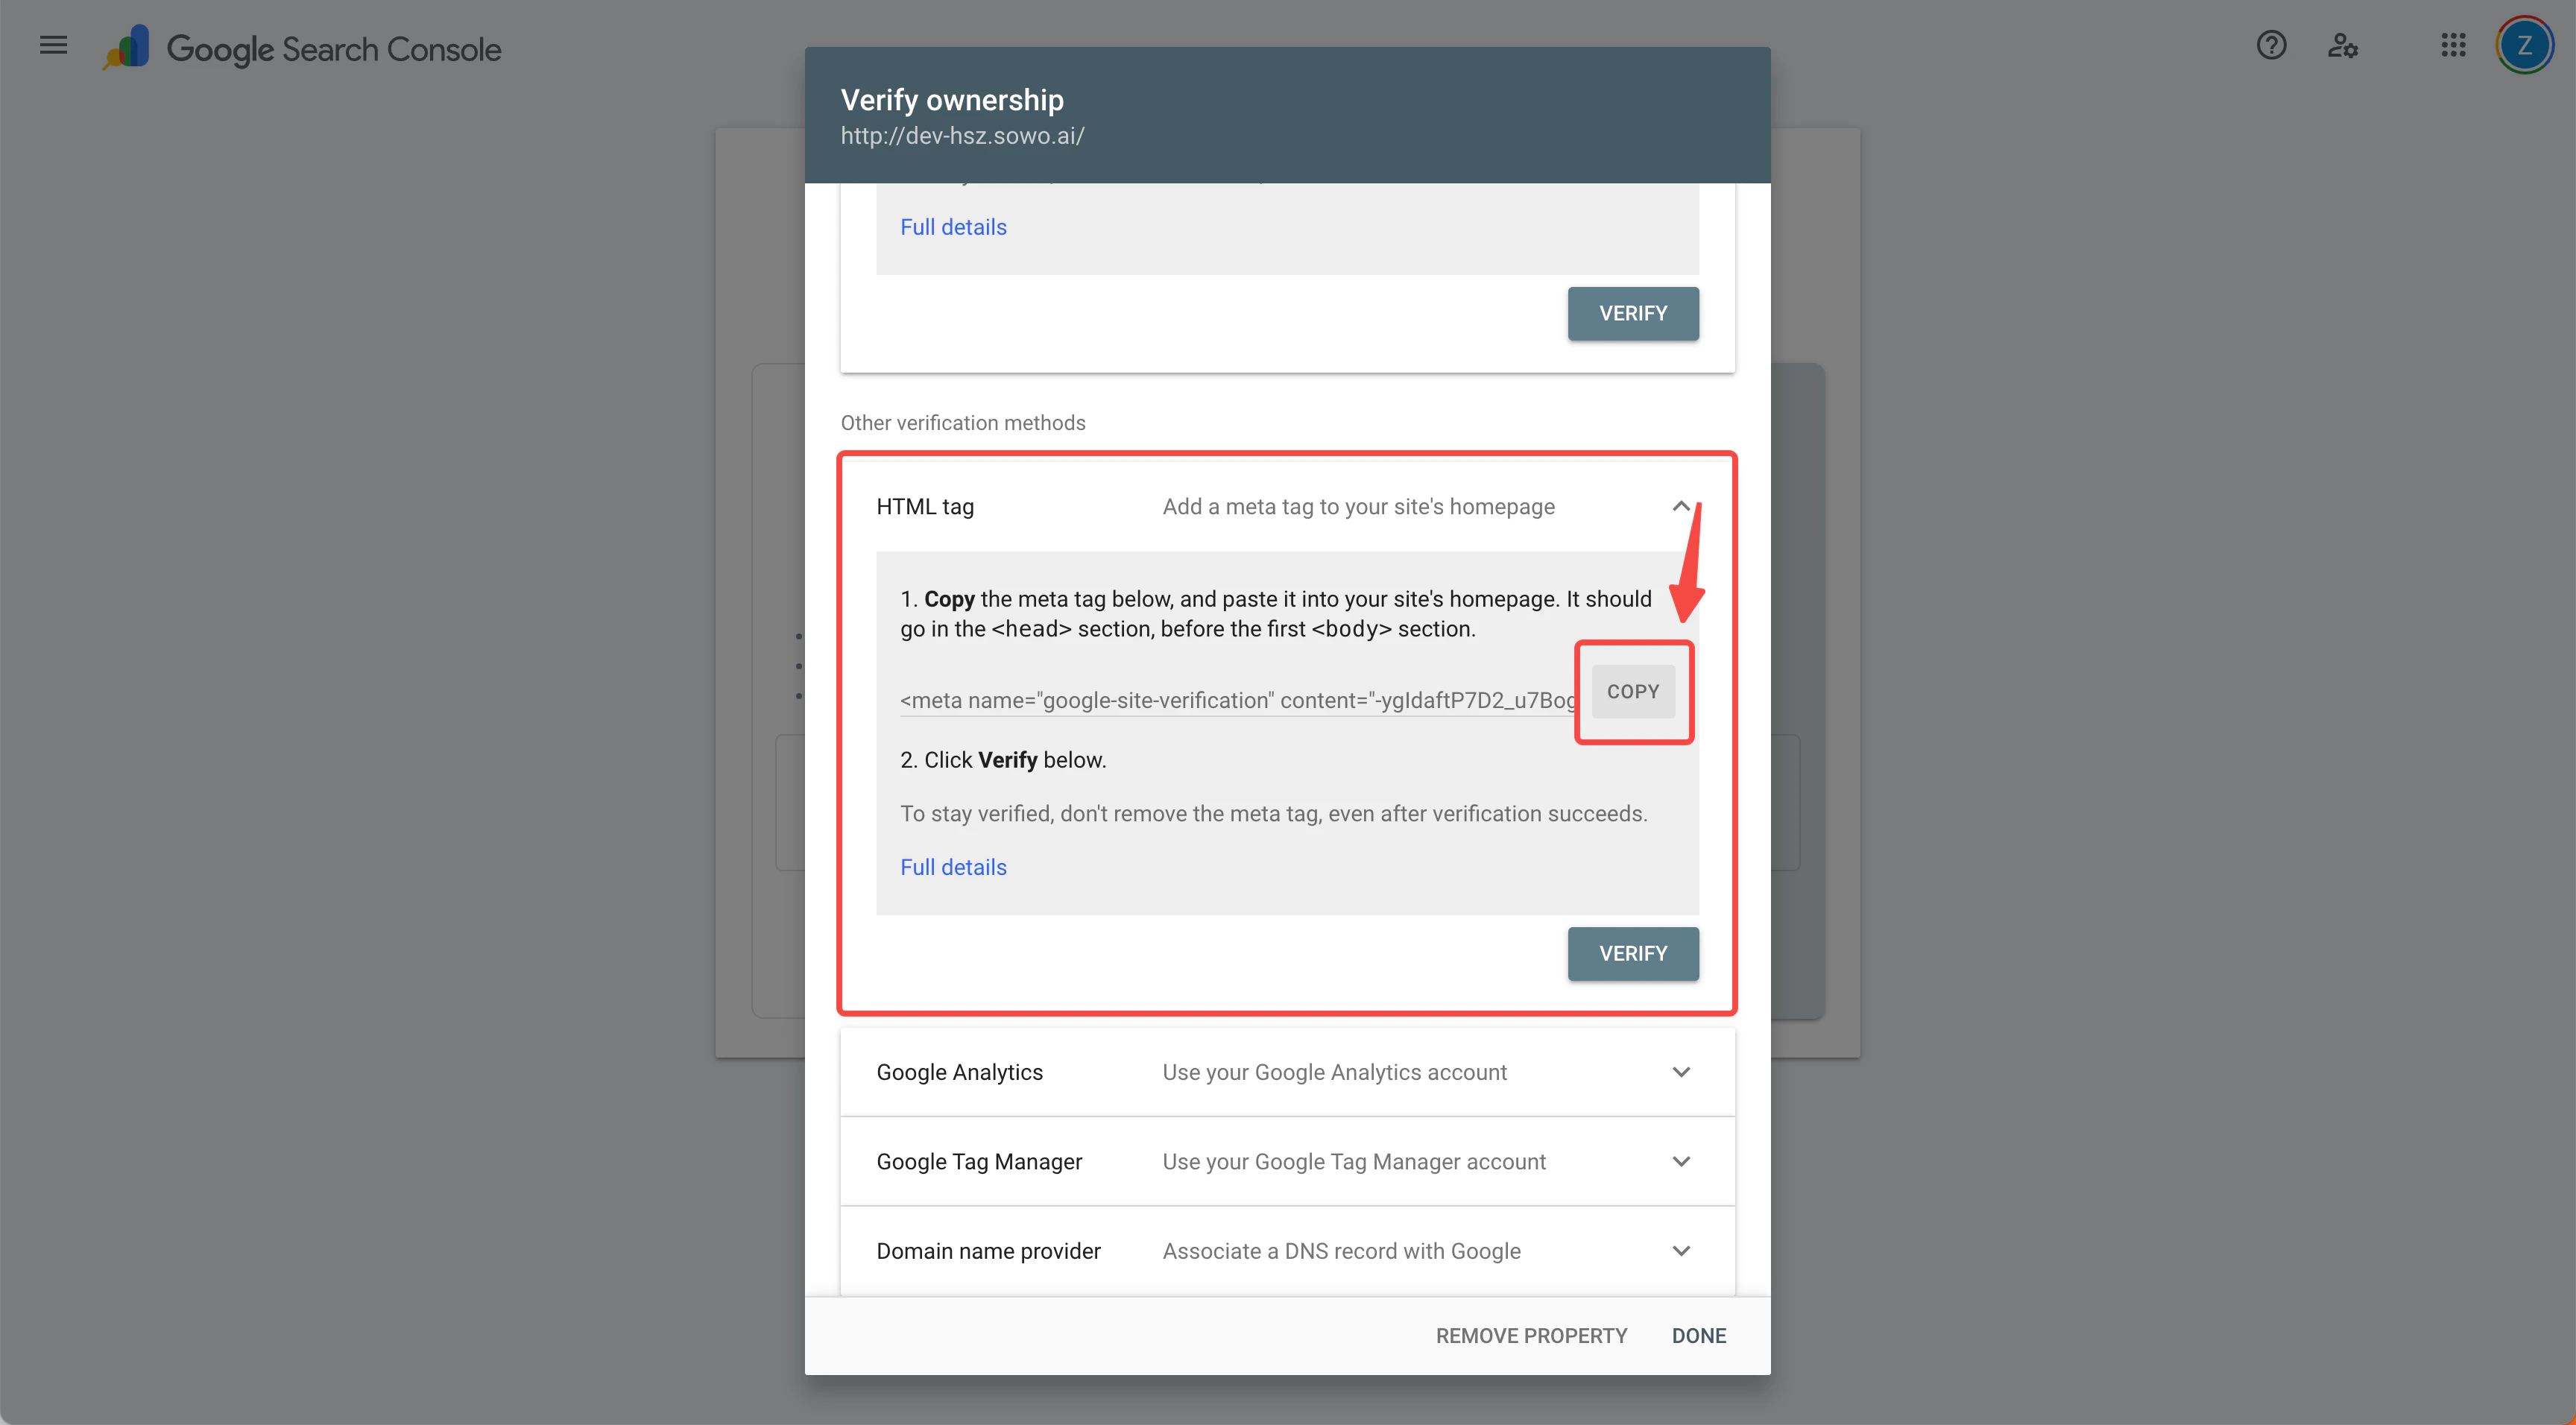
Copy verification code
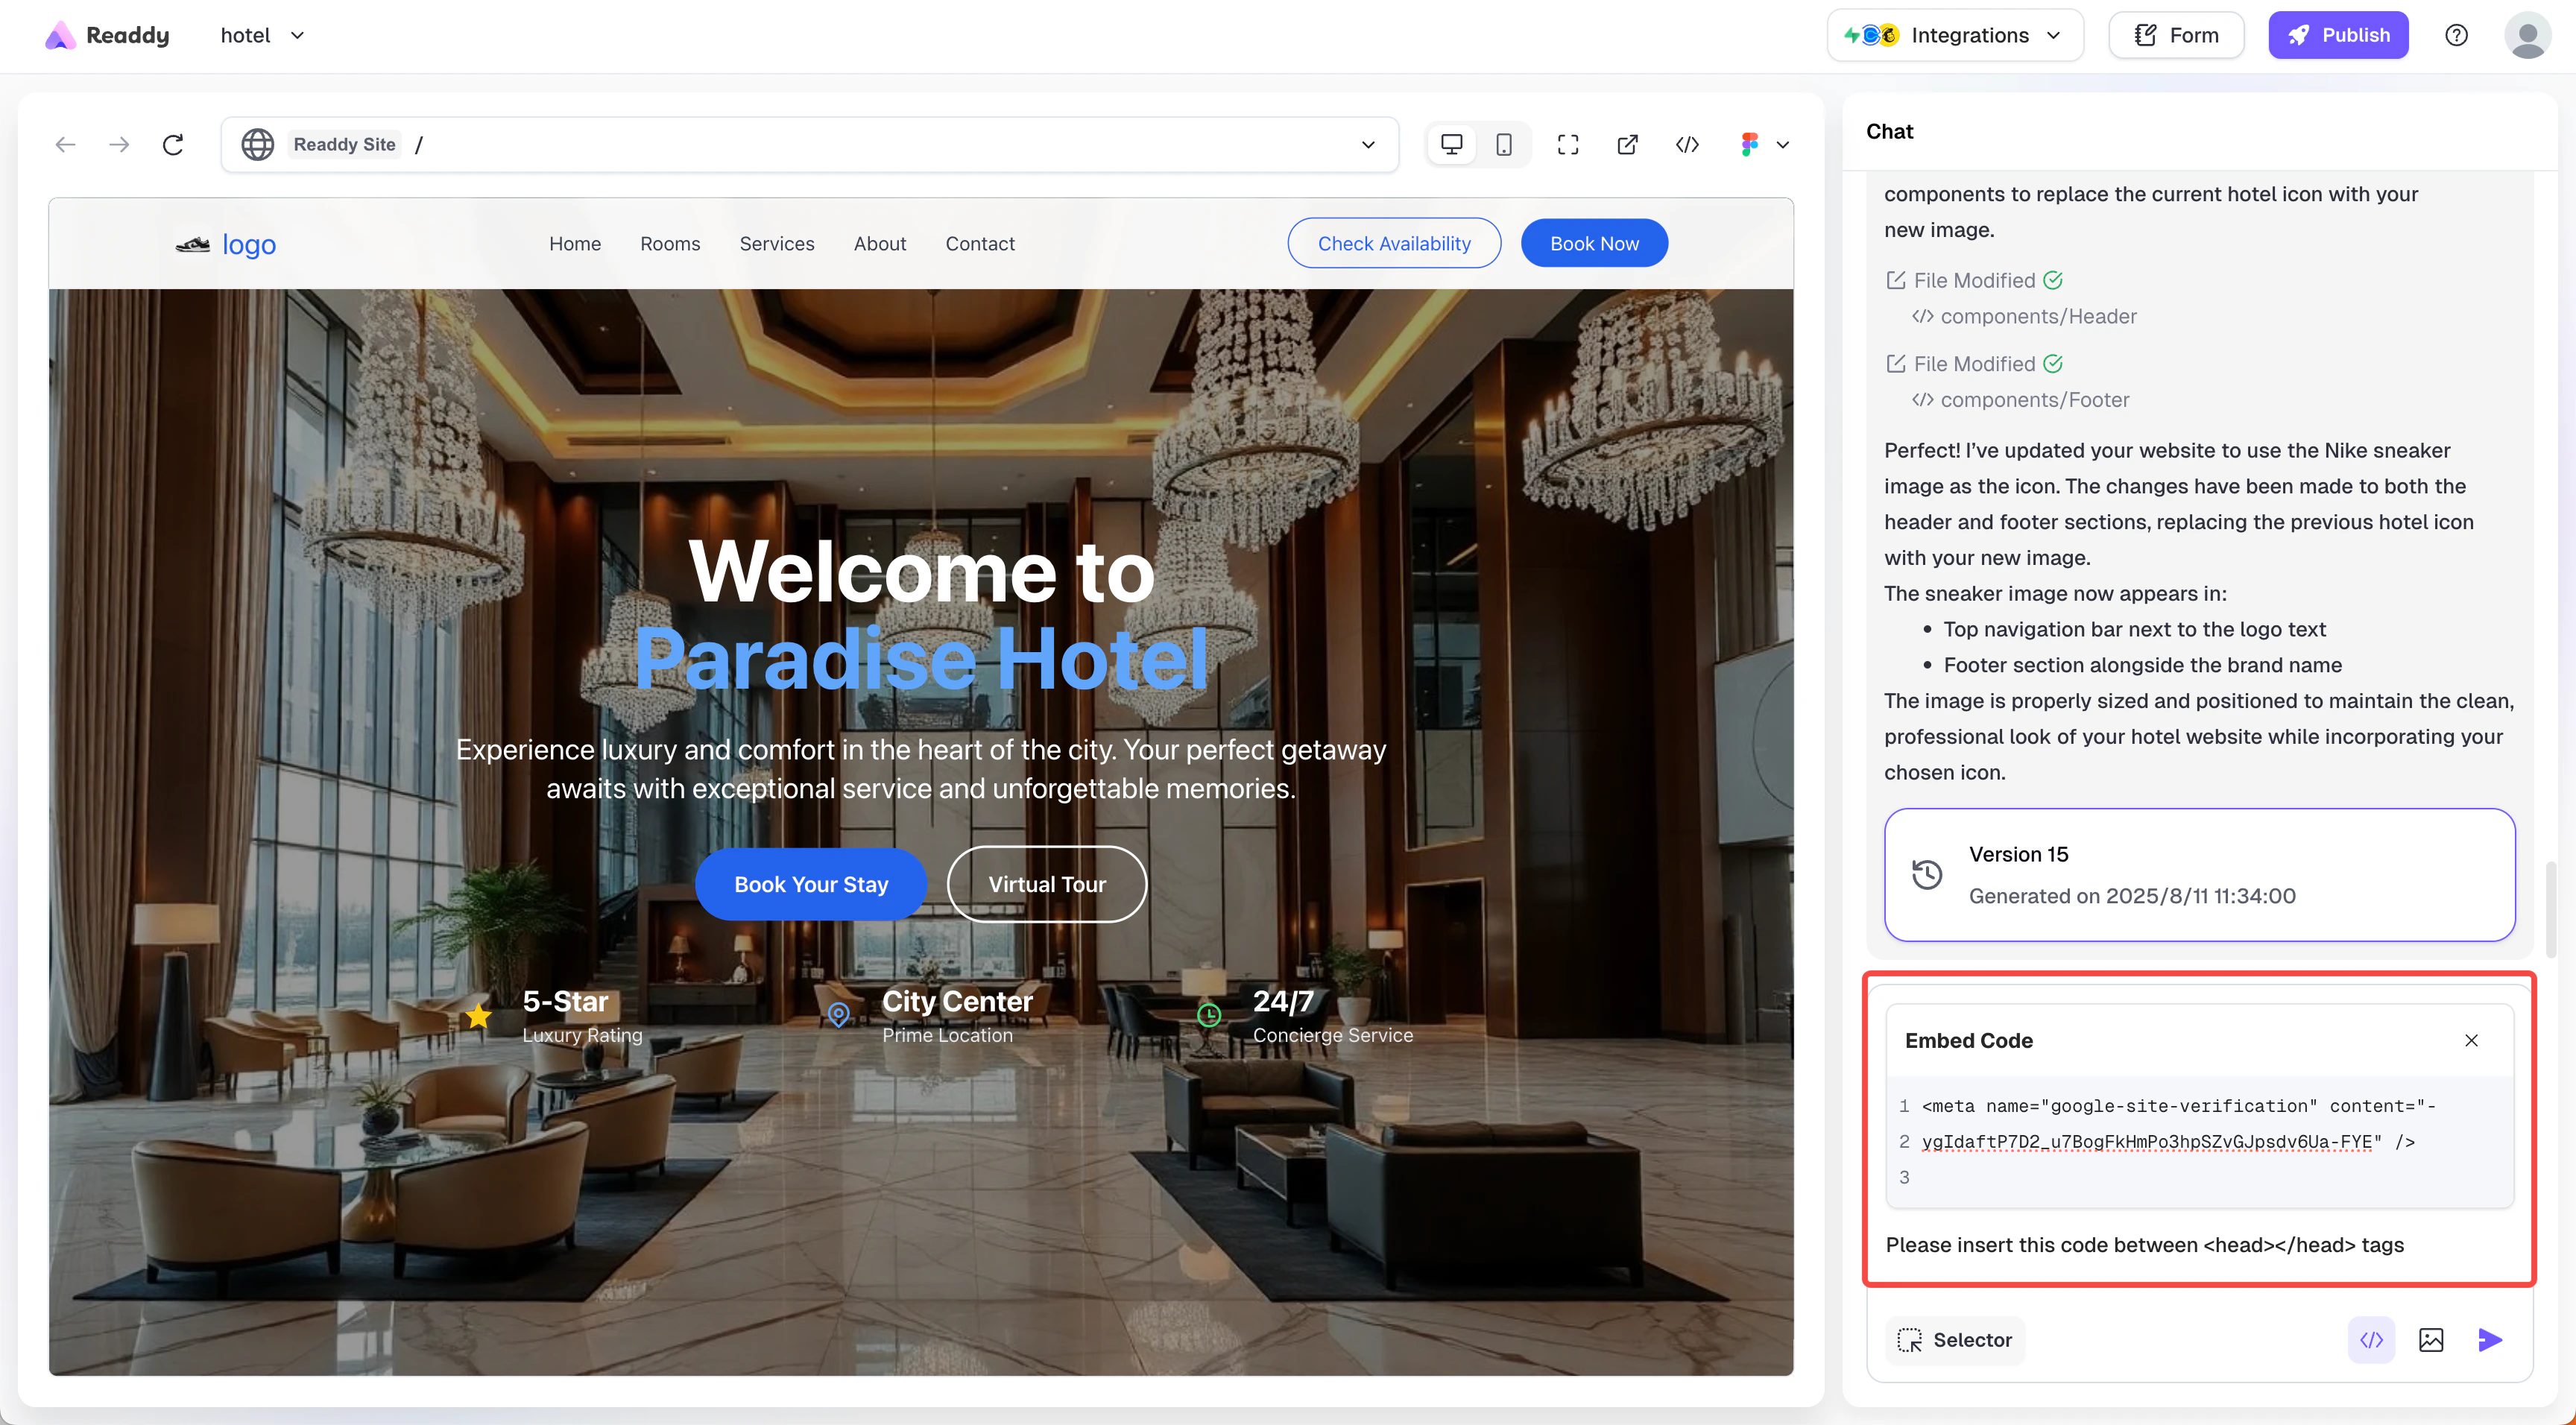
Send code to Readdy for embedding
- Copy the HTML verification code provided by Google
- Return to the Readdy platform
- Paste the code into the “Embed Code” section
- Enter the necessary content: “Please insert this code between tags” in the input field
- Send the information to Readdy
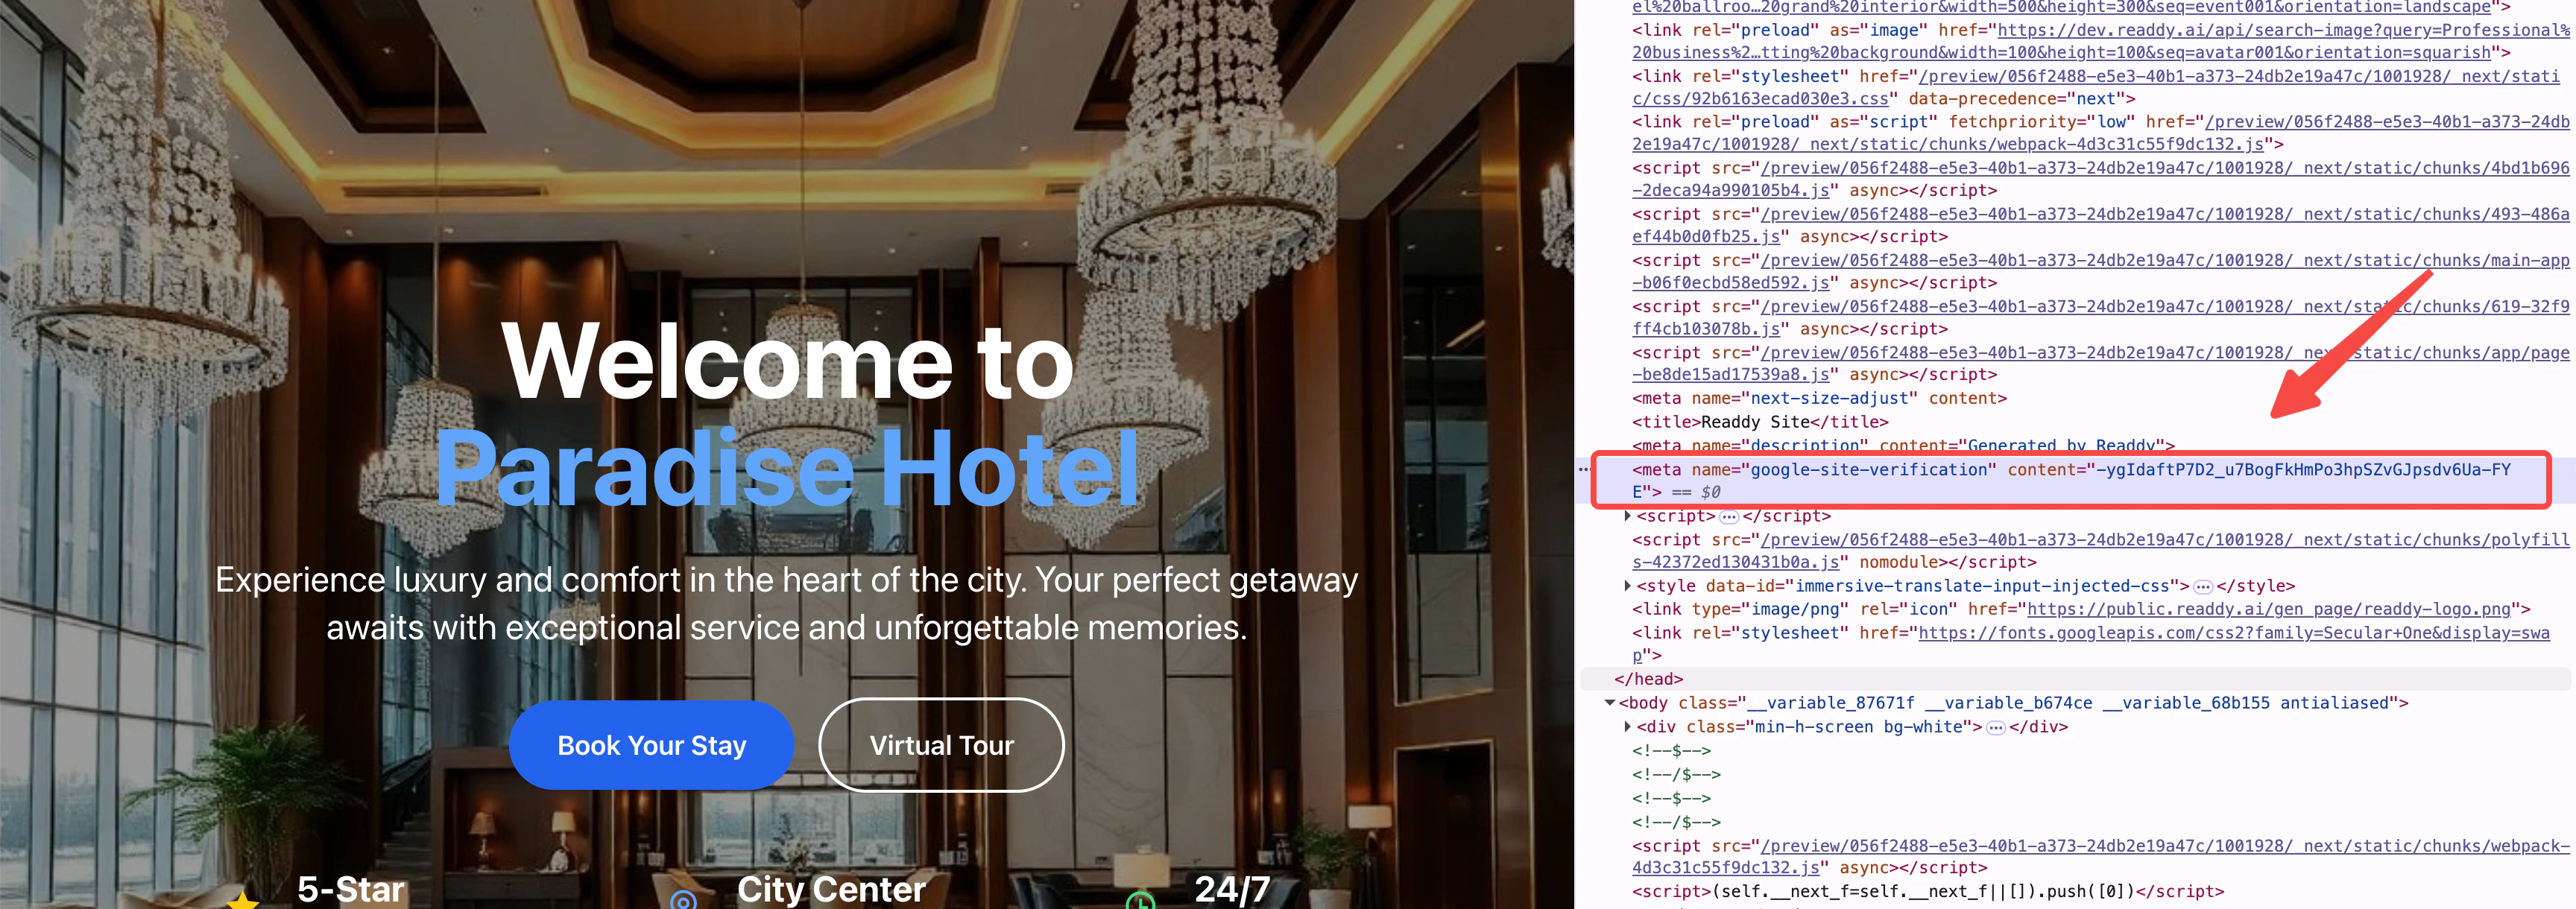
Code embedded

Verify after republishing domain
- Readdy will help you generate a new version of your website, This version includes Google’s site verification code.
- You need to republish your domain for the changes to take effect
- Return to Google Search Console to complete the verification
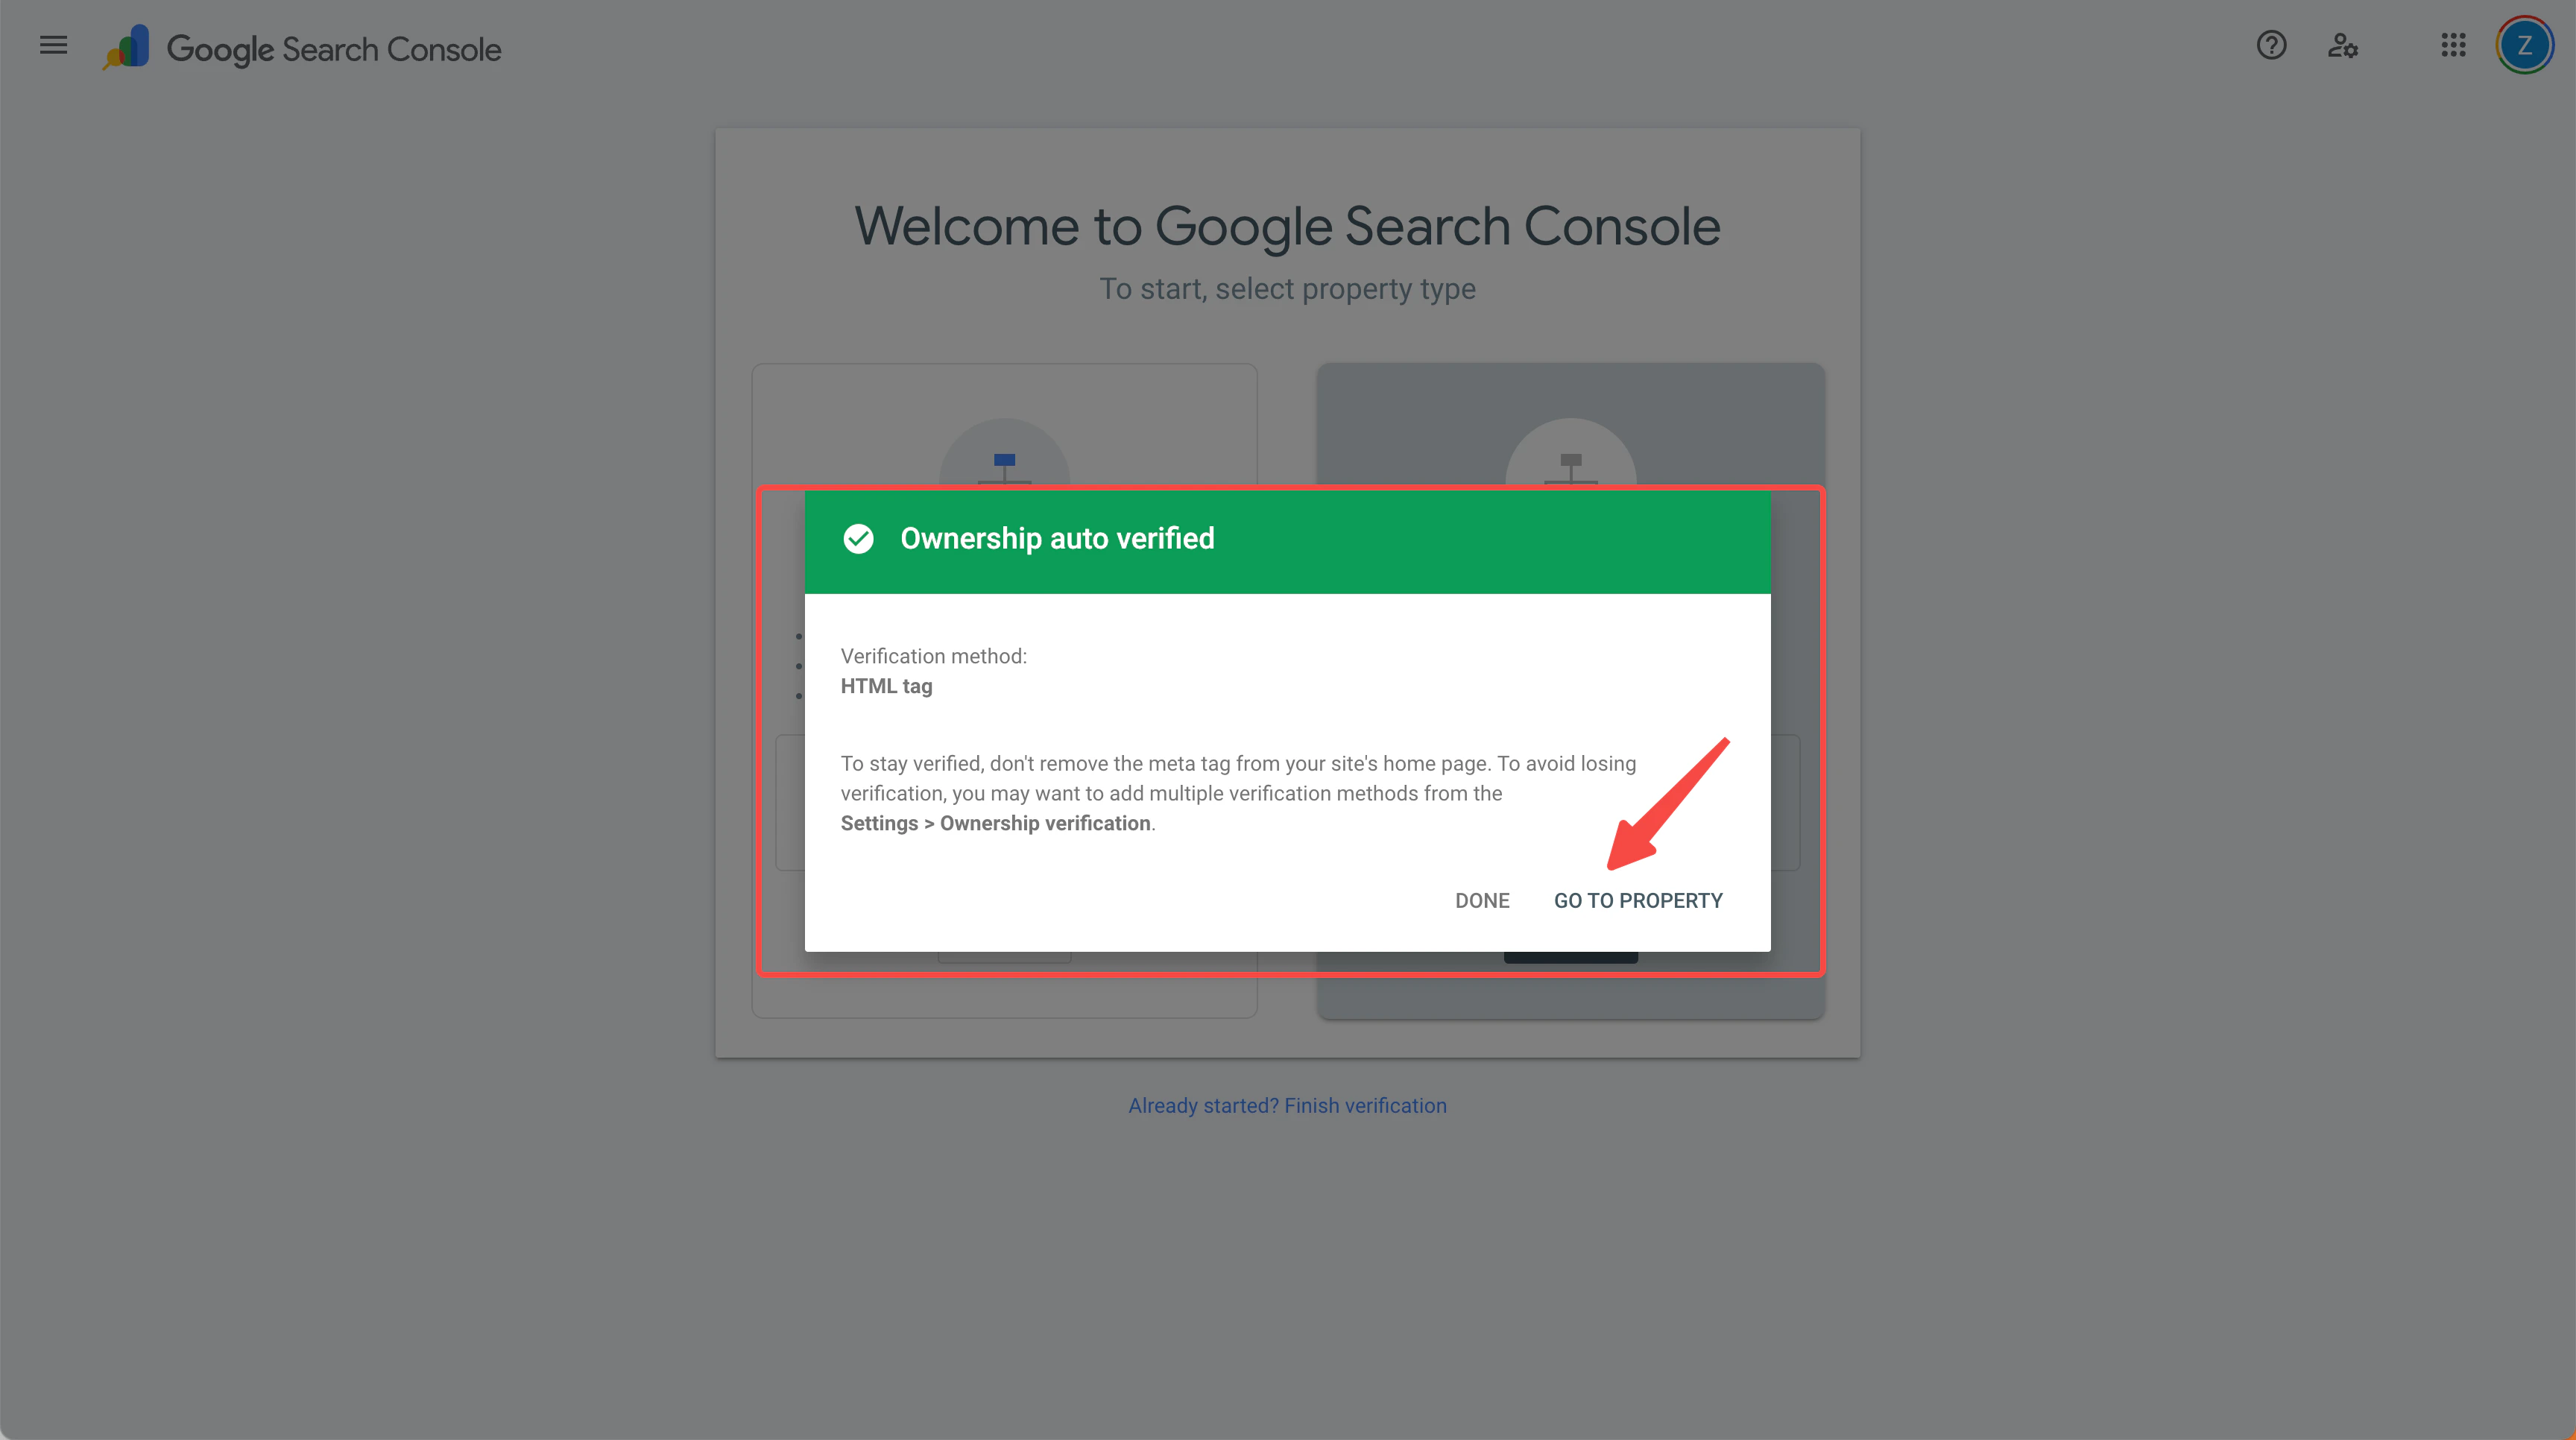
Verification successful
Indexing initiated
Important Notes
How to Get Your Site Indexed by Bing
What is Bing Search Engine Indexing?
Bing search engine indexing refers to the process where Microsoft Bing’s crawler programs discover, analyze, and add your website content to Bing’s search database. Once your site is indexed by Bing, users can find your website through Bing searches. As the world’s second-largest search engine, Bing indexing can bring additional traffic and exposure opportunities to your website.Steps to Follow
-
Connect to Bing Webmaster Tools
First, you need to access Bing Webmaster Tools (
https://www.bing.com/webmasters) and log in with your Microsoft account.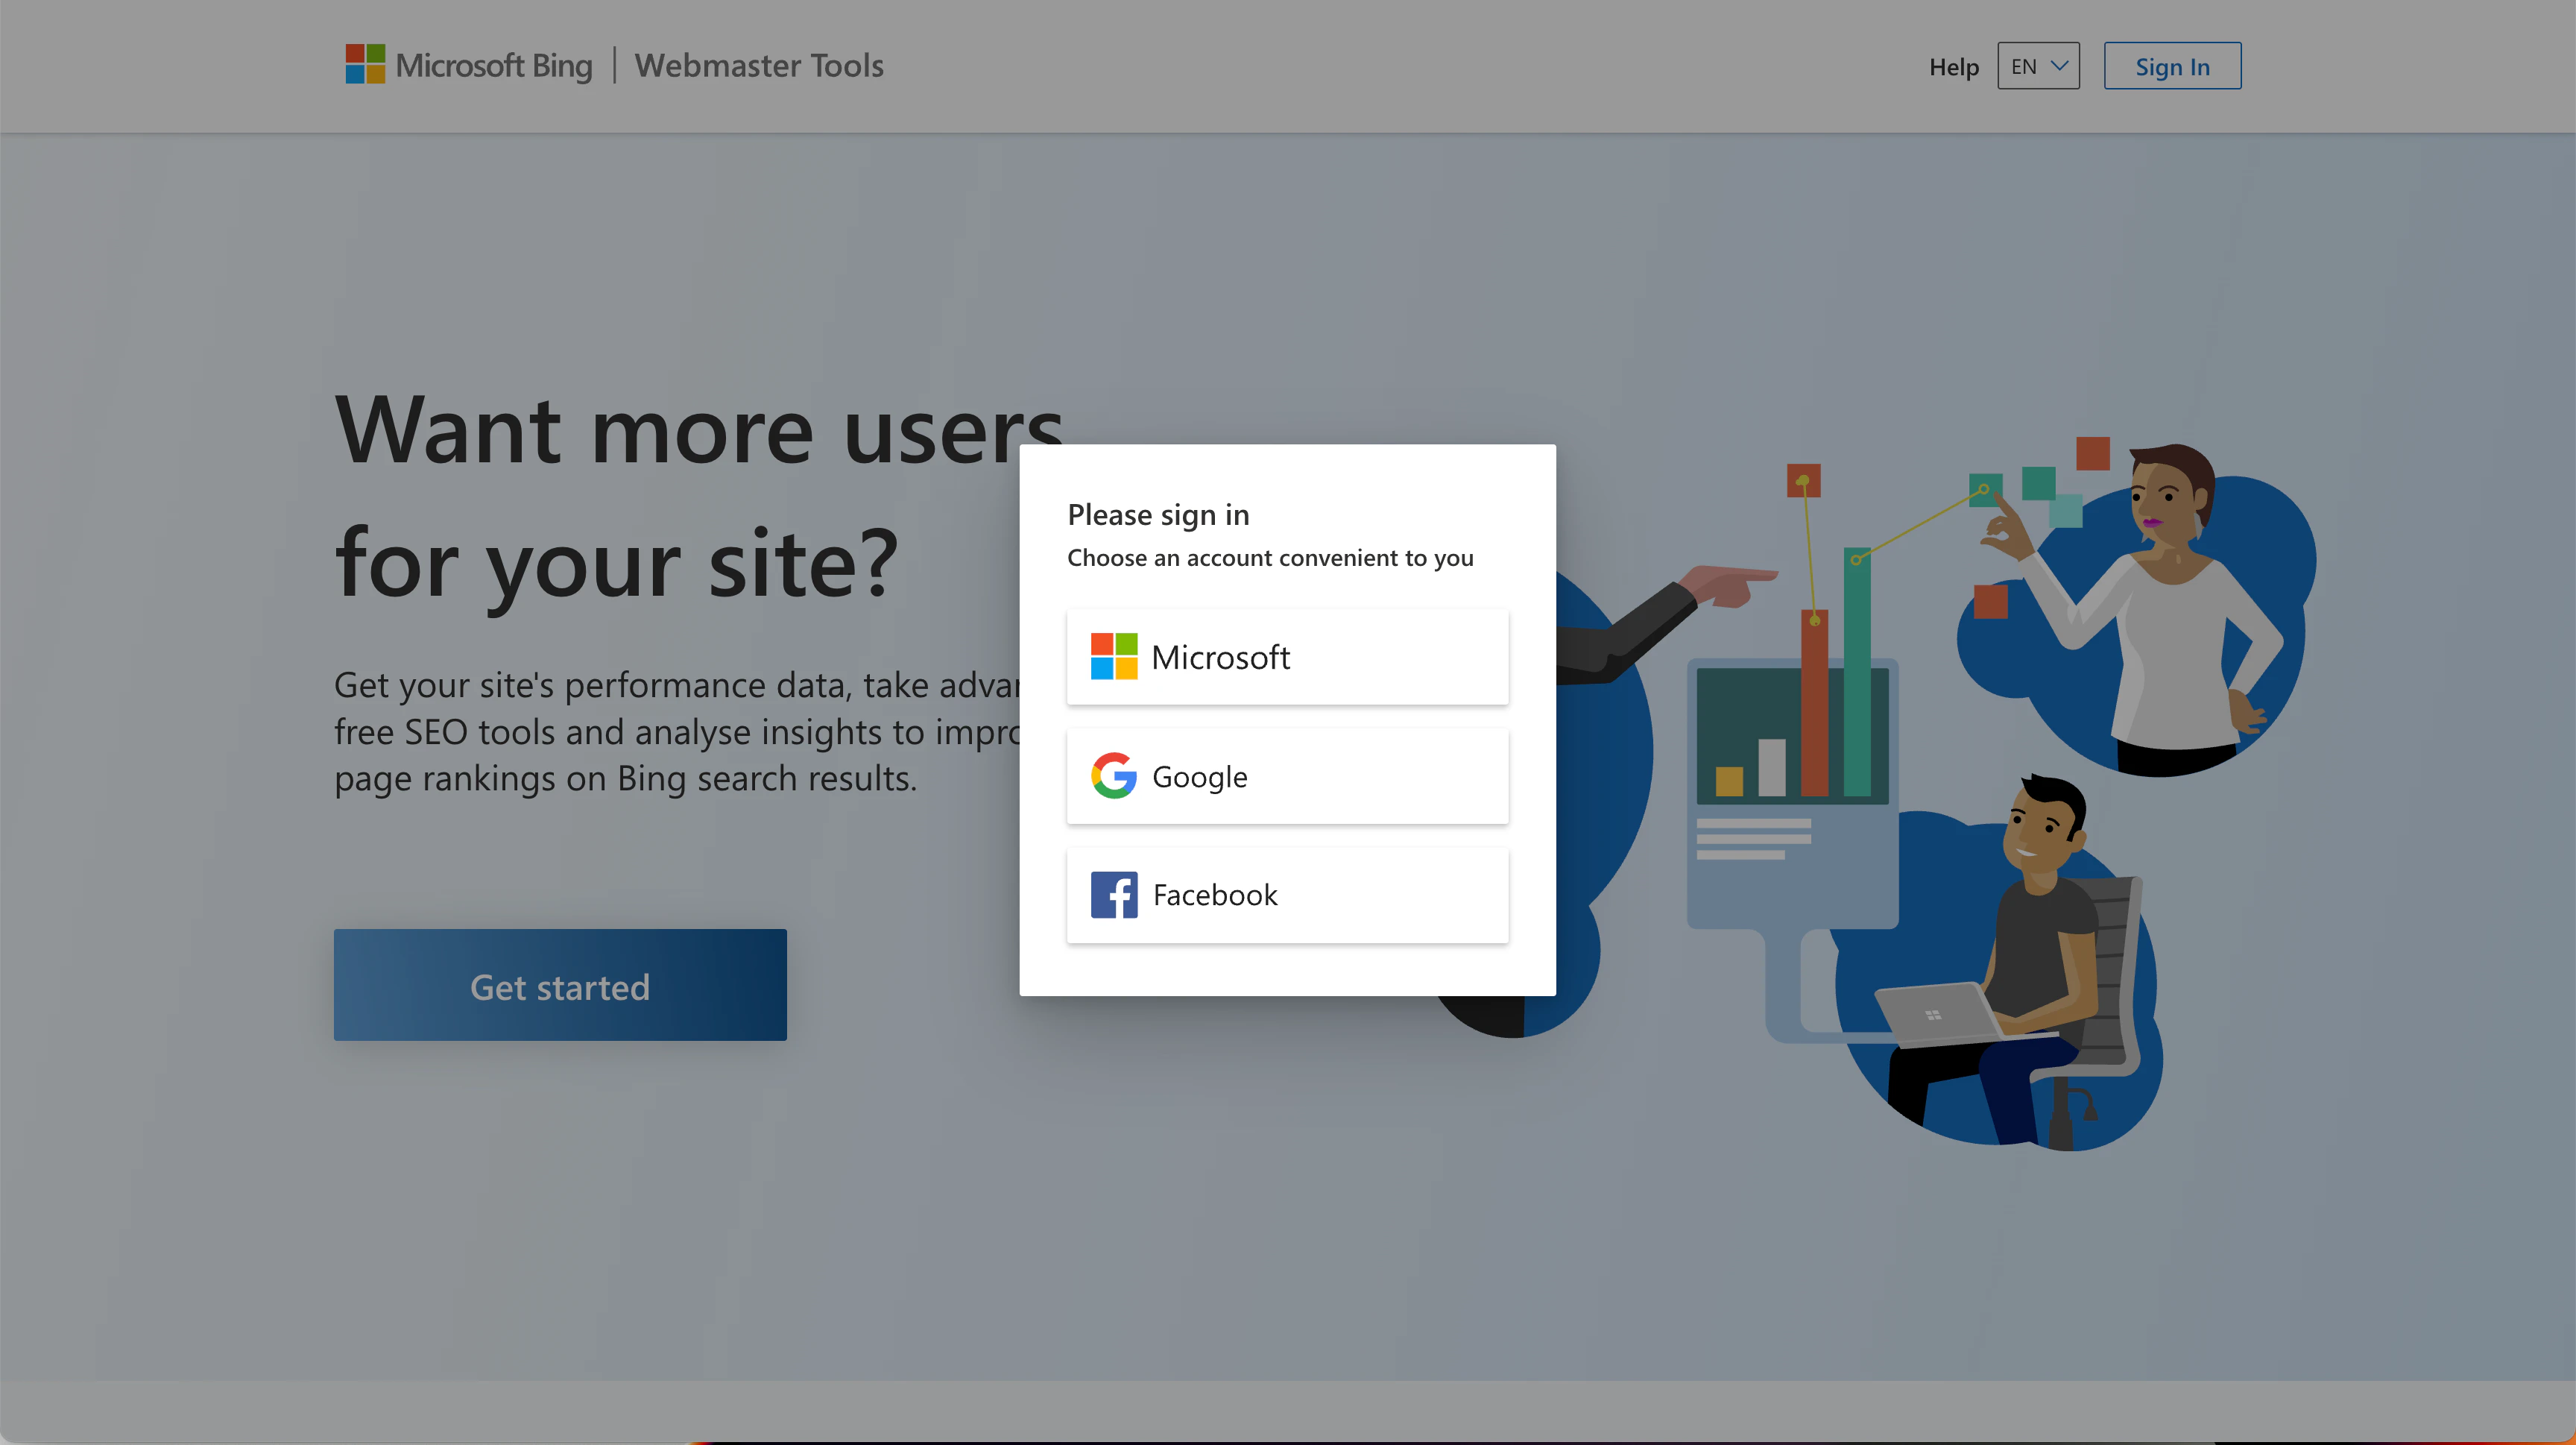
-
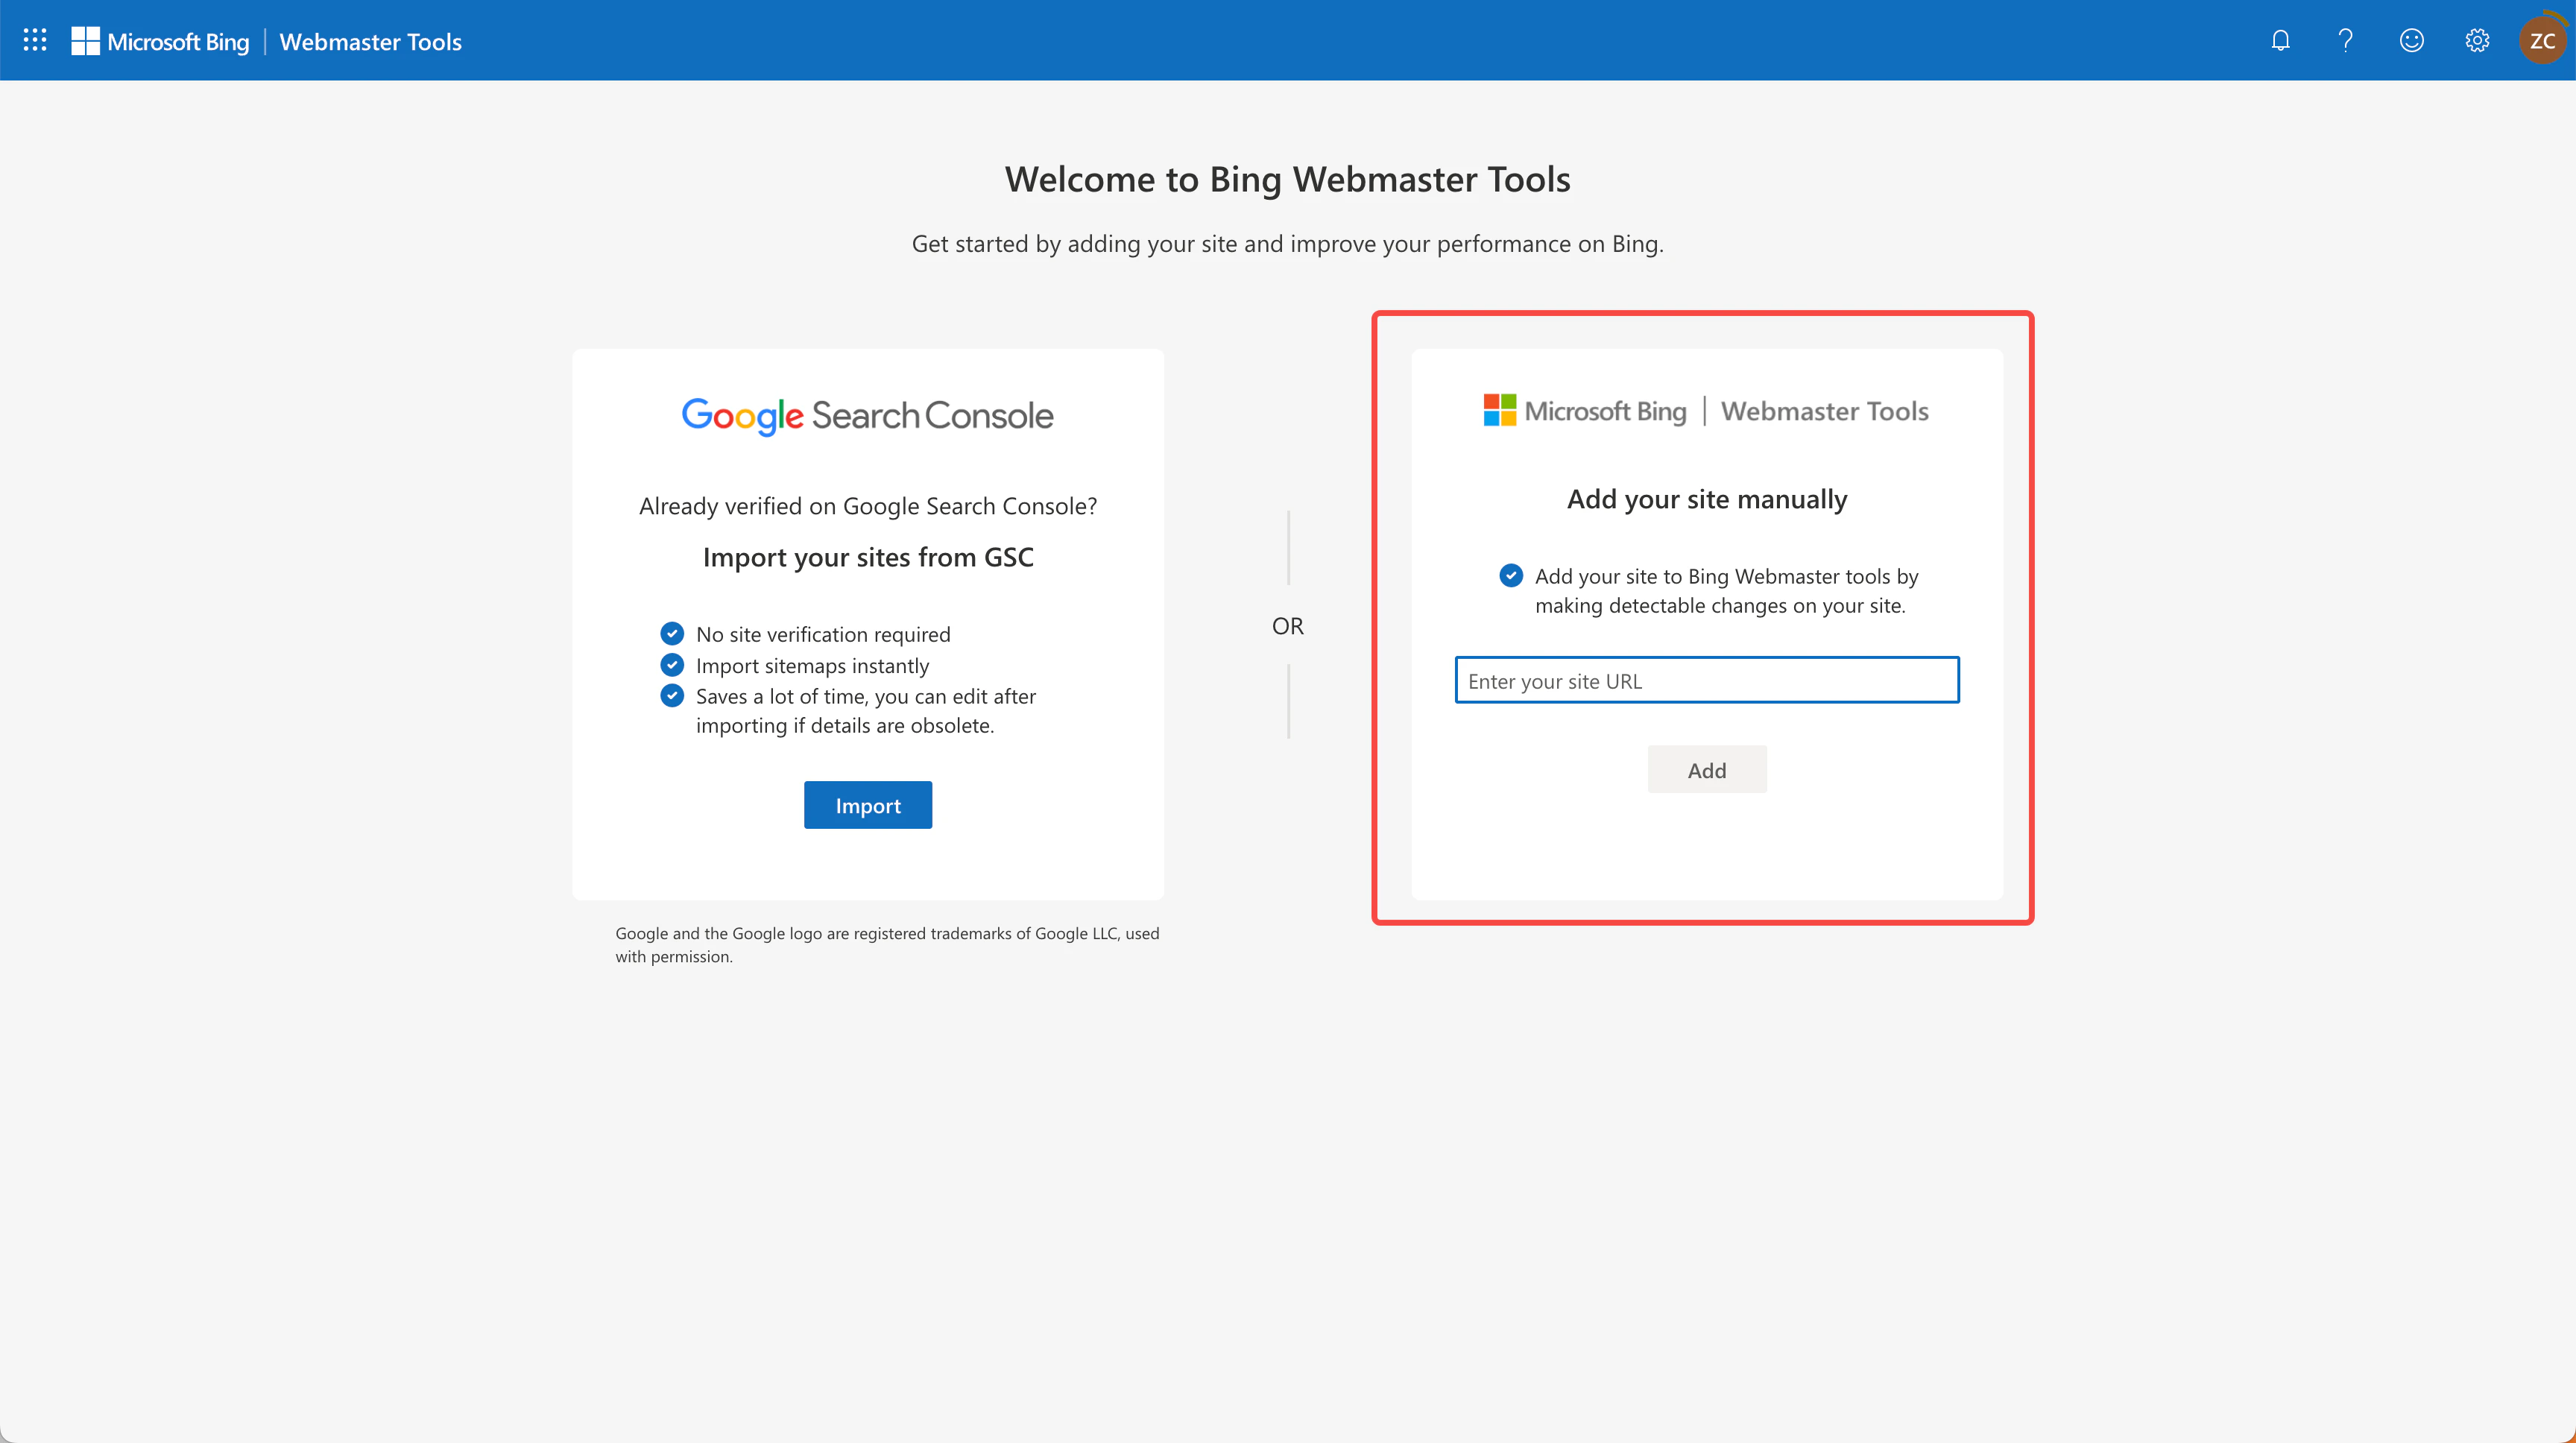
Add Your Website
After logging in, select ‘Add property manually’ for your website.
- Why Choose Manual Addition? Manually adding your website gives you full control over the verification process, ensuring proper configuration and optimal search engine optimization results.
-
Enter Website Address
Enter your complete website address (including
https://orhttp://) in the input field, then click the “Add” button.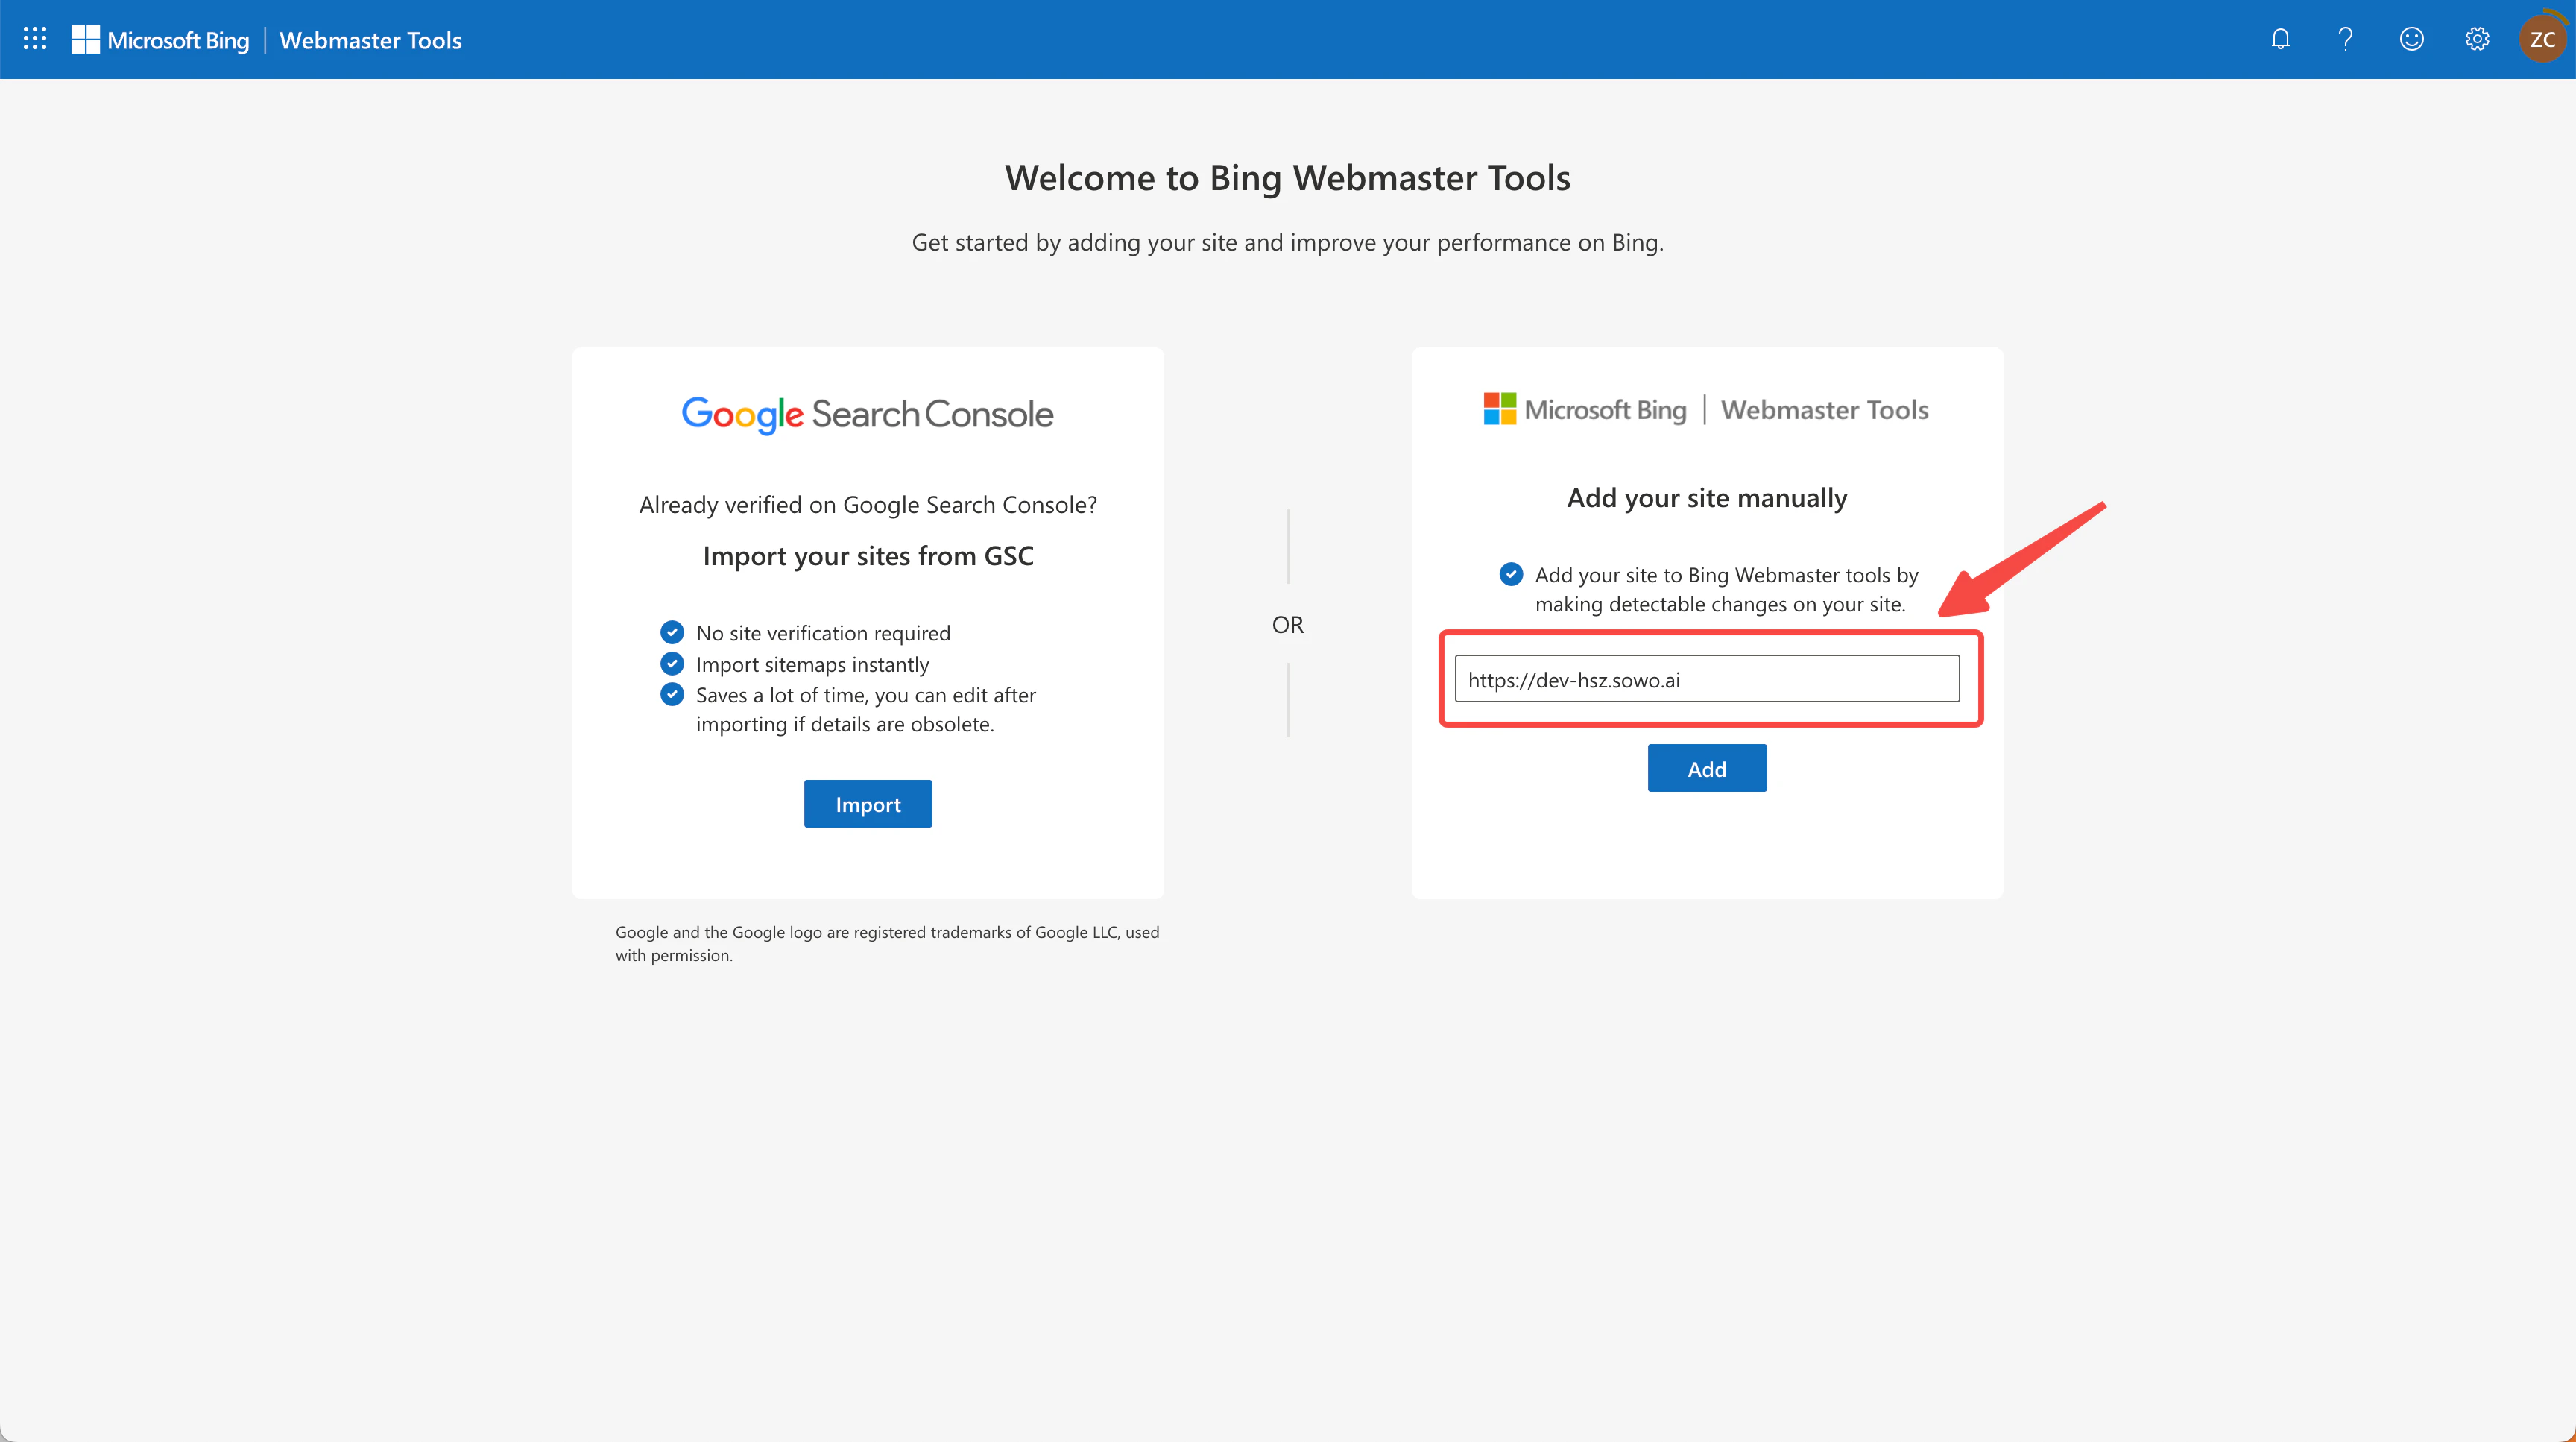
-
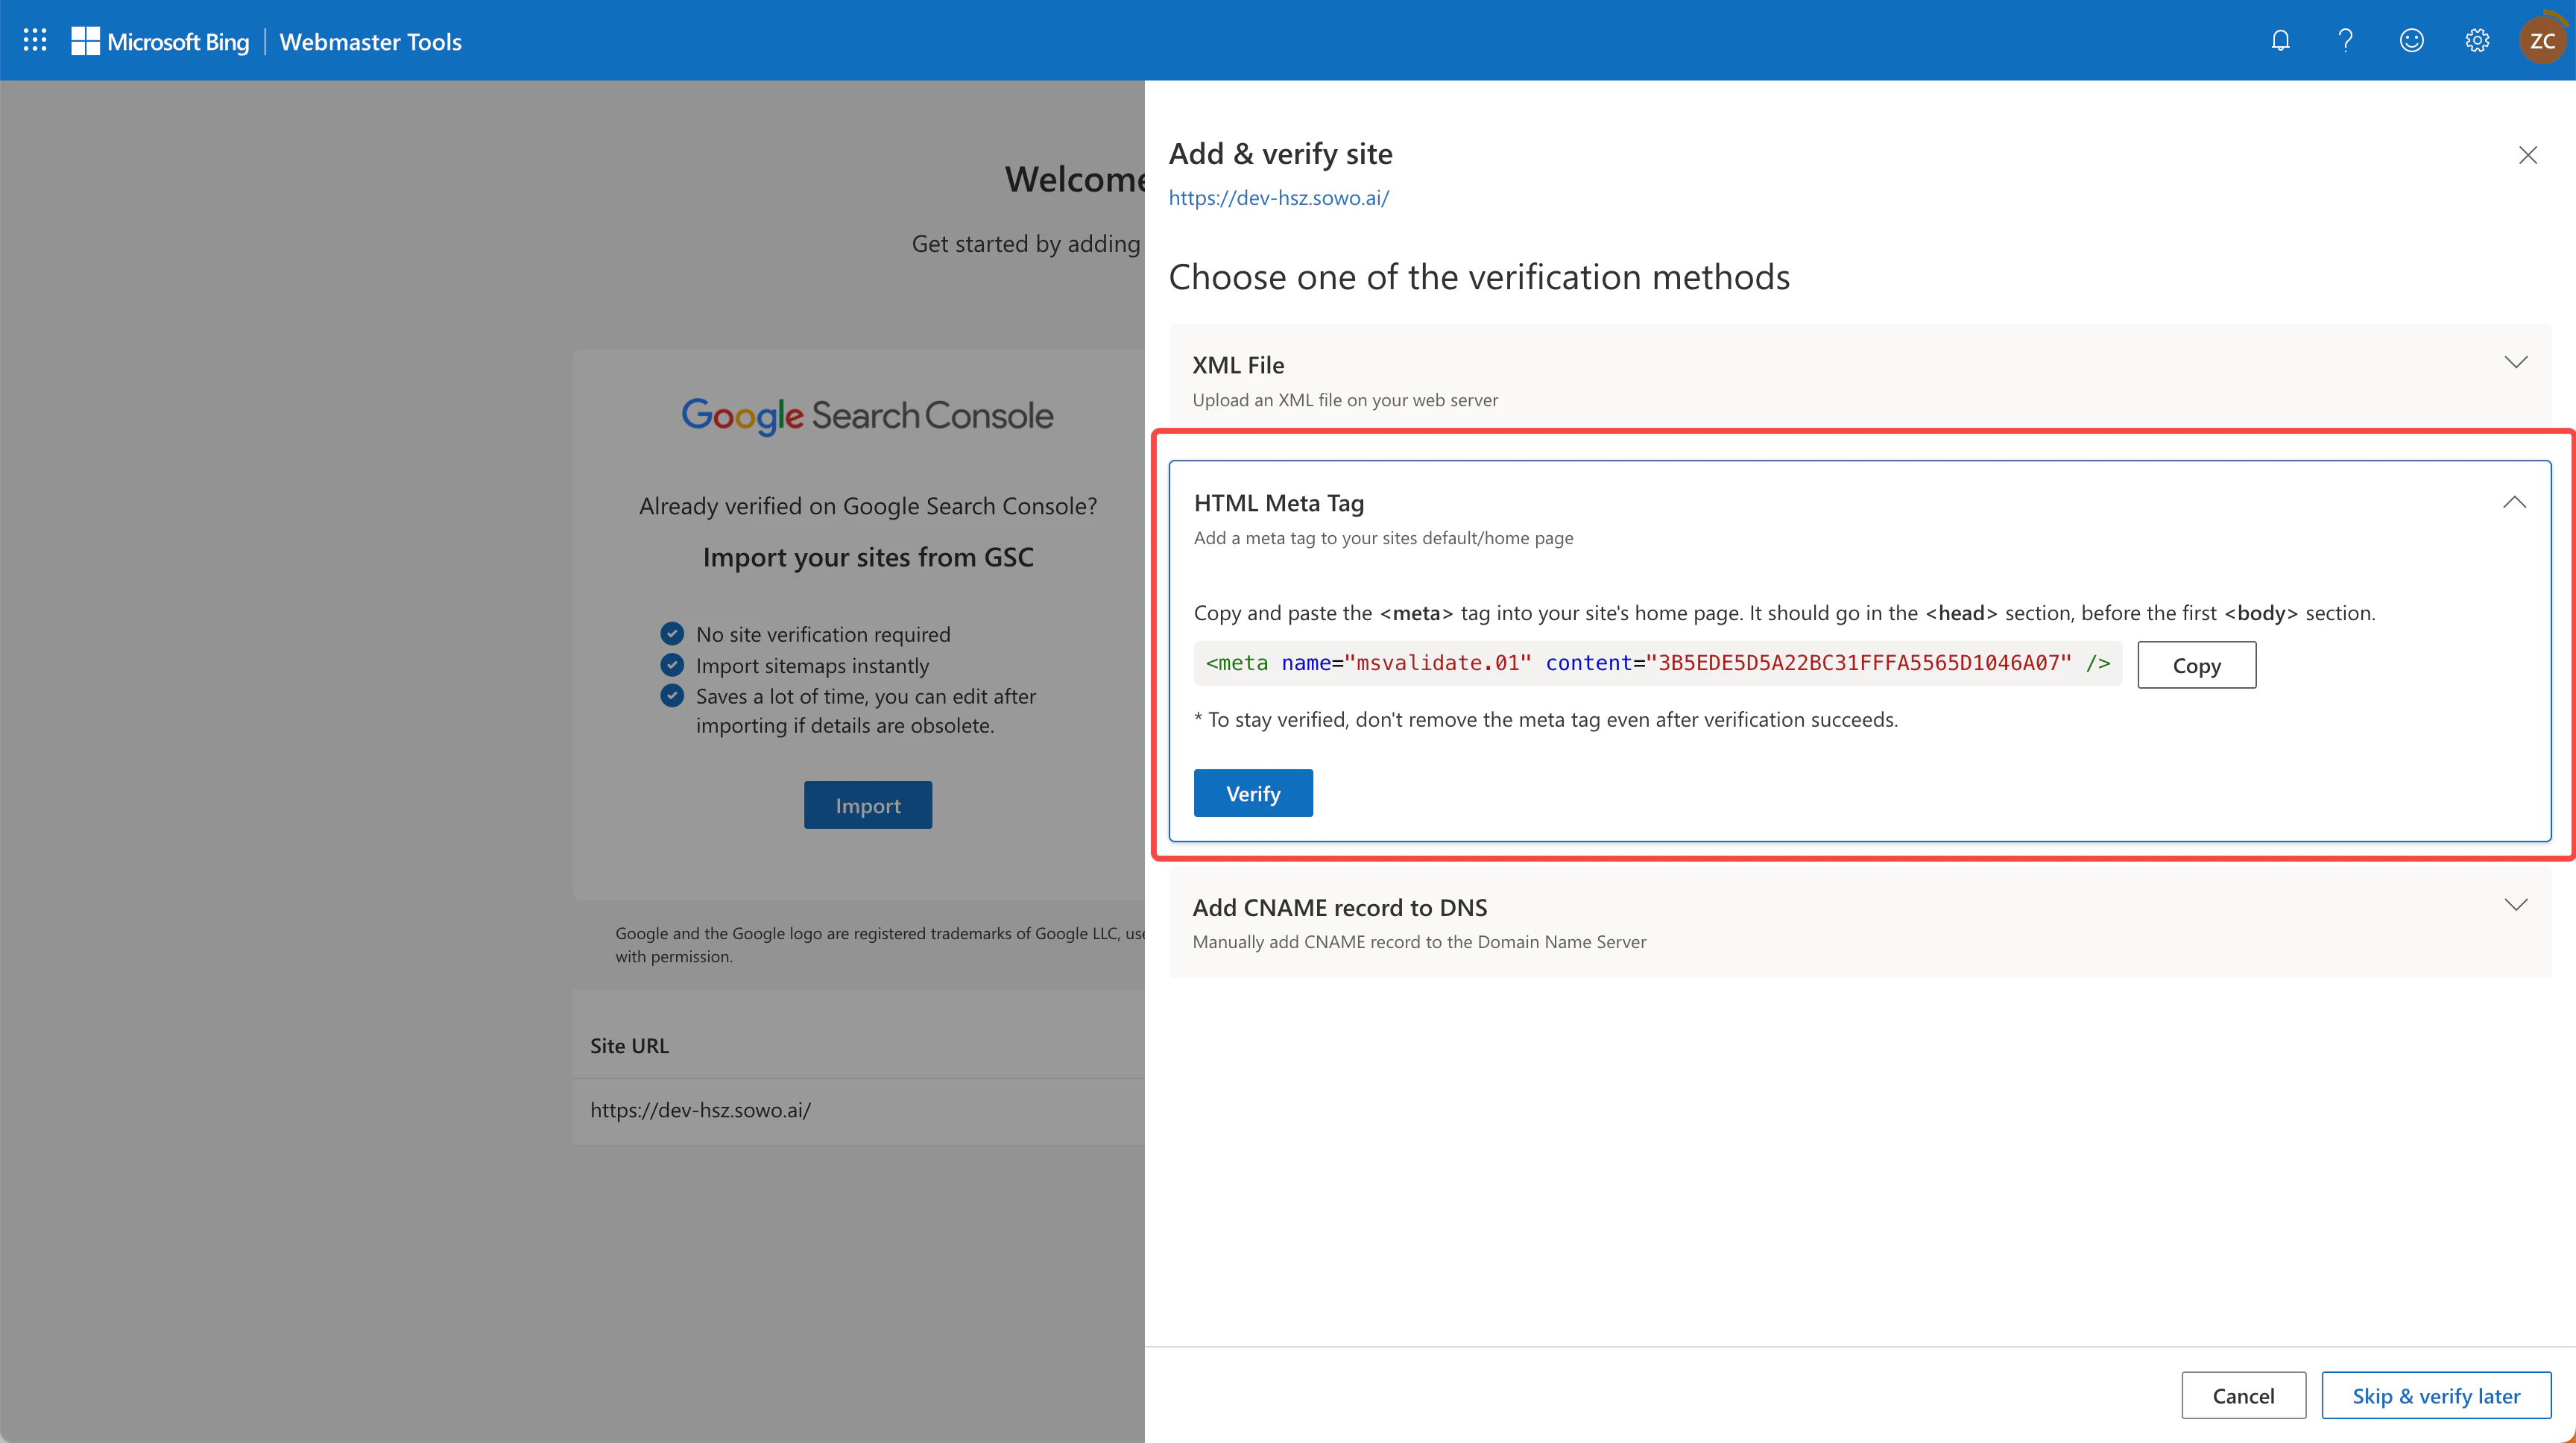
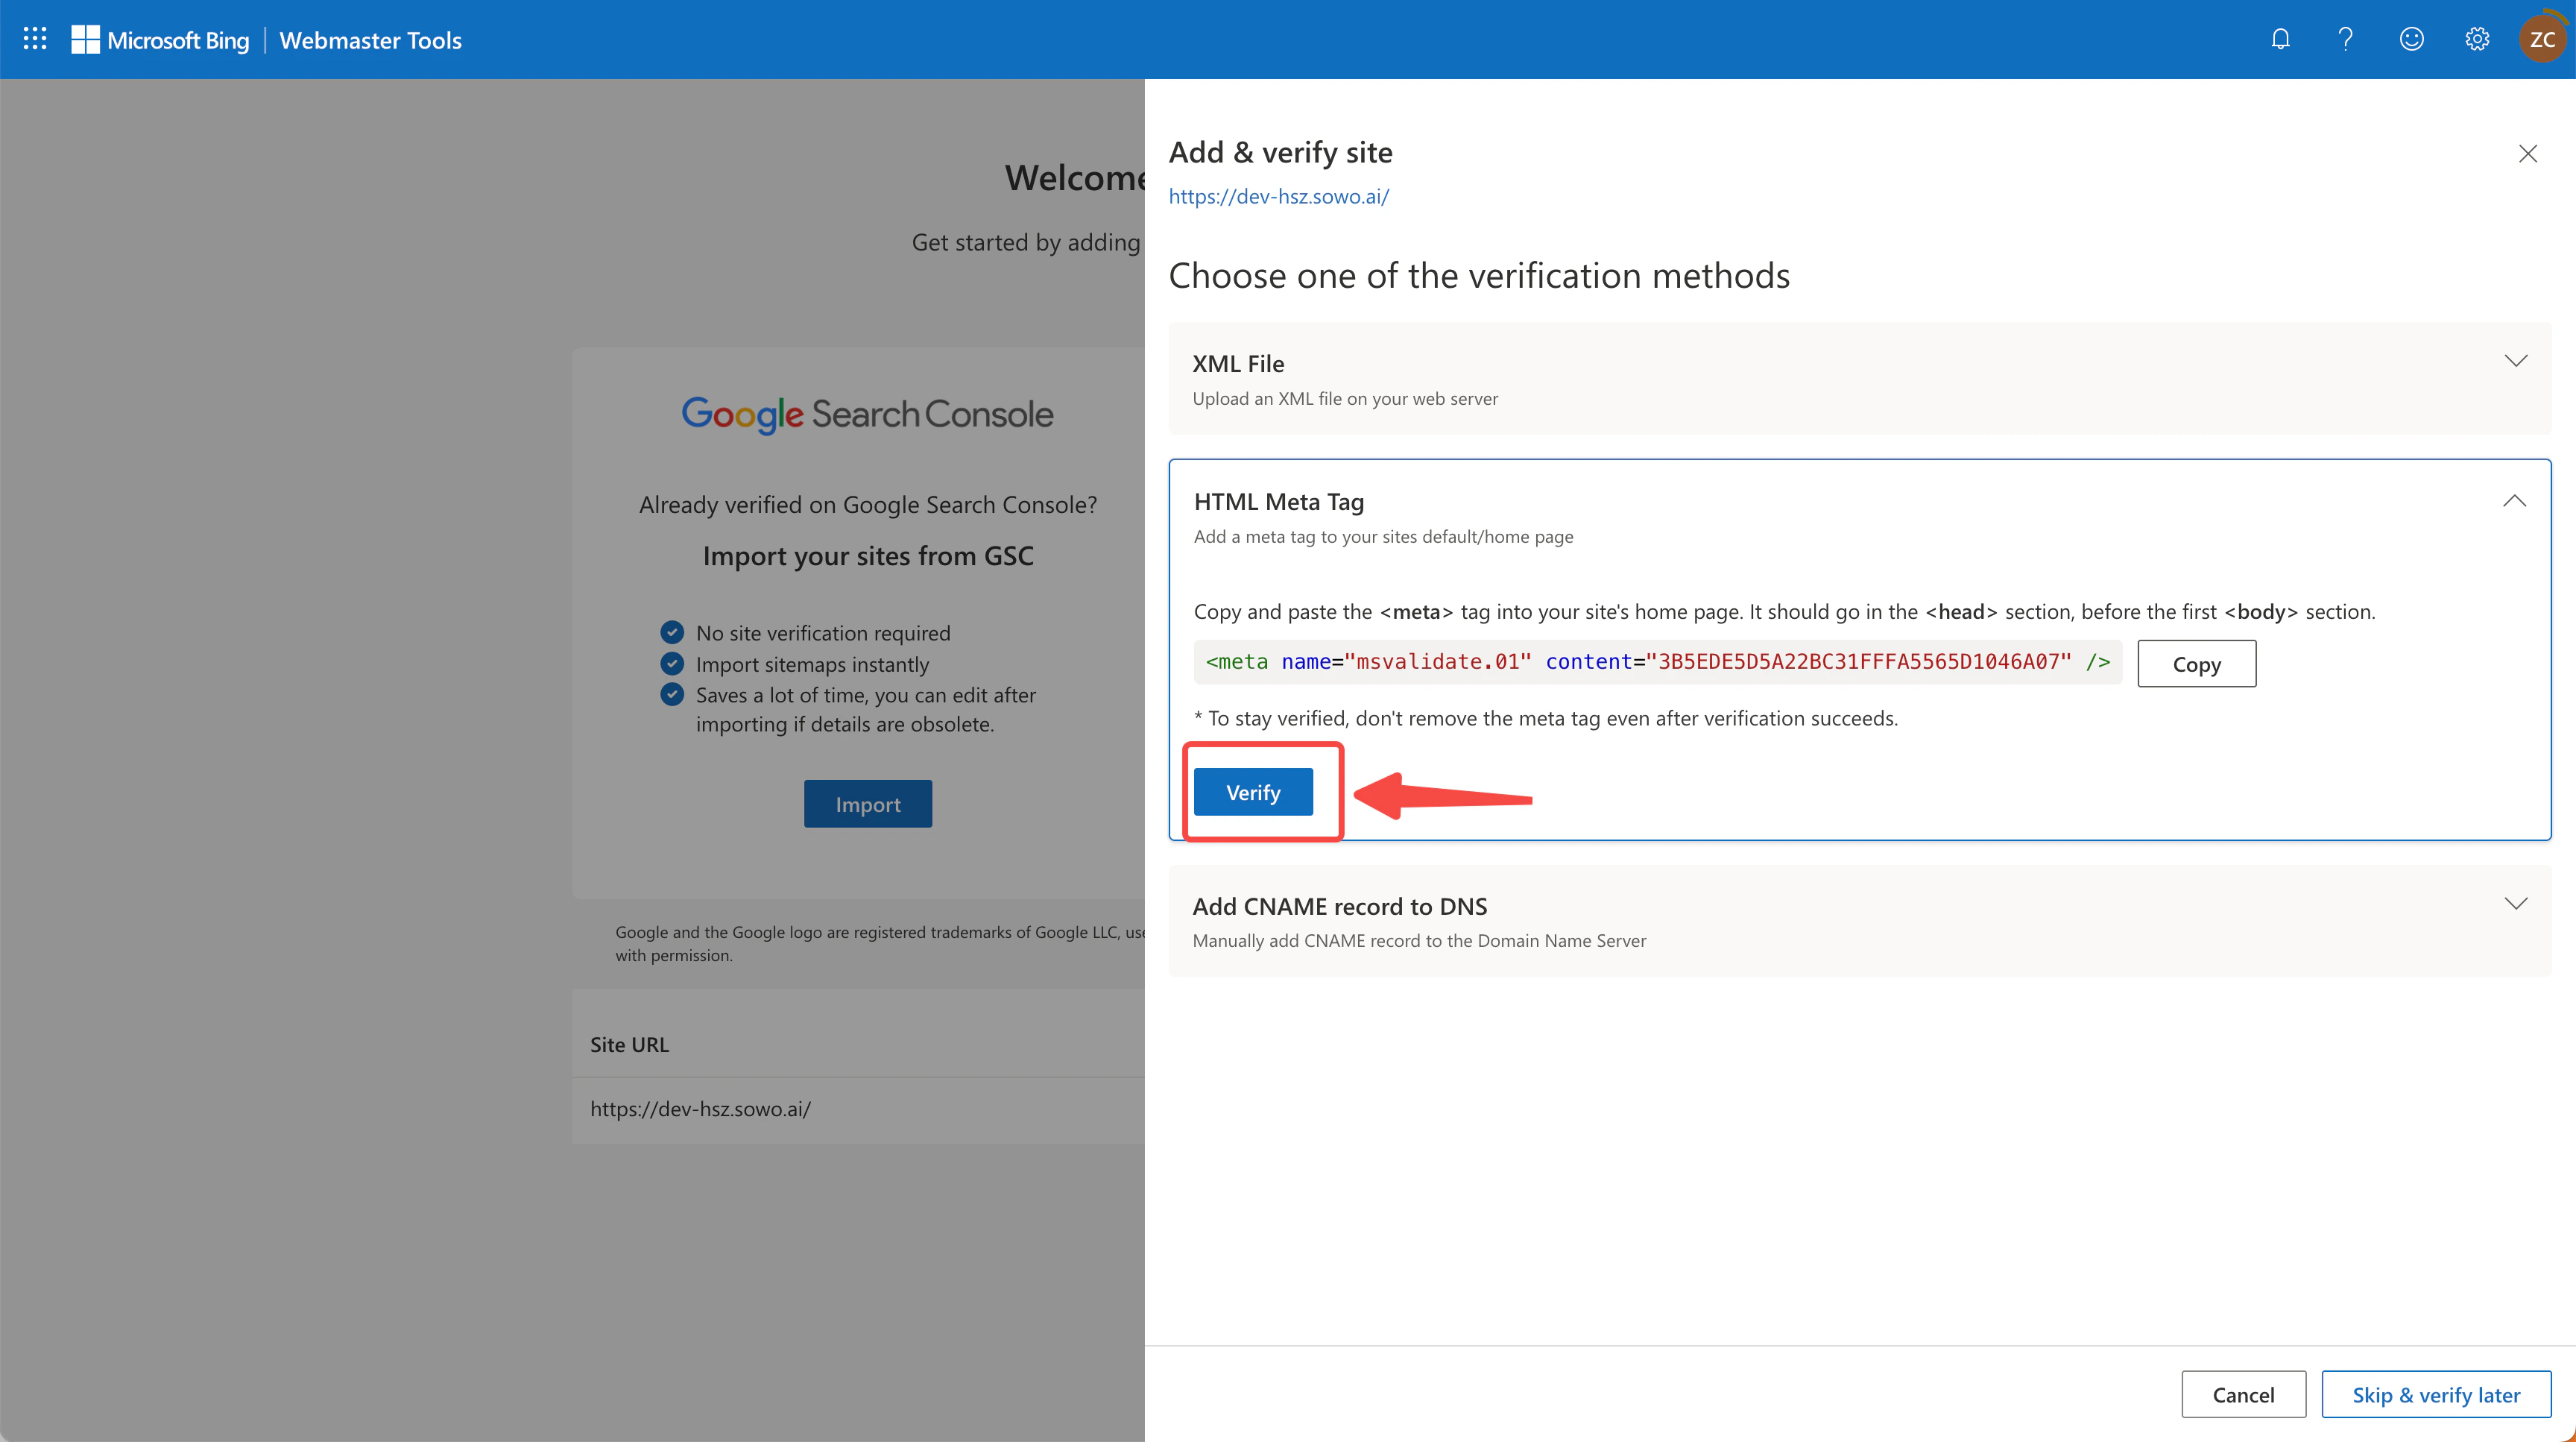
Select Verification Method
Bing offers multiple verification methods. We recommend selecting the “HTML Meta Tag” method for verification.
Select HTML Meta Tag
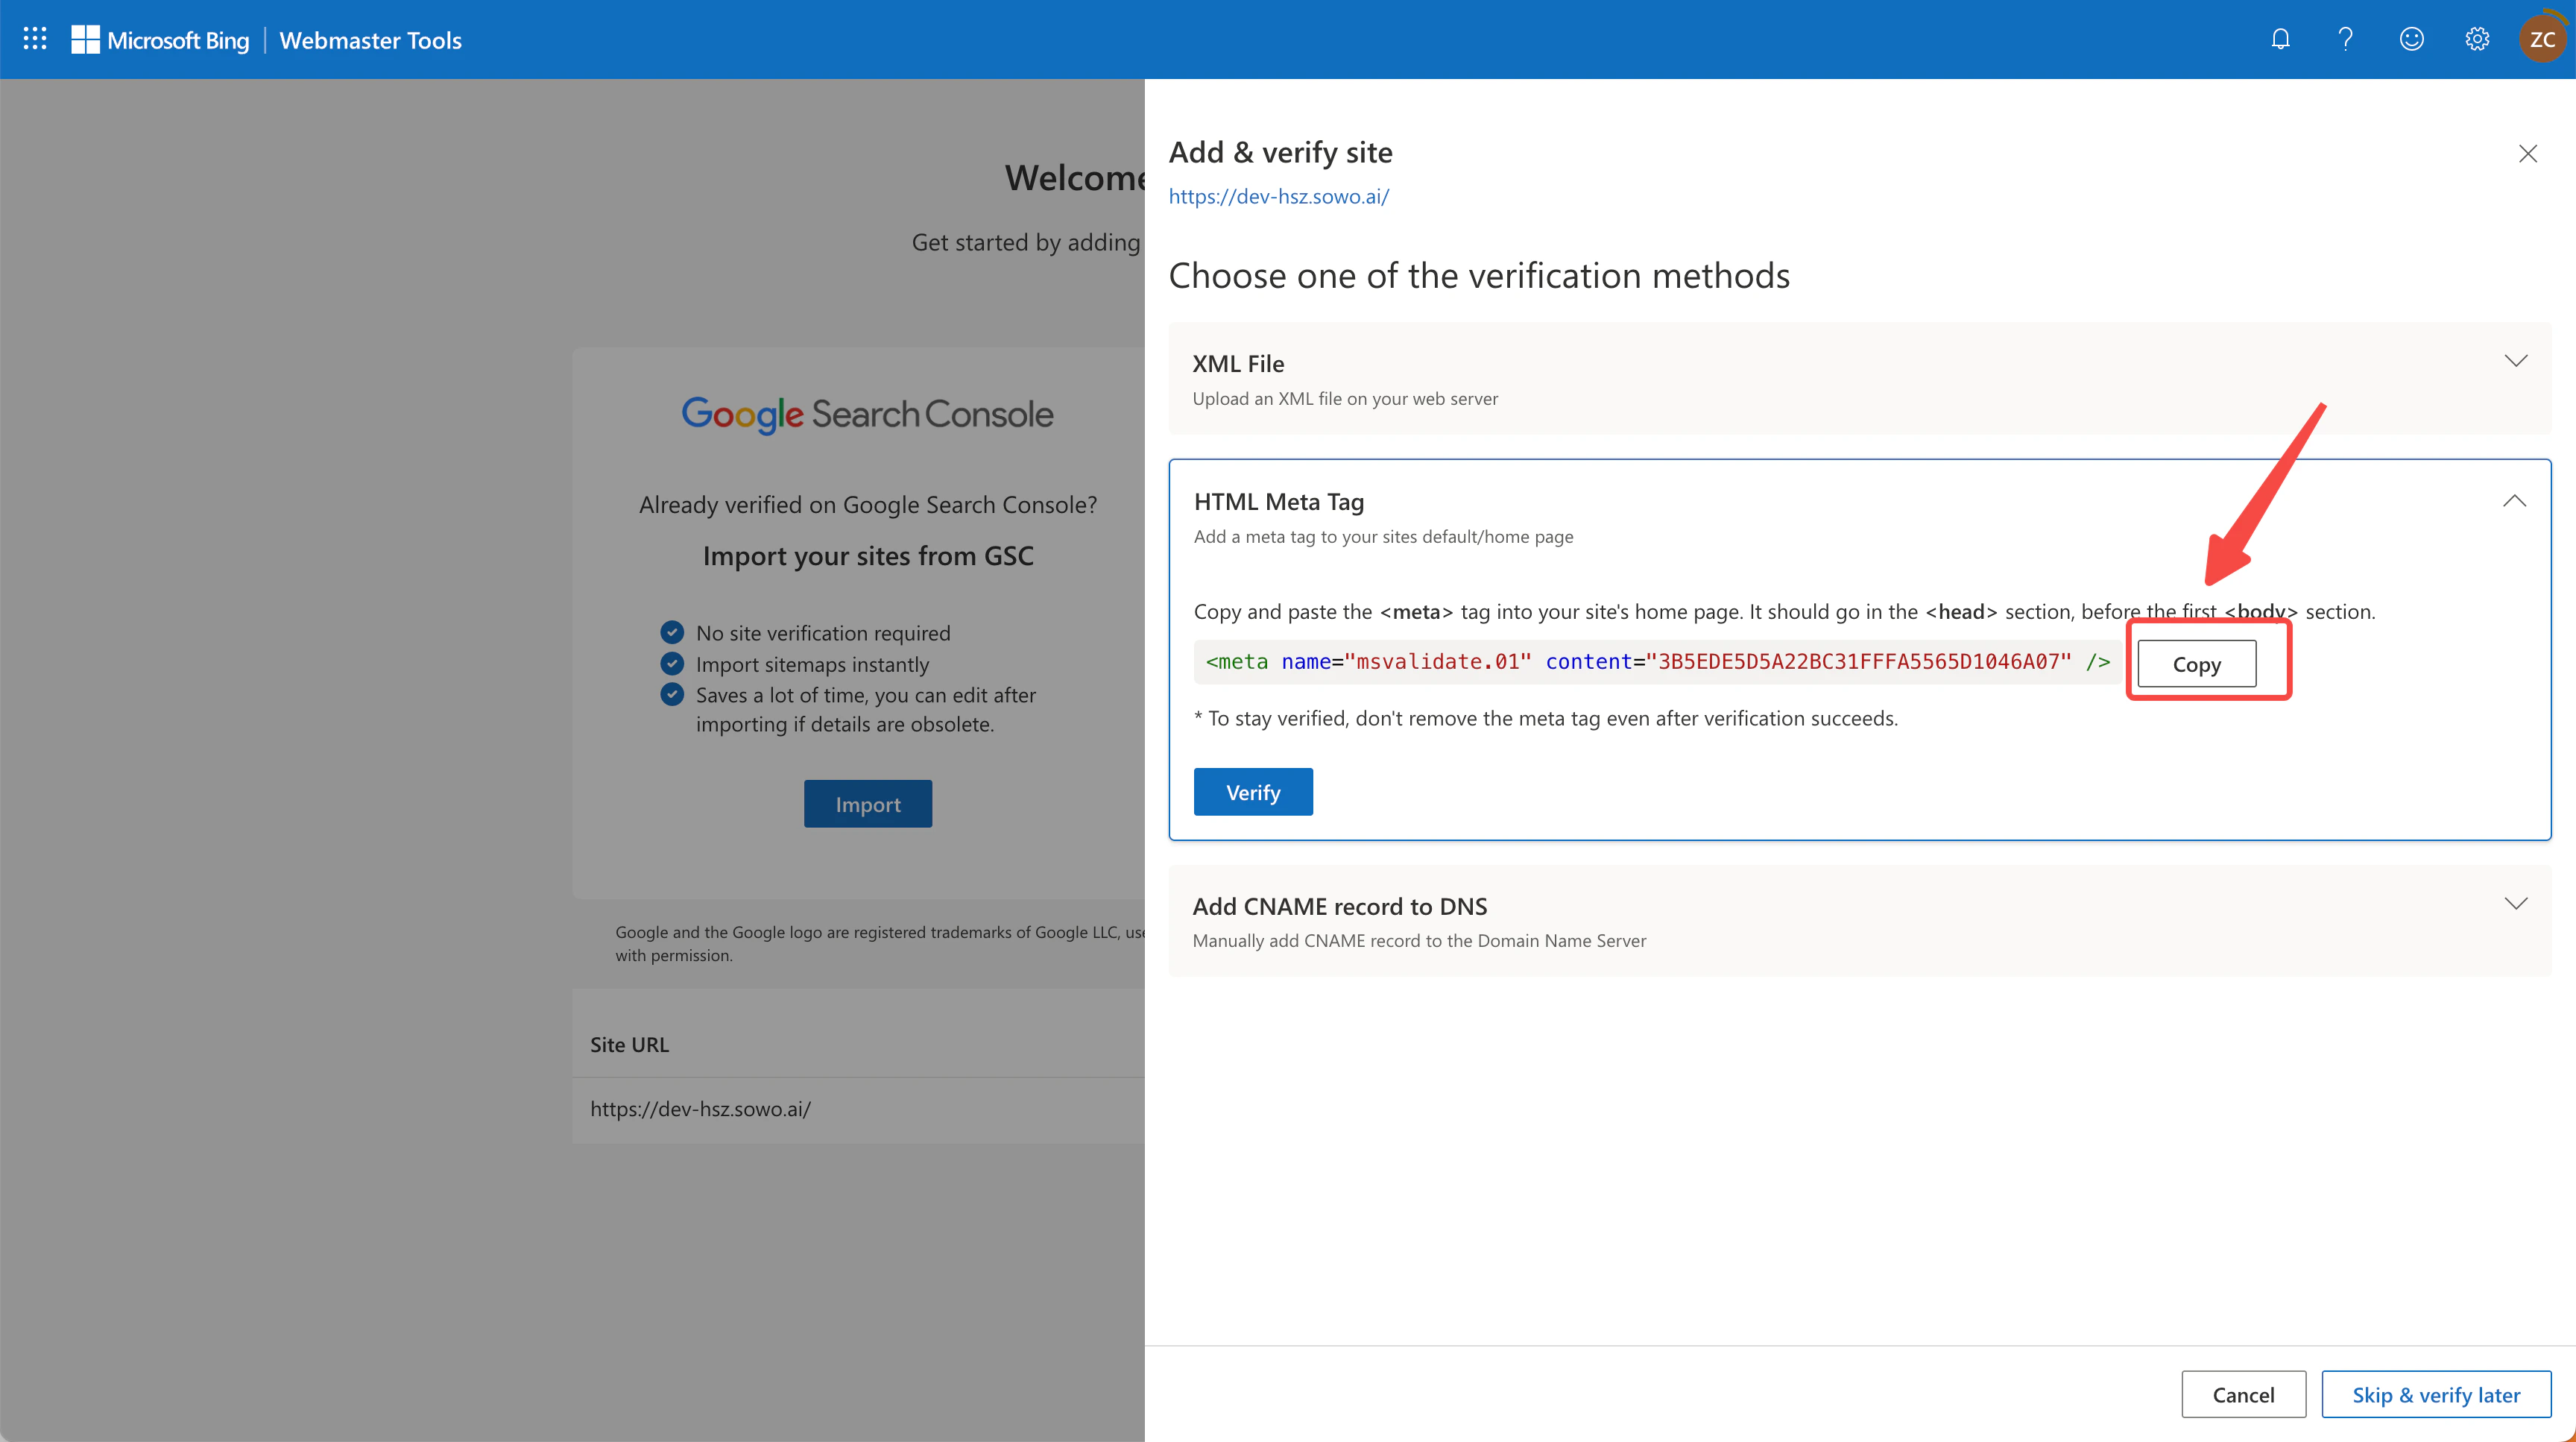
Copy verification code
Send code to Readdy for embedding
- Select the “HTML Meta Tag” verification option
- Copy the meta tag code provided by Bing
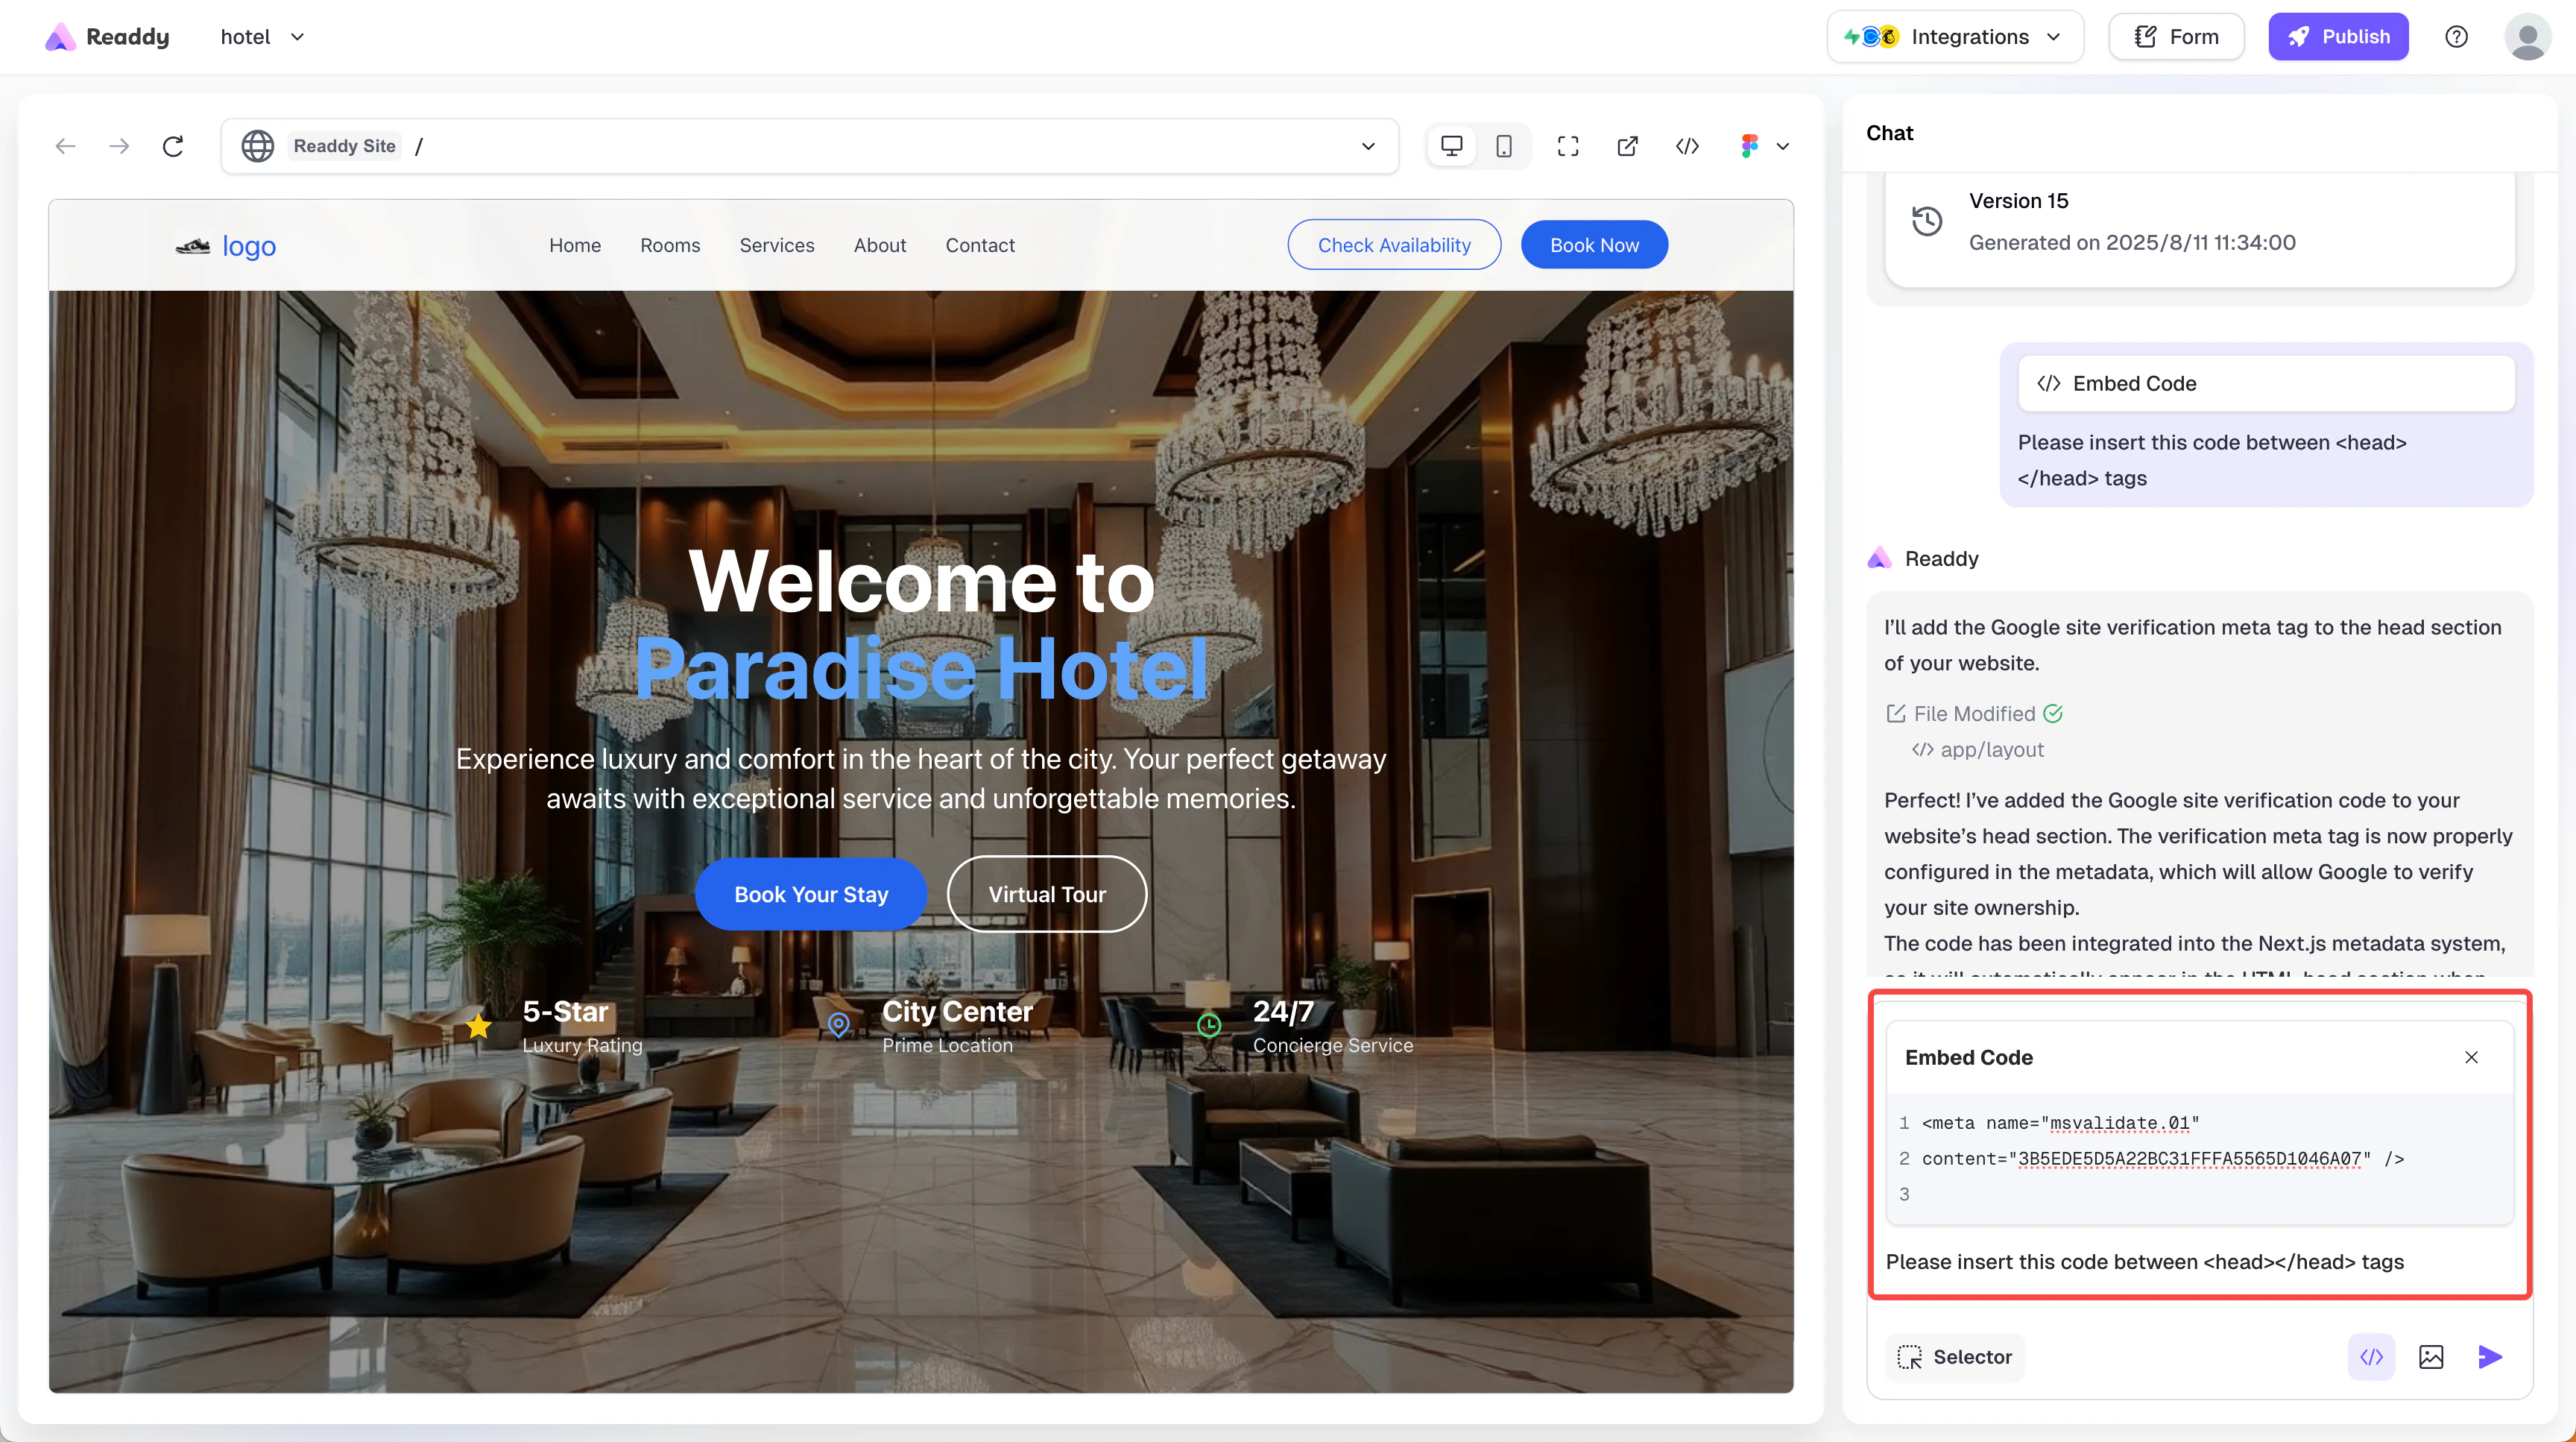
- Return to the Readdy platform
- Paste the code into the “Embed Code” section
- Enter the necessary content: “Please insert this code between tags” in the input field
- Send the information to Readdy

Code embedded
Verify after republishing domain
- Readdy will help you generate a new website version containing the verification code
- You need to republish your domain for the changes to take effect
- Wait for the website update to complete (usually takes a few minutes)
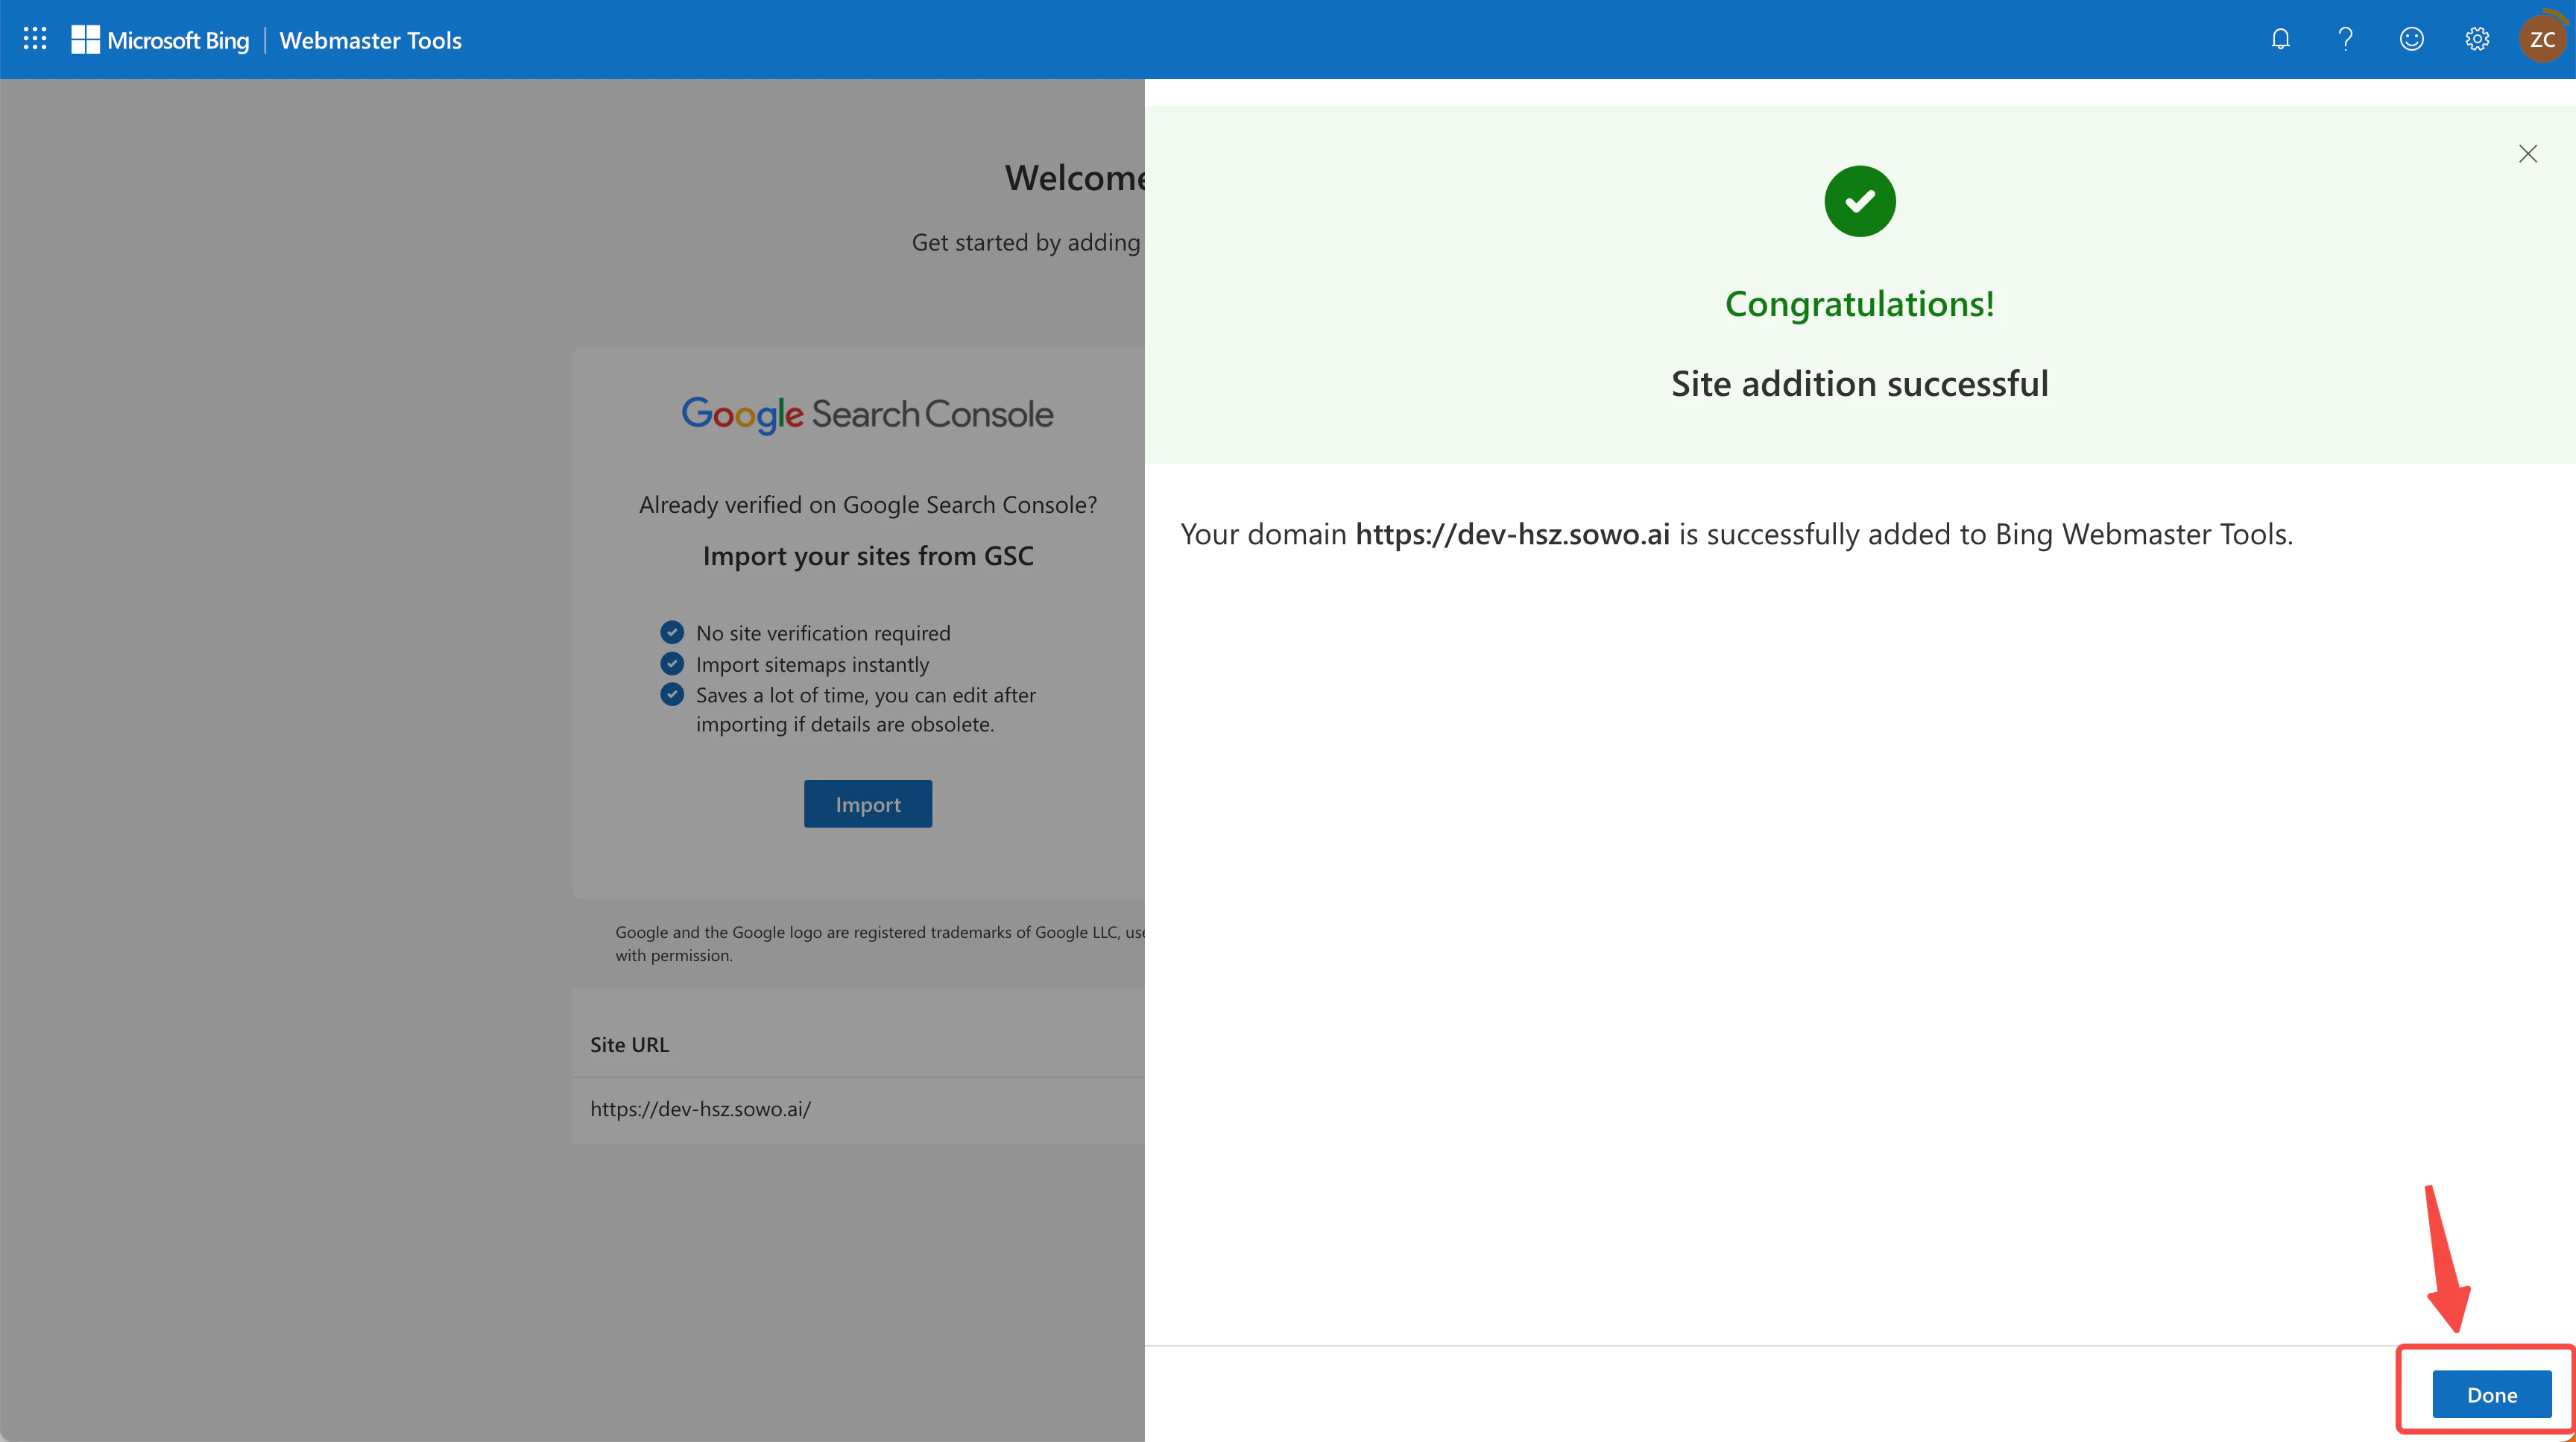
Verification successful
Indexing initiated
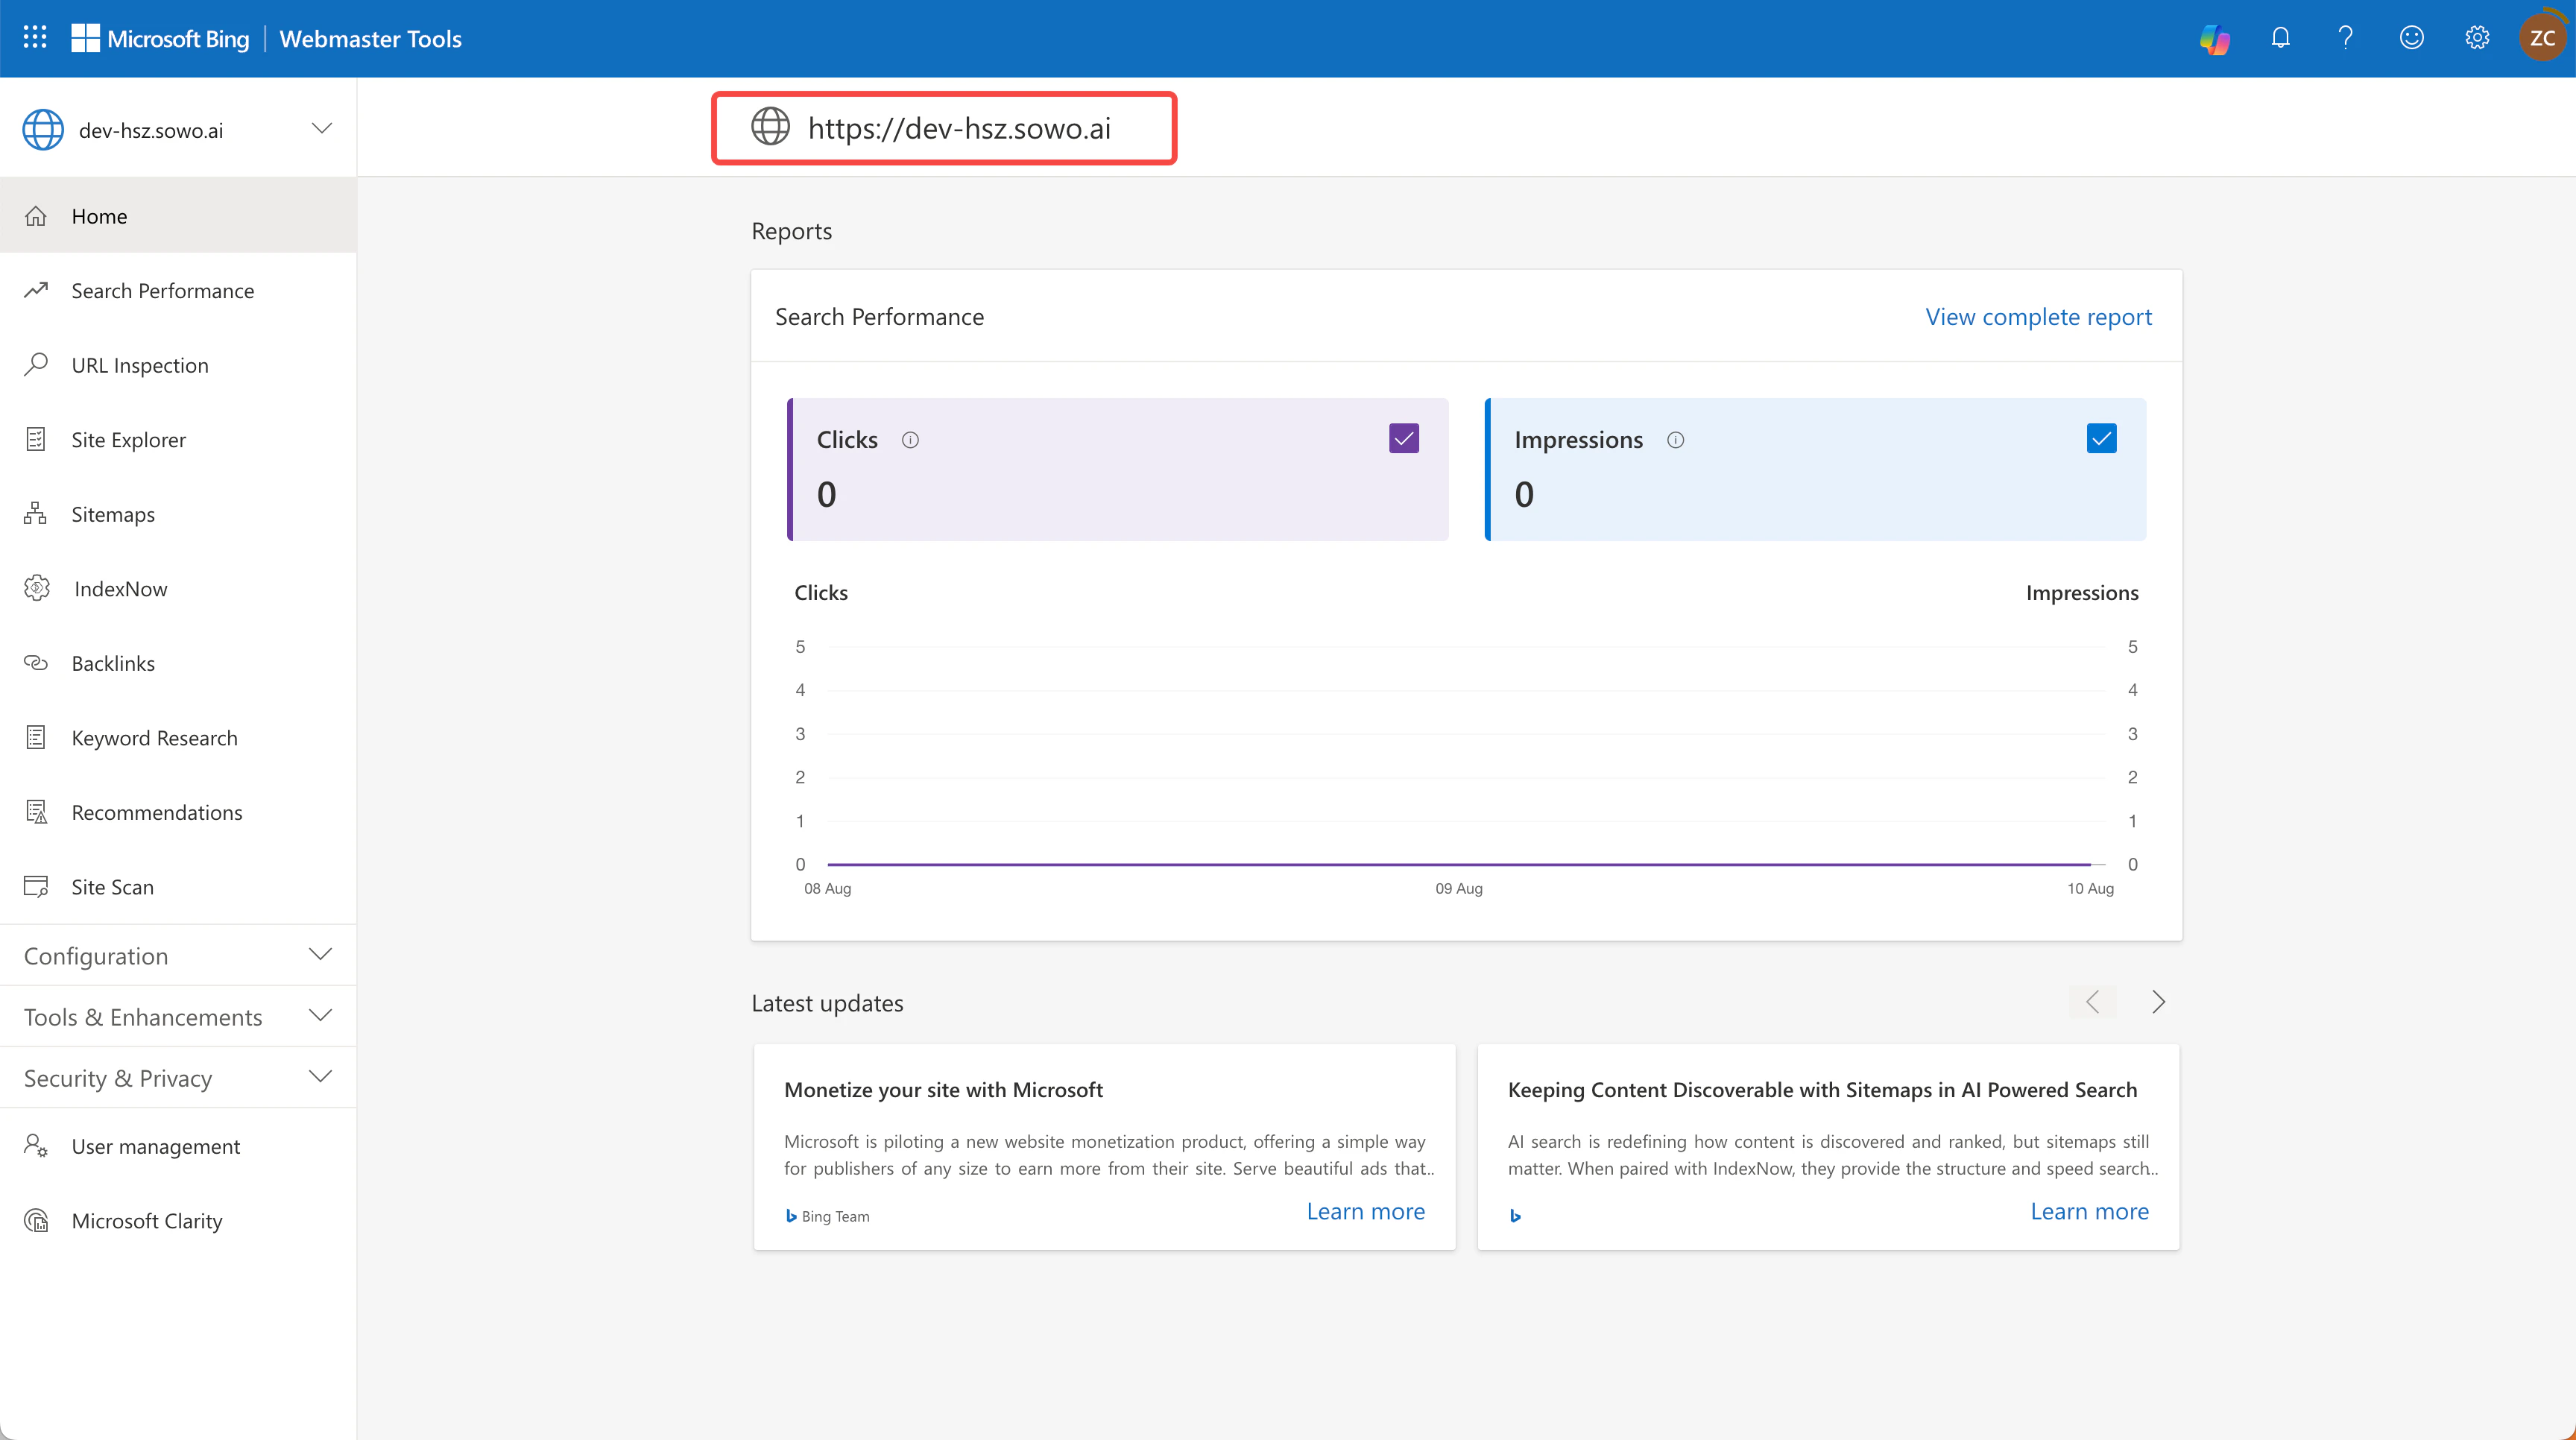
- Return to Bing Webmaster Tools
- Click the “Verify” button to complete verification
- After successful verification, your site has been successfully submitted to Bing for indexing
- Bing will begin crawling and indexing your website content
Important Notes
How to Get Your Site Indexed by Naver
What is Naver Search Engine Indexing?
Naver Search Engine Indexing refers to the process where Naver’s crawler discovers, verifies, and registers your website so it can appear in Naver search results. Similar to Google Search Console, Naver Search Advisor lets you submit your site, verify ownership, and manage how pages are crawled and indexed. Proper indexing is essential for reaching audiences in South Korea where Naver is a leading search platform.Steps to Follow
-
Connect to Naver Search Advisor
Access Naver Search Advisor and log in with your Naver account. After logging in, click “웹마스터 도구 사용하기” (“Use Webmaster Tools”).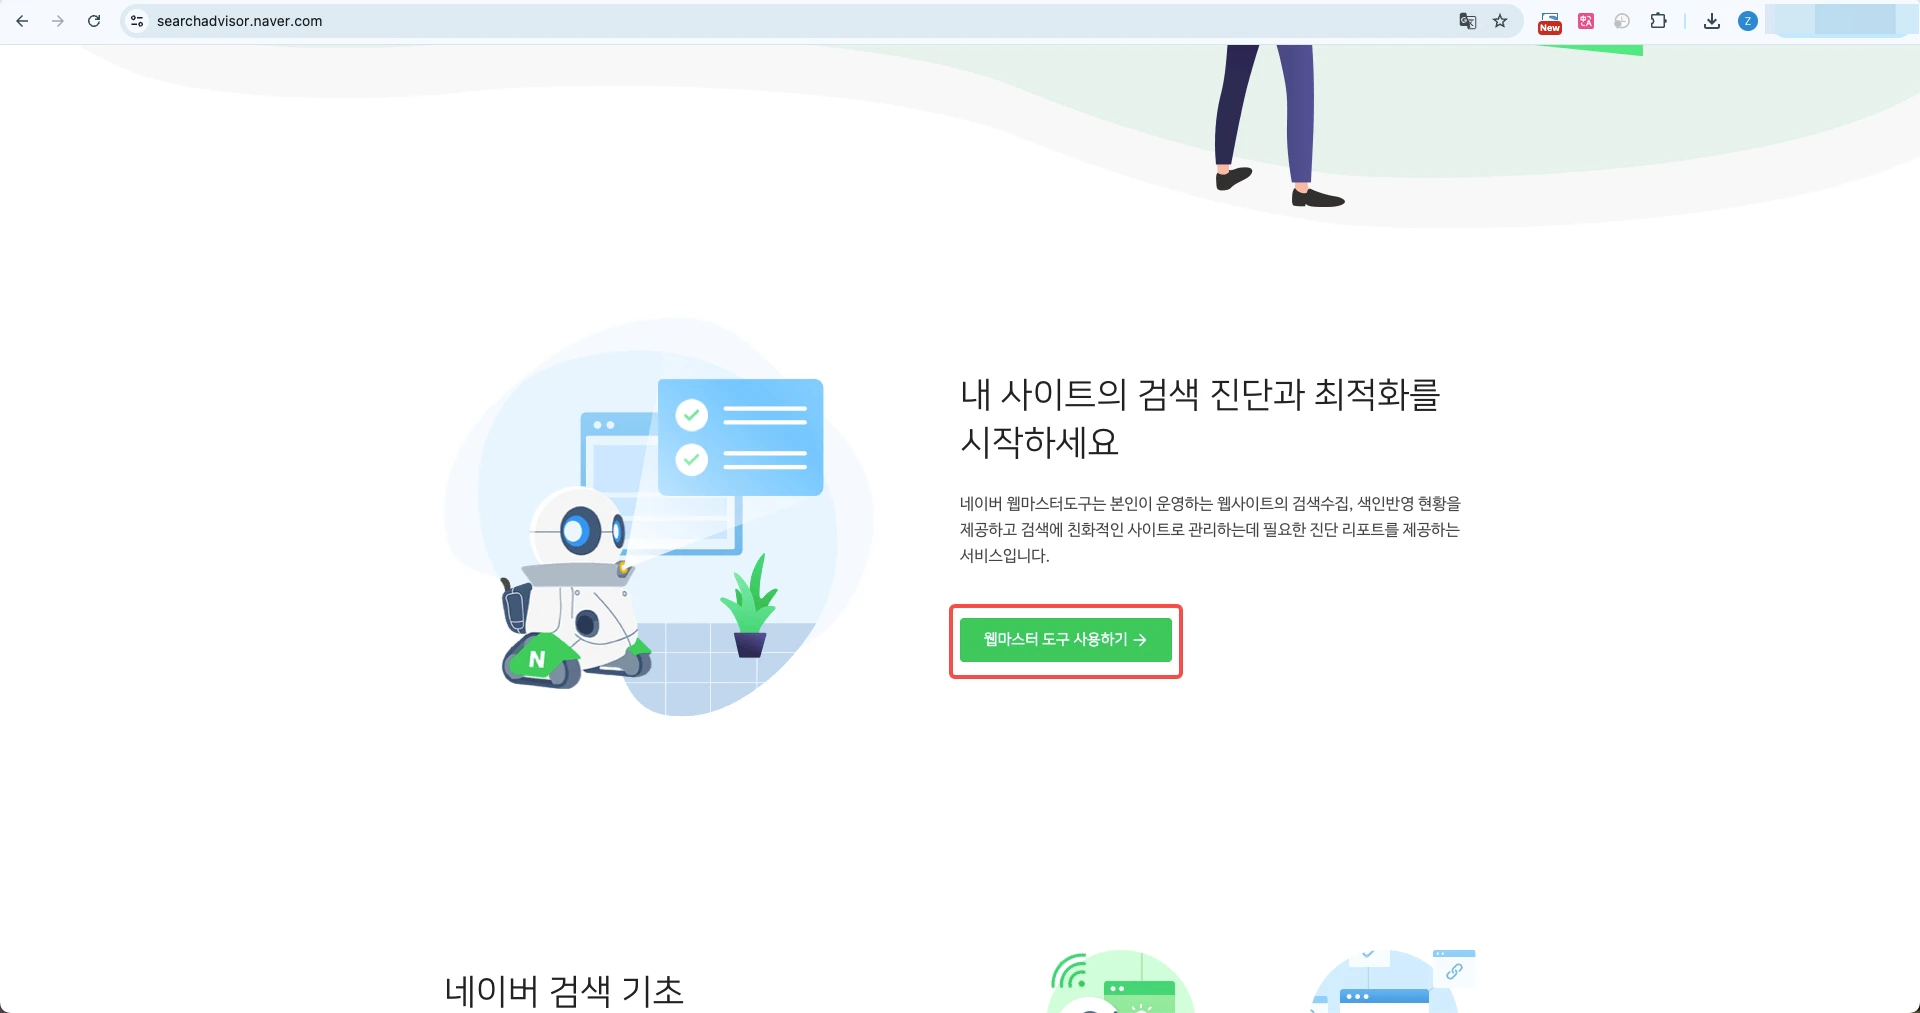
-
Enter Website Address
Input your full website URL (includinghttps://orhttp://) and press Enter.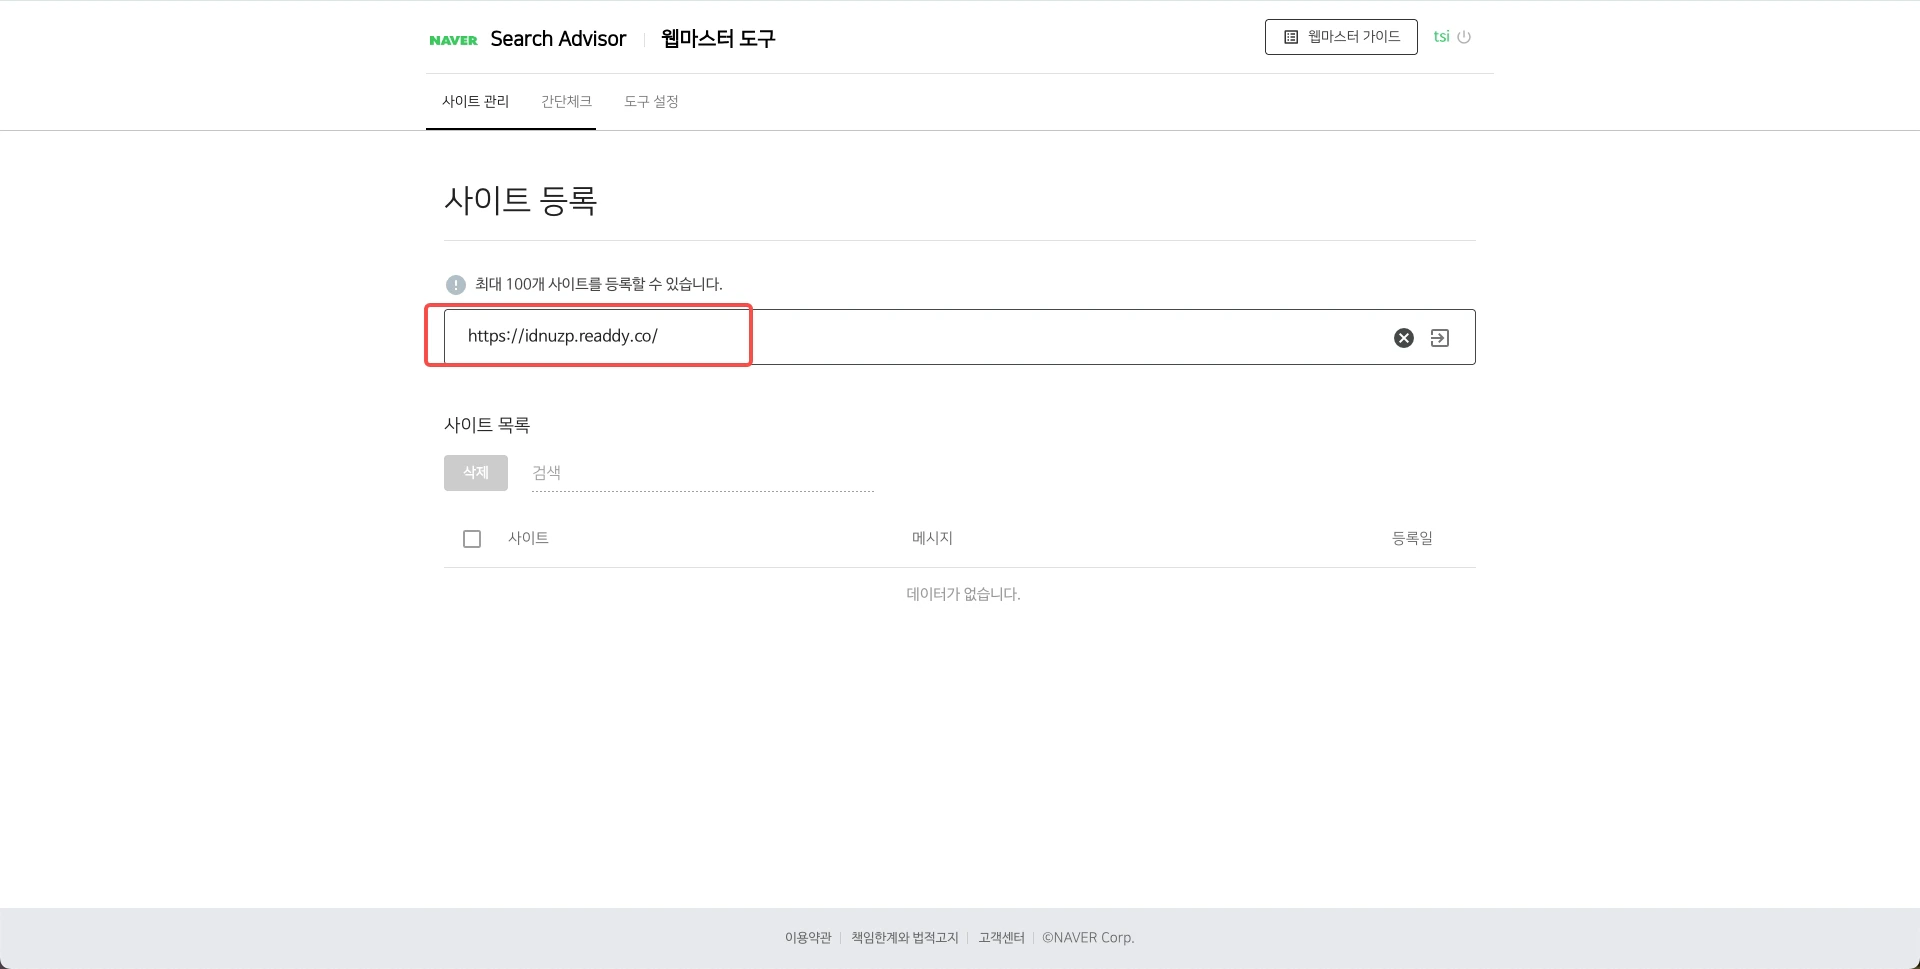
-
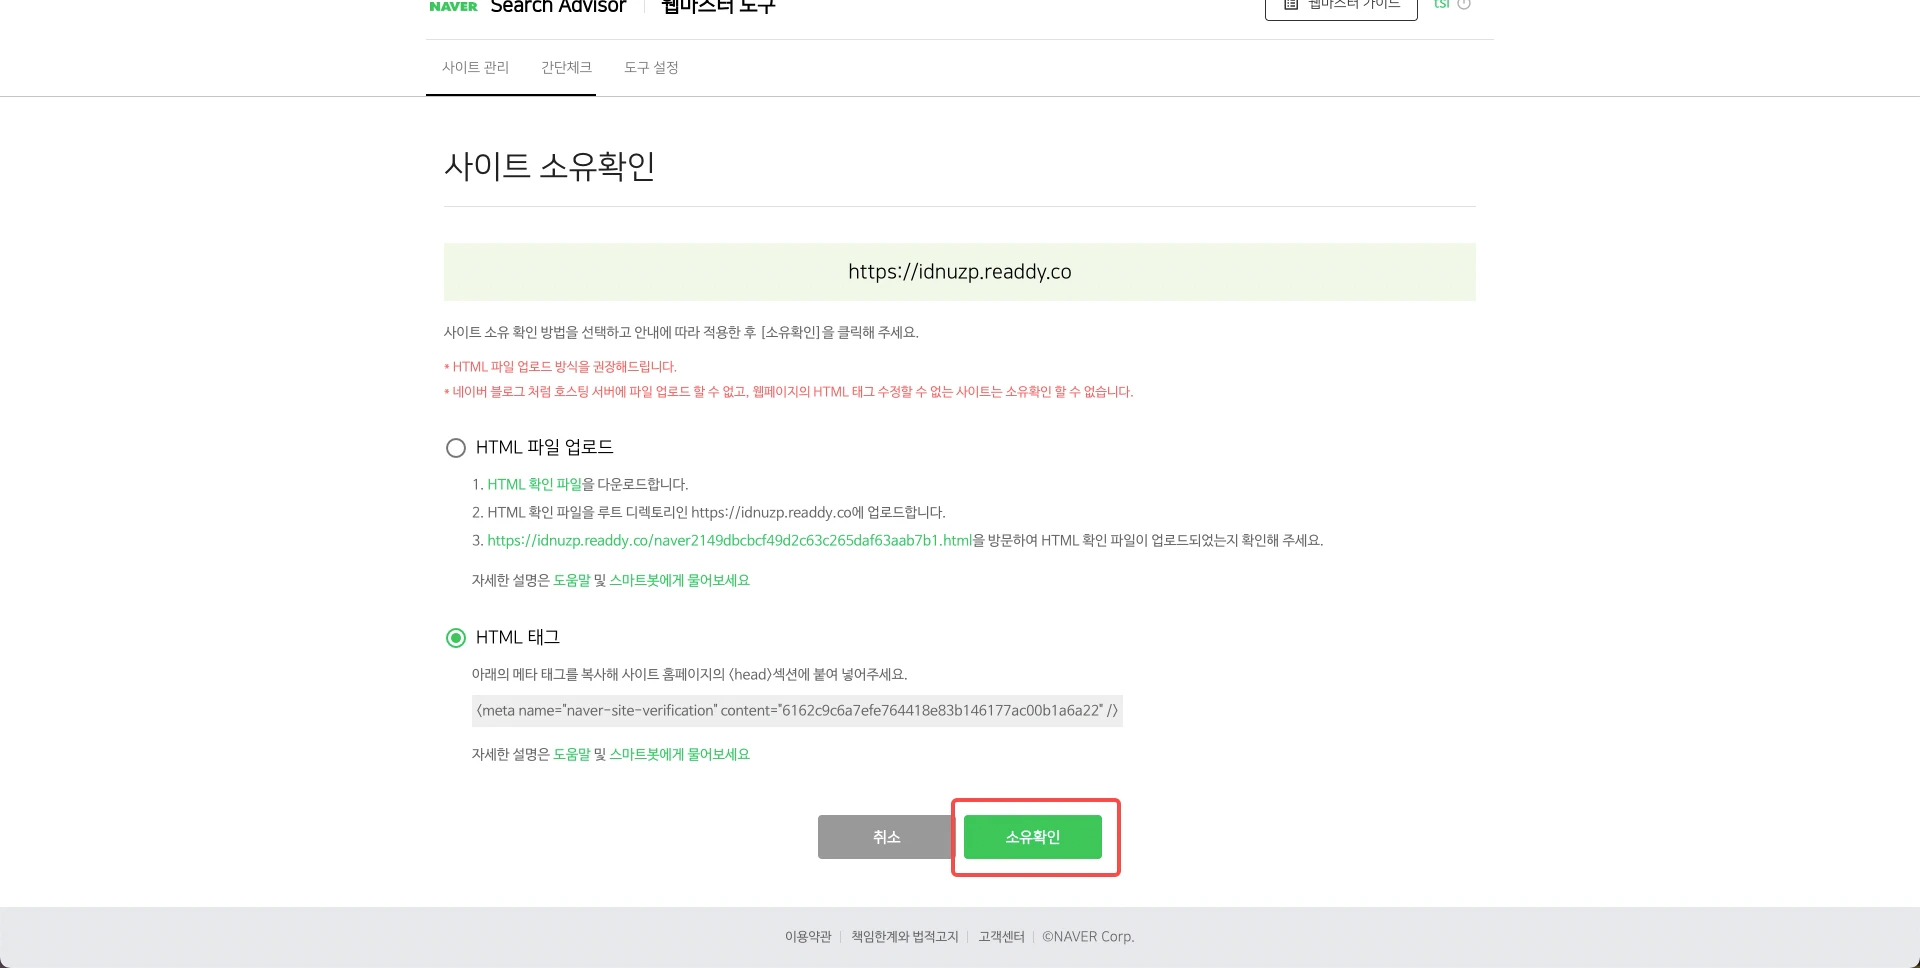
Select Verification Method
Naver provides multiple verification methods. We recommend choosing the “HTML Meta Tag” method for verification.
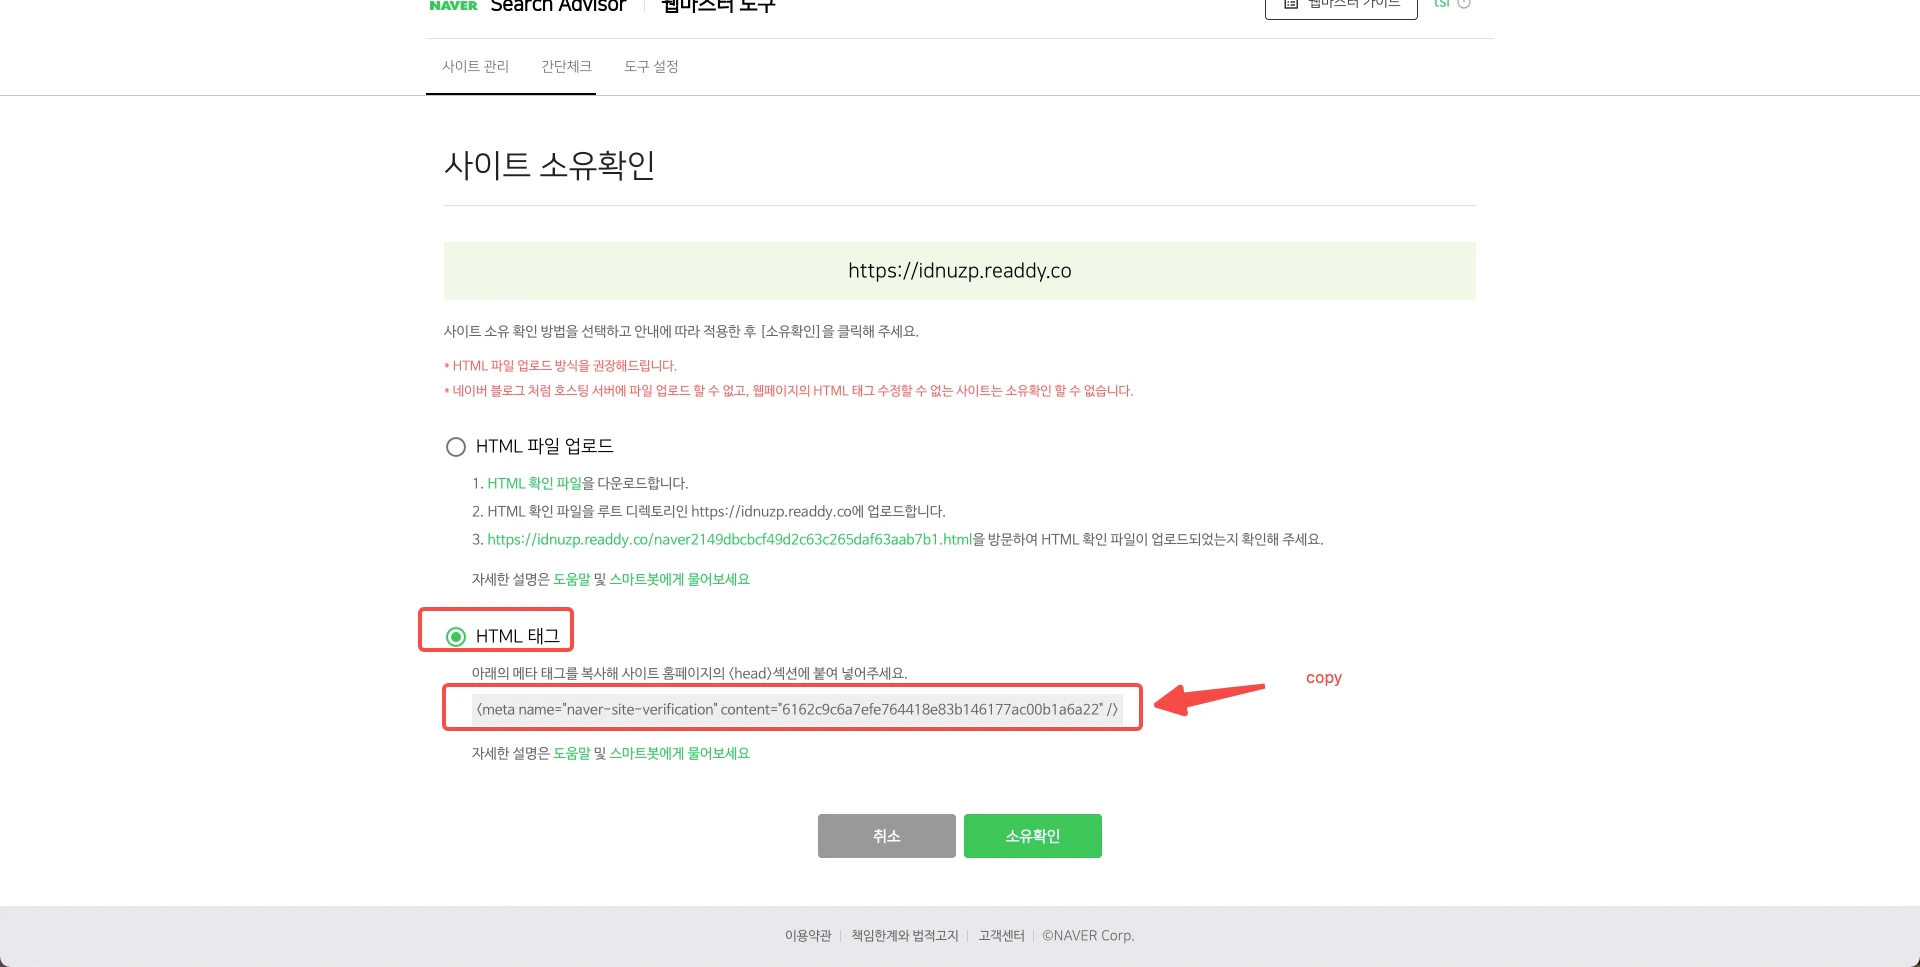
Select HTML Meta Tag and copy verification code

Send code to Readdy for embedding
- Select the HTML Meta Tag verification option
- Copy the meta tag code provided by Naver
- Return to the Readdy platform
- Paste the code into the “Embed Code” section
- In the placement dropdown, choose “Append to the
<head>tag” (or type the same instruction if it is a text field) - Send the information to Readdy
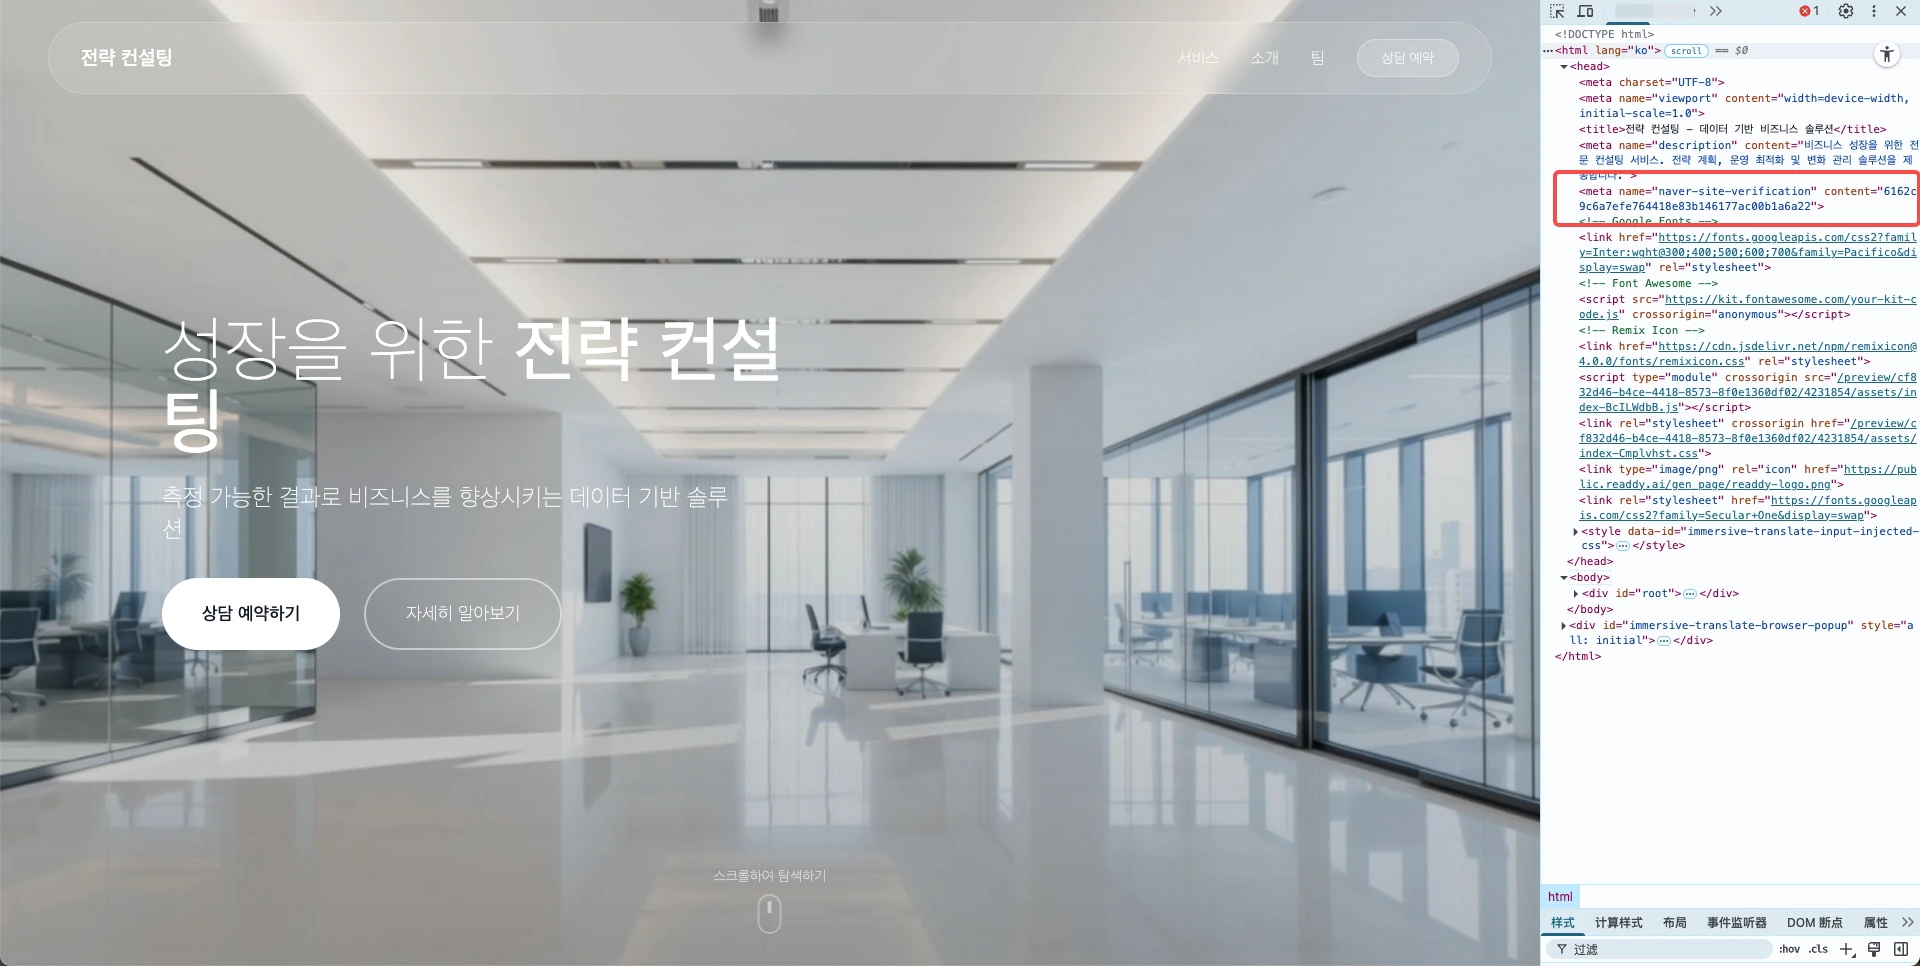
Code embedded
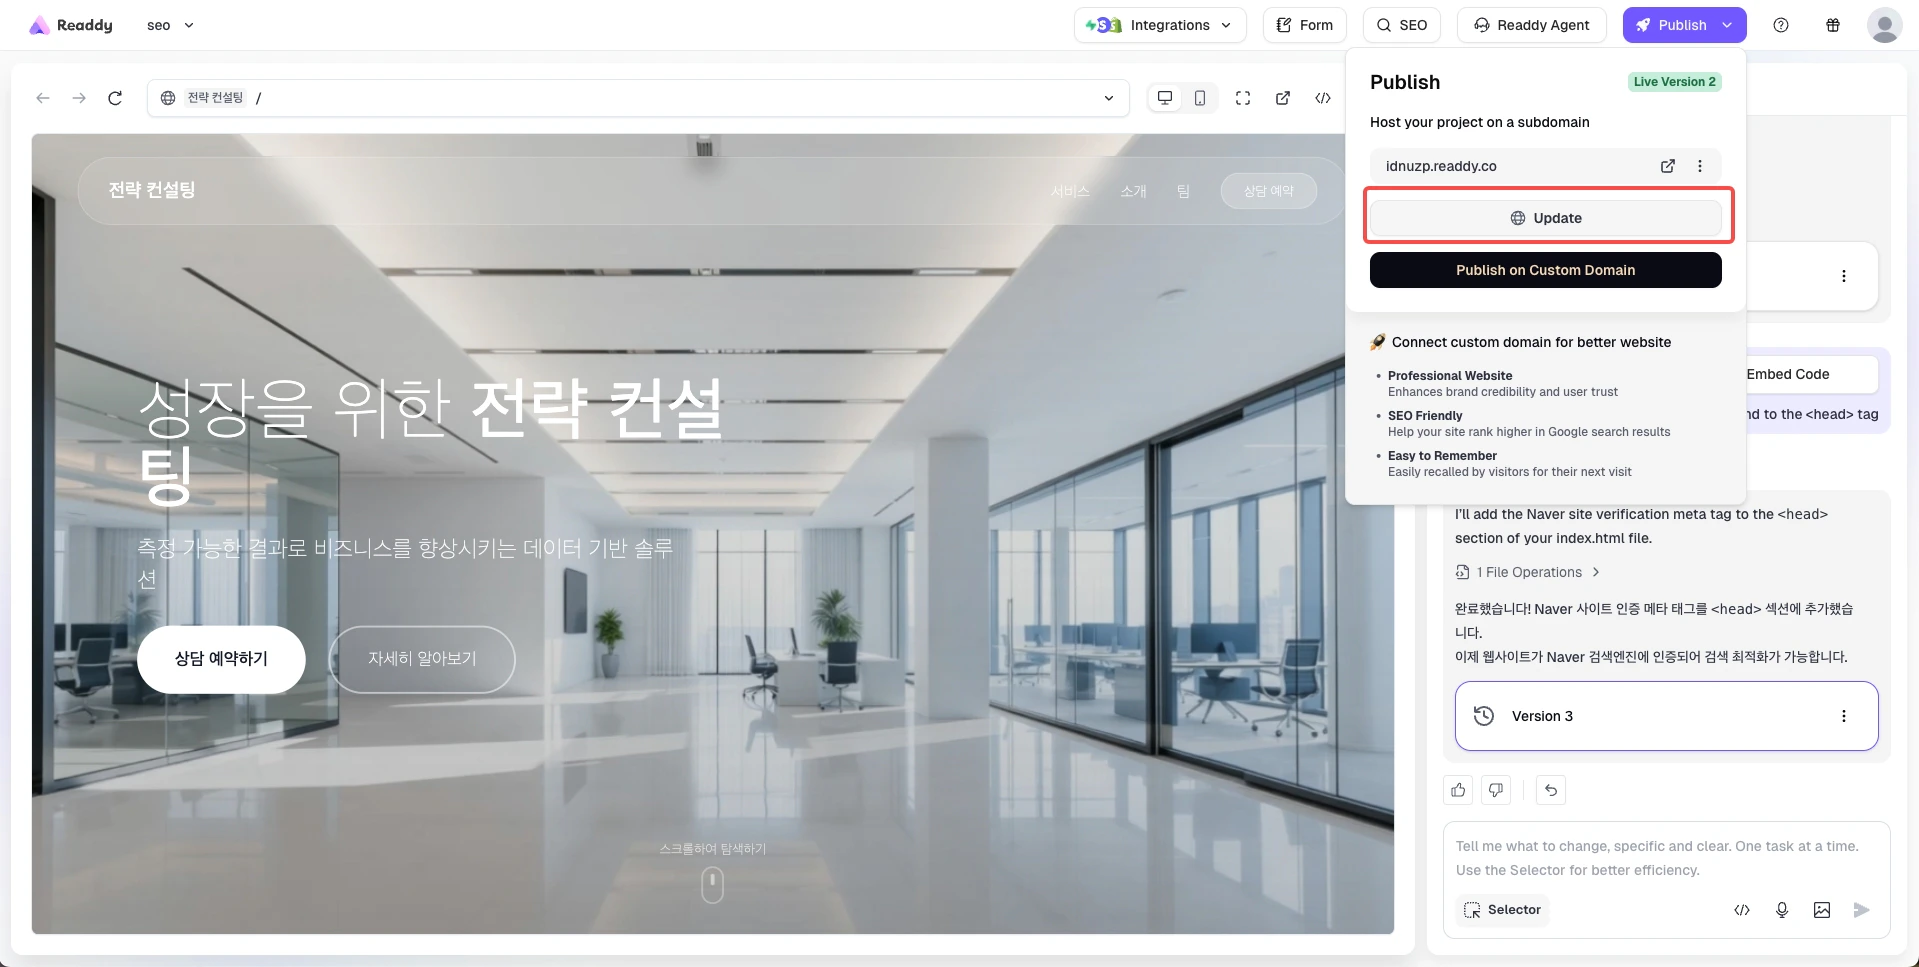
Verify after republishing domain
- Readdy generates a new version of your website containing the verification meta tag
- Republish your domain so the verification code takes effect
- Wait a few minutes for the site update to complete
Indexing initiated
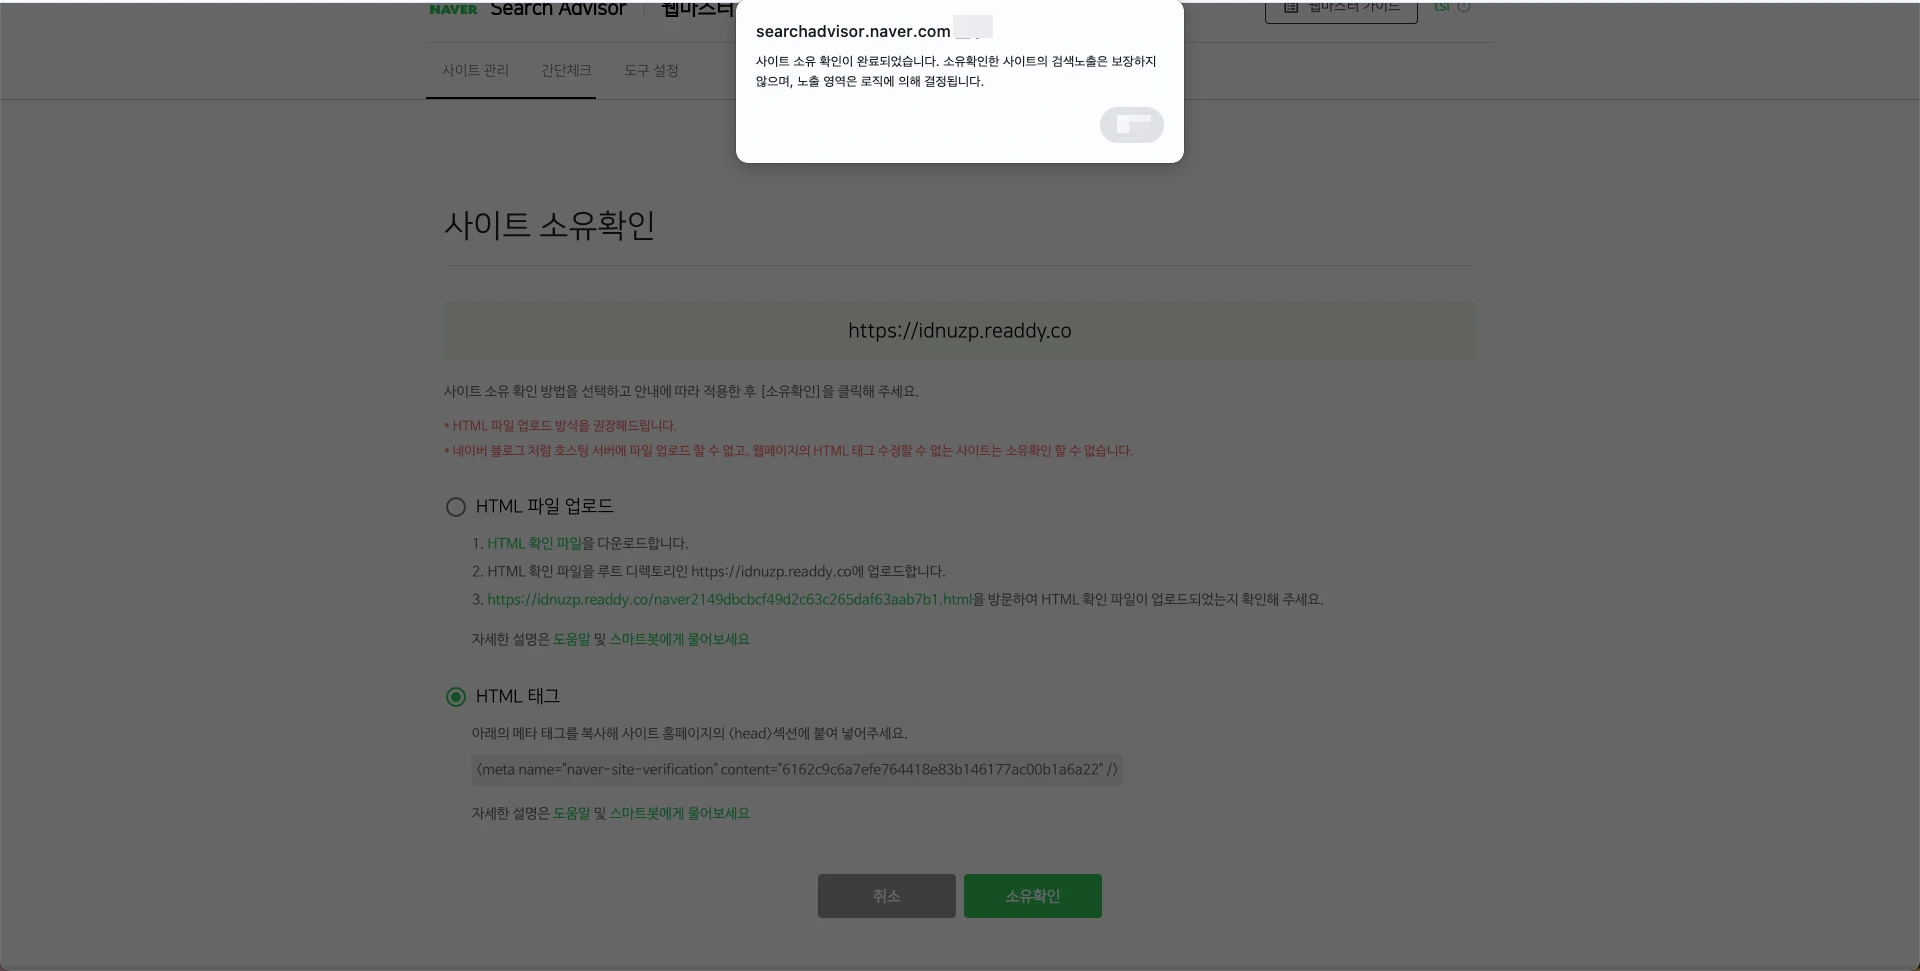
Verification successful
- Return to Naver Search Advisor
- Click “소유확인” (“Verify ownership”) to complete verification
- Once successful, your site is submitted to Naver for indexing
- Naver begins crawling and indexing your site content