What is “Shop”?
Shop is a newly launched e-commerce solution by Readdy that allows you to quickly build a fully functional online store without any technical expertise. From product management to payment processing, from order tracking to inventory management, Shop provides all the tools you need to build your e-commerce business. Let’s complete your first e-commerce website setup through four simple steps.Step 1: Create Your Shop Webpages
Based on your business needs, use Readdy AI in the Editor page to build the basic website pages. A complete e-commerce website typically includes:- Homepage - Showcase your brand, featured products, marketing campaigns, etc.
- Product List Page - Display a complete list of all available products
- Product Detail Page - Display detailed information for individual products
- Shopping Cart Page - Users add and manage items to purchase
- Checkout Page - Enter customer information, shipping address, etc. before placing order
- Payment Success Page - Callback page after successful order placement
- Login/Register Page - Unless your site supports guest checkout, you’ll need an account login feature
- Orders Page - Display all order records for logged-in users
Step 2: Upload and Manage Your Products
After completing the main website pages, go to Shop → Products page where you can add and manage products to sell on your website.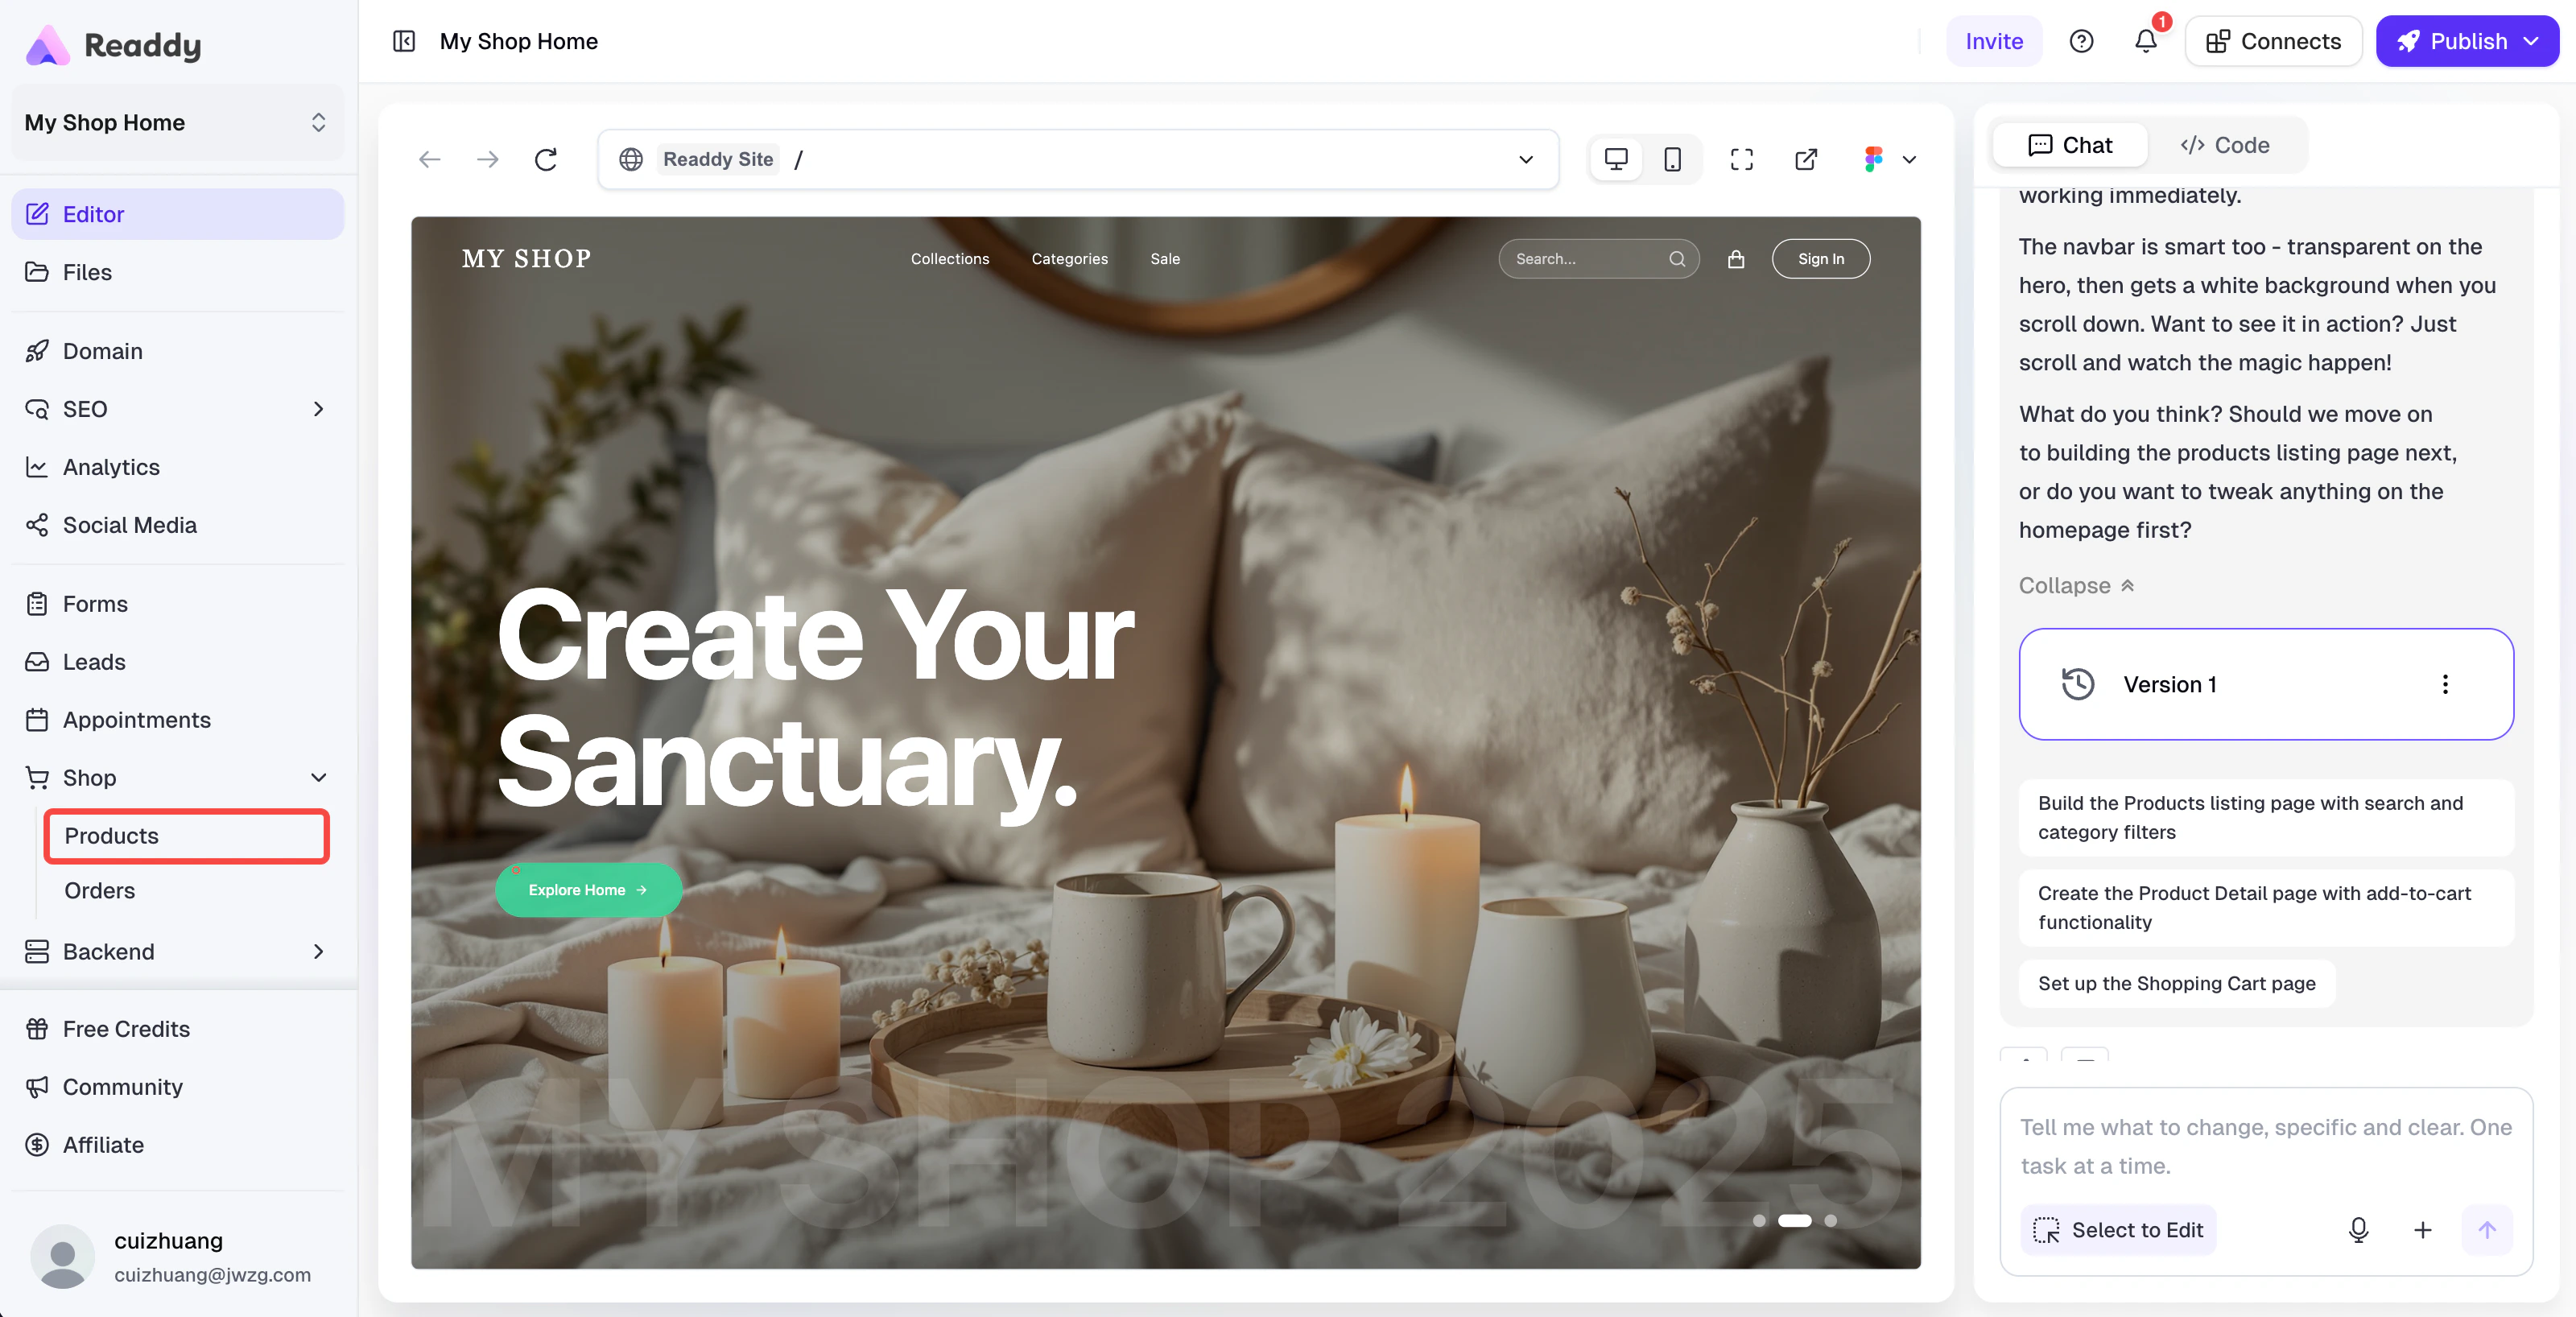
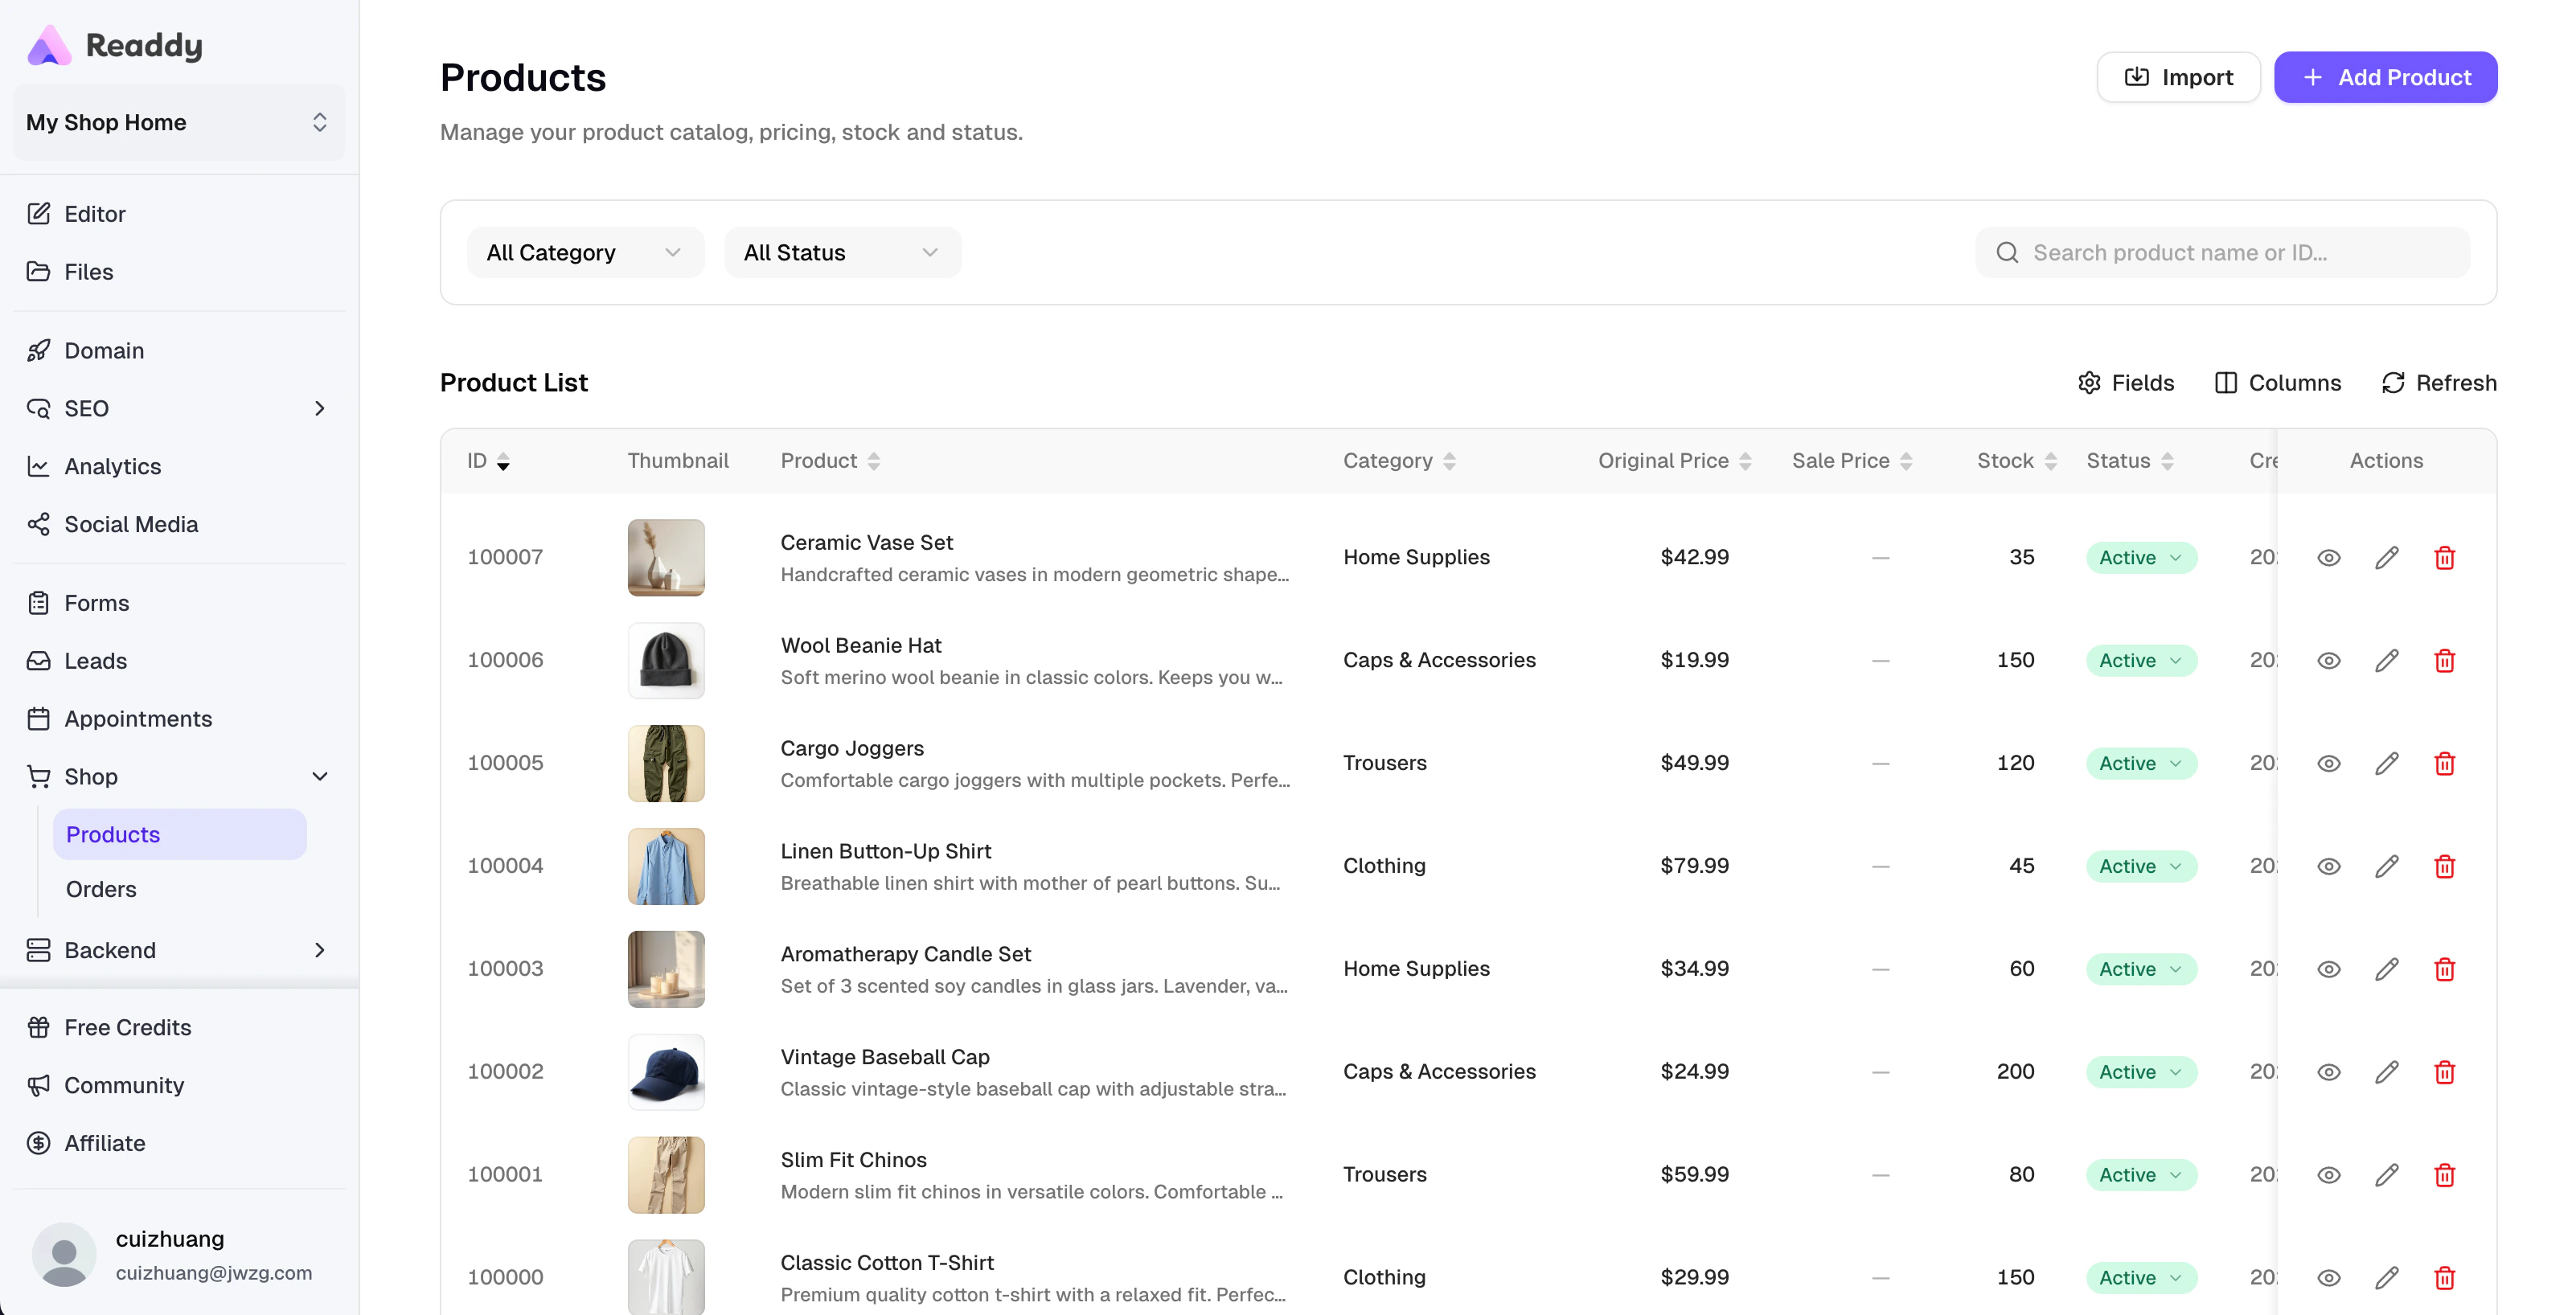
Adding Products
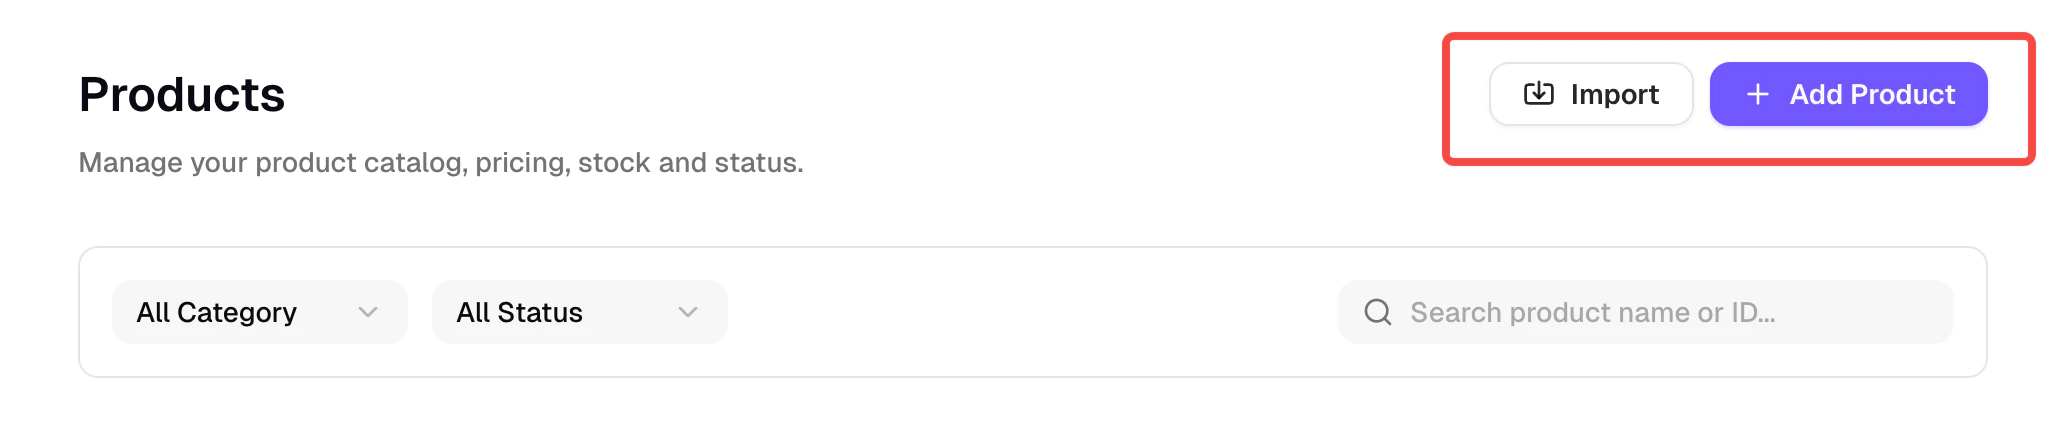
You can add products in the following ways:- Add Product - Manually fill in product information one by one
- Import - Batch import product data, supports Shopify CSV files
💡 Product Management Tips
These tips can help you better manage your products:Product Variants — SKUs
Product Variants — SKUs
If your product has multiple specifications (such as size, color, material, etc.), you can use the product variants feature.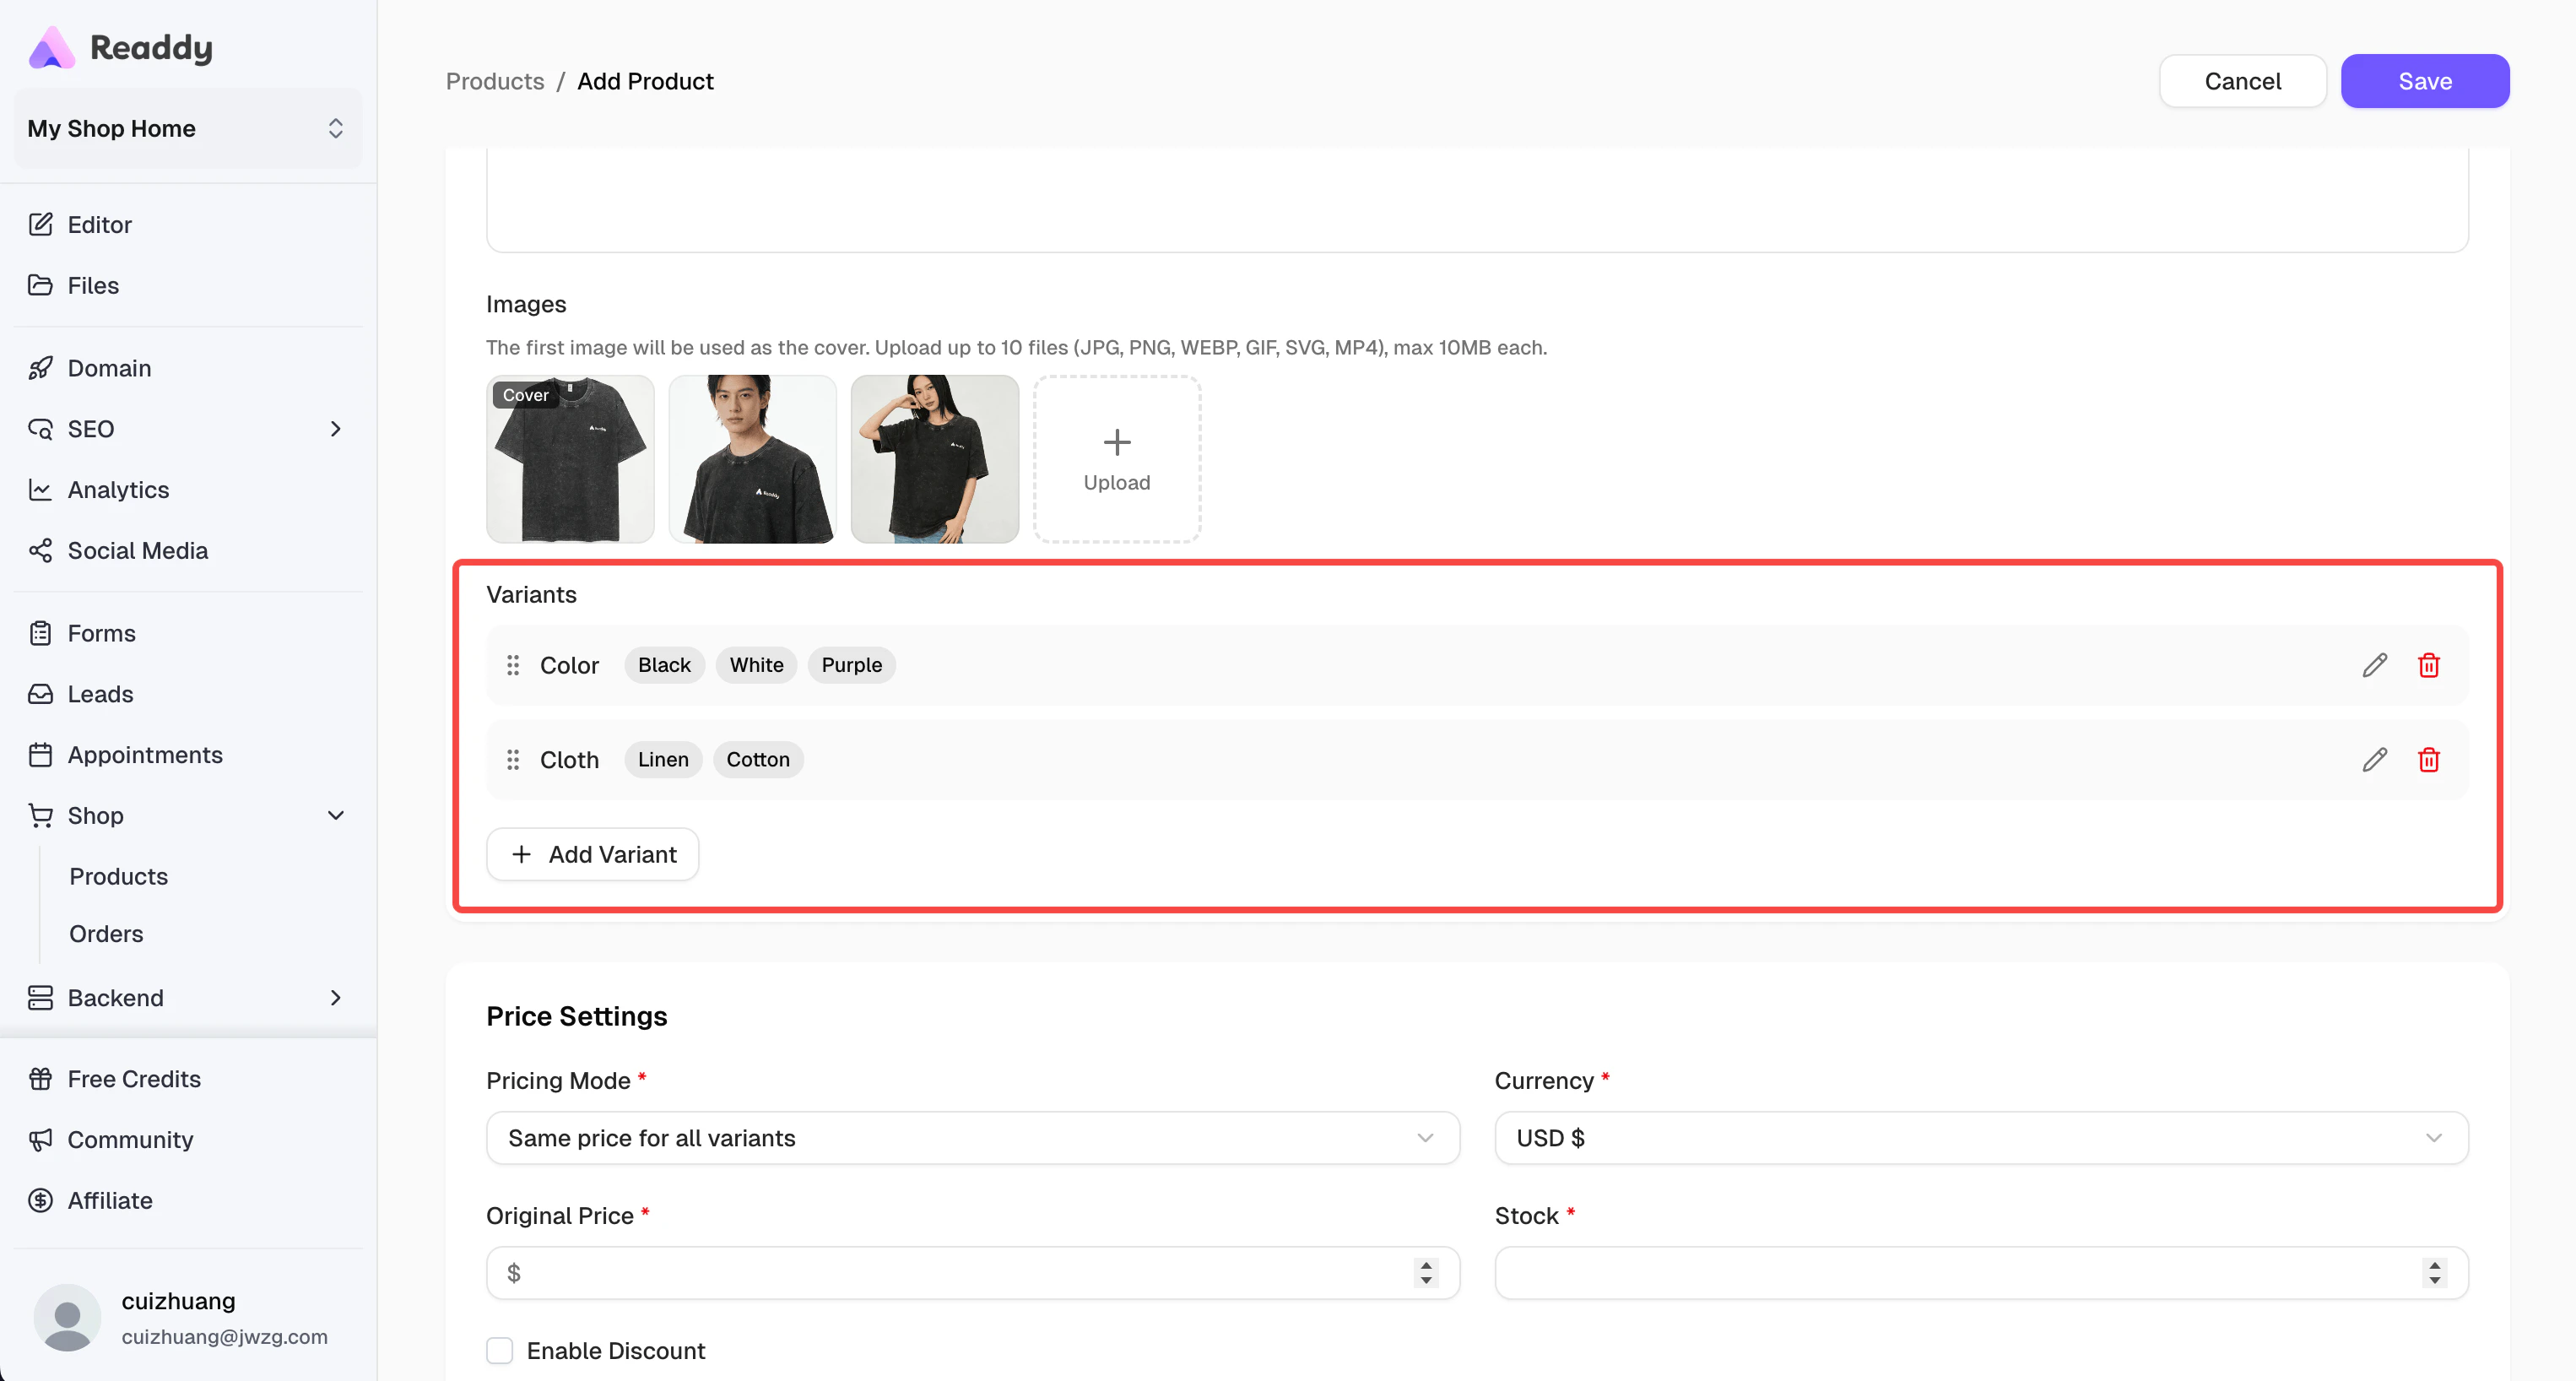
Custom Fields
Custom Fields
In addition to basic product information, you can use Custom Fields to add custom fields to your products.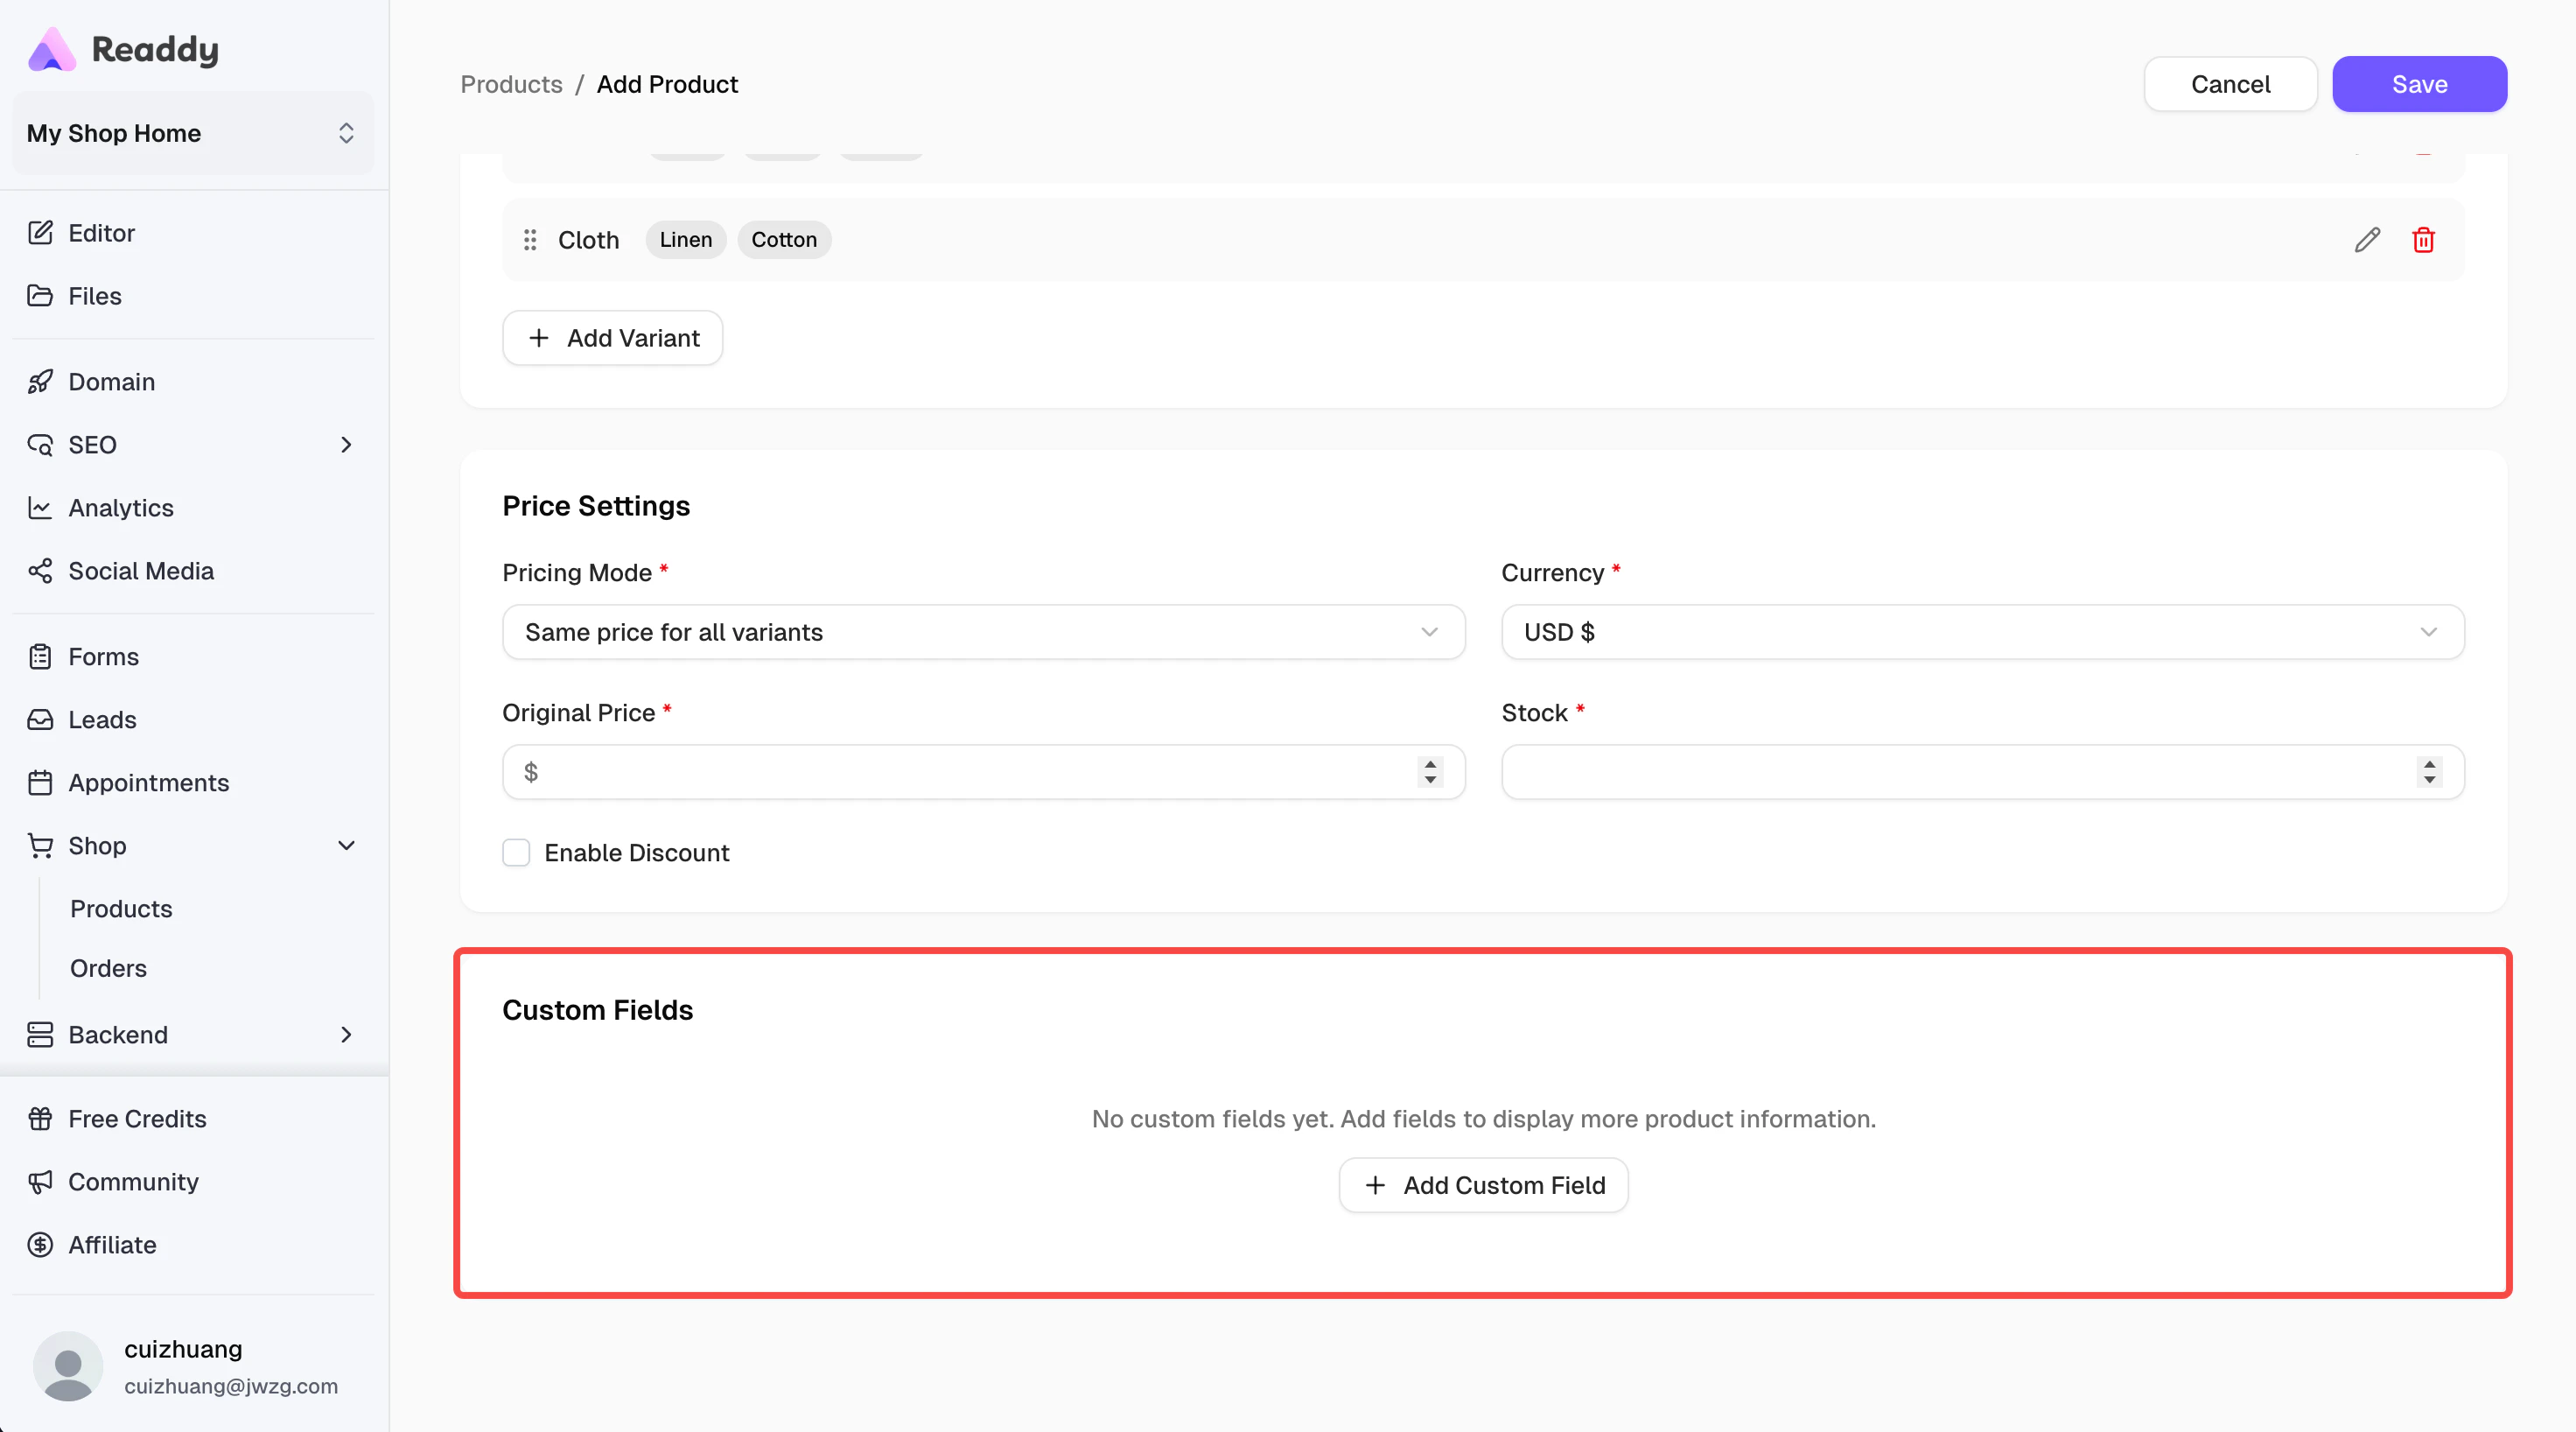
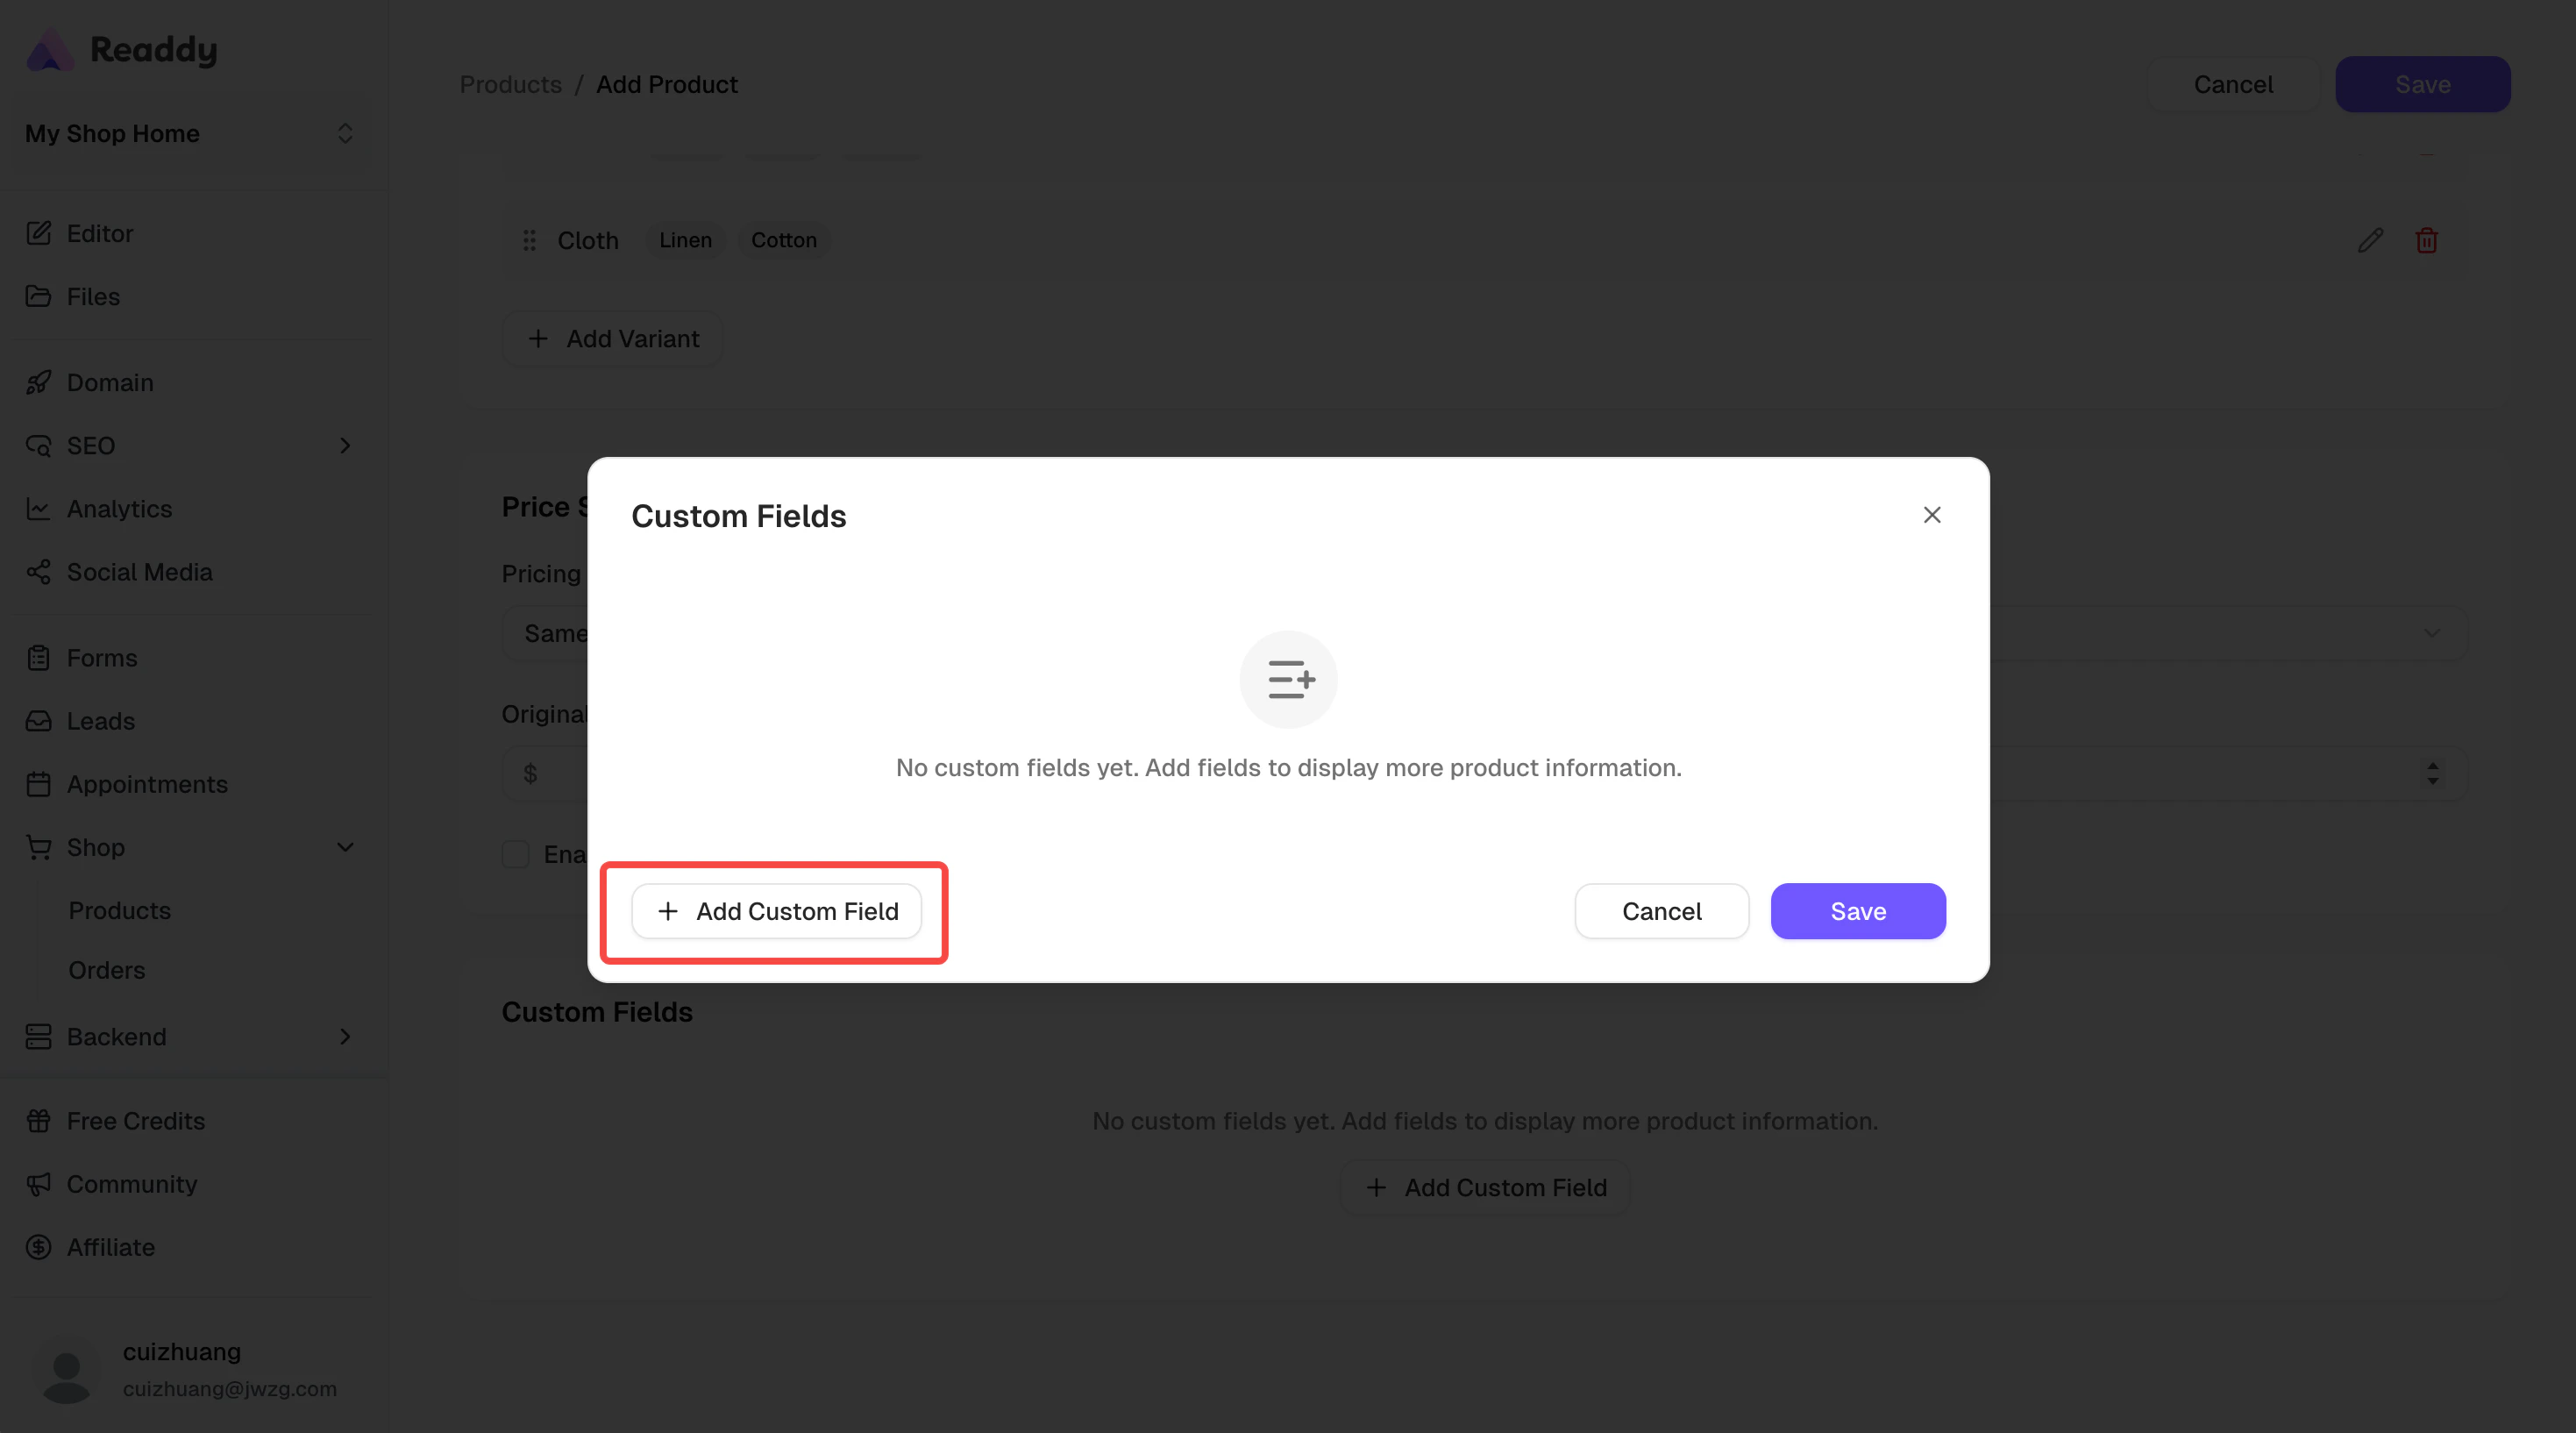

- Whether a 7-day refund is supported
- Whether free shipping is available
- Custom promotional activity tags for products
- Set purchase quantity limit per order
- Mark products as seasonal or limited edition
- …
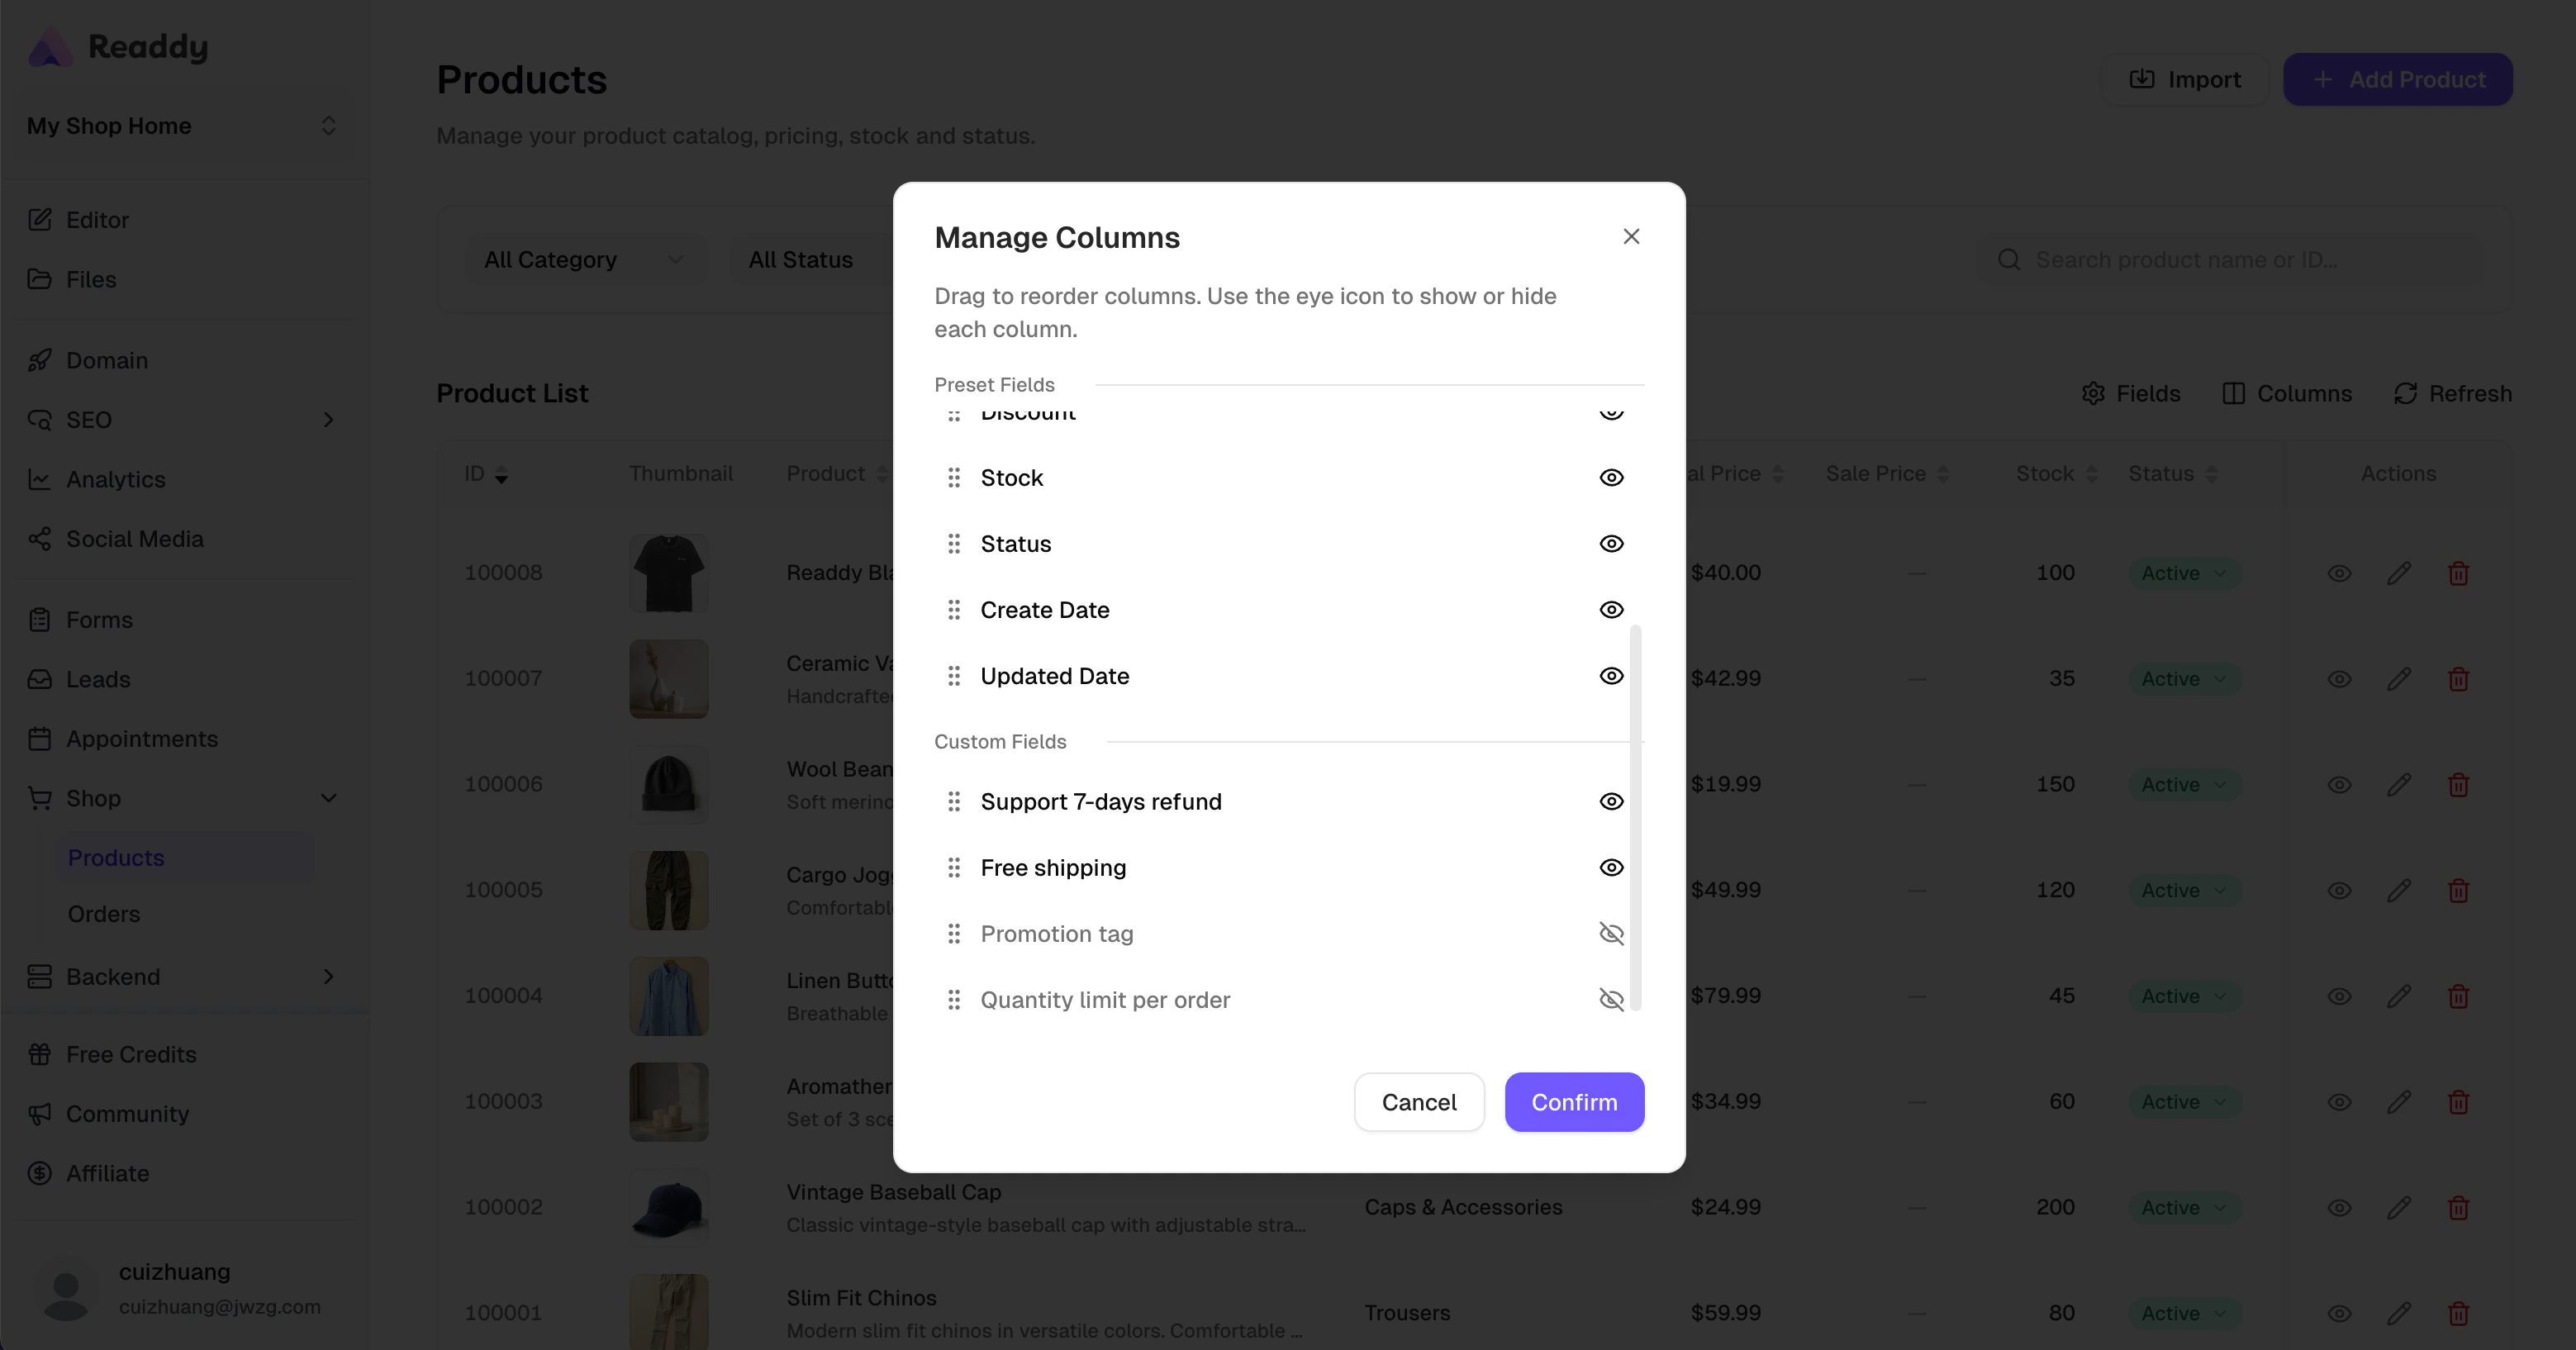
Manage Columns
Manage Columns
On the Products list page, you can customize the columns displayed in the table and hide unimportant information to make the product list clearer and easier to read.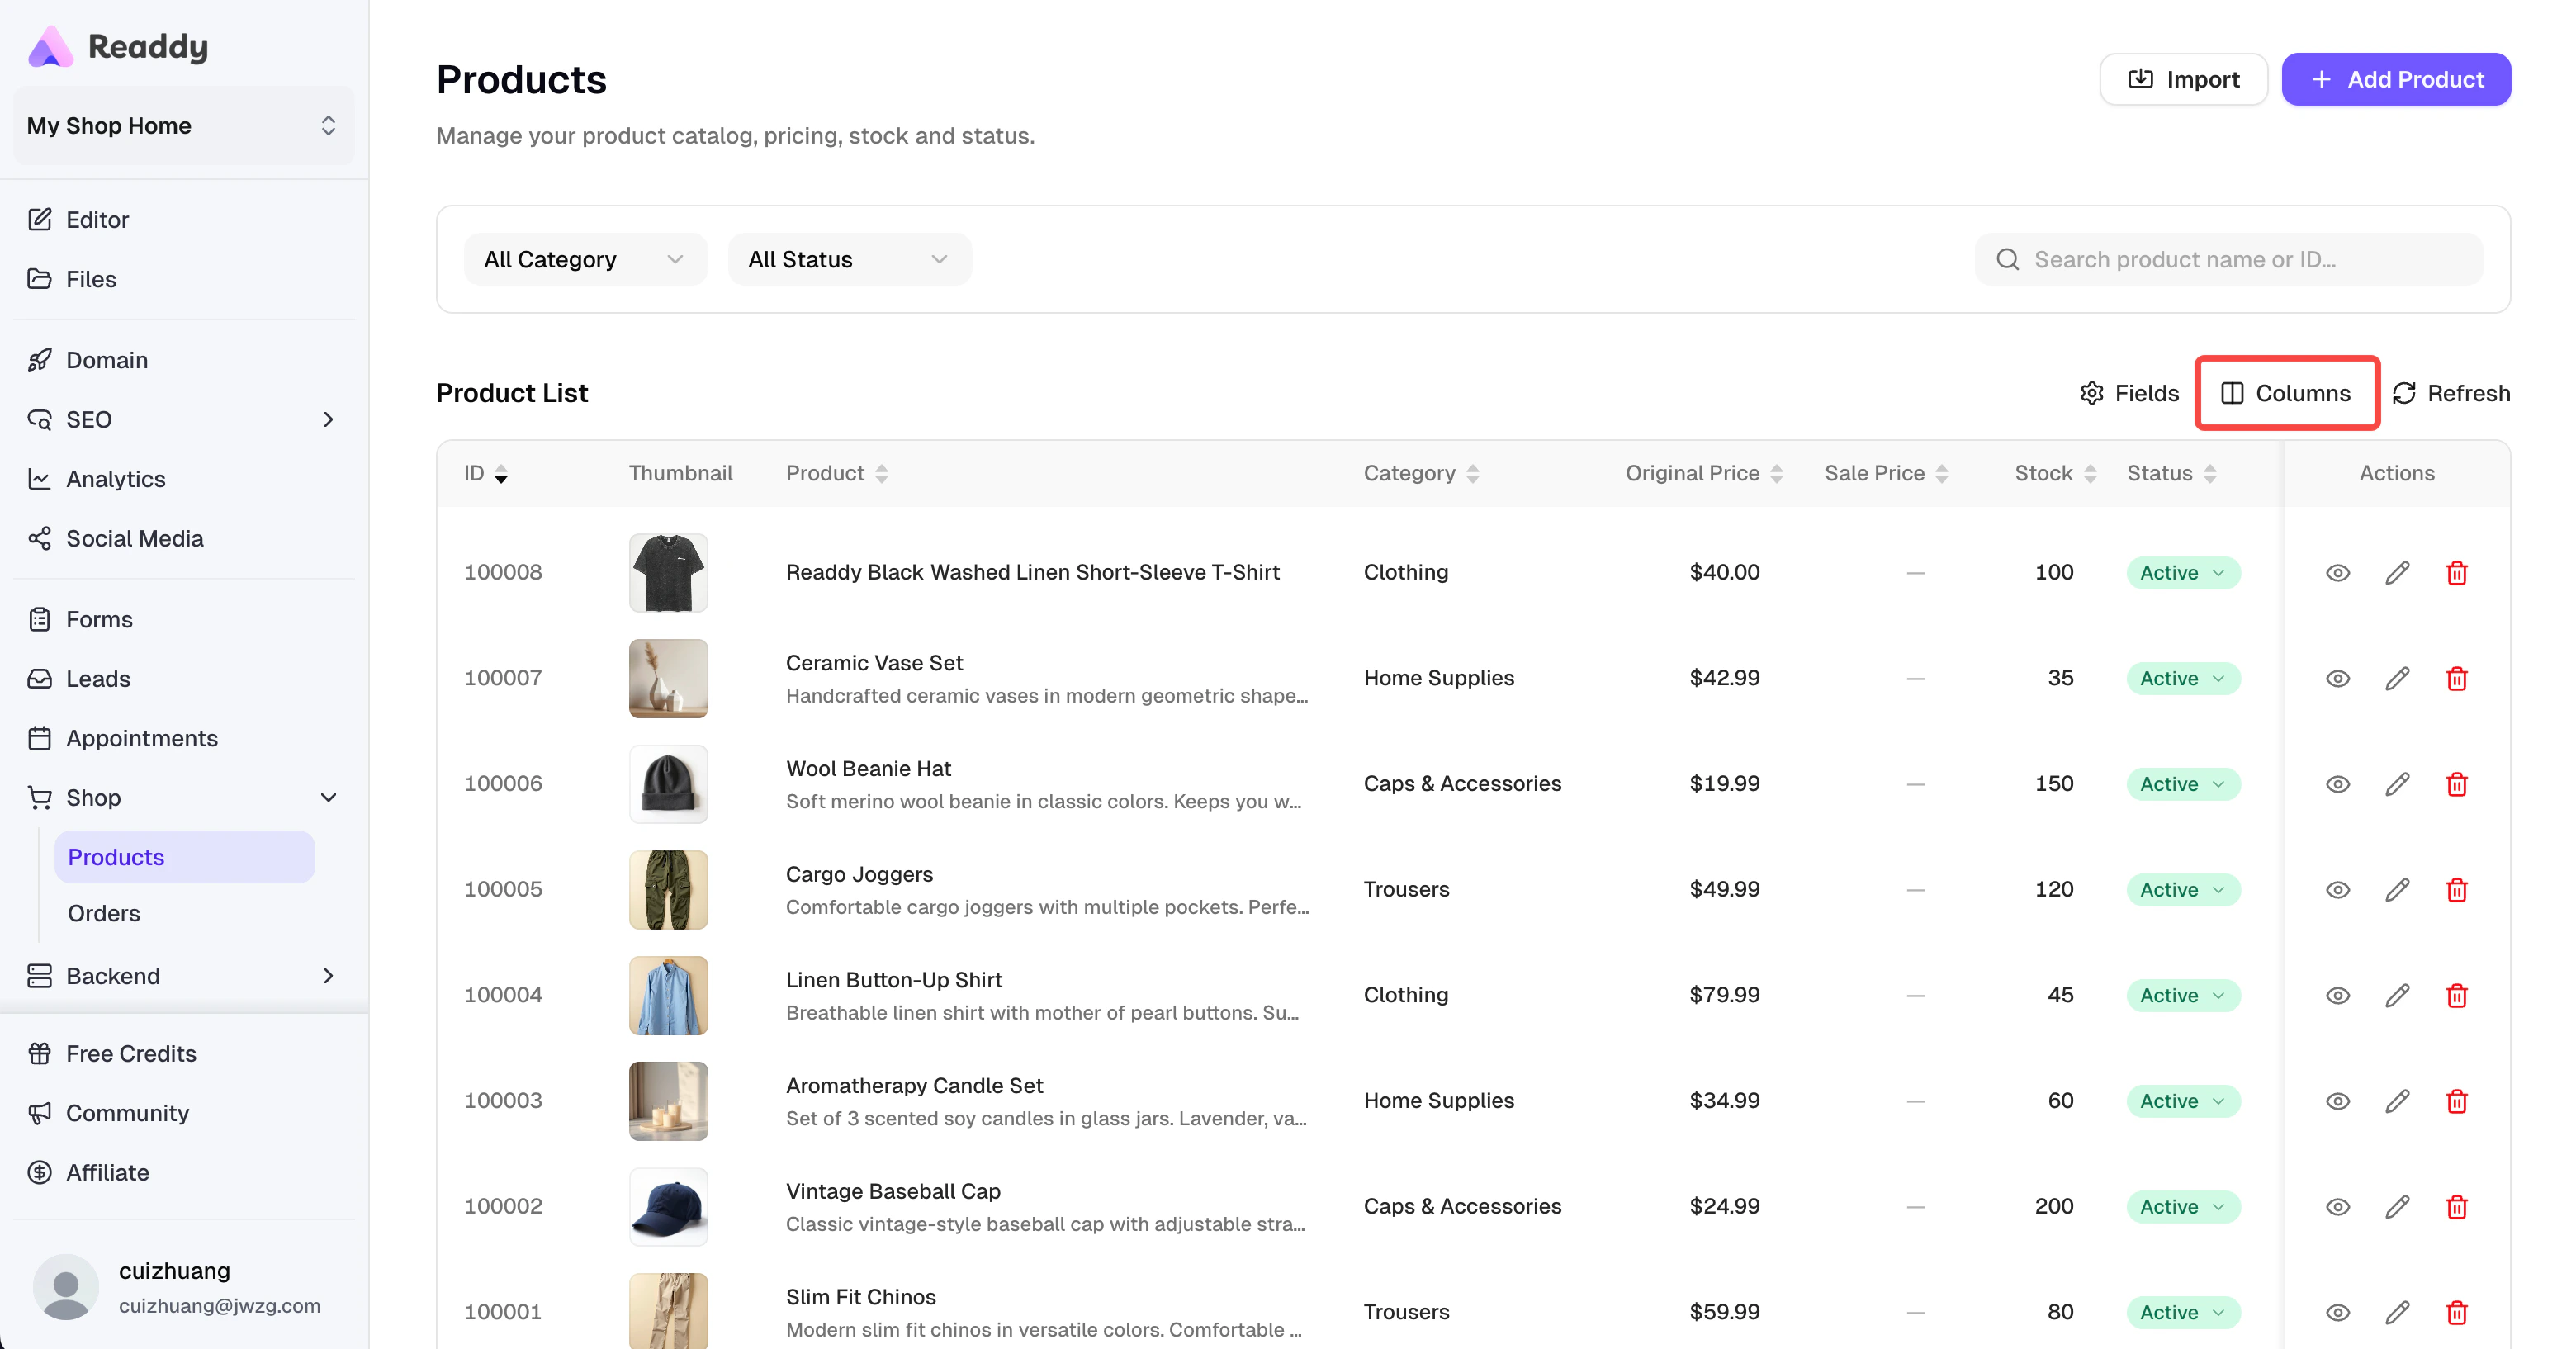
Product Status
Product Status
You can control product display status through the product’s Status field: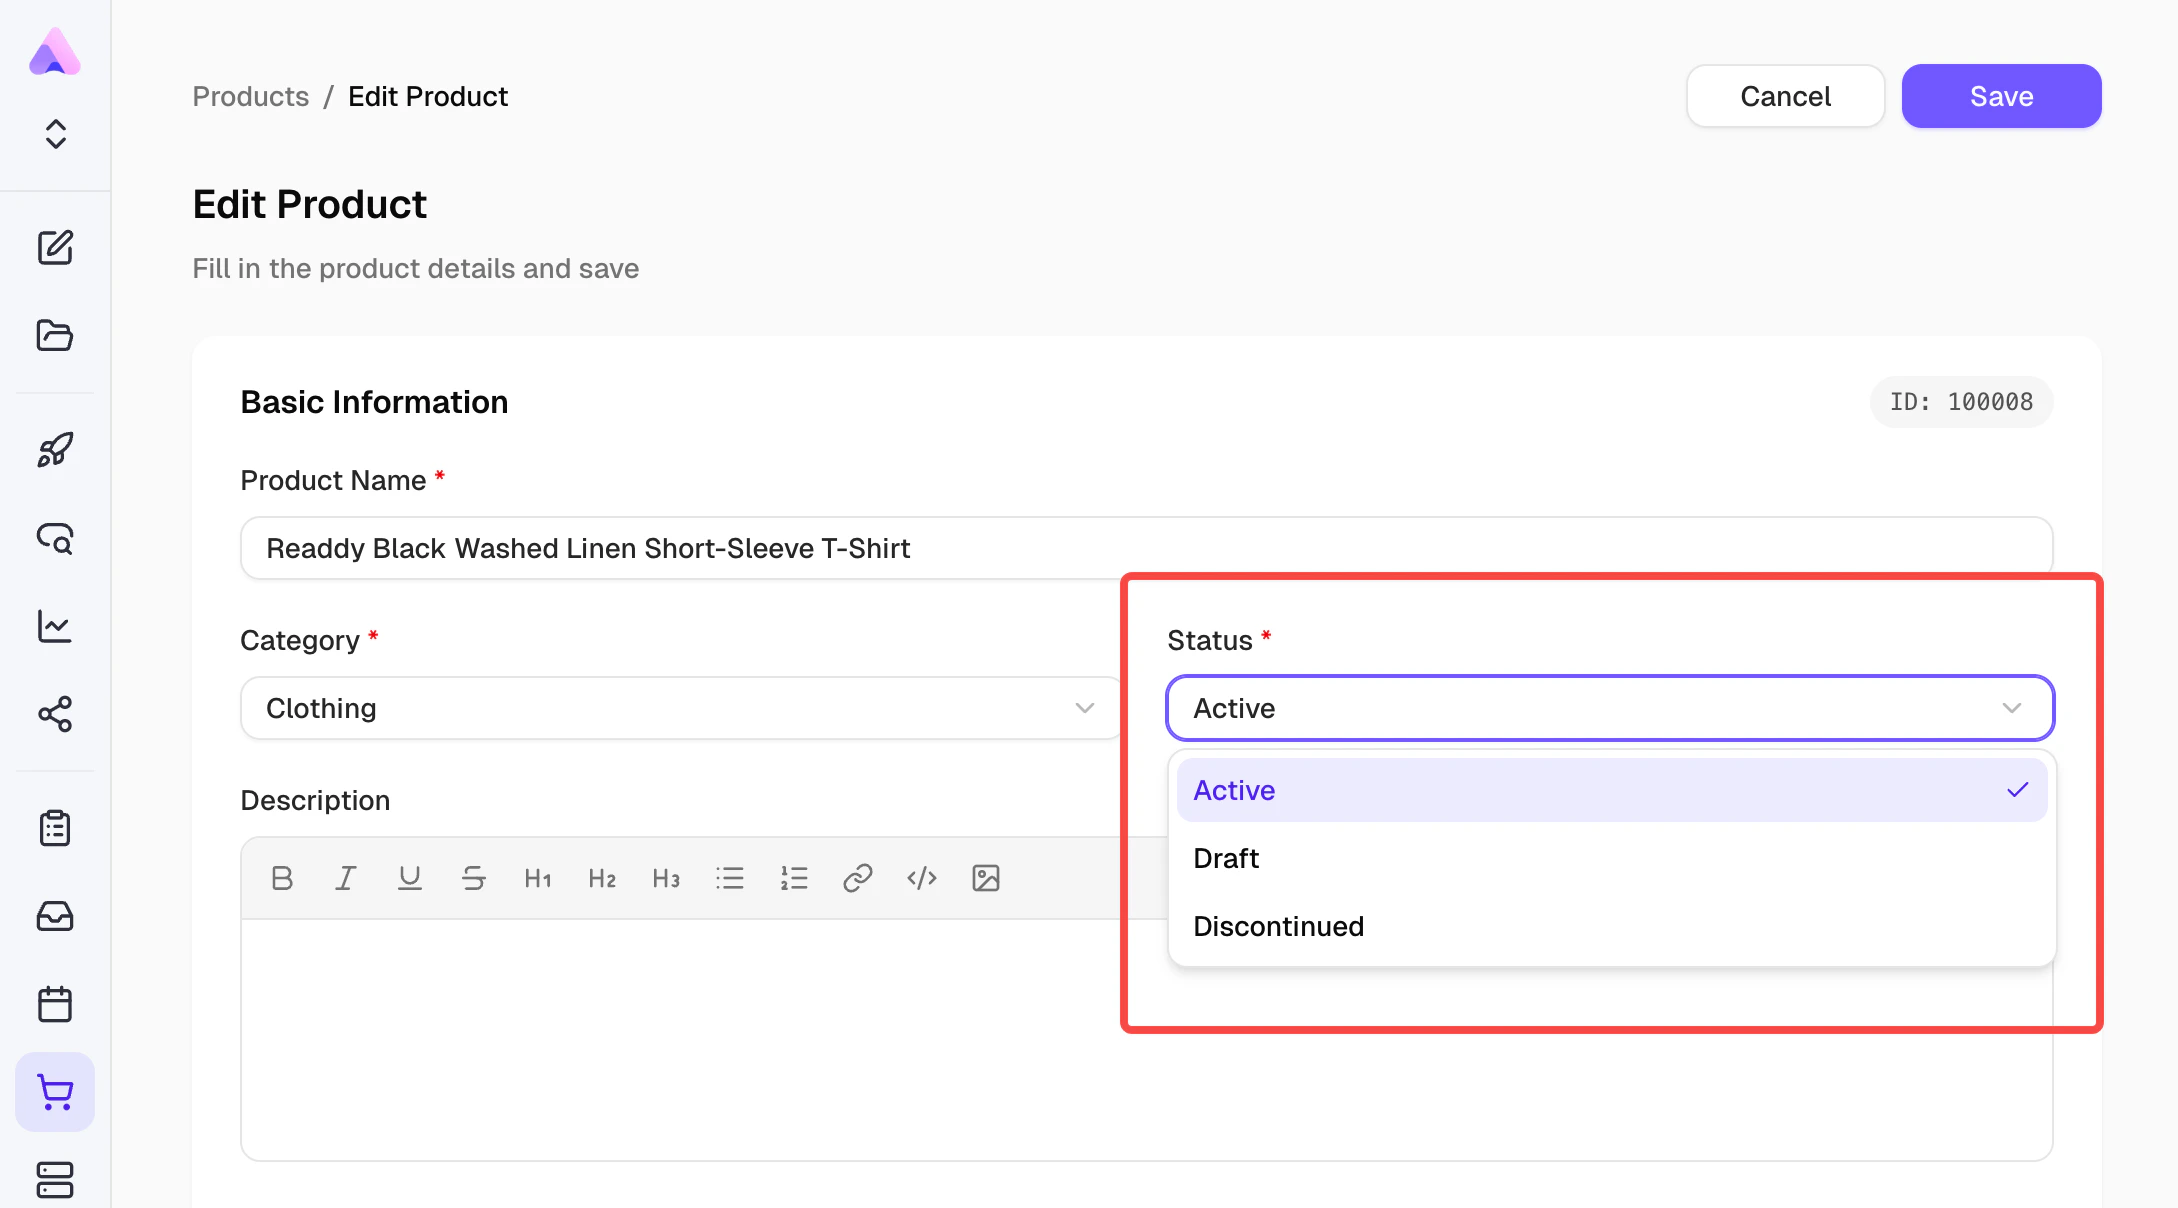
- Active - Products that are currently available for sale
- Draft - Draft status, not displayed publicly
- Discontinued - Discontinued (whether to continue displaying depends on your business model)
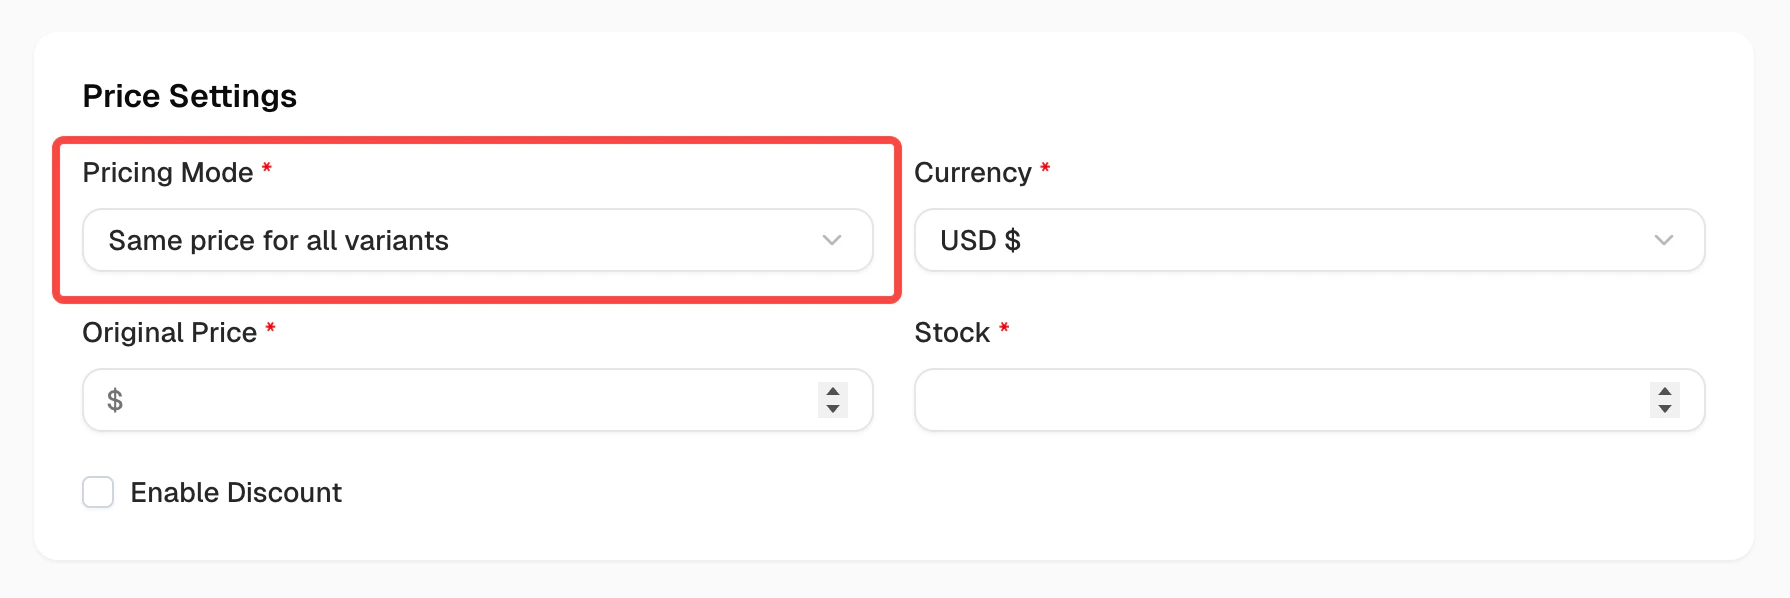
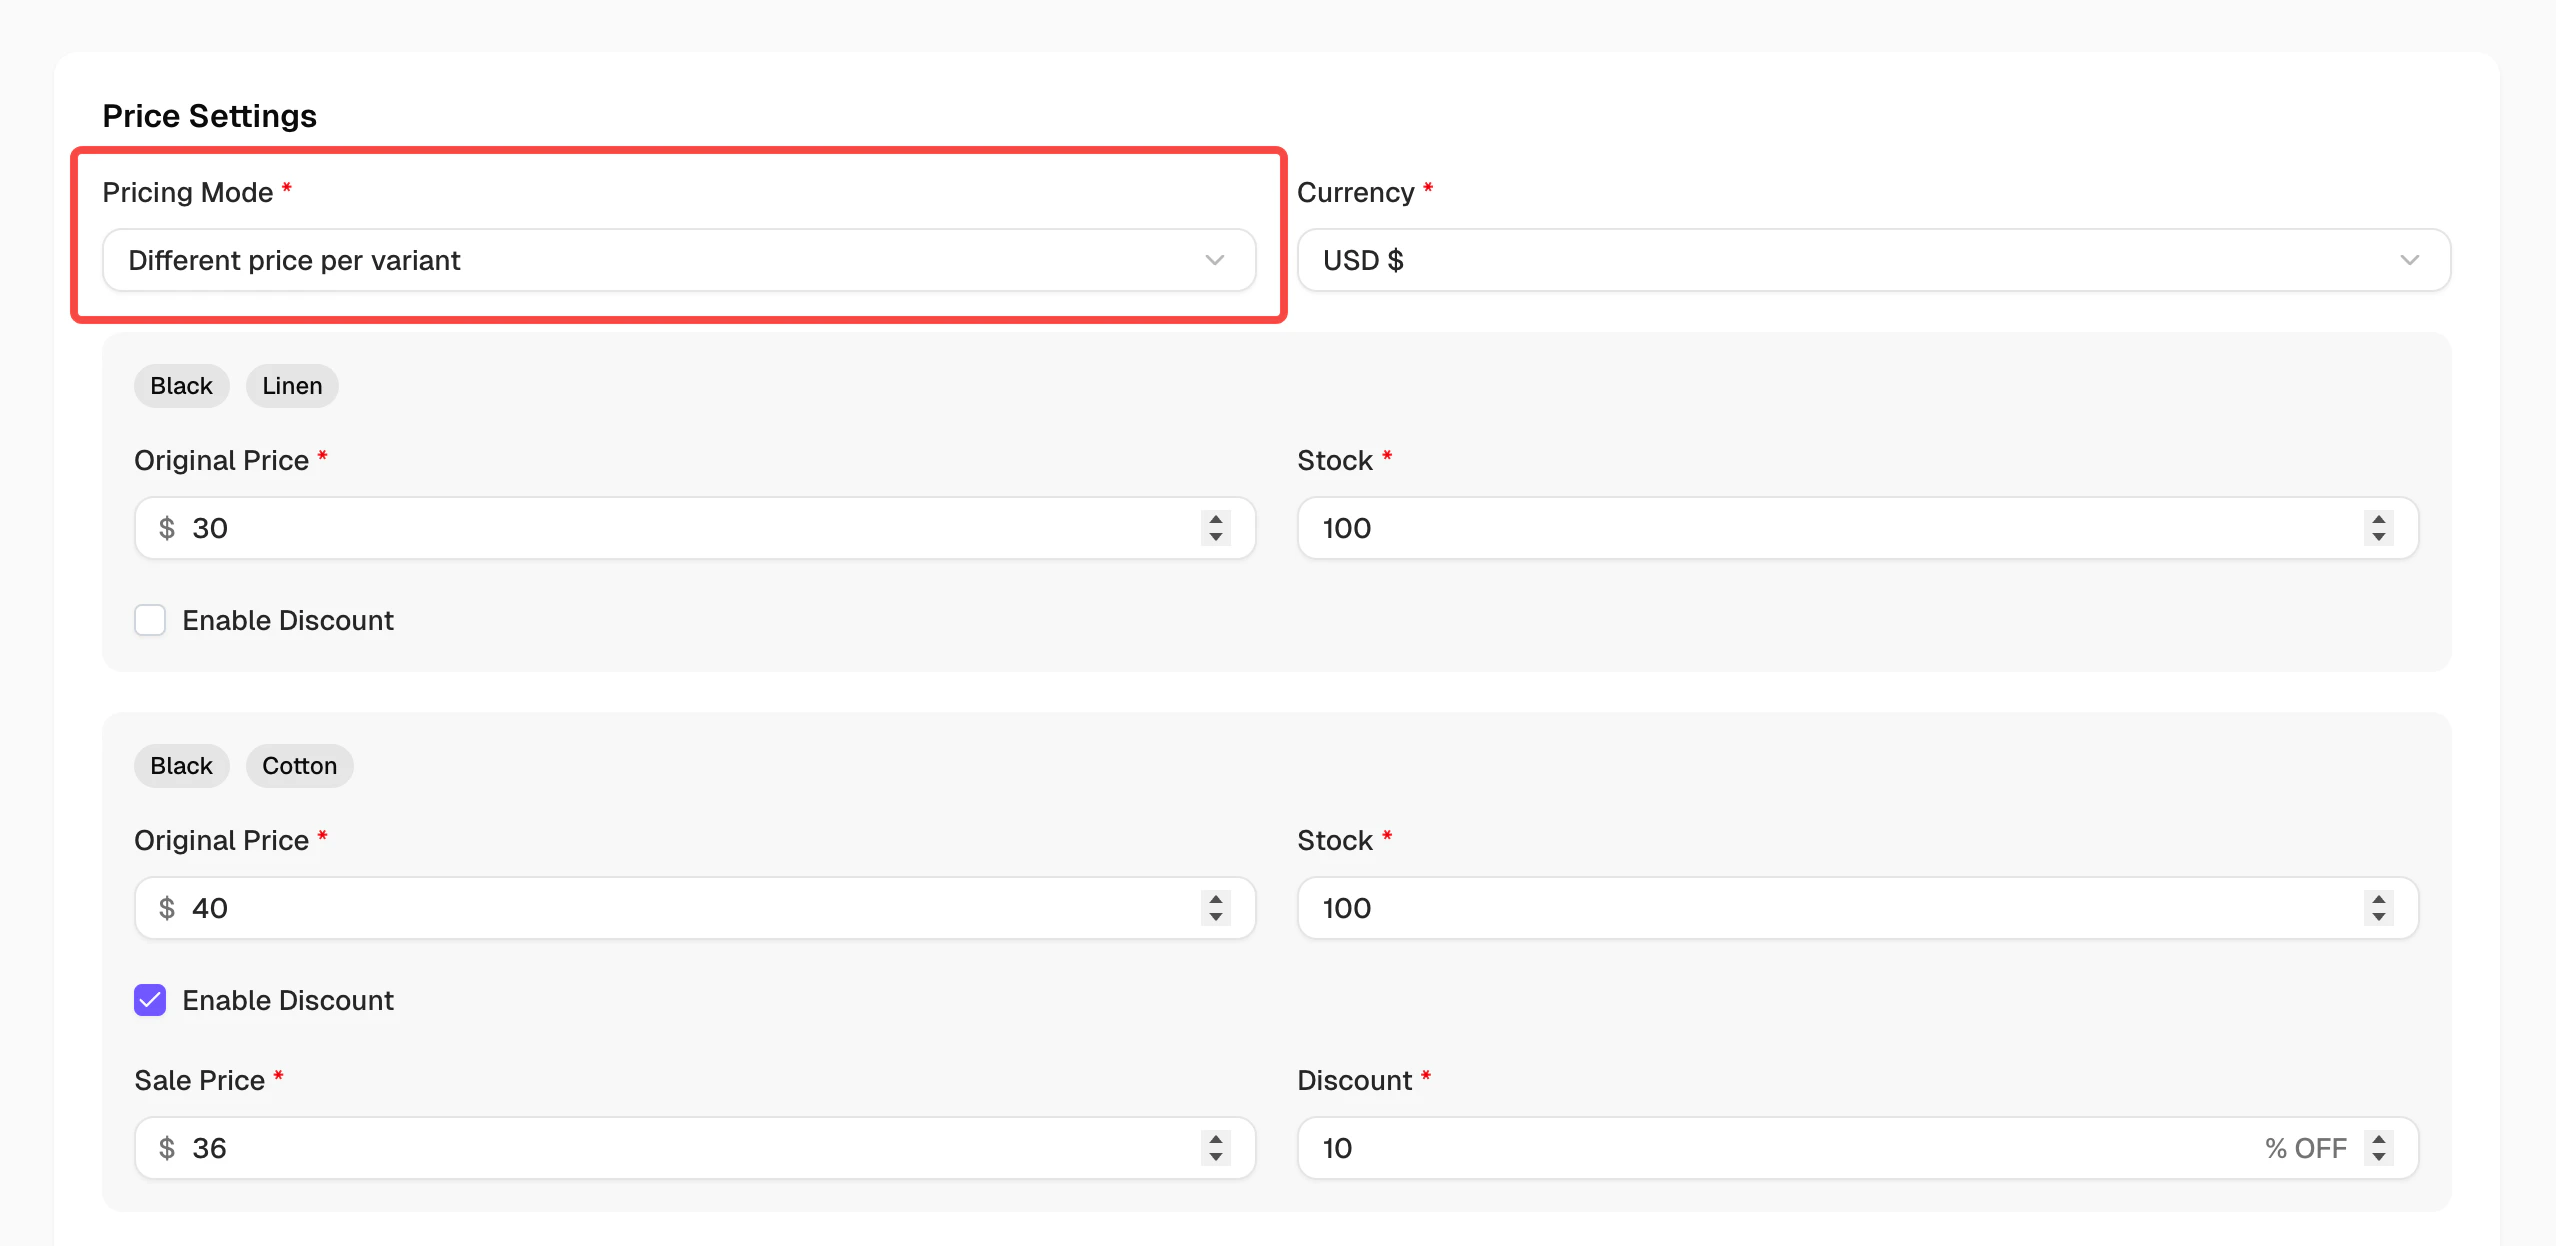
Step 3: Set Up Online Payment
We recommend using Stripe to complete payment integration.Connect Stripe
- In the Editor page, click the Connects button at the top
- Find Stripe in the Connects panel and click Connect
- Follow the prompts to enter your Stripe API Key (How to get Stripe API Key?)
Configure Payment Flow
After connecting your Stripe API Key, describe your payment requirements to AI, for example:“Use Stripe payment when checking out, and redirect to payment success page after payment is completed”
Test Payment Function
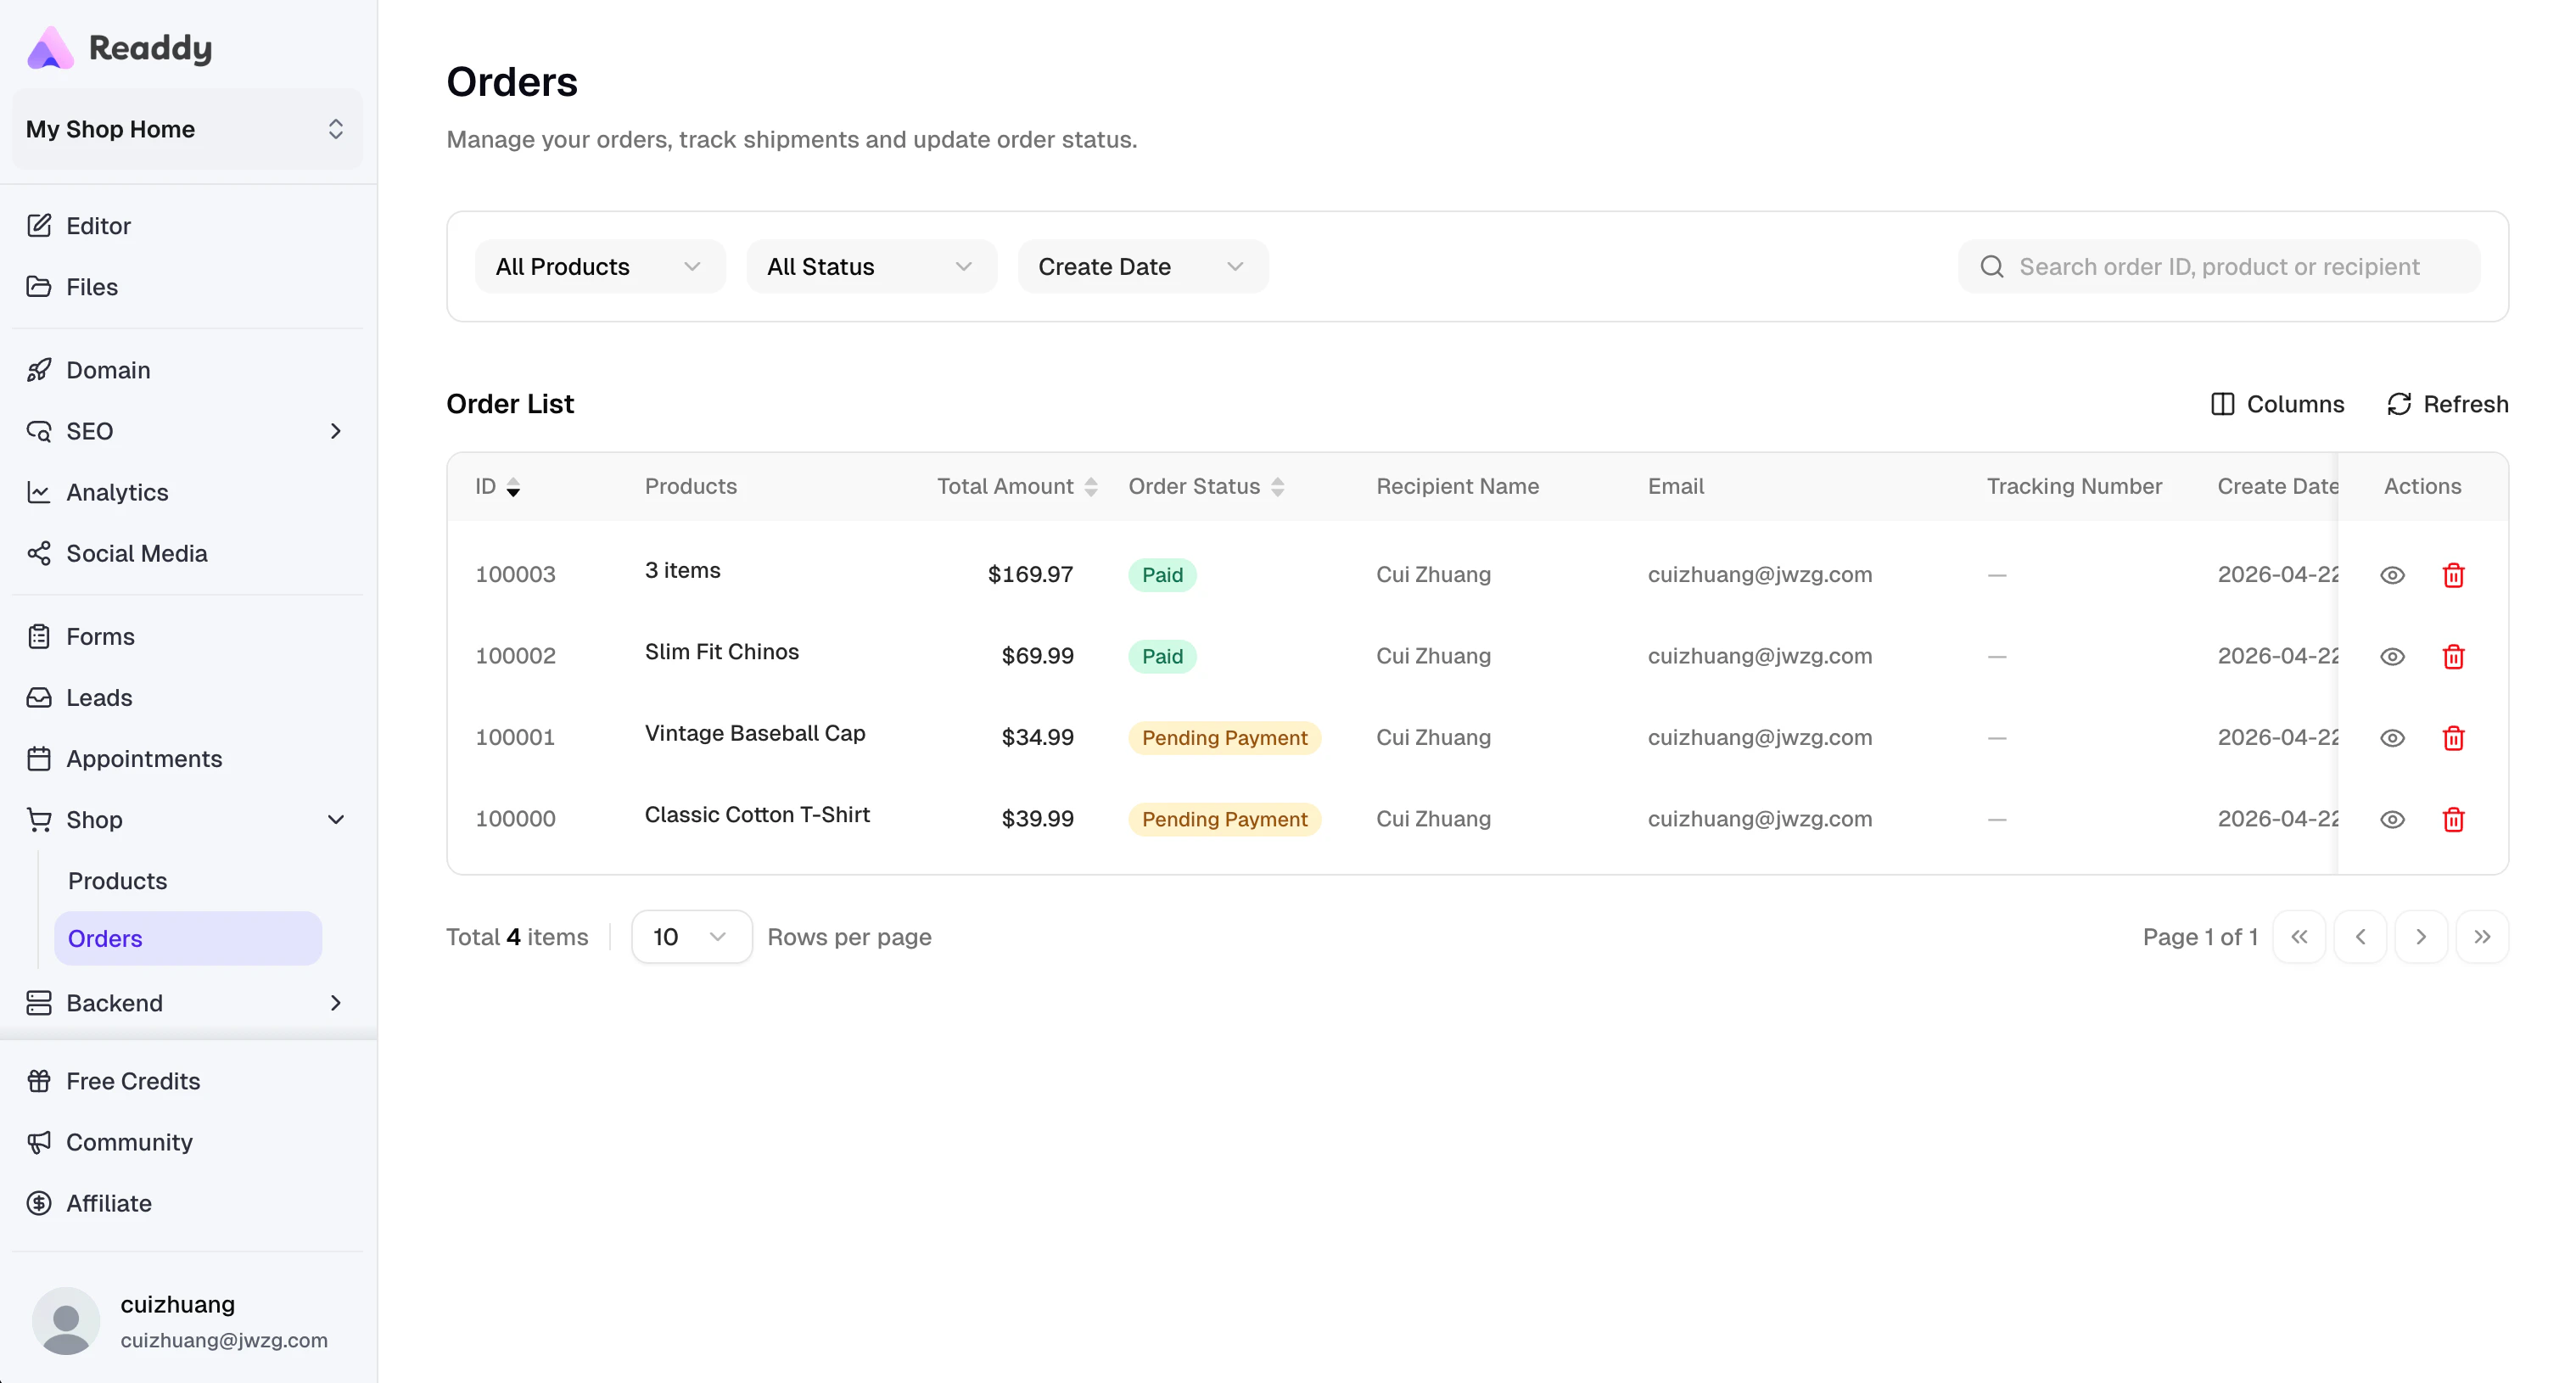
Step 4: View and Manage Orders
After completing the previous step, you can view all order data on the Shop → Orders page.Order Management
You can see all order records on the Orders list page (including real payment orders and test data).- Real Payment Orders: Real orders created after connecting Stripe, payment status can be dynamically retrieved from Stripe (such as Paid, Canceled, Refunded, etc.).
- Test Orders: Orders created before connecting Stripe are virtual orders, mainly used for testing. Their order details do not include Stripe’s Payment ID, and Status will remain at Pending Payment. You can delete these test order data as needed to keep the order list clean.
Refunds or Other Order Operations
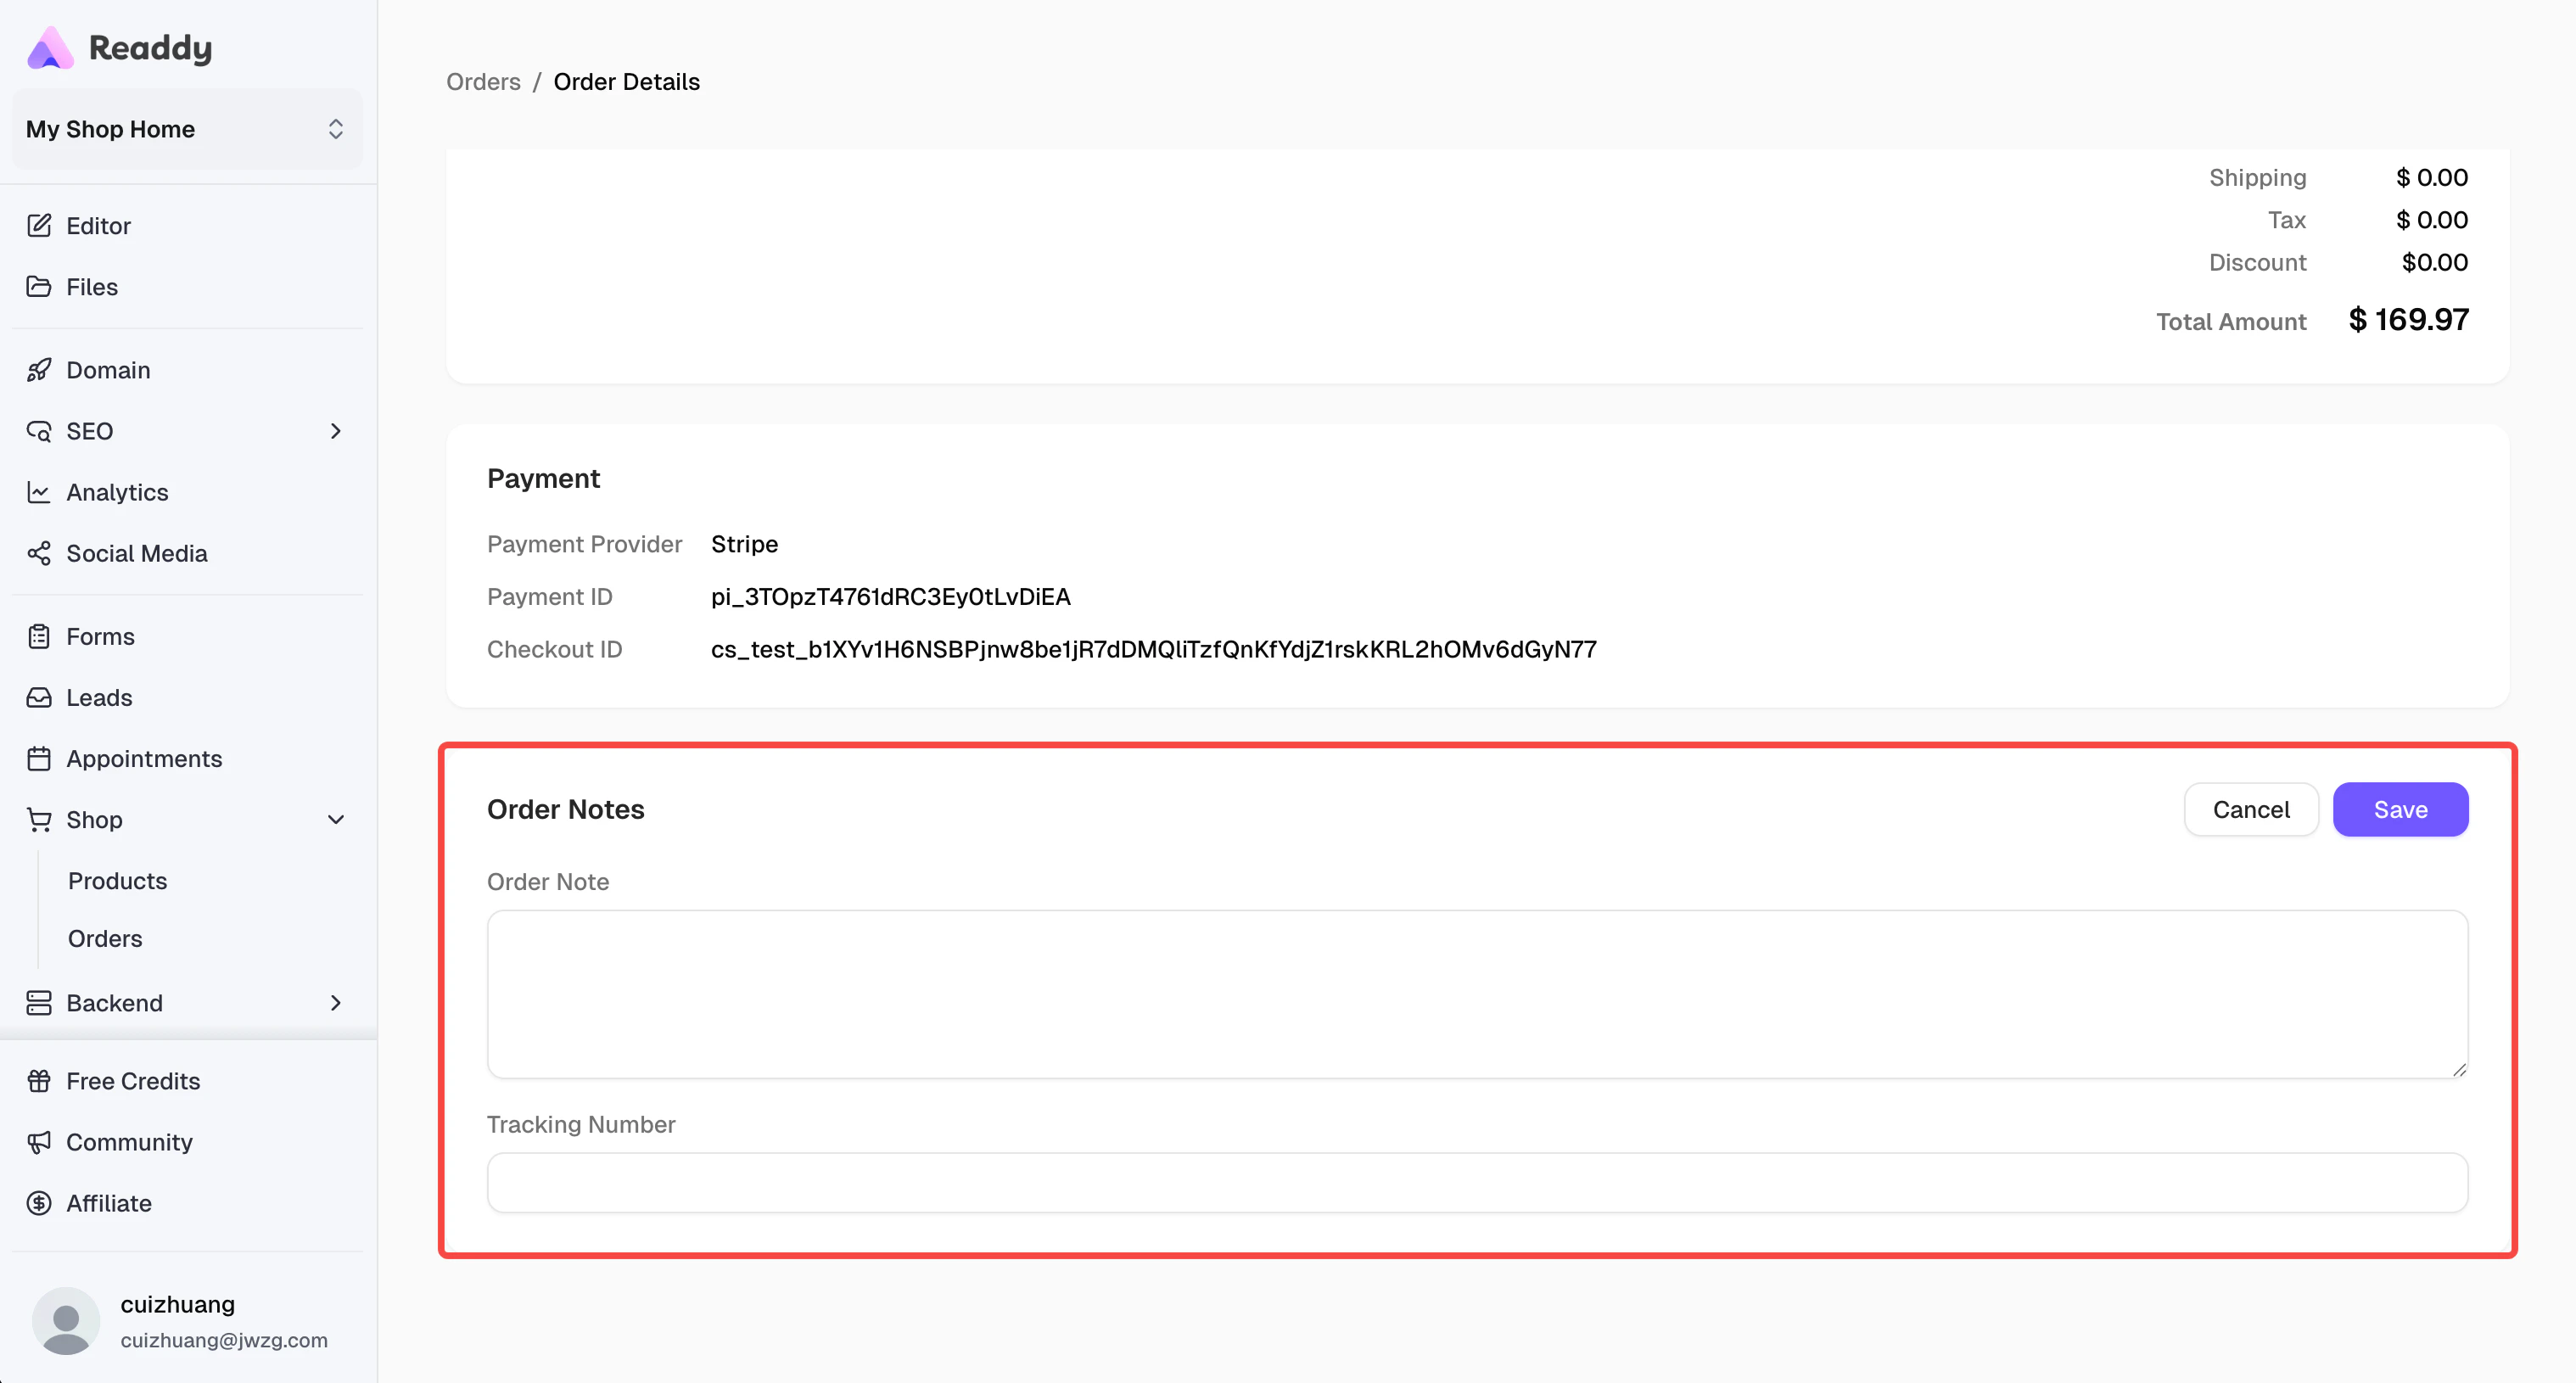
If you need to process order refunds or other order-related operations, you can use the Payment ID and Checkout Session ID in the order details to find the corresponding order on Stripe and process refunds directly on the Stripe platform.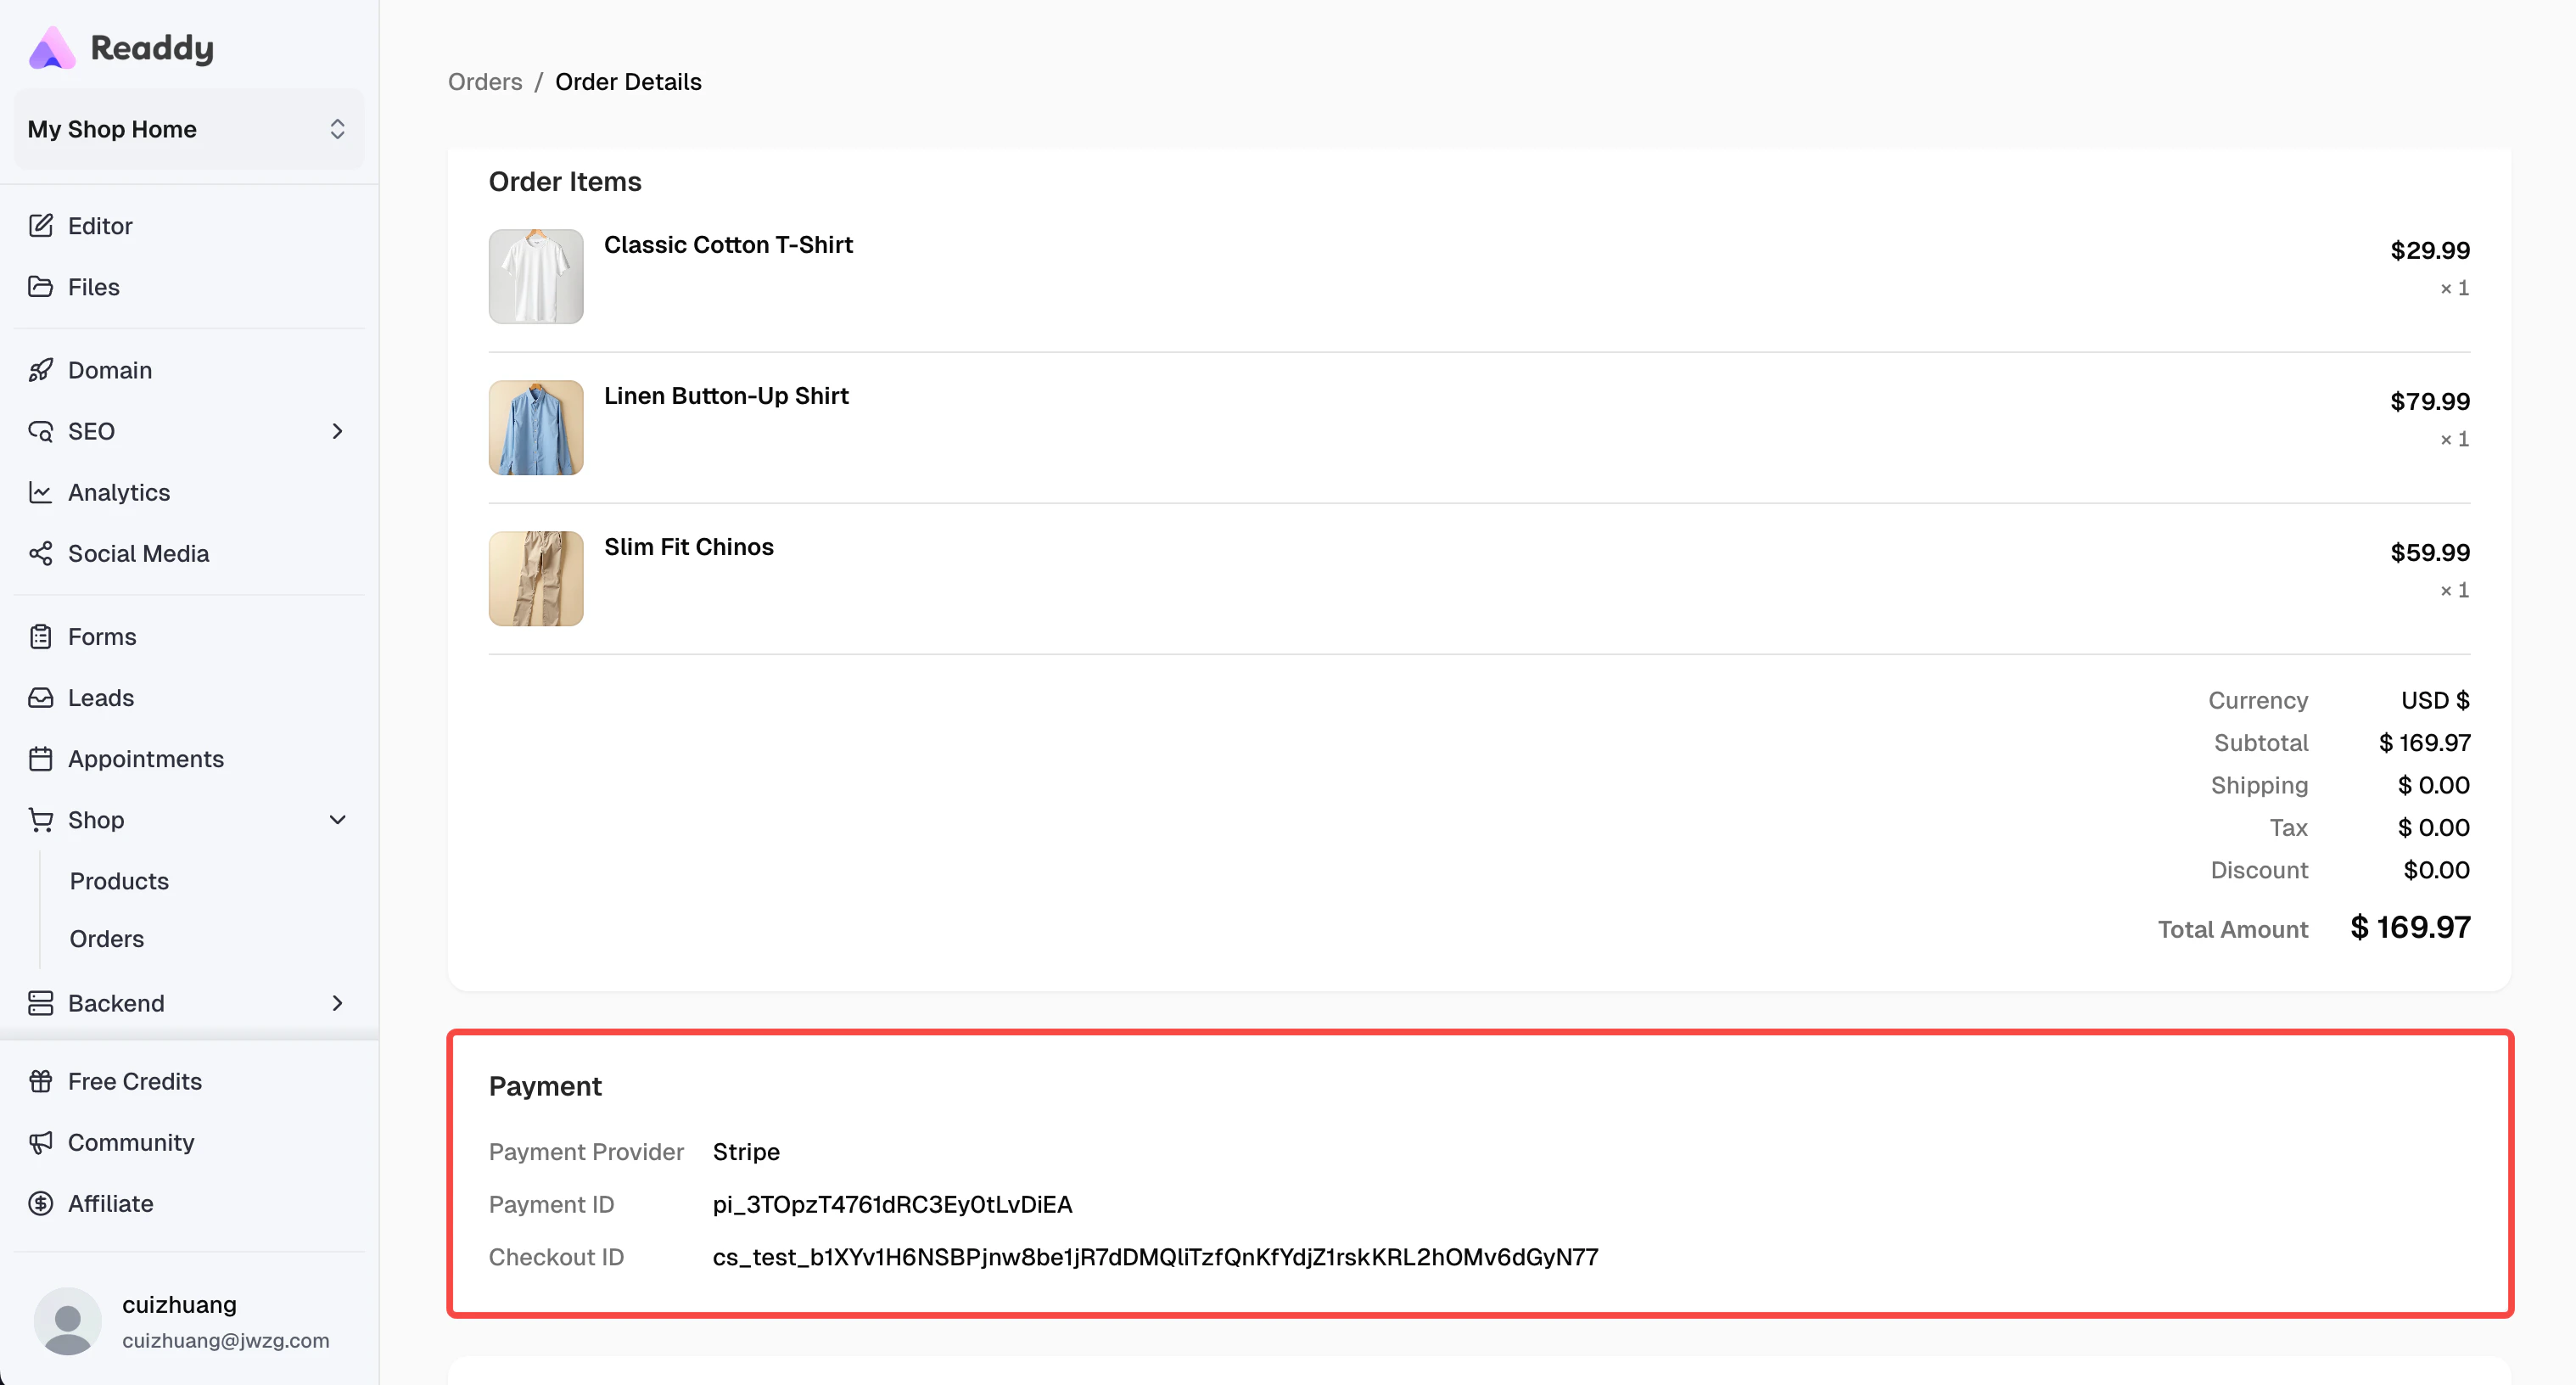
Logistics Management
Currently, Readdy has not yet integrated third-party logistics services. If you need to manage order logistics status (such as shipping, delivery, etc.), you can manually add tracking numbers and shipping details at the bottom of the order details page.Logistics management is in our future plans. In the near future, we will support dynamically displaying order logistics status directly on Readdy. Stay tuned!