1. Go to the Project Publish Page
Navigate to your project generate page and click the Publish button in the top right corner.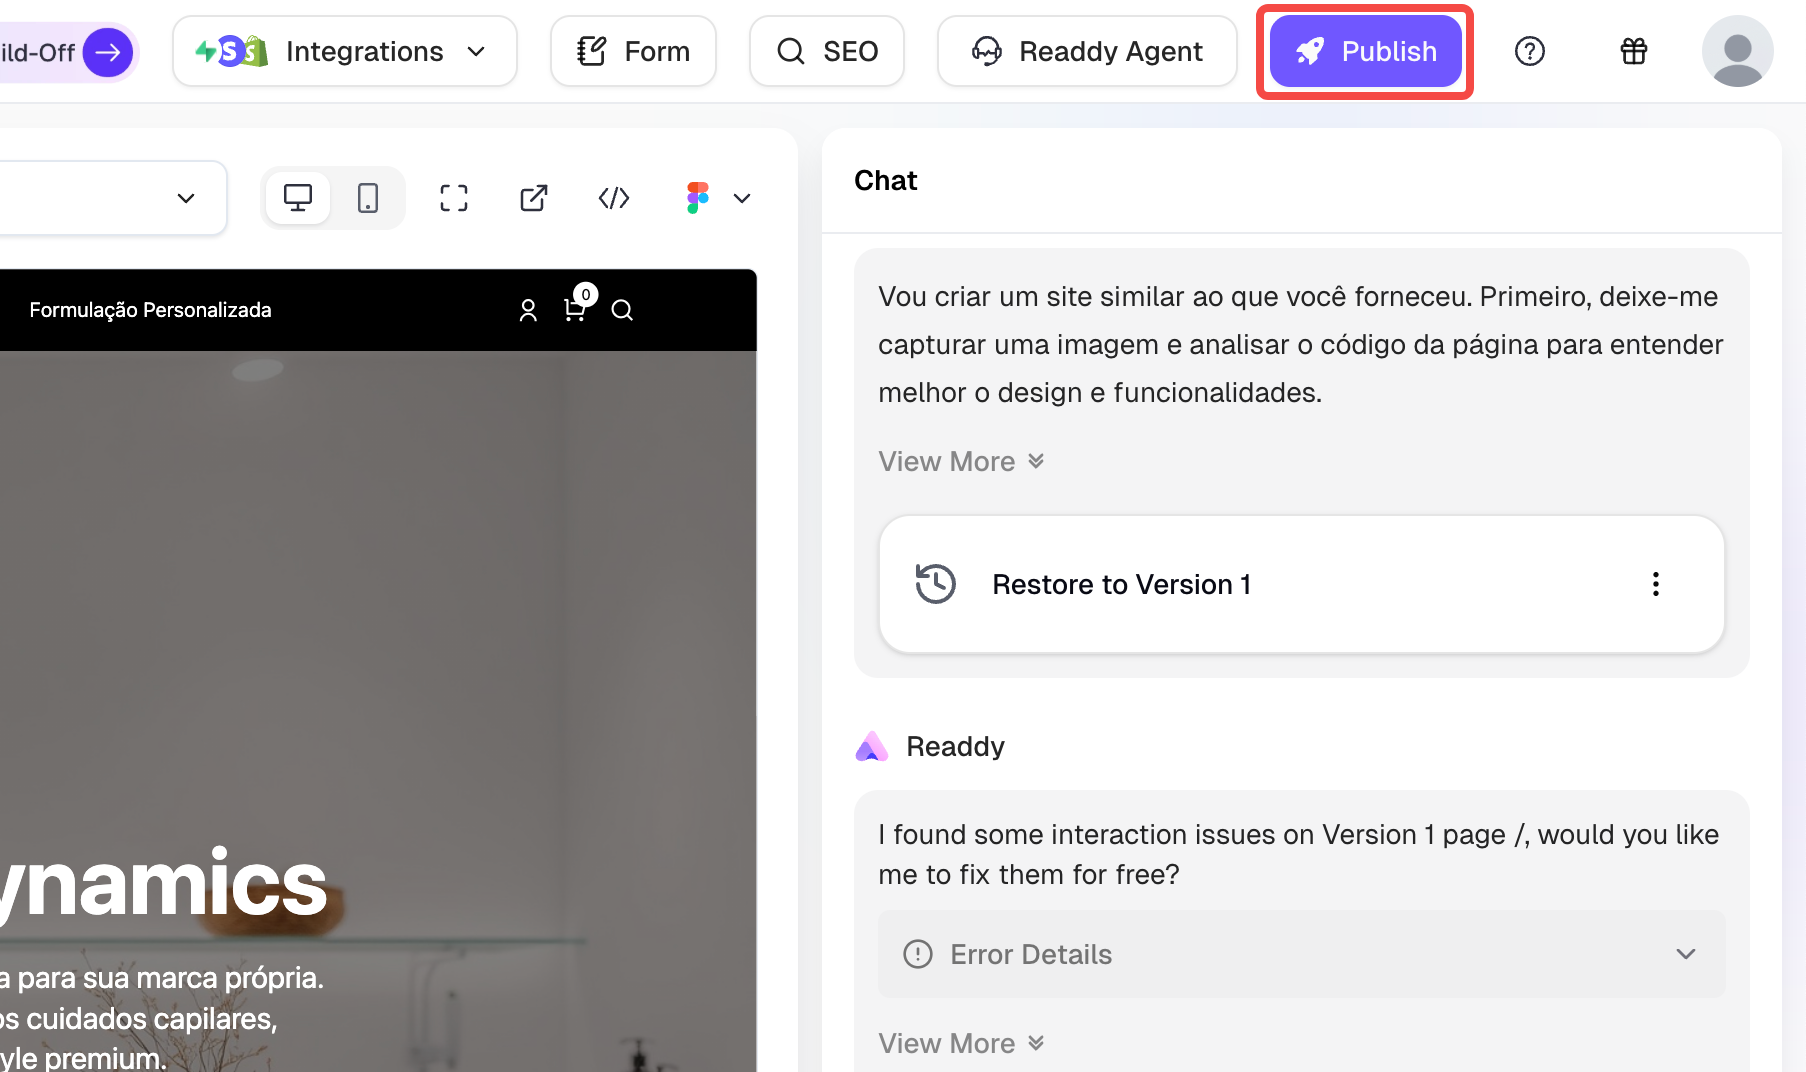
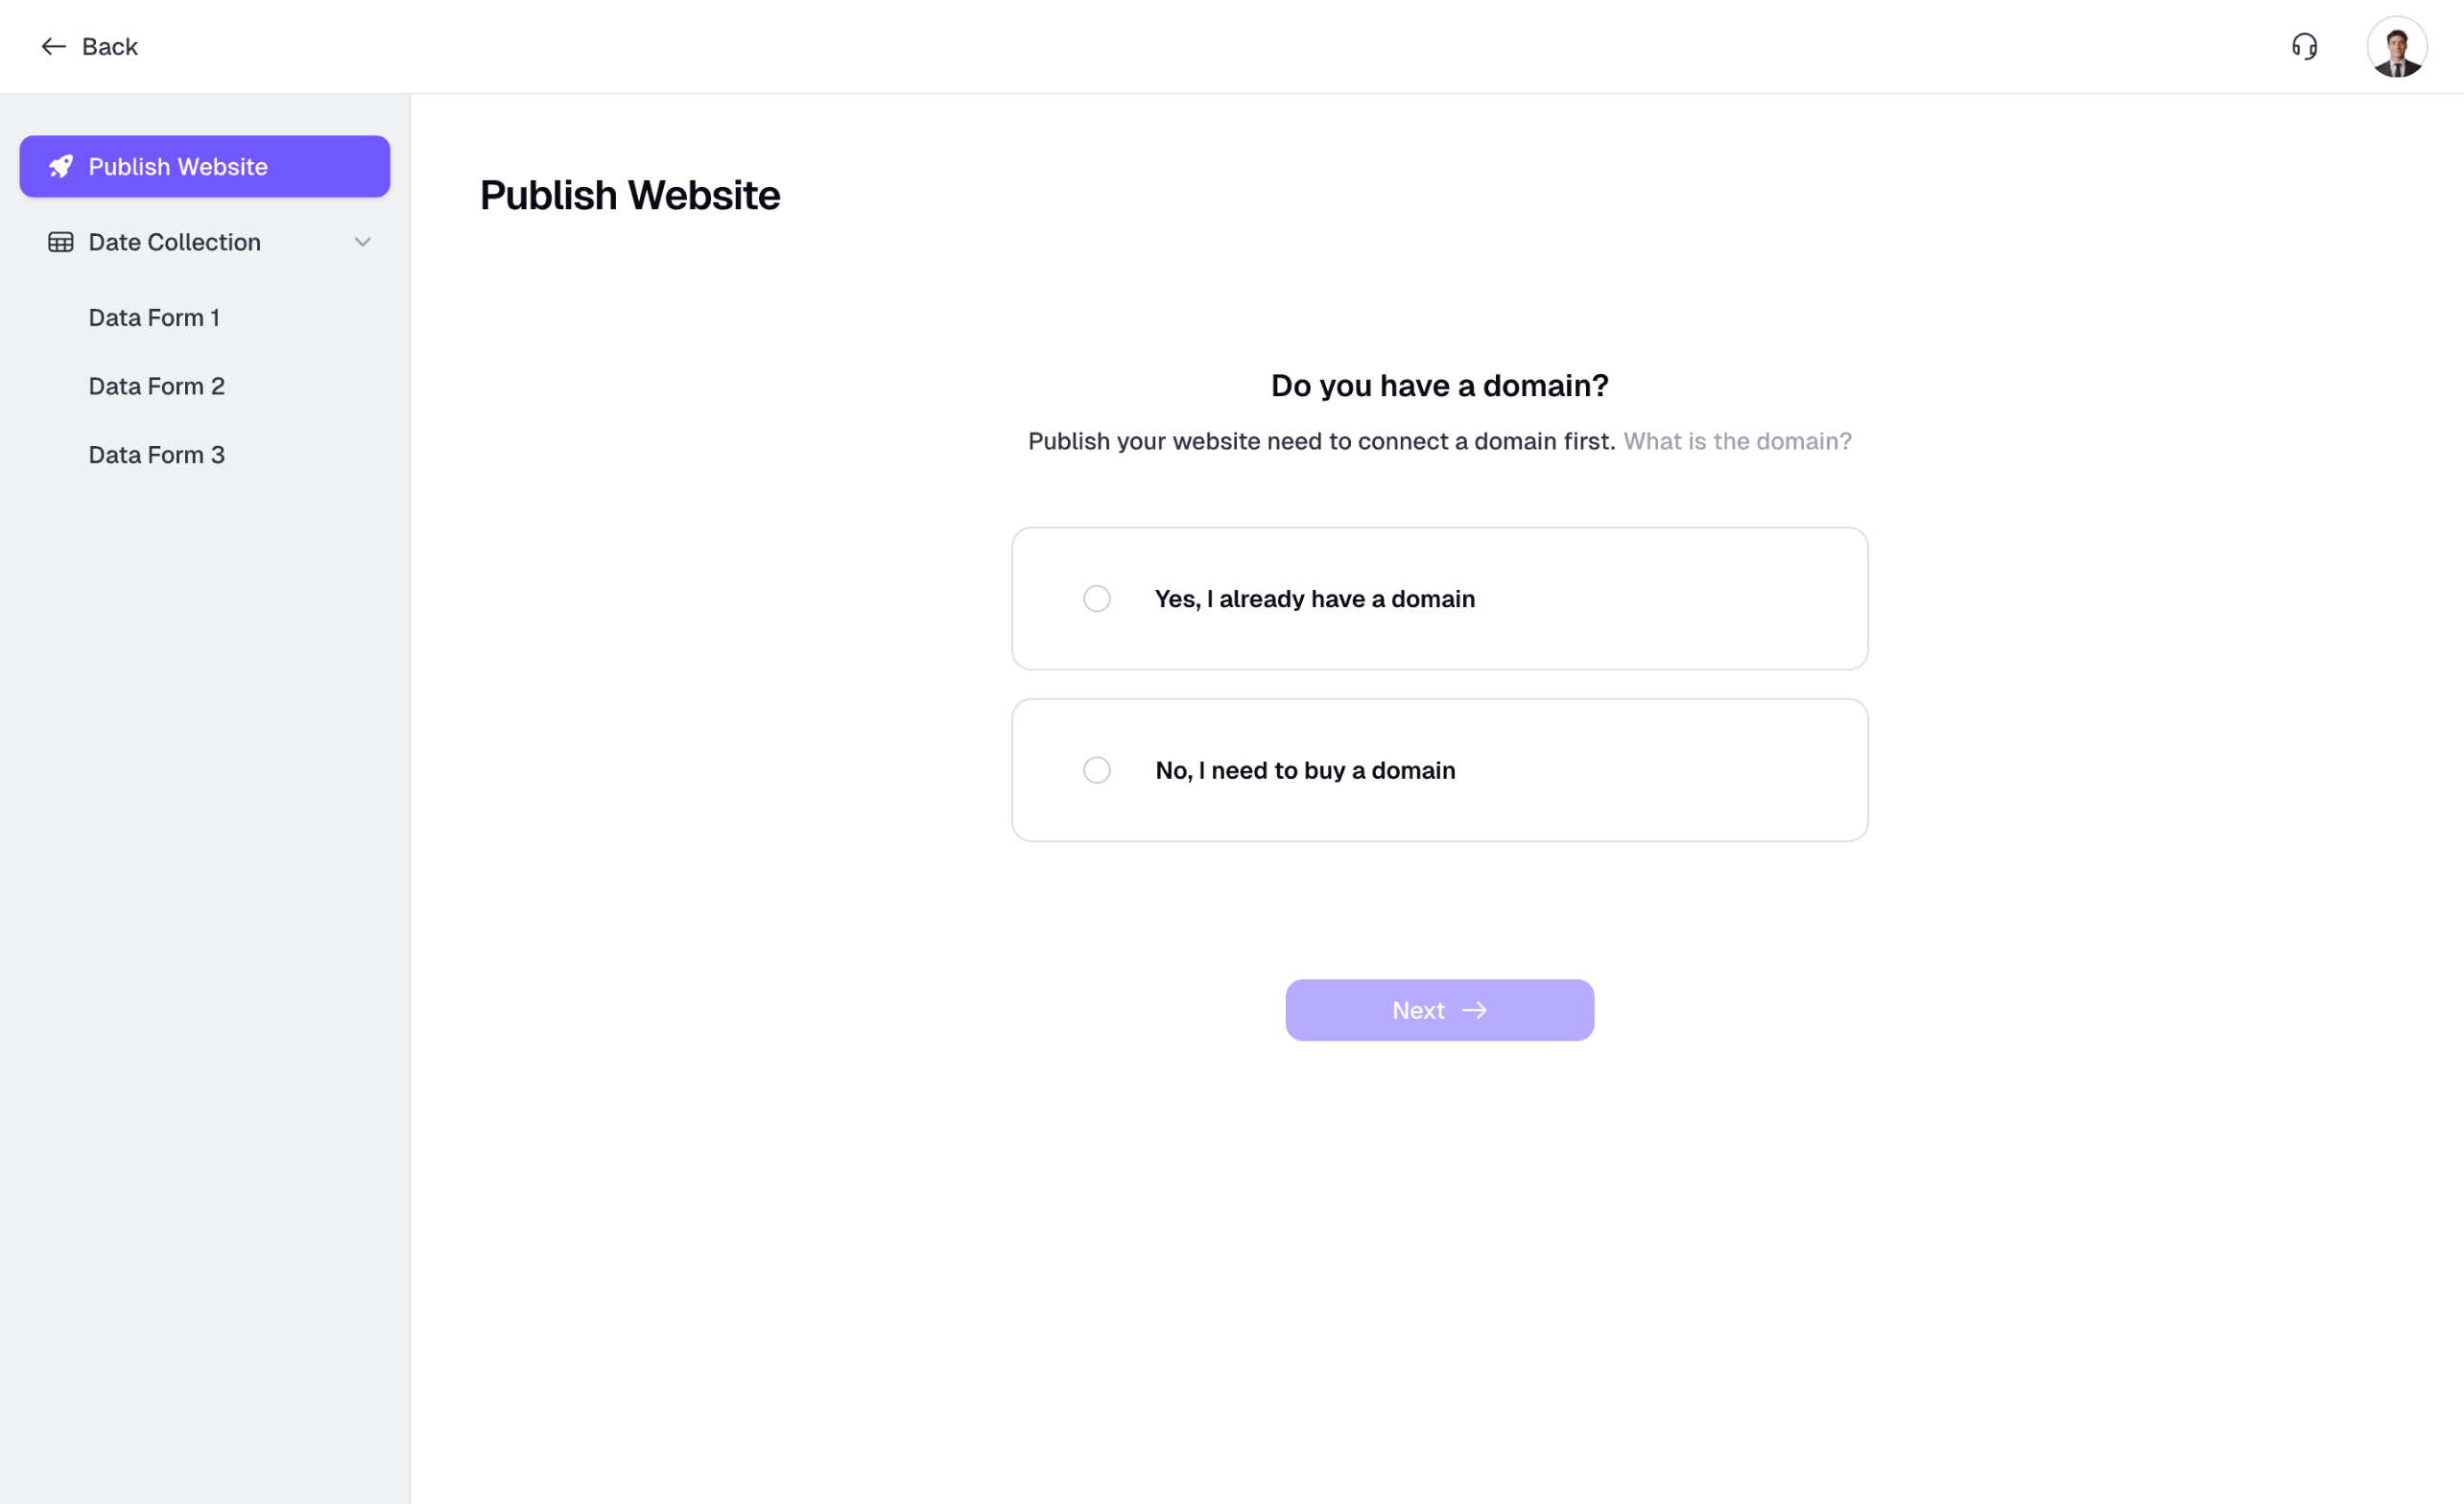
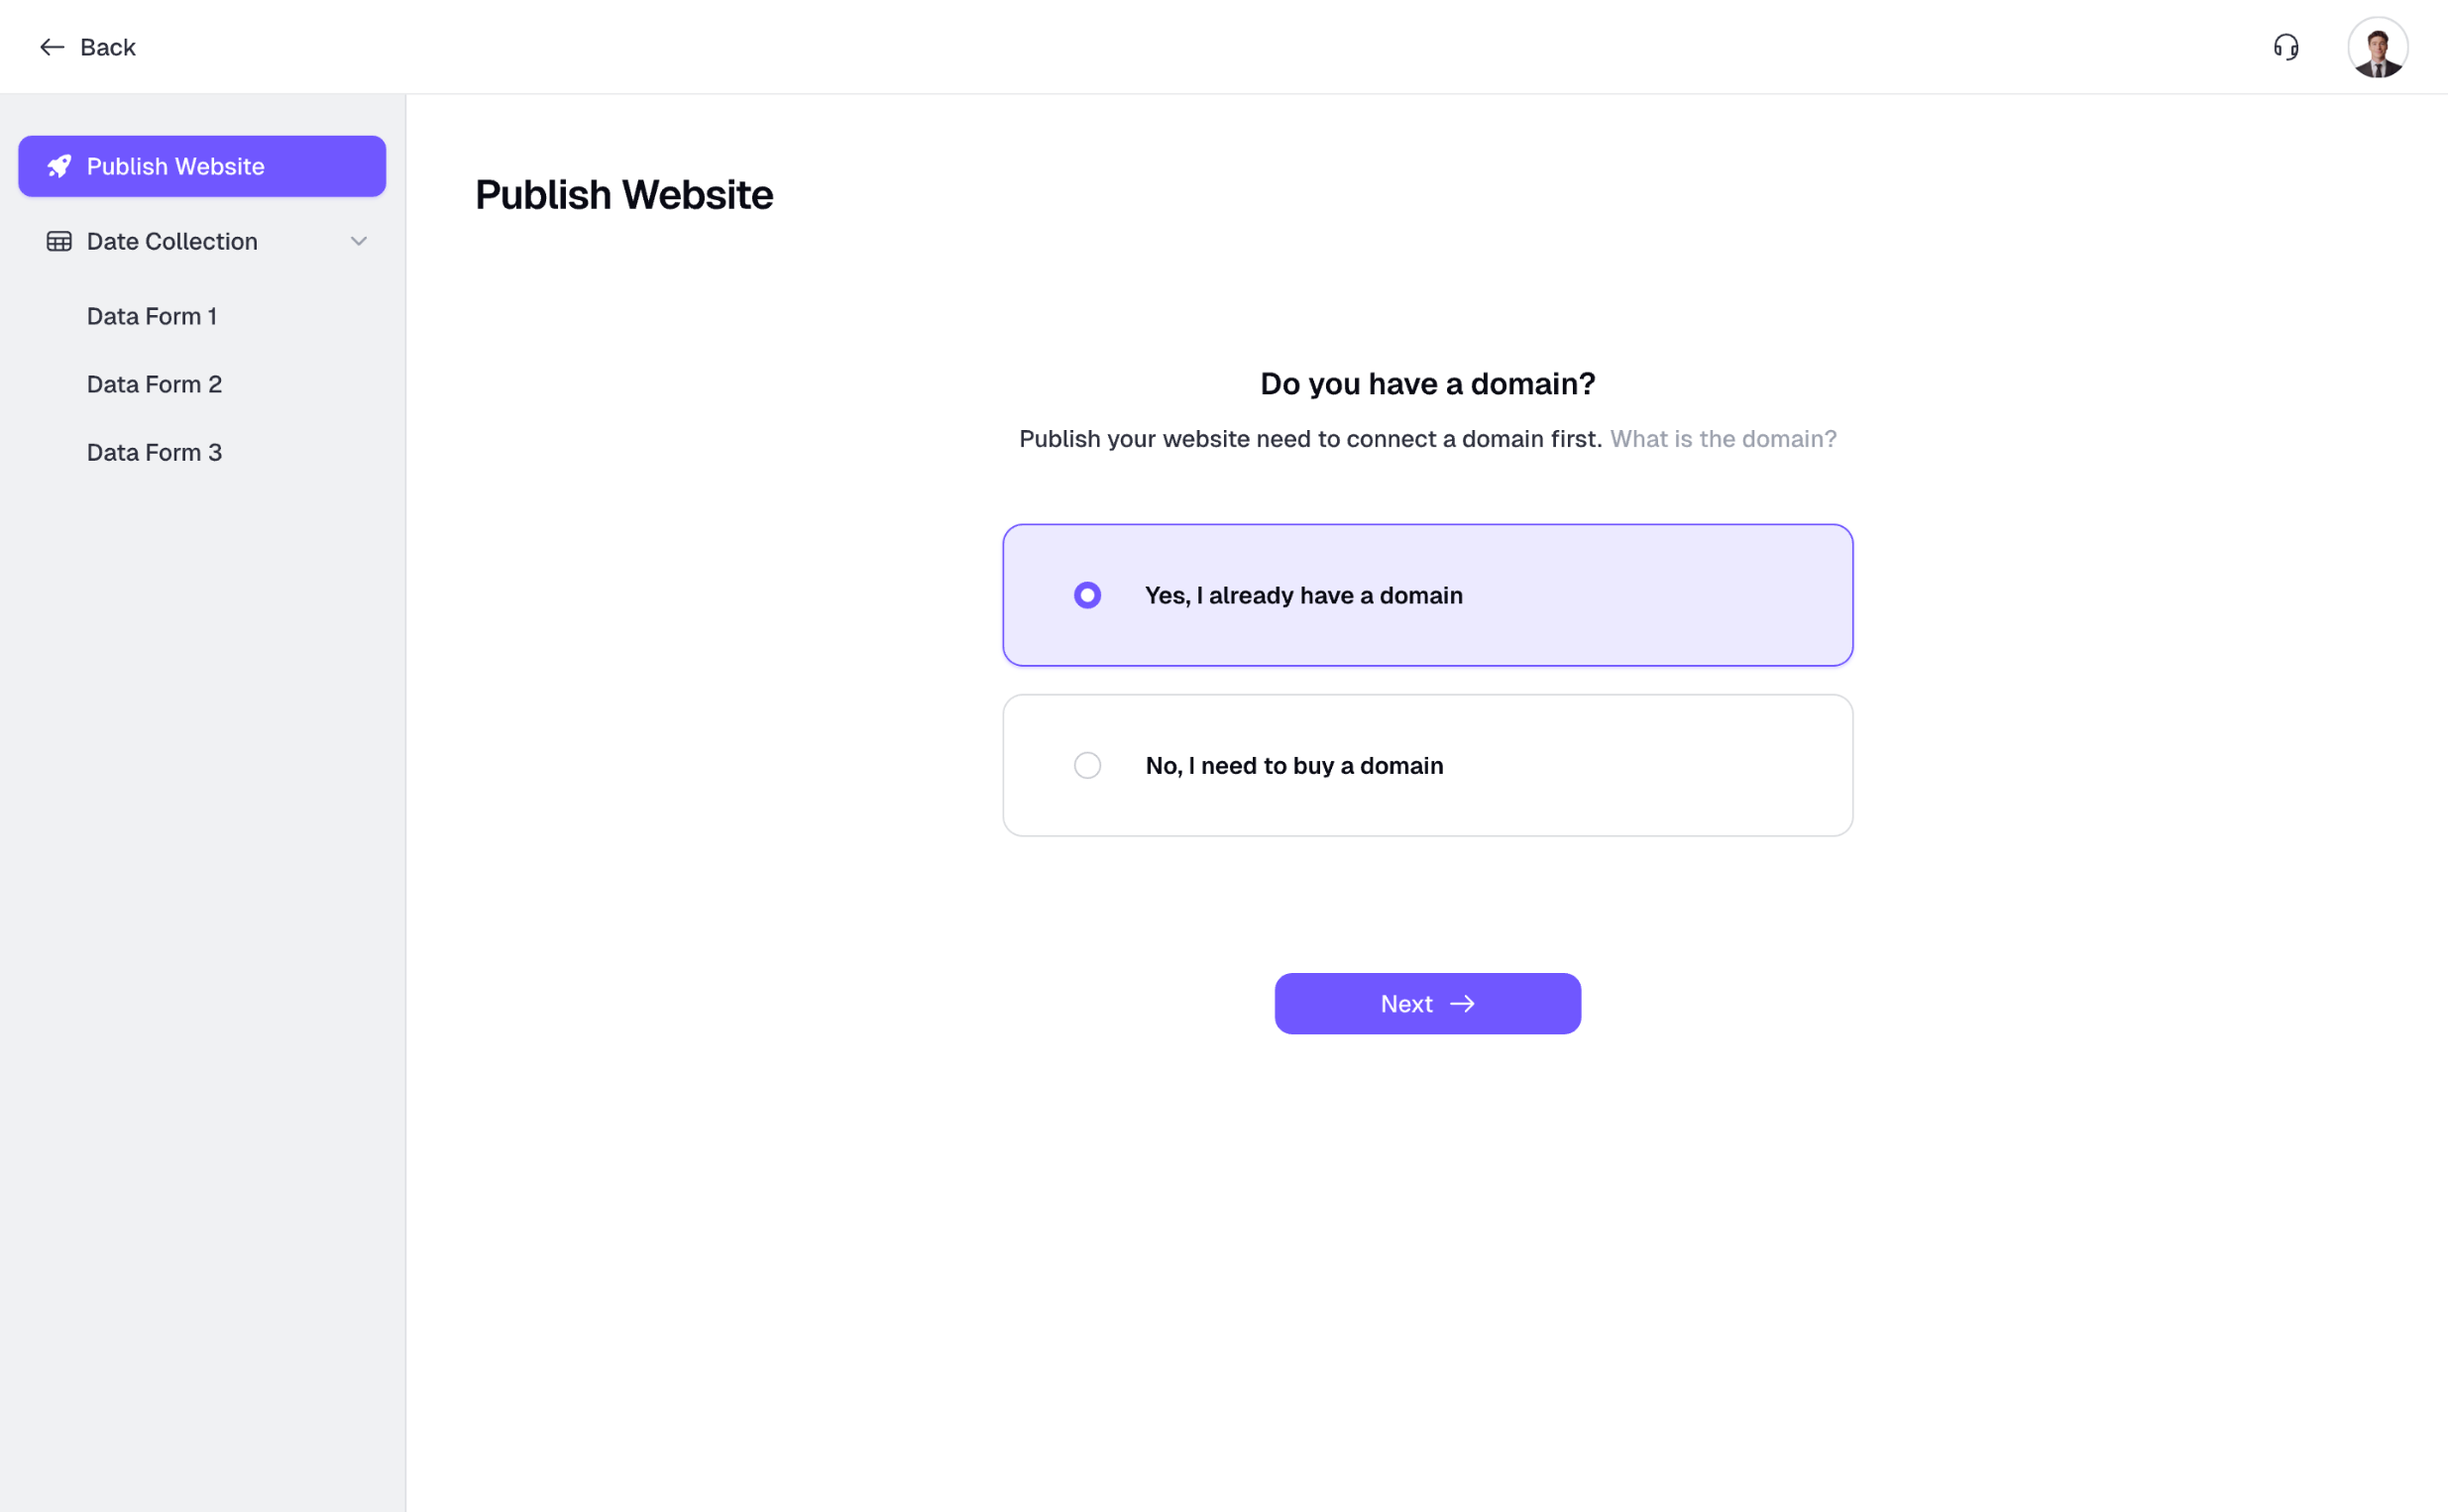
2. Choose Whether You Already Have a Domain
- If you already have your own domain, select Yes, I already have a domain. This guide will walk you through connecting your domain to the project and publishing it.
- If you don’t have a domain yet, select No, I need to buy a domain. We support purchasing a new domain via IONOS. How to Buy a Domain >
3. Connect a Custom Domain
You’ll begin with Step 1 of the domain connecting process. Enter the domain you want to use in the input field. Please note: a domain can only be bound to one website, so make sure the domain is purchased and not already in use.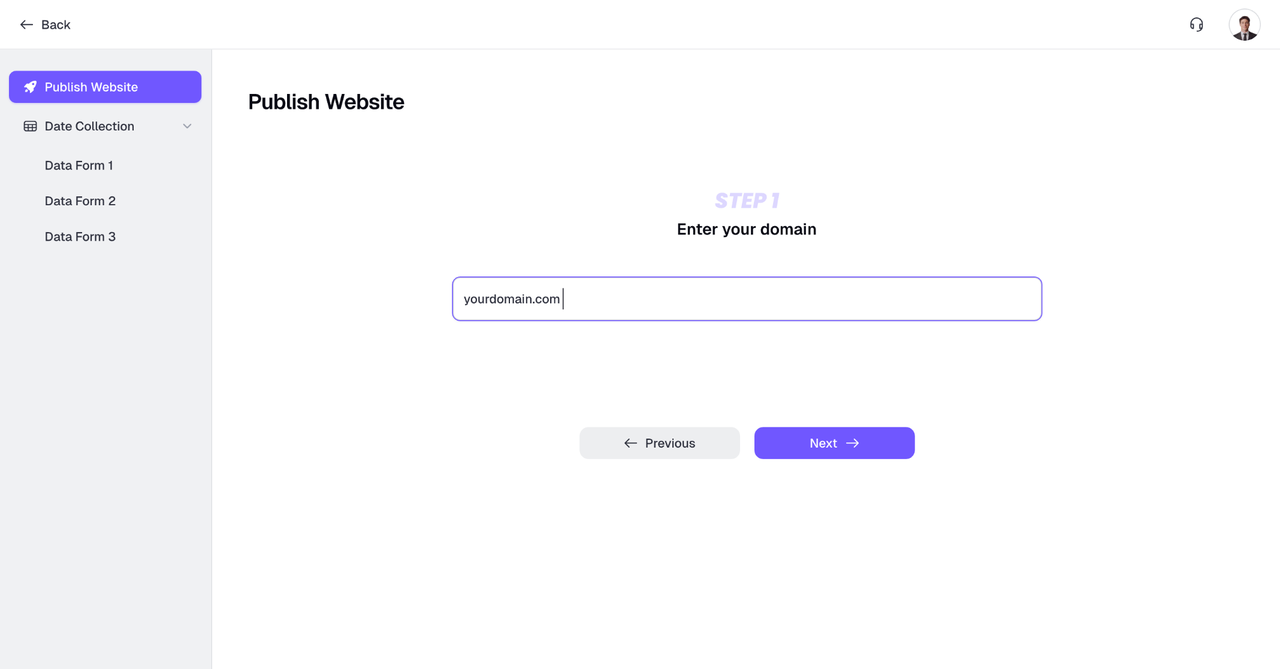
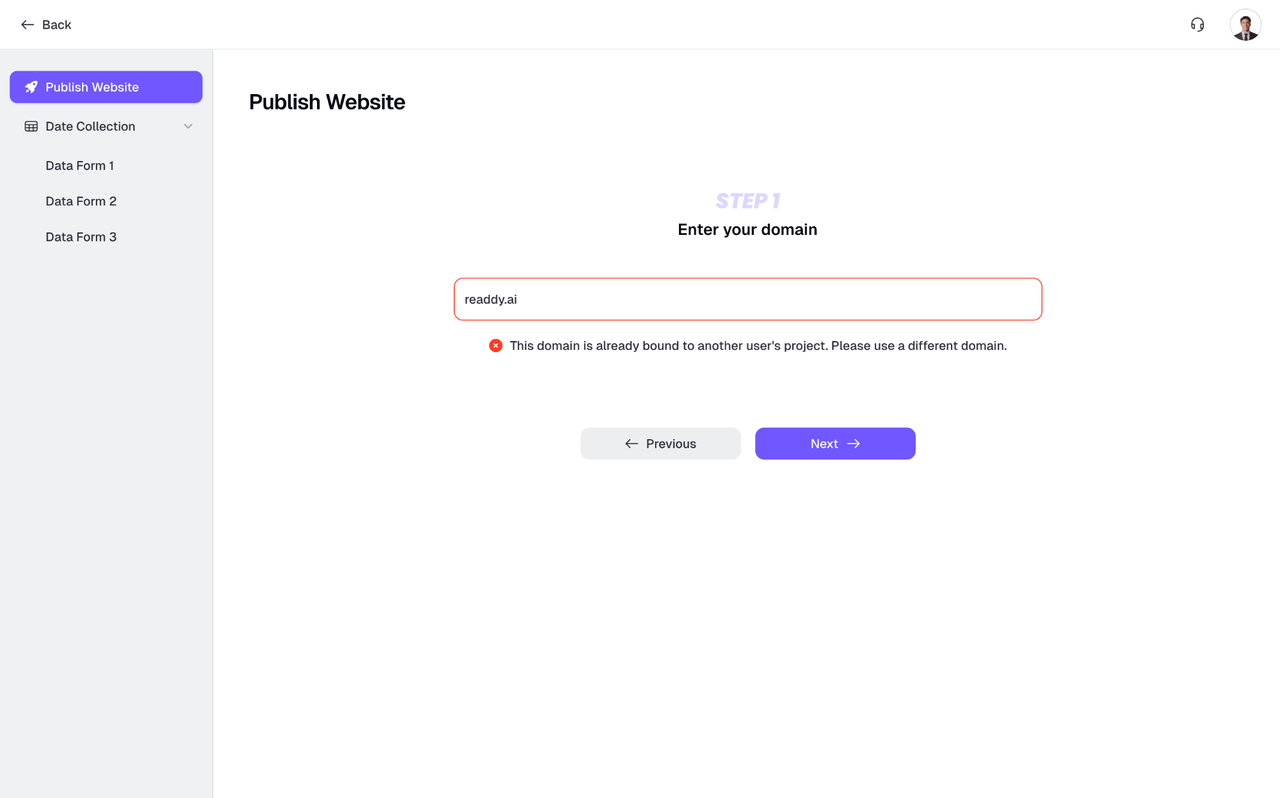
Common Domain Validation Errors
If validation fails, you’ll see a red error message. Here’s how to interpret and resolve common errors:Please enter a correct domain
Please enter a correct domain
google.com.This domain has not been purchased by you yet
This domain has not been purchased by you yet
This domain is already bound to xxx. Please unbind it first.
This domain is already bound to xxx. Please unbind it first.
This domain is already bound to another user's project. Please use a different domain.
This domain is already bound to another user's project. Please use a different domain.
4. Configure DNS Records
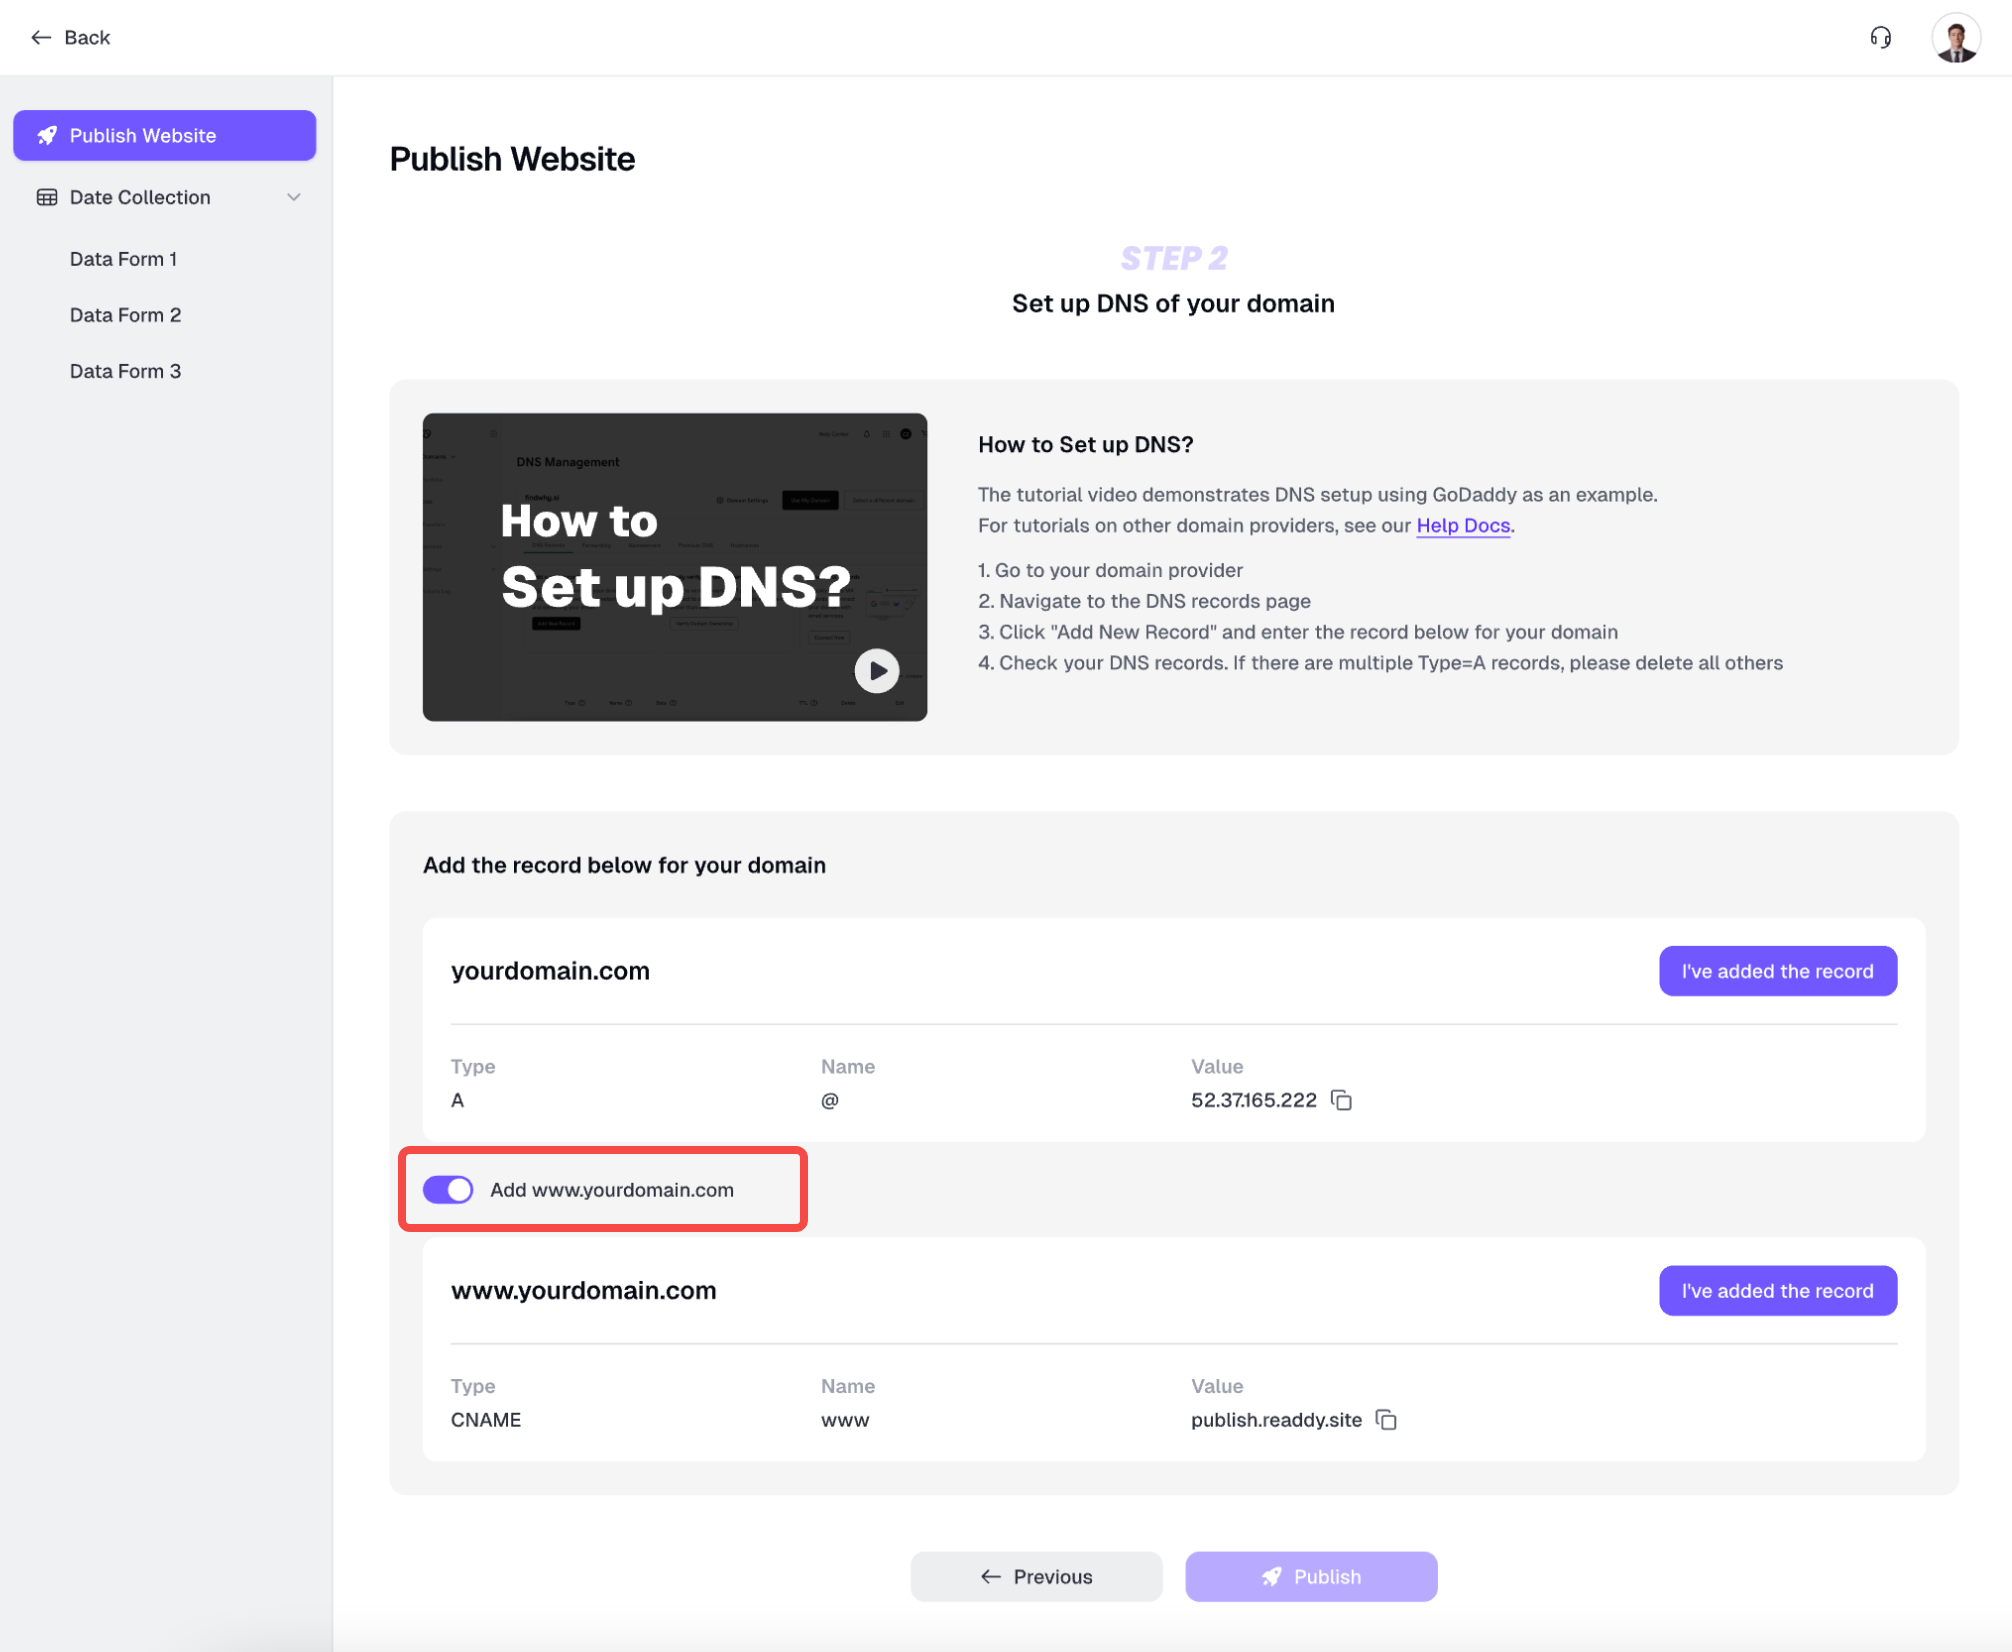
After proceeding to Step 2, you’ll see a tutorial video titled “How to Set up DNS”. Watch this video carefully if you’re unfamiliar with DNS setup.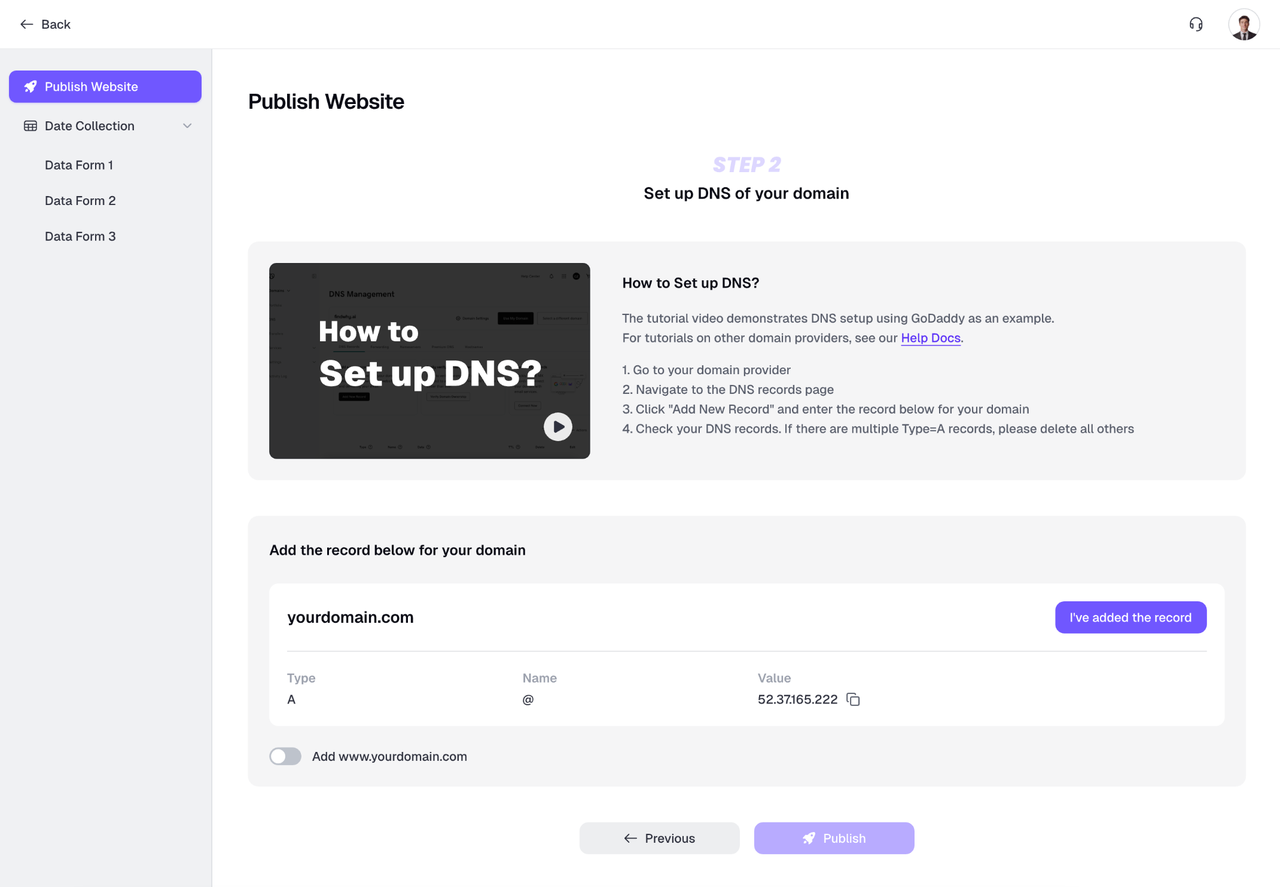
A written guide is also available:
- Go to your domain provider’s website (e.g., GoDaddy)
- Access the DNS settings or DNS management page
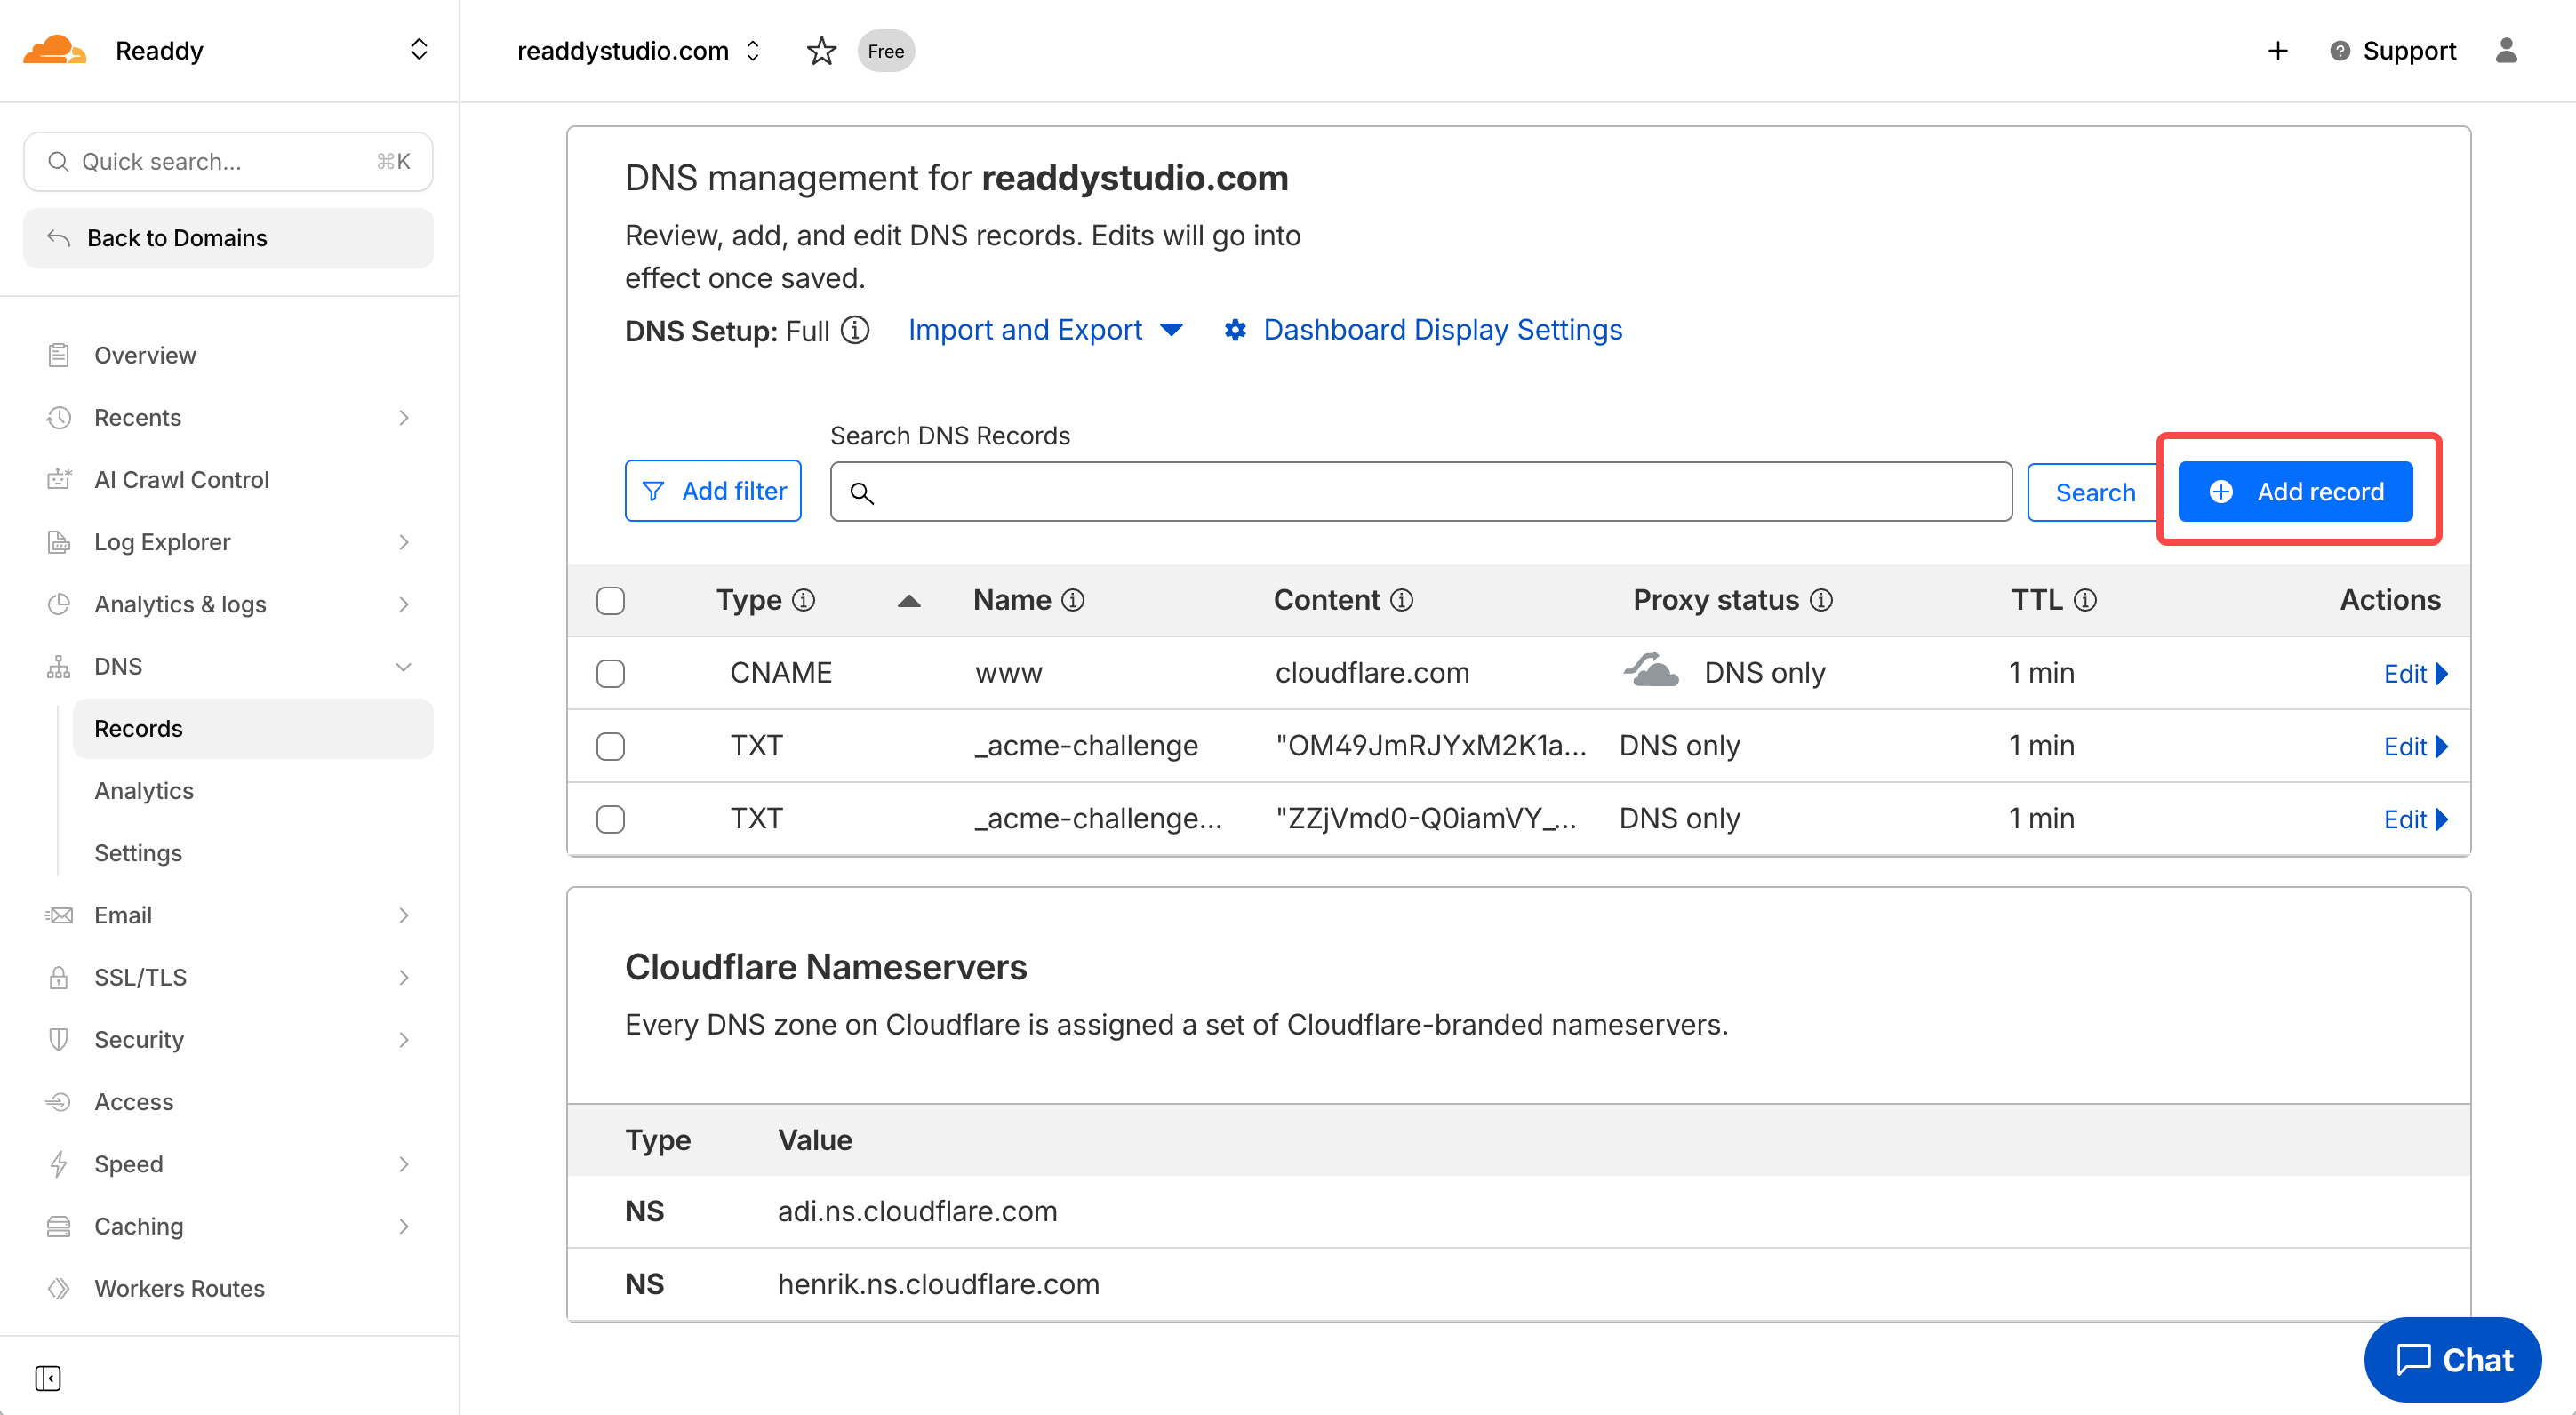
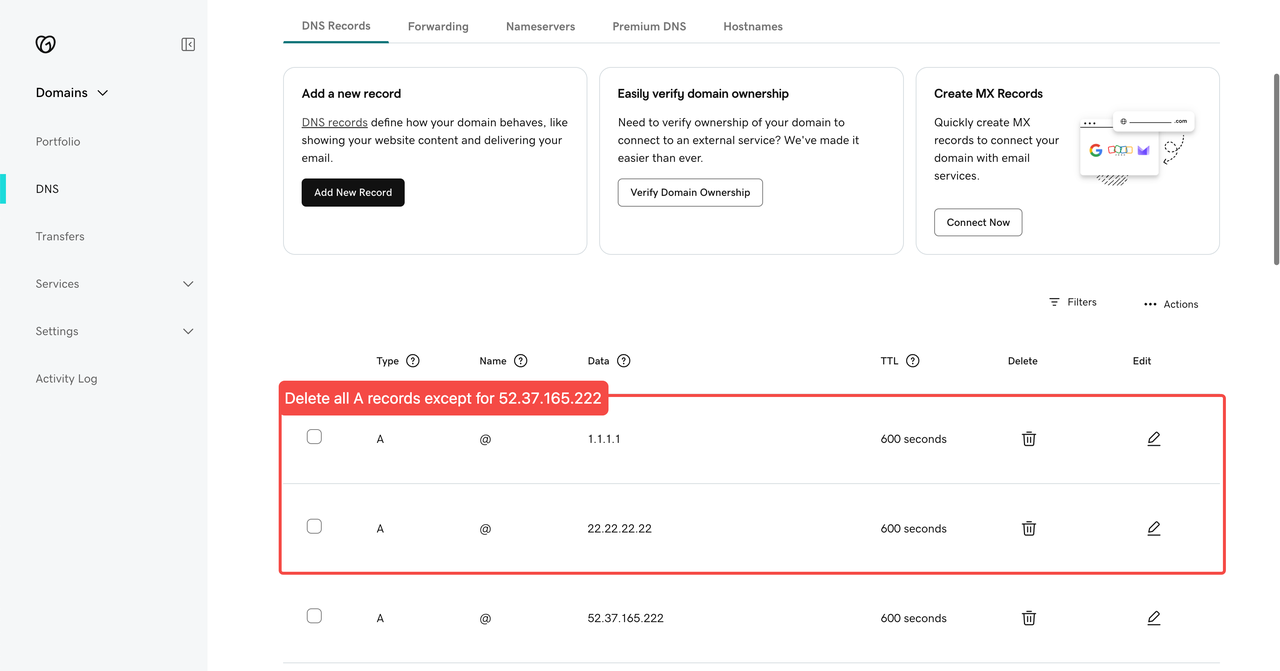
- Delete all existing A records
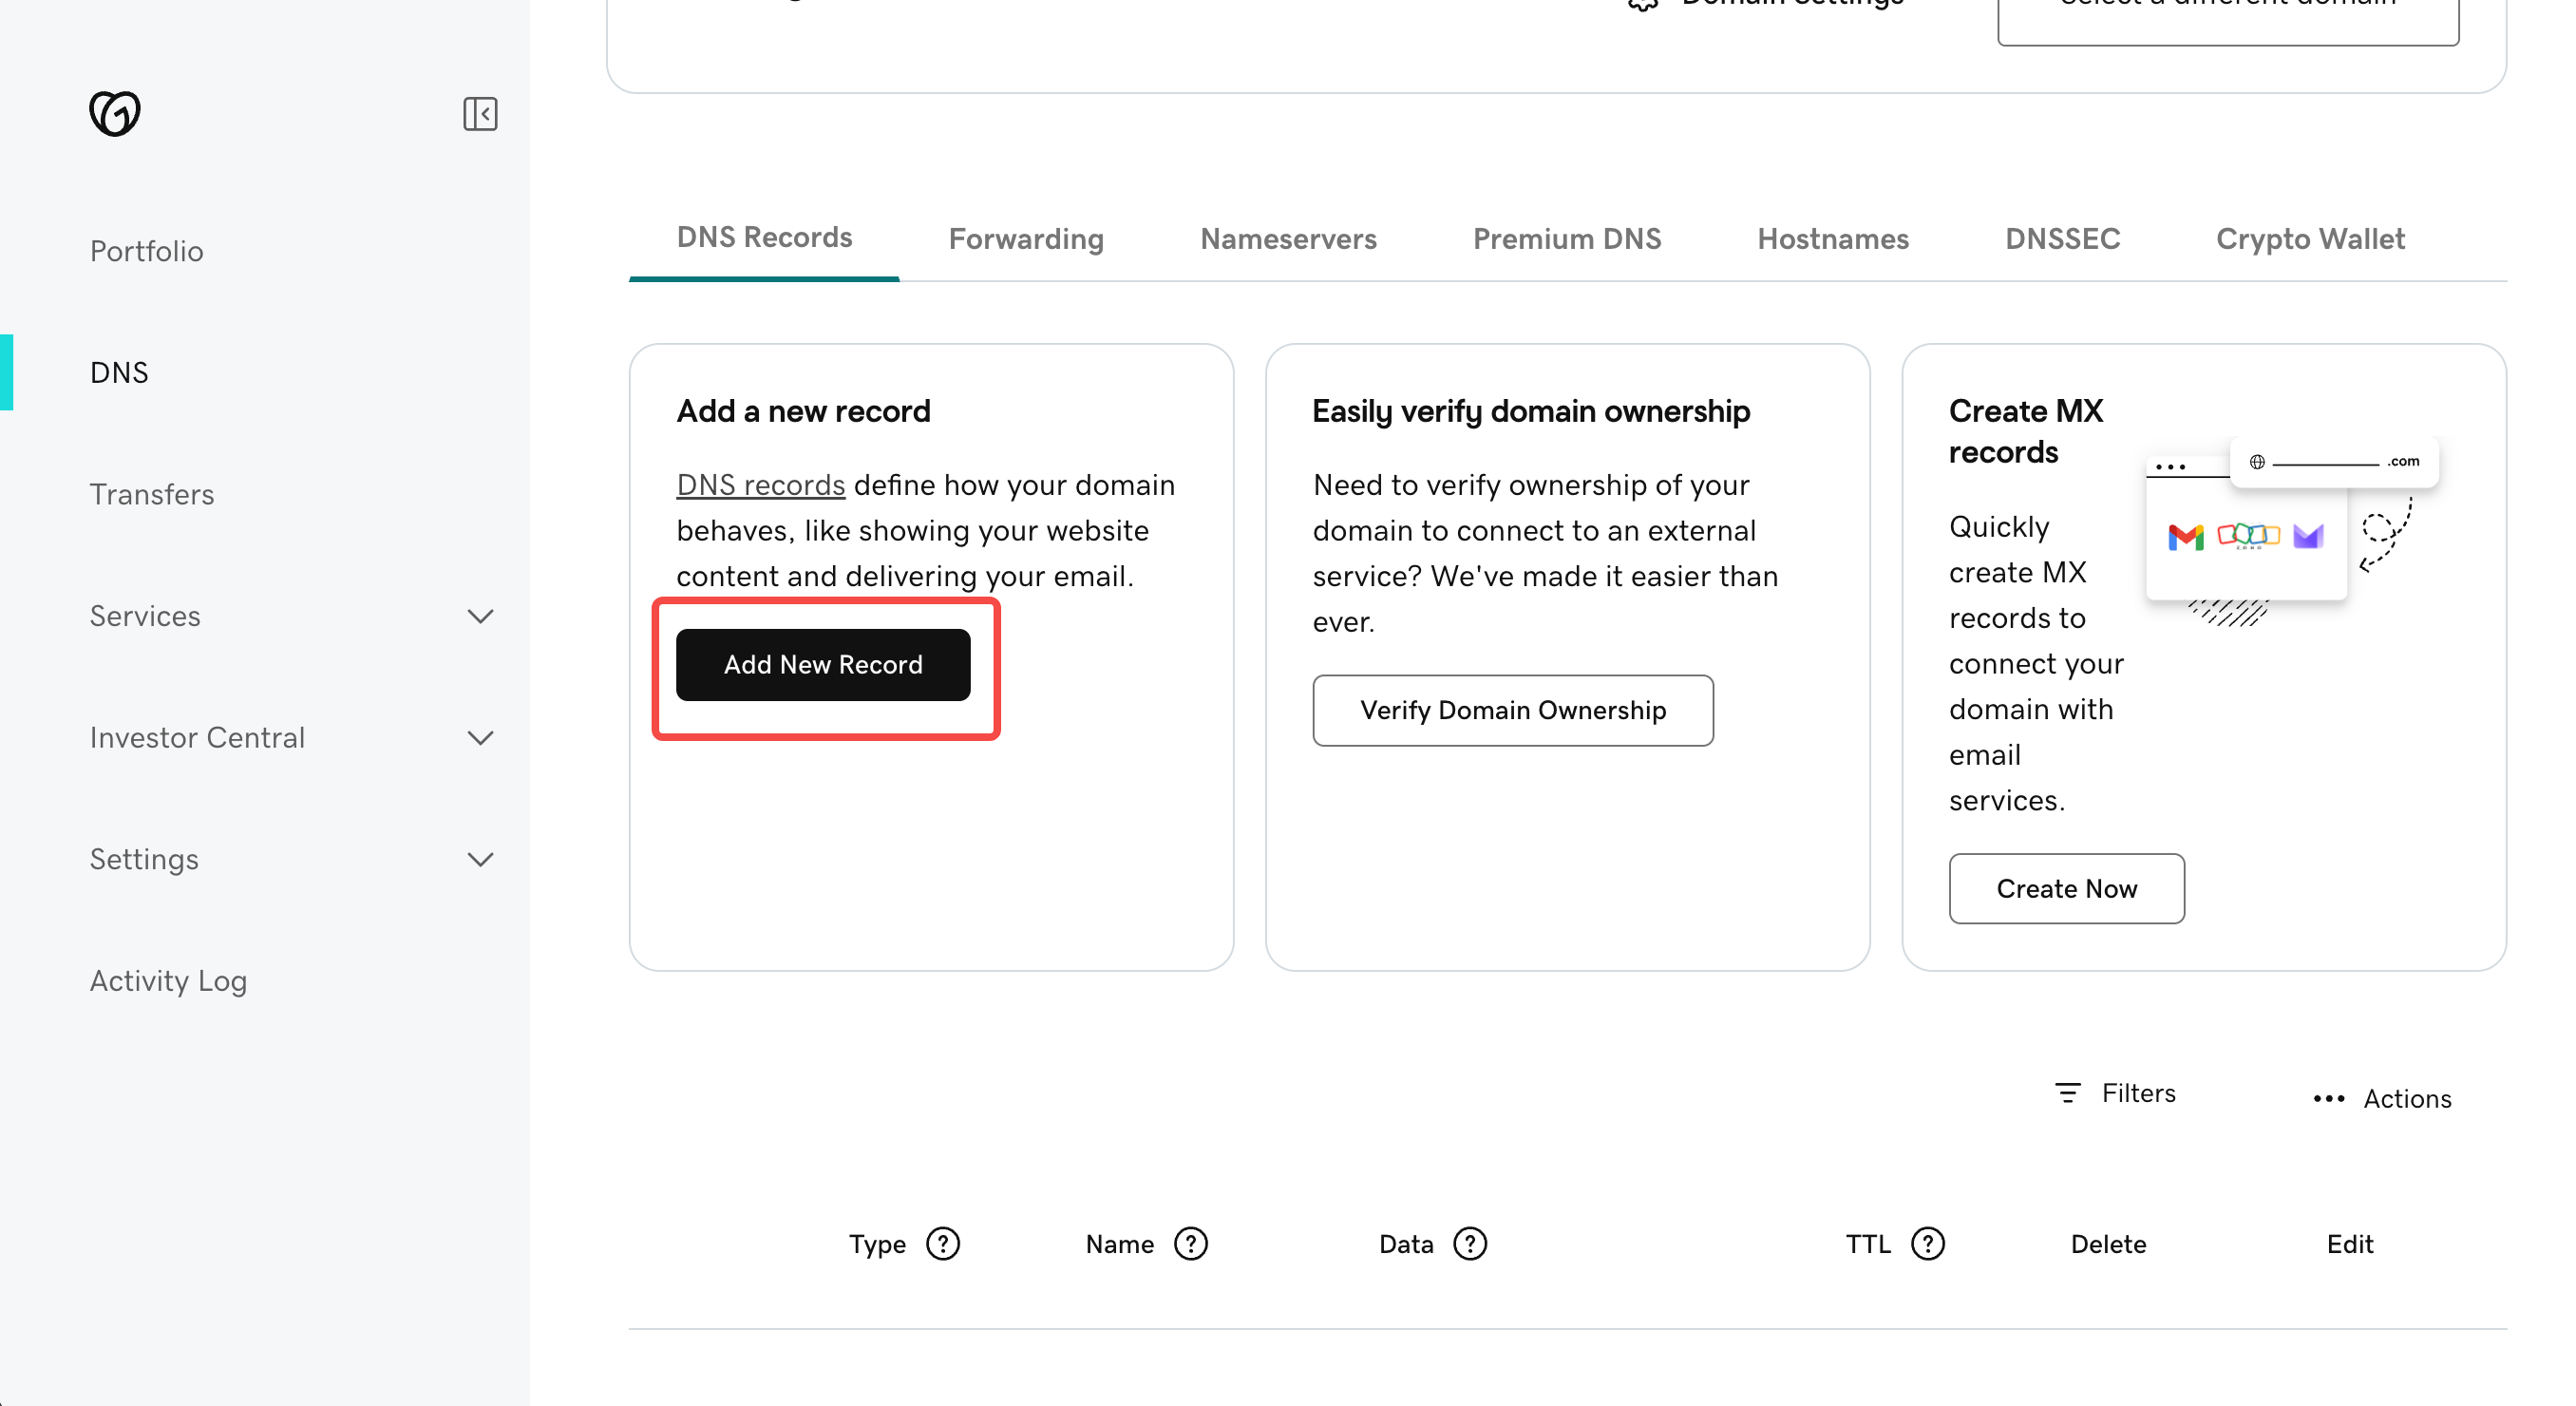
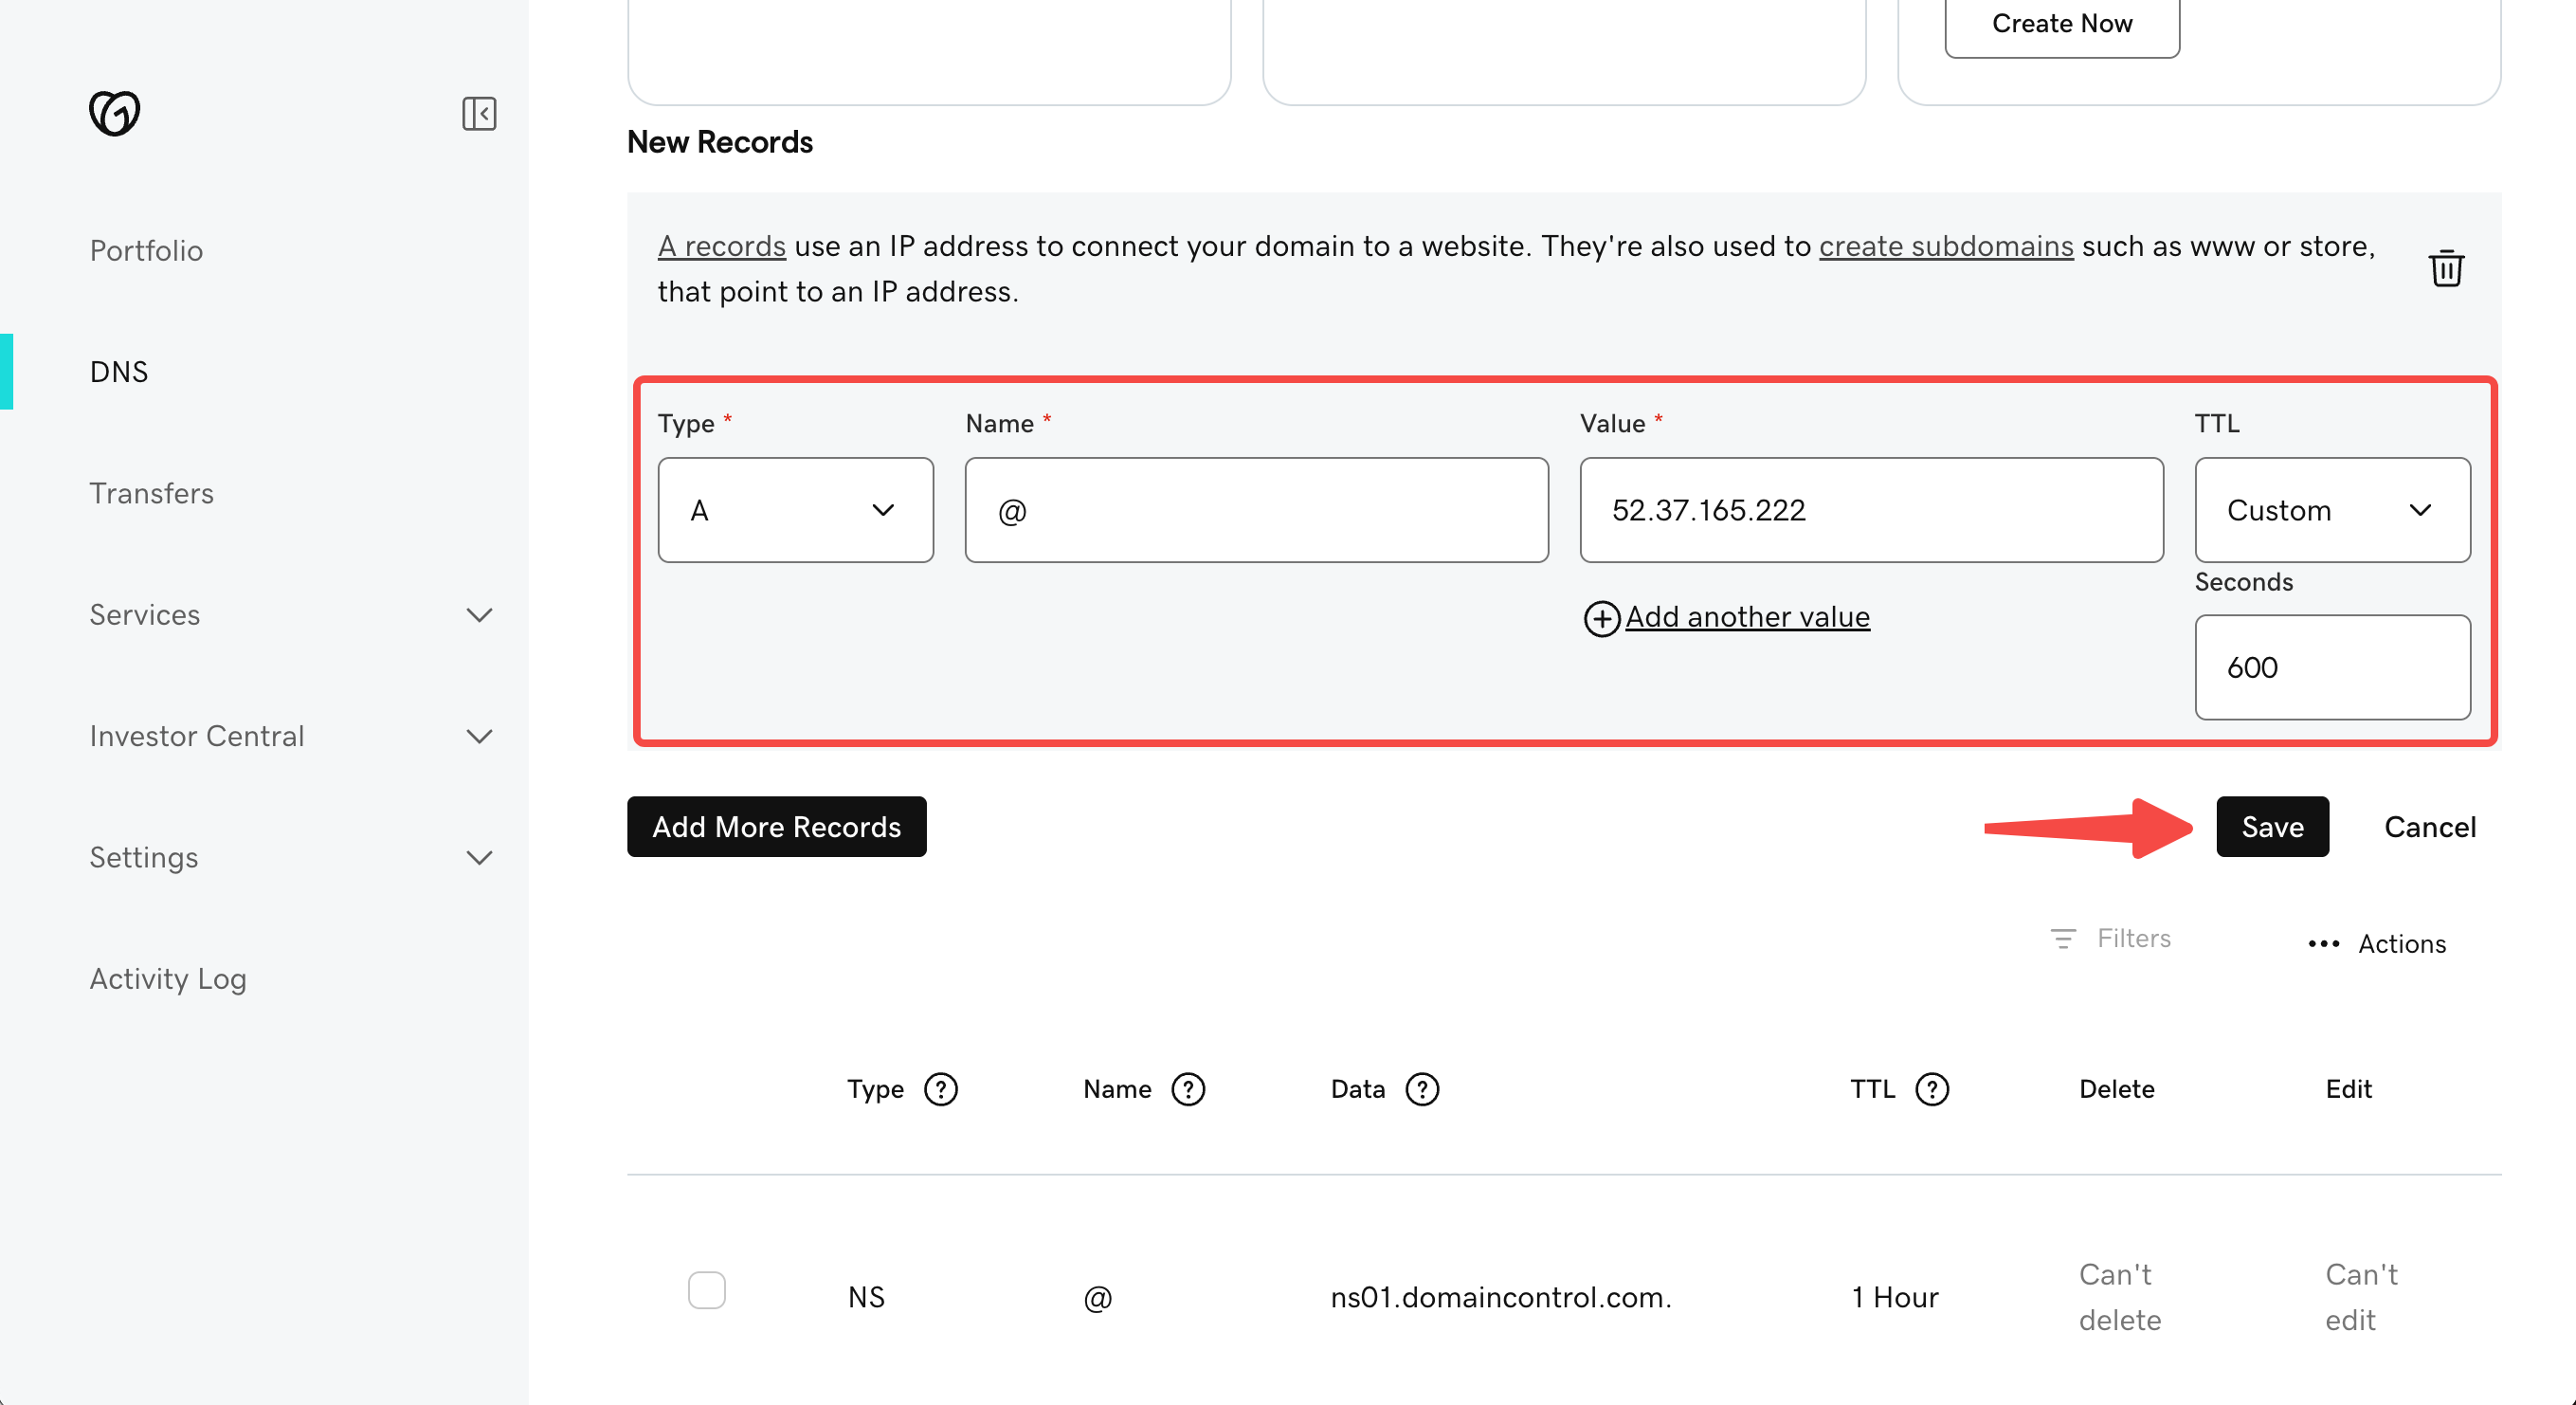
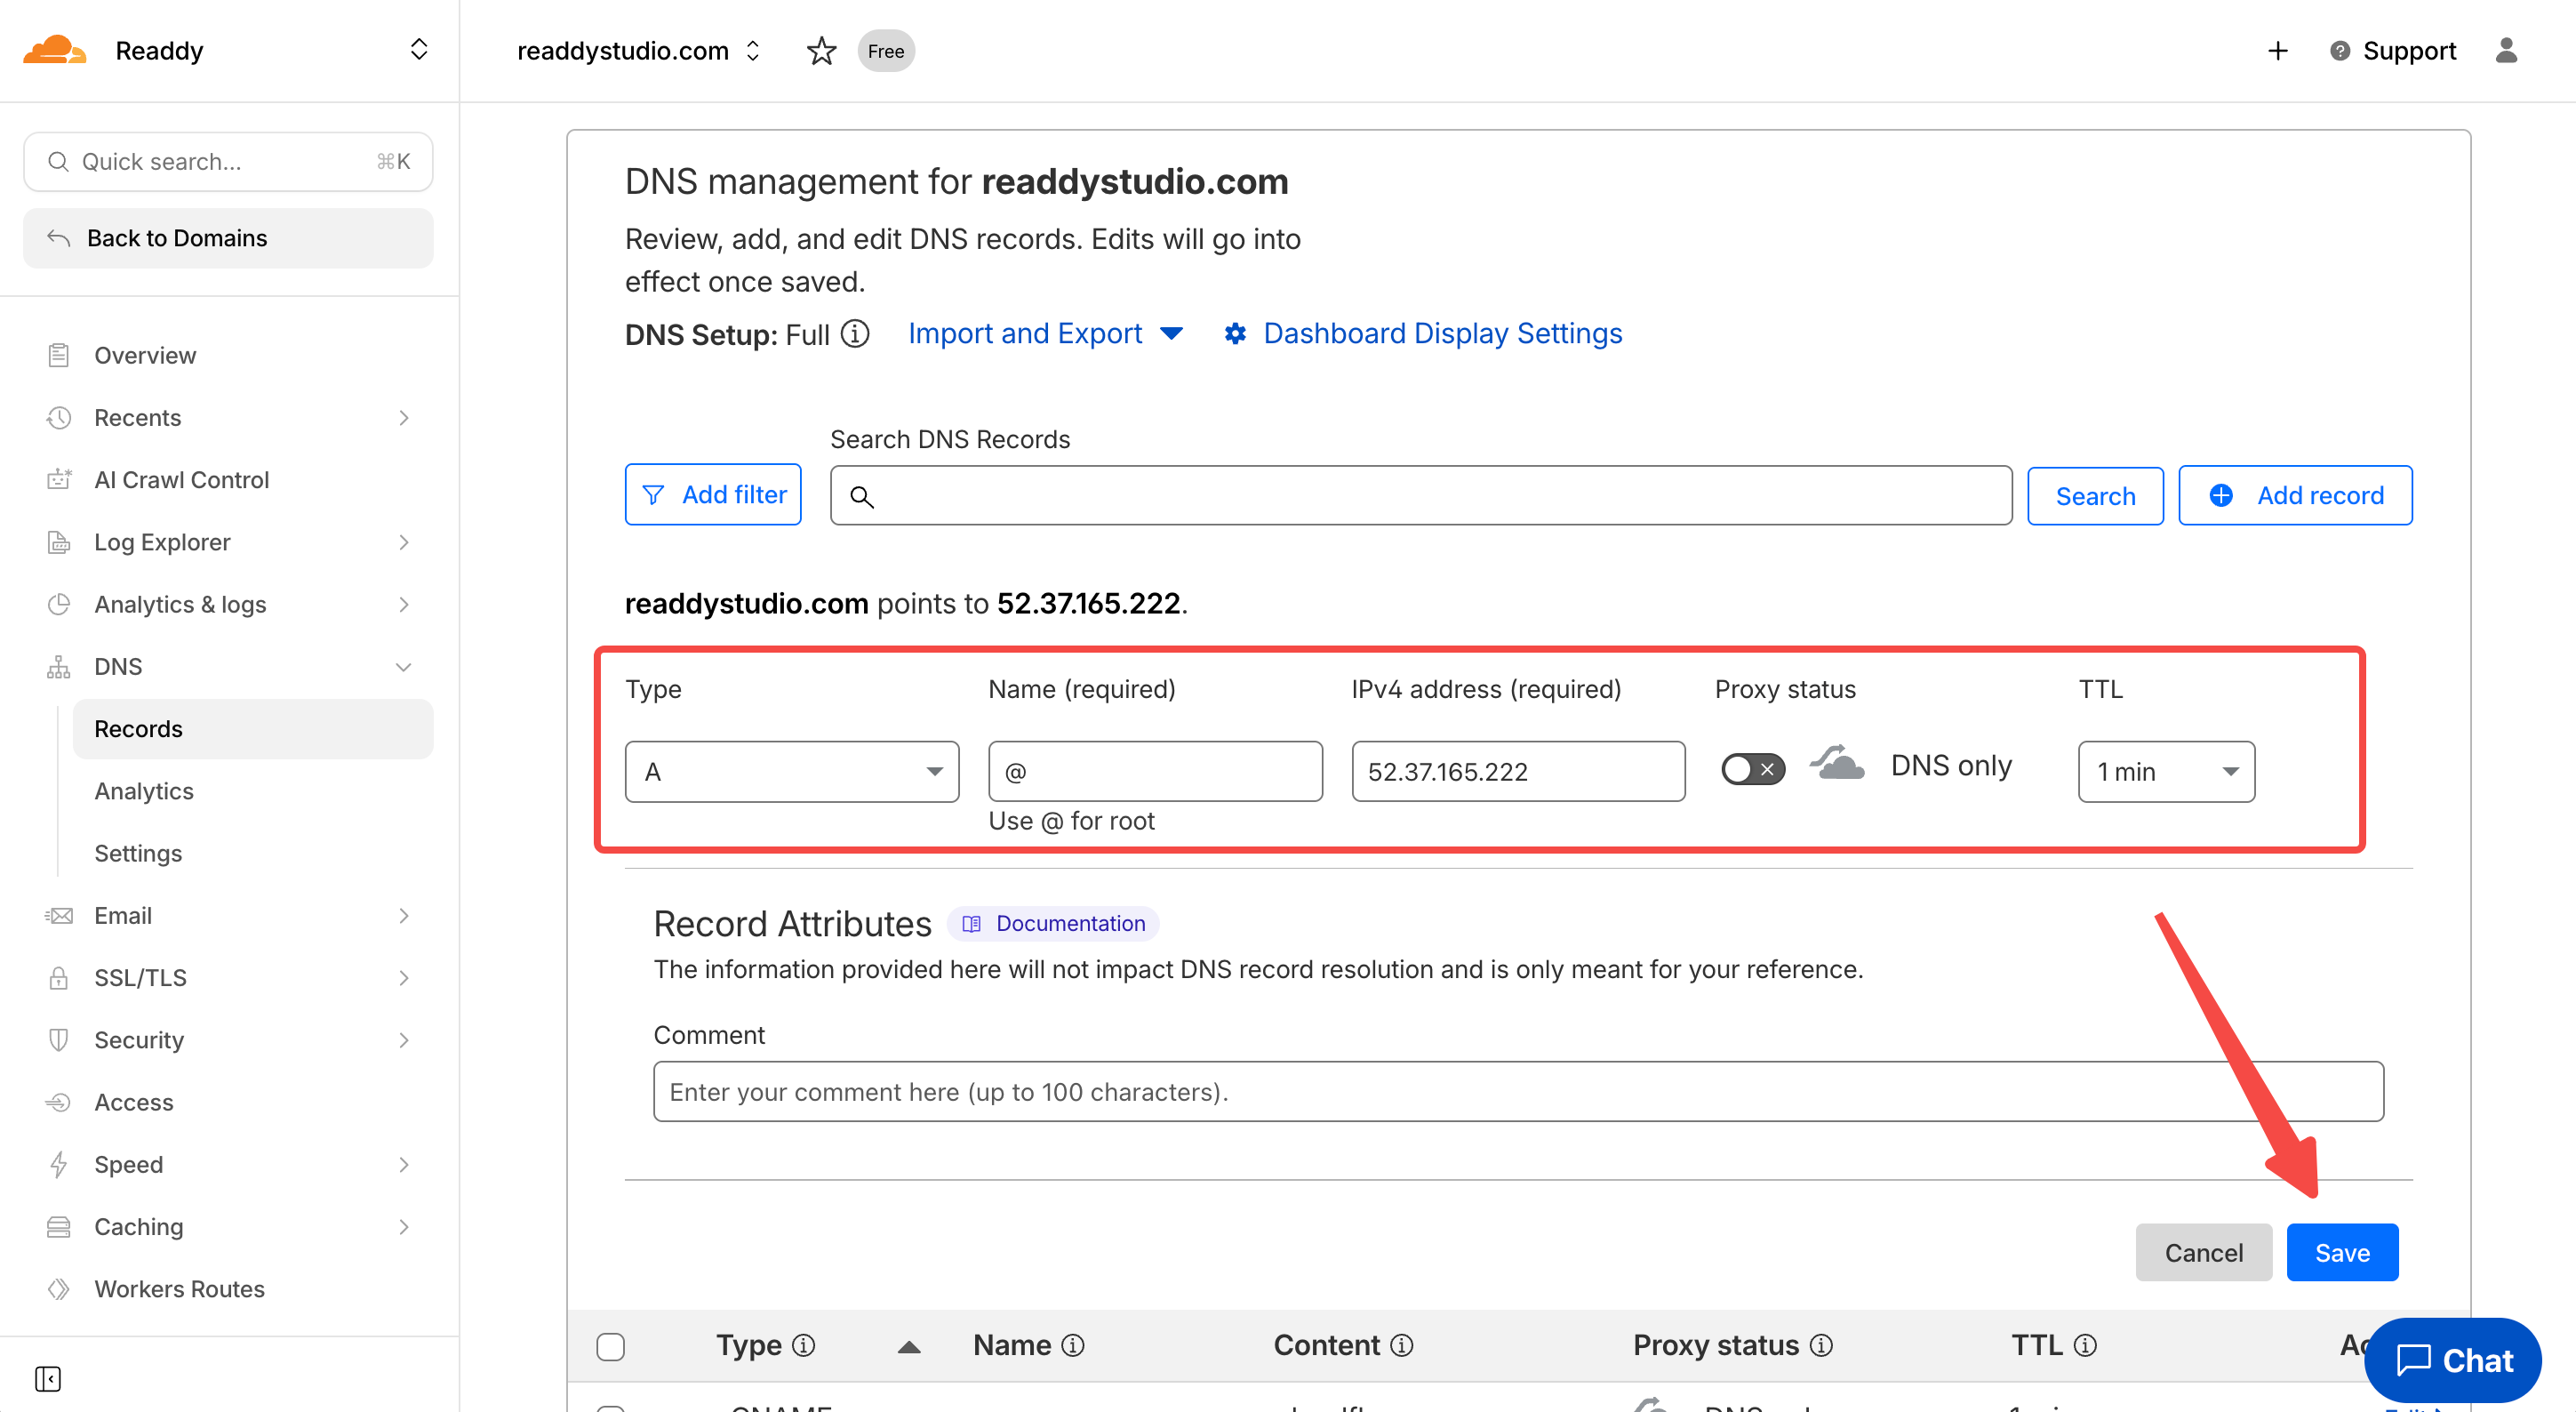
- Add a new A record with the following values:
- Type: A
- Name: @
- Value: 52.37.165.222
Setup Instructions by Provider
To connect your custom domain to your Readdy website, you need to configure DNS records through your domain provider. In this guide, we provide step-by-step instructions for several common domain providers.GoDaddy
GoDaddy
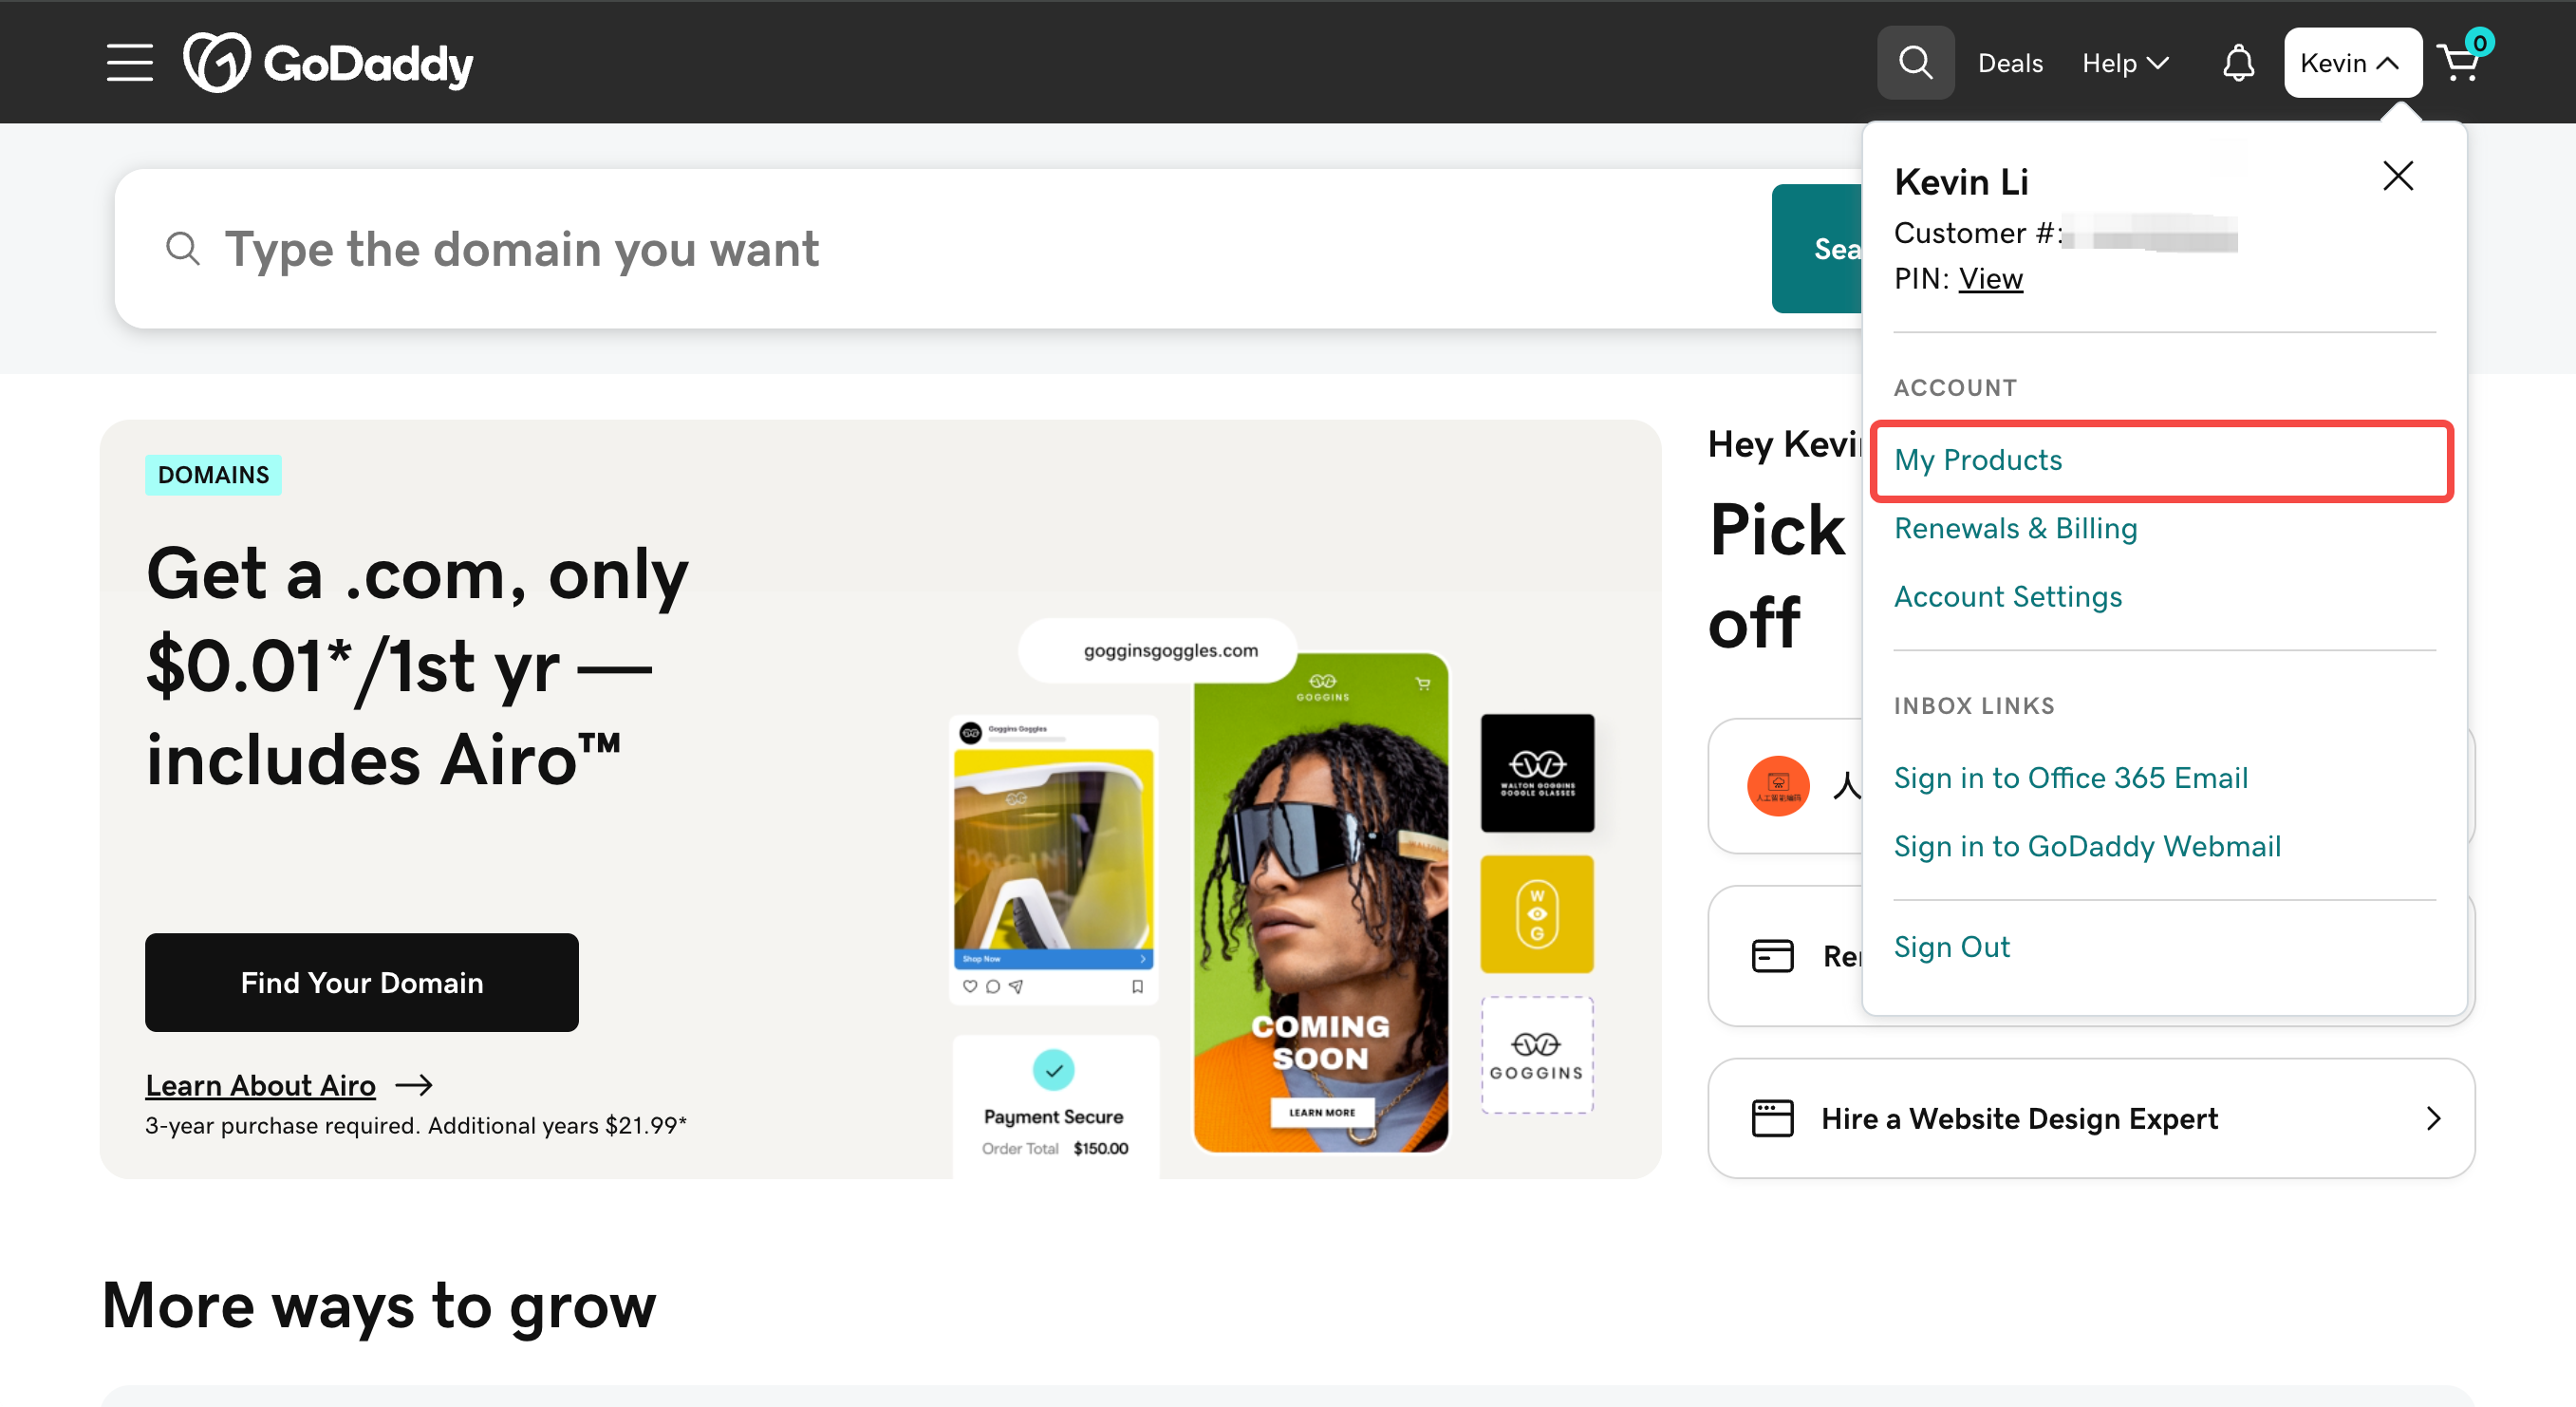
- Open a new tab in your browser, go to www.godaddy.com/ and log in. Locate ACCOUNT in the top-right corner of the page, and click My Products, you will see your domain.
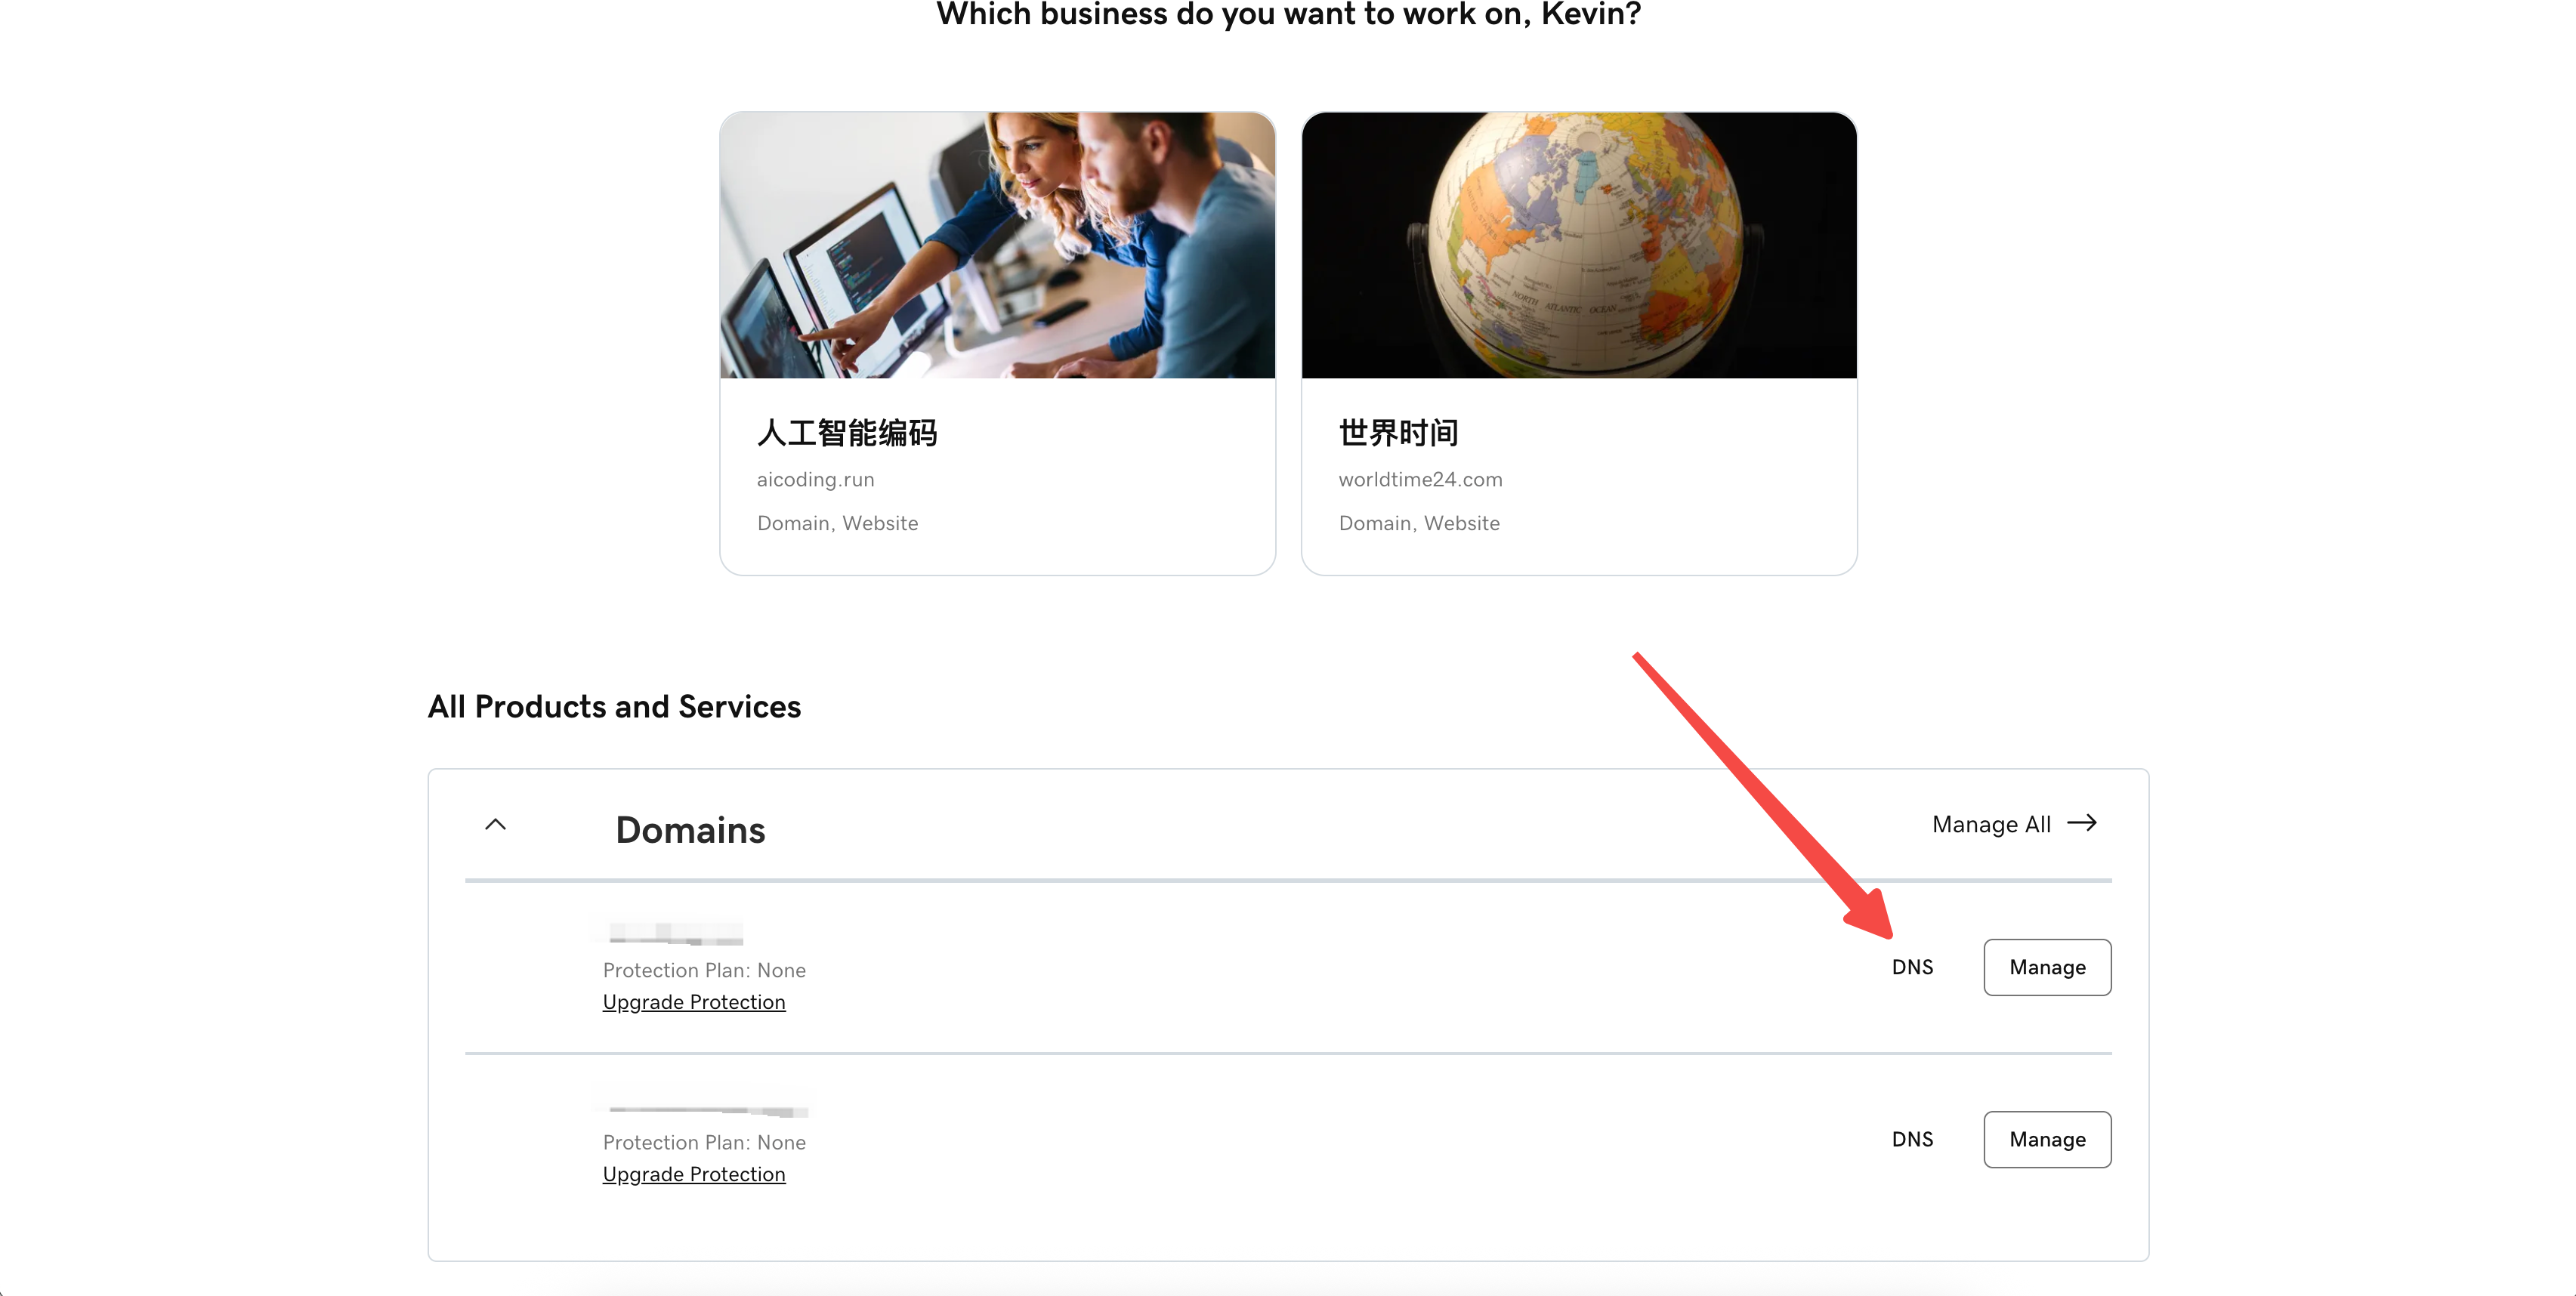
- Find the domain you want to connect and click DNS to navigate to its DNS Management page.
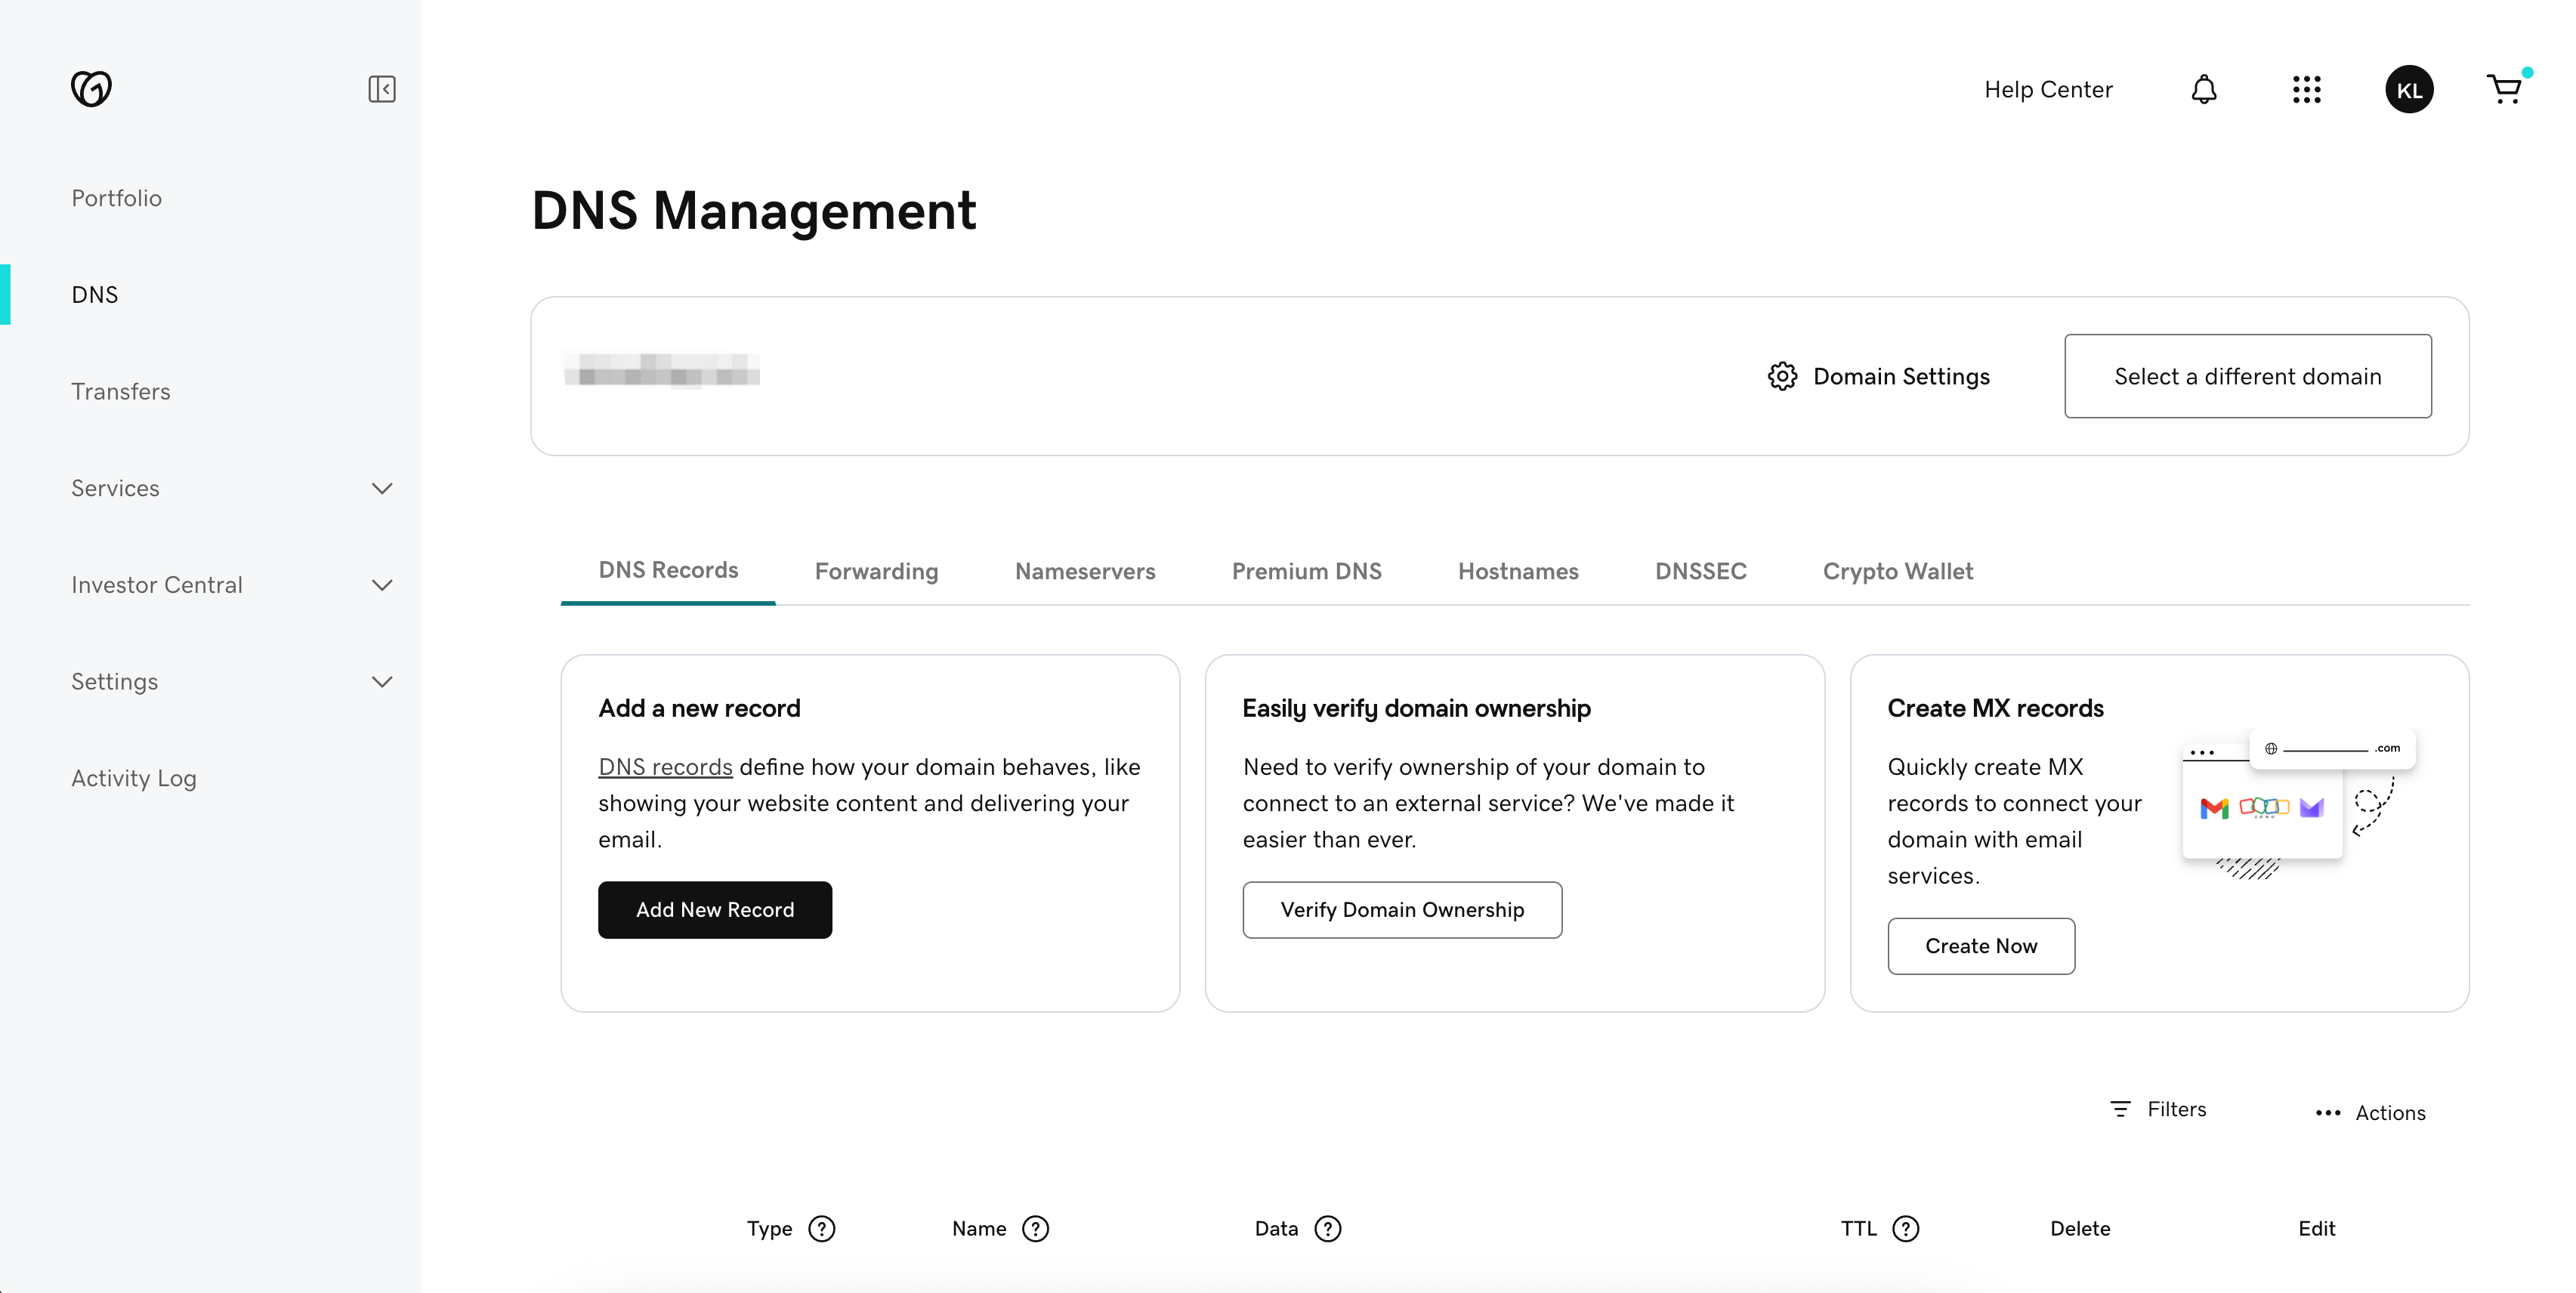
- Scroll down on the DNS Management page, and you will see all the DNS records for the current domain.
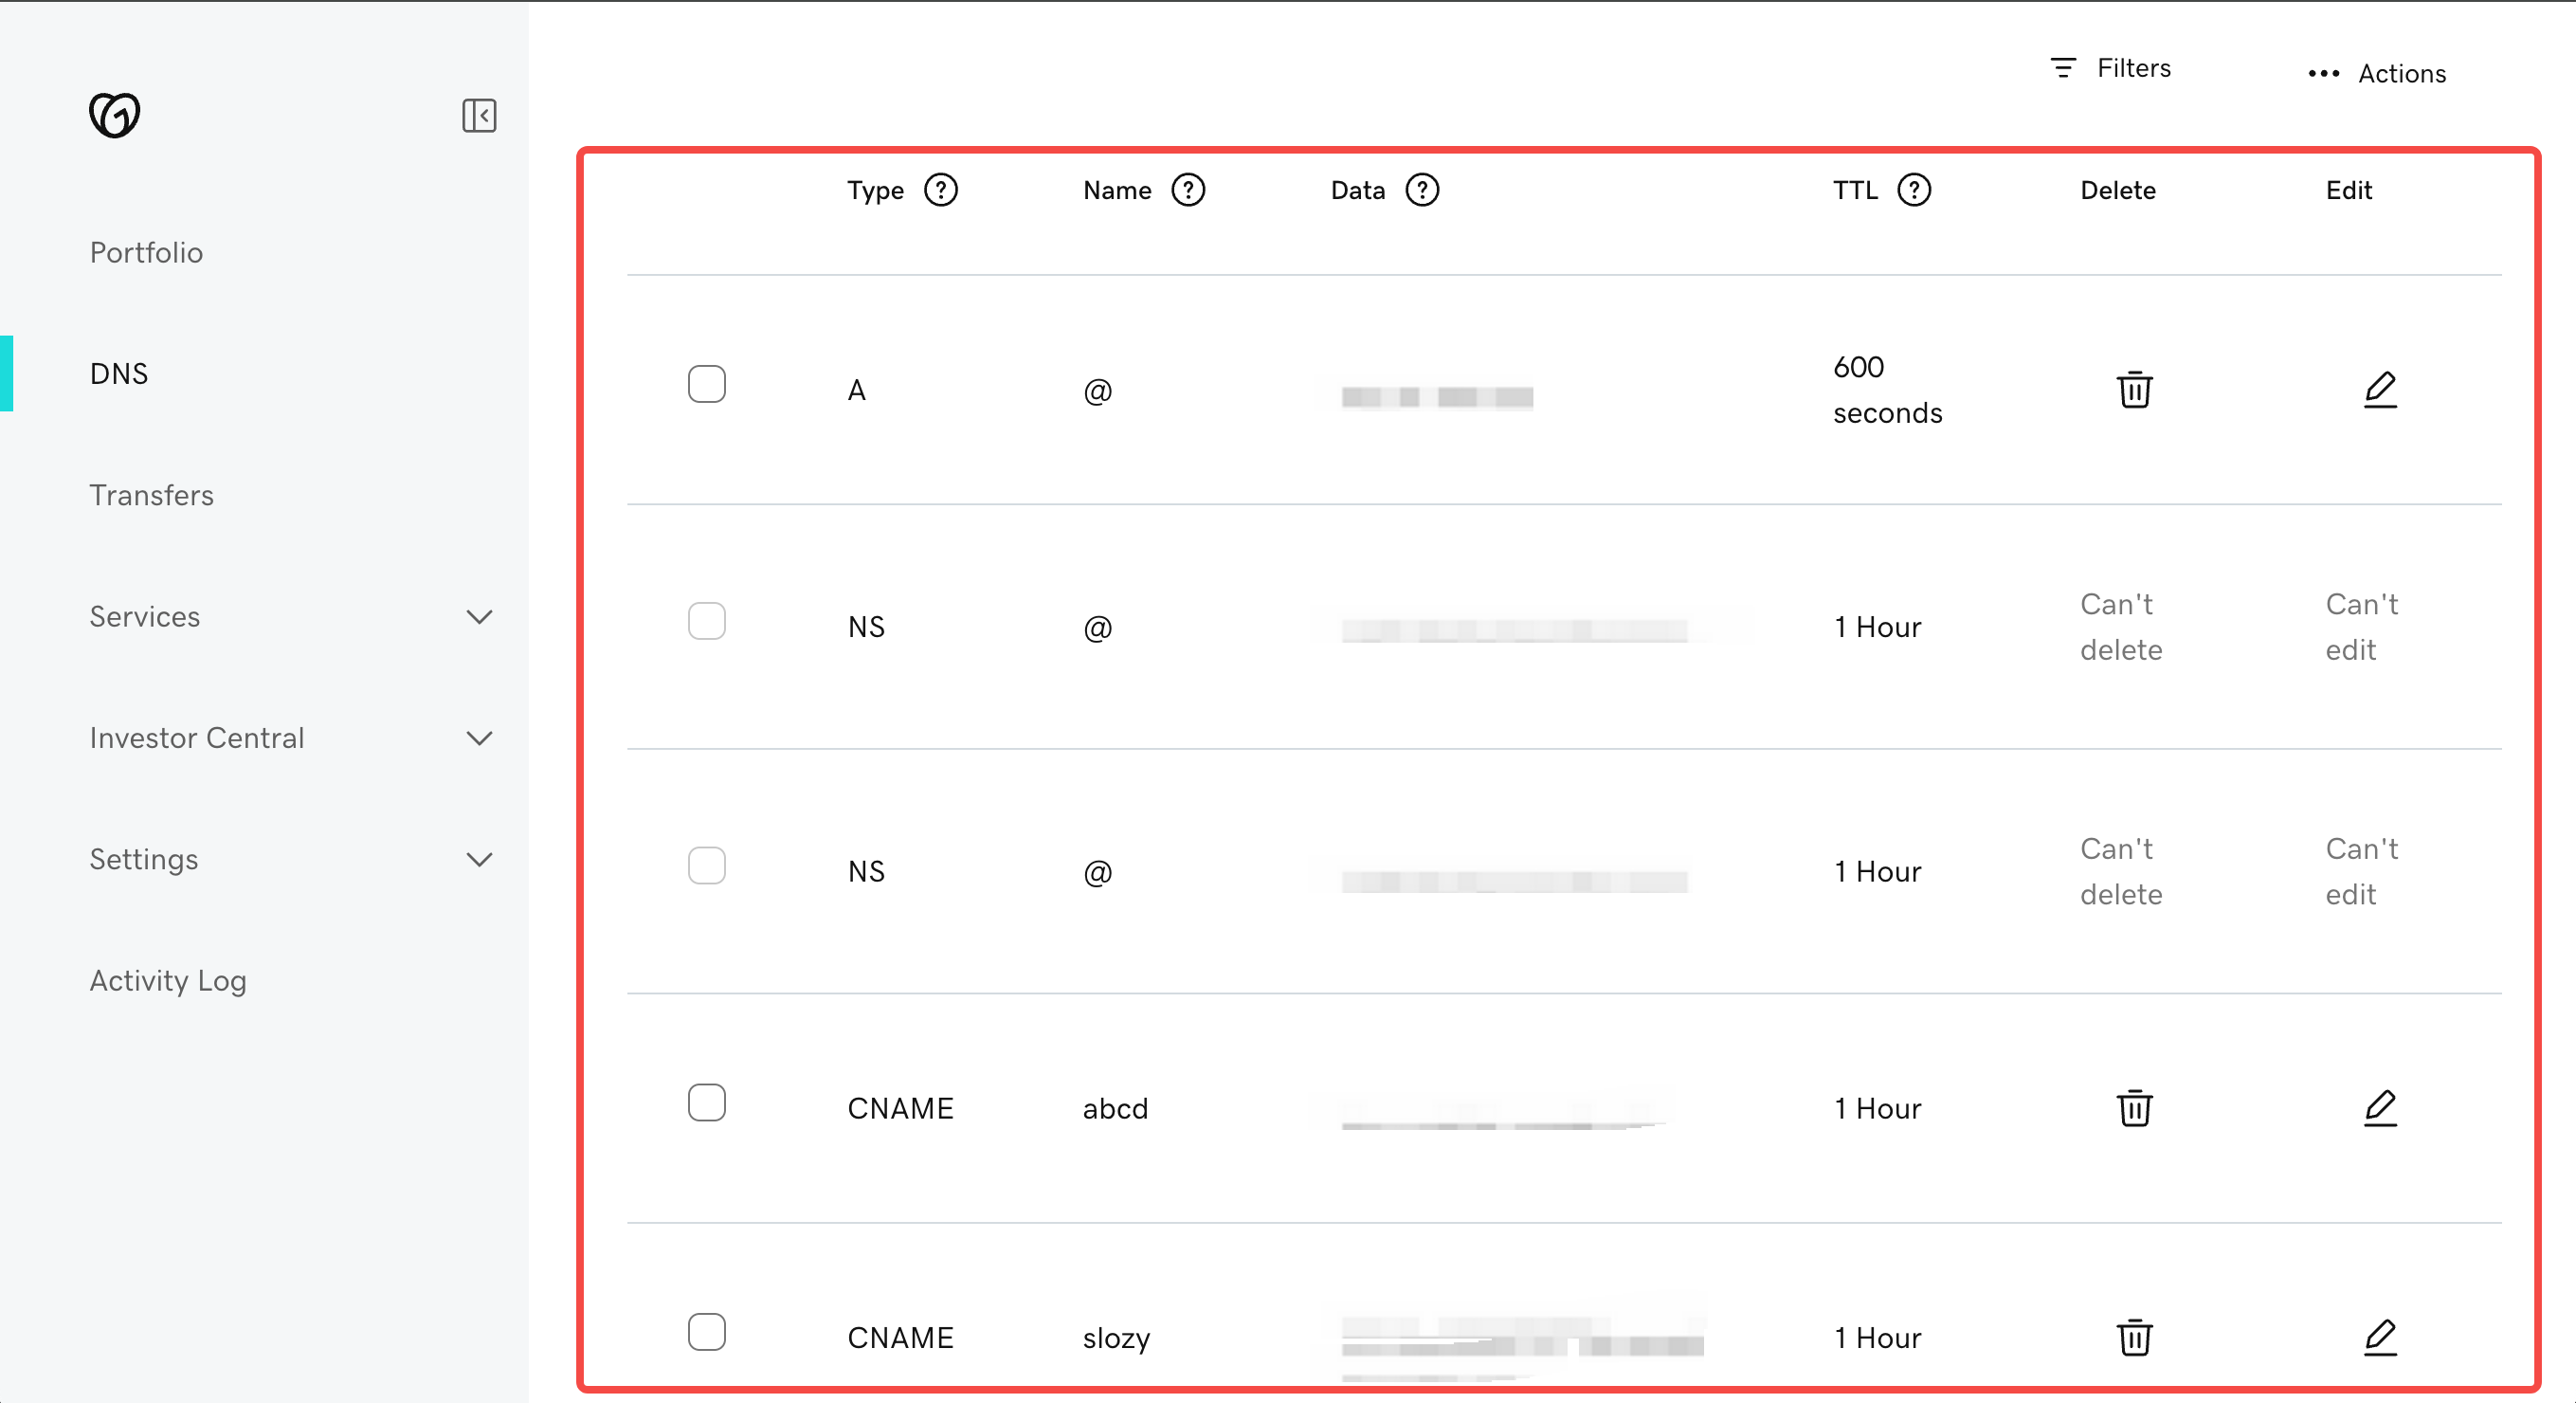
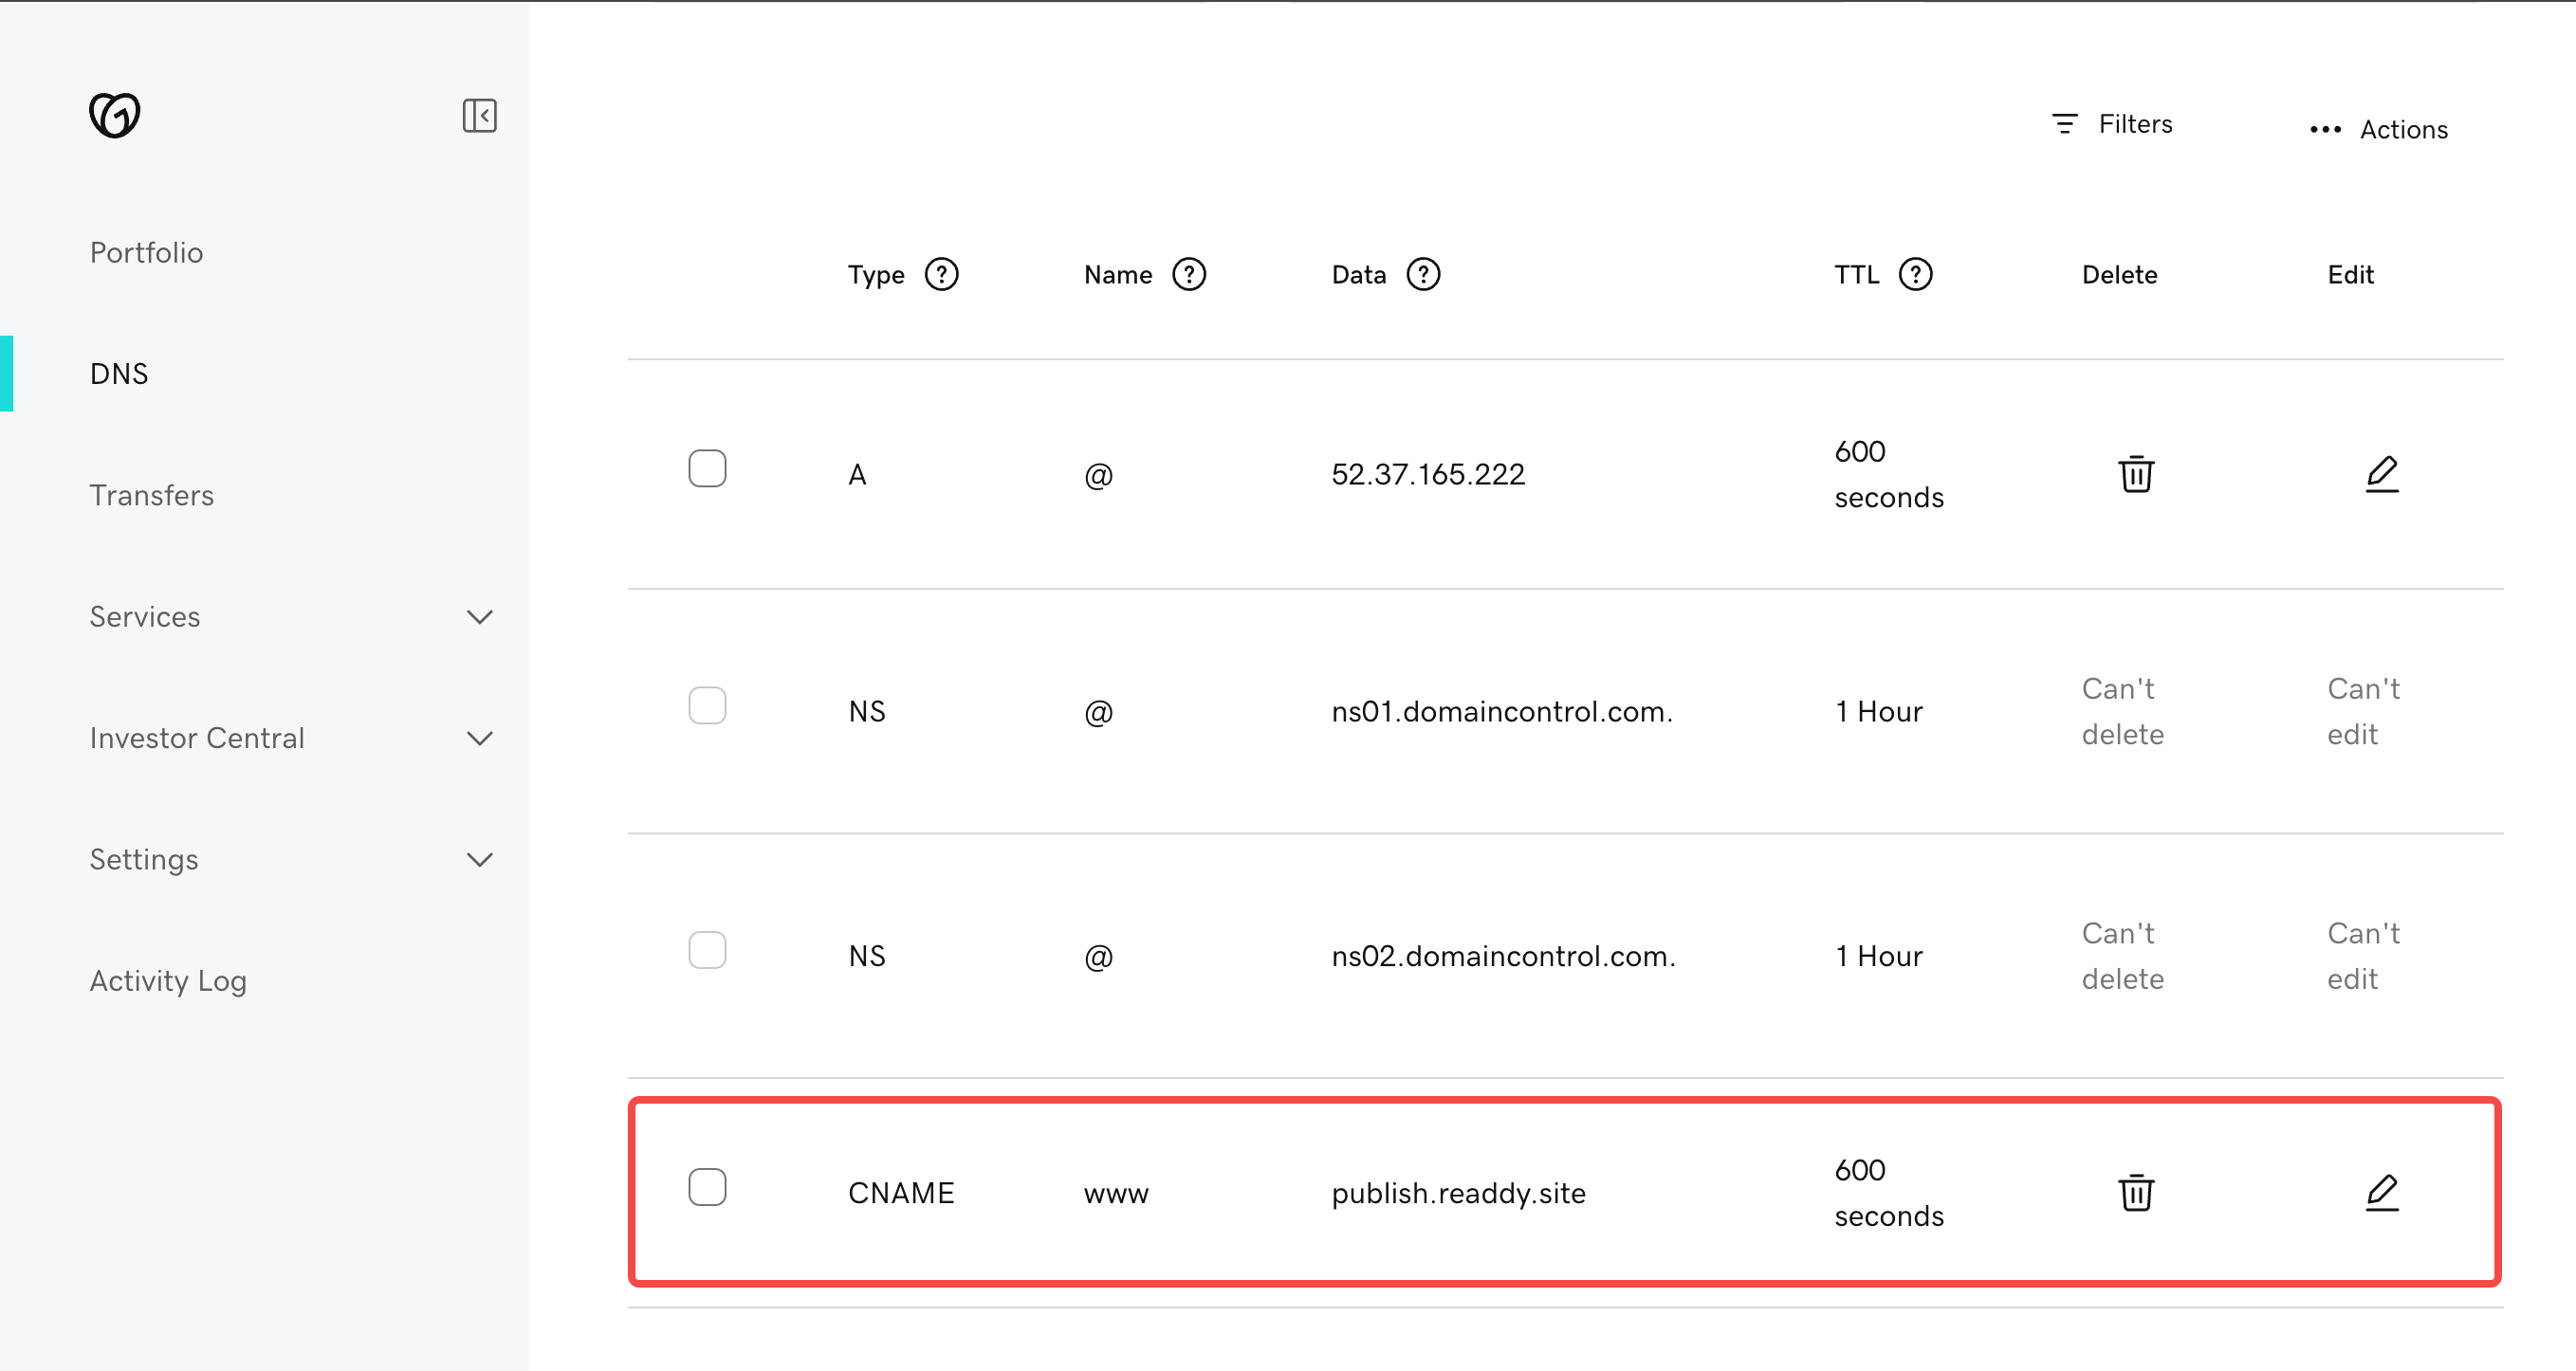
- If you connect a root domain, such as
xxxxxx.com,you need to update A + TXT - If you connect a subdomain, such as
www.xxxxxx.com,you need to update CNAME + TXT
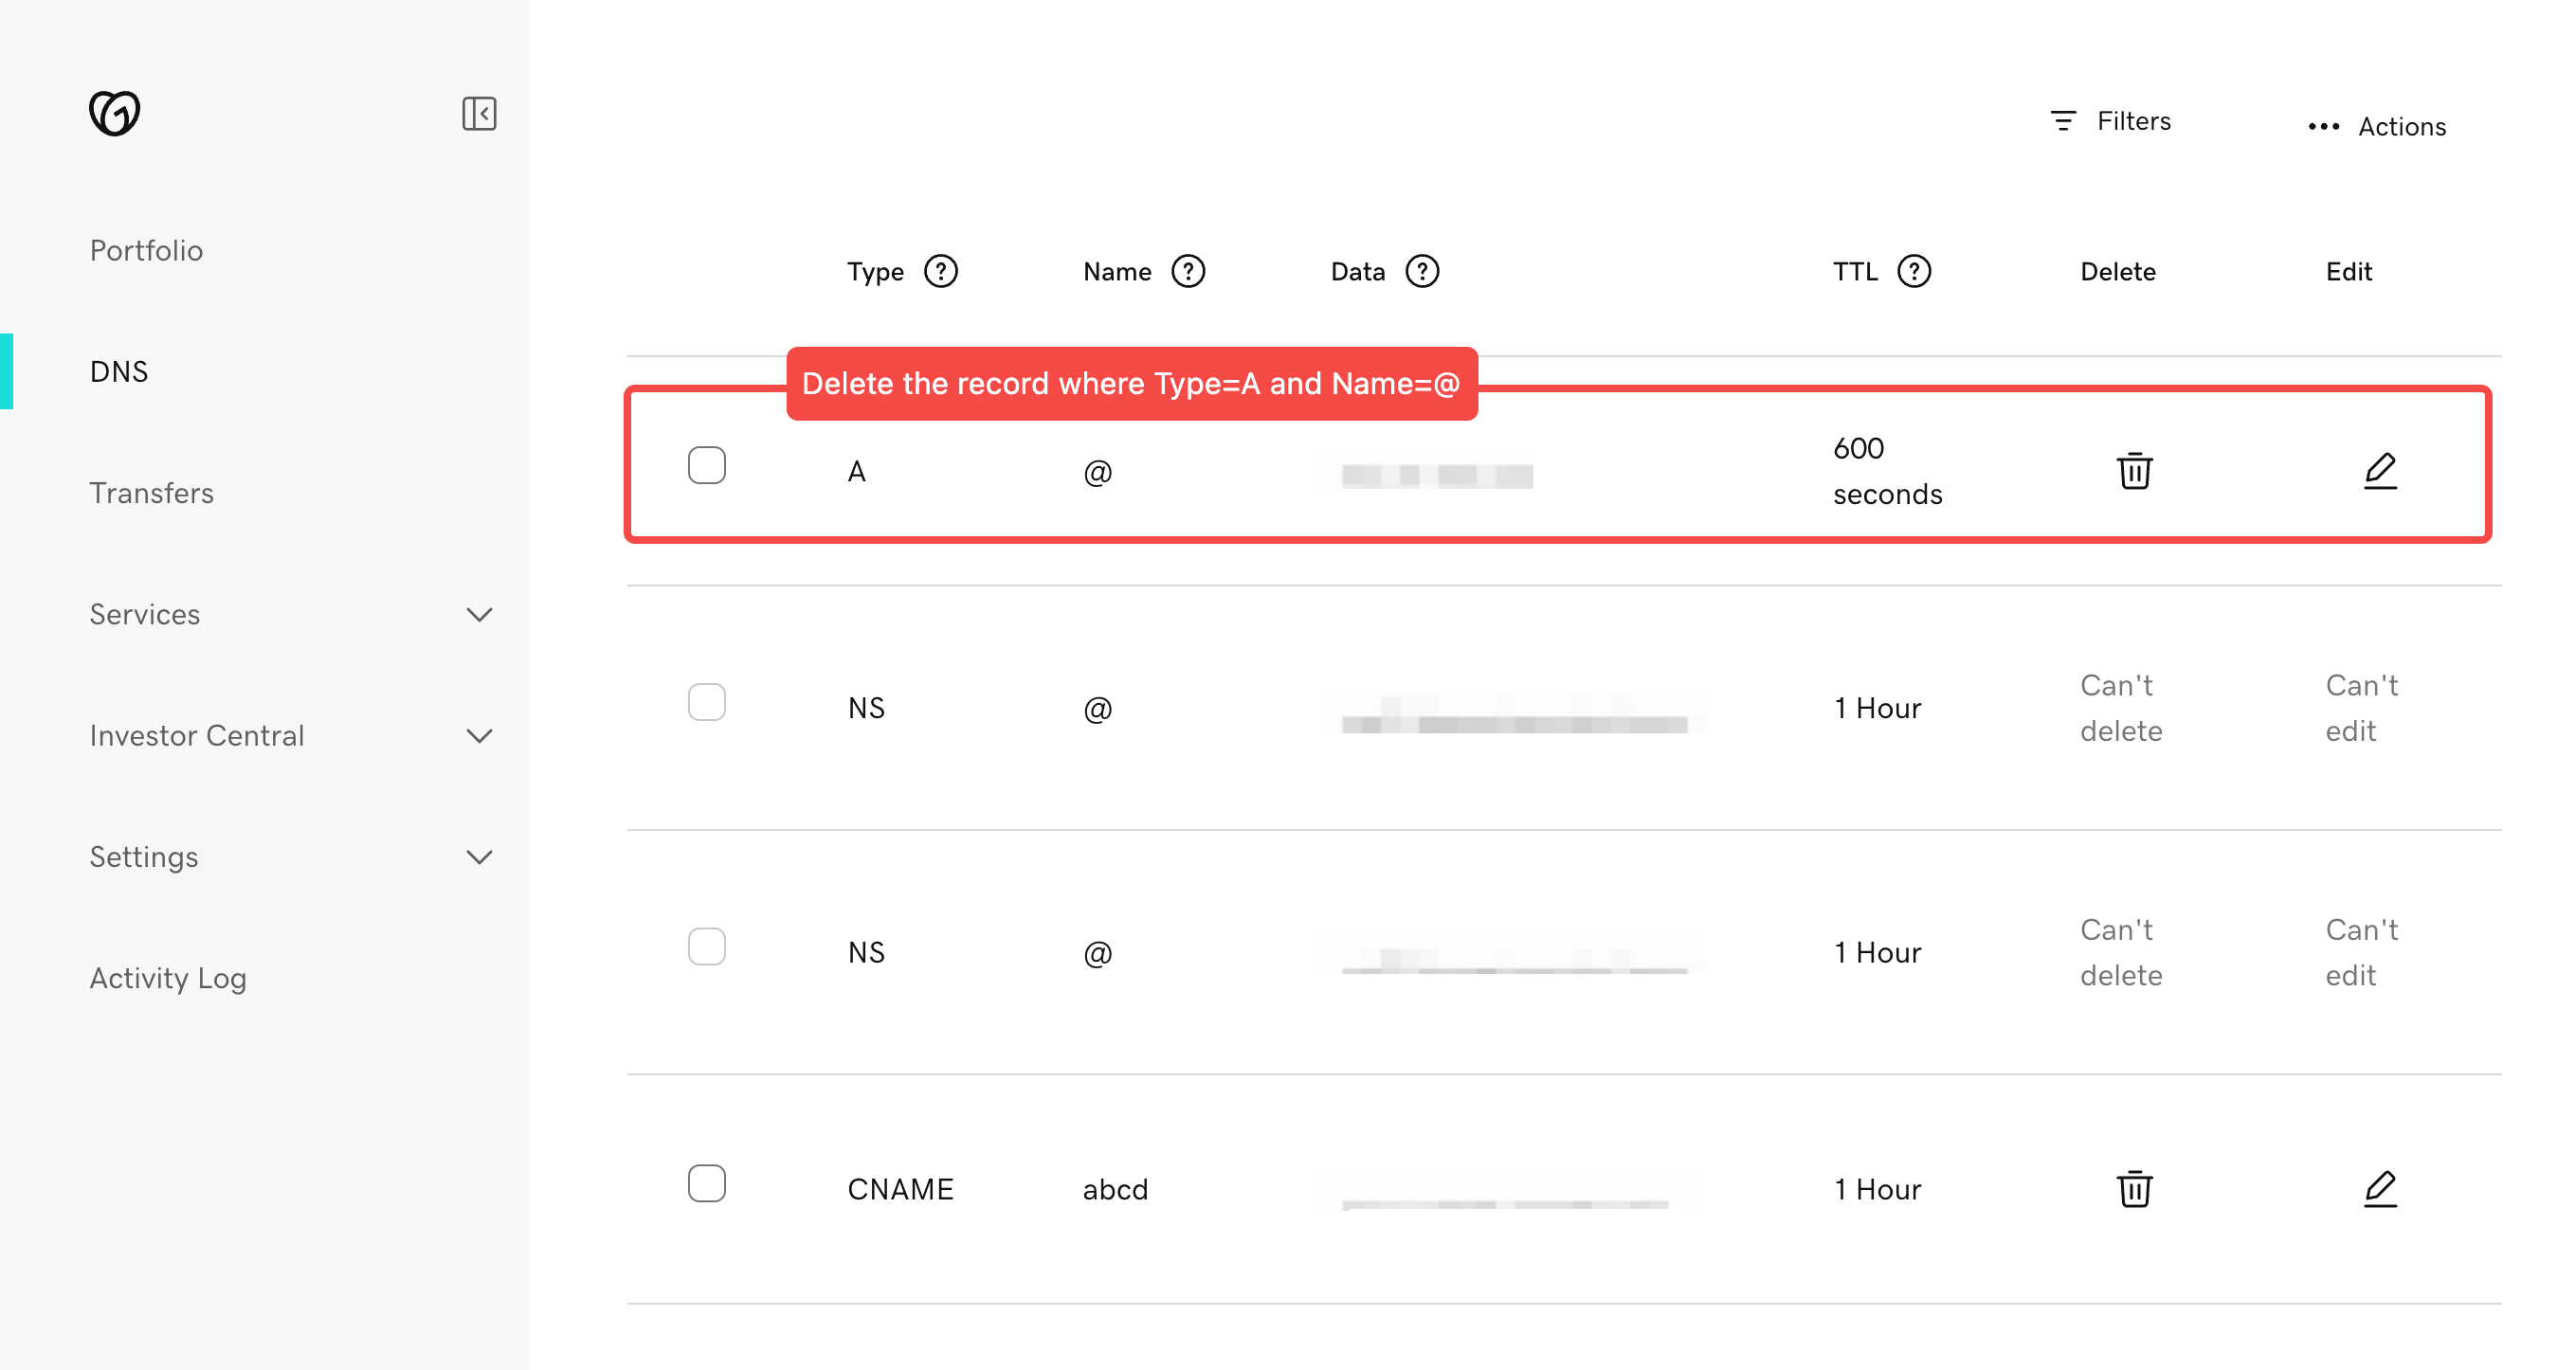
Type: A
Name: @
Value: 52.37.165.222
TTL: 600
Hostinger
Hostinger
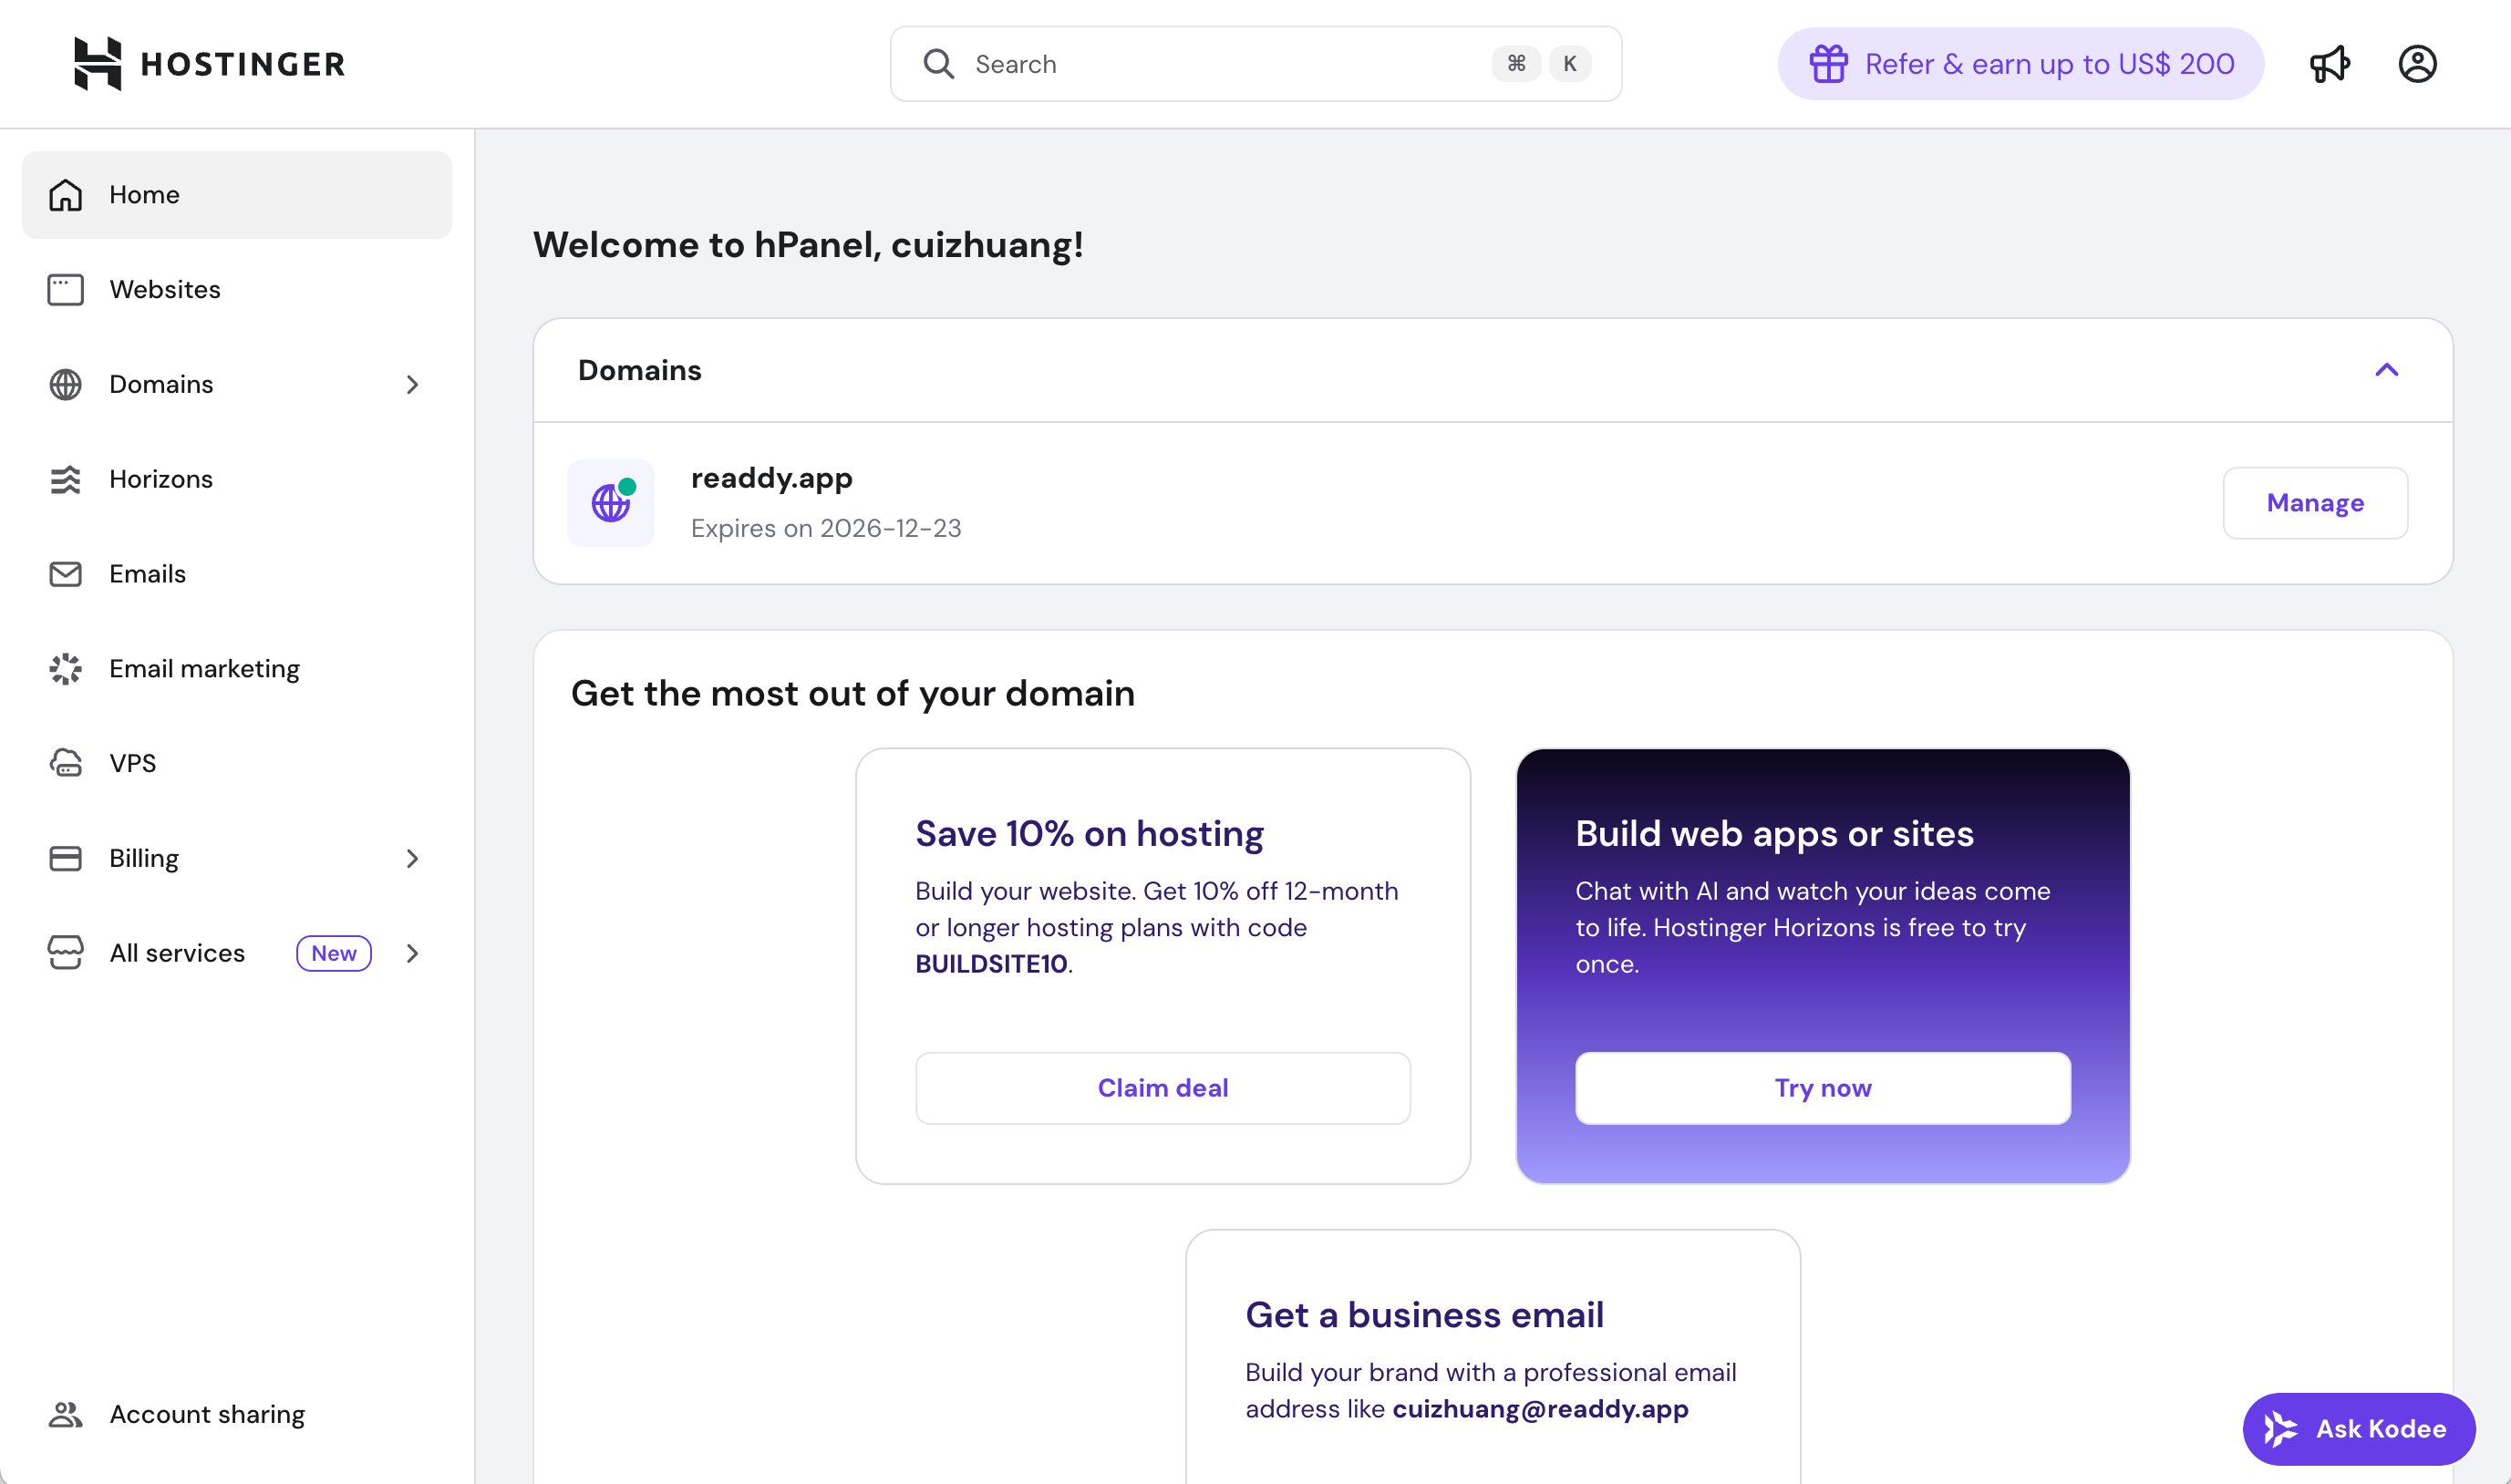
- Open a new tab in your browser, go to https://hpanel.hostinger.com/ and log in. You will see your domain on the home page.
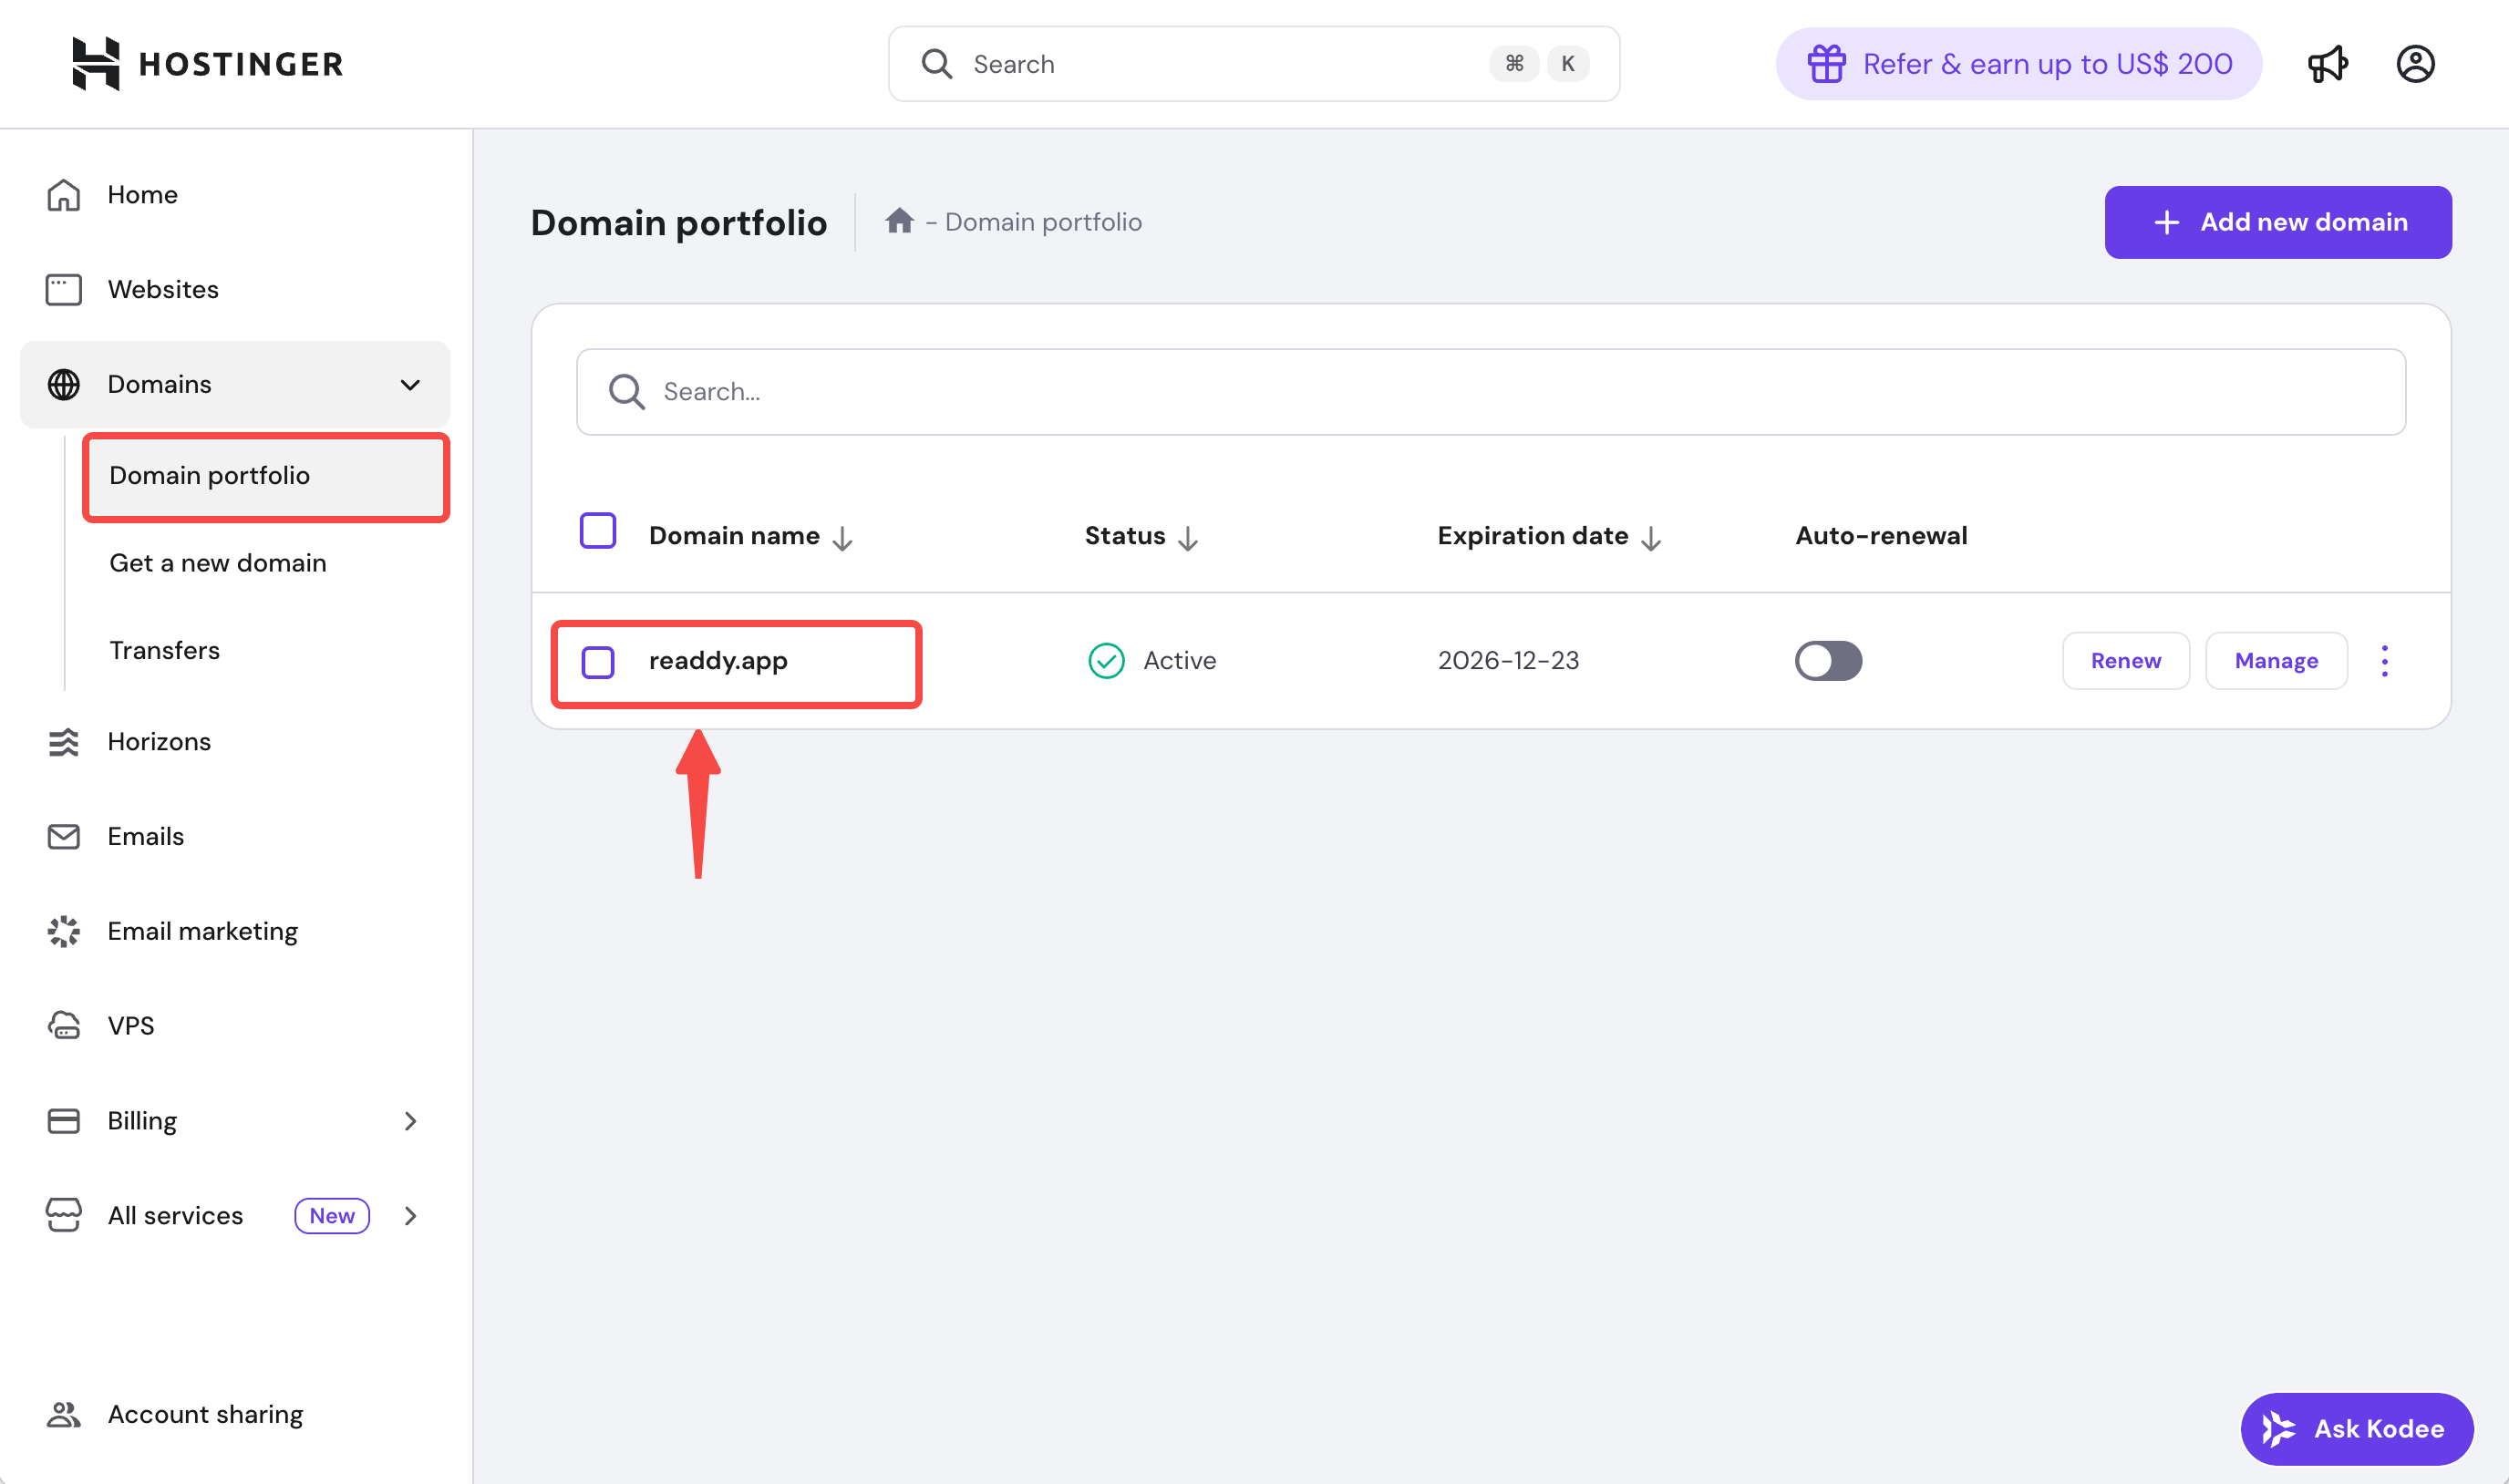
- Go to the Domain portfolio page and click the domain you want to connect.
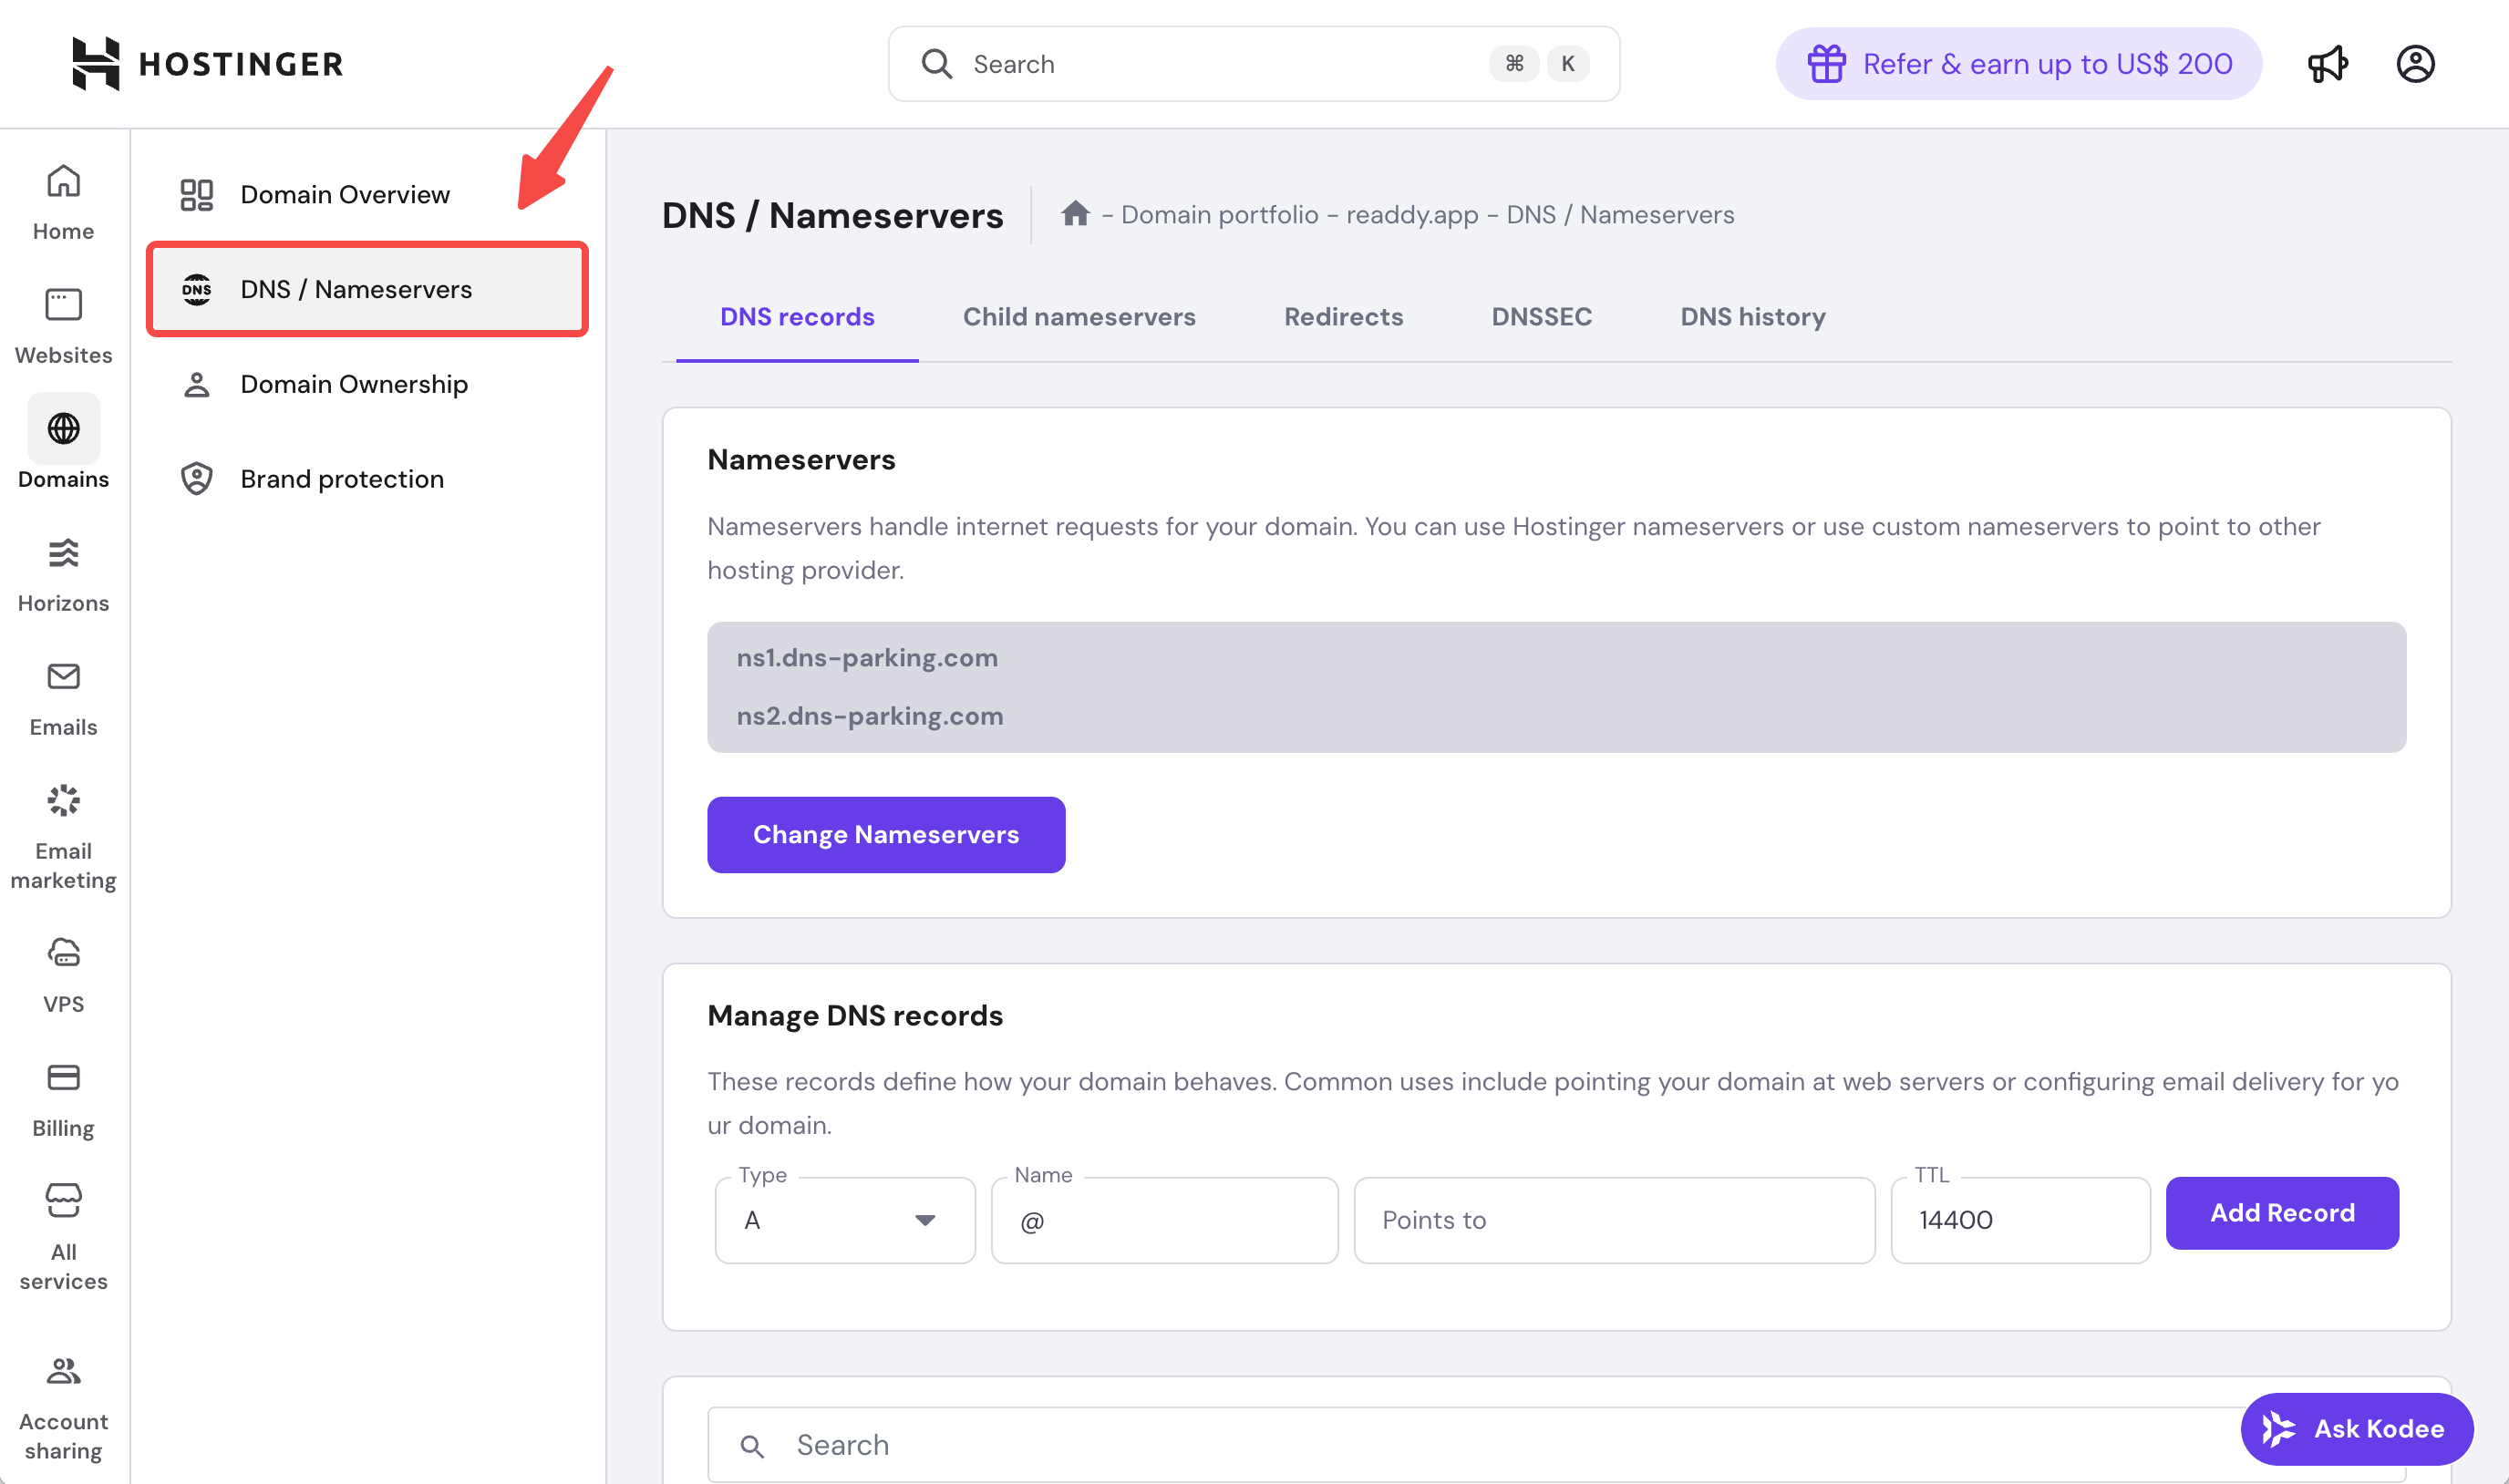
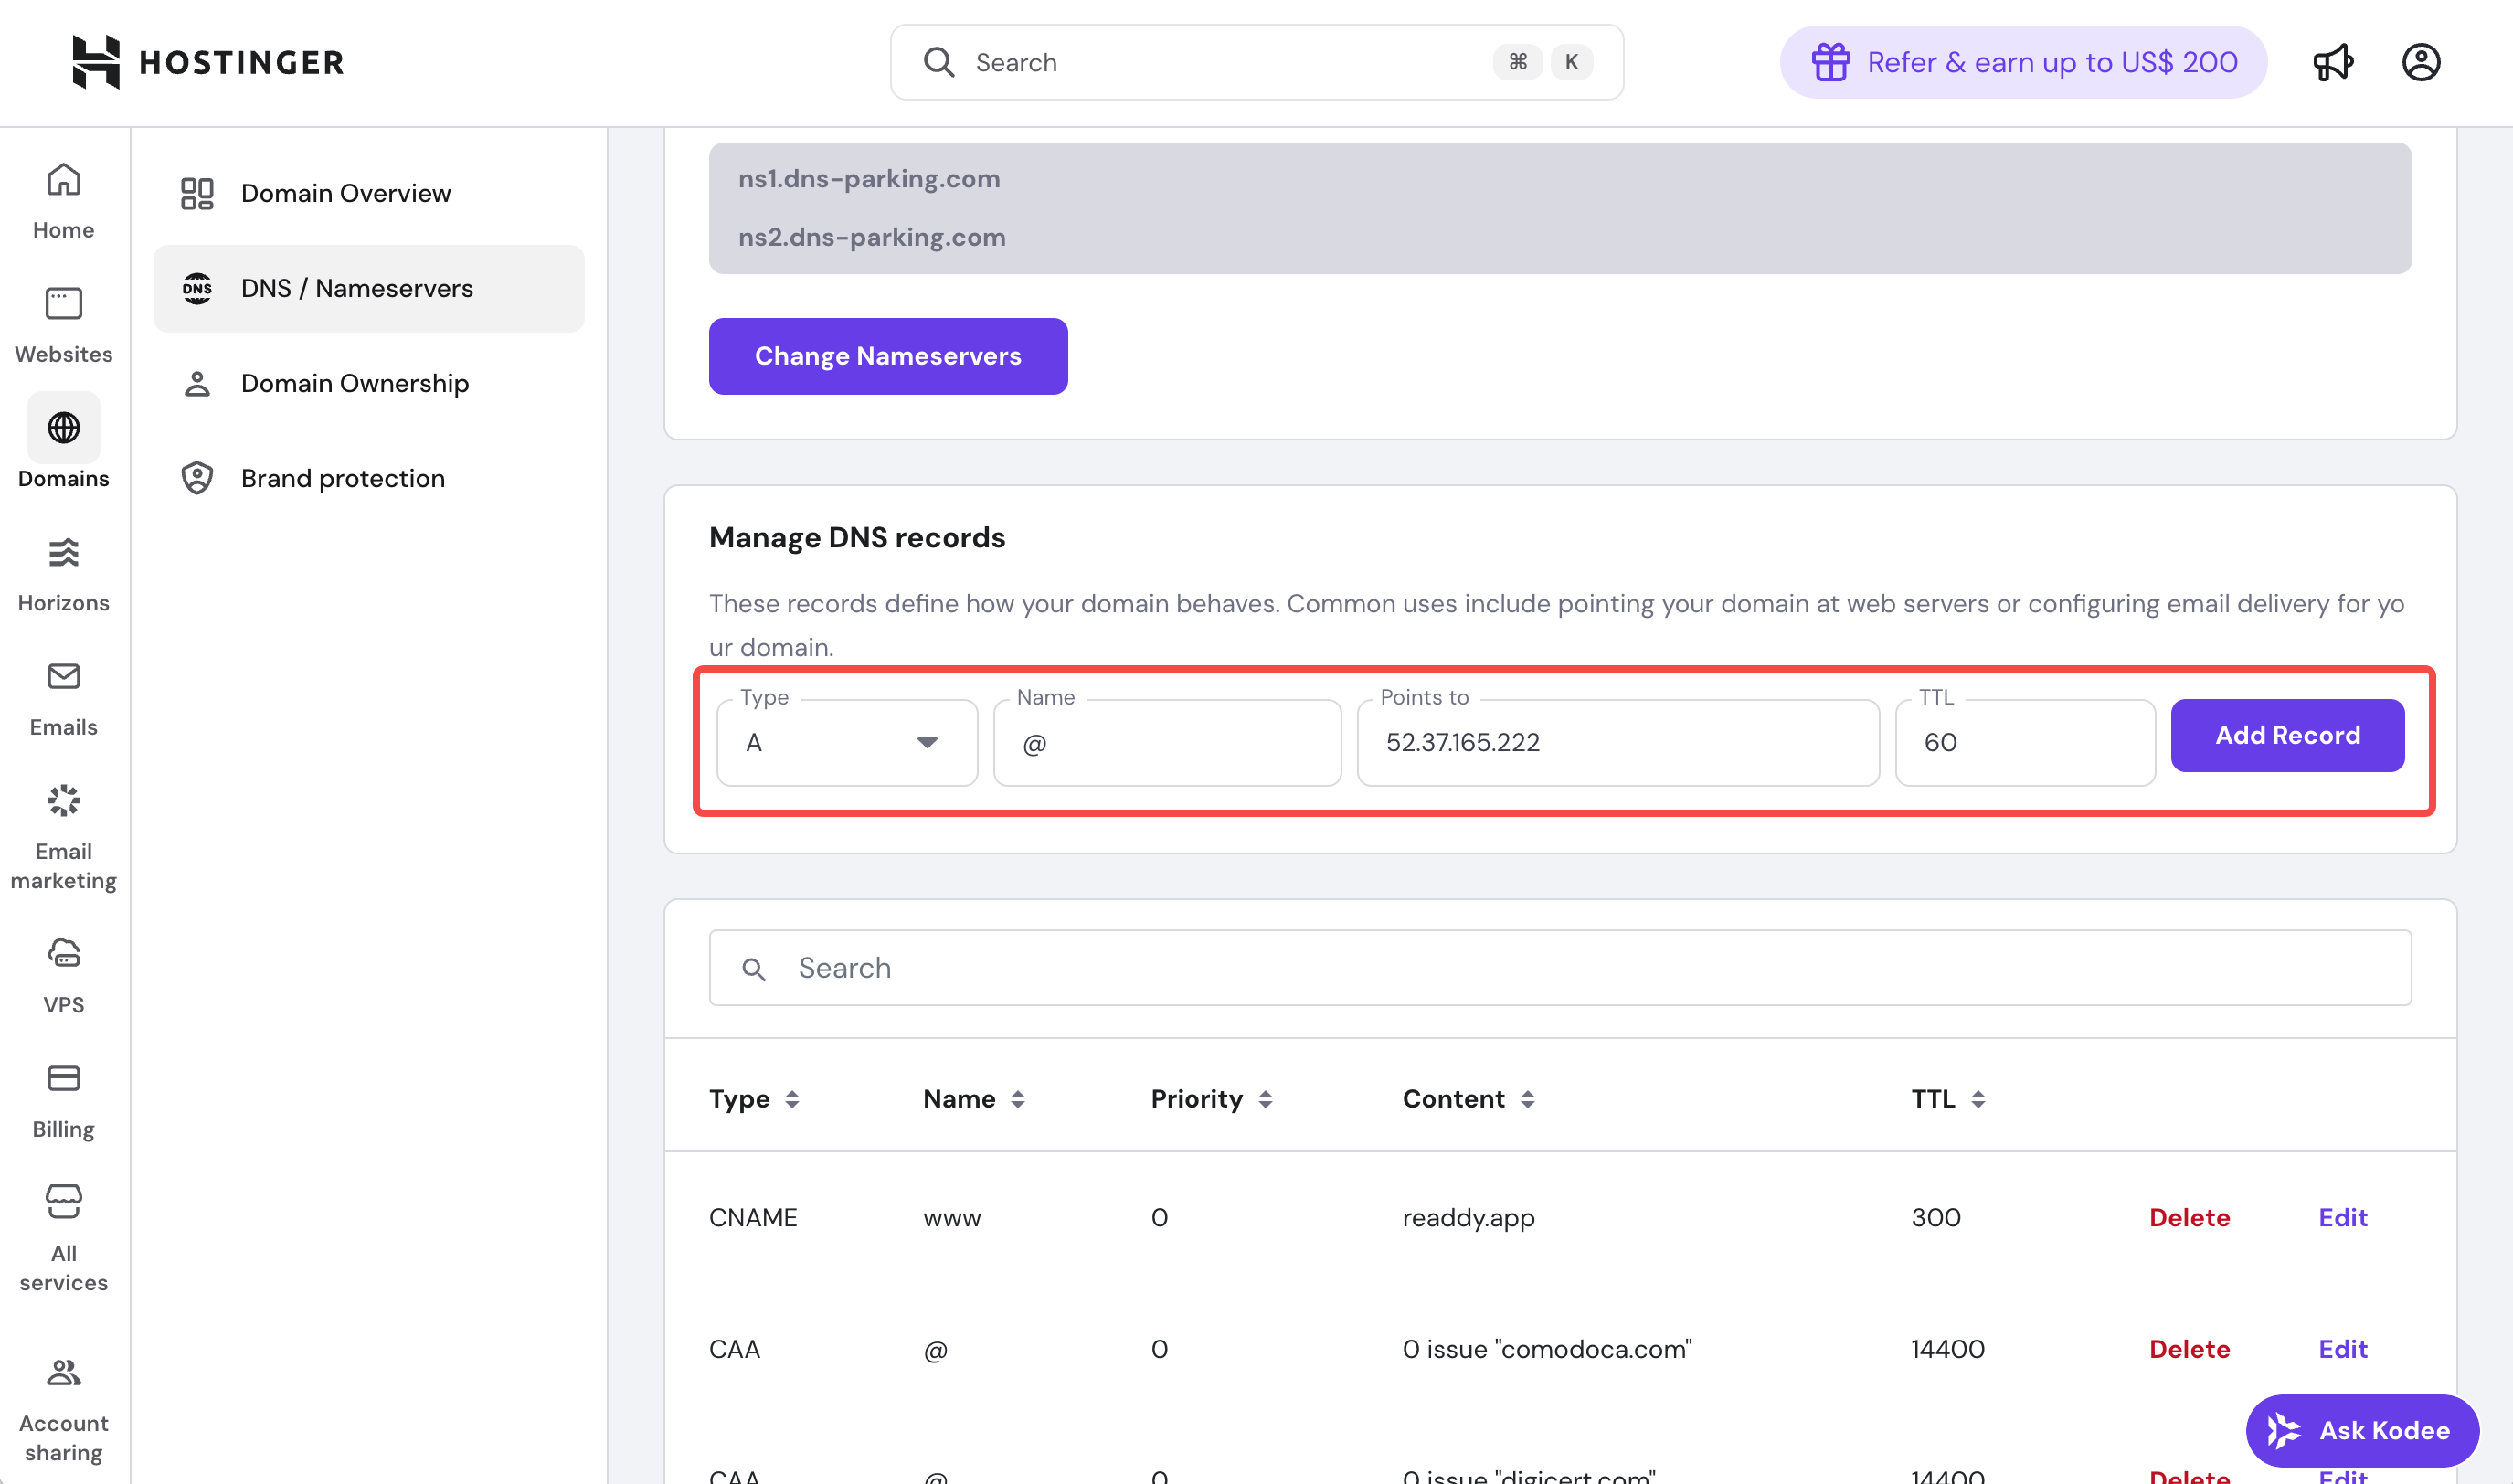
- Navigate to DNS / Nameservers page where you can manage the DNS records.
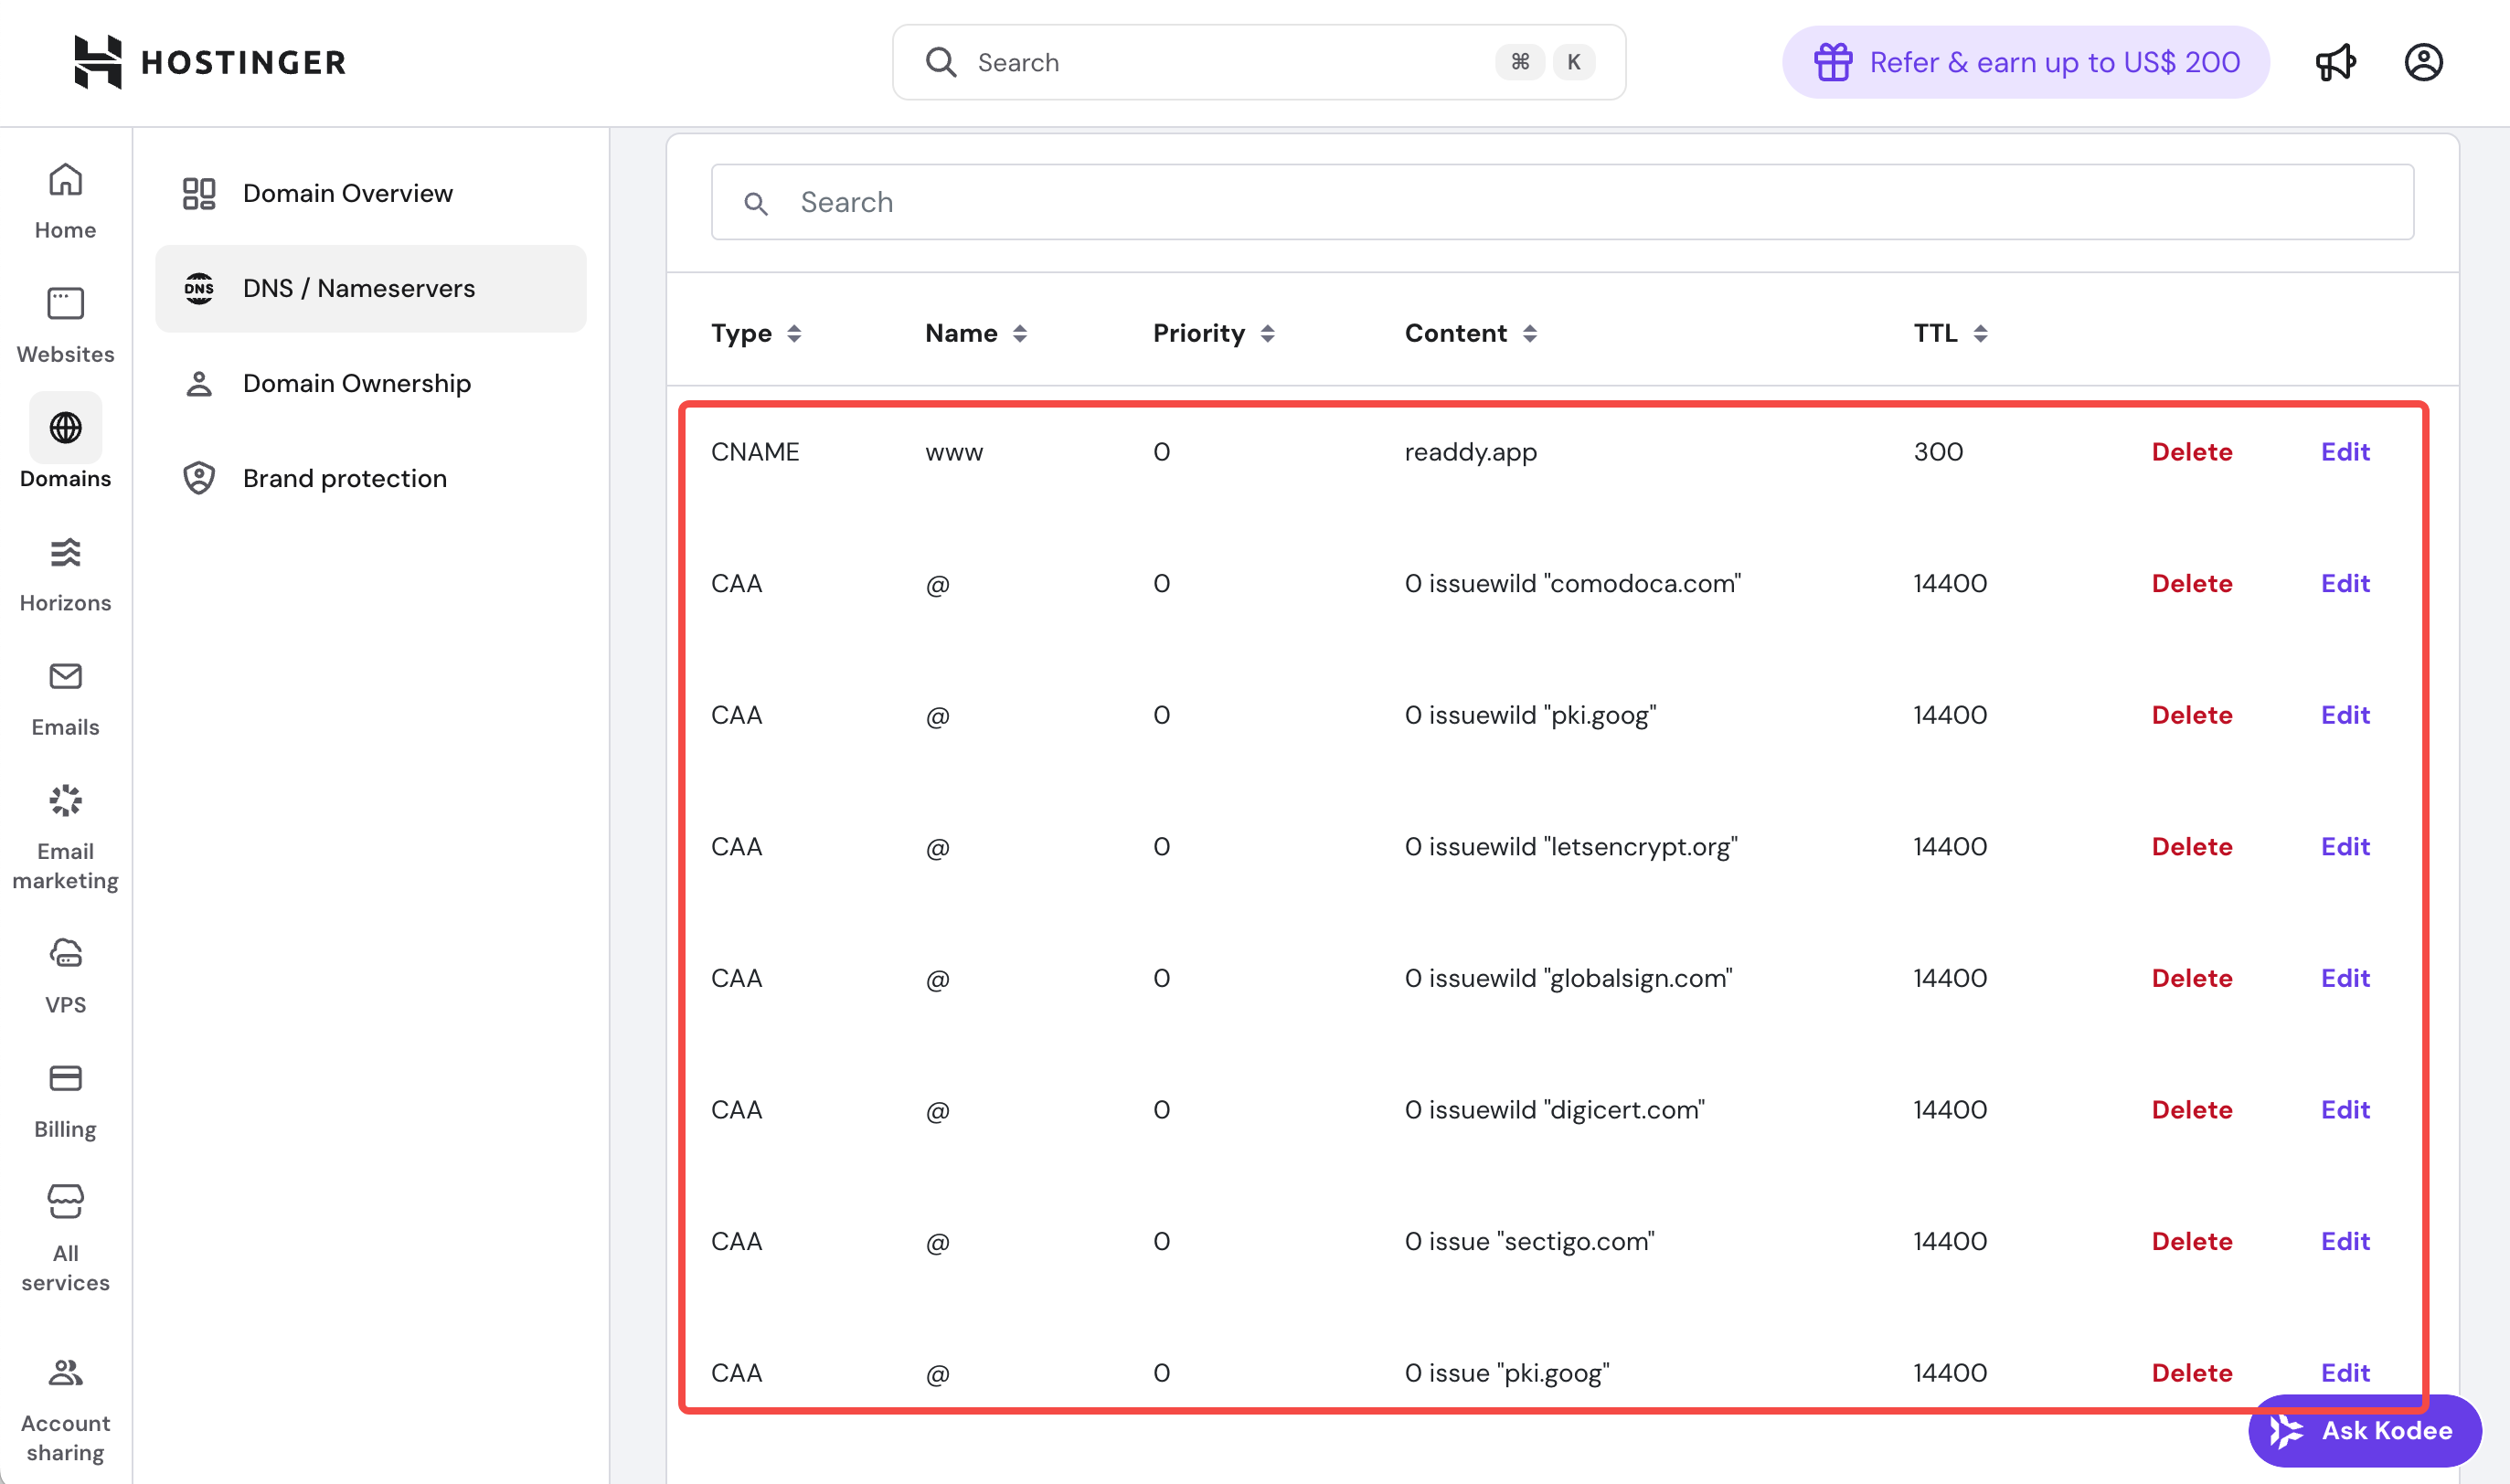
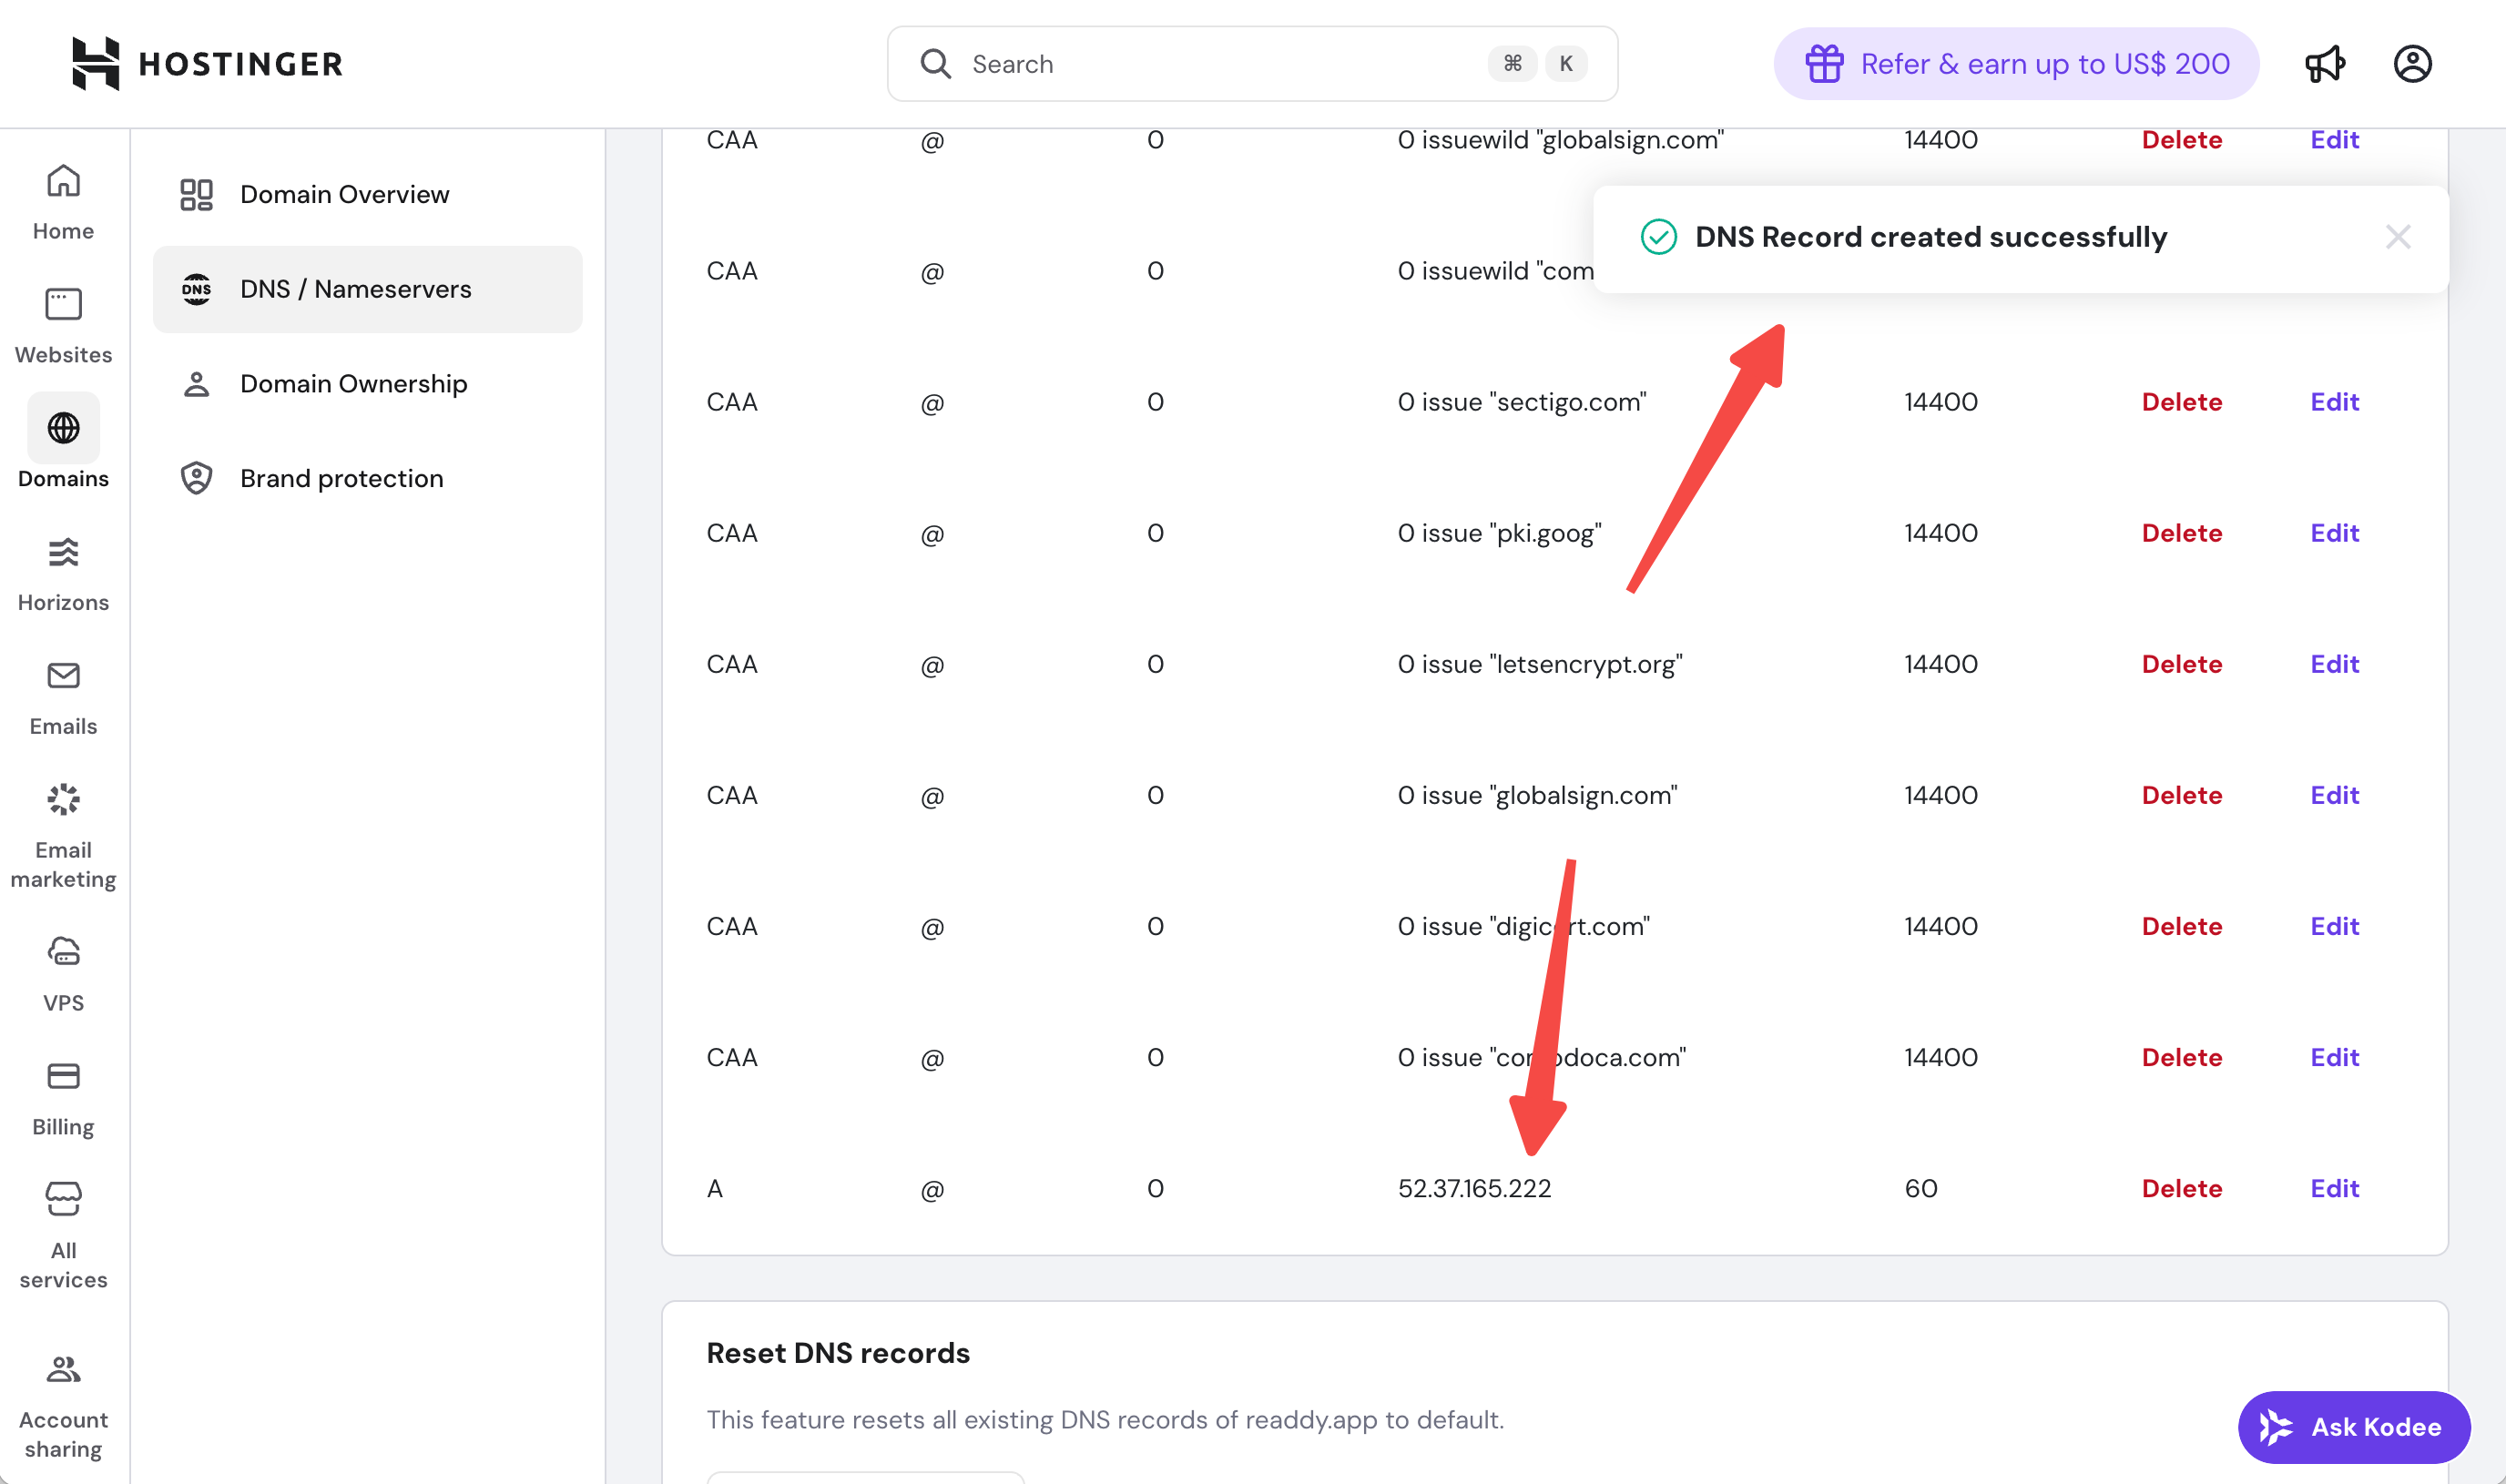
- Scroll down on the DNS / Nameservers page, and you will see all the DNS records for the current domain.
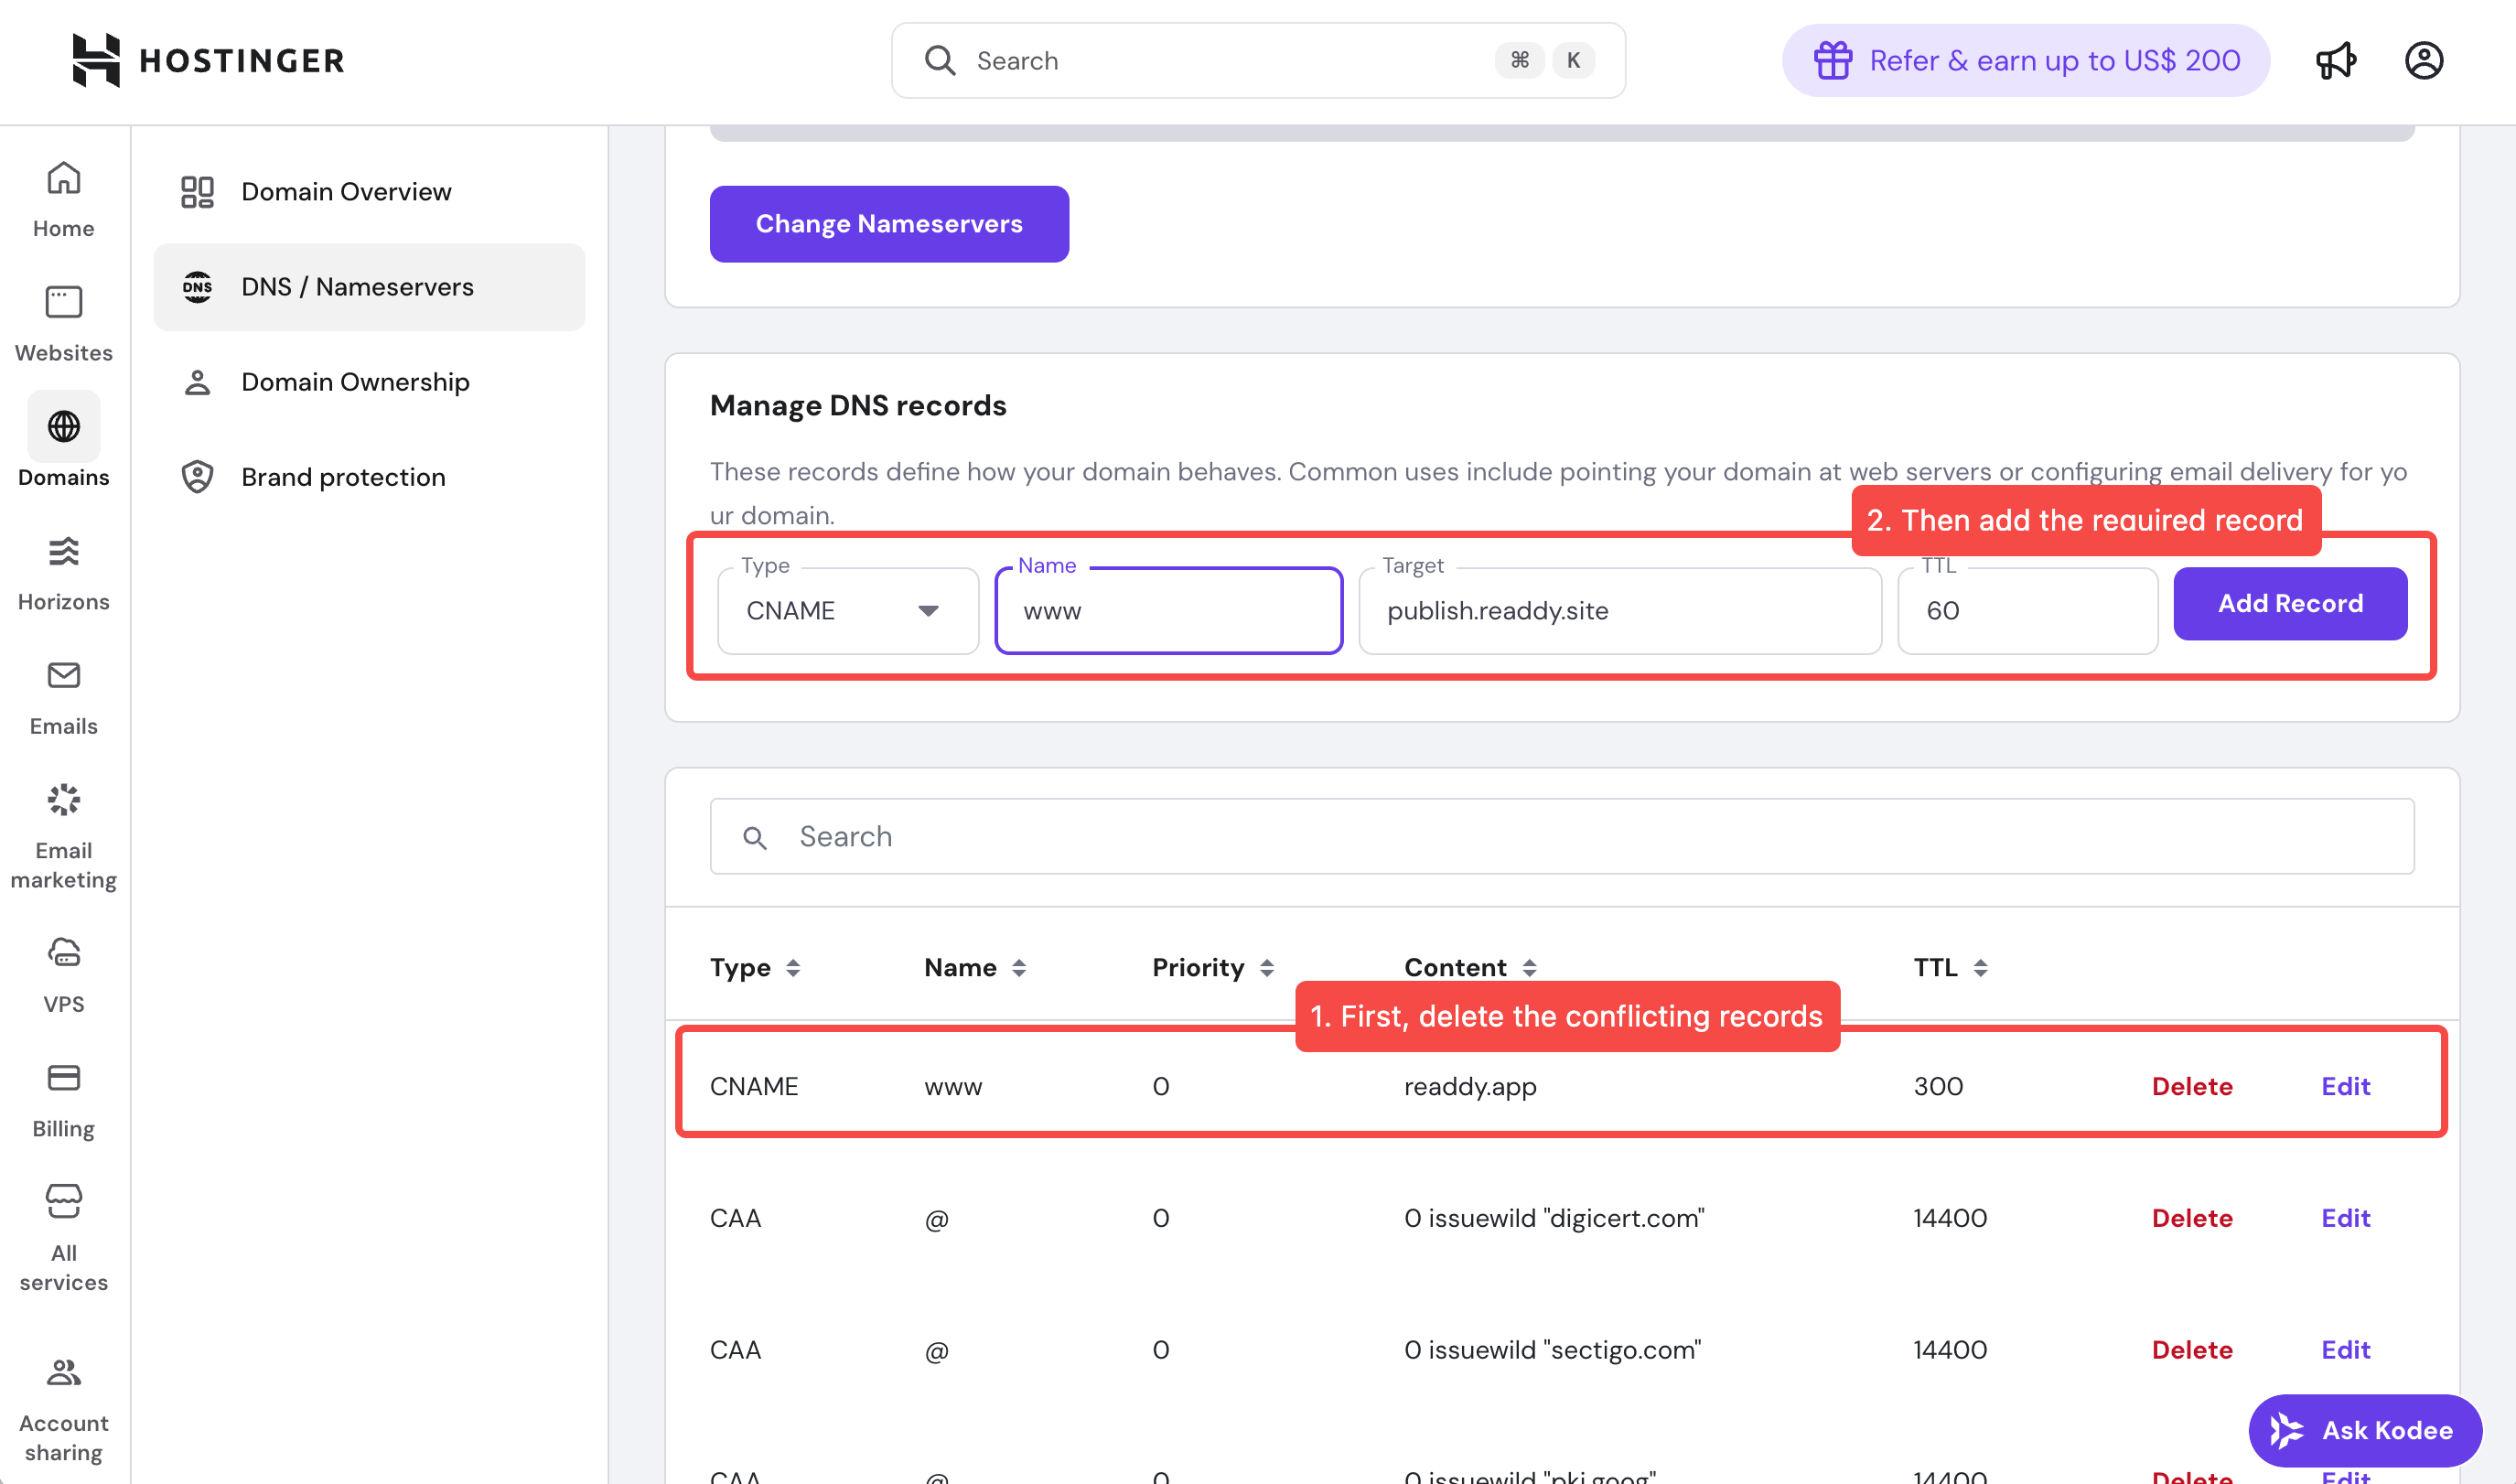
- If you connect a root domain, such as
xxxxxx.com,you need to update A + TXT - If you connect a subdomain, such as
www.xxxxxx.com,you need to update CNAME + TXT
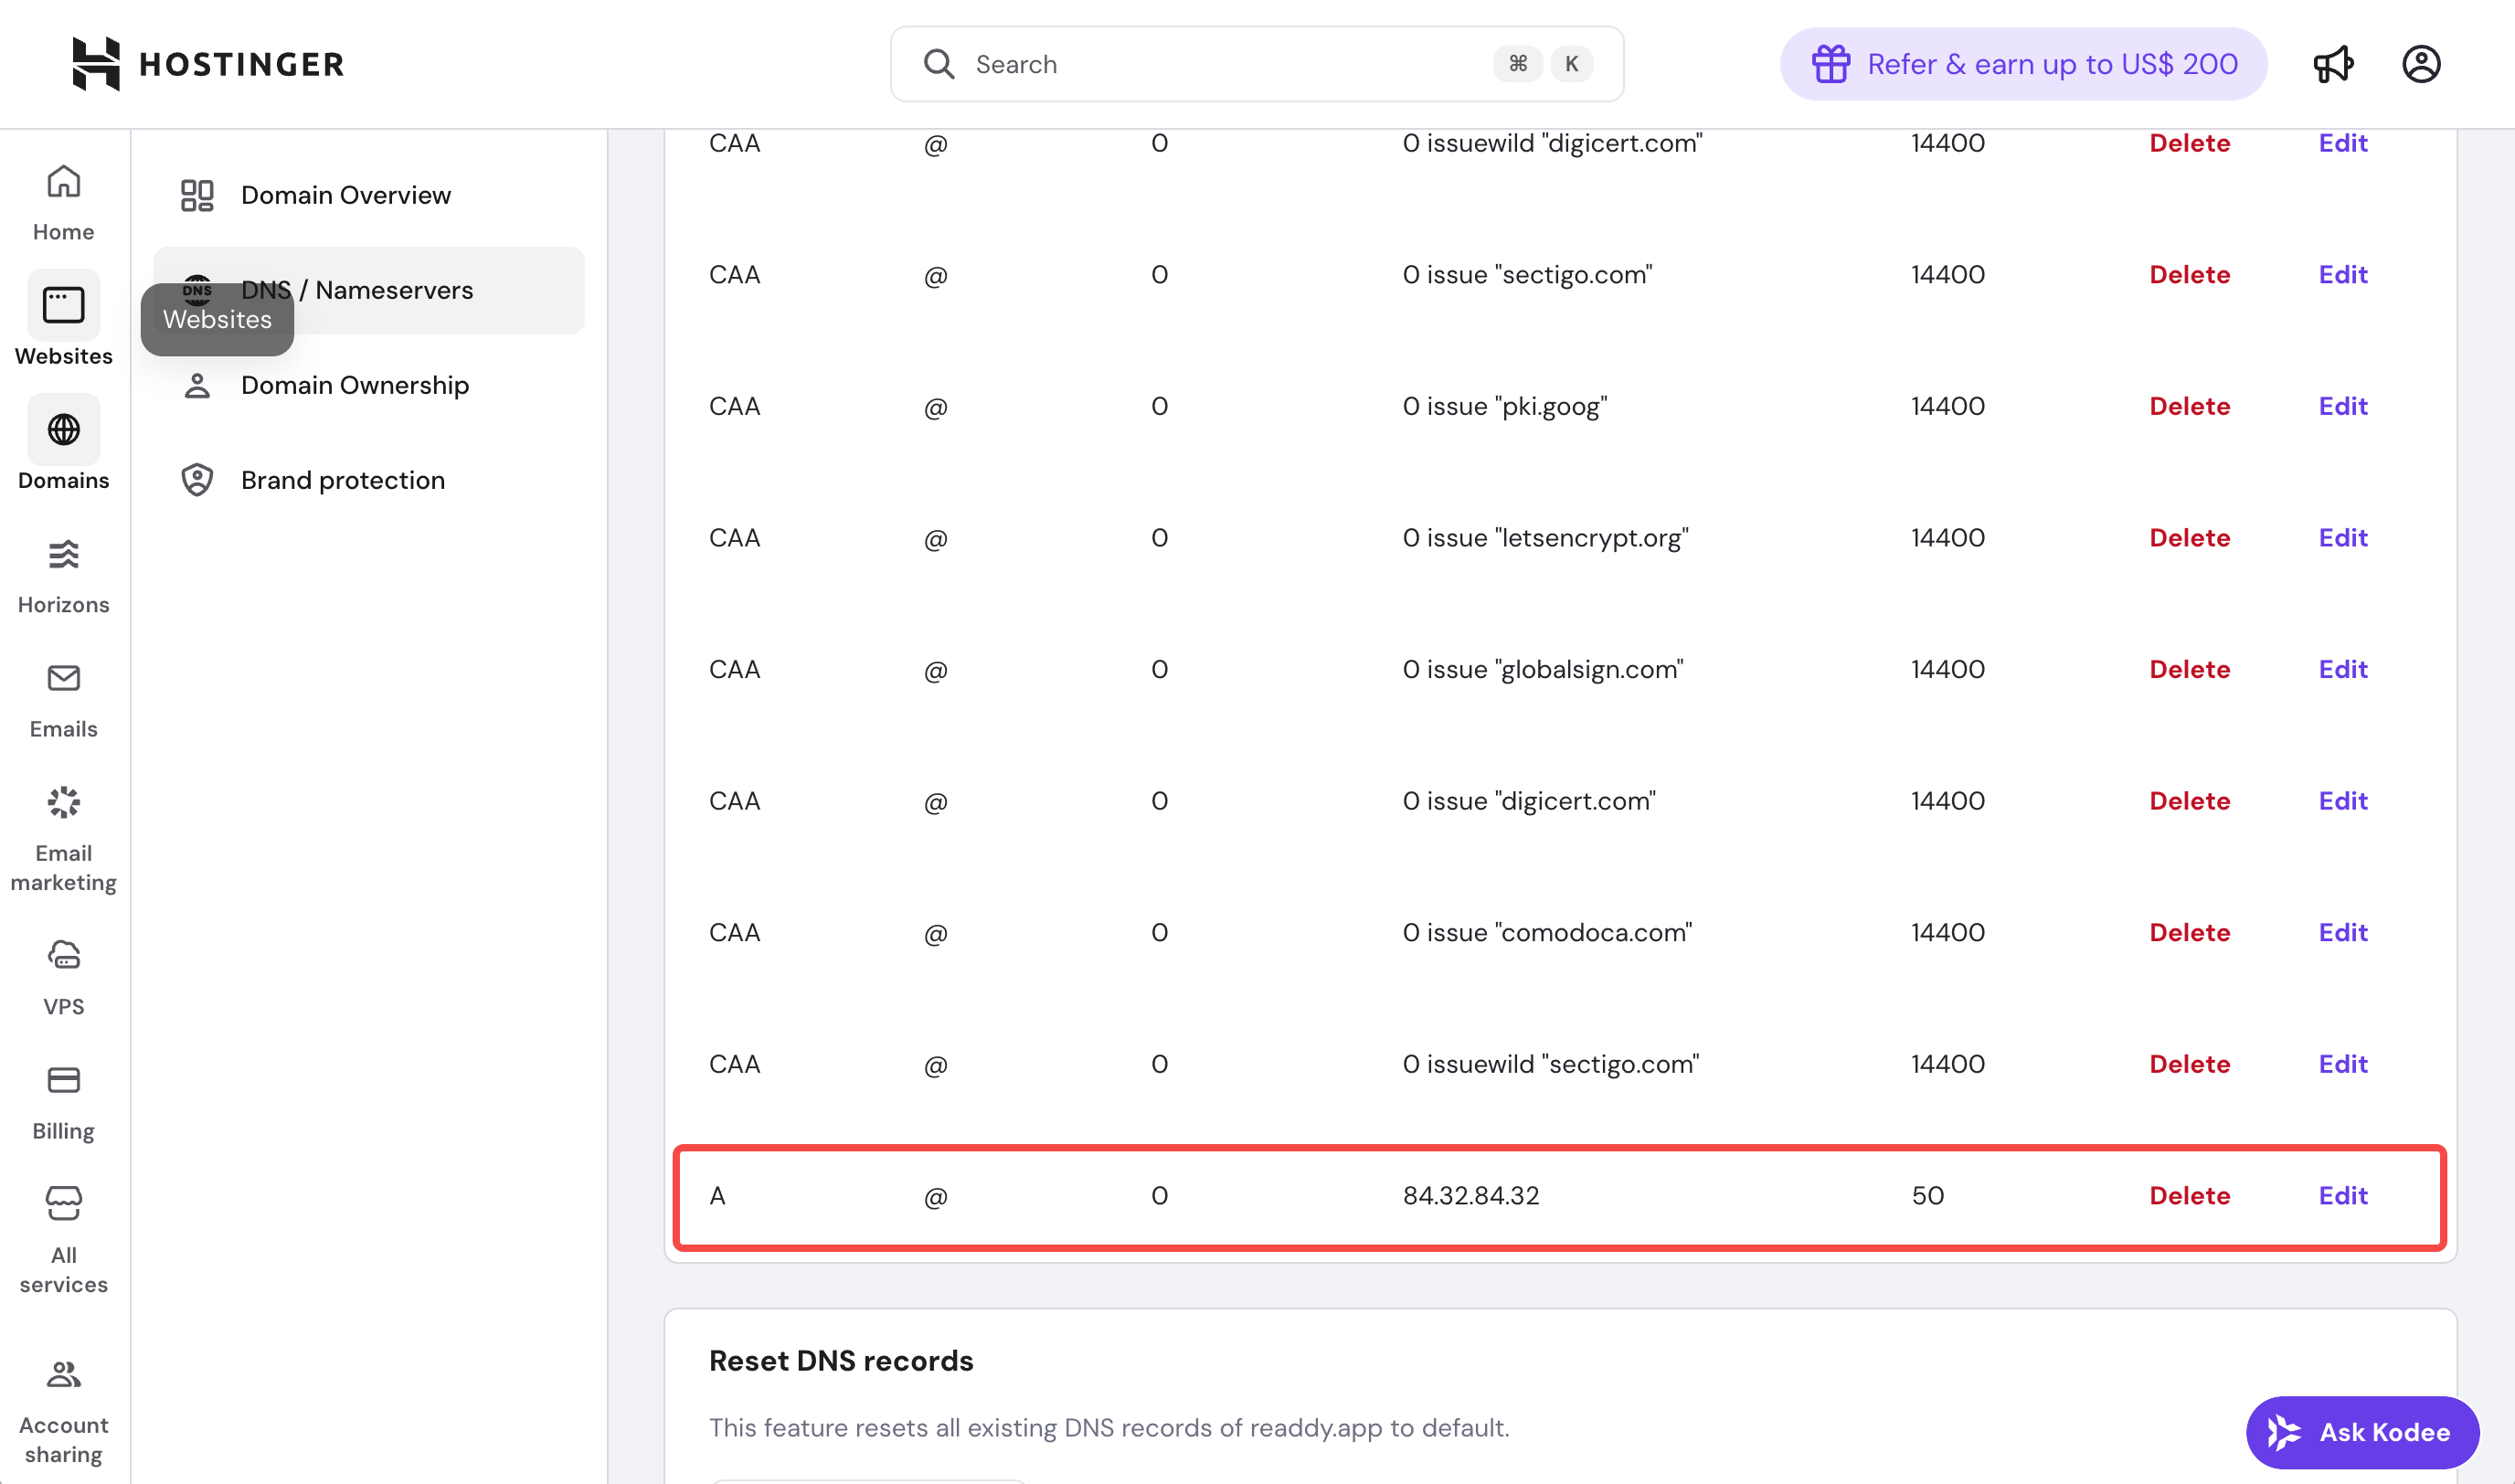
Type: A
Name: @
Value: 52.37.165.222
TTL: 60
Cloudflare
Cloudflare
- Open a new tab in your browser, go to https://dash.cloudflare.com/ and log in. You will see your domain on the Account home page.
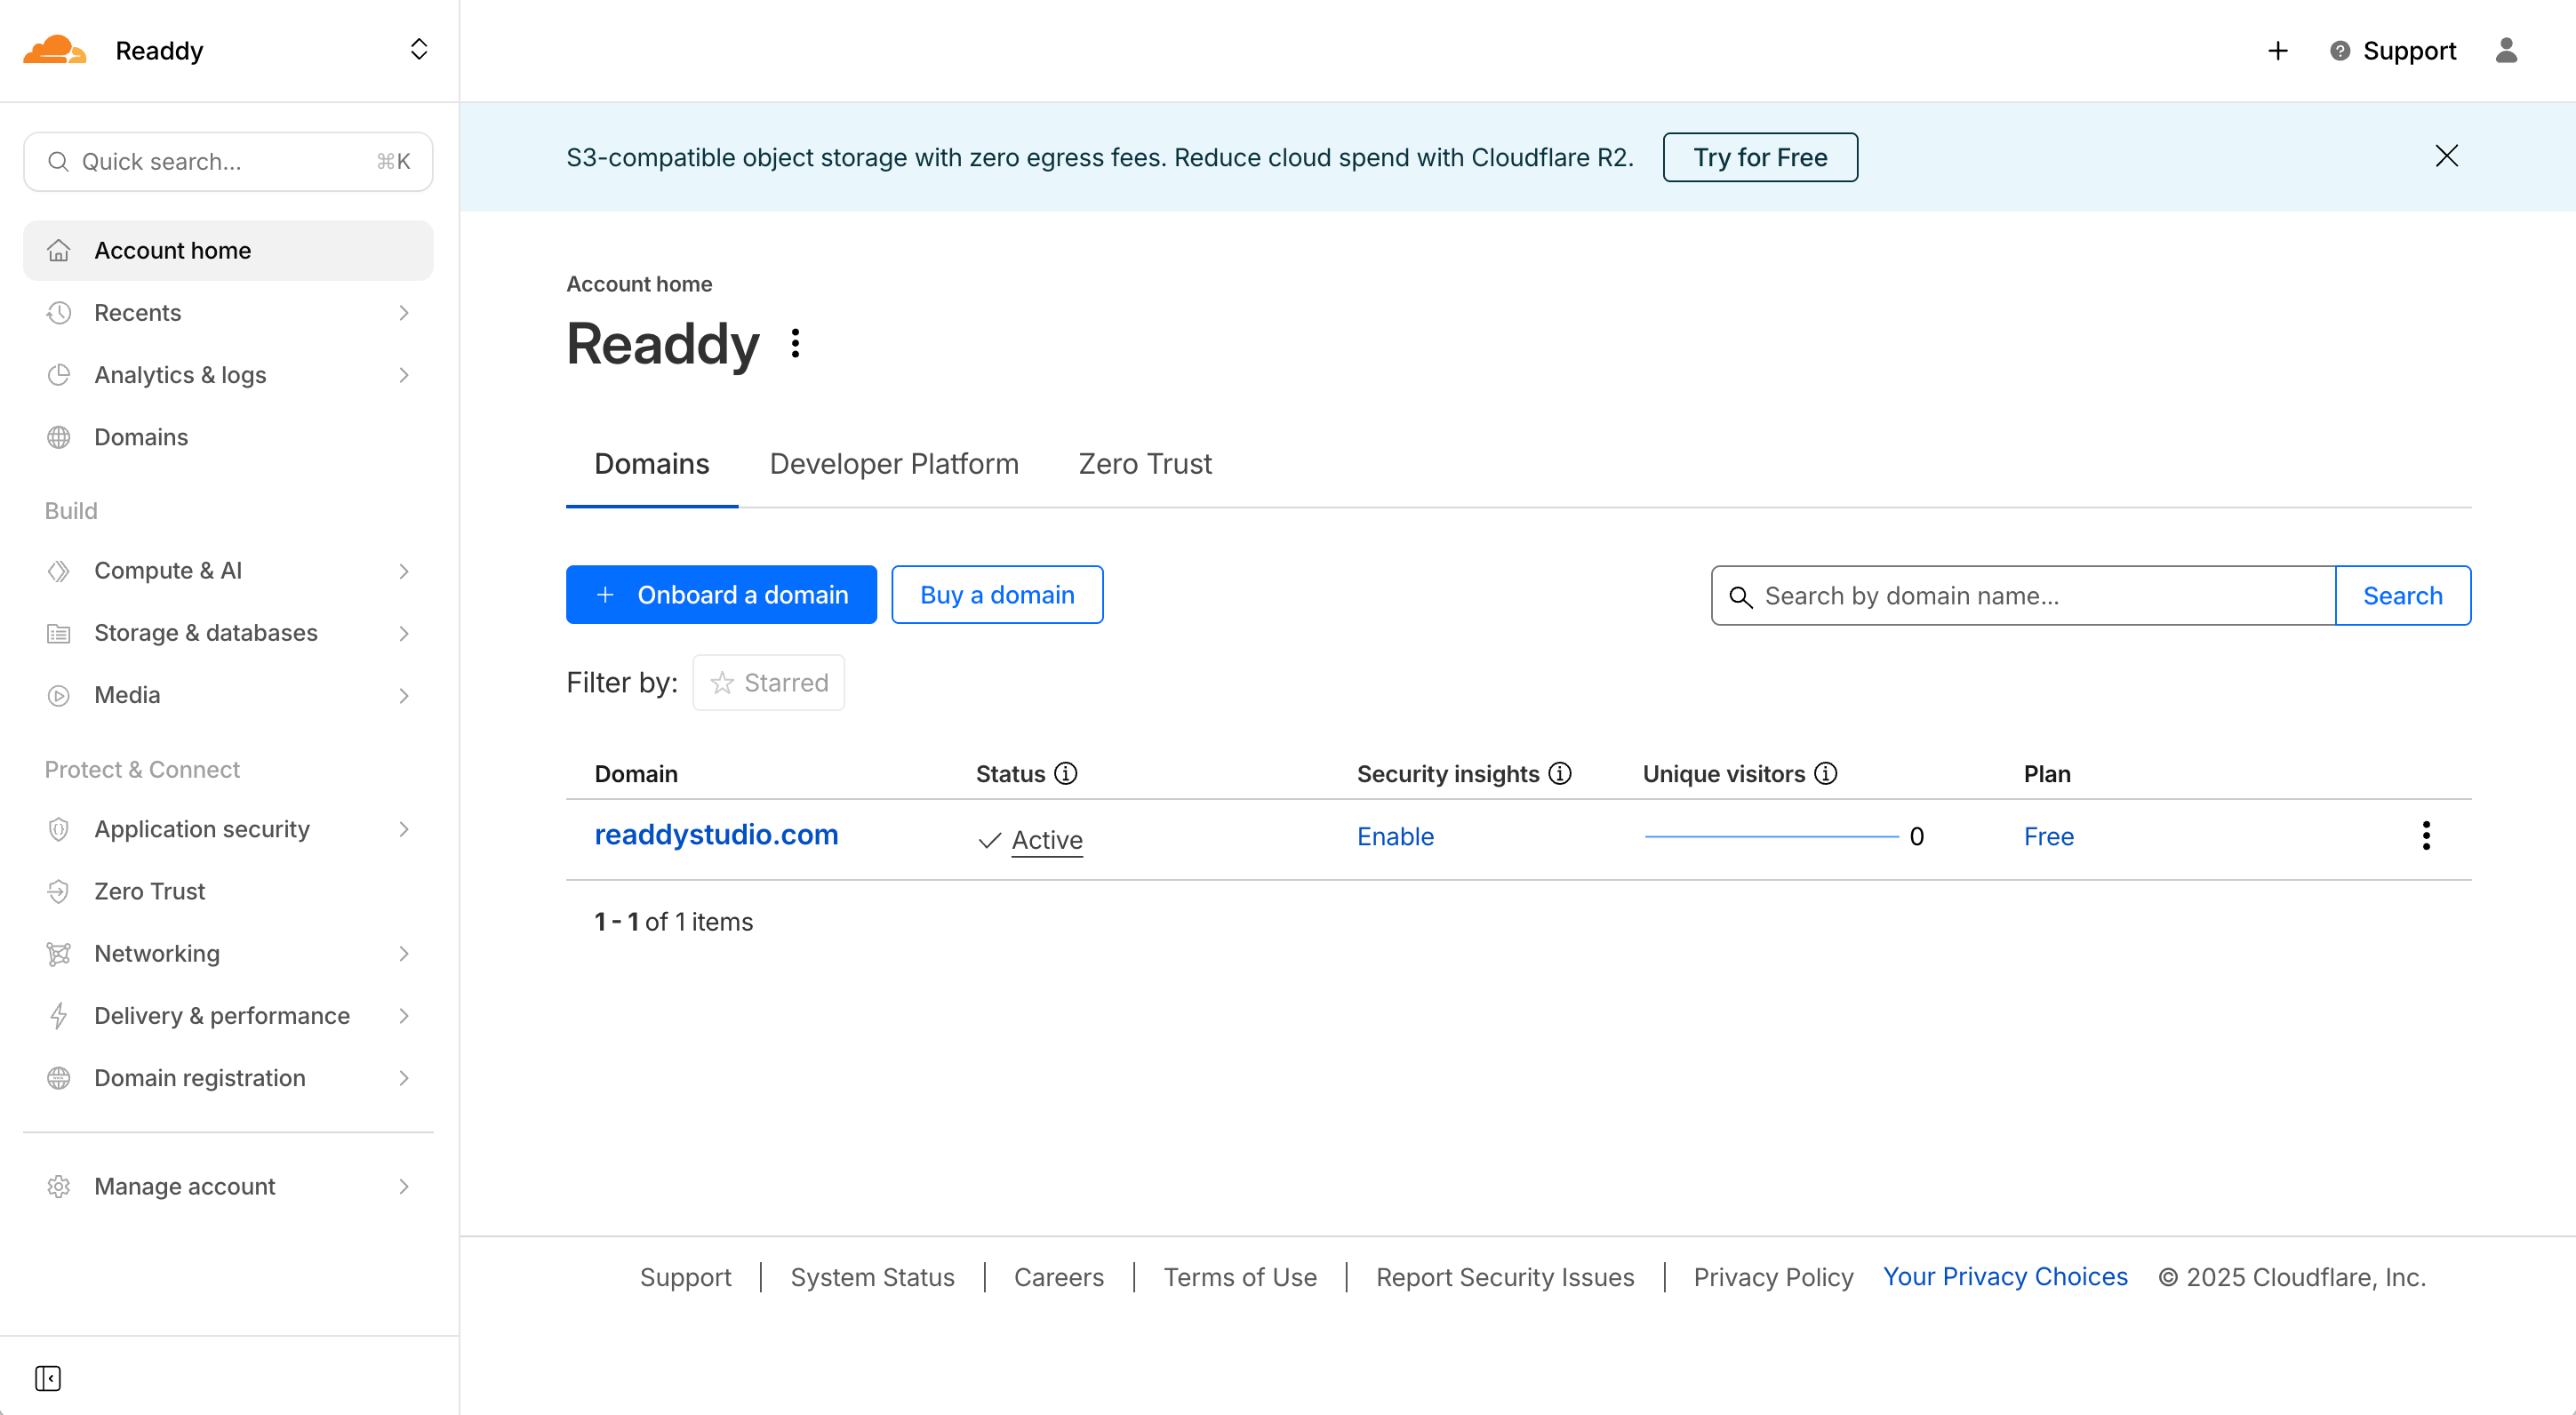
- Click the domain you want to connect.
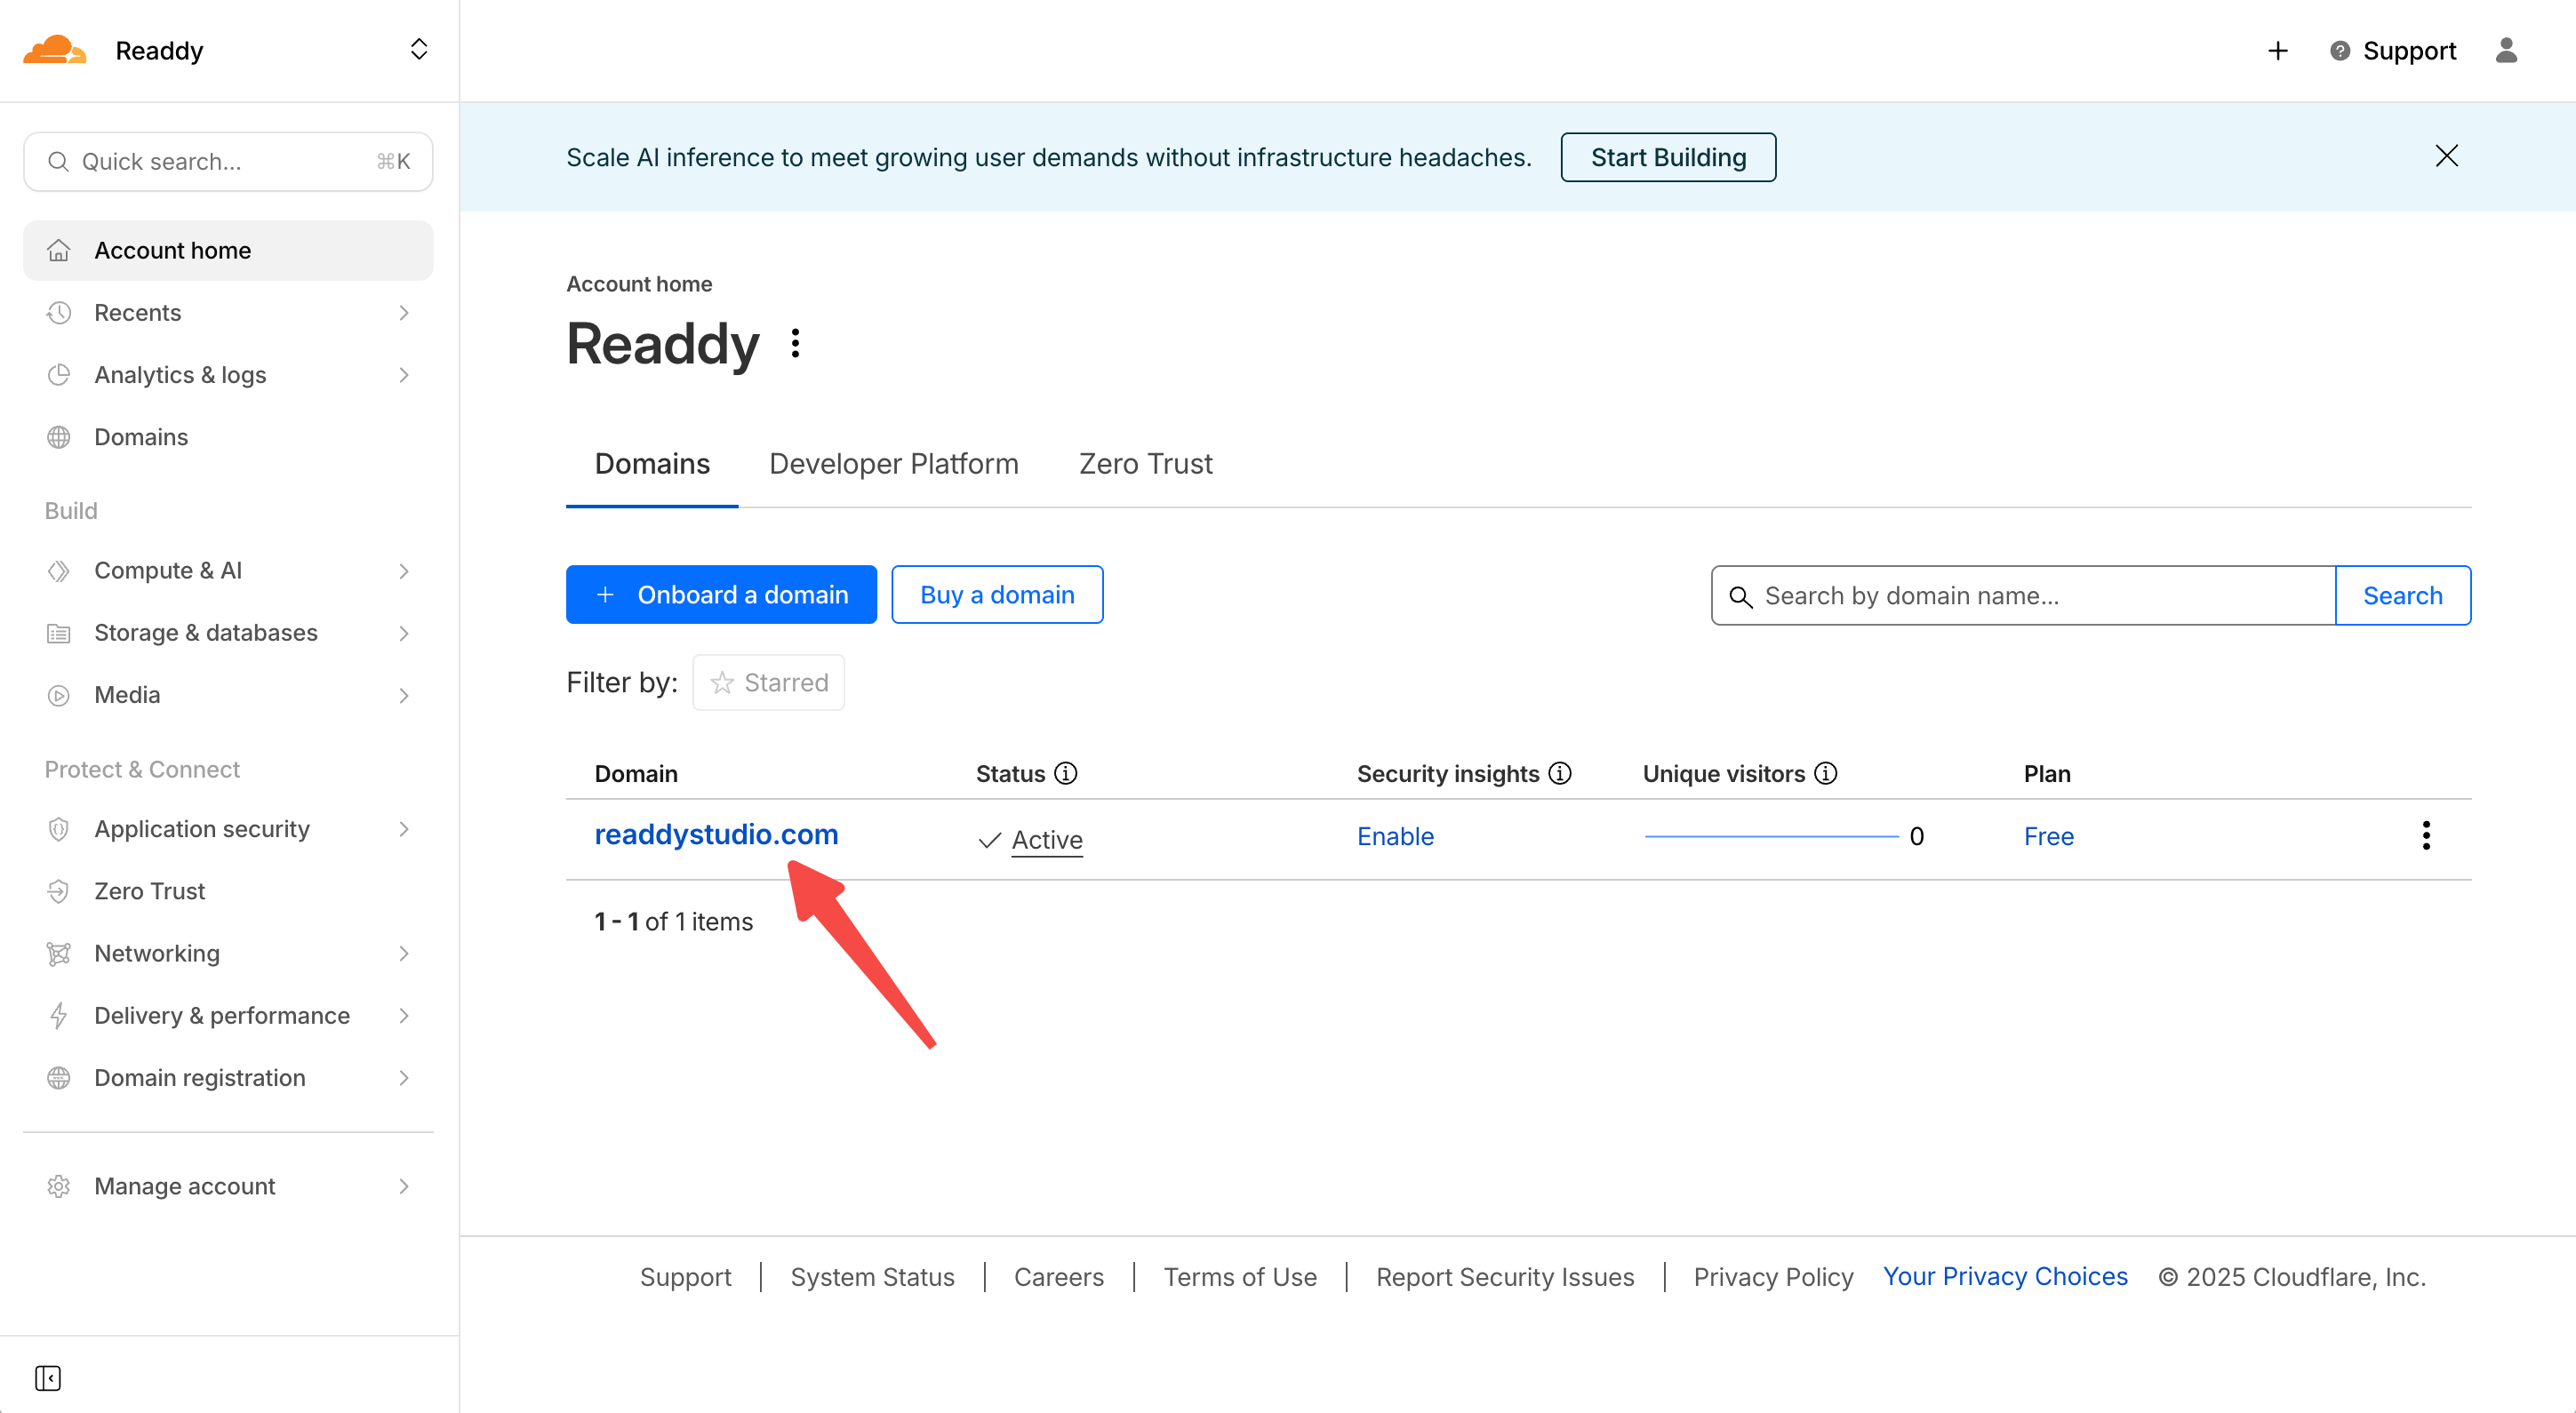
- Click DNS Records to access to the DNS management page.
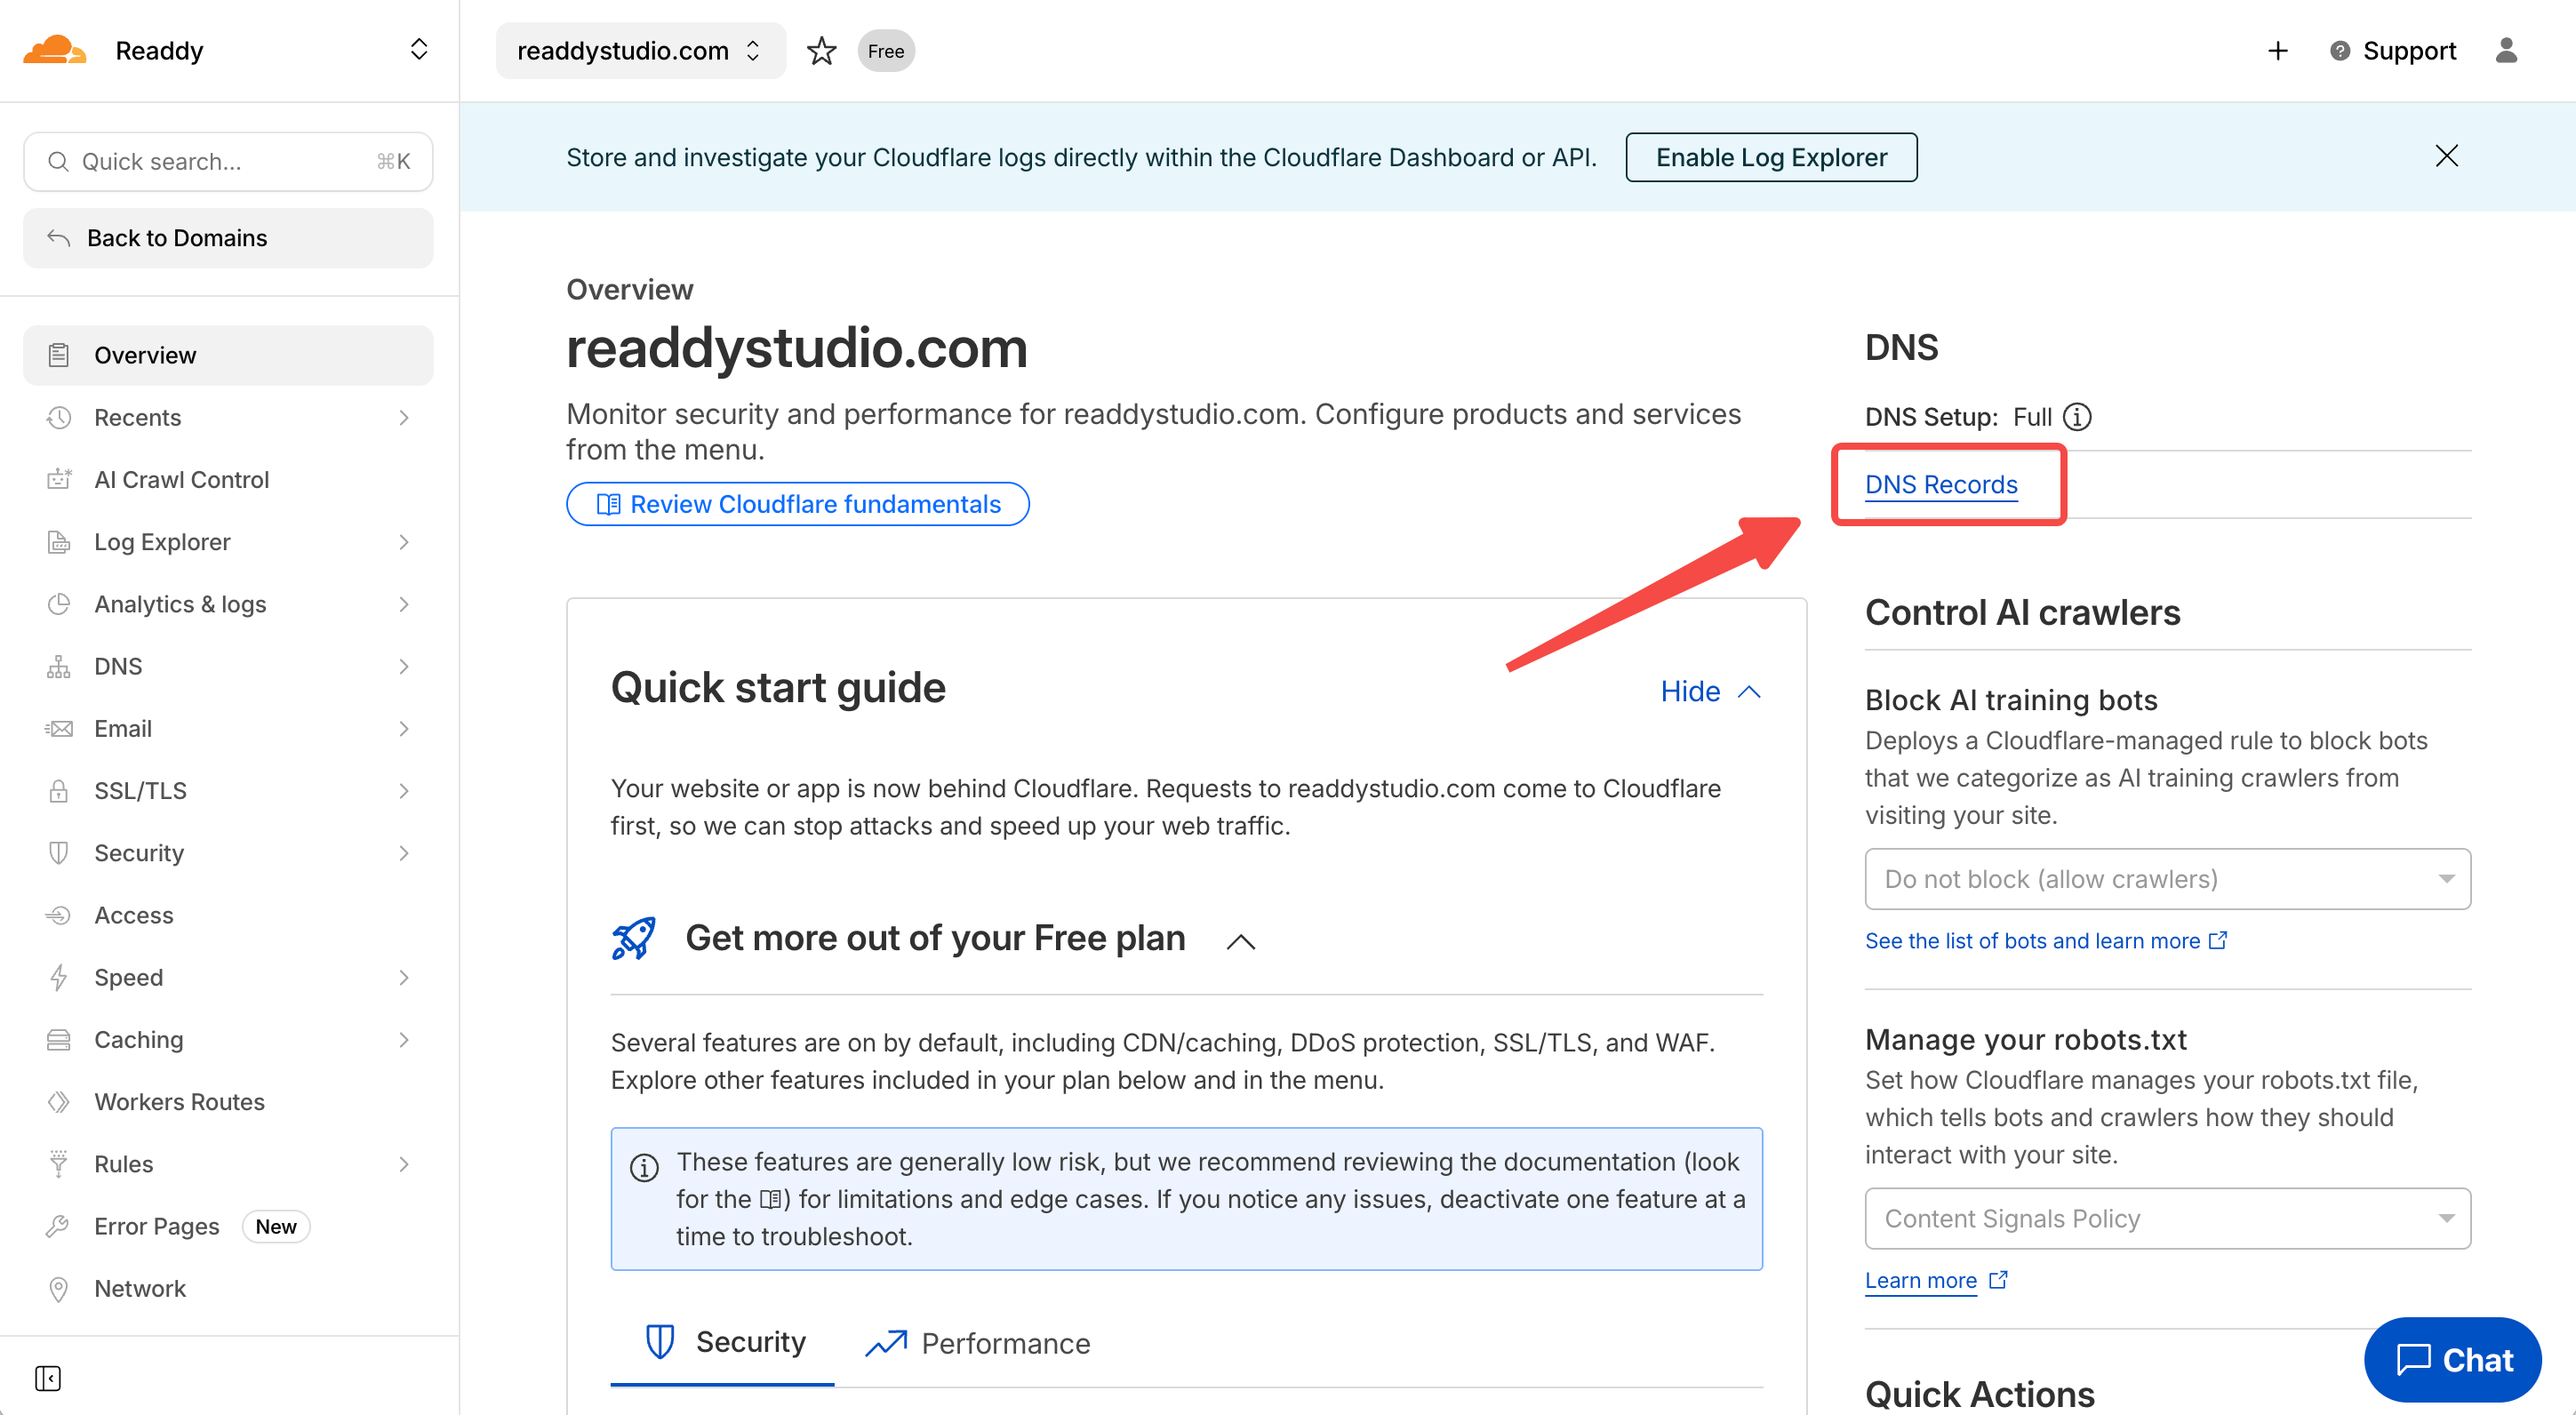
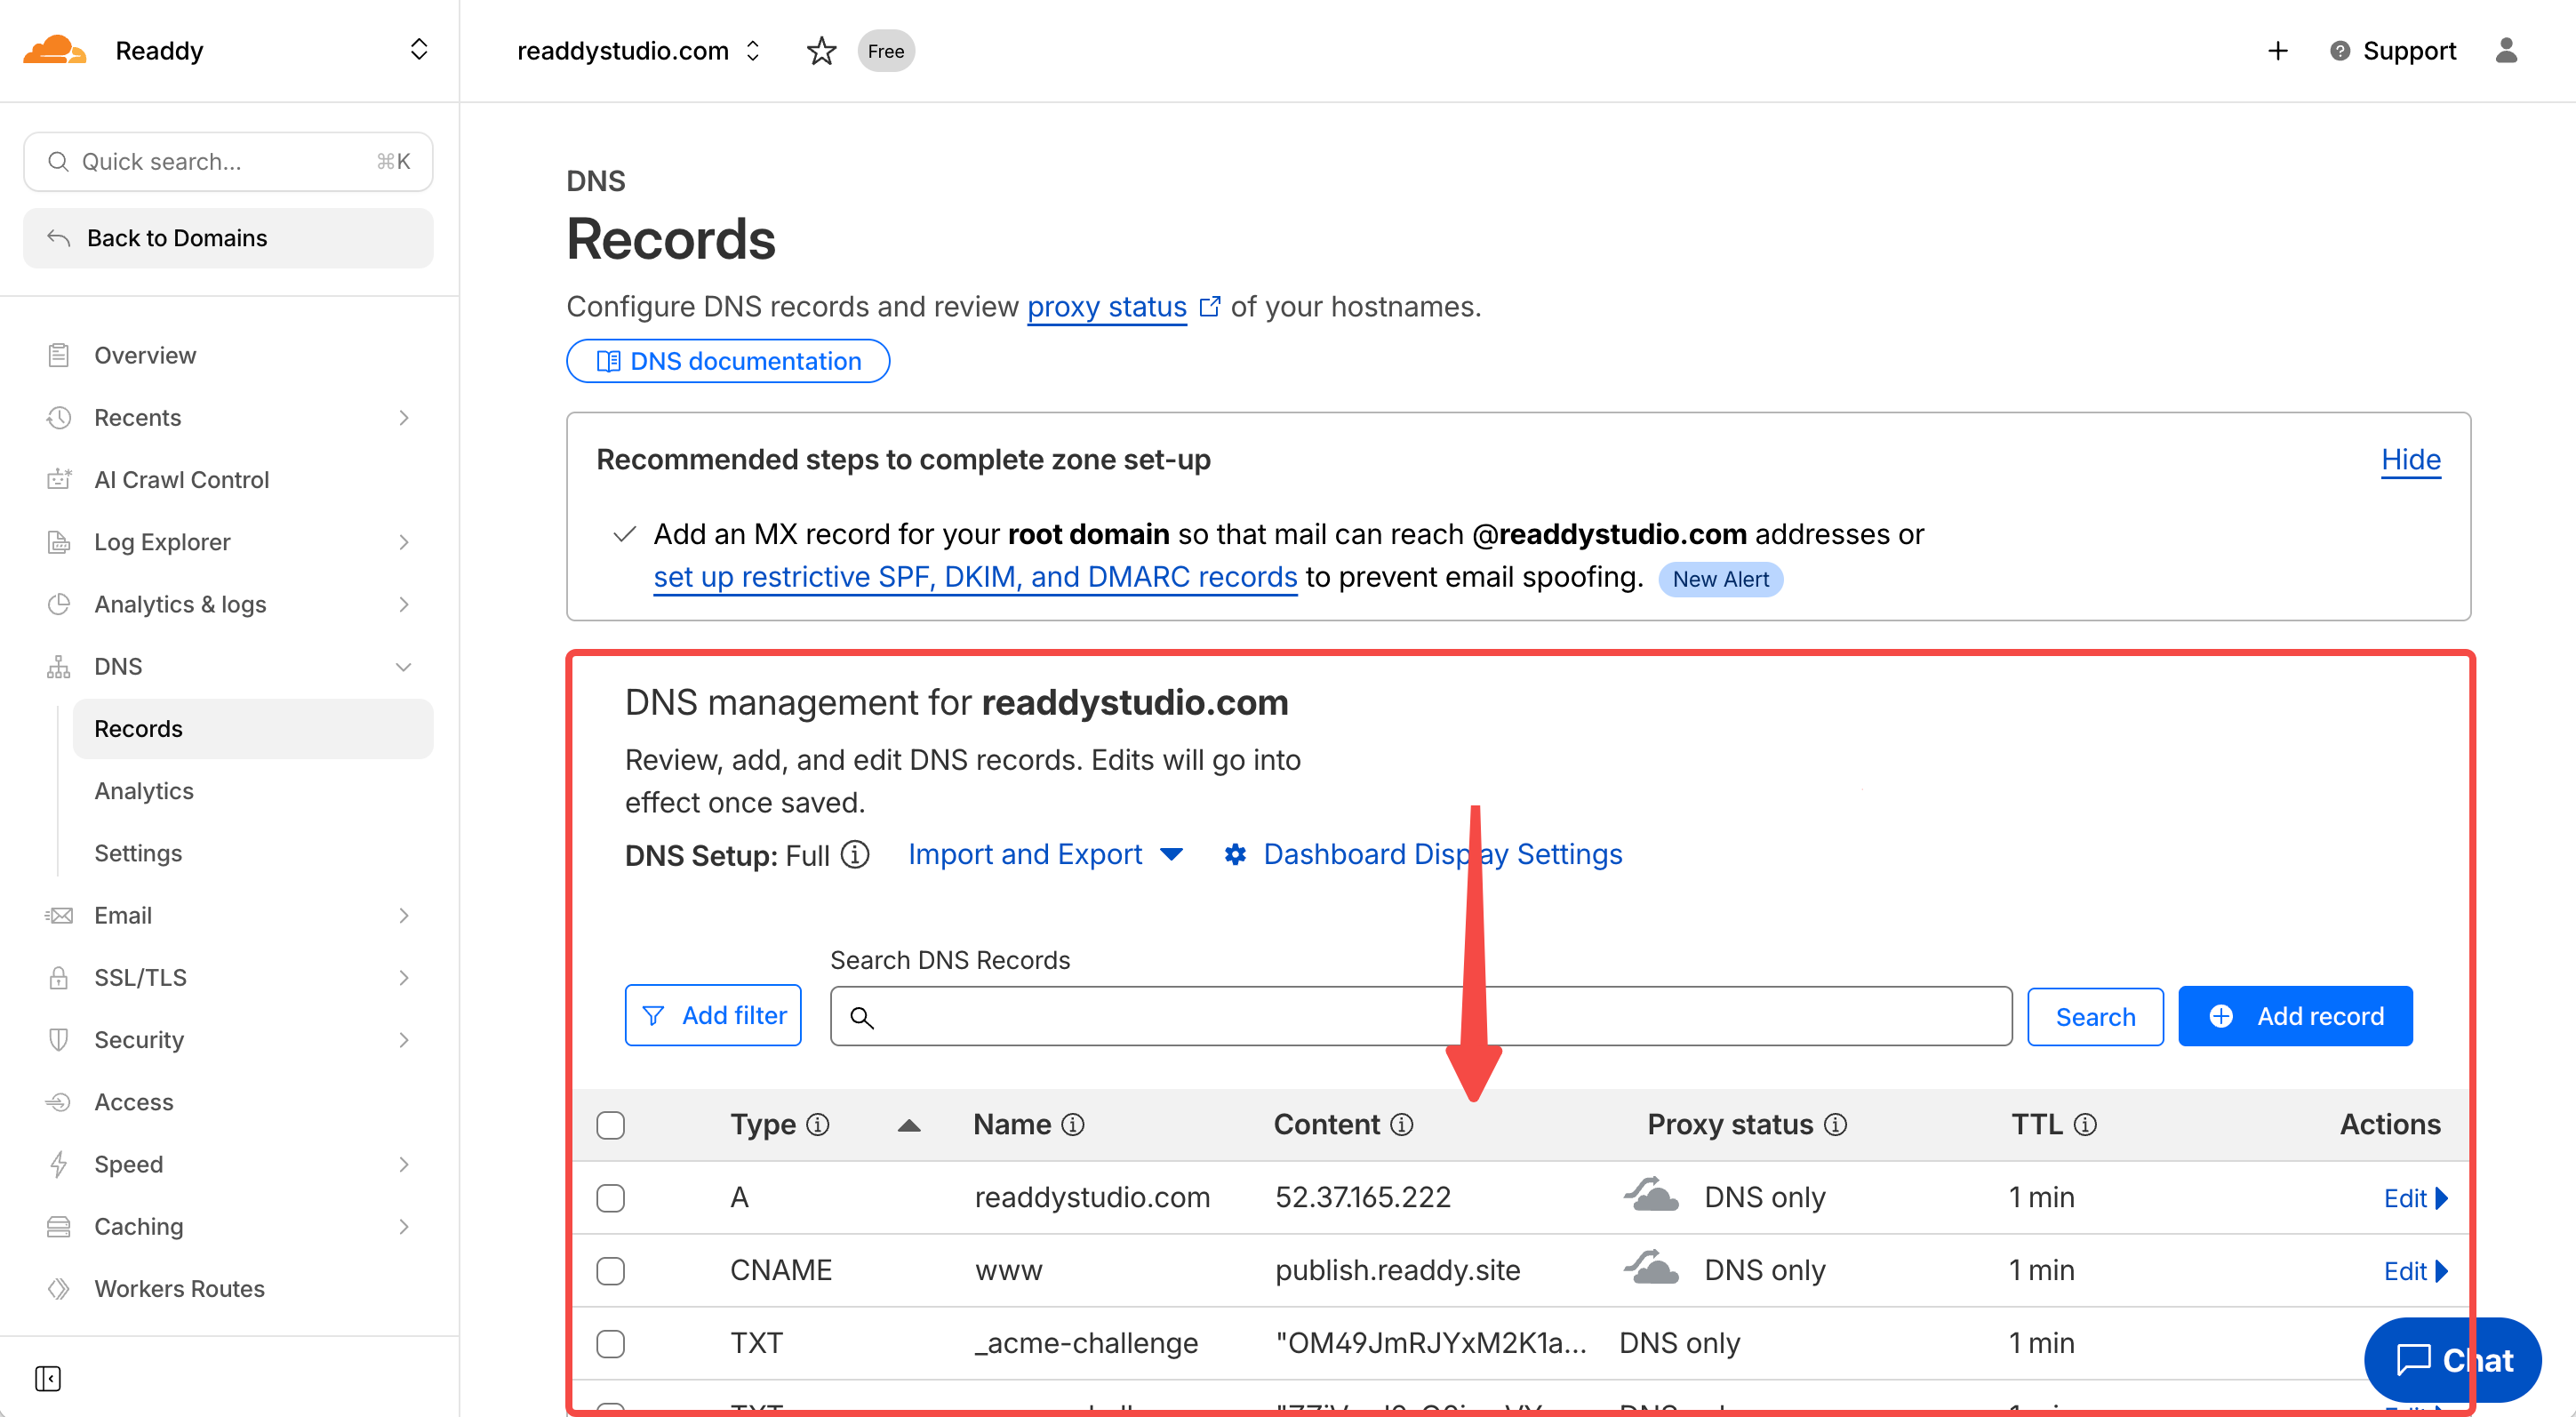
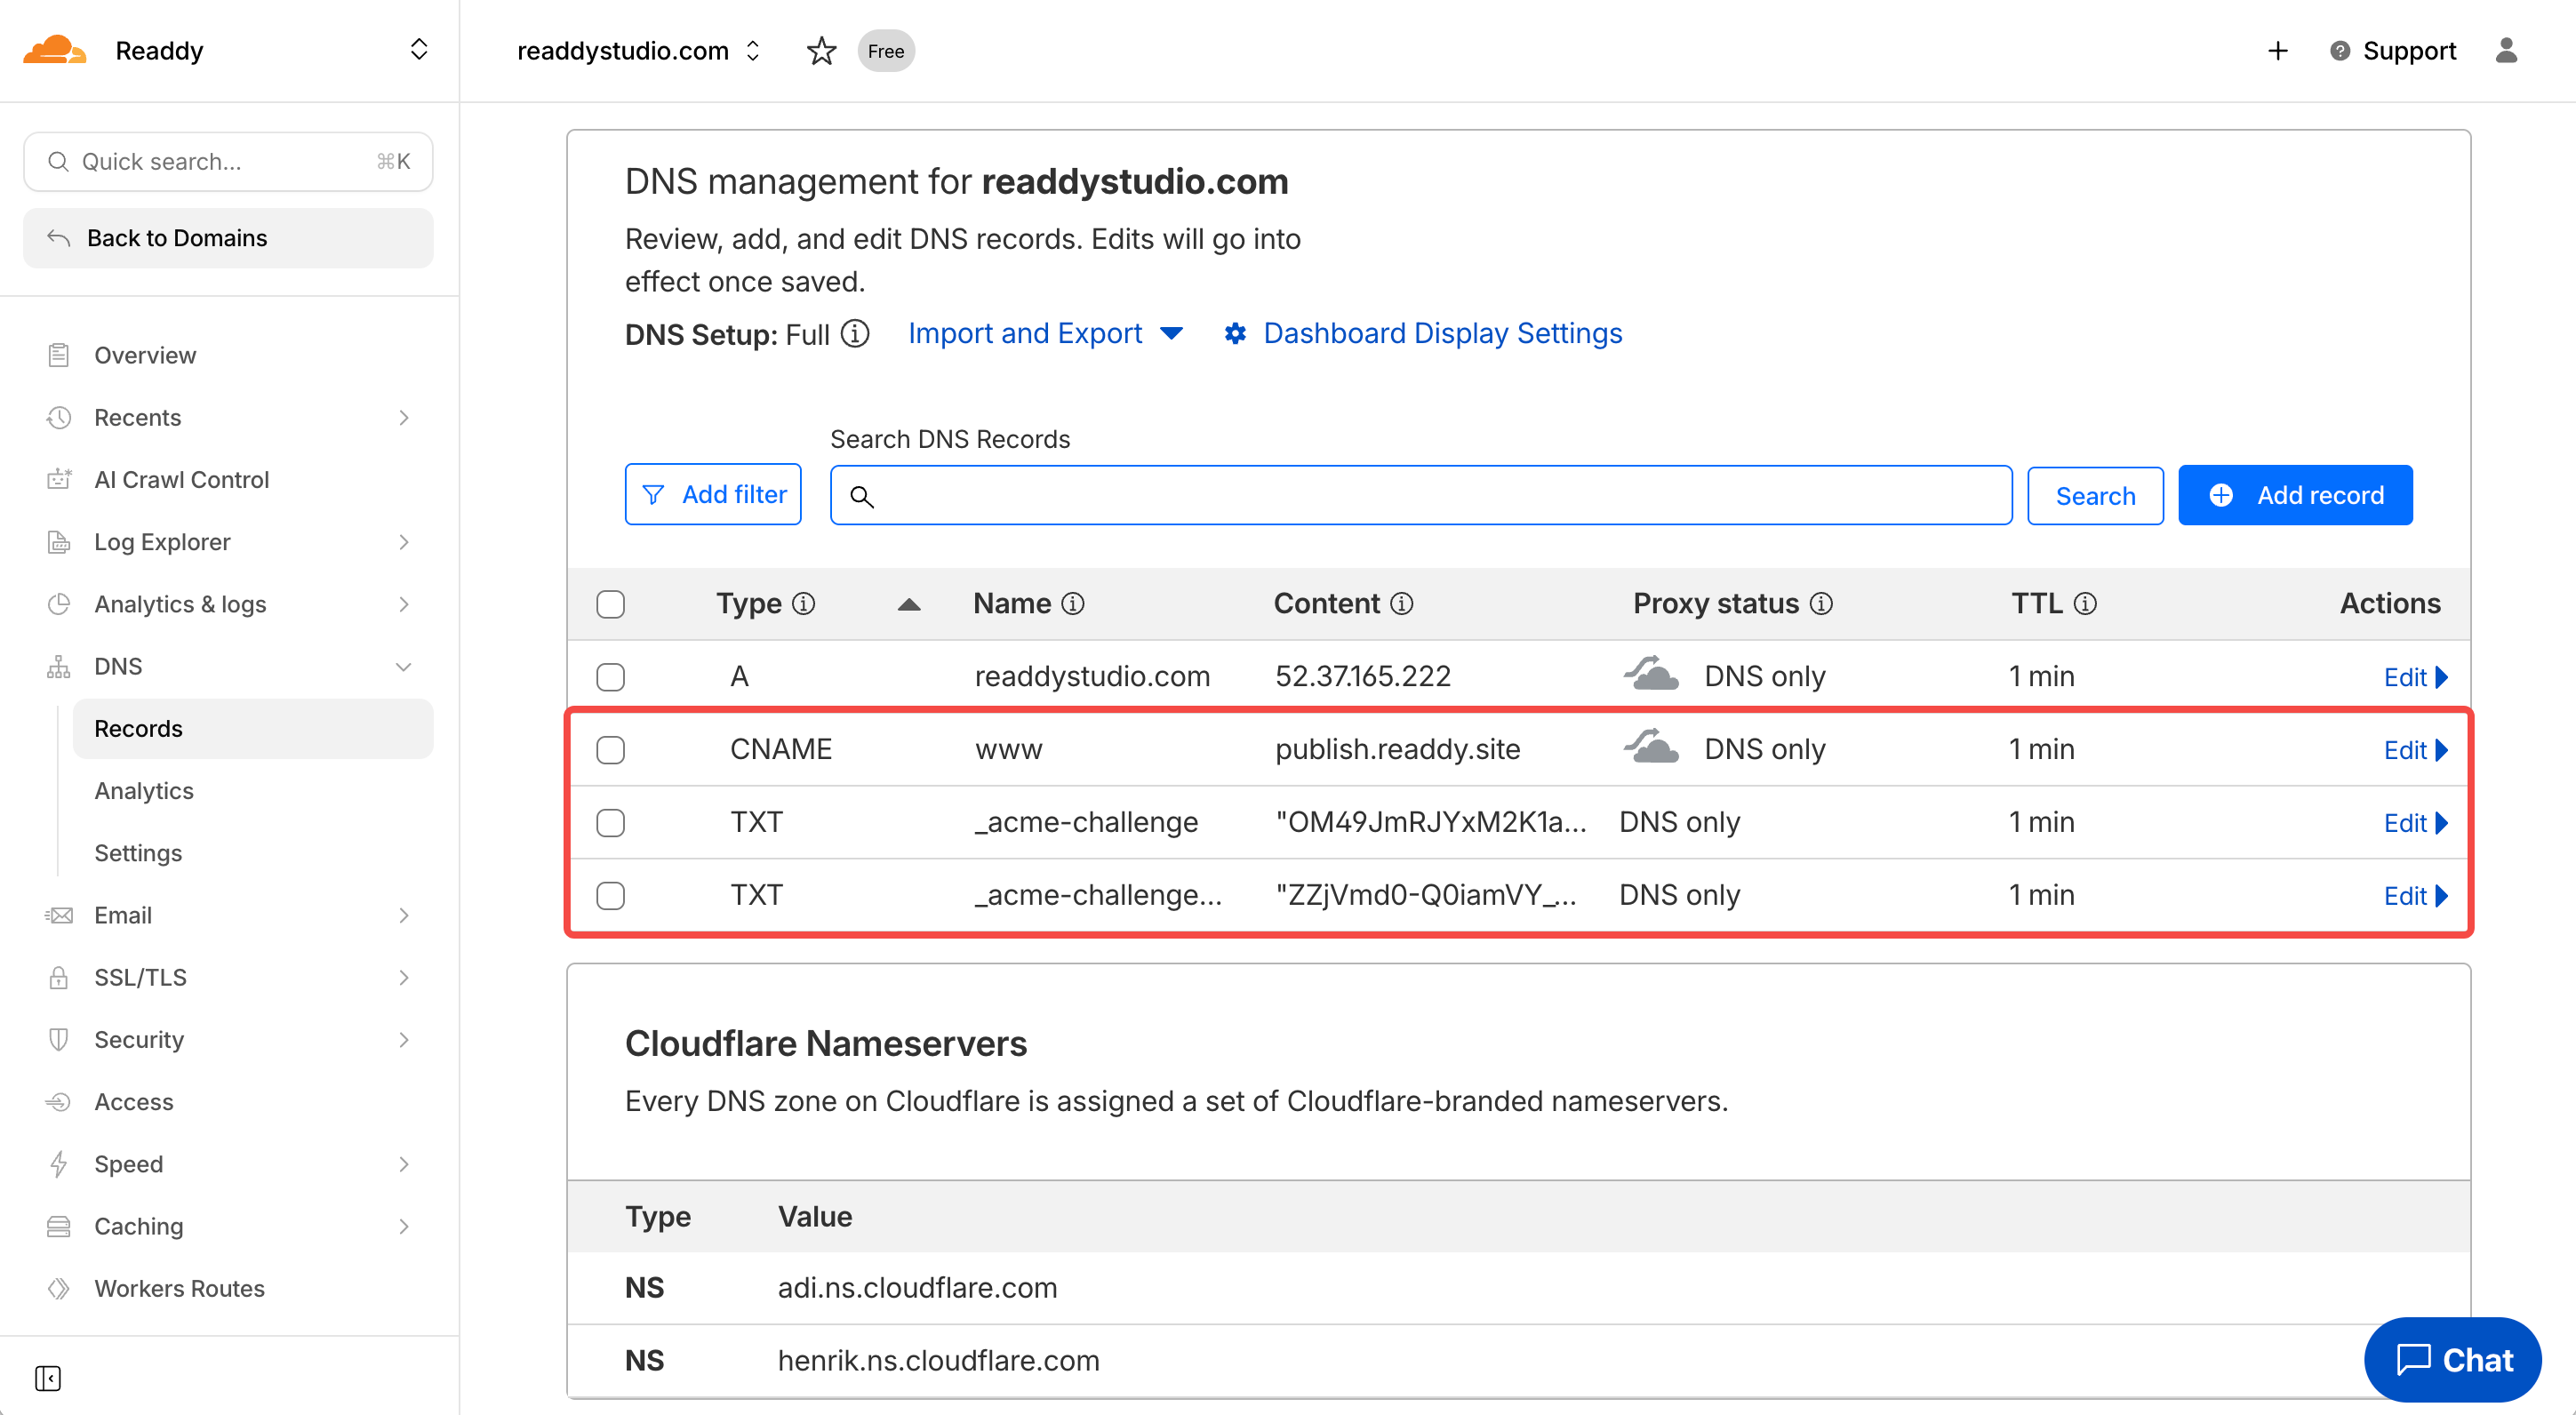
- If you connect a root domain, such as
xxxxxx.com,you need to update A + TXT - If you connect a subdomain, such as
www.xxxxxx.com,you need to update CNAME + TXT
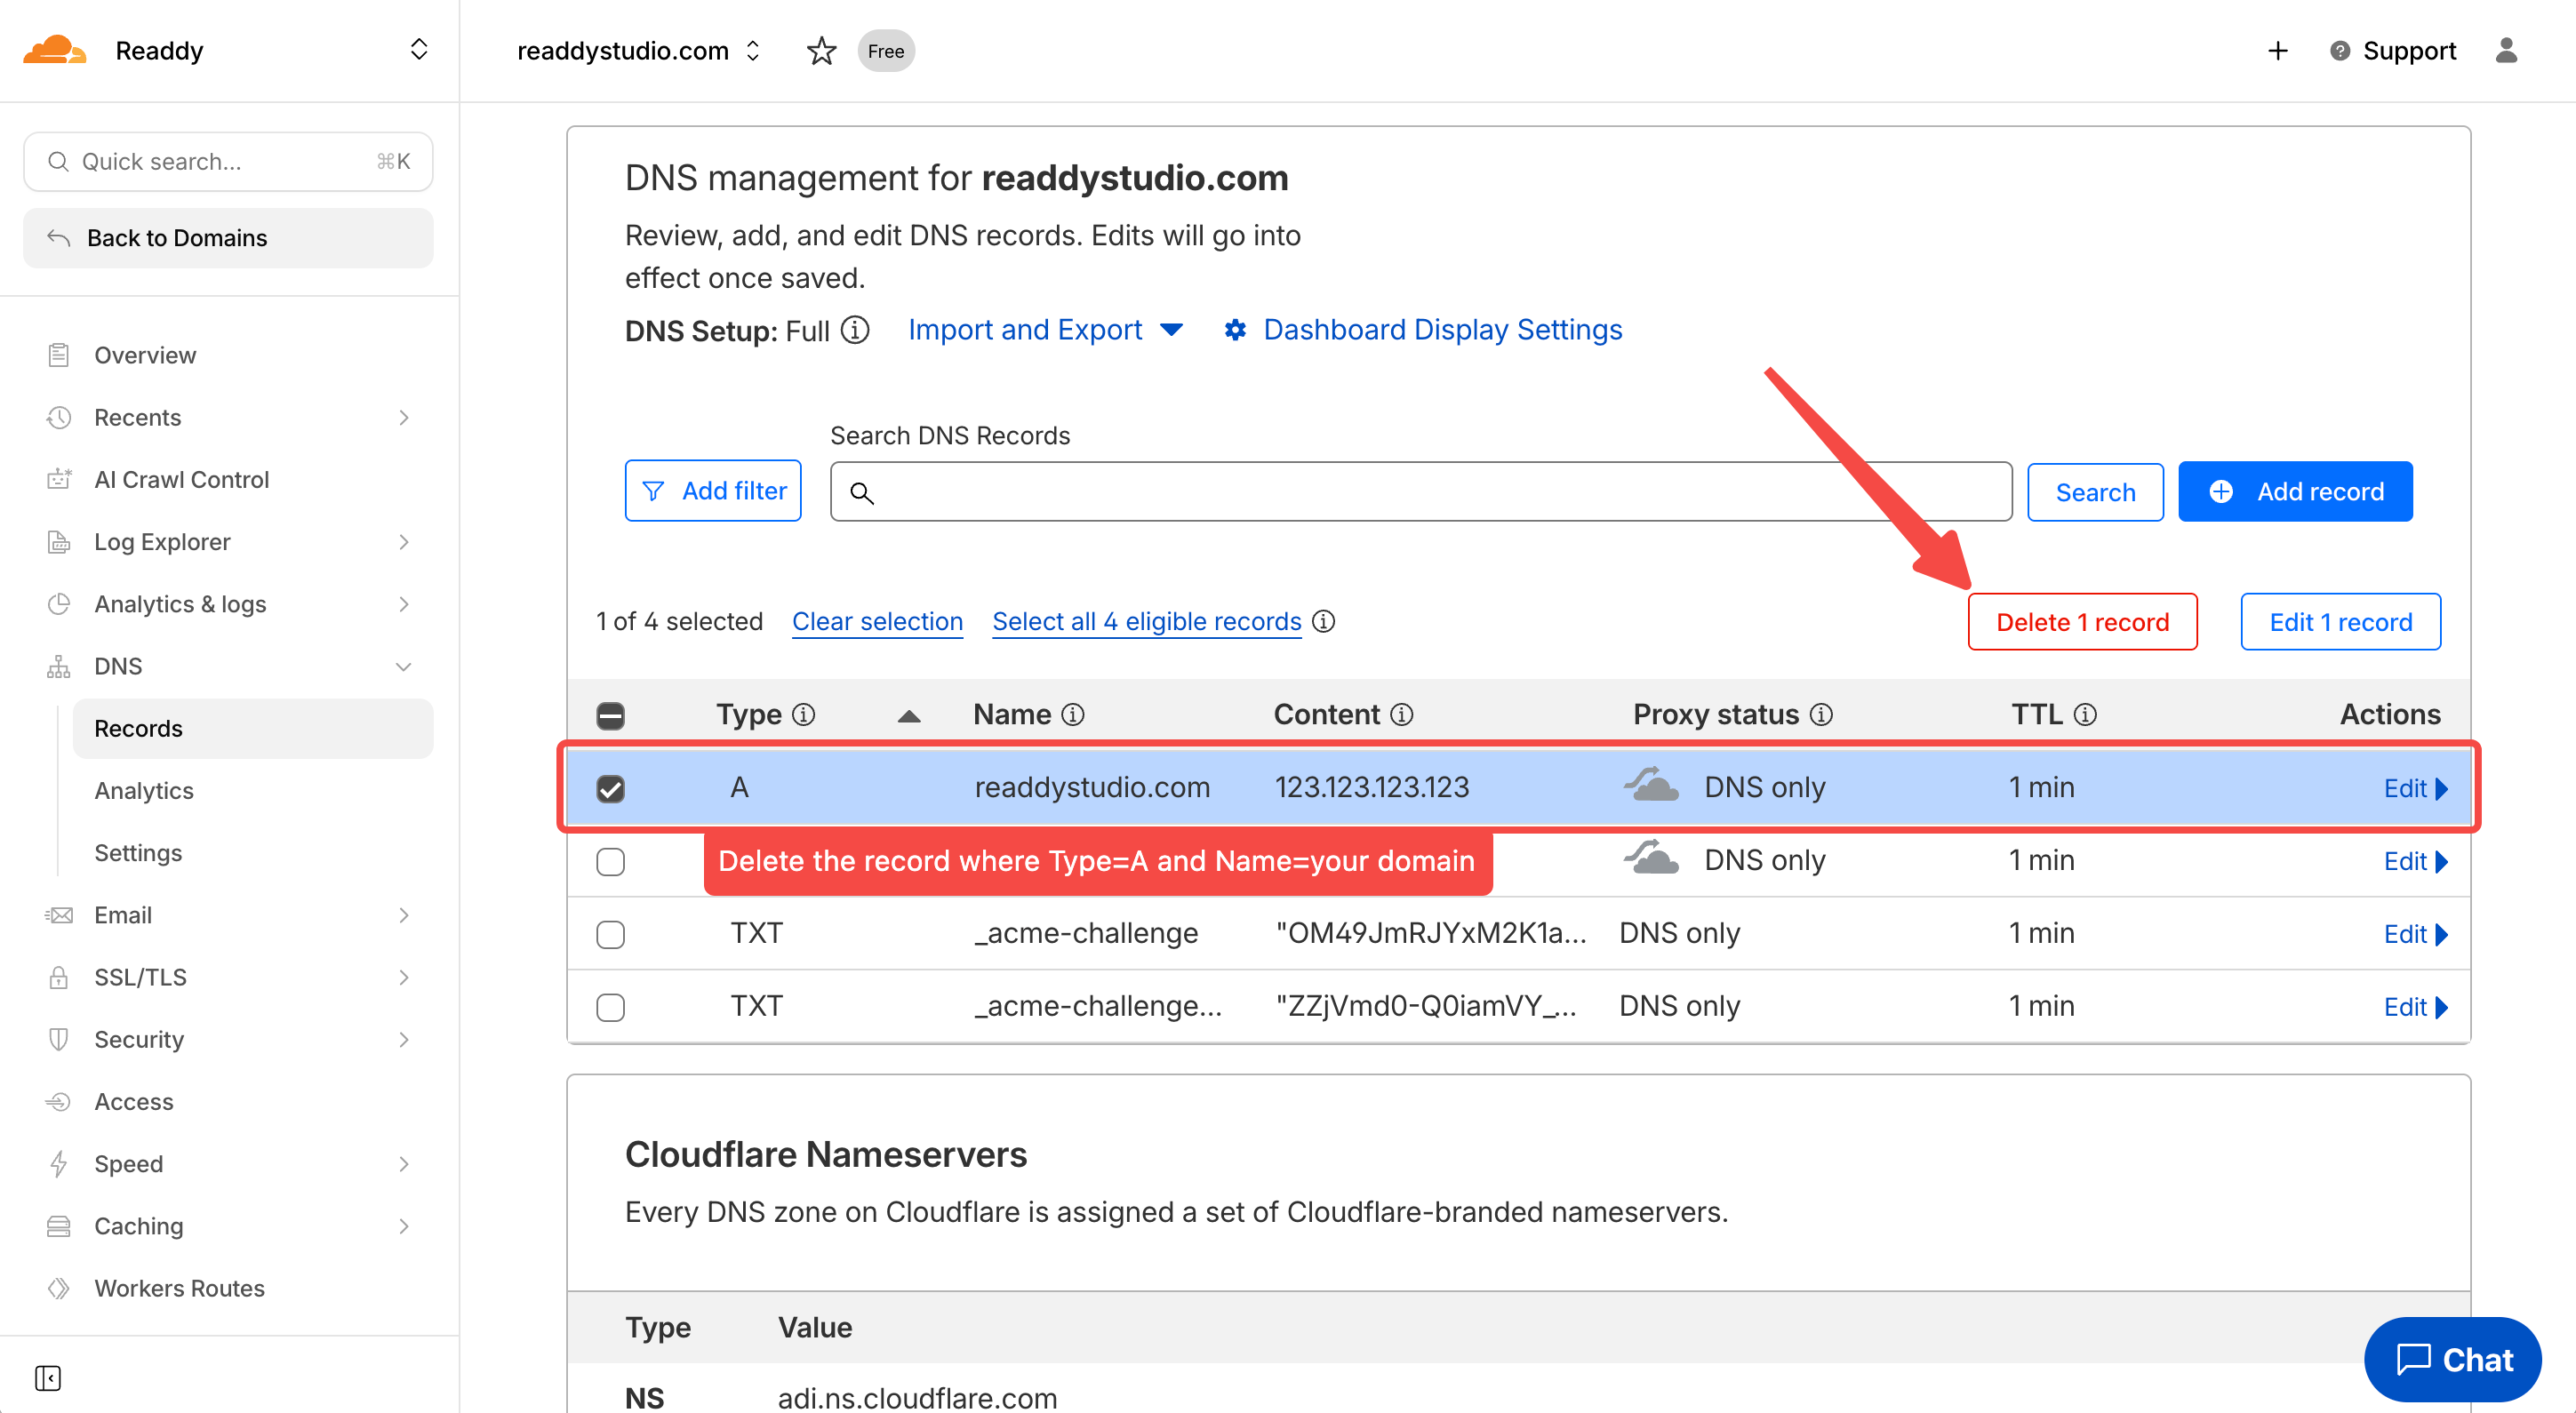
Type: A
Name: @
IPv4 address (Value): 52.37.165.222
TTL: 1 min
And very importent: switch Proxy status from Proxied to DNS only
Namecheap
Namecheap
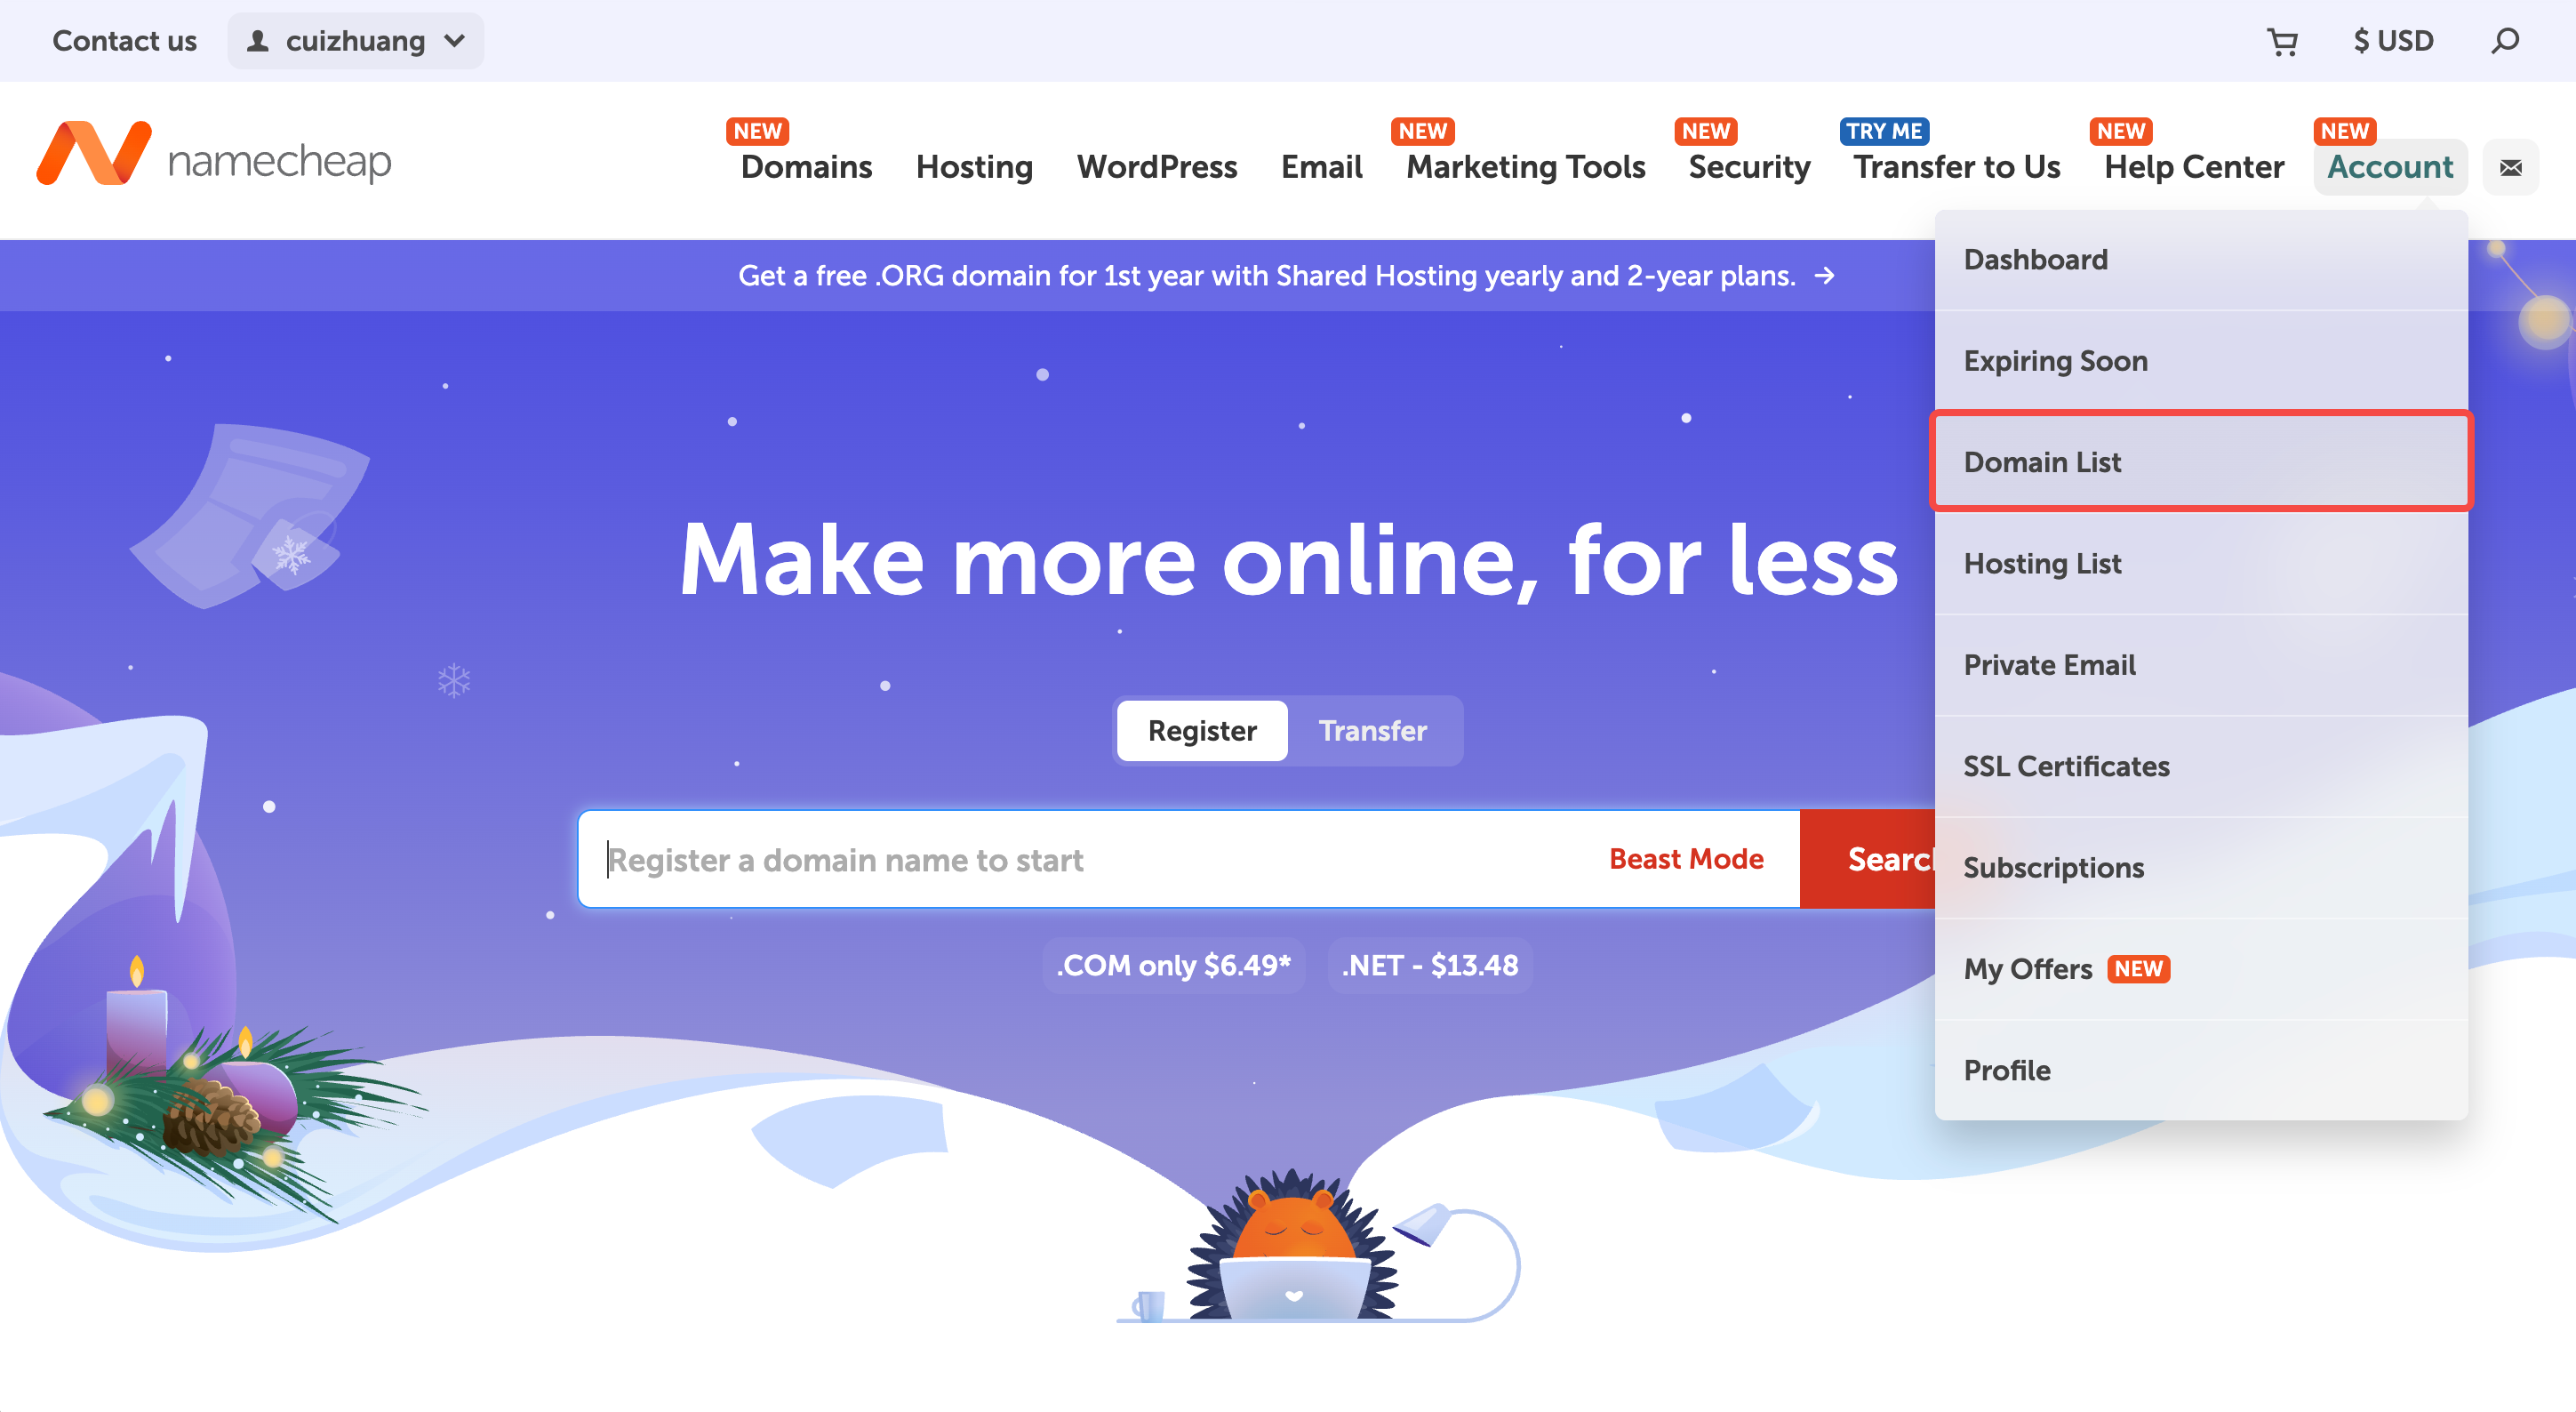
- Open a new tab in your browser, go to www.namecheap.com and log in. Locate Account in the top-right corner of the page, and click Domain list, you will see your domain.
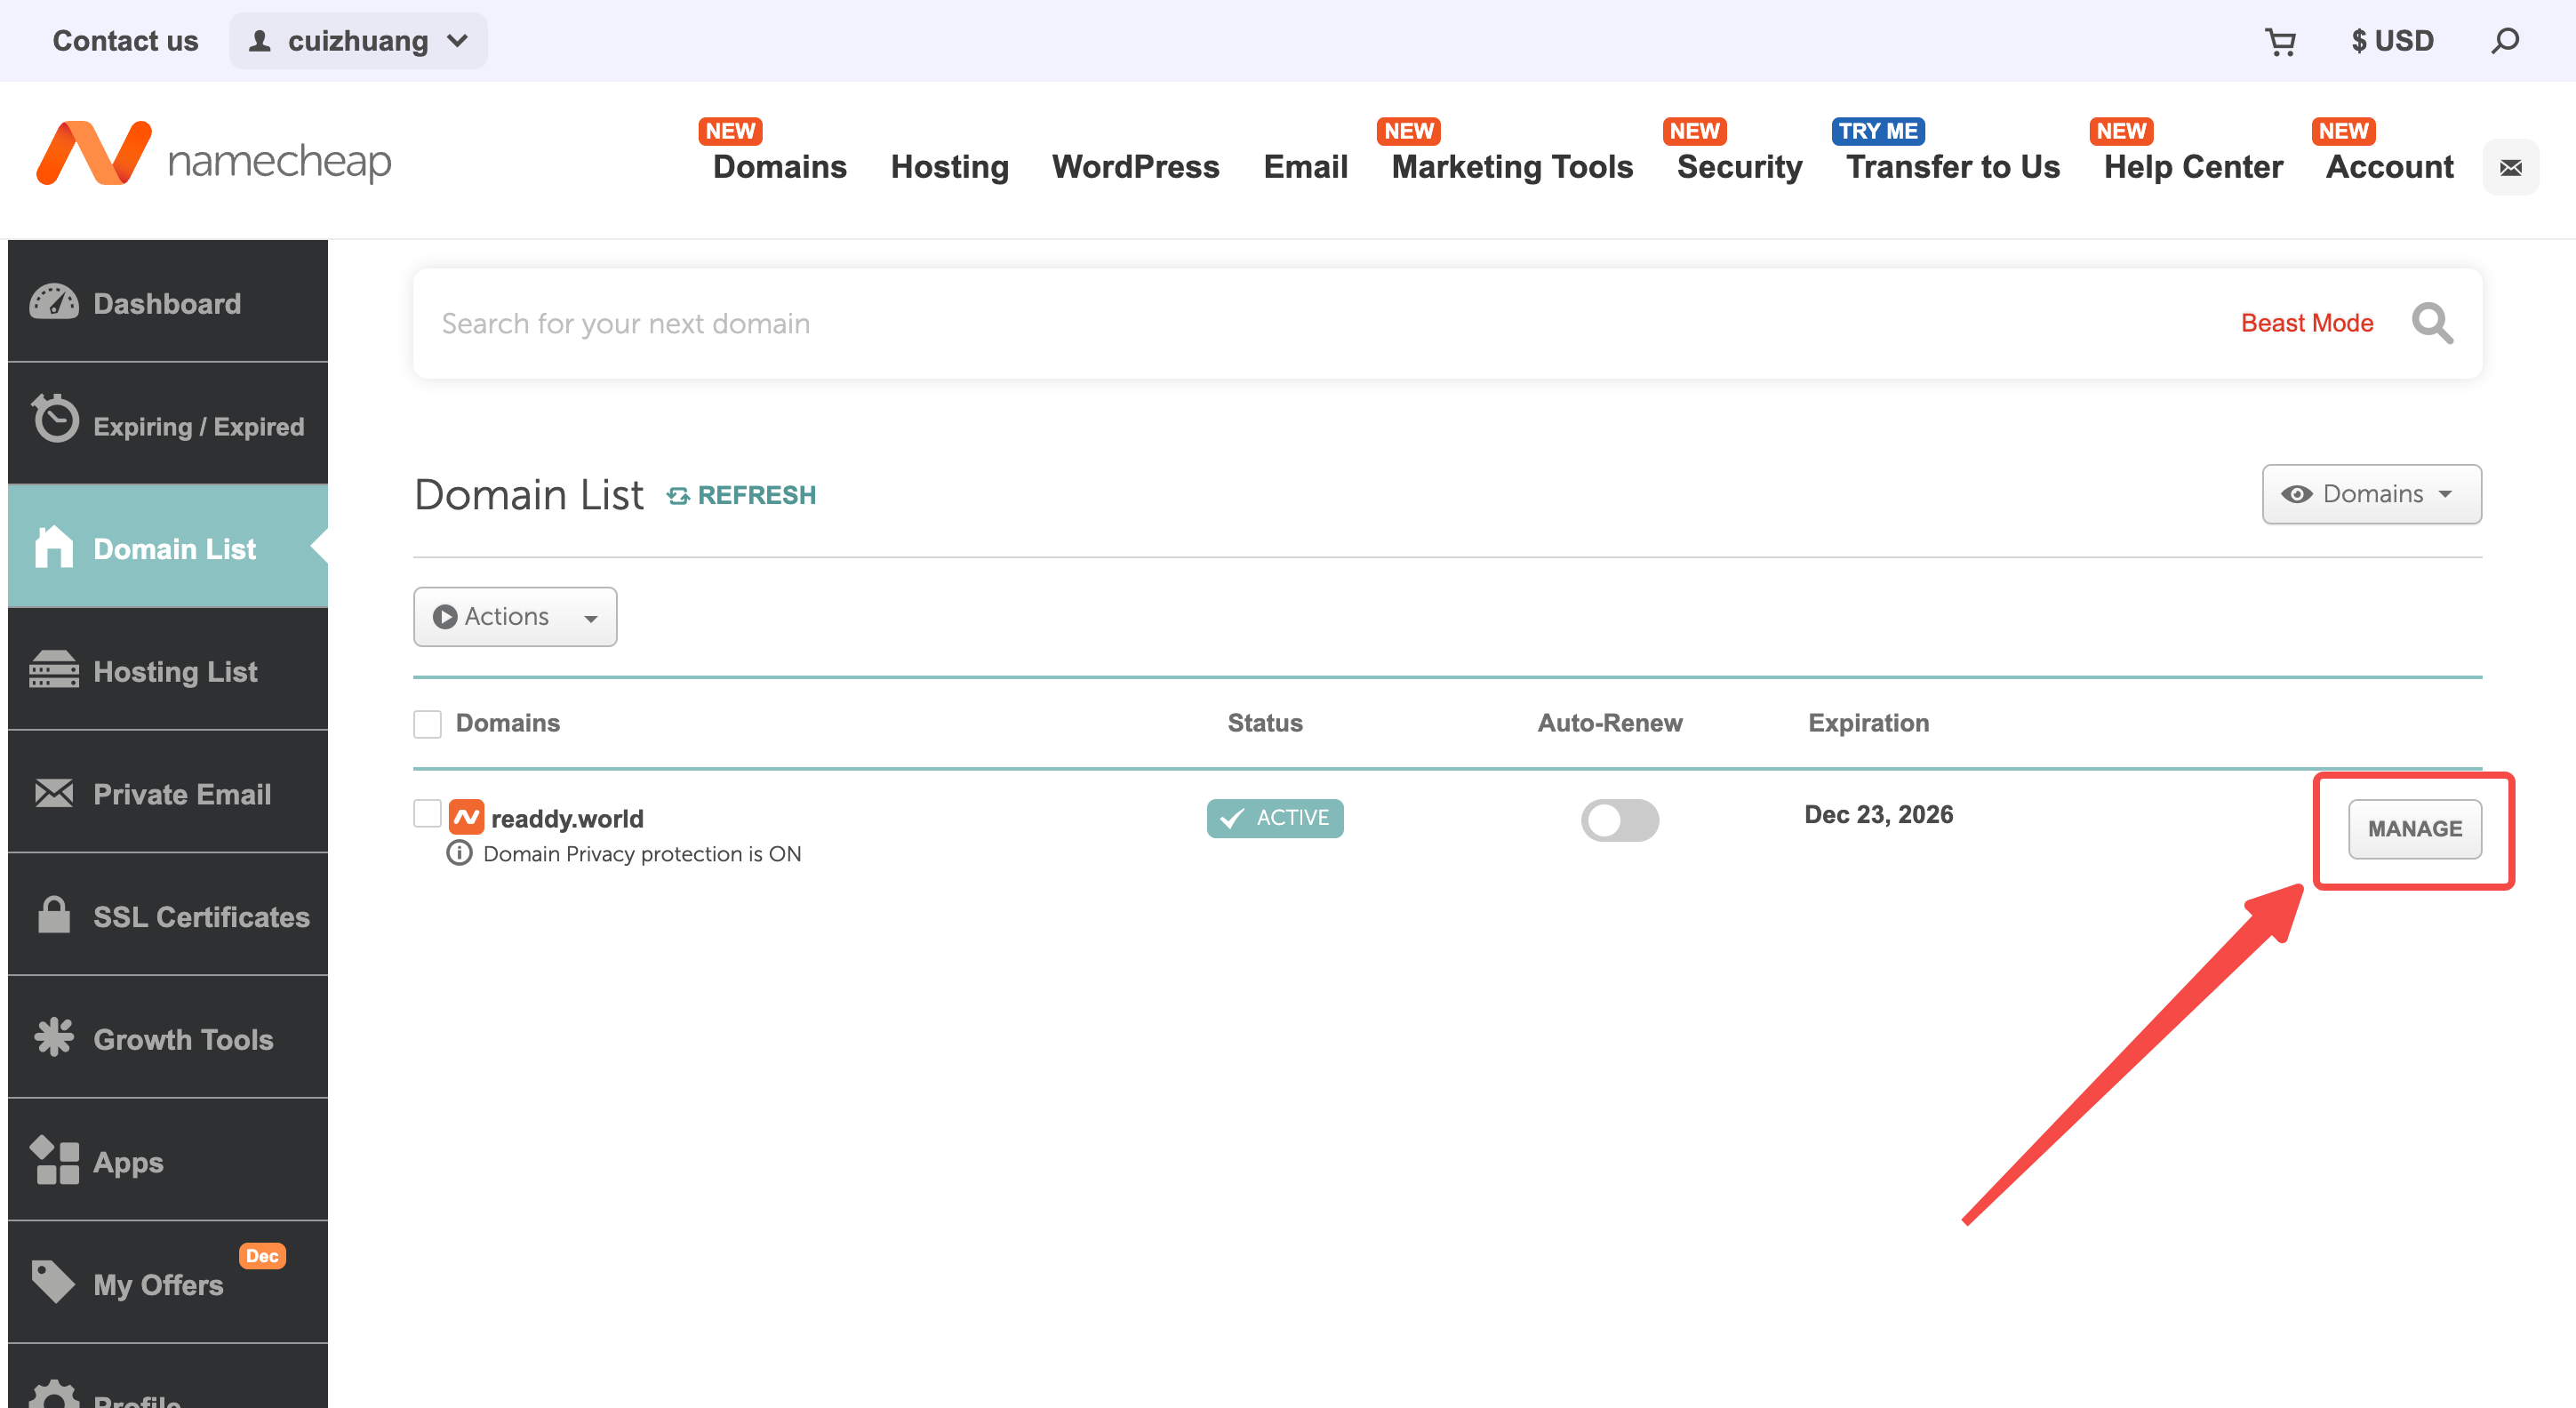
- Find the domain you want to connect and click MANAGE.
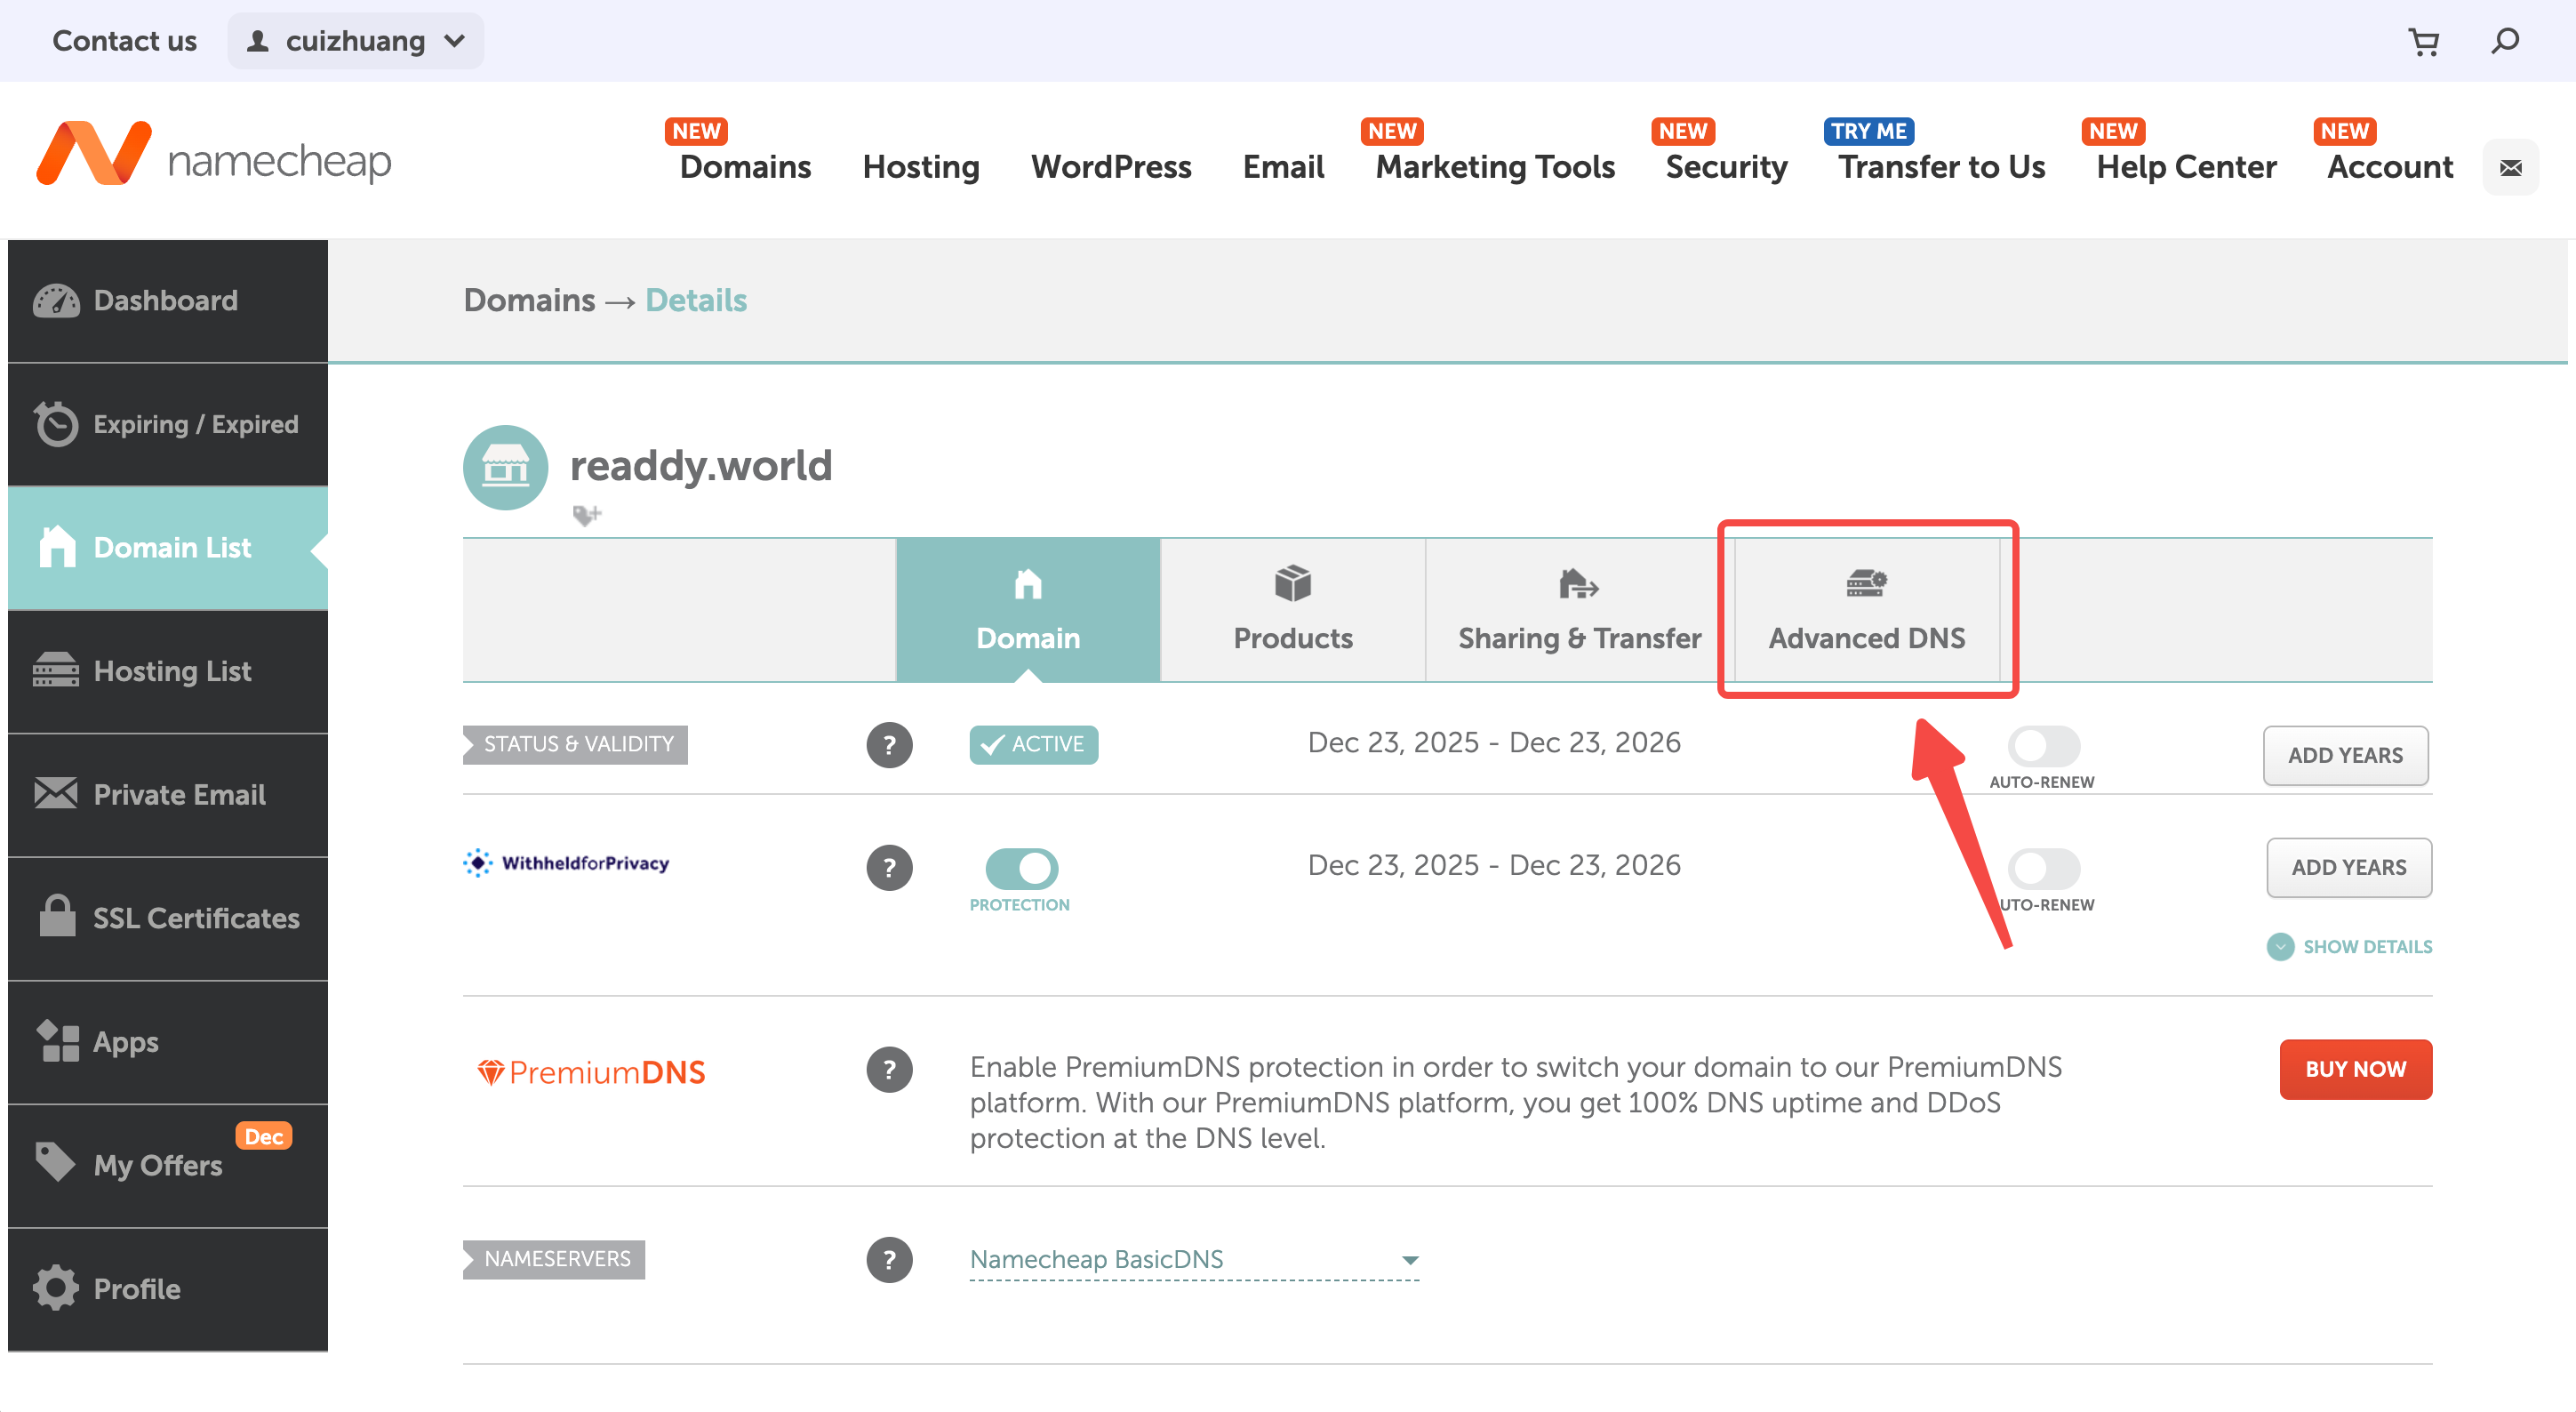
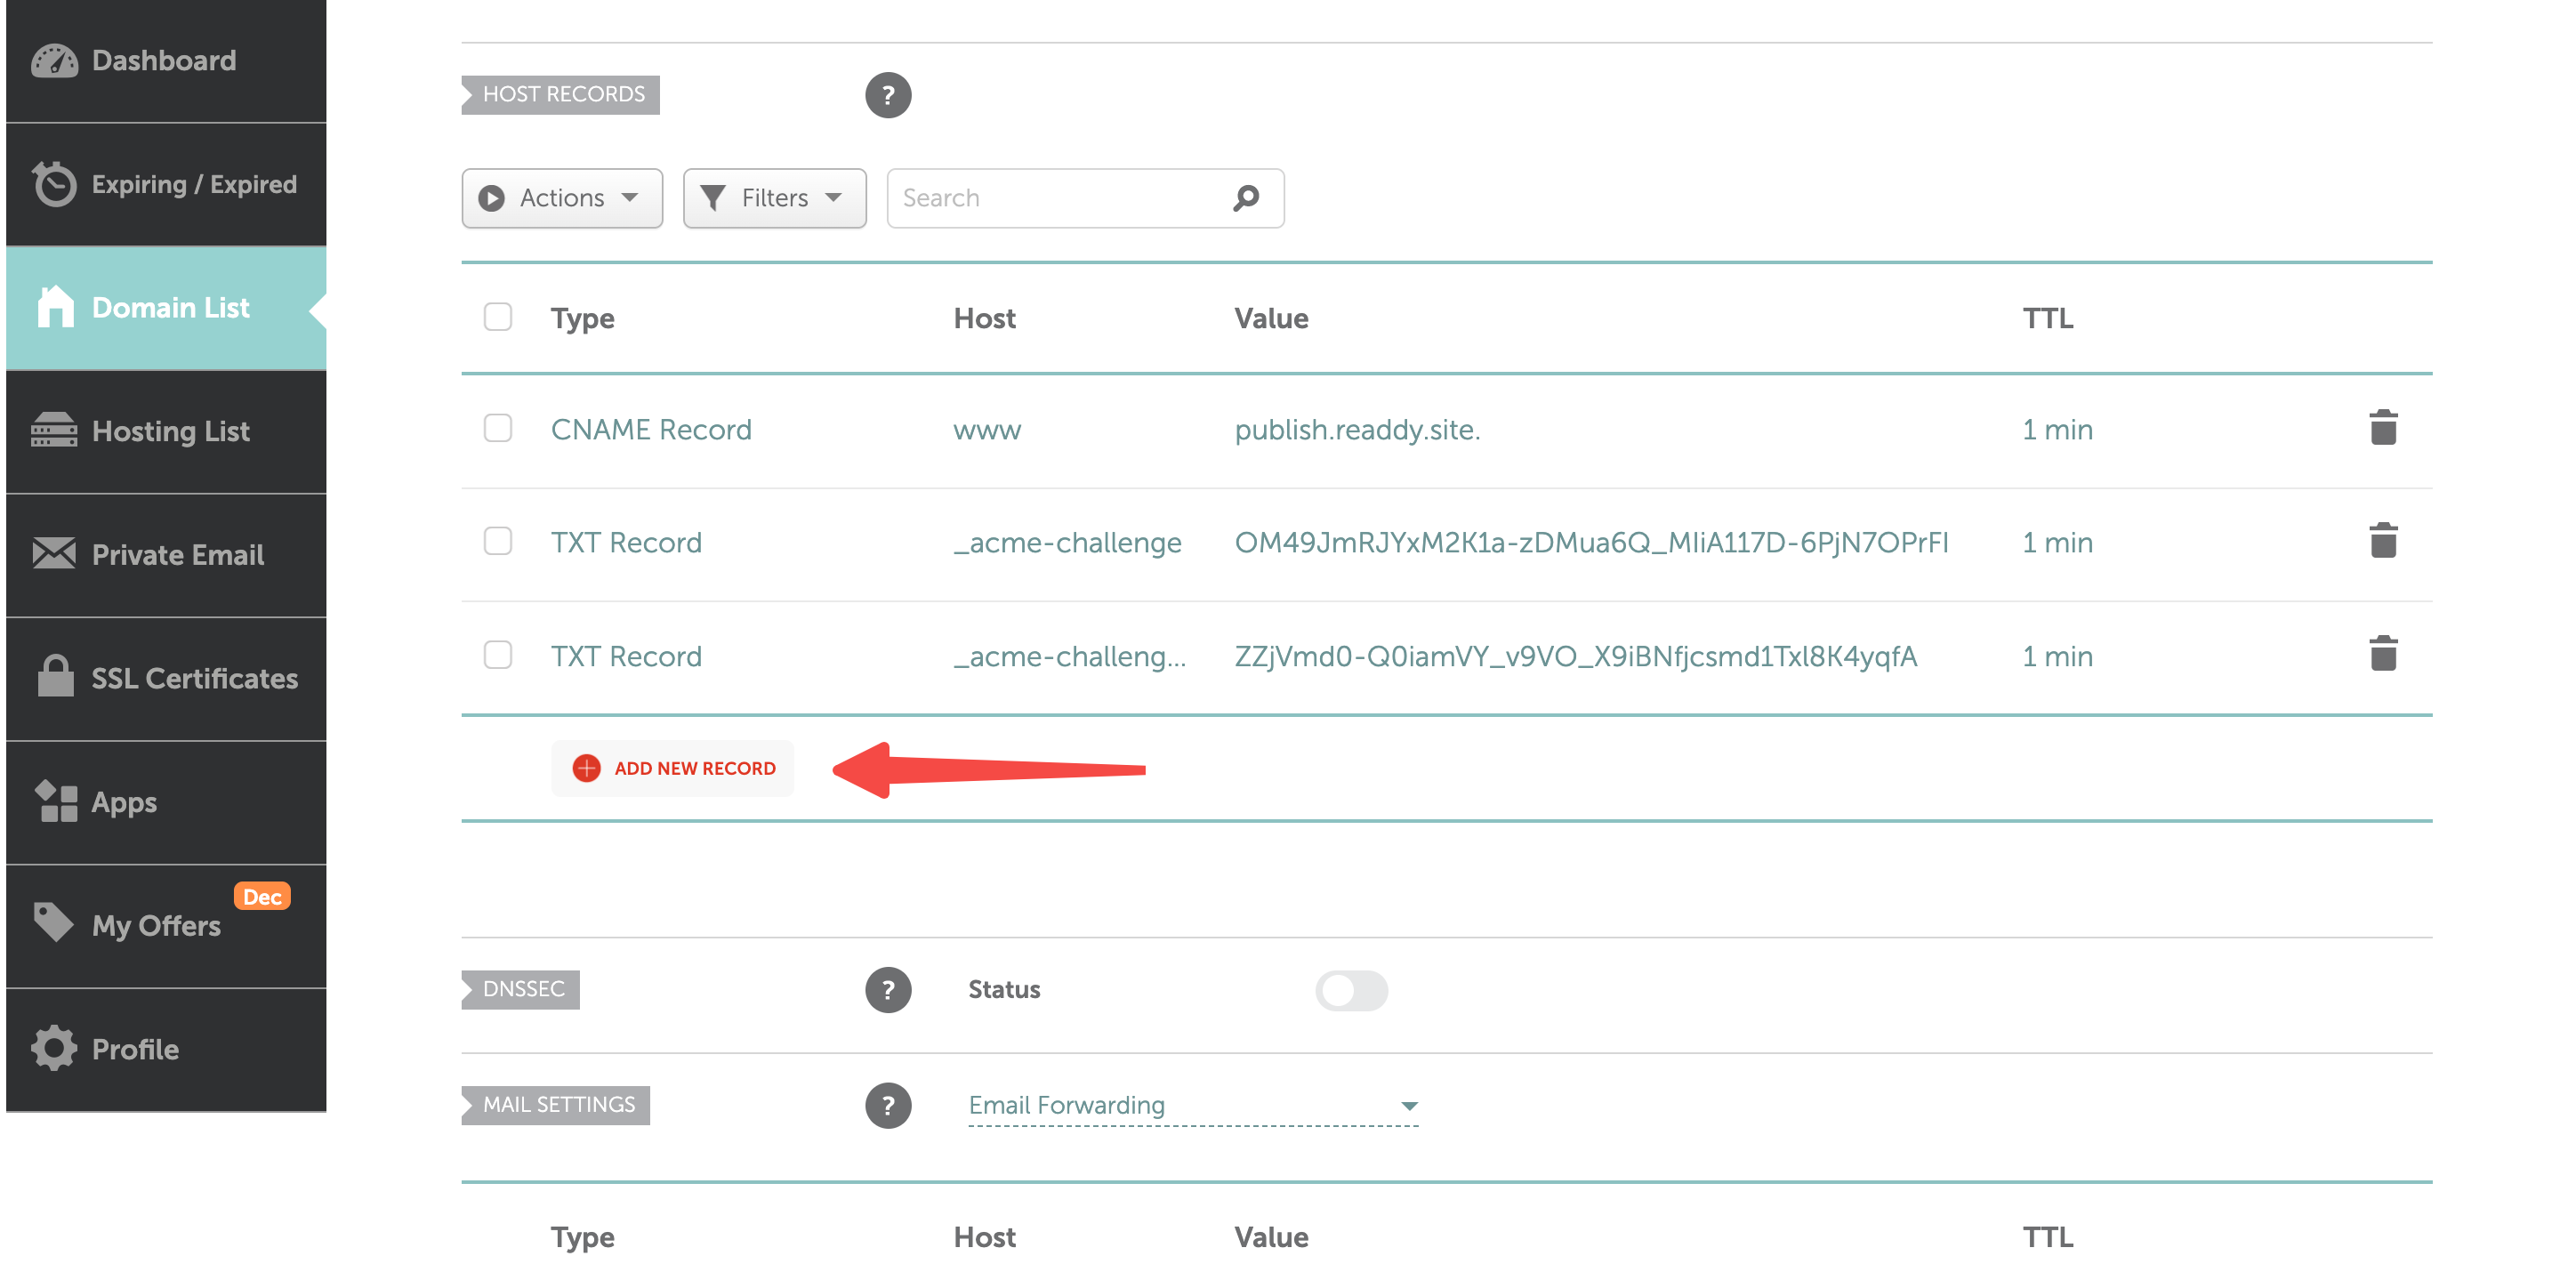
- Click Advanced DNS to access to the DNS management page.
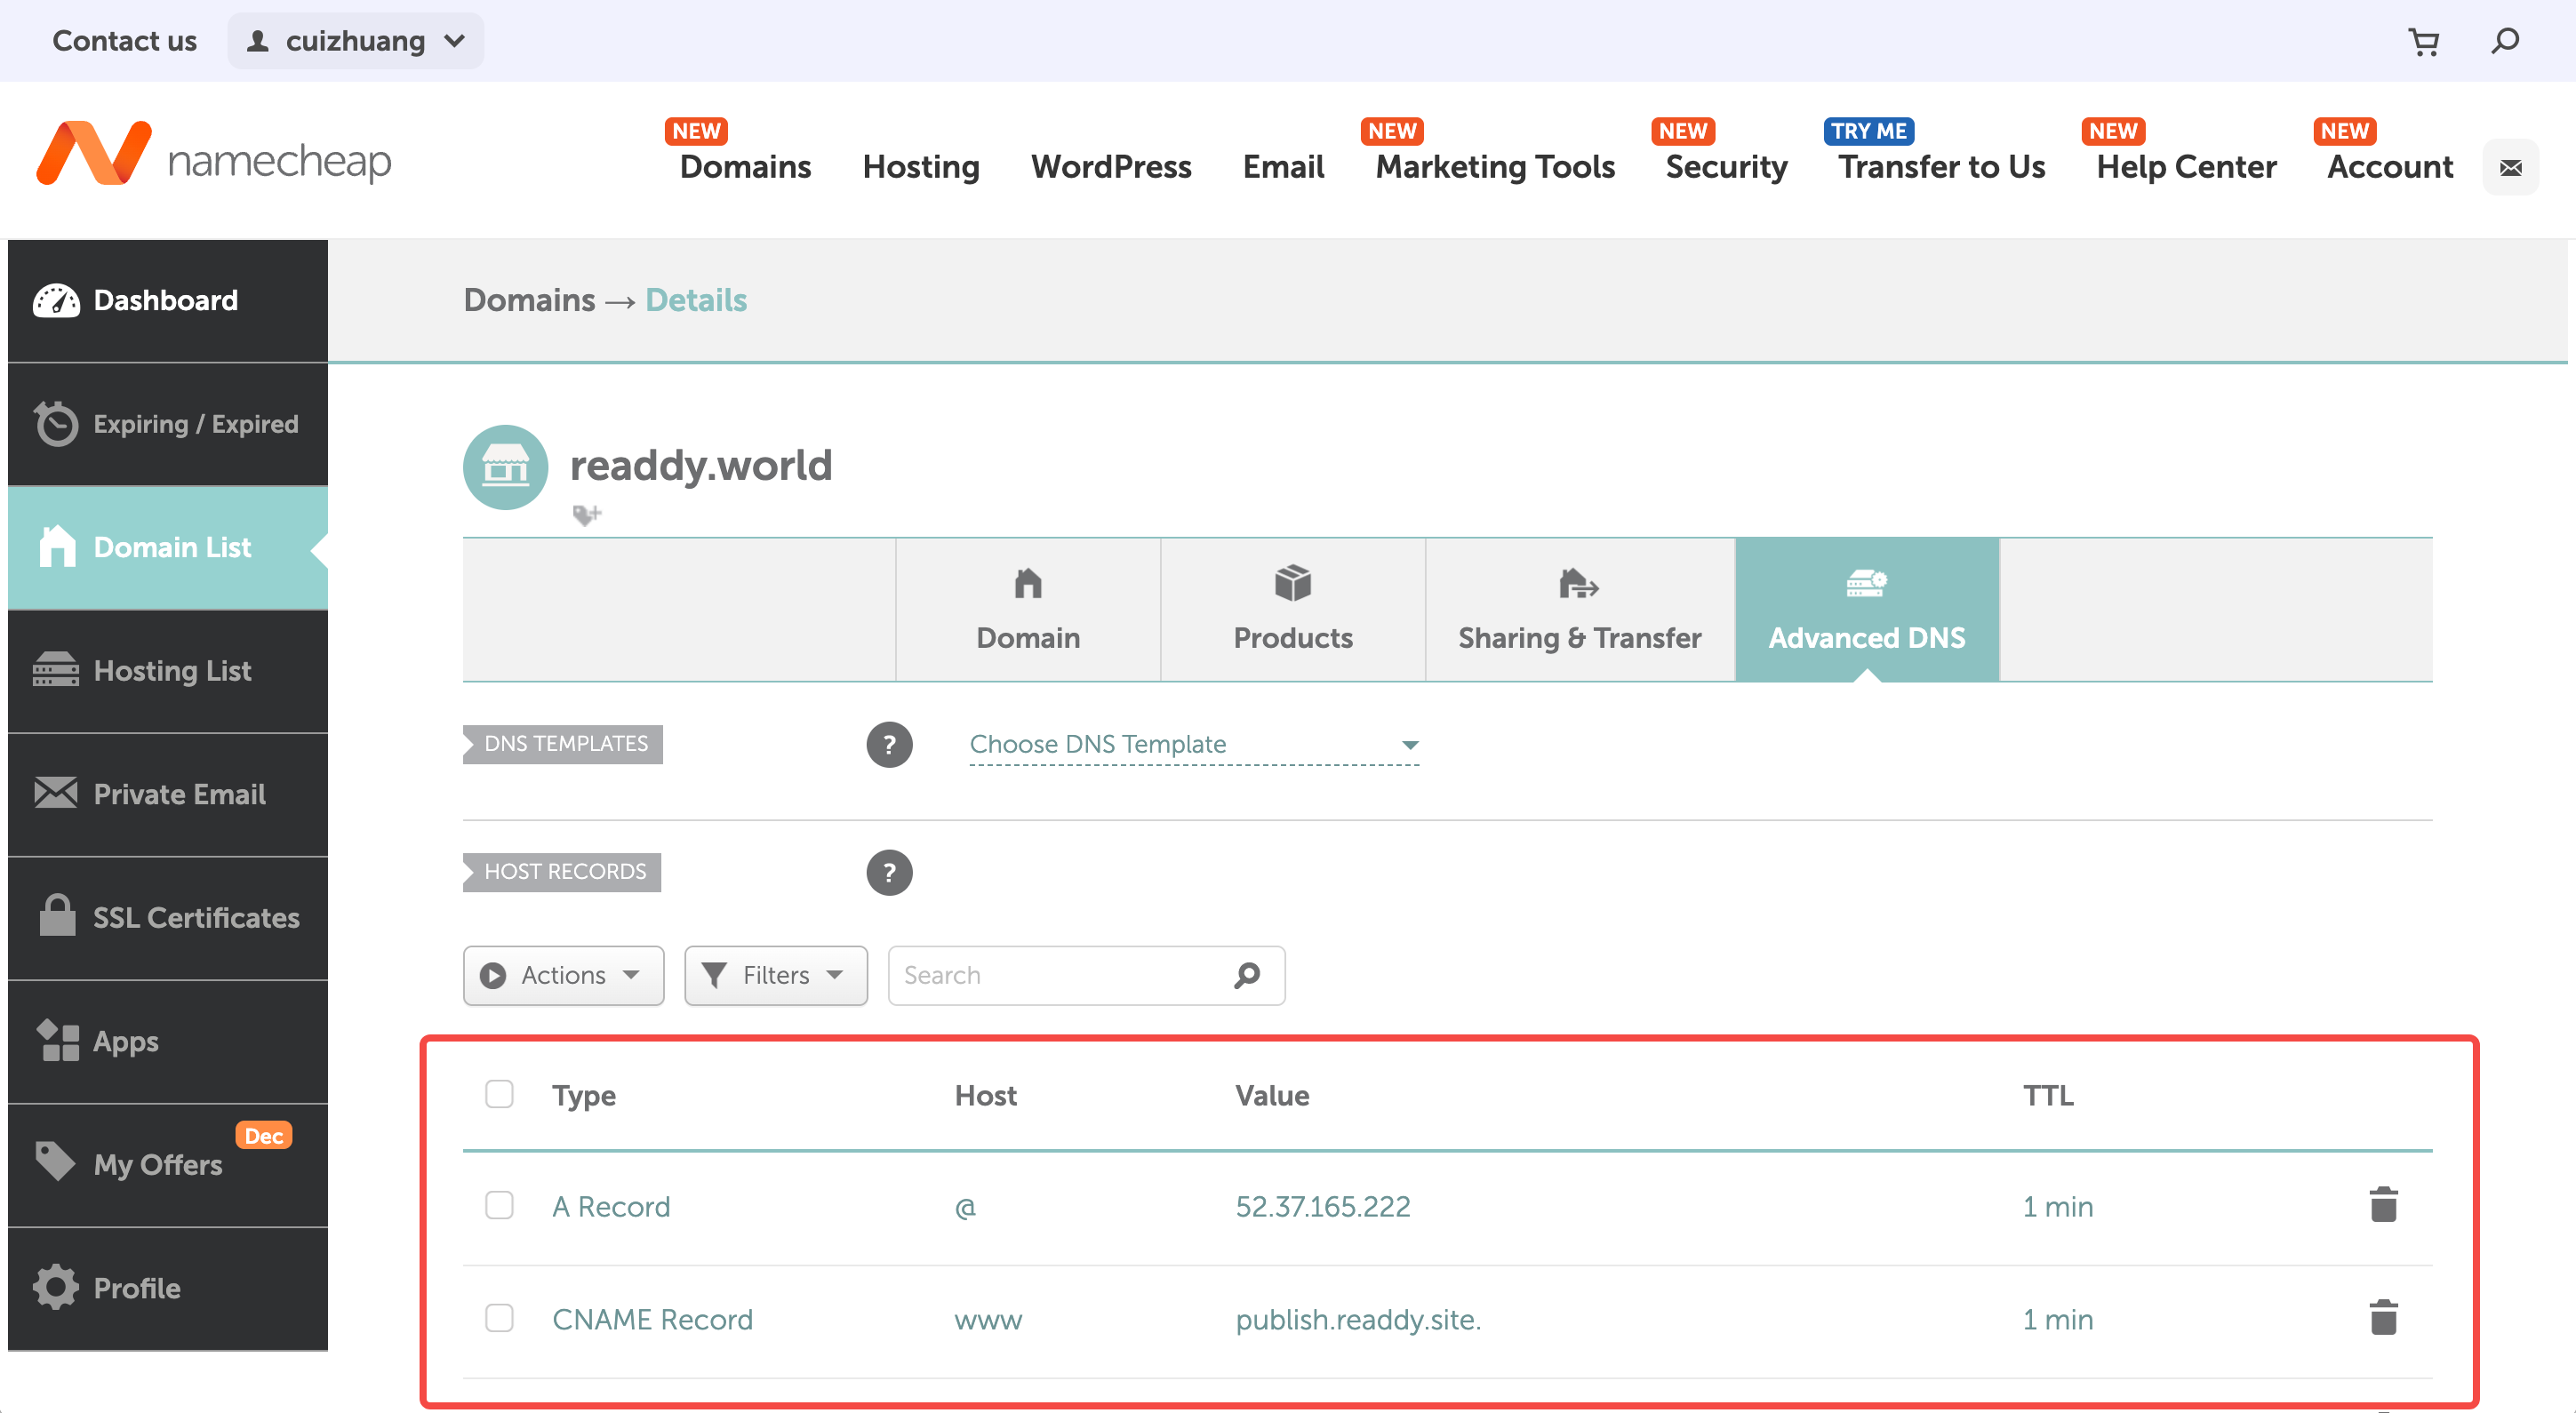
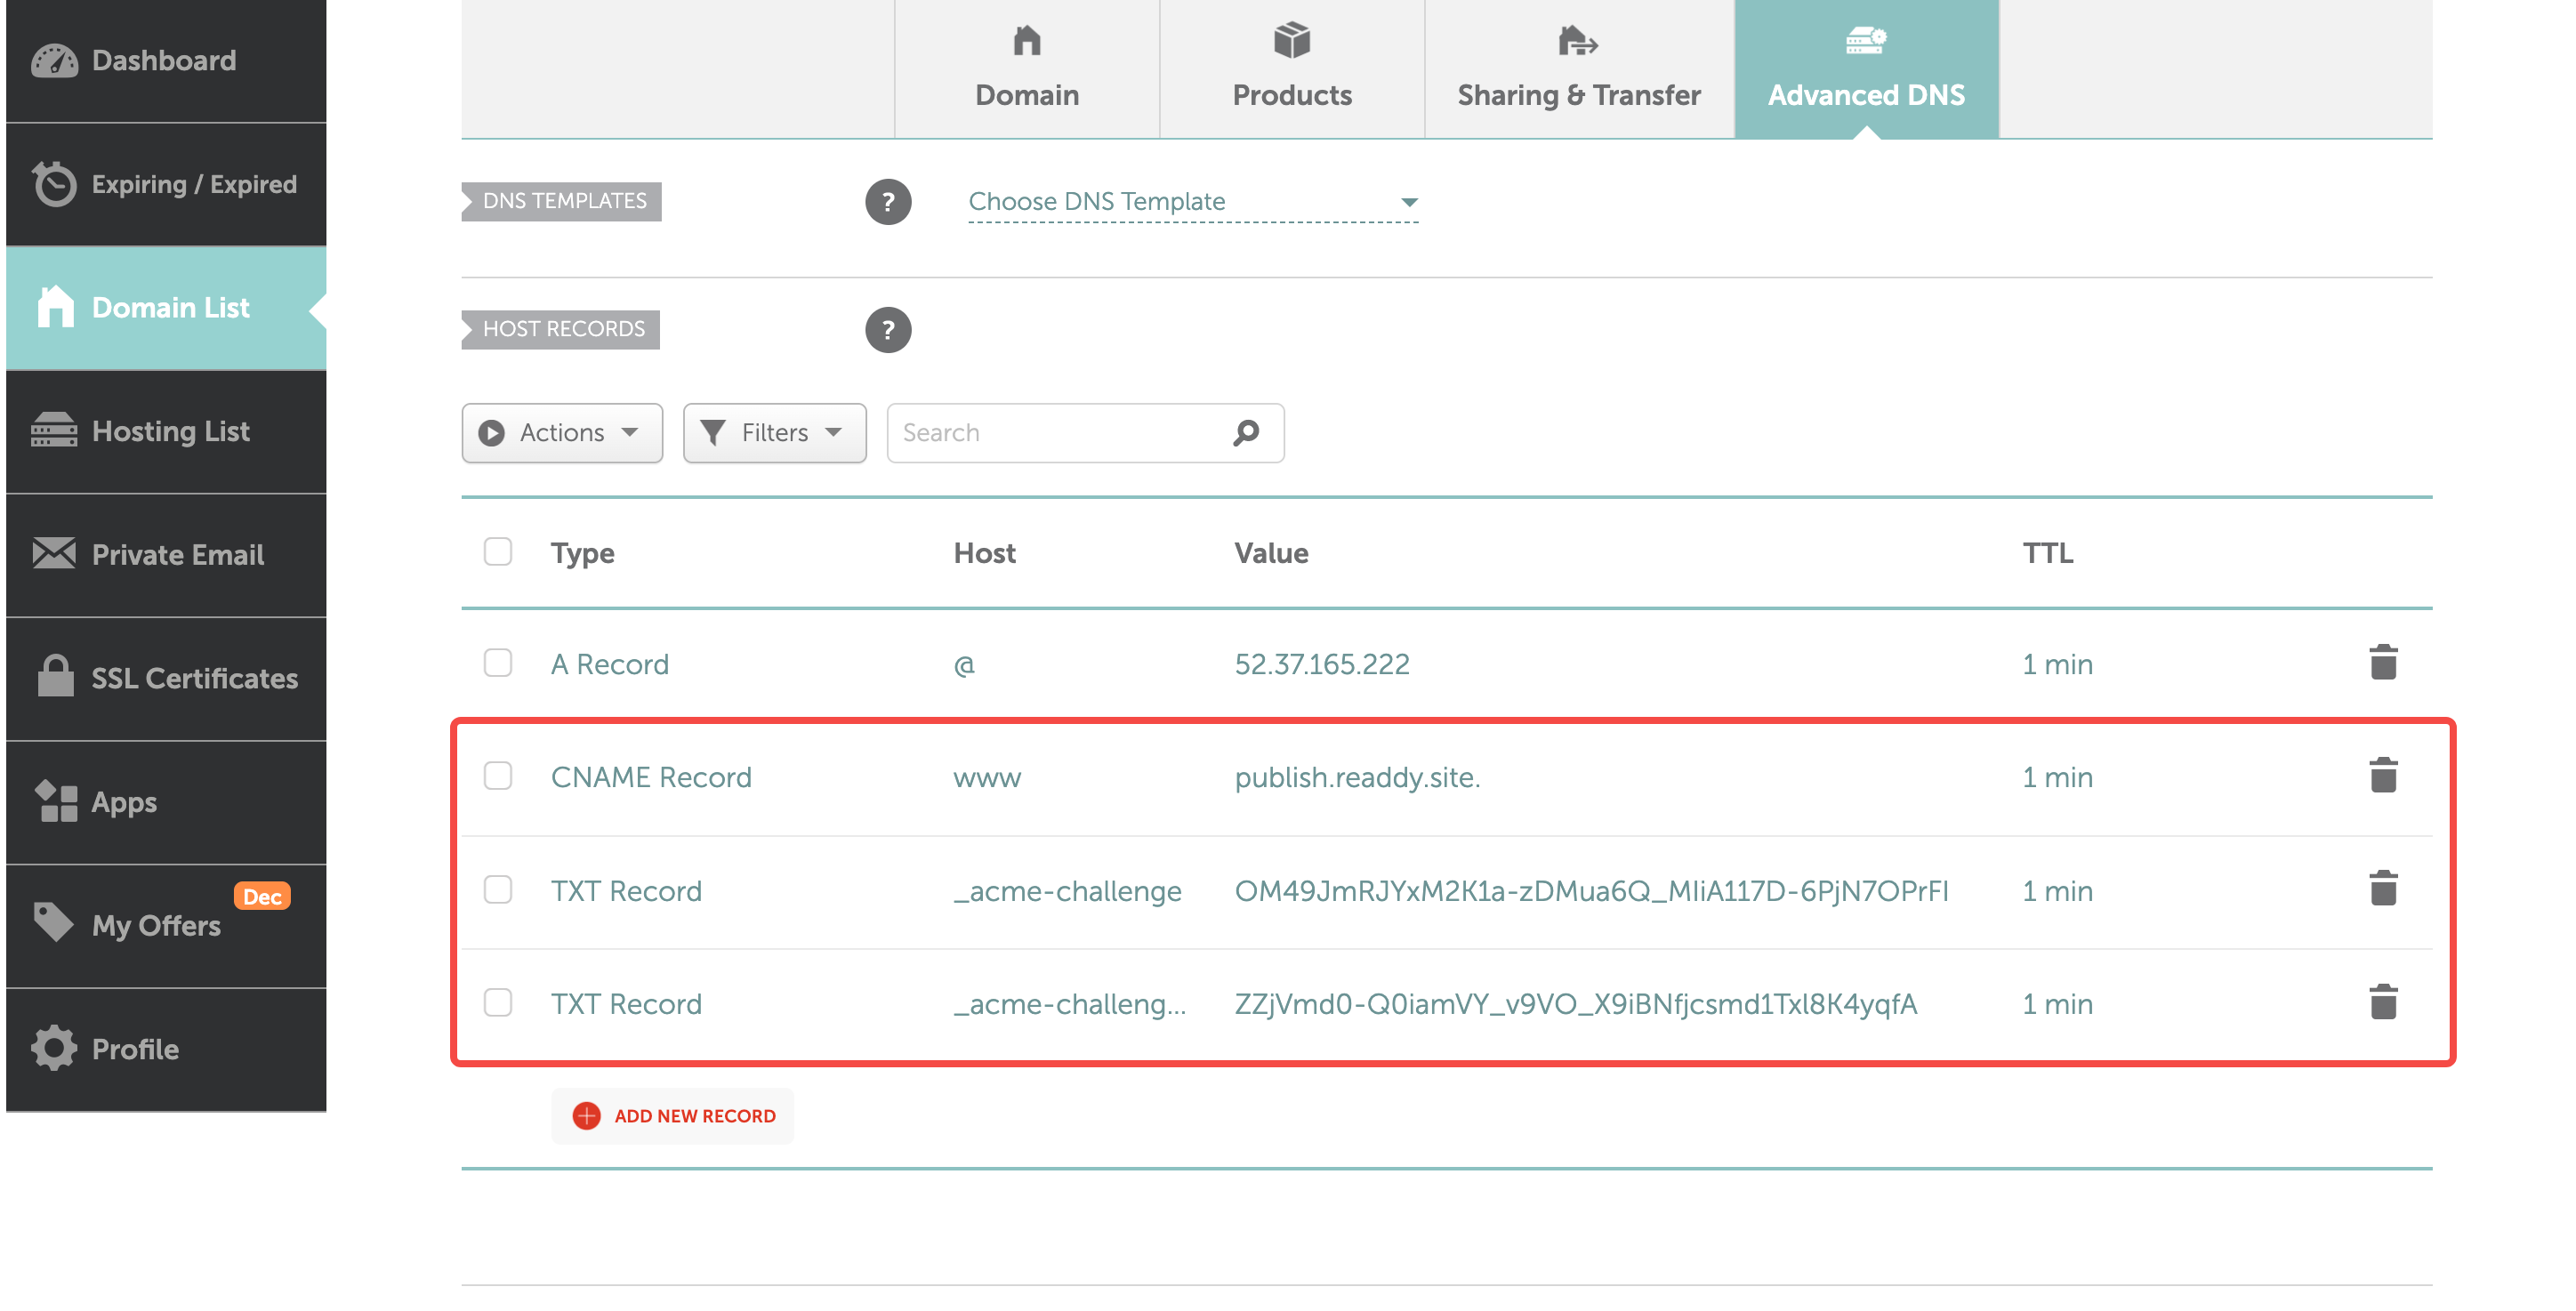
- If you connect a root domain, such as
xxxxxx.com,you need to update A + TXT - If you connect a subdomain, such as
www.xxxxxx.com,you need to update CNAME + TXT
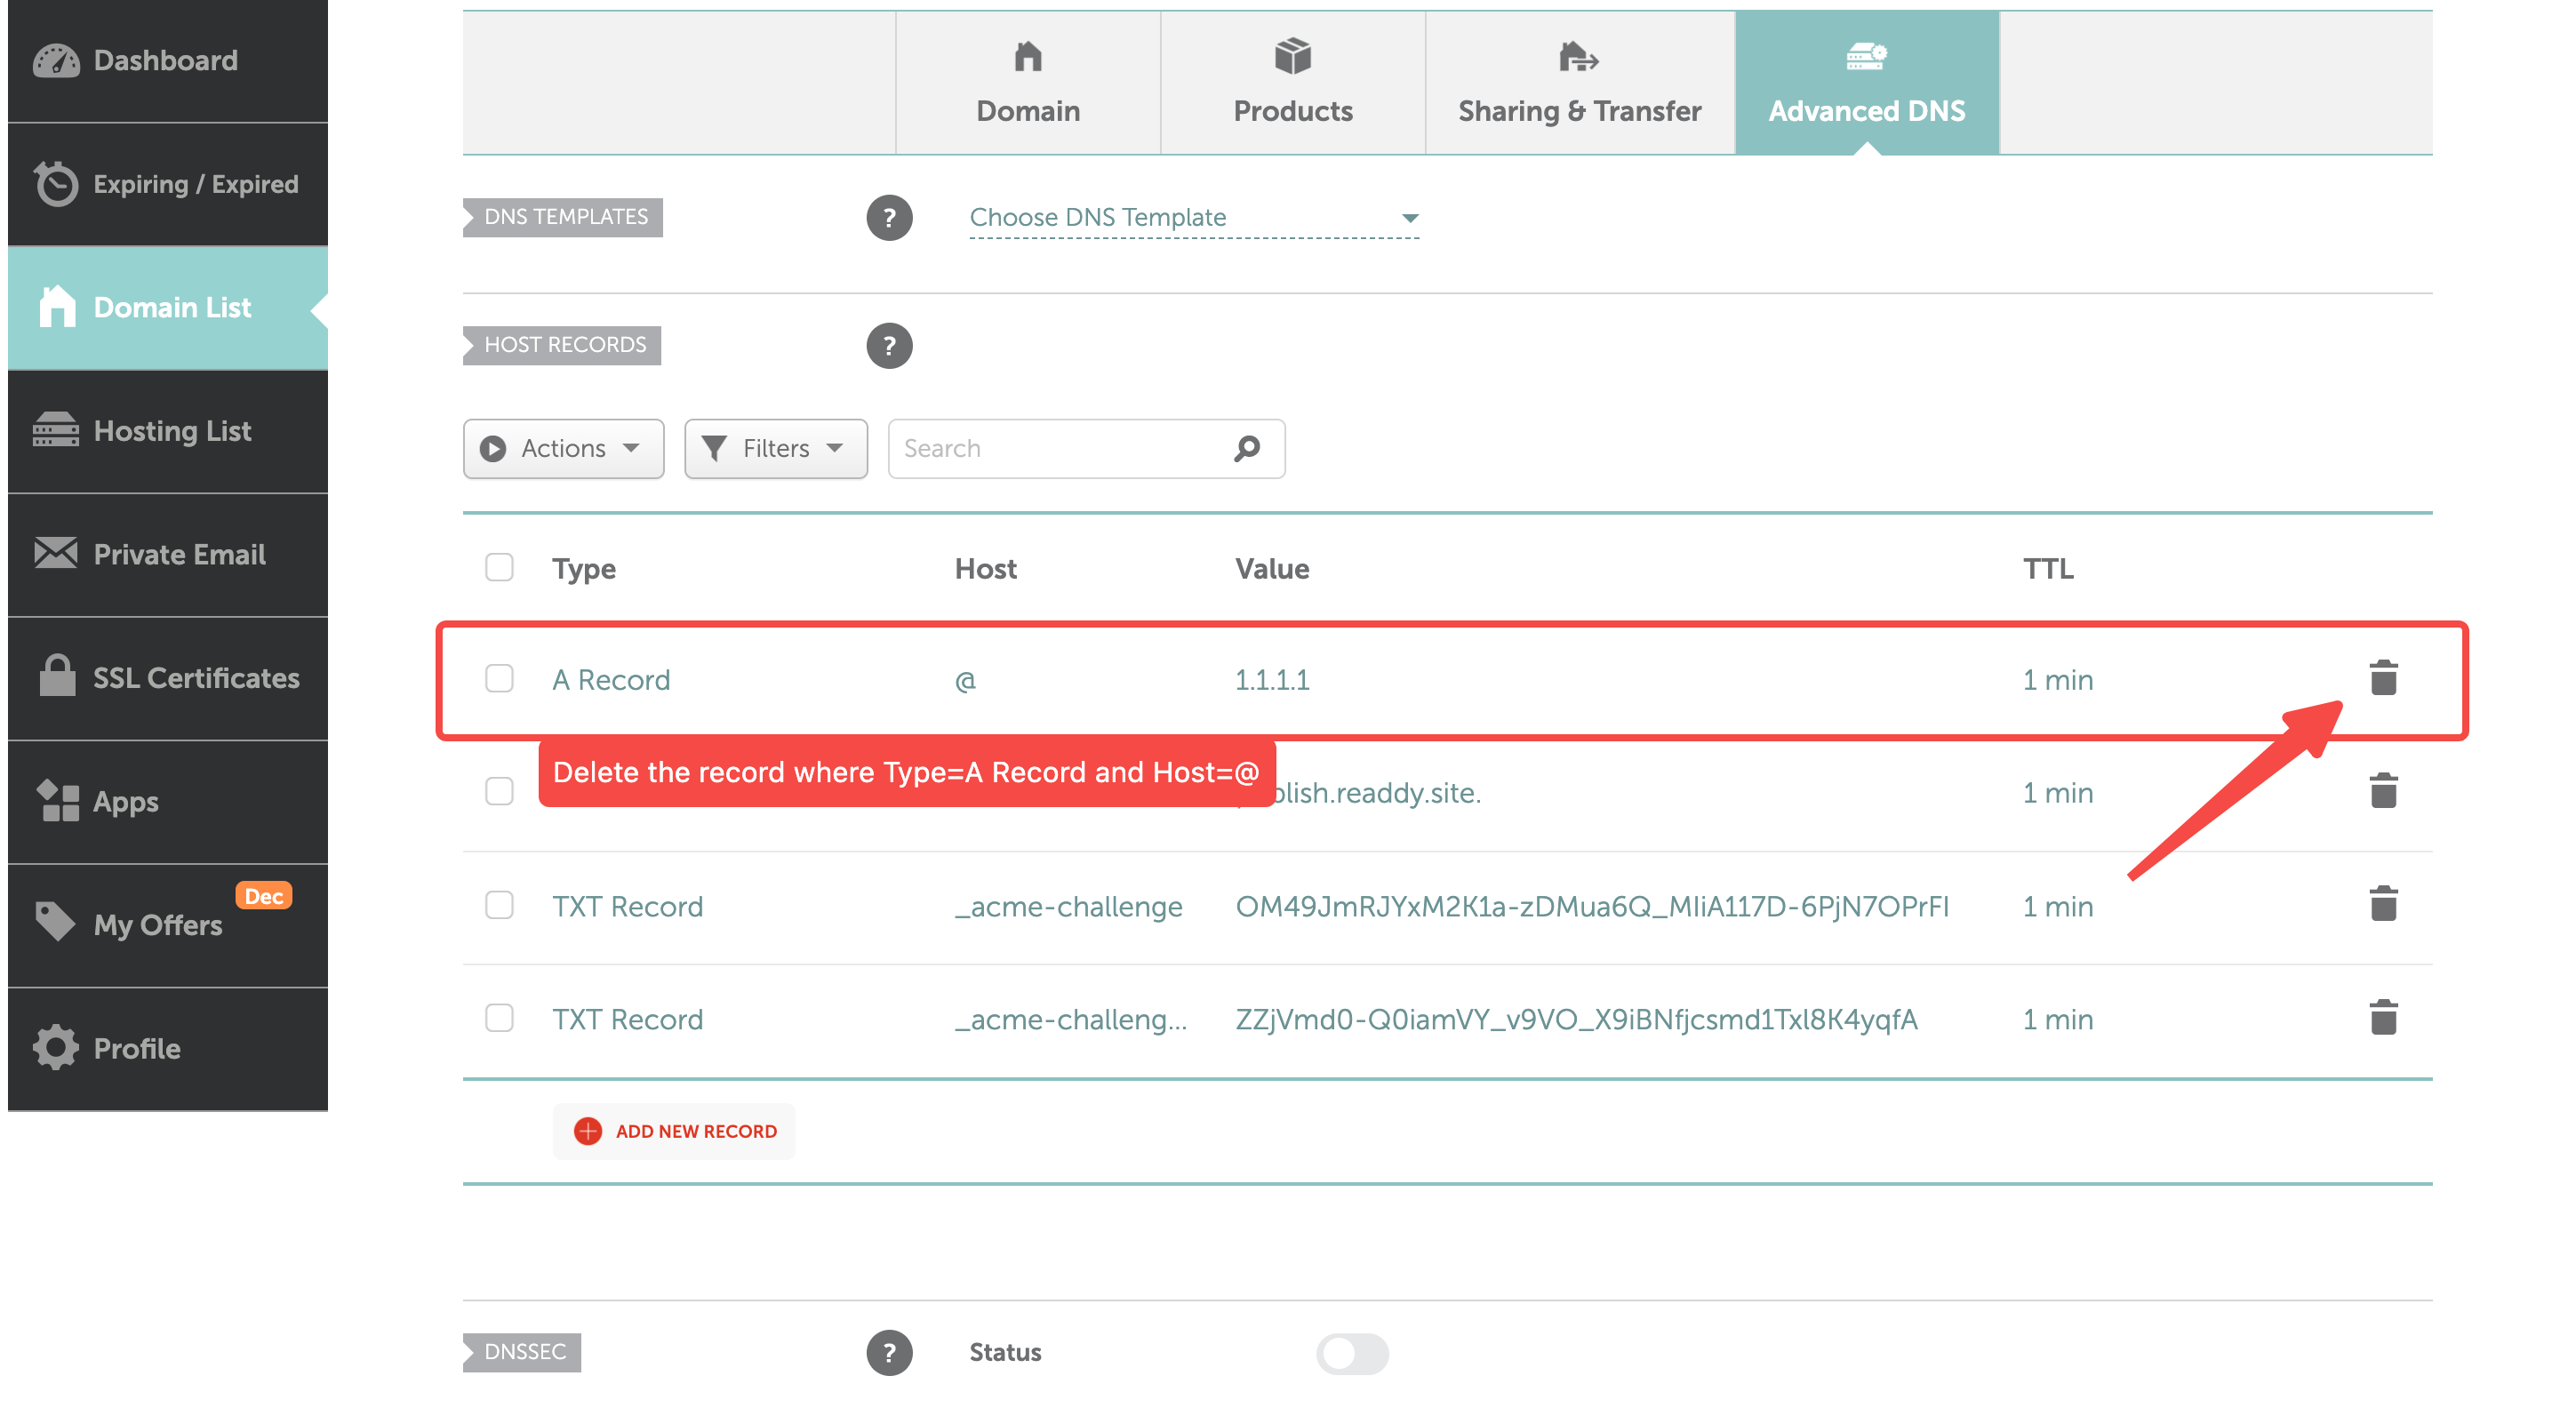
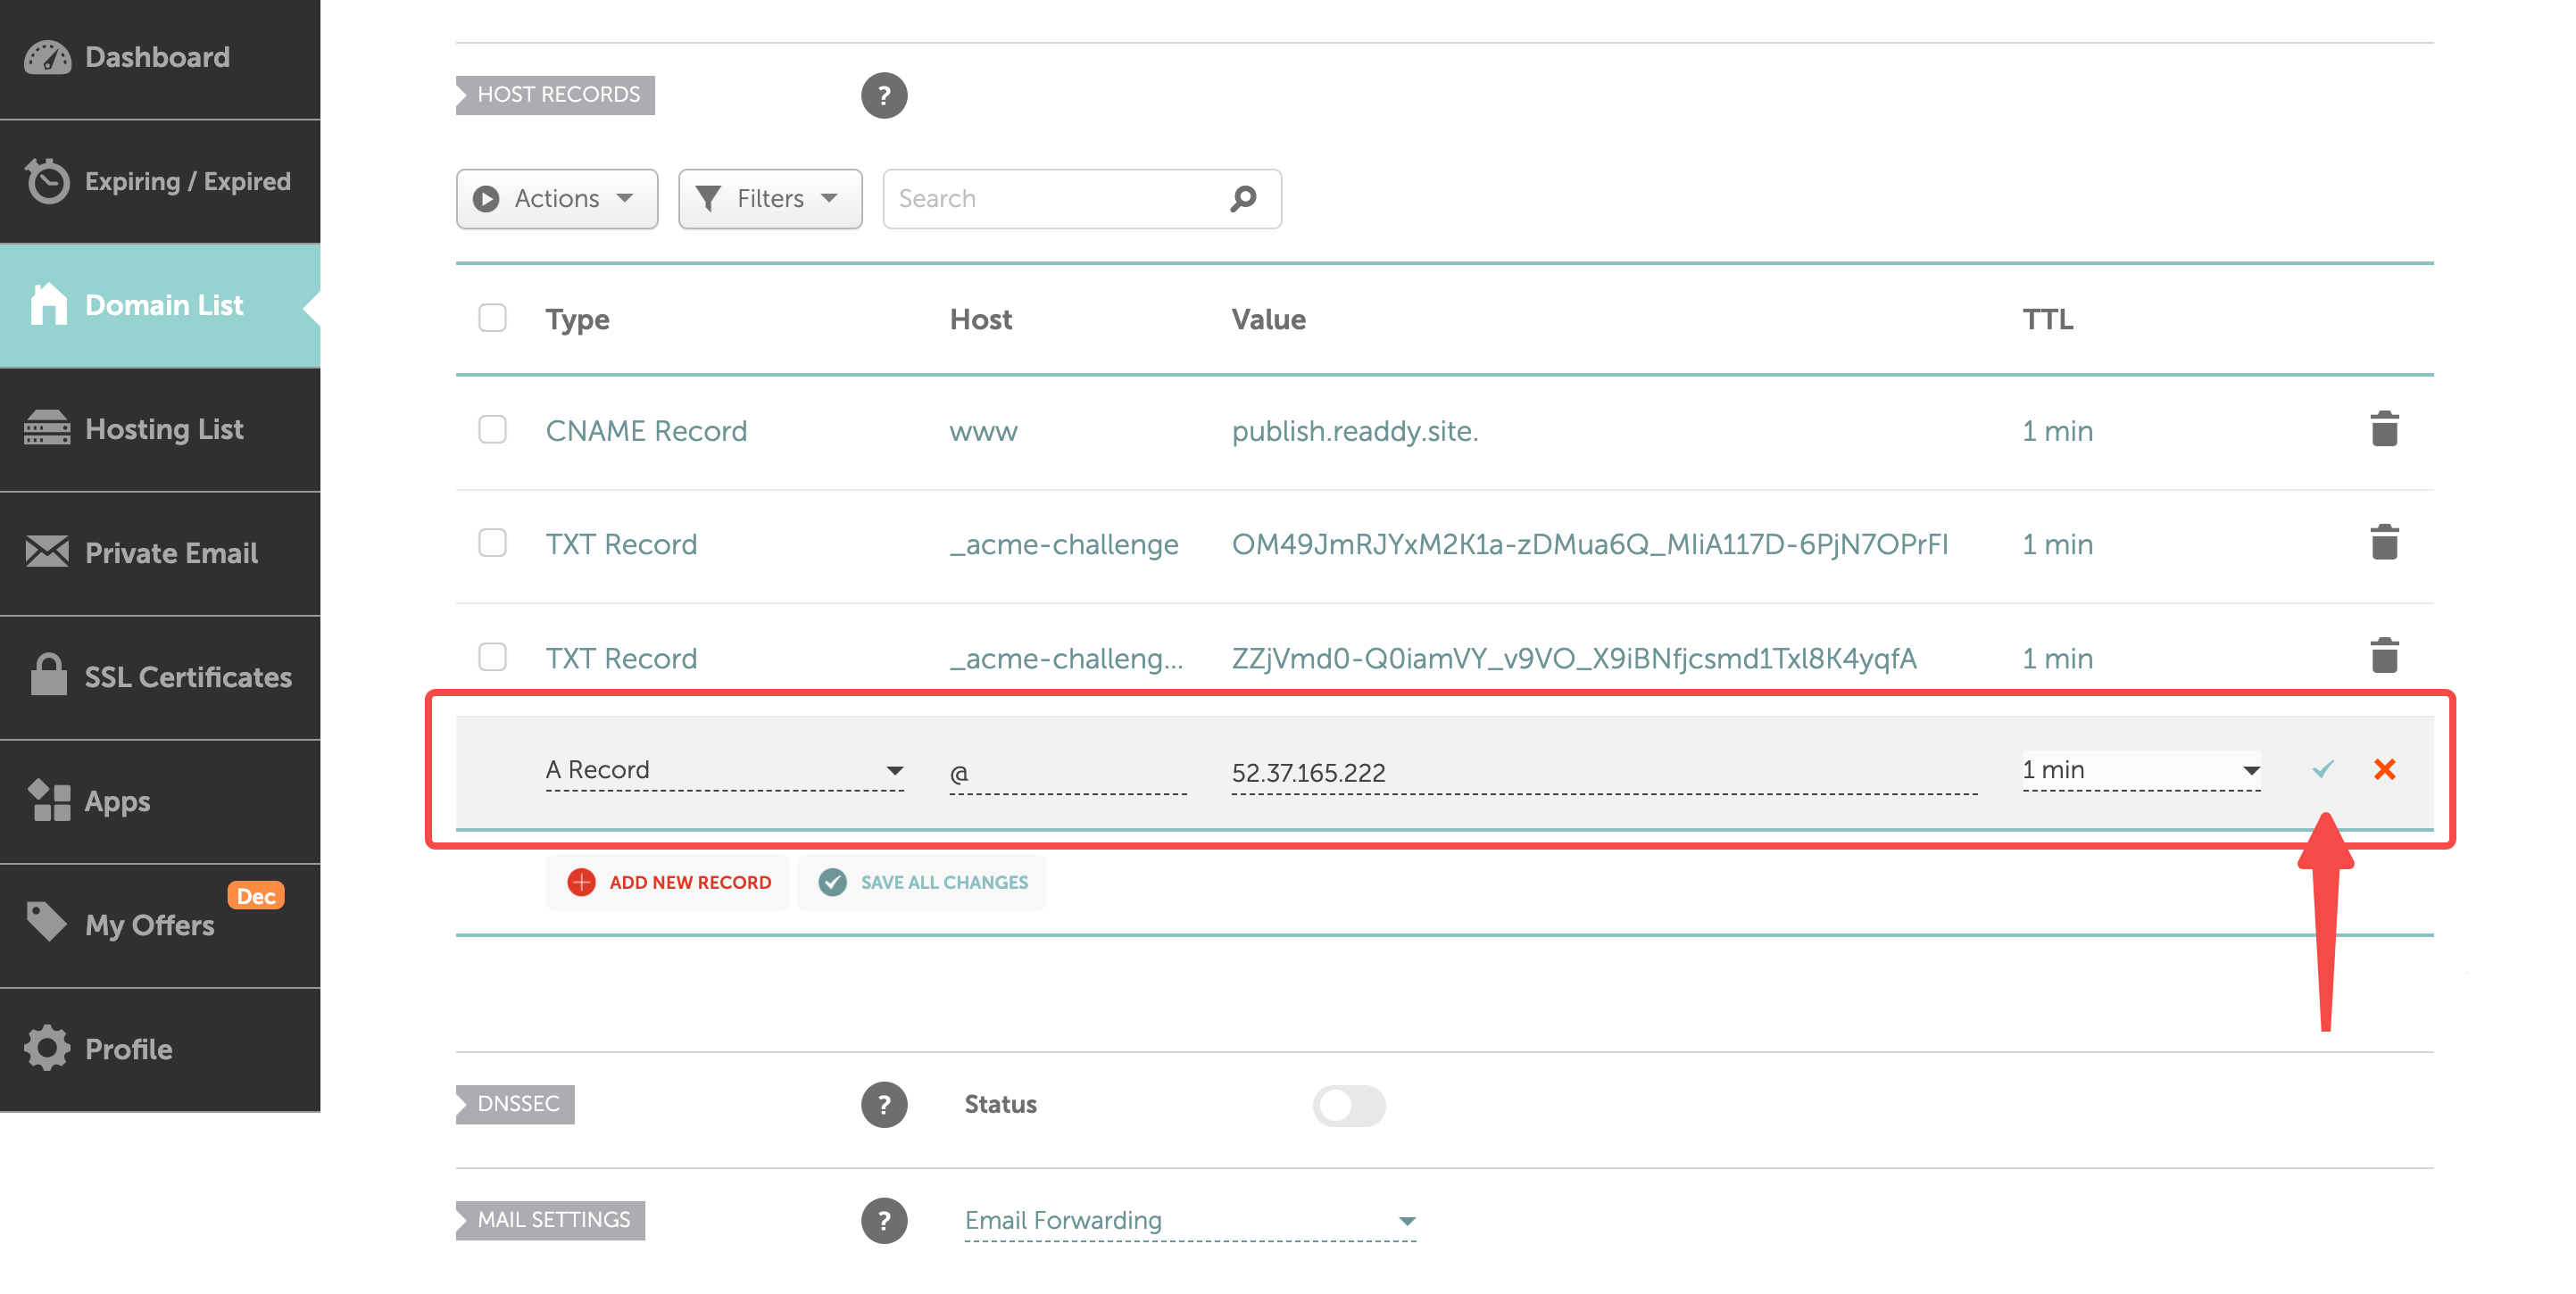
Type: A Record
Host: @
Value: 52.37.165.222
TTL: 1 min
Squarespace Configuration
Squarespace Configuration
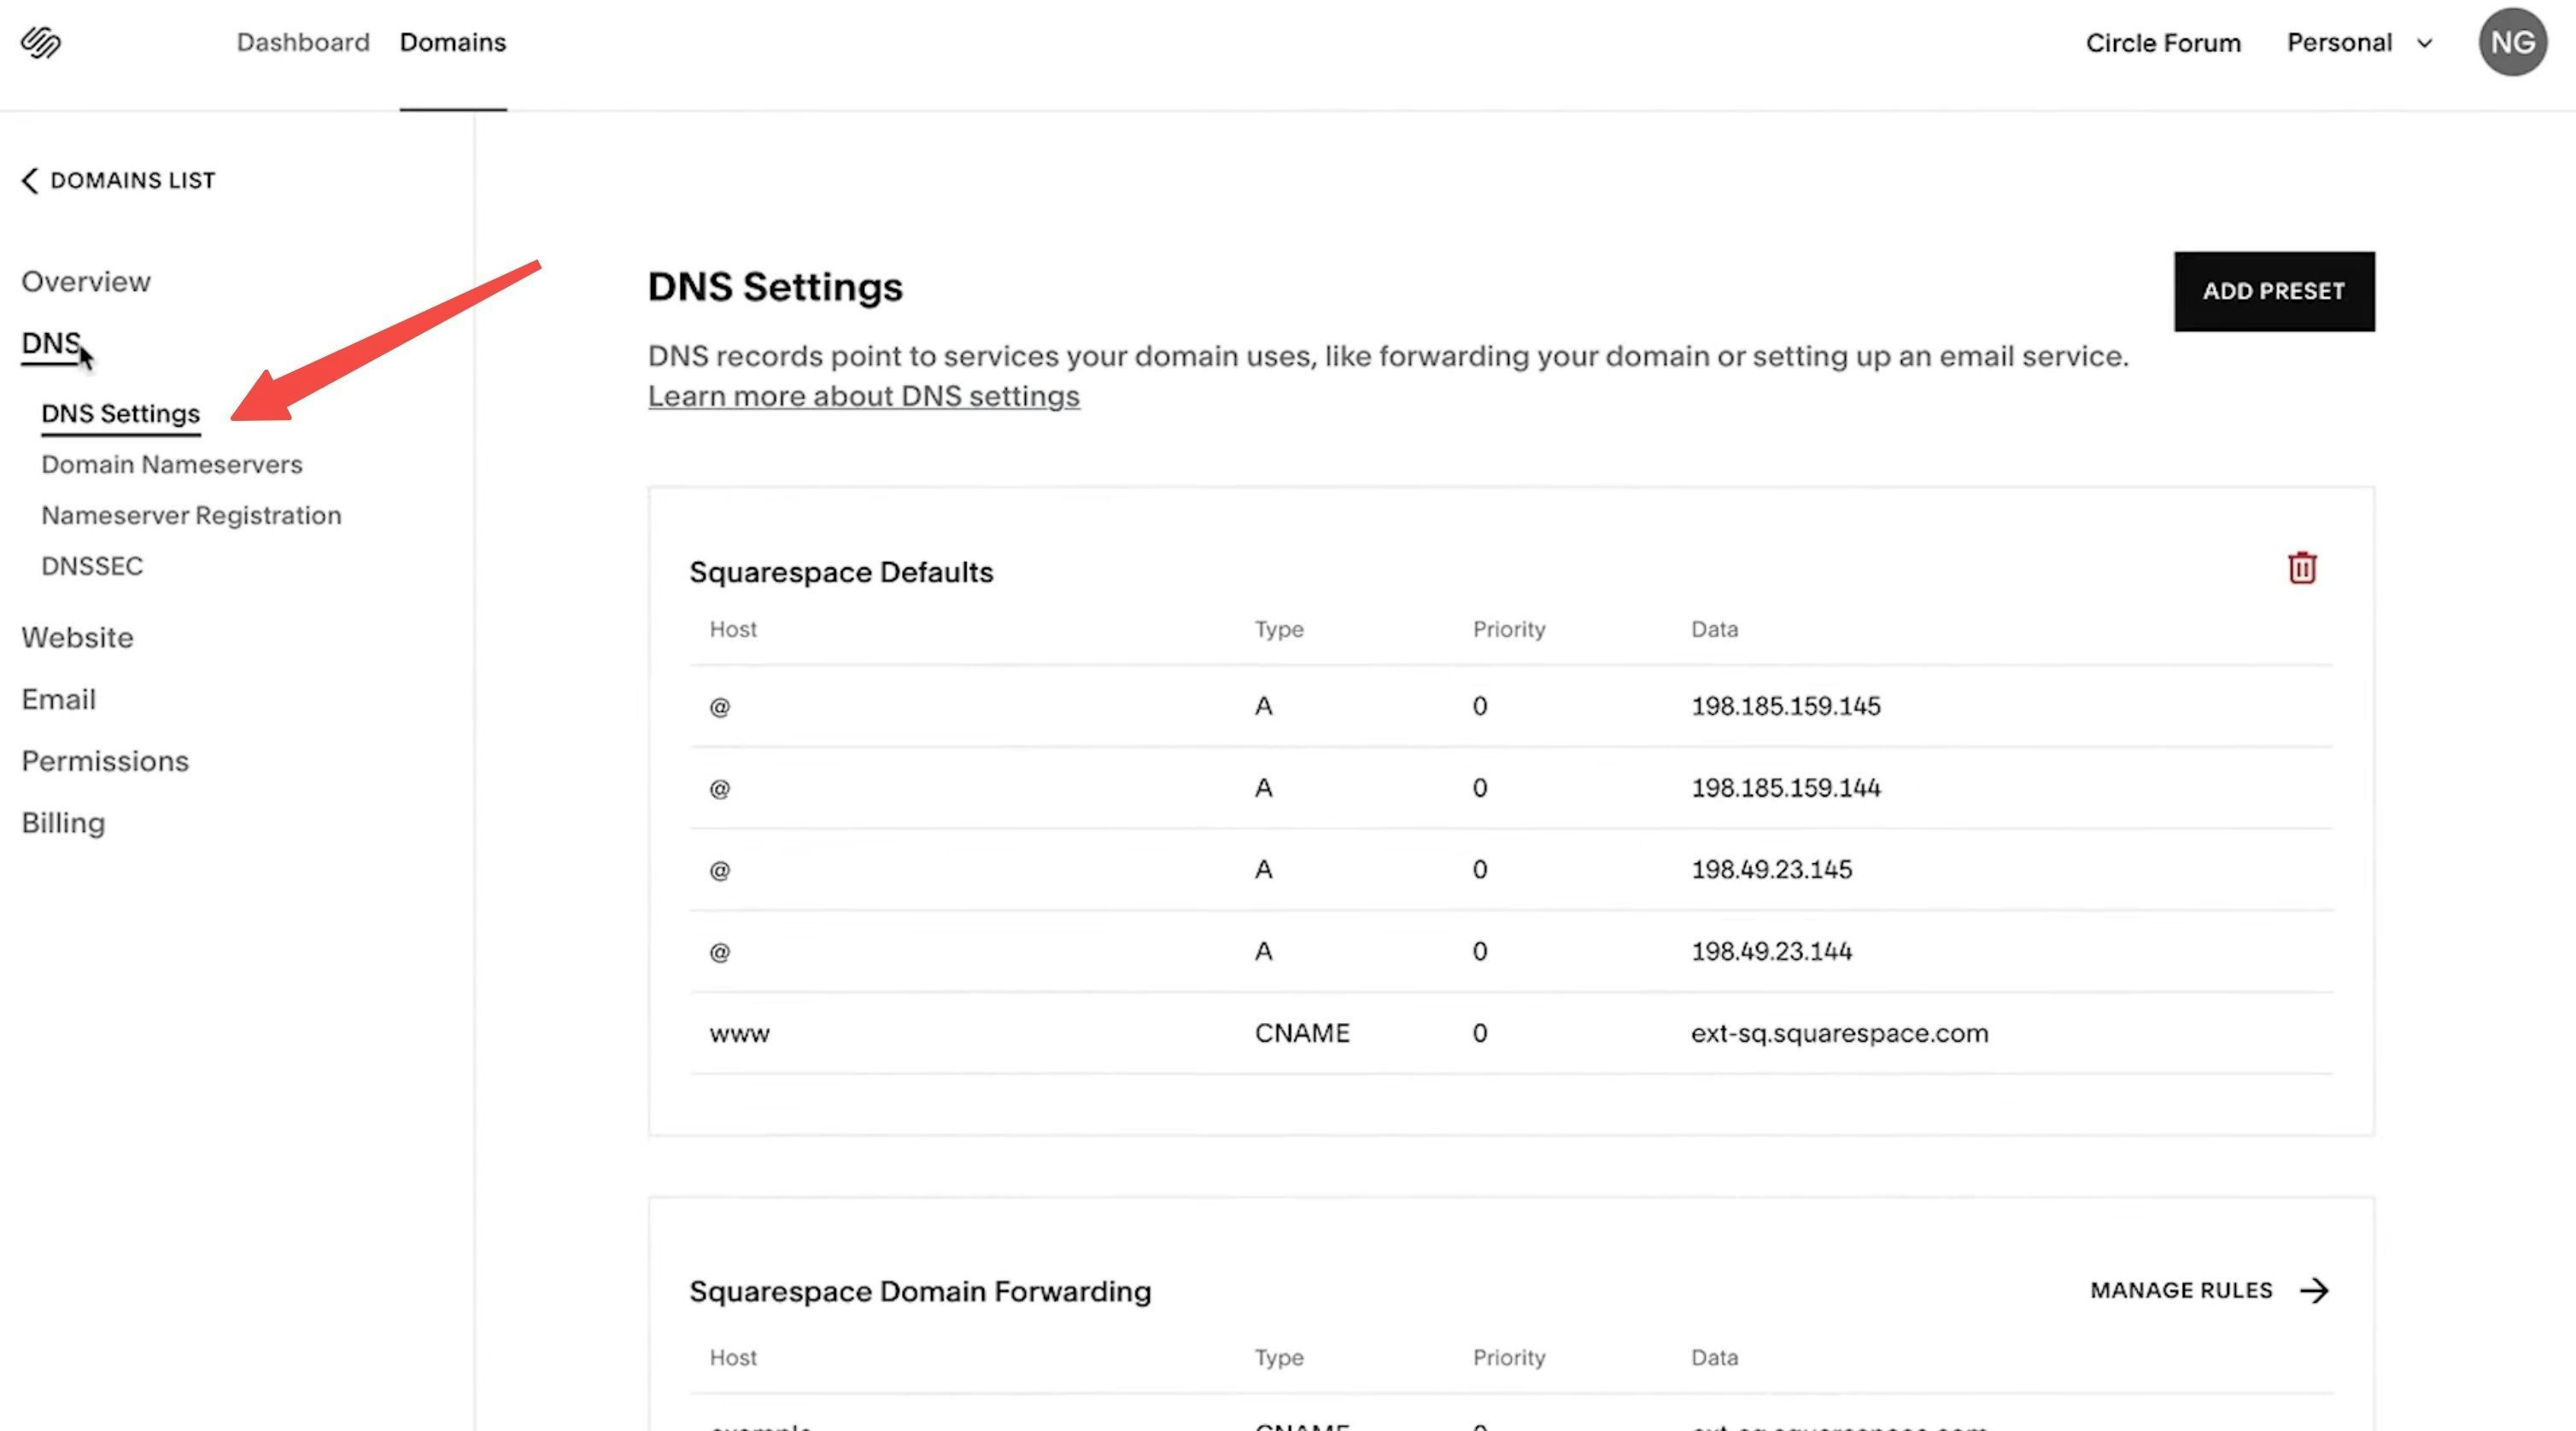
- Click on DNS, then select DNS Settings
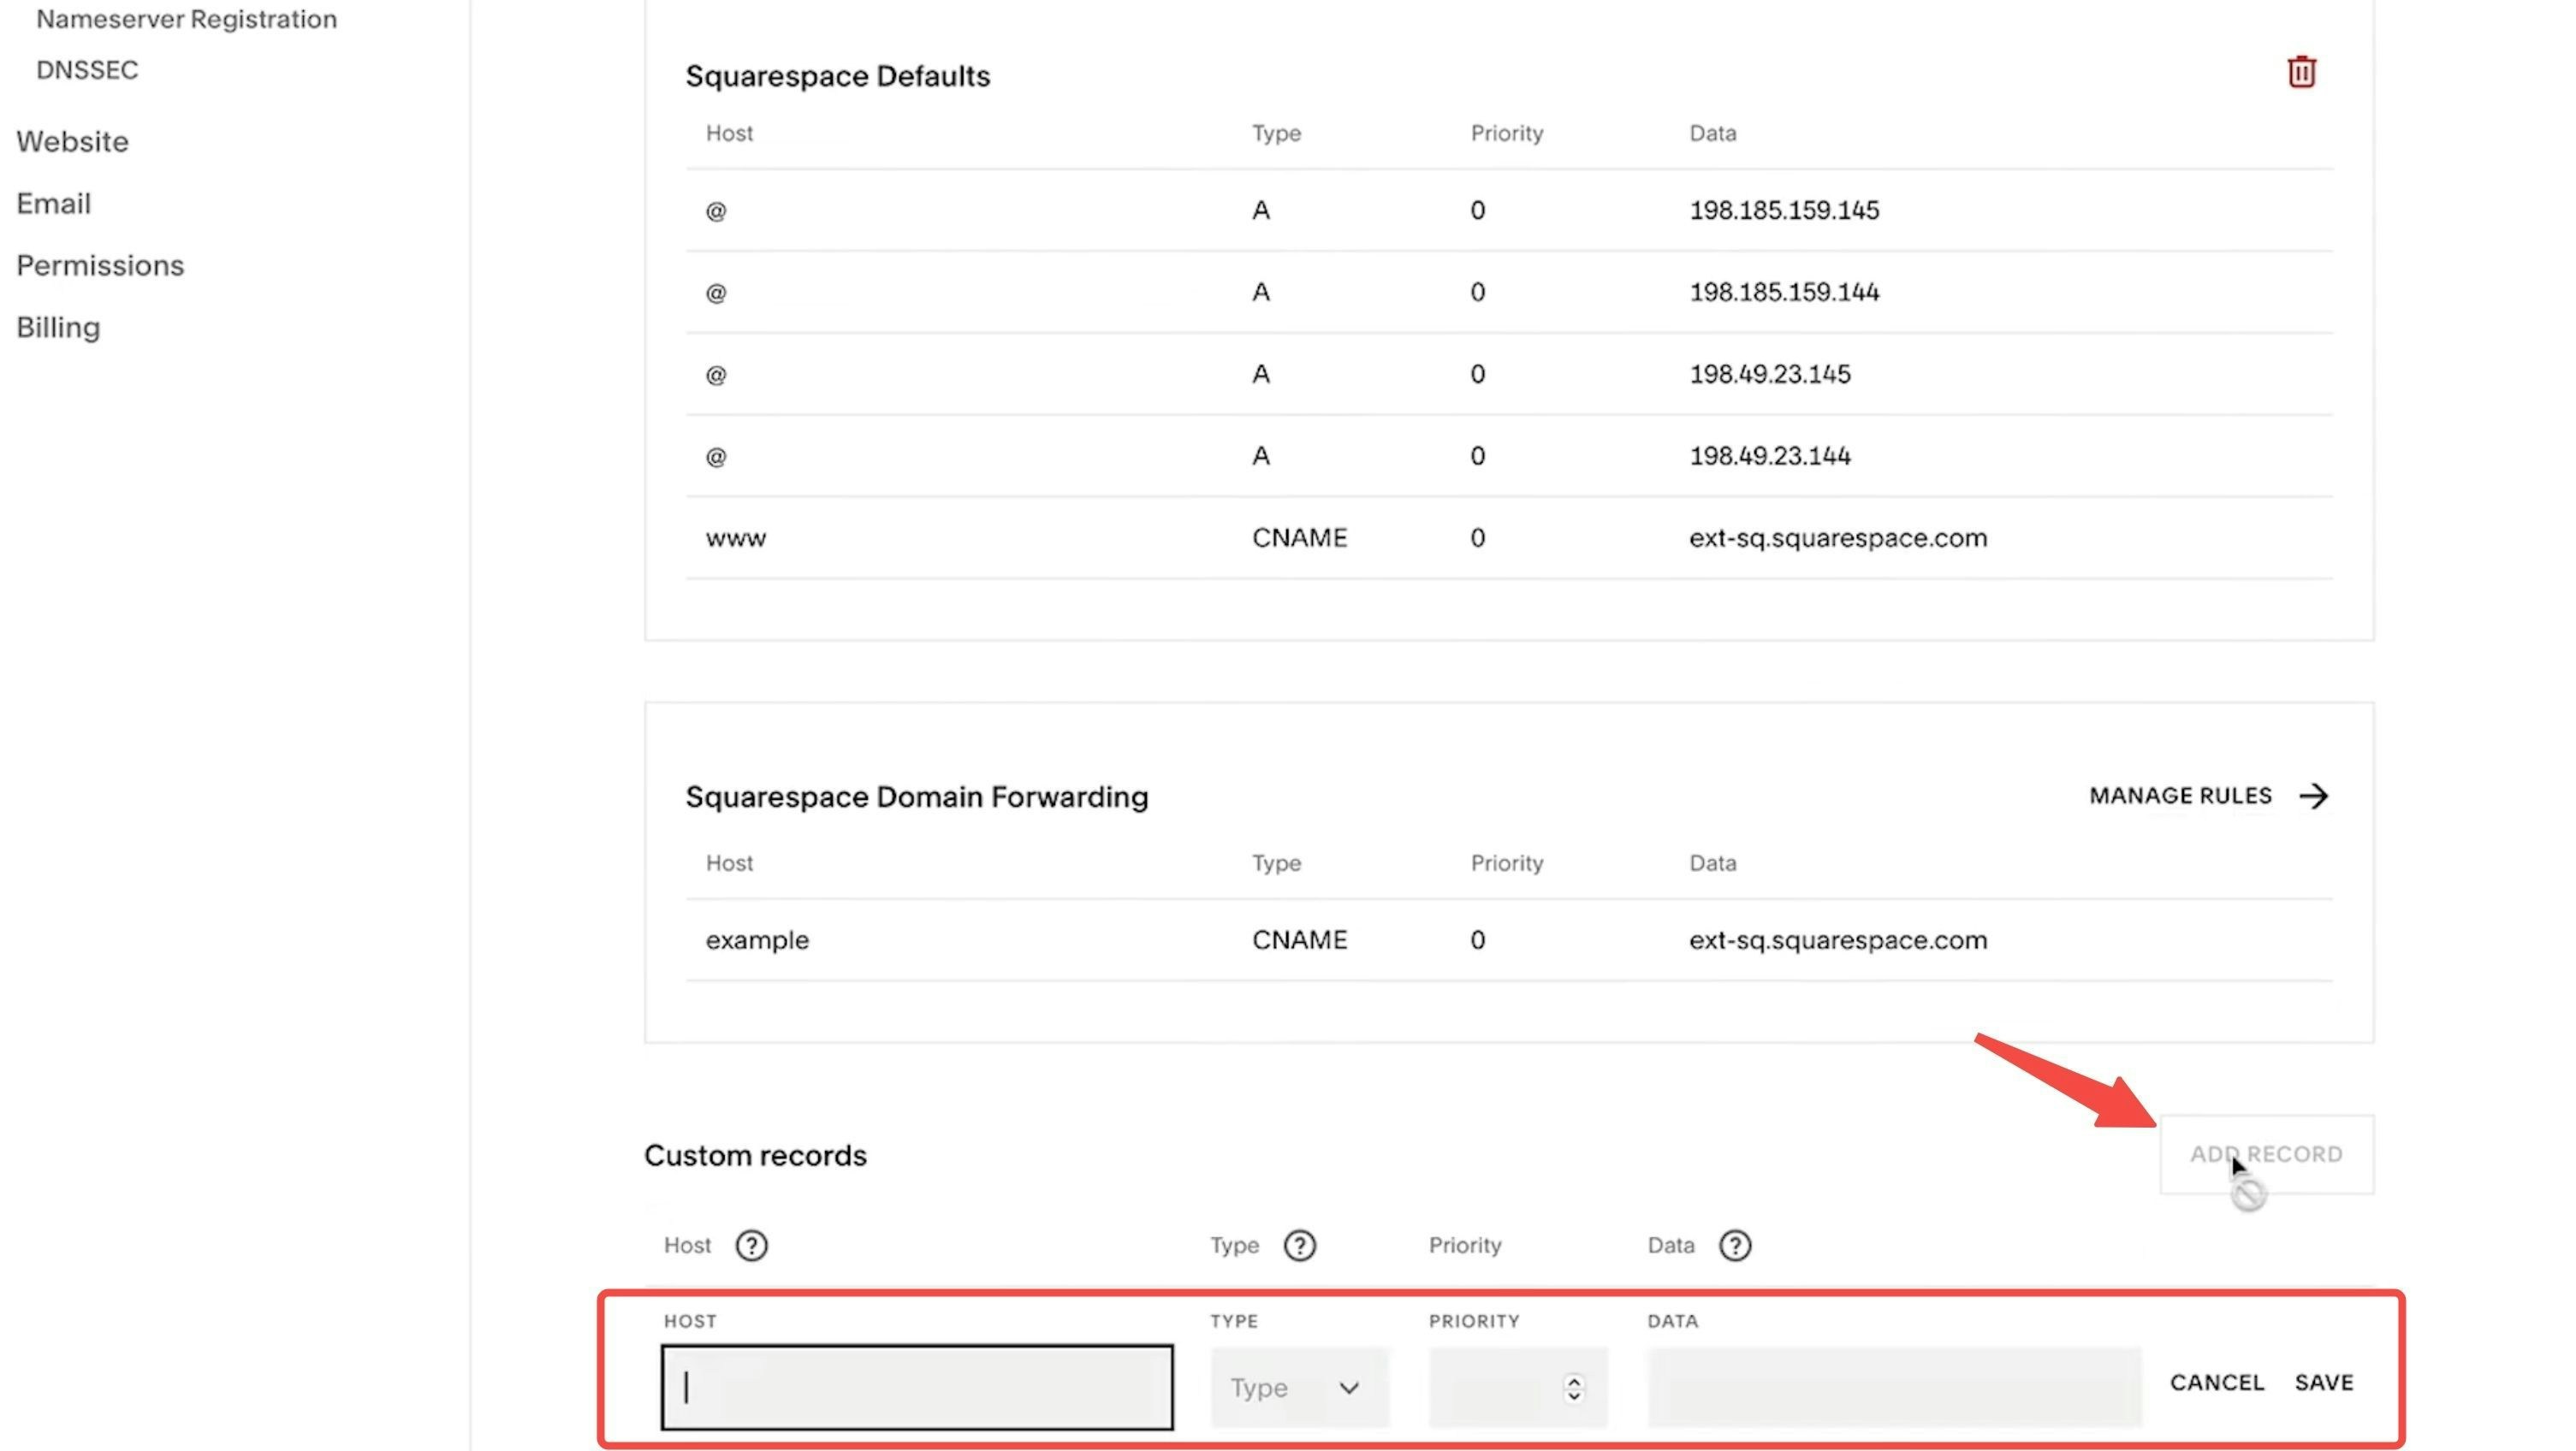
- Scroll down to the Custom Records section
- Click Add Record to input the DNS information provided by Readdy
Wix Configuration
Wix Configuration
- Go to Domains in your Wix account
- Click the Domain Actions icon next to the domain you want to connect
- Select Manage DNS records


- Scroll down to the record type you need to add (e.g., A, CNAME, TXT), then click + Add Record
- Enter the DNS record values exactly as provided by Readdy
- Click Save
- In the pop-up message, click Save Changes to confirm
WordPress Configuration
WordPress Configuration
- Visit your site’s dashboard
- Navigate to Upgrades → Domains (or Hosting → Domains if you’re using WP Admin) to view all the domains associated with your site
- Click on the domain you want to configure
- Select DNS records and click the Manage button
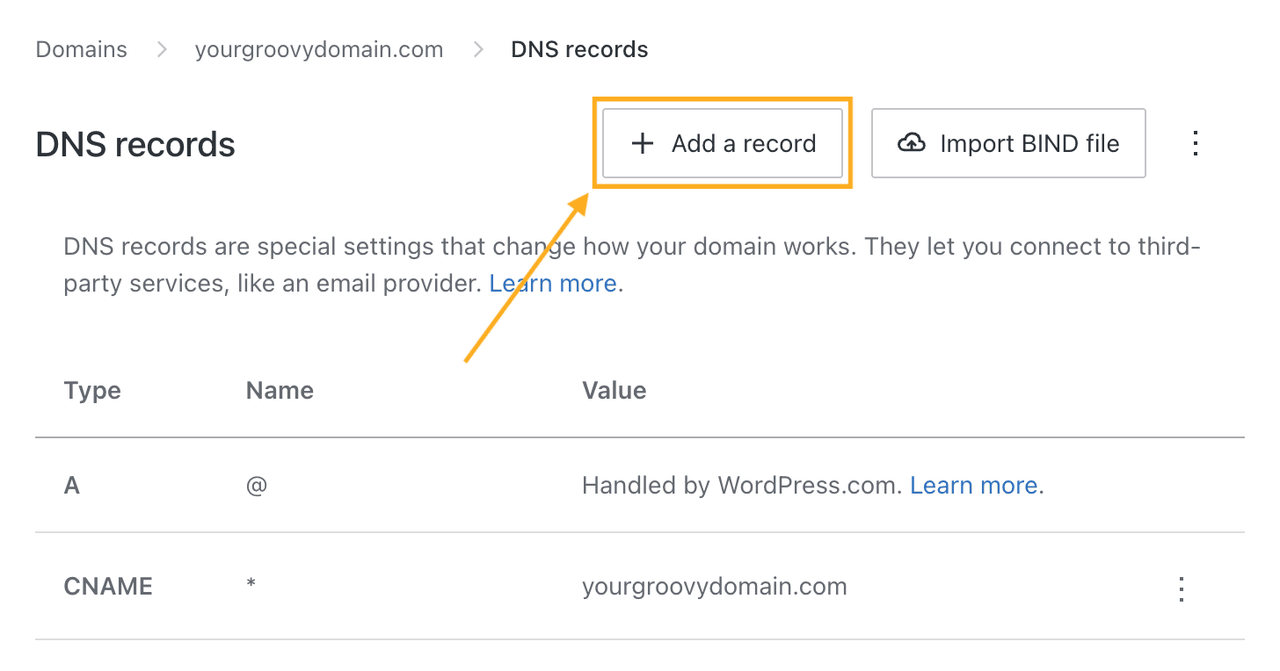
- In the top-right corner, click Add a record
- In the Type dropdown, choose the type of DNS record you need to add (e.g., A, CNAME, TXT, etc.)
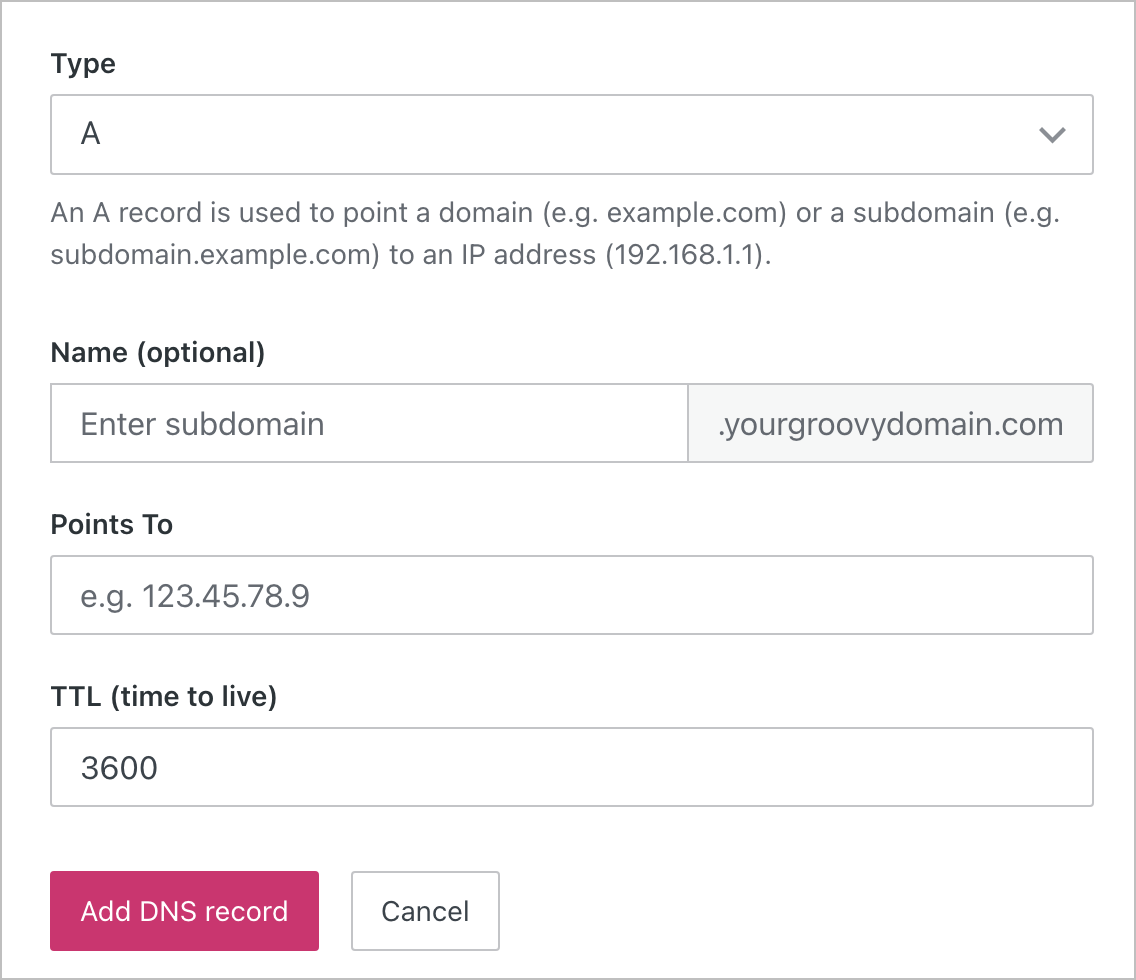
- Enter the DNS record information exactly as provided by Readdy
- Save your changes to complete the update
Bluehost Configuration
Bluehost Configuration
- Log in to your Bluehost Account Manager
- From the left navigation menu, click Hosting
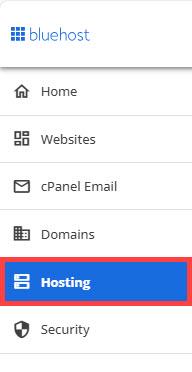
- Scroll down to Quick Links and tap CPANEL

- On the cPanel dashboard, scroll to the Domains section and click Zone Editor
- In the Zone Editor, click the + icon next to the type of DNS record you’d like to add (e.g., A, CNAME, TXT)
- Fill in the required fields using the DNS values provided by Readdy

Verify DNS Configuration
Once you’ve added the record, return to Readdy and click “I’ve added the record” to check the DNS status.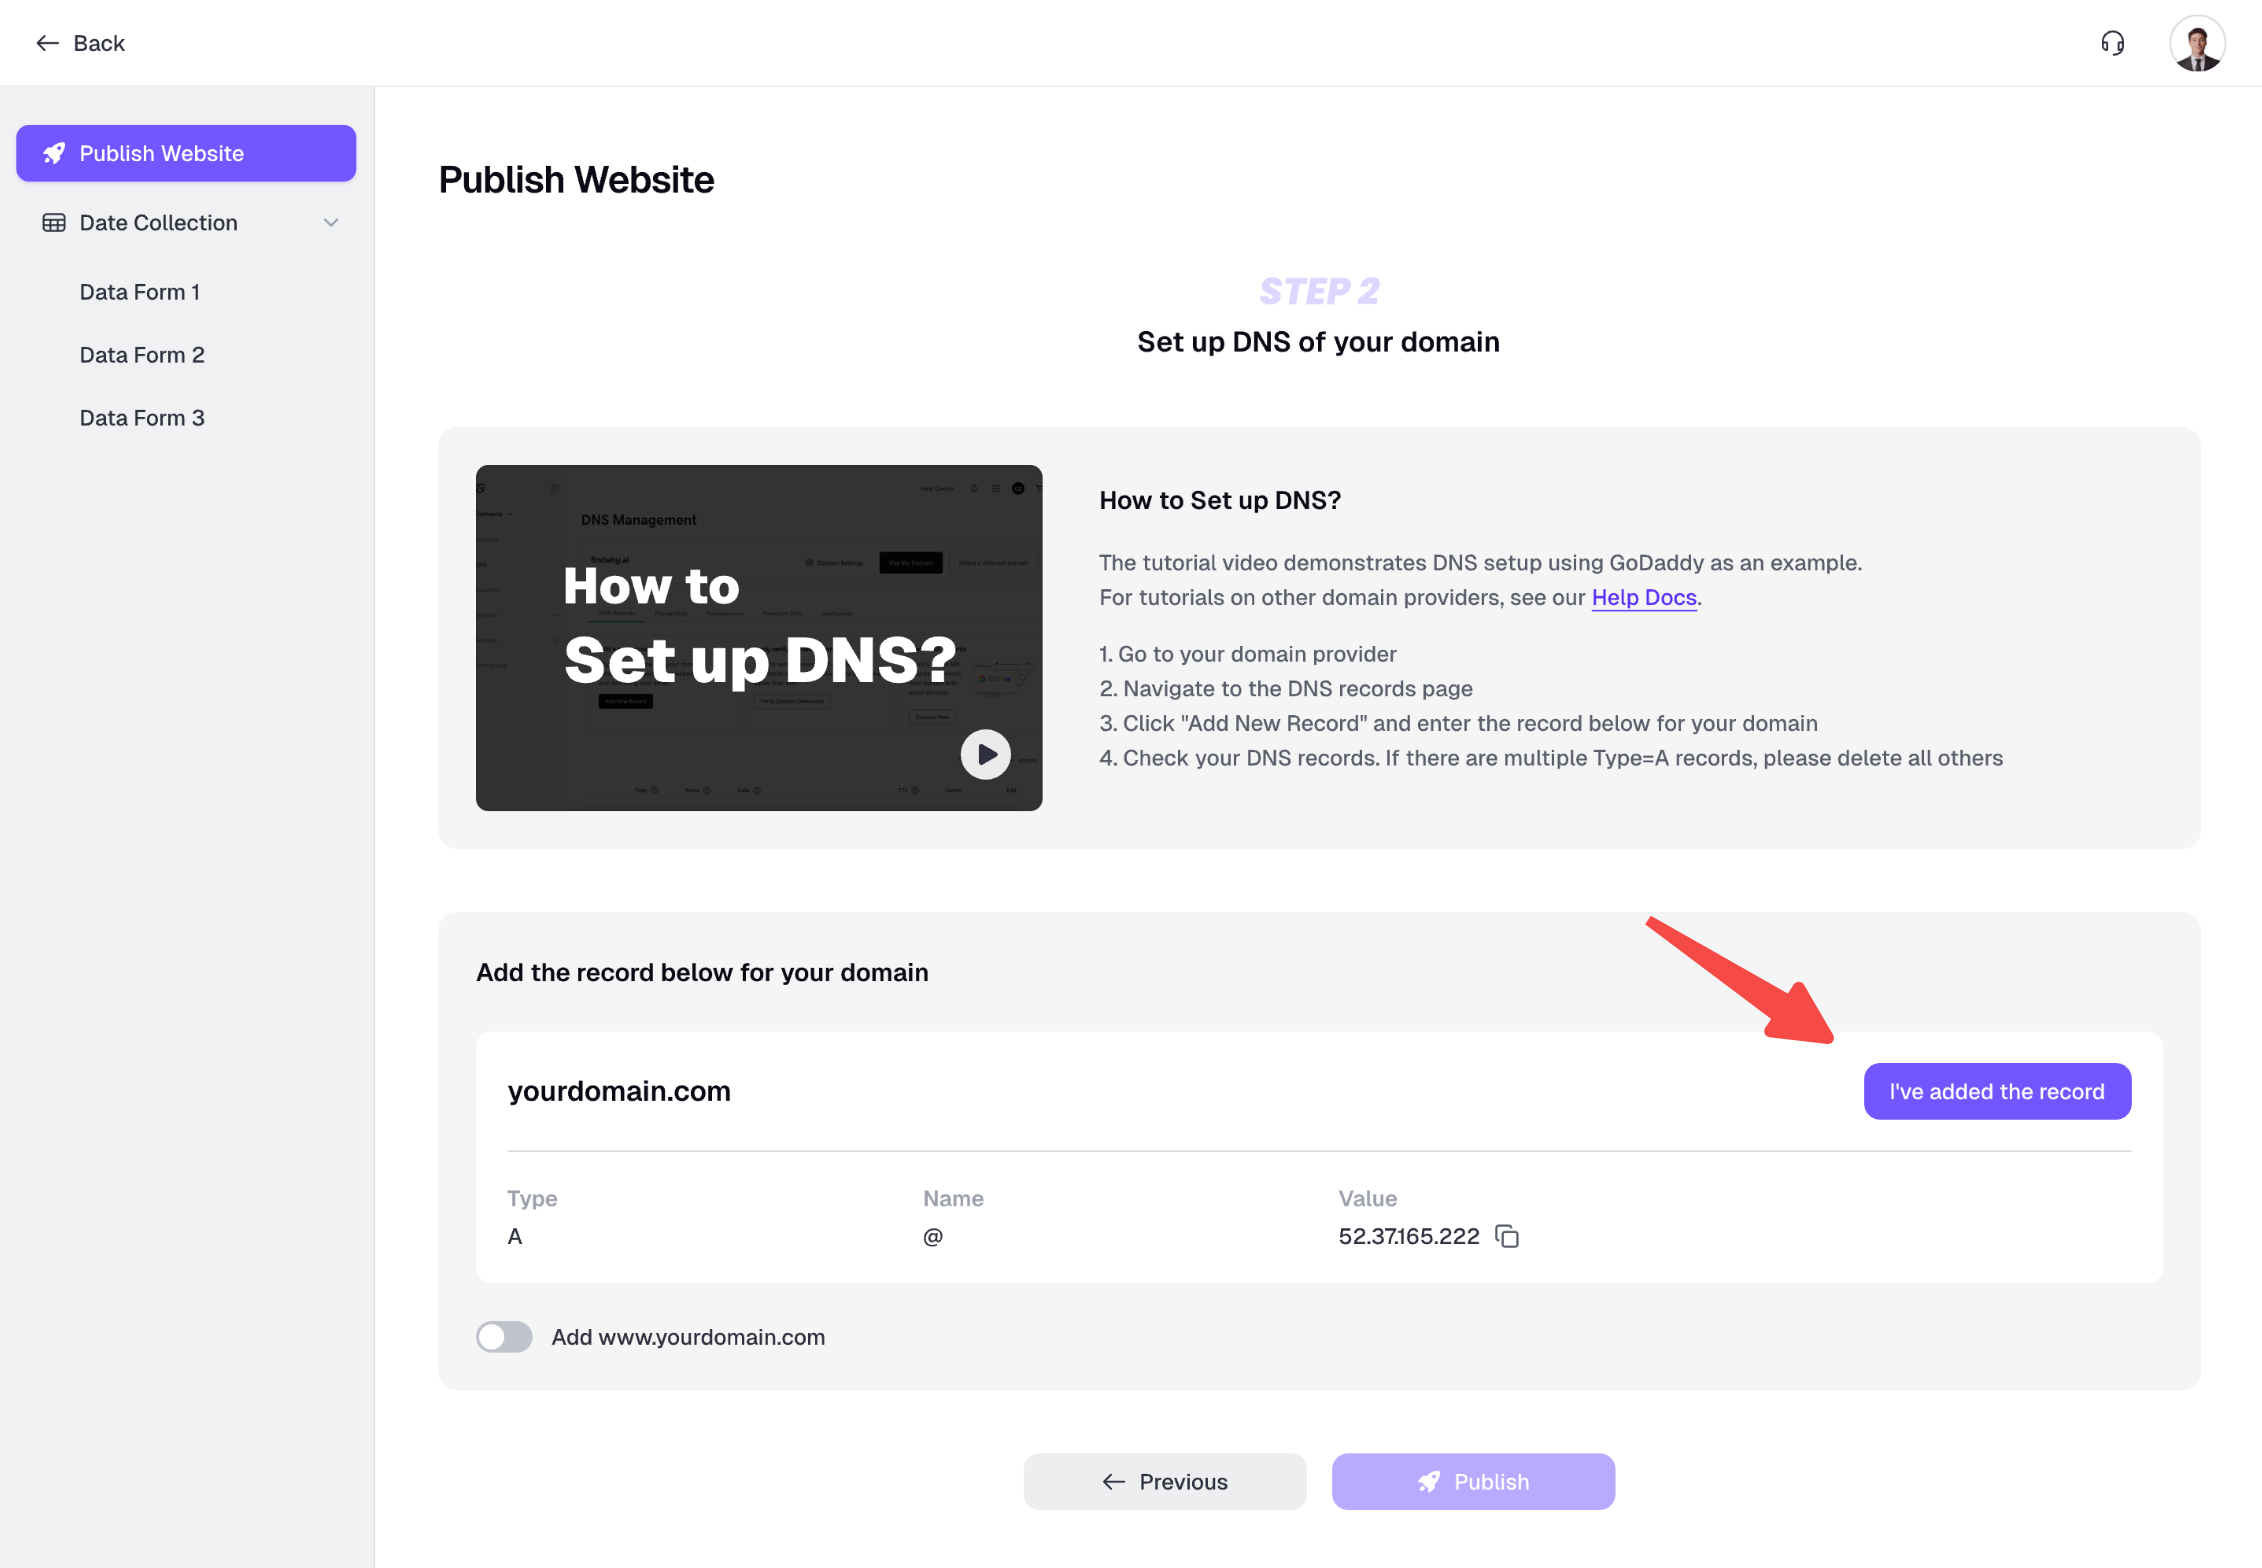
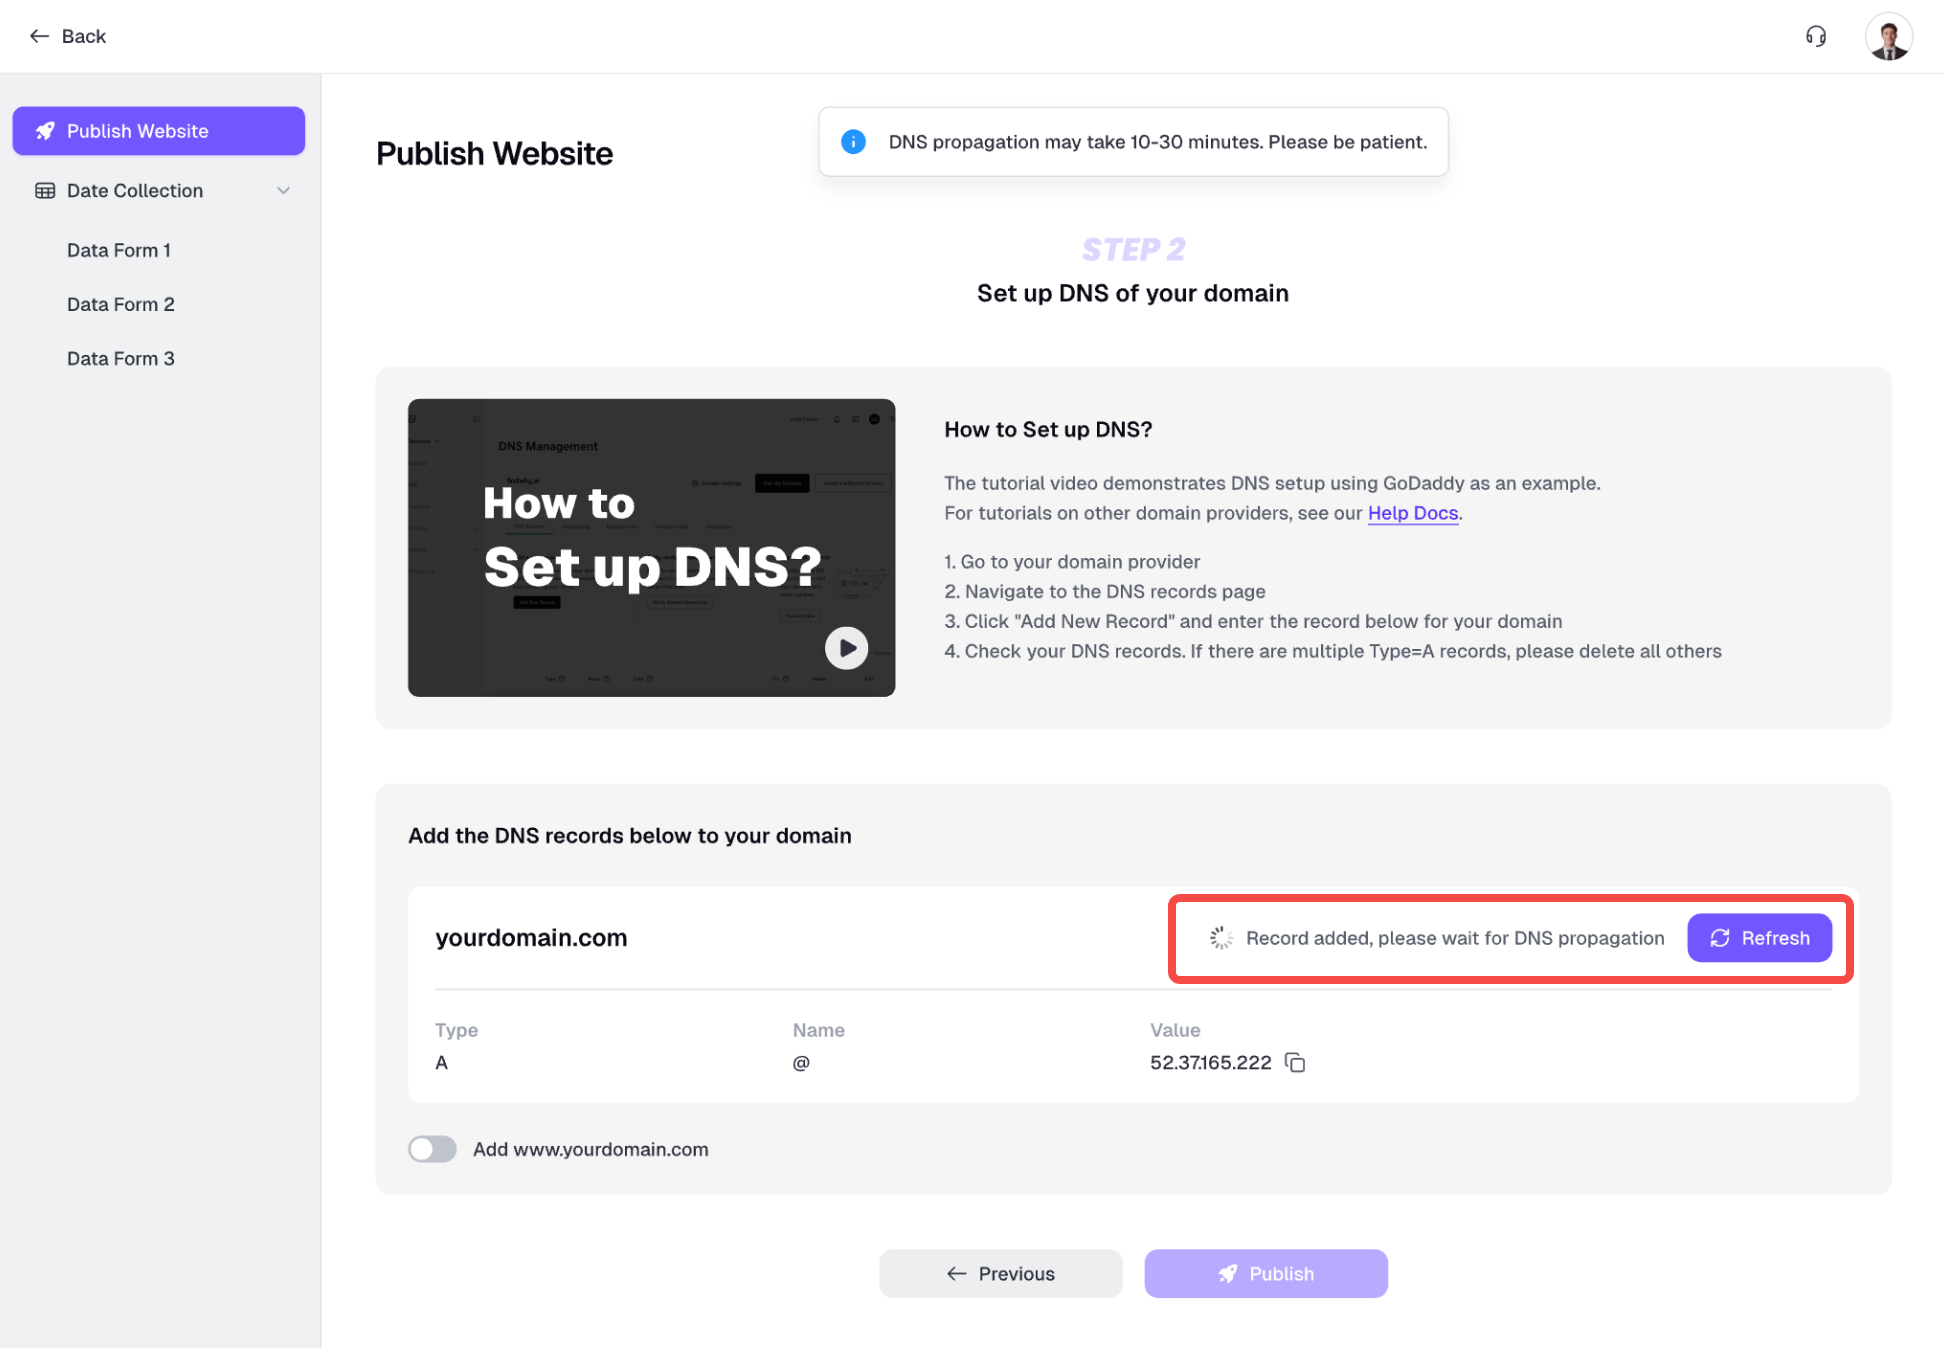
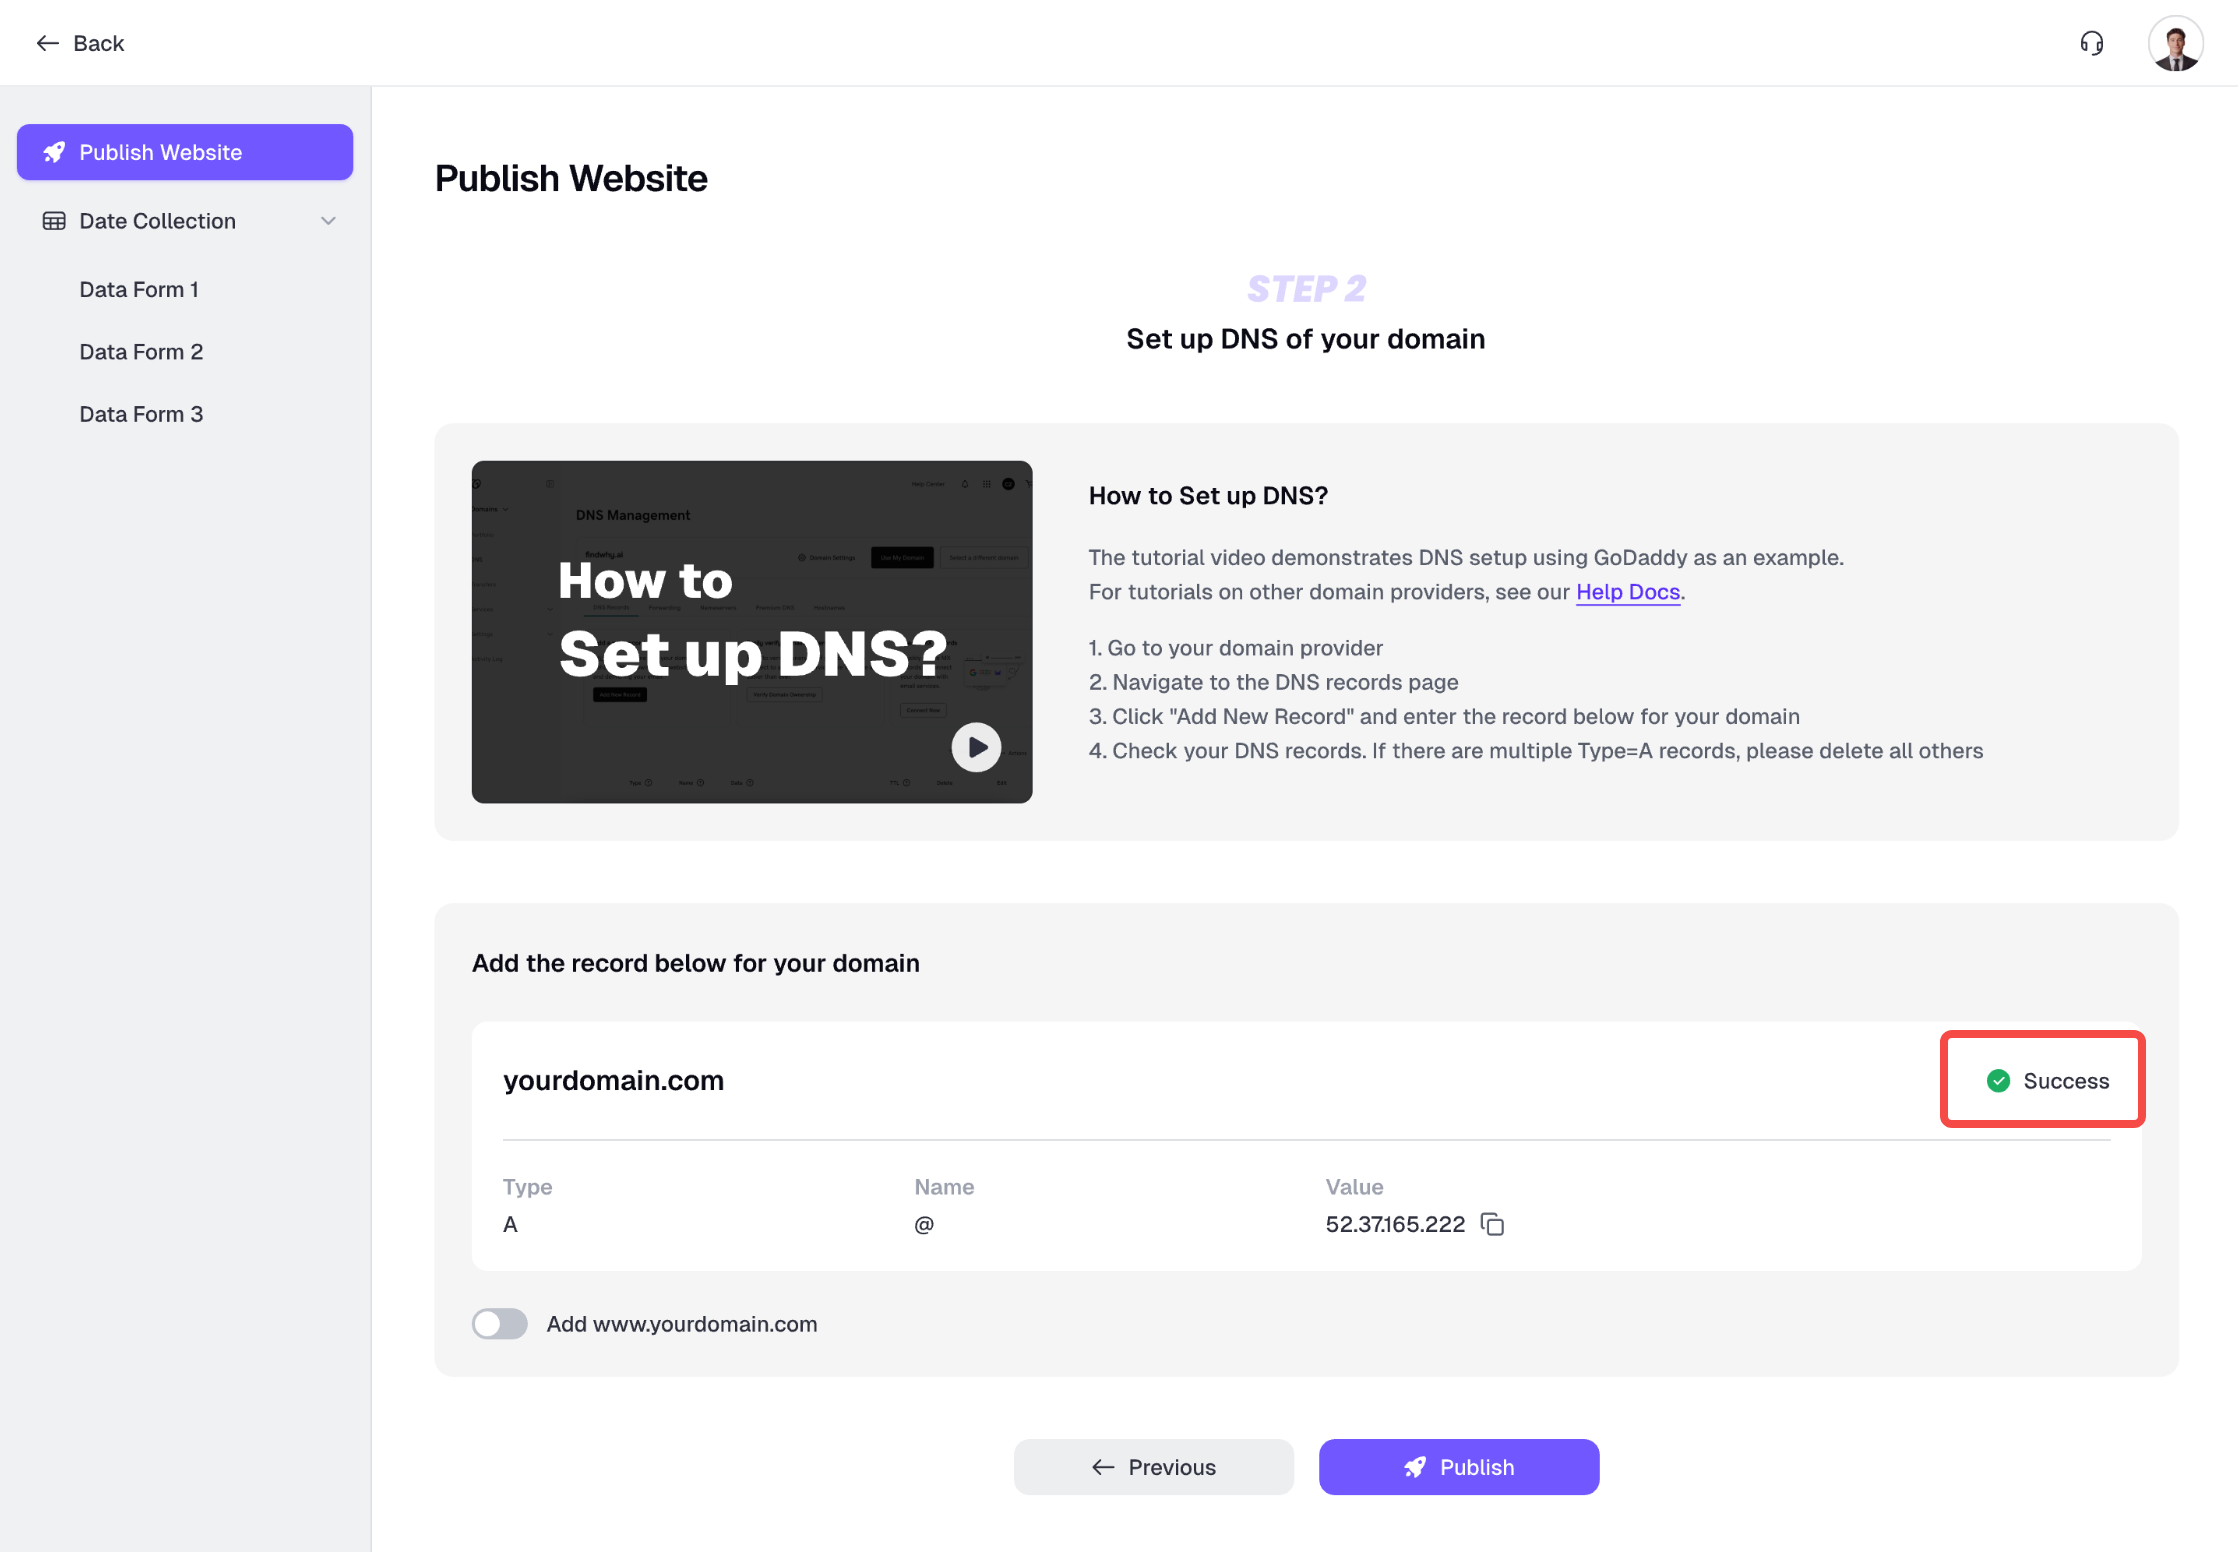
DNS Troubleshooting
If there are issues, you may see these messages:Please follow the video tutorial above to add this DNS record to your domain provider, then wait 1 minute and try again.
Please follow the video tutorial above to add this DNS record to your domain provider, then wait 1 minute and try again.
This domain has multiple A records configured. Please delete other A records.
This domain has multiple A records configured. Please delete other A records.
This domain is already bound to xxx. Please unbind it first.
This domain is already bound to xxx. Please unbind it first.
This domain is already bound to another user's project. Please use a different domain.
This domain is already bound to another user's project. Please use a different domain.
5. Publish the Project
After clicking Publish, Readdy will start the publishing process. You’ll see a progress screen. Please wait until it completes.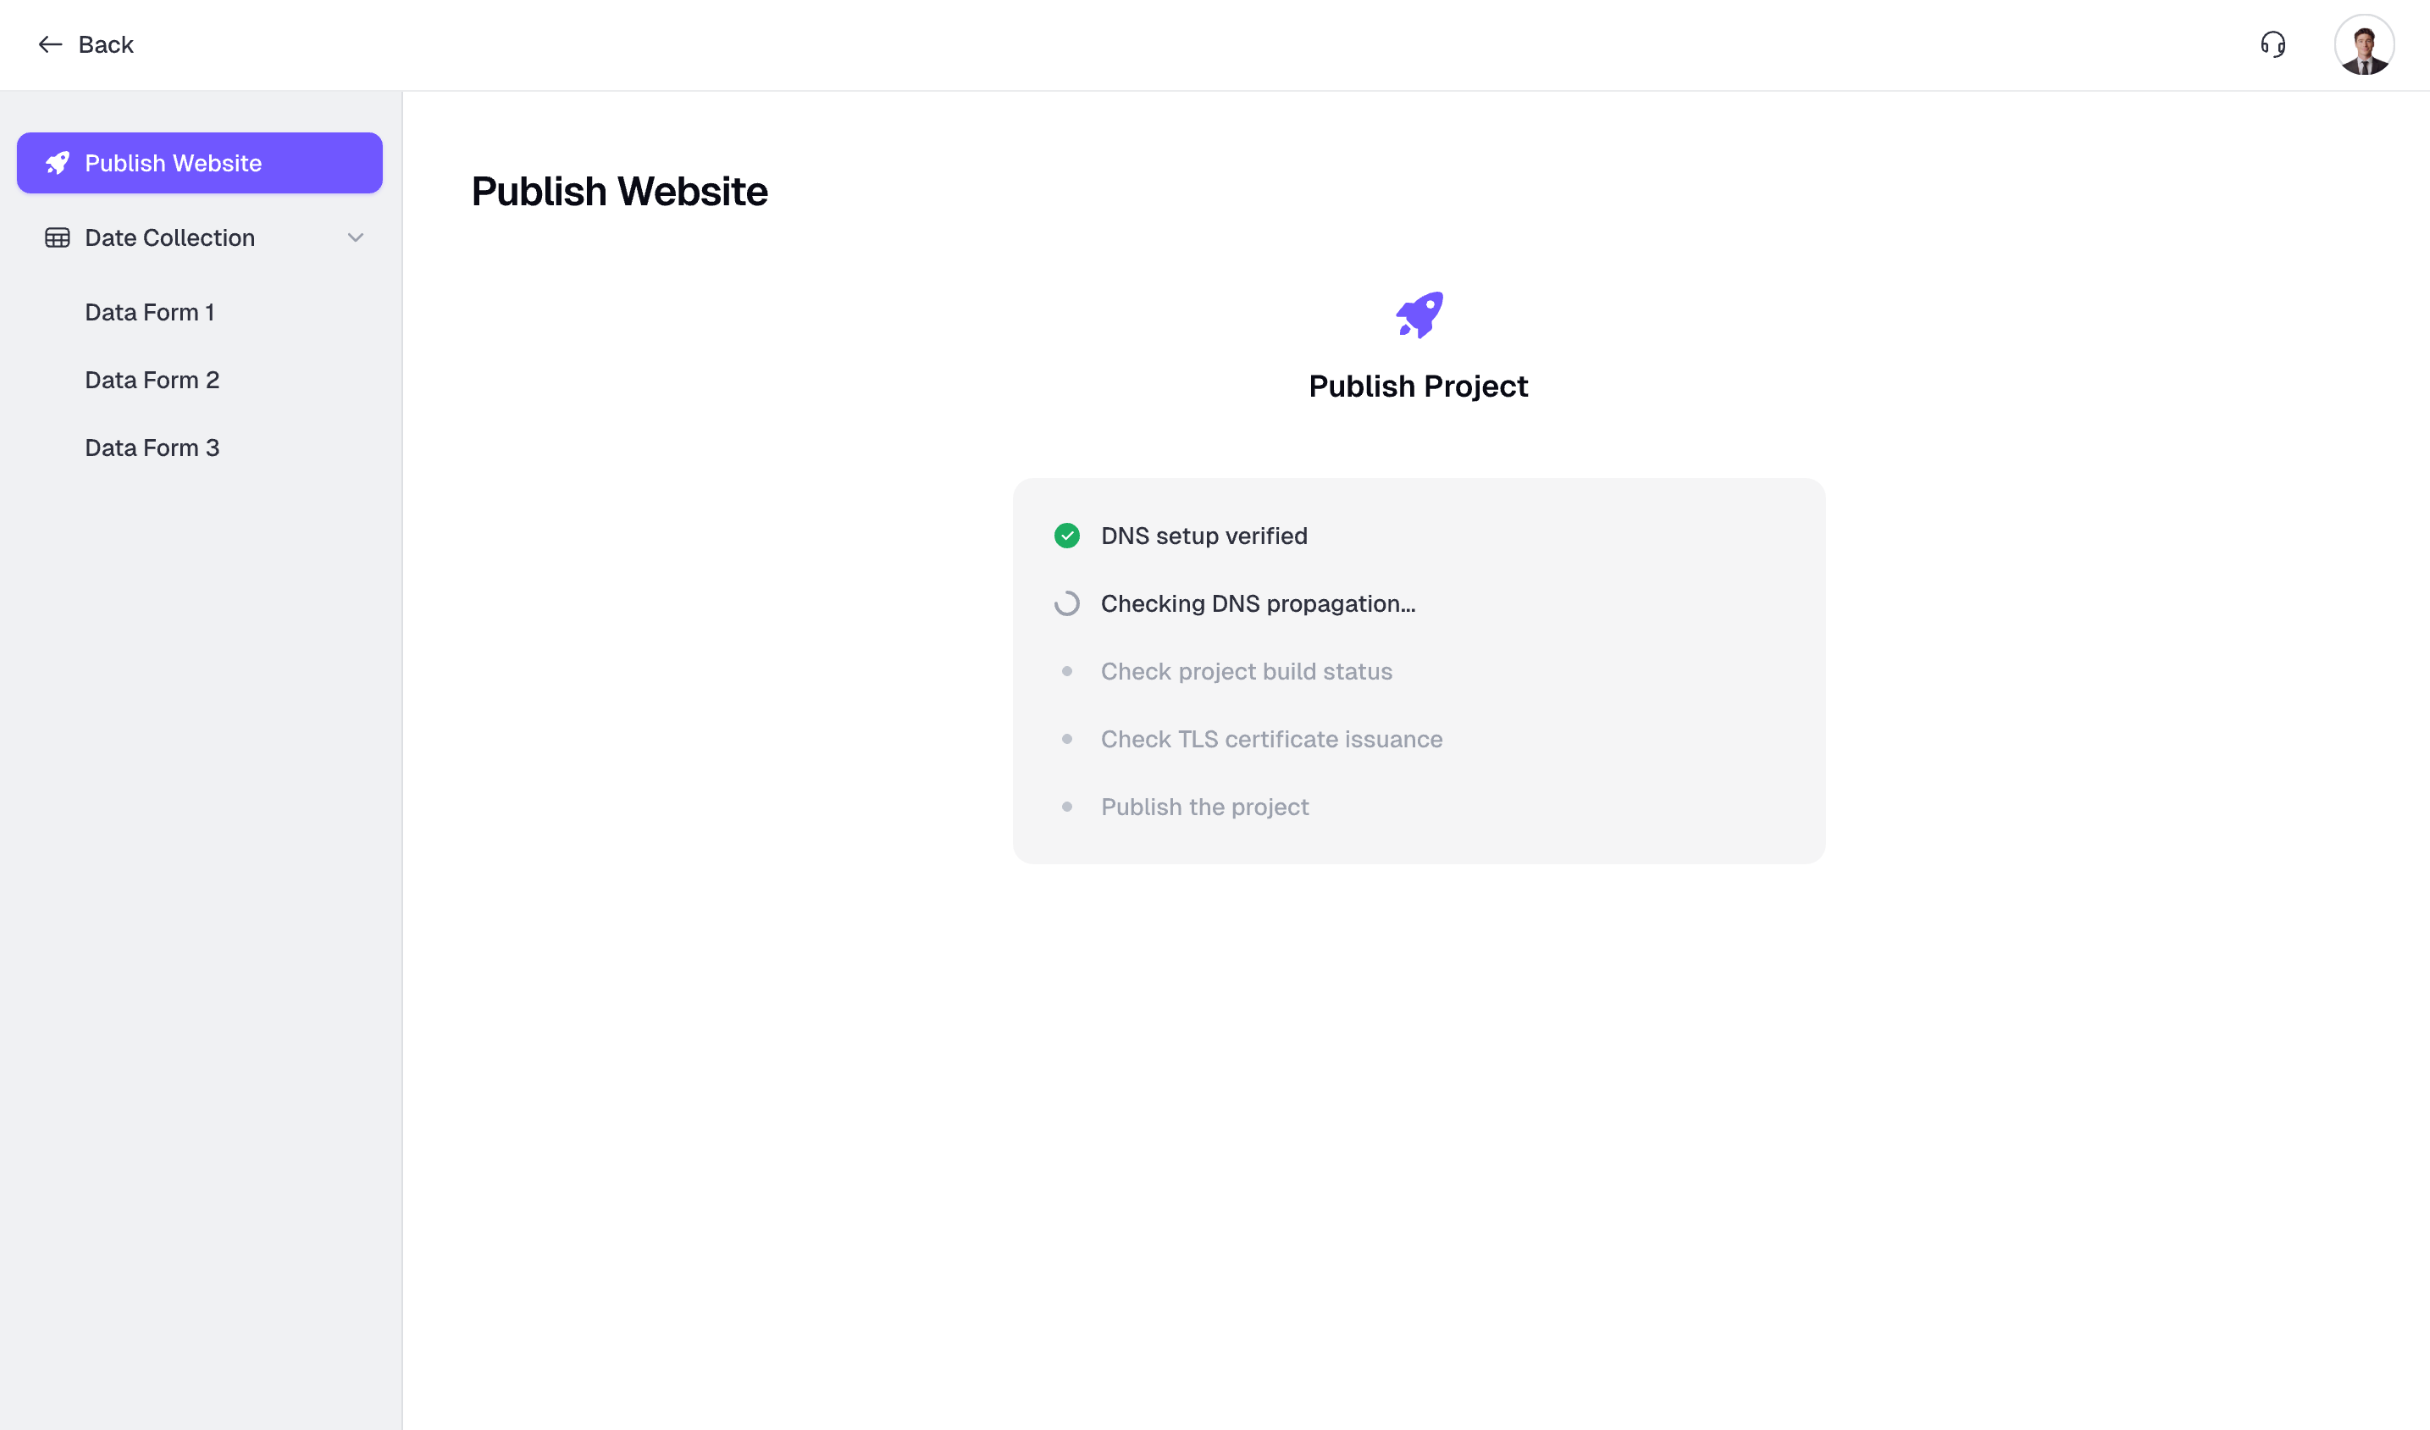
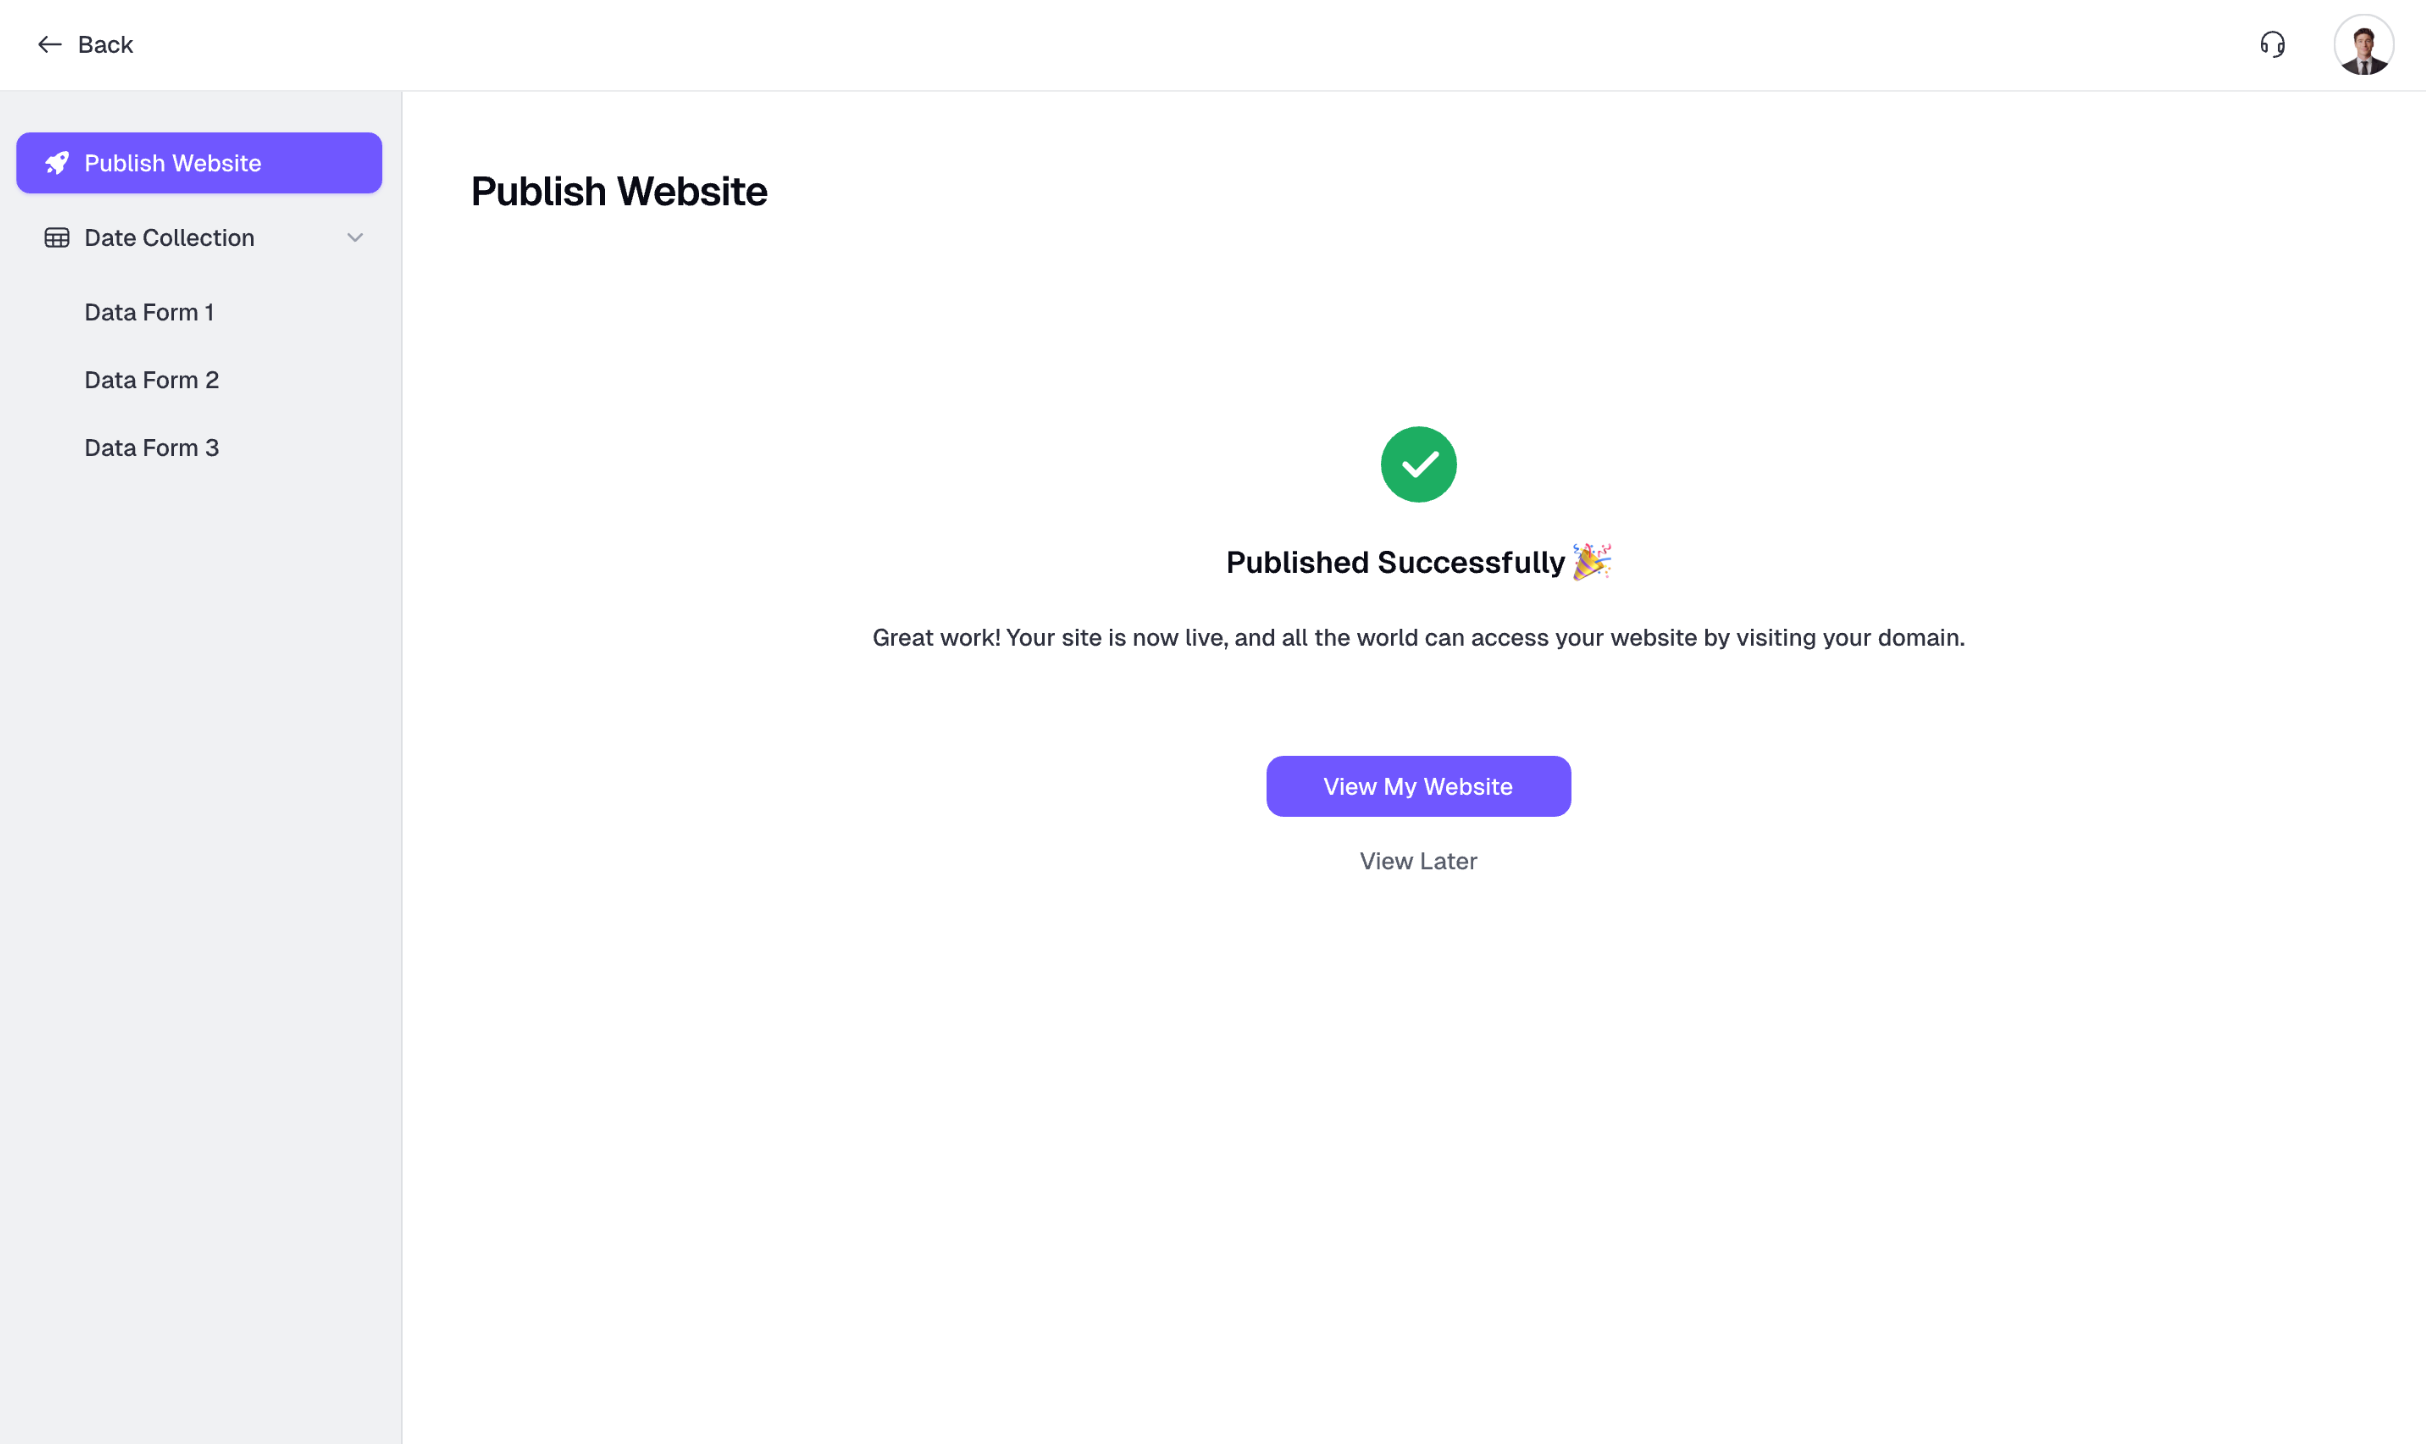
Your site is now live. Click “View My Website” to view your published site.
6. Update Your Website
Whenever you make changes to your site — such as creating new pages or editing content — you’ll need to republish the project for those updates to go live.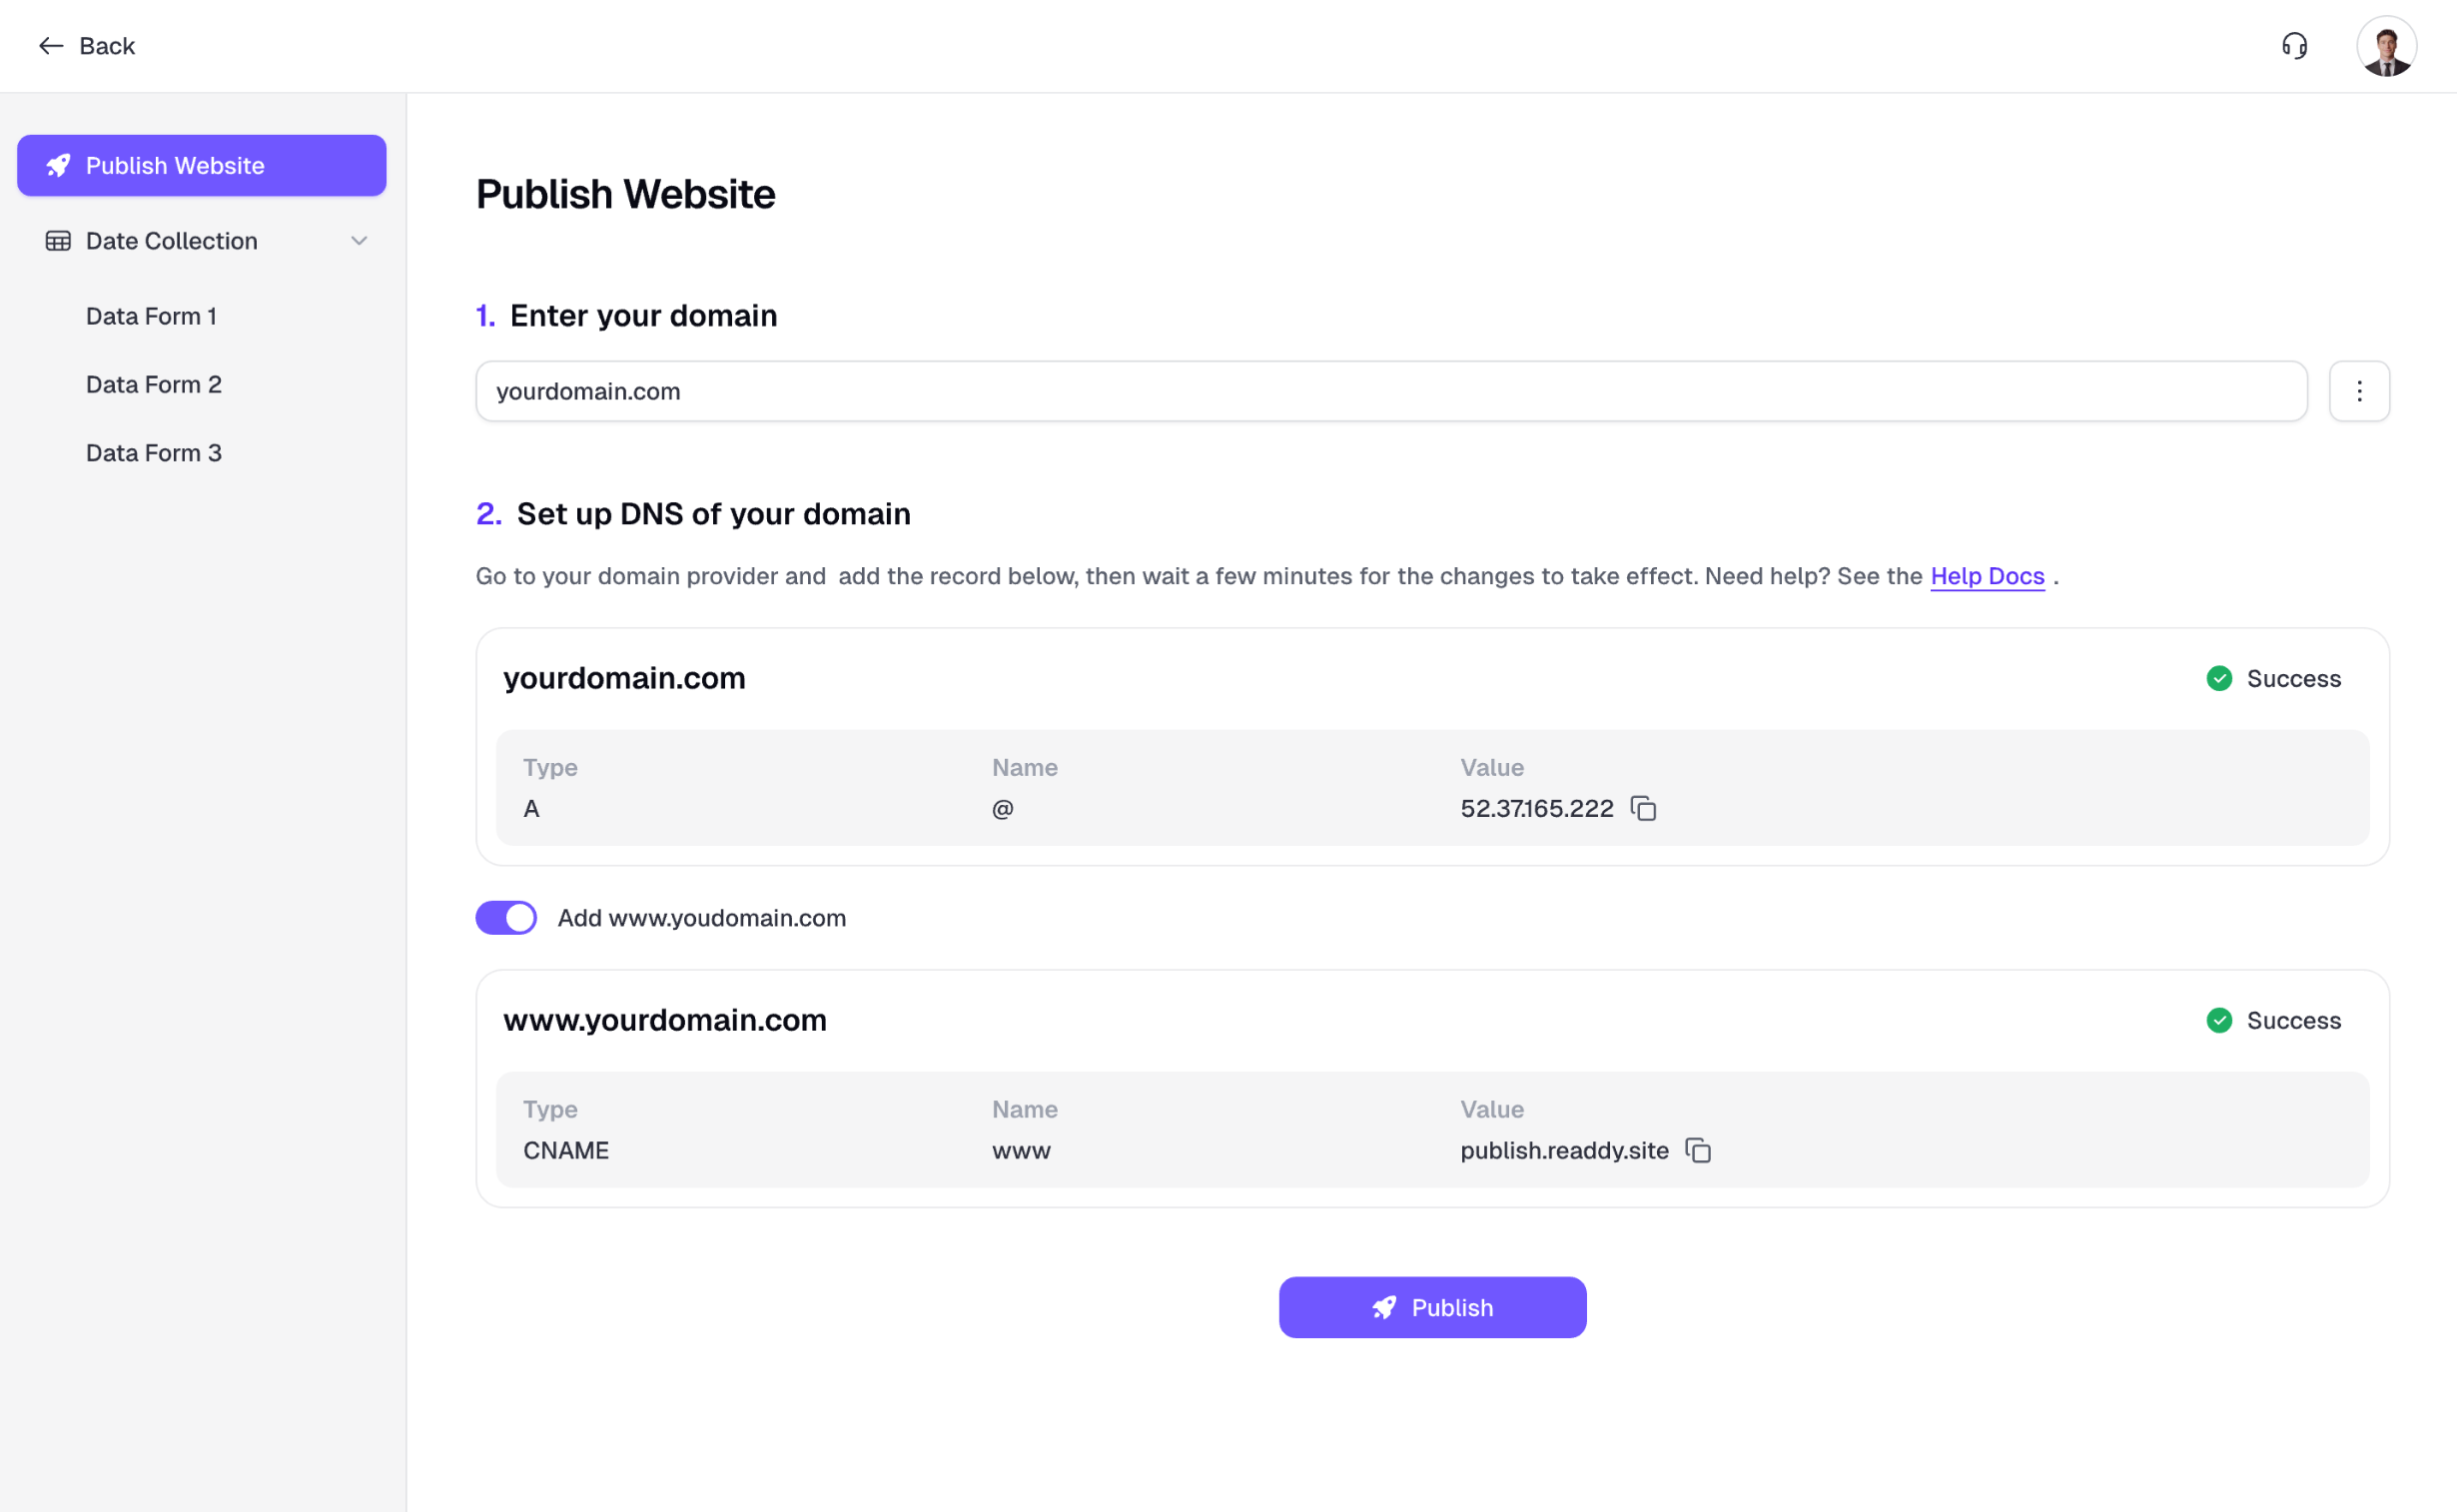
Need Help?
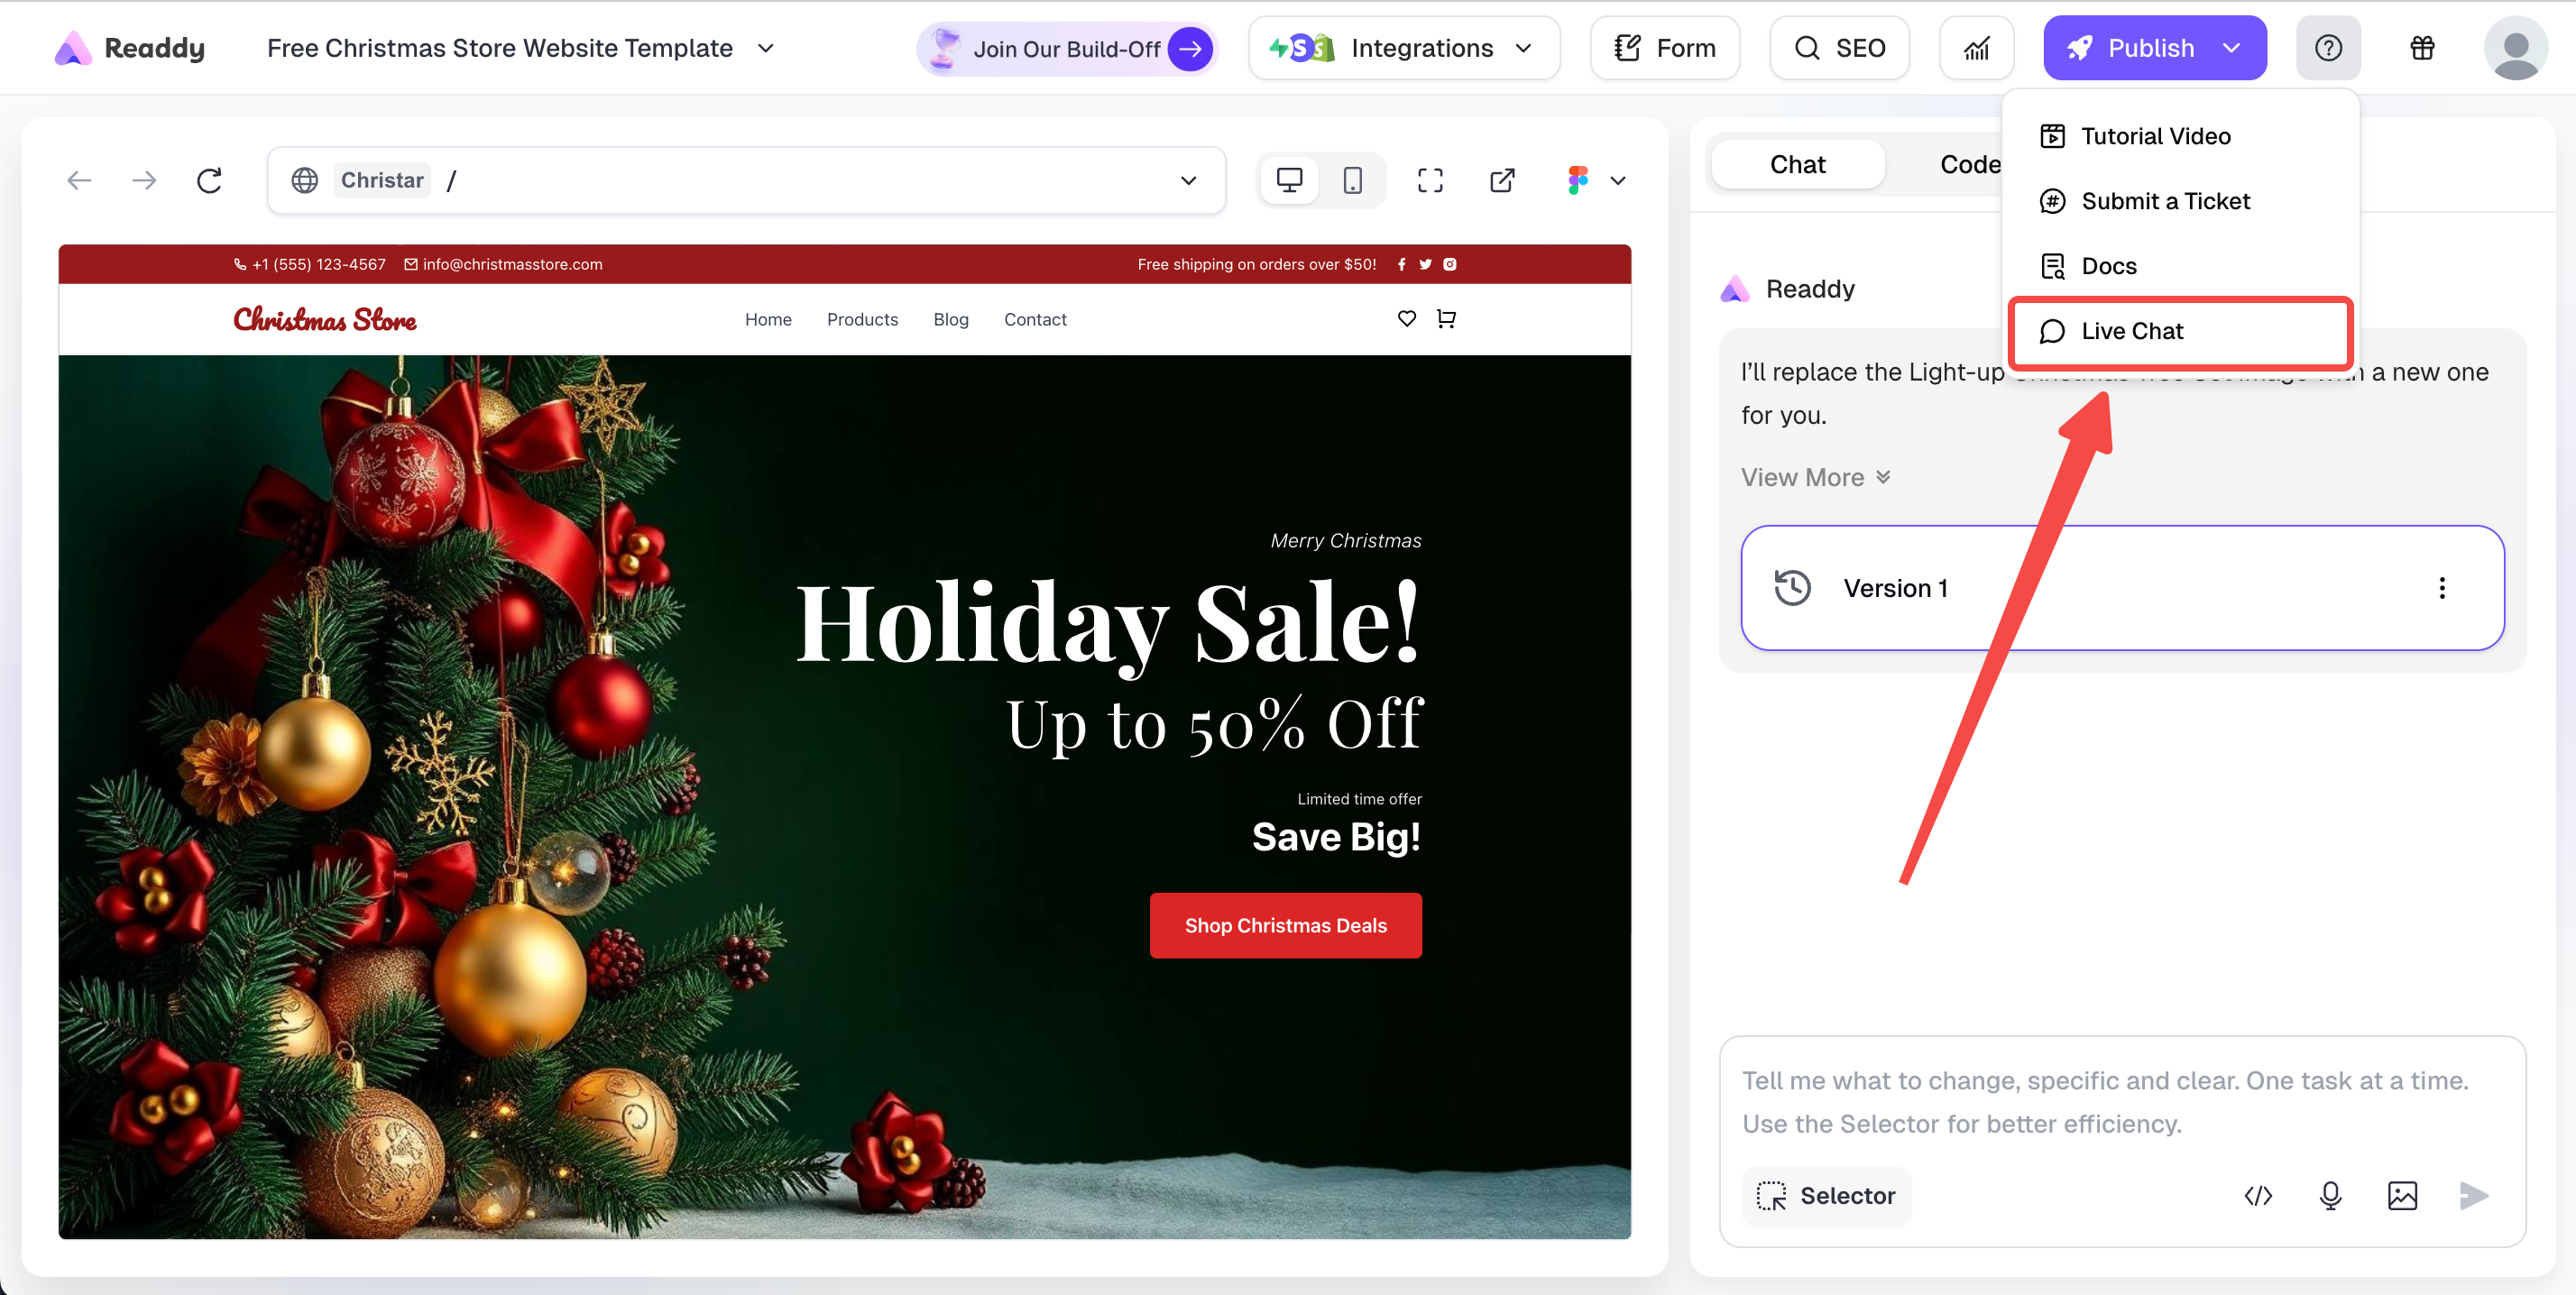
If this guide doesn’t resolve your issue, contact us at [email protected] or use our live chat in right top corner of Readdy. We’re here to help!