> ## Documentation Index
> Fetch the complete documentation index at: https://docs.readdy.ai/llms.txt
> Use this file to discover all available pages before exploring further.
# Integrate with Google Analytics
> Set up Google Analytics tracking on your Readdy website to monitor visitor behavior, traffic sources, and performance metrics
Google Analytics is a powerful, free web analytics tool that helps you understand your website visitors and their behavior. By integrating it with your Readdy website, you can track page views, user demographics, traffic sources, and much more.
Google Analytics provides valuable insights that can help you improve your website's performance and better understand your audience.
## Why Use Google Analytics?
* **Track visitor behavior**: See which pages are most popular
* **Understand your audience**: Learn about visitor demographics and interests
* **Monitor traffic sources**: Discover how visitors find your website
* **Measure conversions**: Track goals and important user actions
* **Free and comprehensive**: Industry-standard analytics at no cost
## If you're new to Google Analytics (GA)
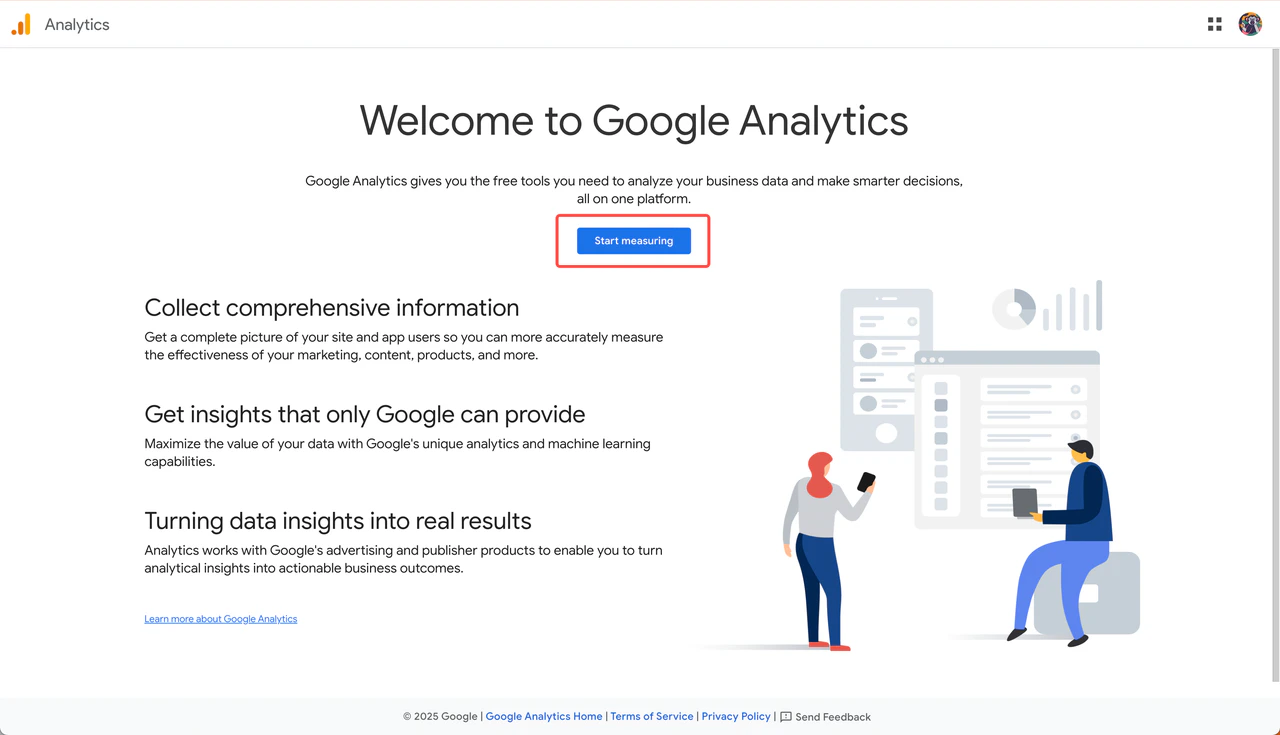
Go to the [Google Analytics platform](https://analytics.google.com) and click **"Start measuring"** to begin setup.
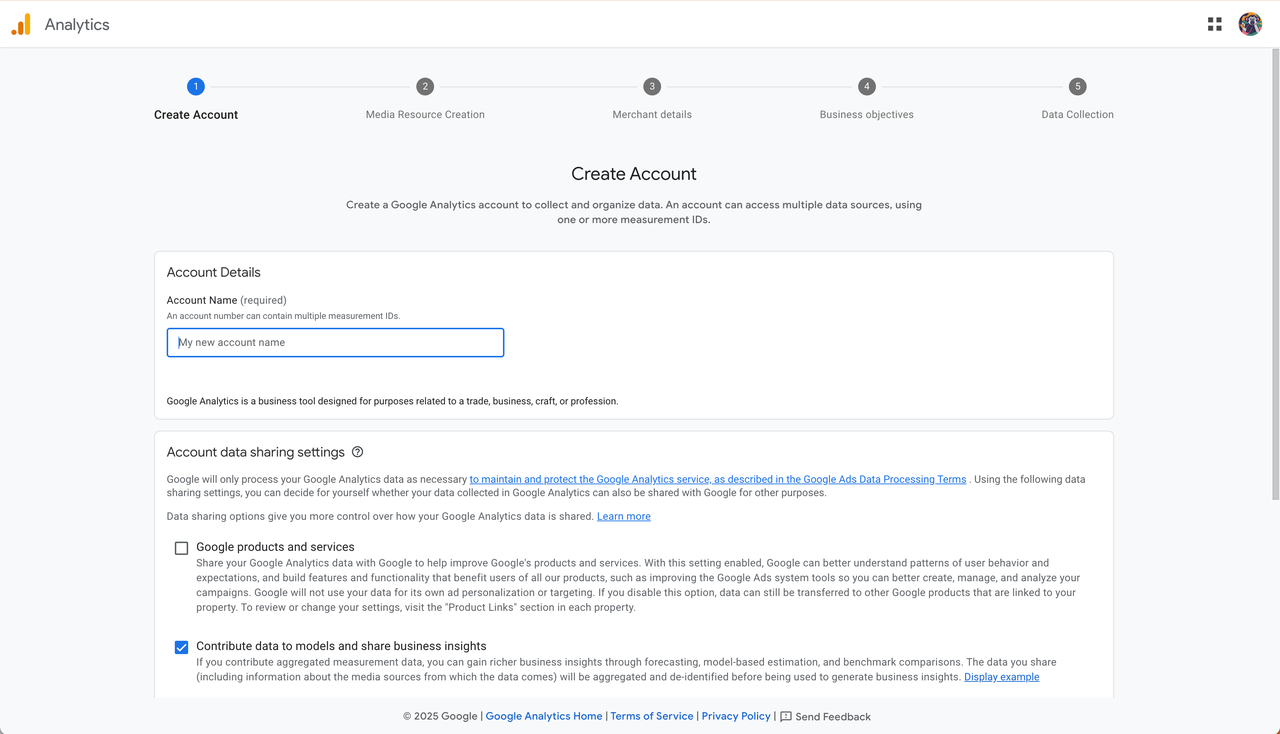
 Follow the setup steps to configure your GA account.
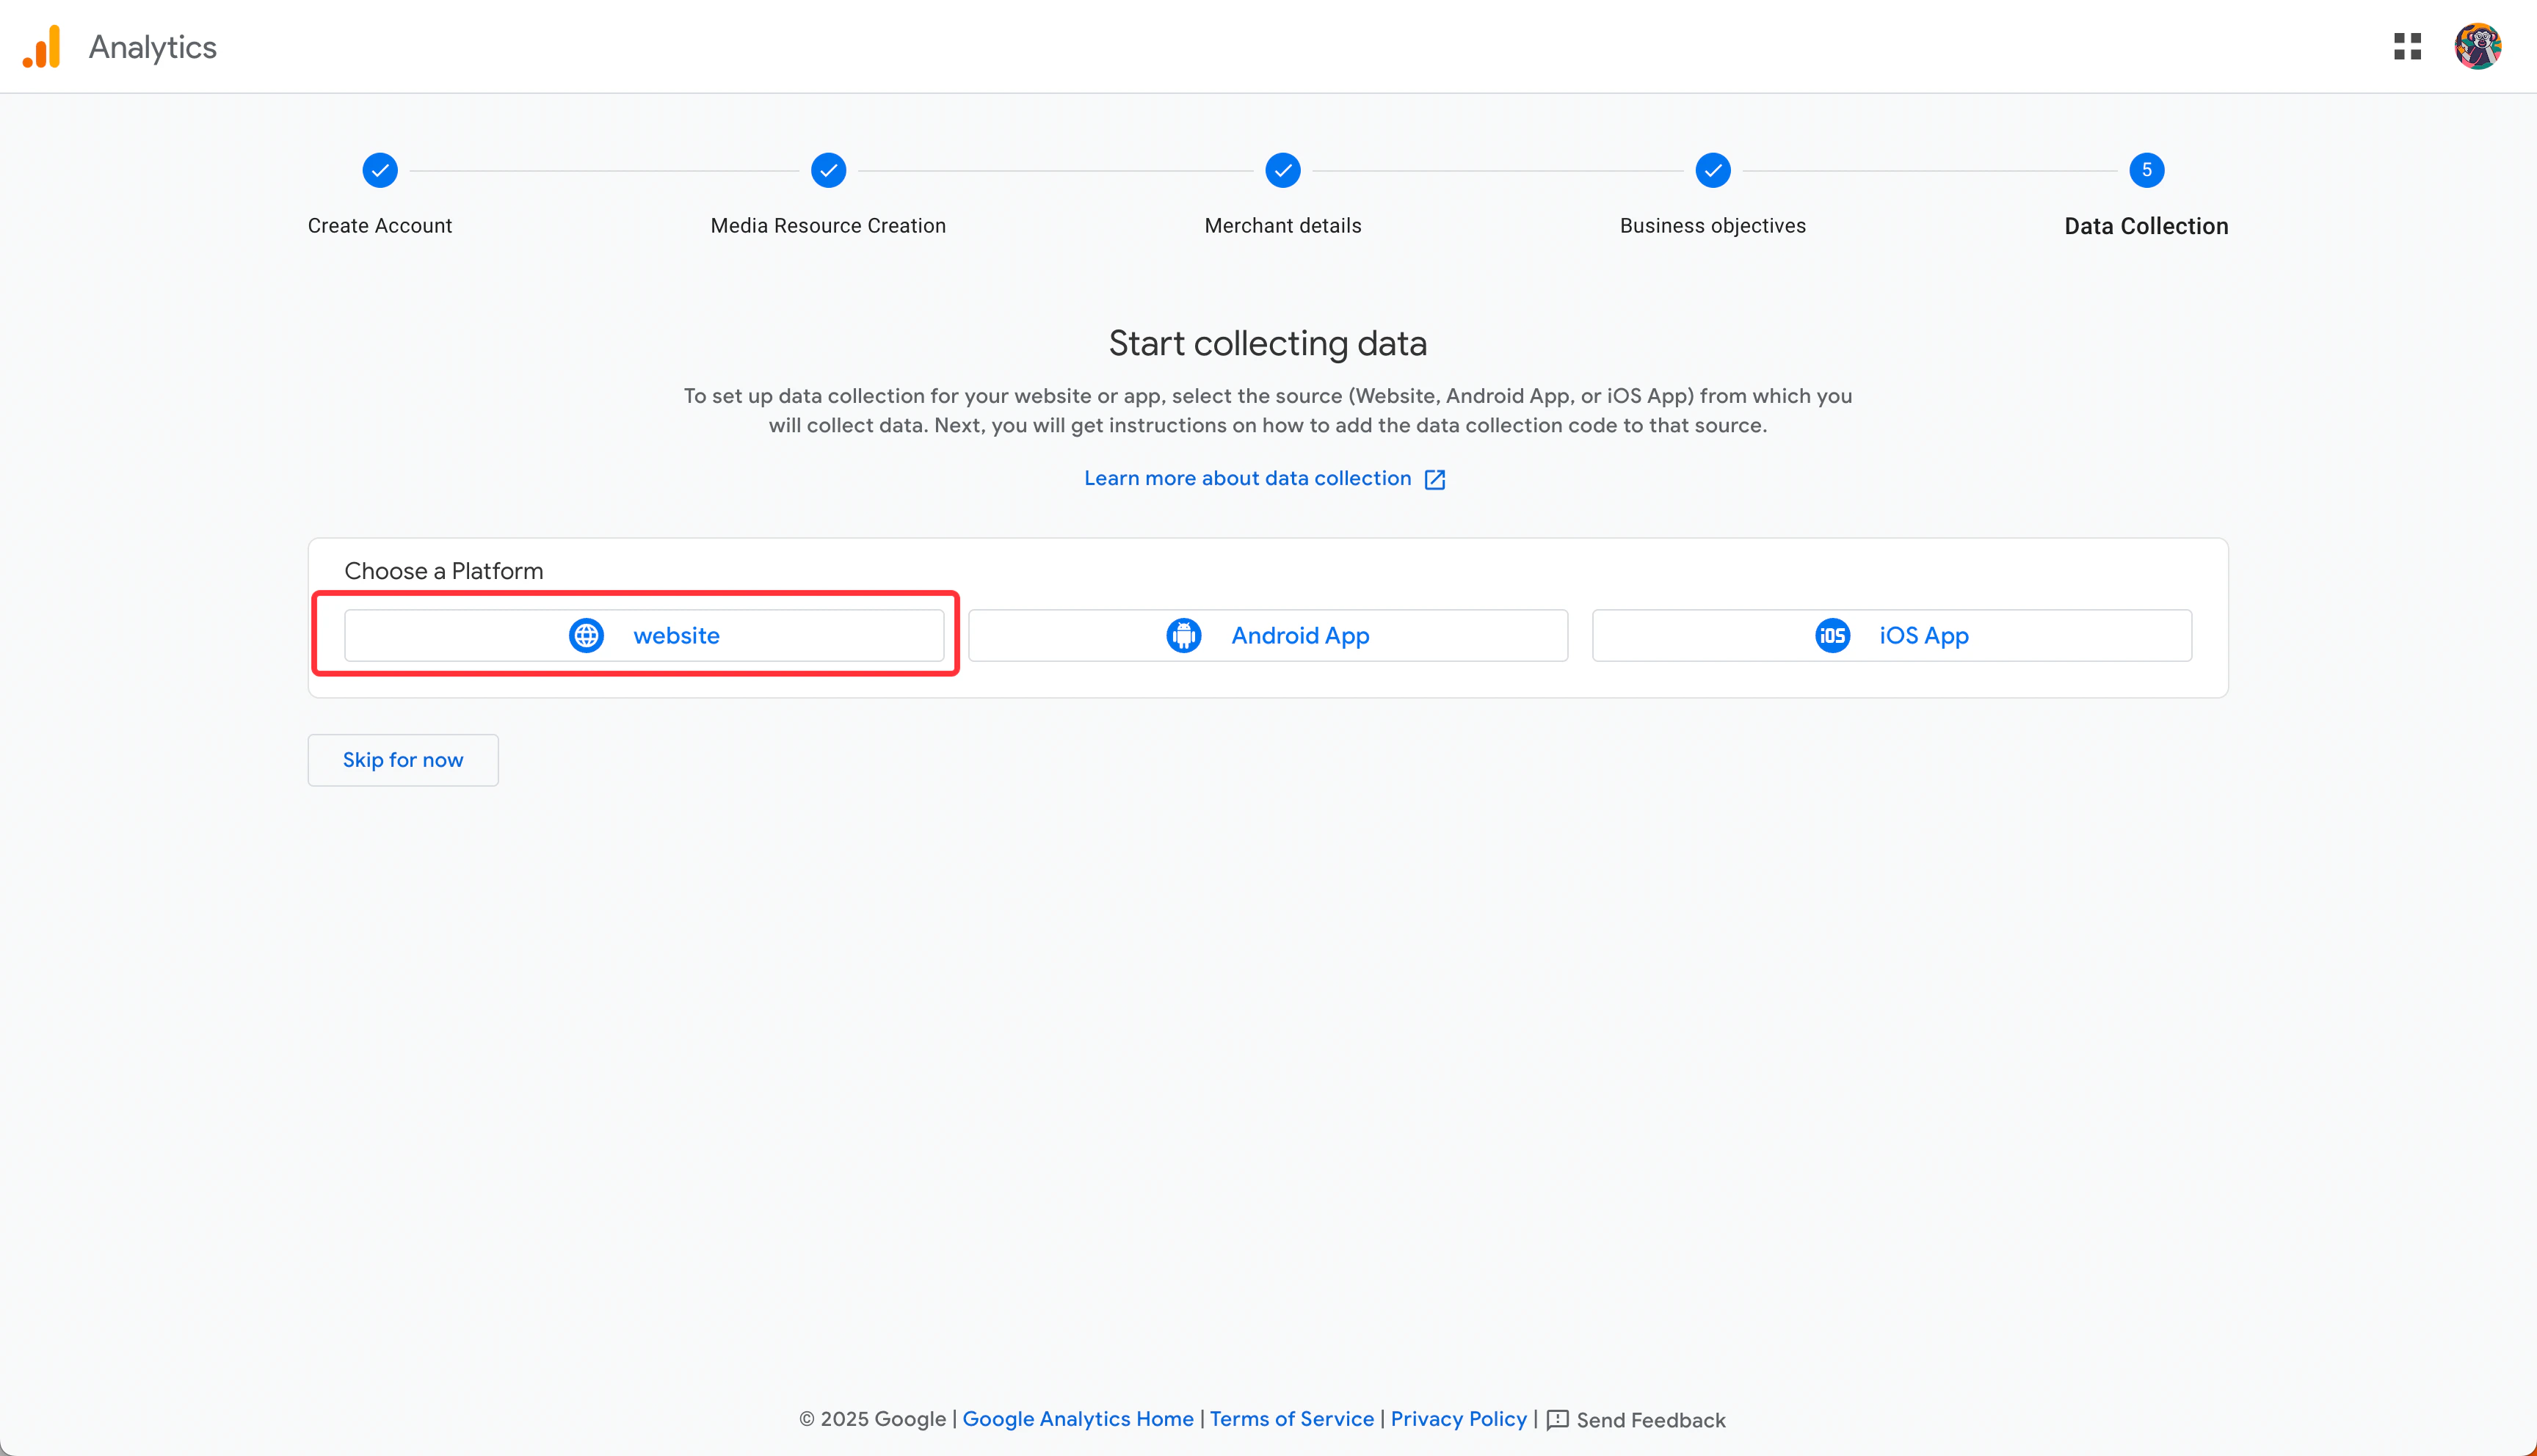
 When you reach "Data Collection", select **"Web"** as your platform type.
Note: Readdy currently only supports website projects.
When you reach "Data Collection", select **"Web"** as your platform type.
Note: Readdy currently only supports website projects.
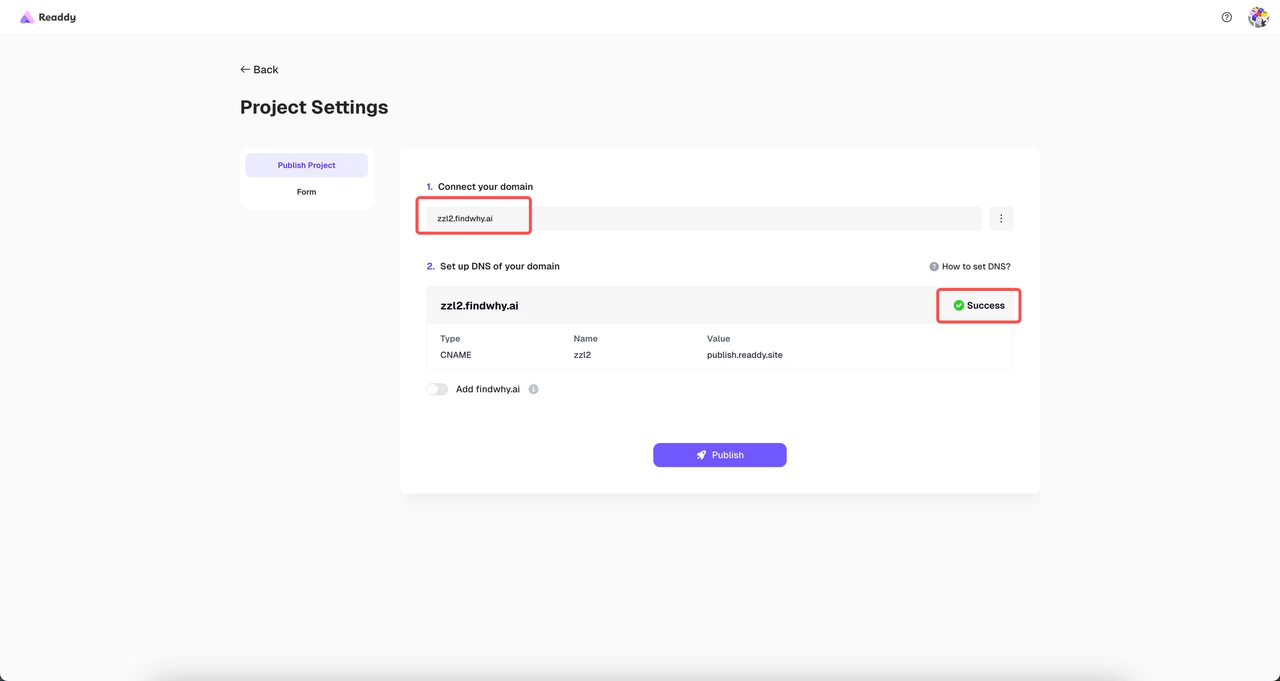
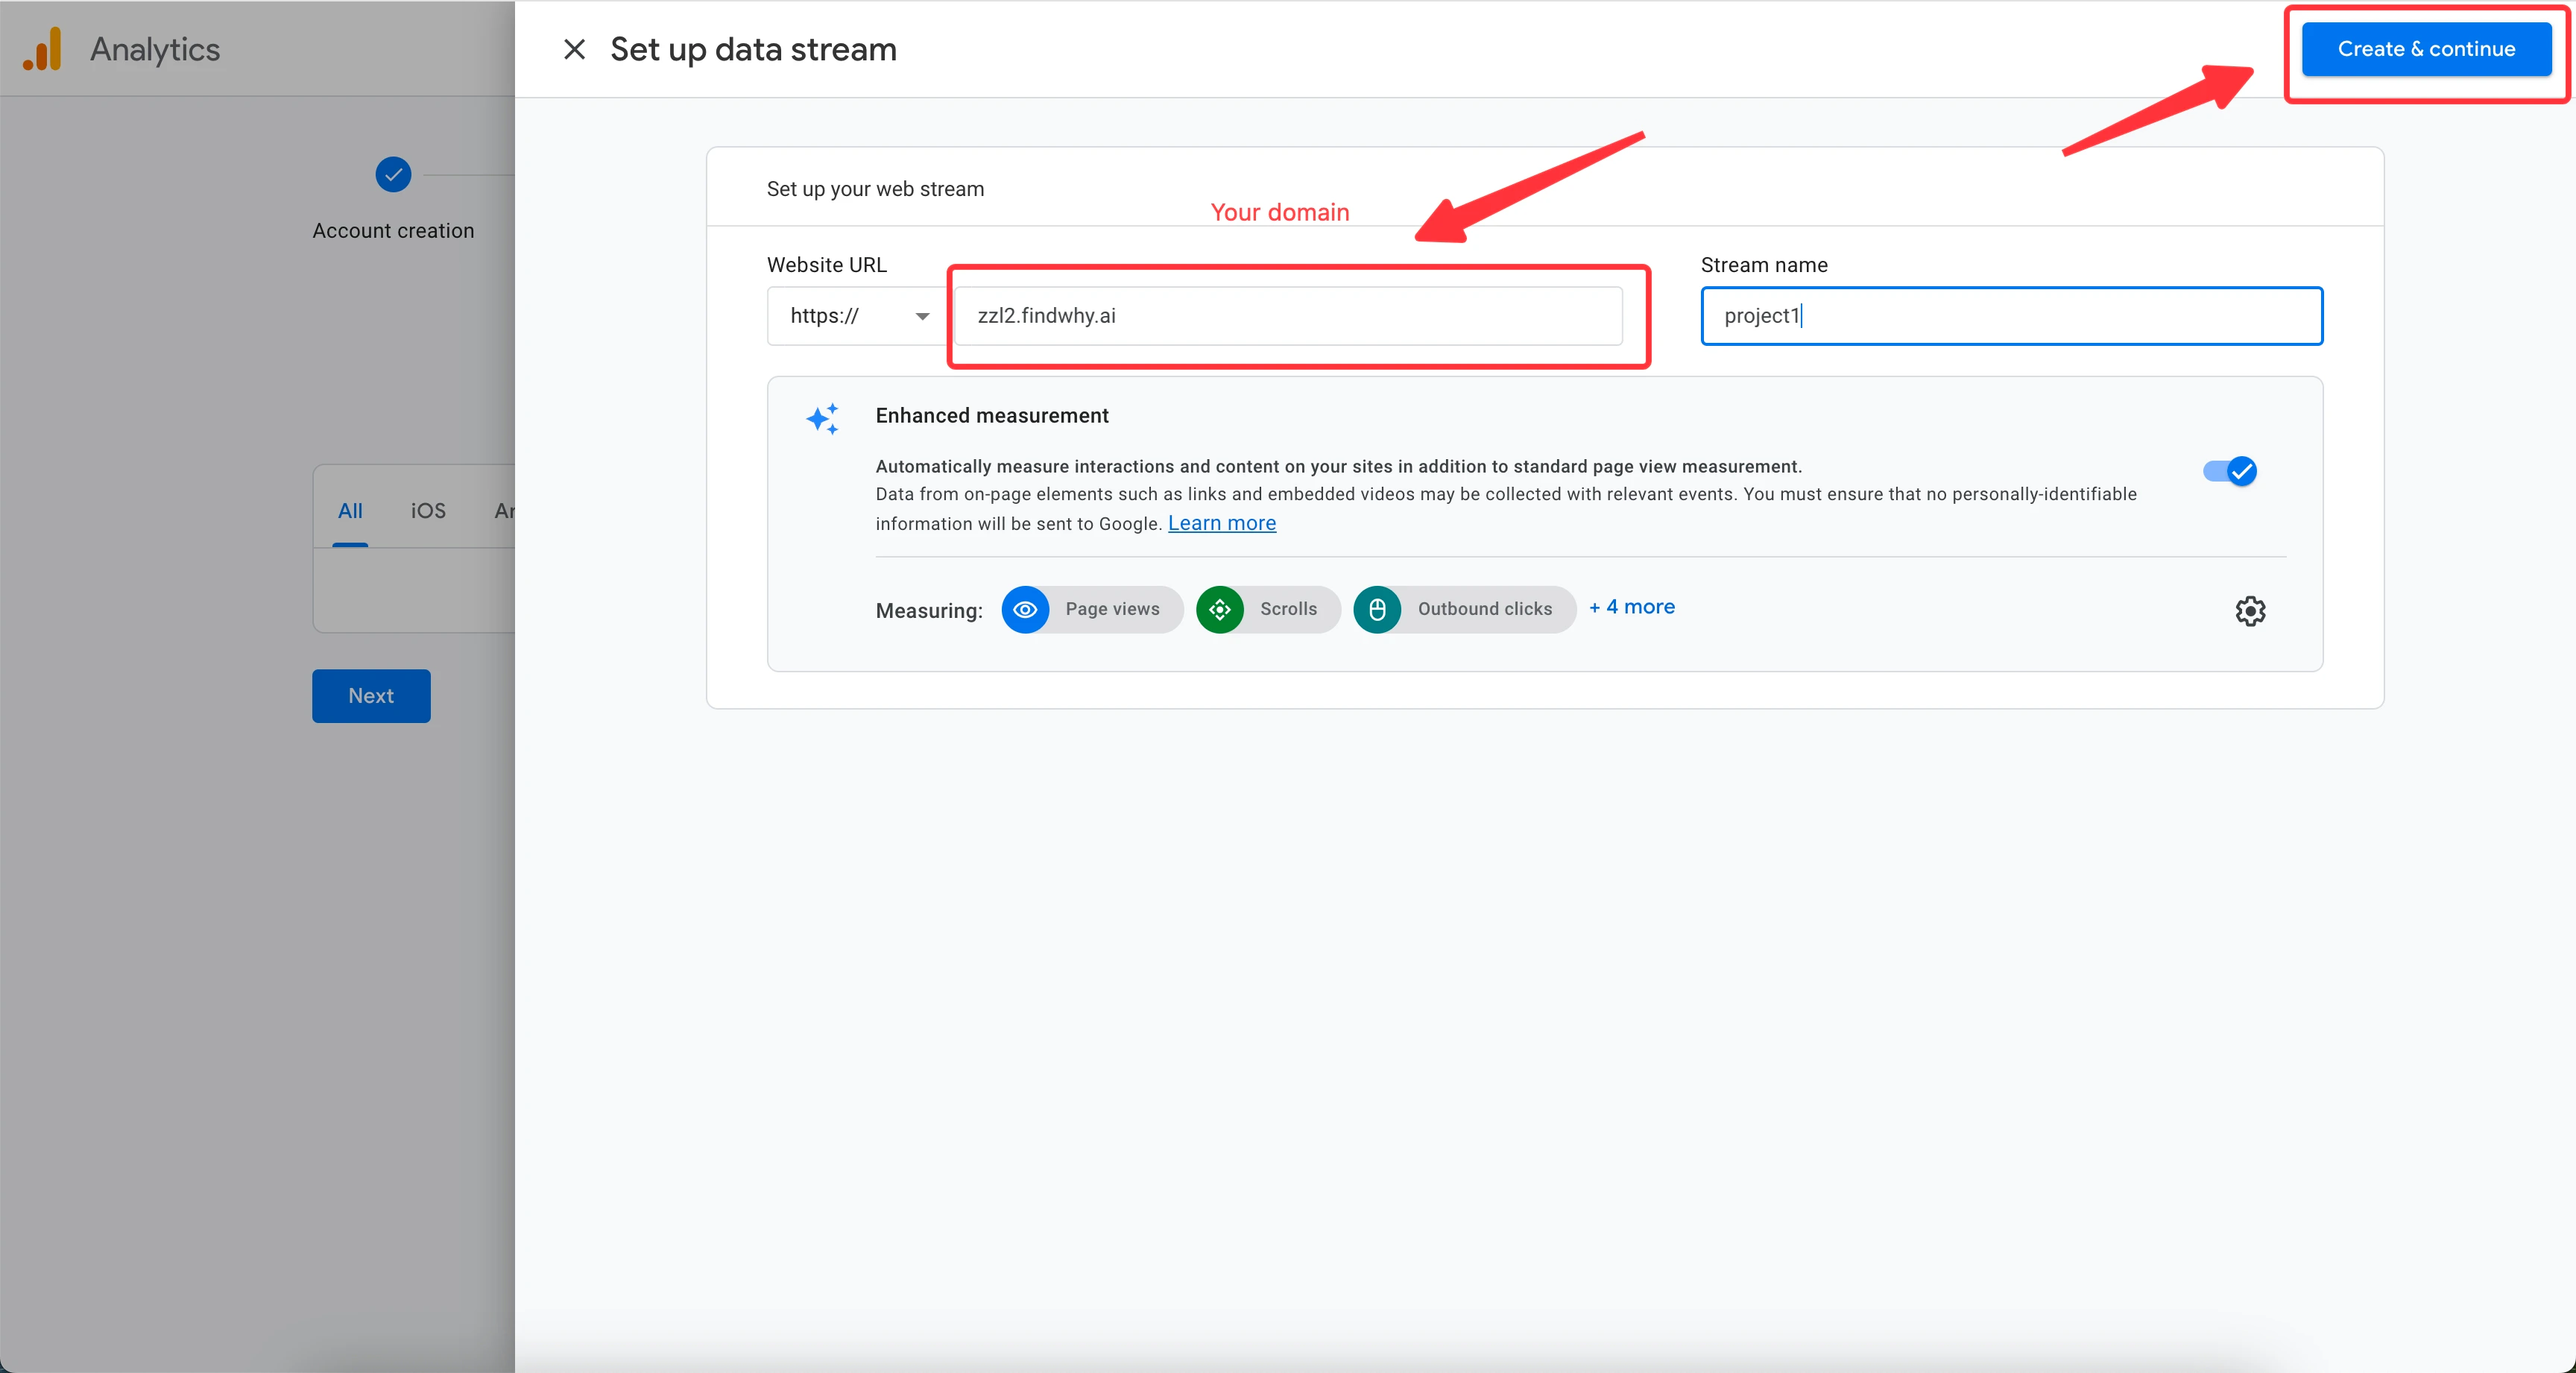
 Enter your **published domain** and give your Data Stream a name. Then click **"Create and Continue"**.
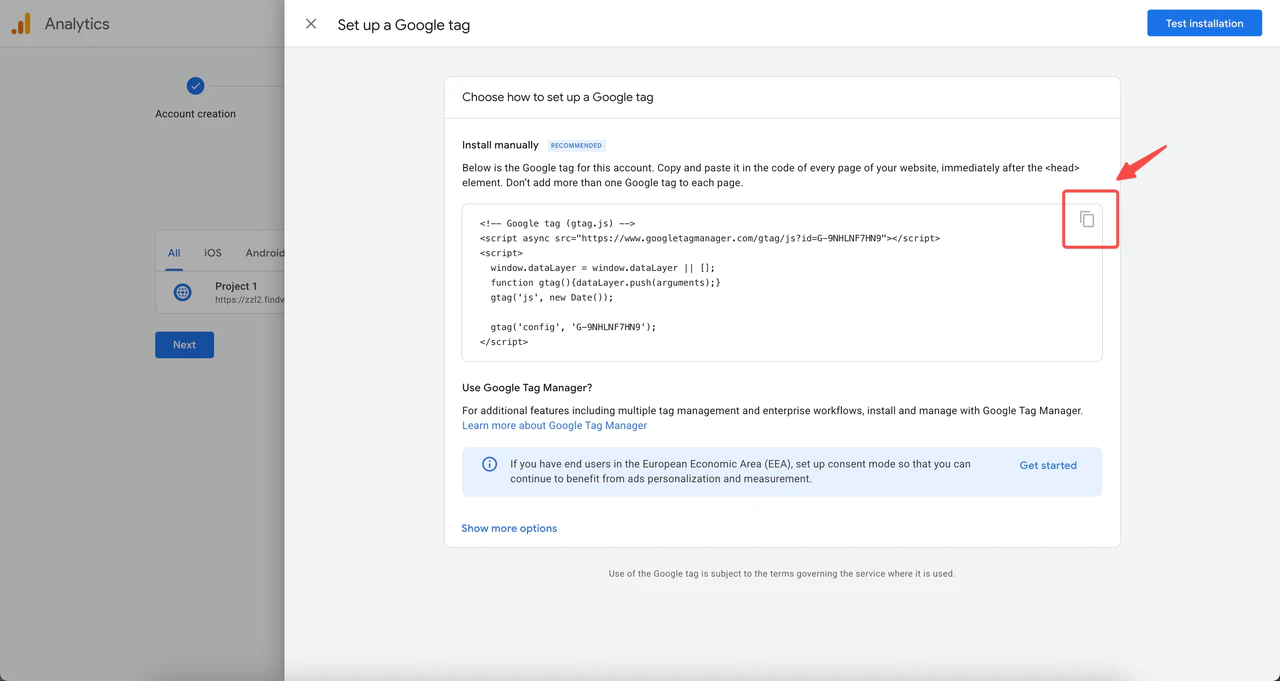
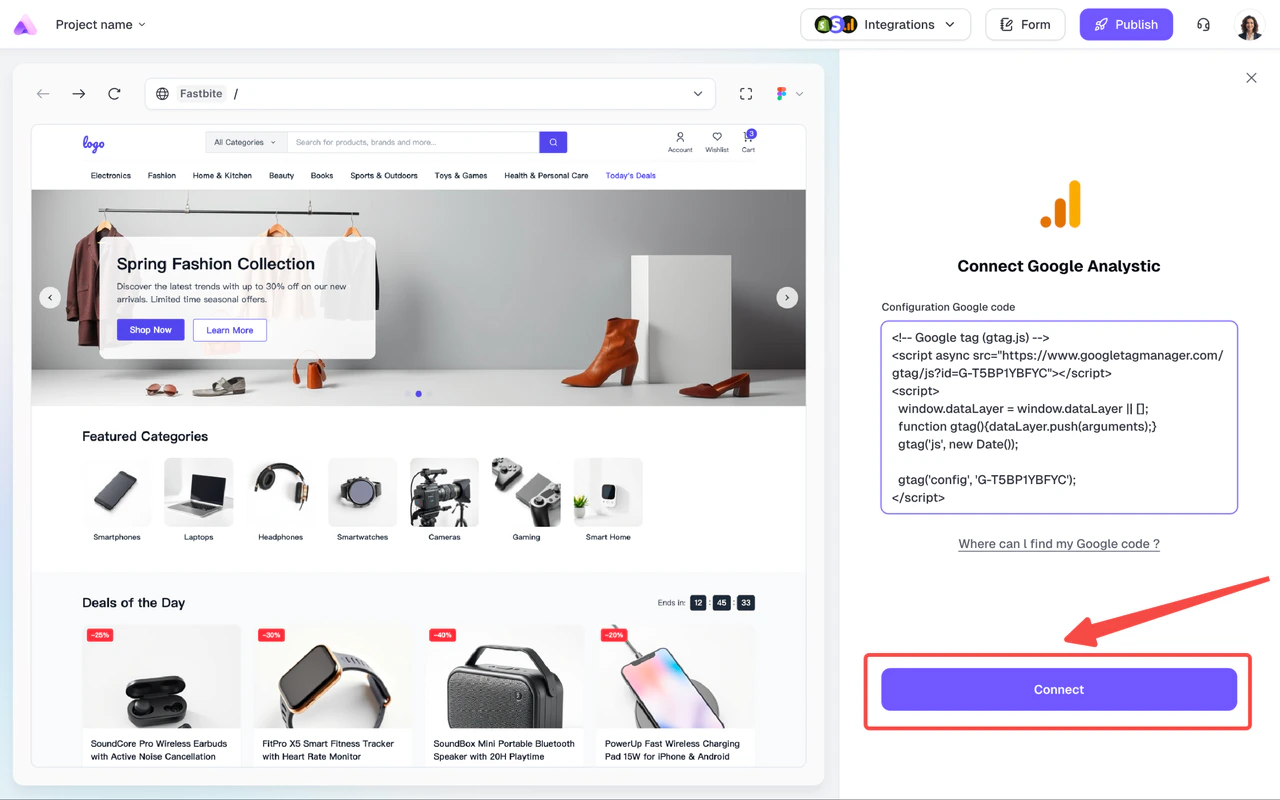
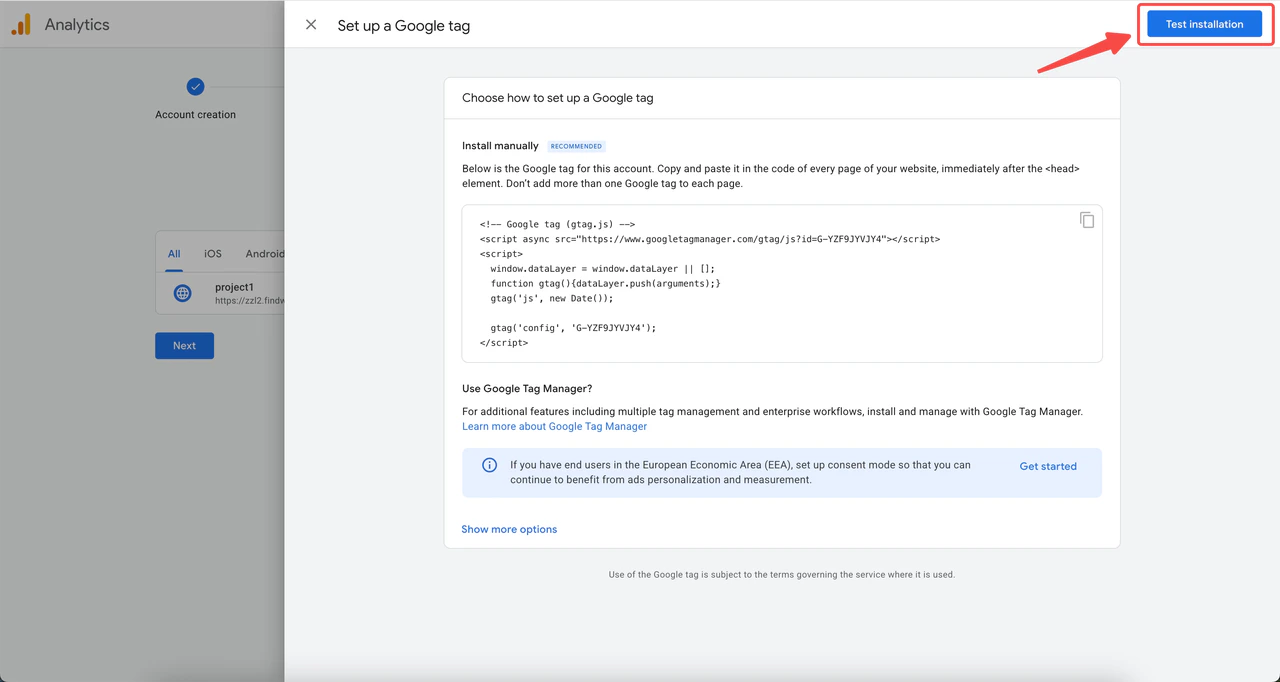
 A popup will appear with your Google tag. Copy the code and paste it into the input field in Readdy. Click **"Connect"** to generate a new version. Don't forget to re-publish your domain afterwards.
 Back in GA, click **"Test installation"** to check if the connection is working.
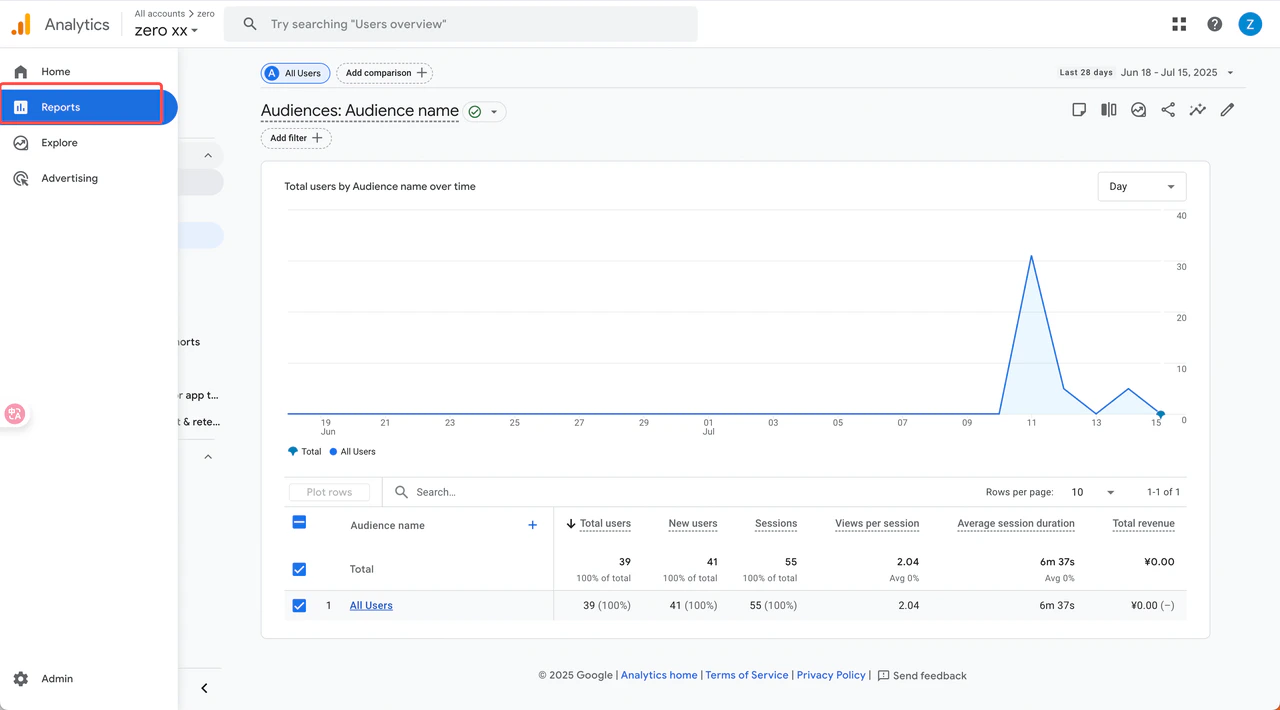
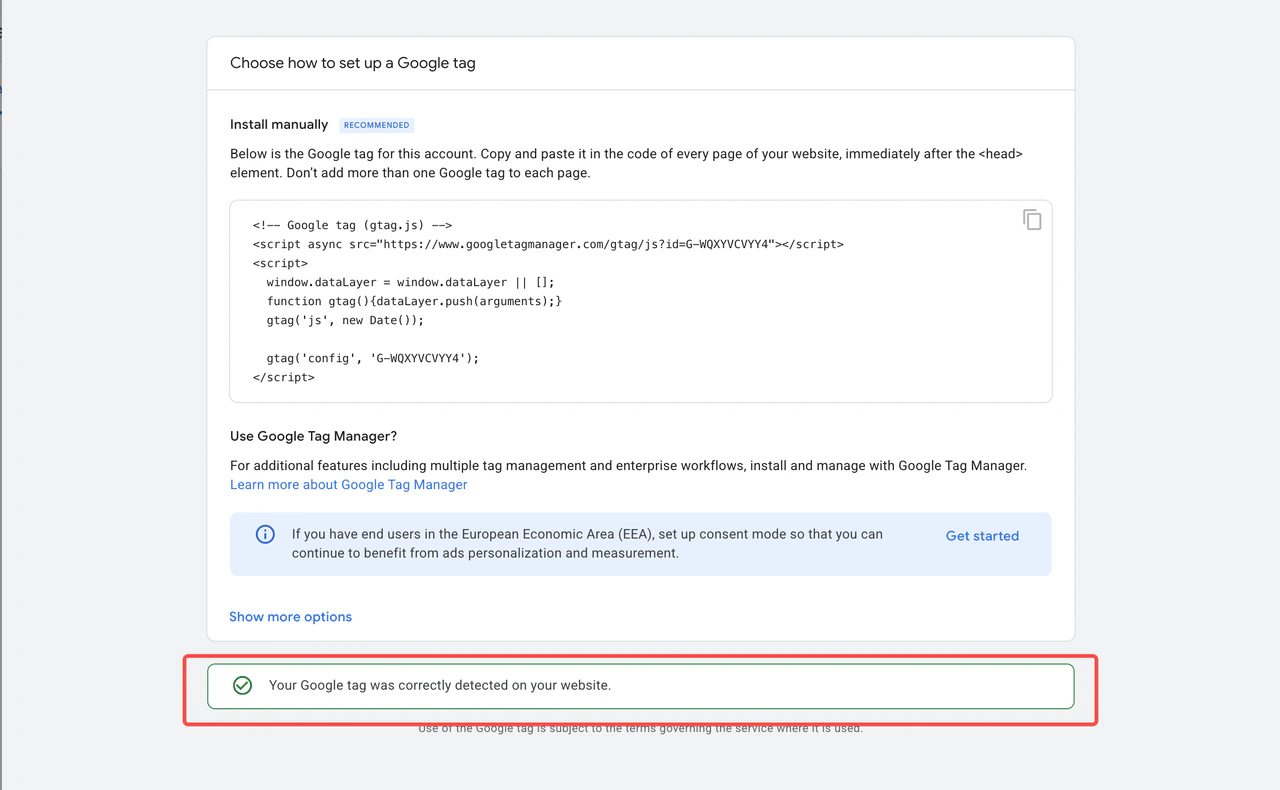 Once connected, GA will start collecting user data from your site. You can view reports under the **"Reports"** tab later.
 ## If you already have a Data Stream in GA
Log into GA, go to your property's **Admin panel**.
## If you already have a Data Stream in GA
Log into GA, go to your property's **Admin panel**.
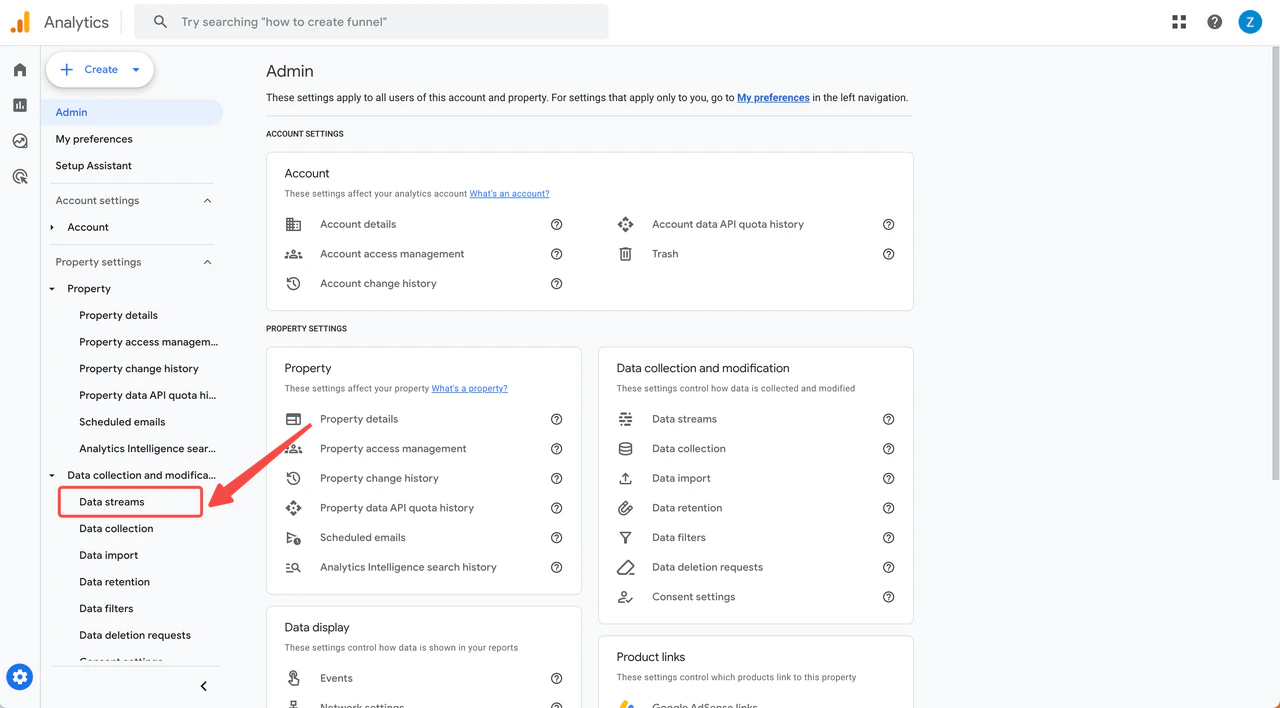
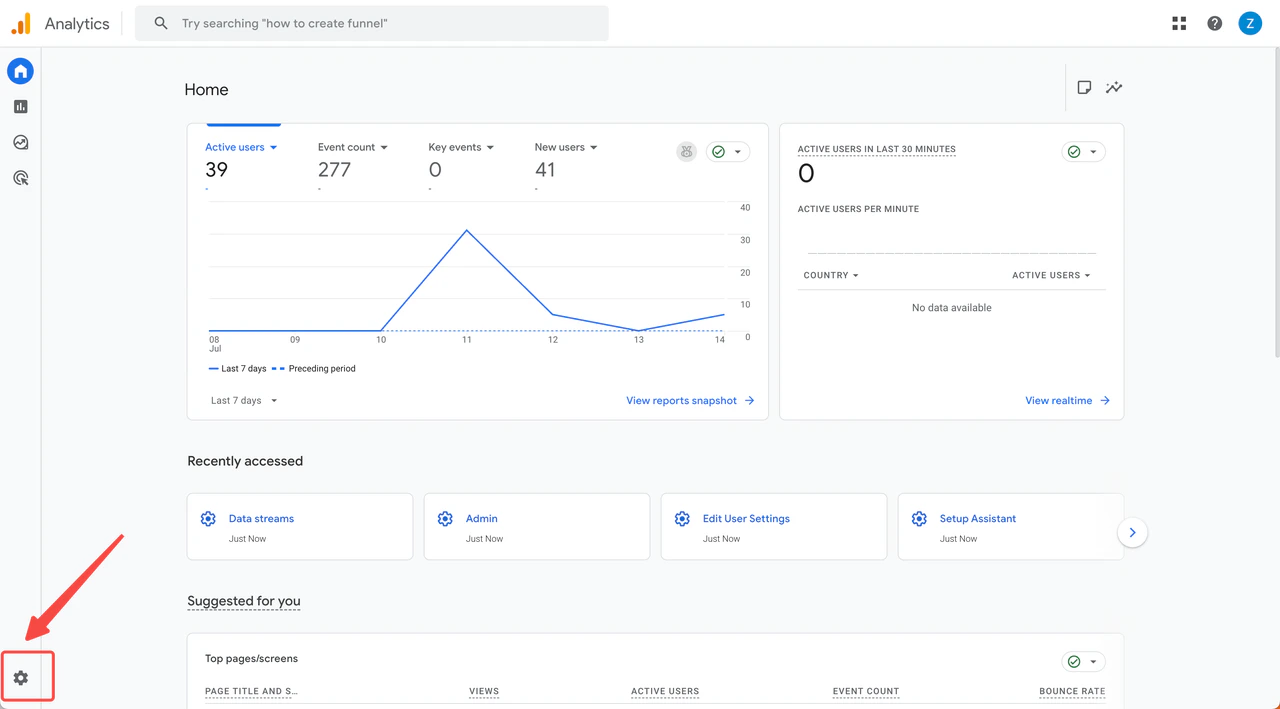 Under **Property Settings** > **Data collection and modification**, select **"Data Streams"**.
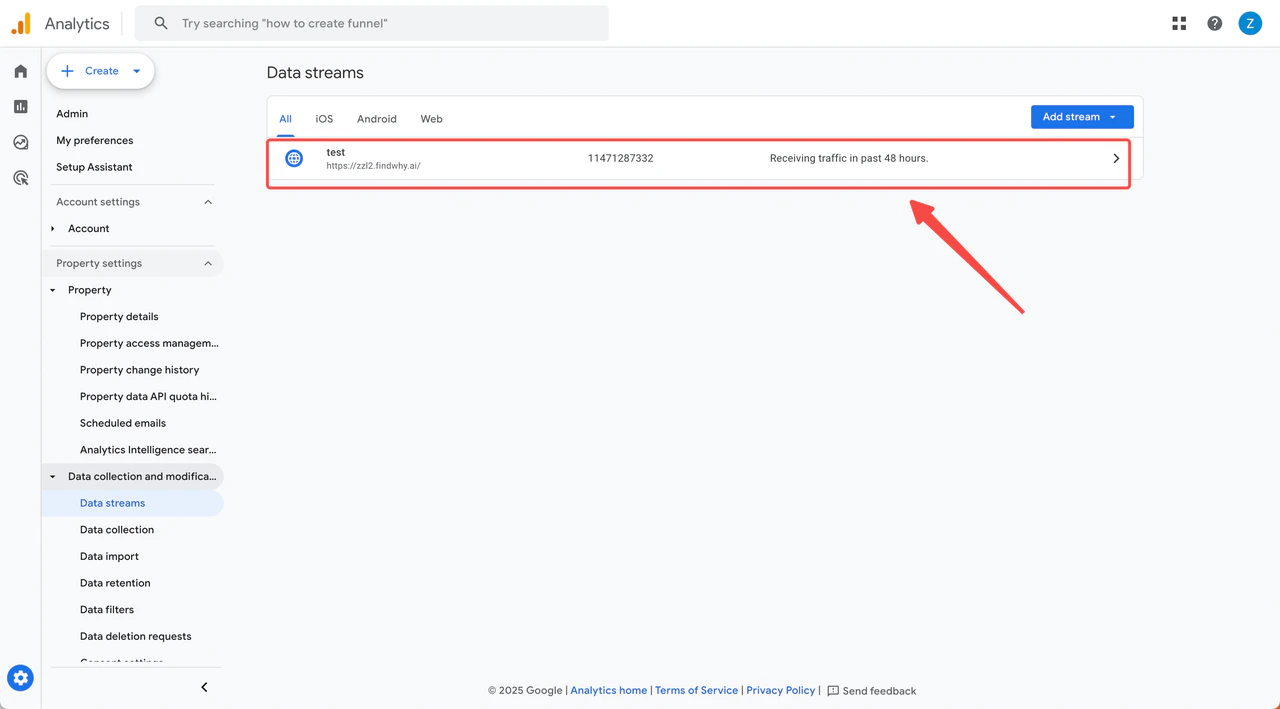
 **If you already have a Web Data Stream**, select it.
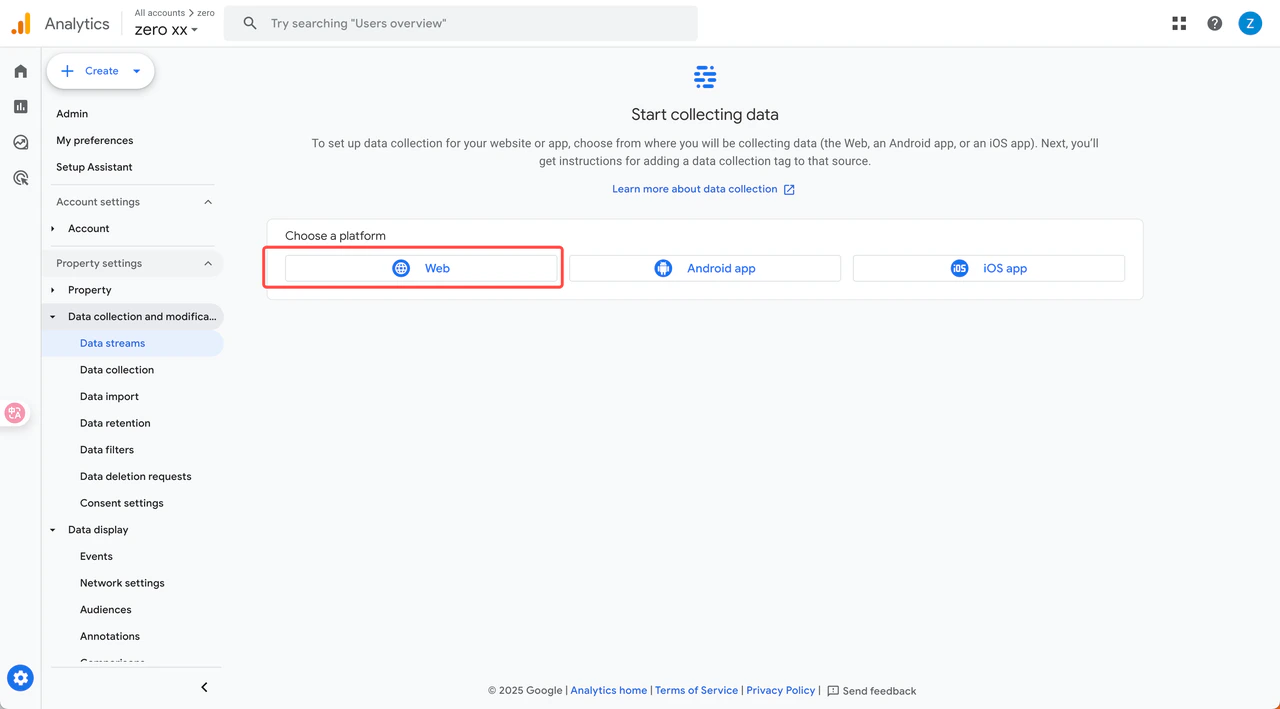
 **If no existing Data Stream is available**, click **"Web"** to create one. Follow the steps from Step 4 to Step 6 in the "New to GA" section.
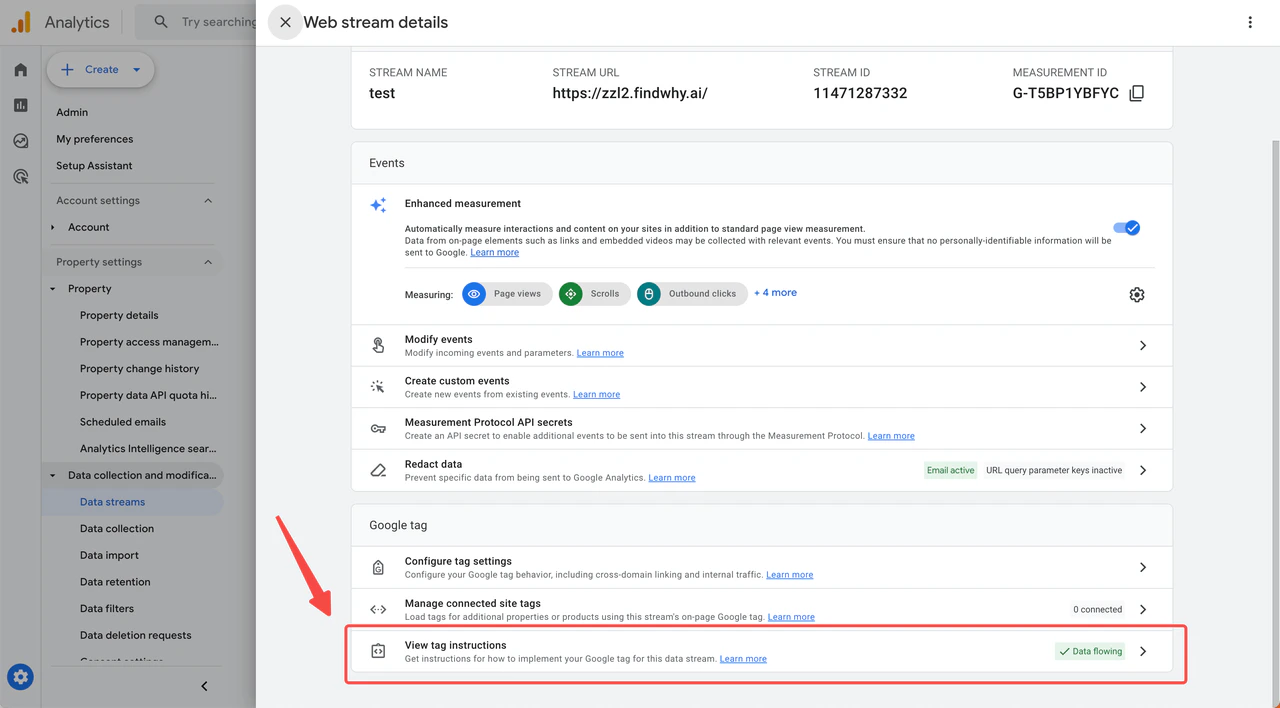
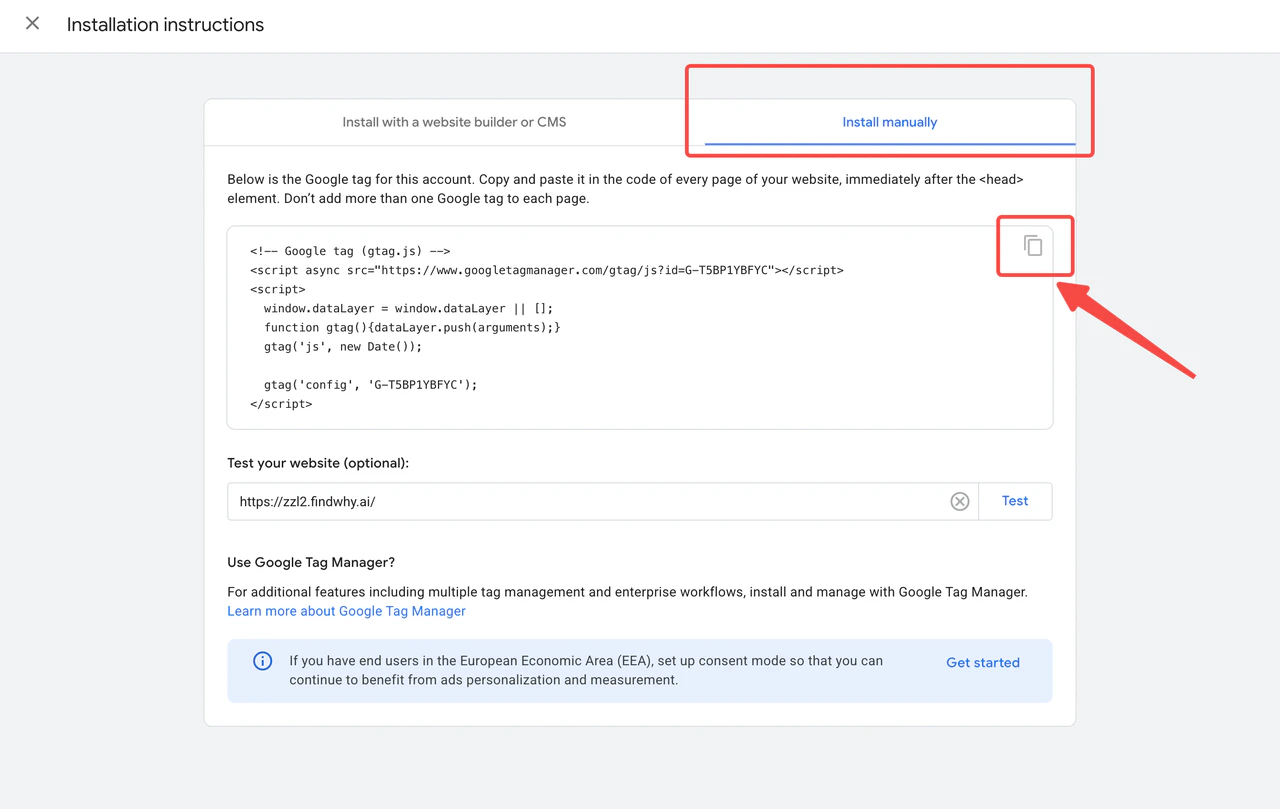
 In the Google tag section, click **"View tag instructions"**.
 Switch to the **"Install manually"** tab and copy the Google code.
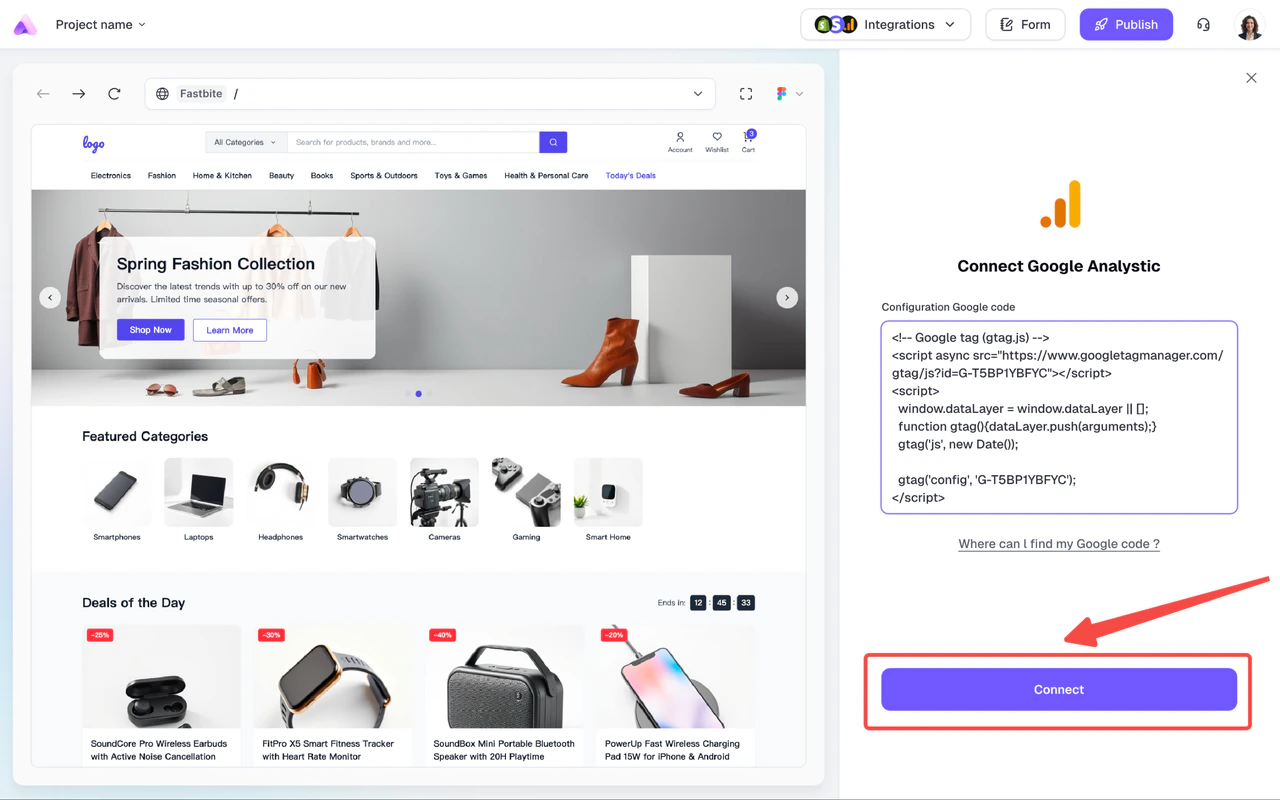
 Go back to Readdy, paste the code into the input field, and click **"Connect"**. A new version connected to GA will be created.
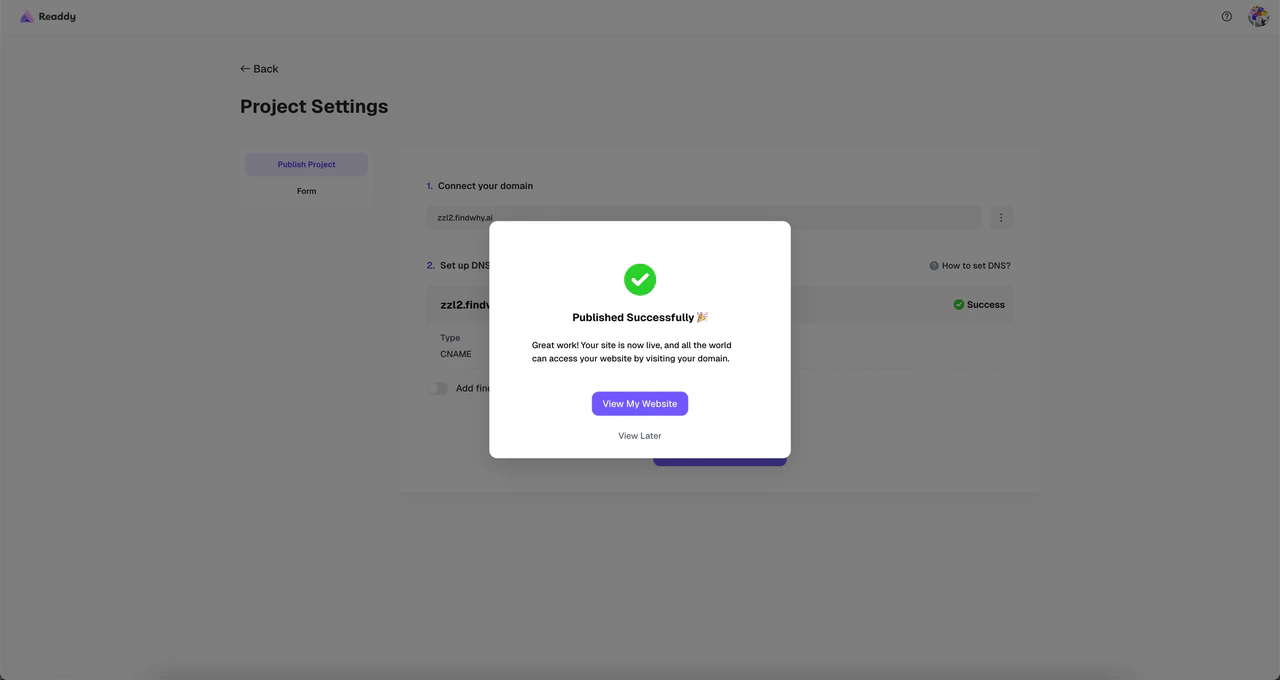
Remember to re-publish your site so GA can start tracking your user data.
Go back to Readdy, paste the code into the input field, and click **"Connect"**. A new version connected to GA will be created.
Remember to re-publish your site so GA can start tracking your user data.
 ## After Integration
### Viewing Your Analytics Data
Once connected, Google Analytics will start collecting user data from your site. You can view comprehensive reports under the **"Reports"** tab in your GA dashboard.
### What You Can Track
* **Real-time visitors**: See who's on your site right now
* **Page views**: Most and least popular pages
* **User demographics**: Age, location, and interests
* **Traffic sources**: Search engines, social media, direct visits
* **User behavior**: How visitors navigate through your site
## Troubleshooting
**Common solutions:**
1. **Check if you republished**: Analytics won't work until you republish your site after connecting
2. **Verify the code**: Make sure you copied the complete Google tag code
3. **Wait for data**: It can take 24-48 hours for data to appear in GA
4. **Test installation**: Use the "Test installation" feature in Google Analytics
5. **Check domain**: Ensure your domain is correctly published and accessible
If issues persist, contact our support team for assistance.
If you have multiple websites, you can:
1. **Create separate data streams** for each domain in the same GA property
2. **Use different GA properties** for completely separate tracking
3. **Set up cross-domain tracking** if the sites are related
Choose the approach that best fits your analytics needs.
## After Integration
### Viewing Your Analytics Data
Once connected, Google Analytics will start collecting user data from your site. You can view comprehensive reports under the **"Reports"** tab in your GA dashboard.
### What You Can Track
* **Real-time visitors**: See who's on your site right now
* **Page views**: Most and least popular pages
* **User demographics**: Age, location, and interests
* **Traffic sources**: Search engines, social media, direct visits
* **User behavior**: How visitors navigate through your site
## Troubleshooting
**Common solutions:**
1. **Check if you republished**: Analytics won't work until you republish your site after connecting
2. **Verify the code**: Make sure you copied the complete Google tag code
3. **Wait for data**: It can take 24-48 hours for data to appear in GA
4. **Test installation**: Use the "Test installation" feature in Google Analytics
5. **Check domain**: Ensure your domain is correctly published and accessible
If issues persist, contact our support team for assistance.
If you have multiple websites, you can:
1. **Create separate data streams** for each domain in the same GA property
2. **Use different GA properties** for completely separate tracking
3. **Set up cross-domain tracking** if the sites are related
Choose the approach that best fits your analytics needs.