> ## Documentation Index
> Fetch the complete documentation index at: https://docs.readdy.ai/llms.txt
> Use this file to discover all available pages before exploring further.
# Integrate with Stripe
> Sell the products on your website with conncet Stripe
## 1. What is Stripe?
Stripe is a leading global payment processing platform that provides businesses and individuals with a complete solution for accepting and managing online payments. You can integrate your Stripe account into your e-commerce websites, enabling you to securely process credit cards, digital wallets, and various payment methods from customers worldwide.
Once you've set up Stripe integration, you can start accepting real-time payments on your website so that customers can complete transactions seamlessly. This guide will walk you through the steps to implement Stripe payments on your website.
## 2. Before You Start
This guide will walk you through connecting Stripe to your Readdy project. Before we begin, please make sure you have the following ready:
* An active Stripe account ready for payments.
* Your Readdy project is already connected to **Supabase** (Stripe integration requires Supabase [How to connect Supabase](/integrations/supabase)).
Once these are ready, let’s connect Stripe.
## 3. Access the Stripe Integration
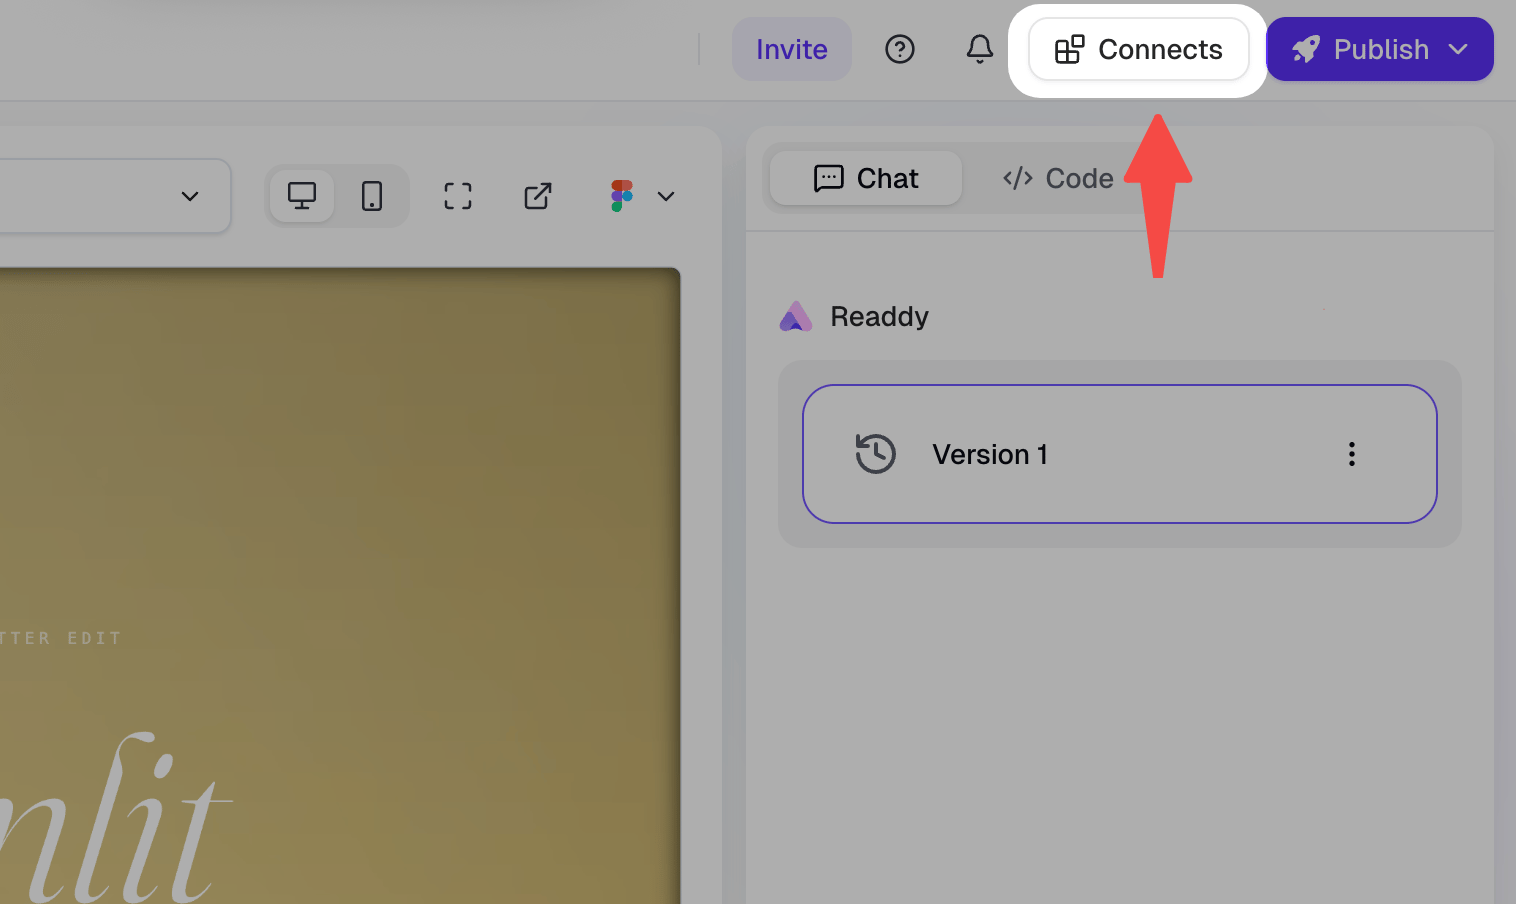
In the Readdy editor, click the **Connects** button at the top of the screen.
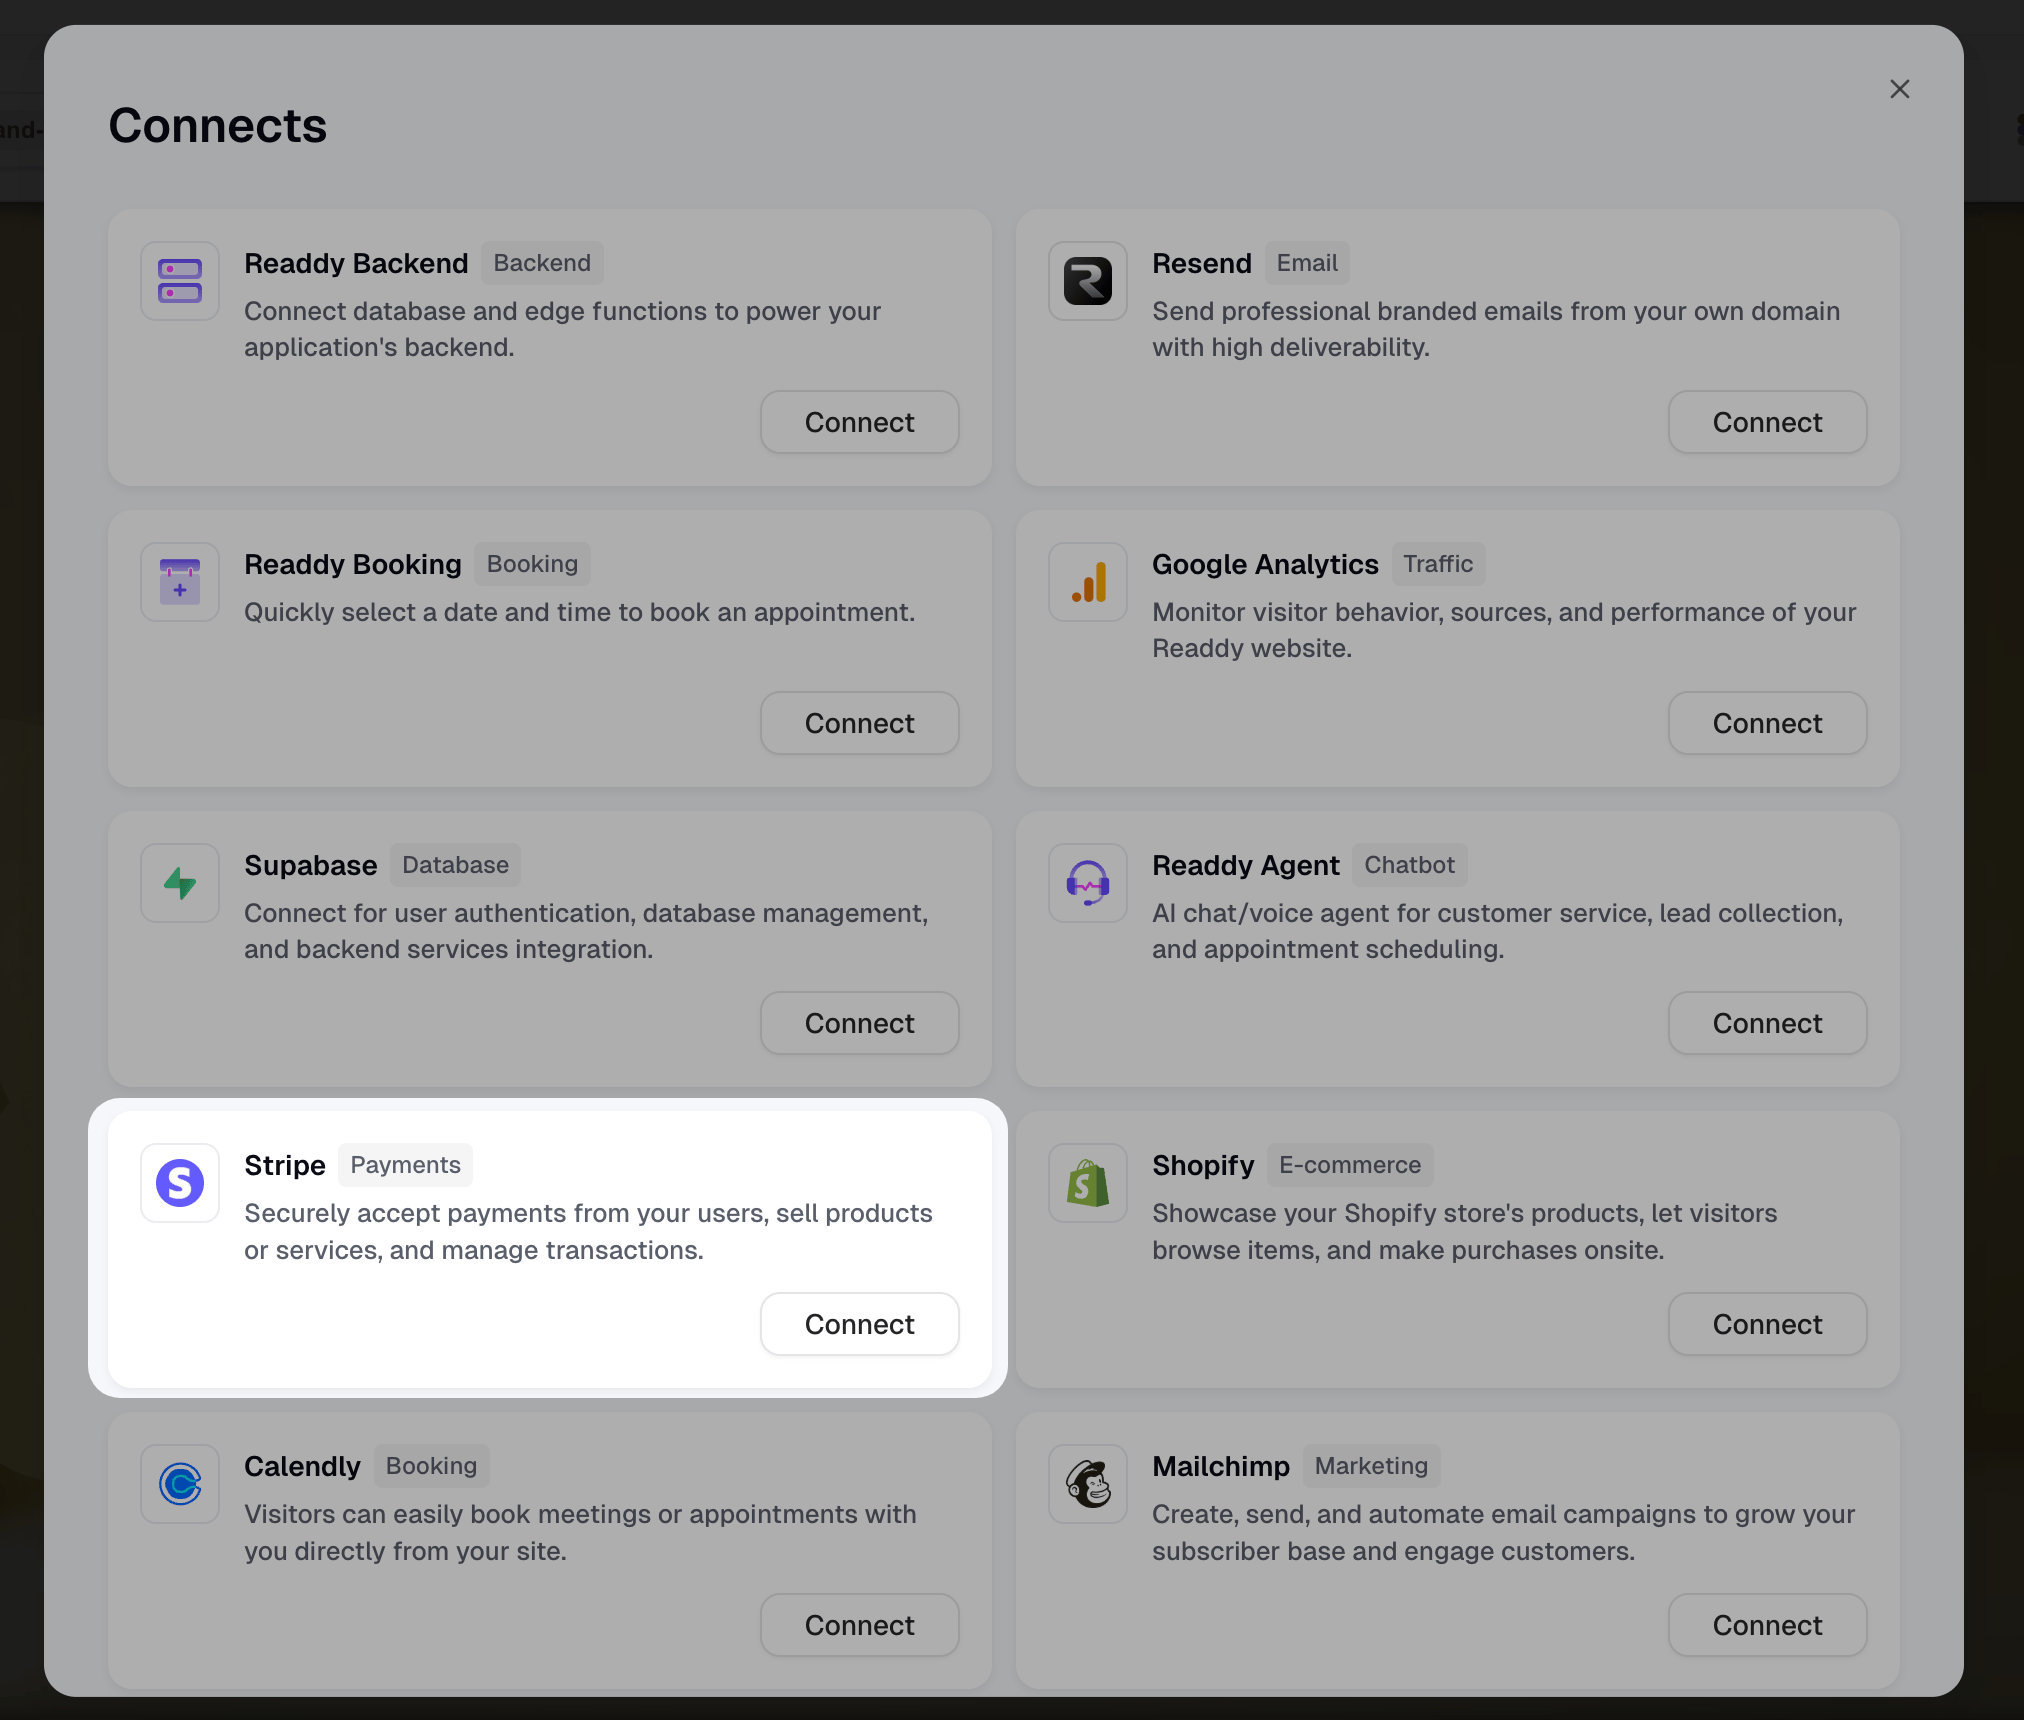
 From the Connects panel, find **Stripe** and click **Connect**.
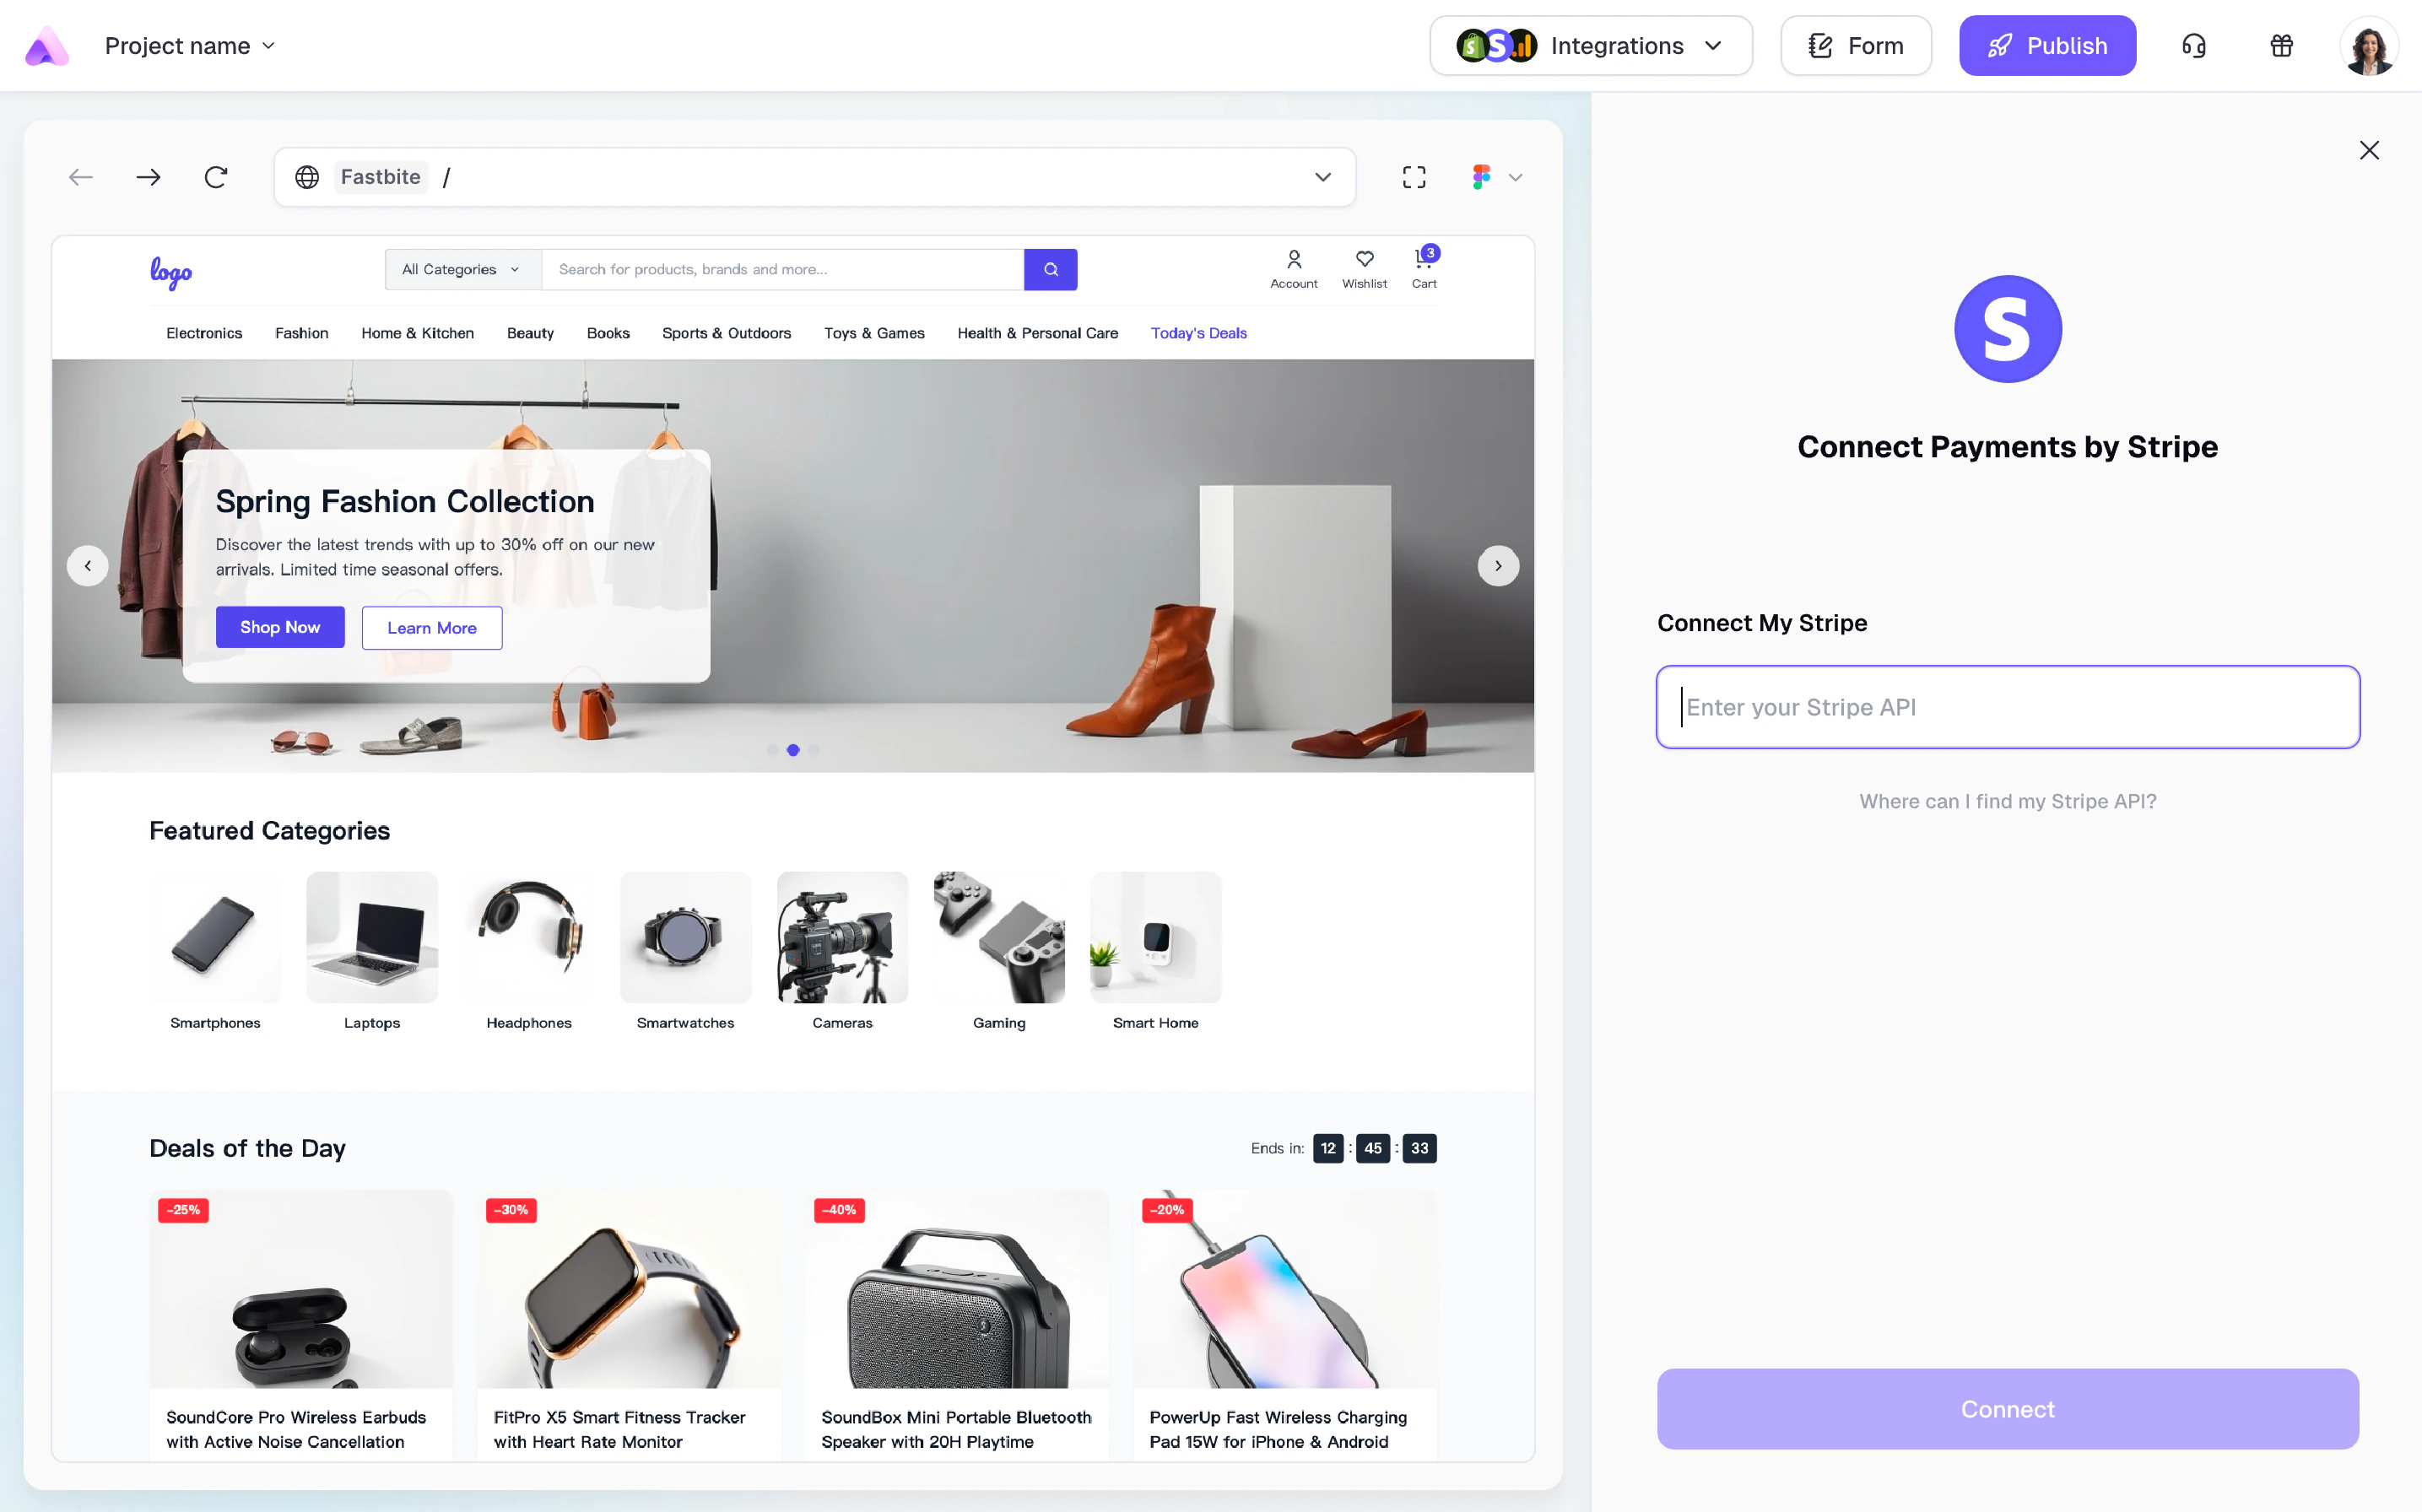
 A panel will open where you’ll need to enter your Stripe API key.
> API connection is a one-time setup - you won't need to enter the API again for future use of this feature.
A panel will open where you’ll need to enter your Stripe API key.
> API connection is a one-time setup - you won't need to enter the API again for future use of this feature.
 ## 4. Get Stripe API
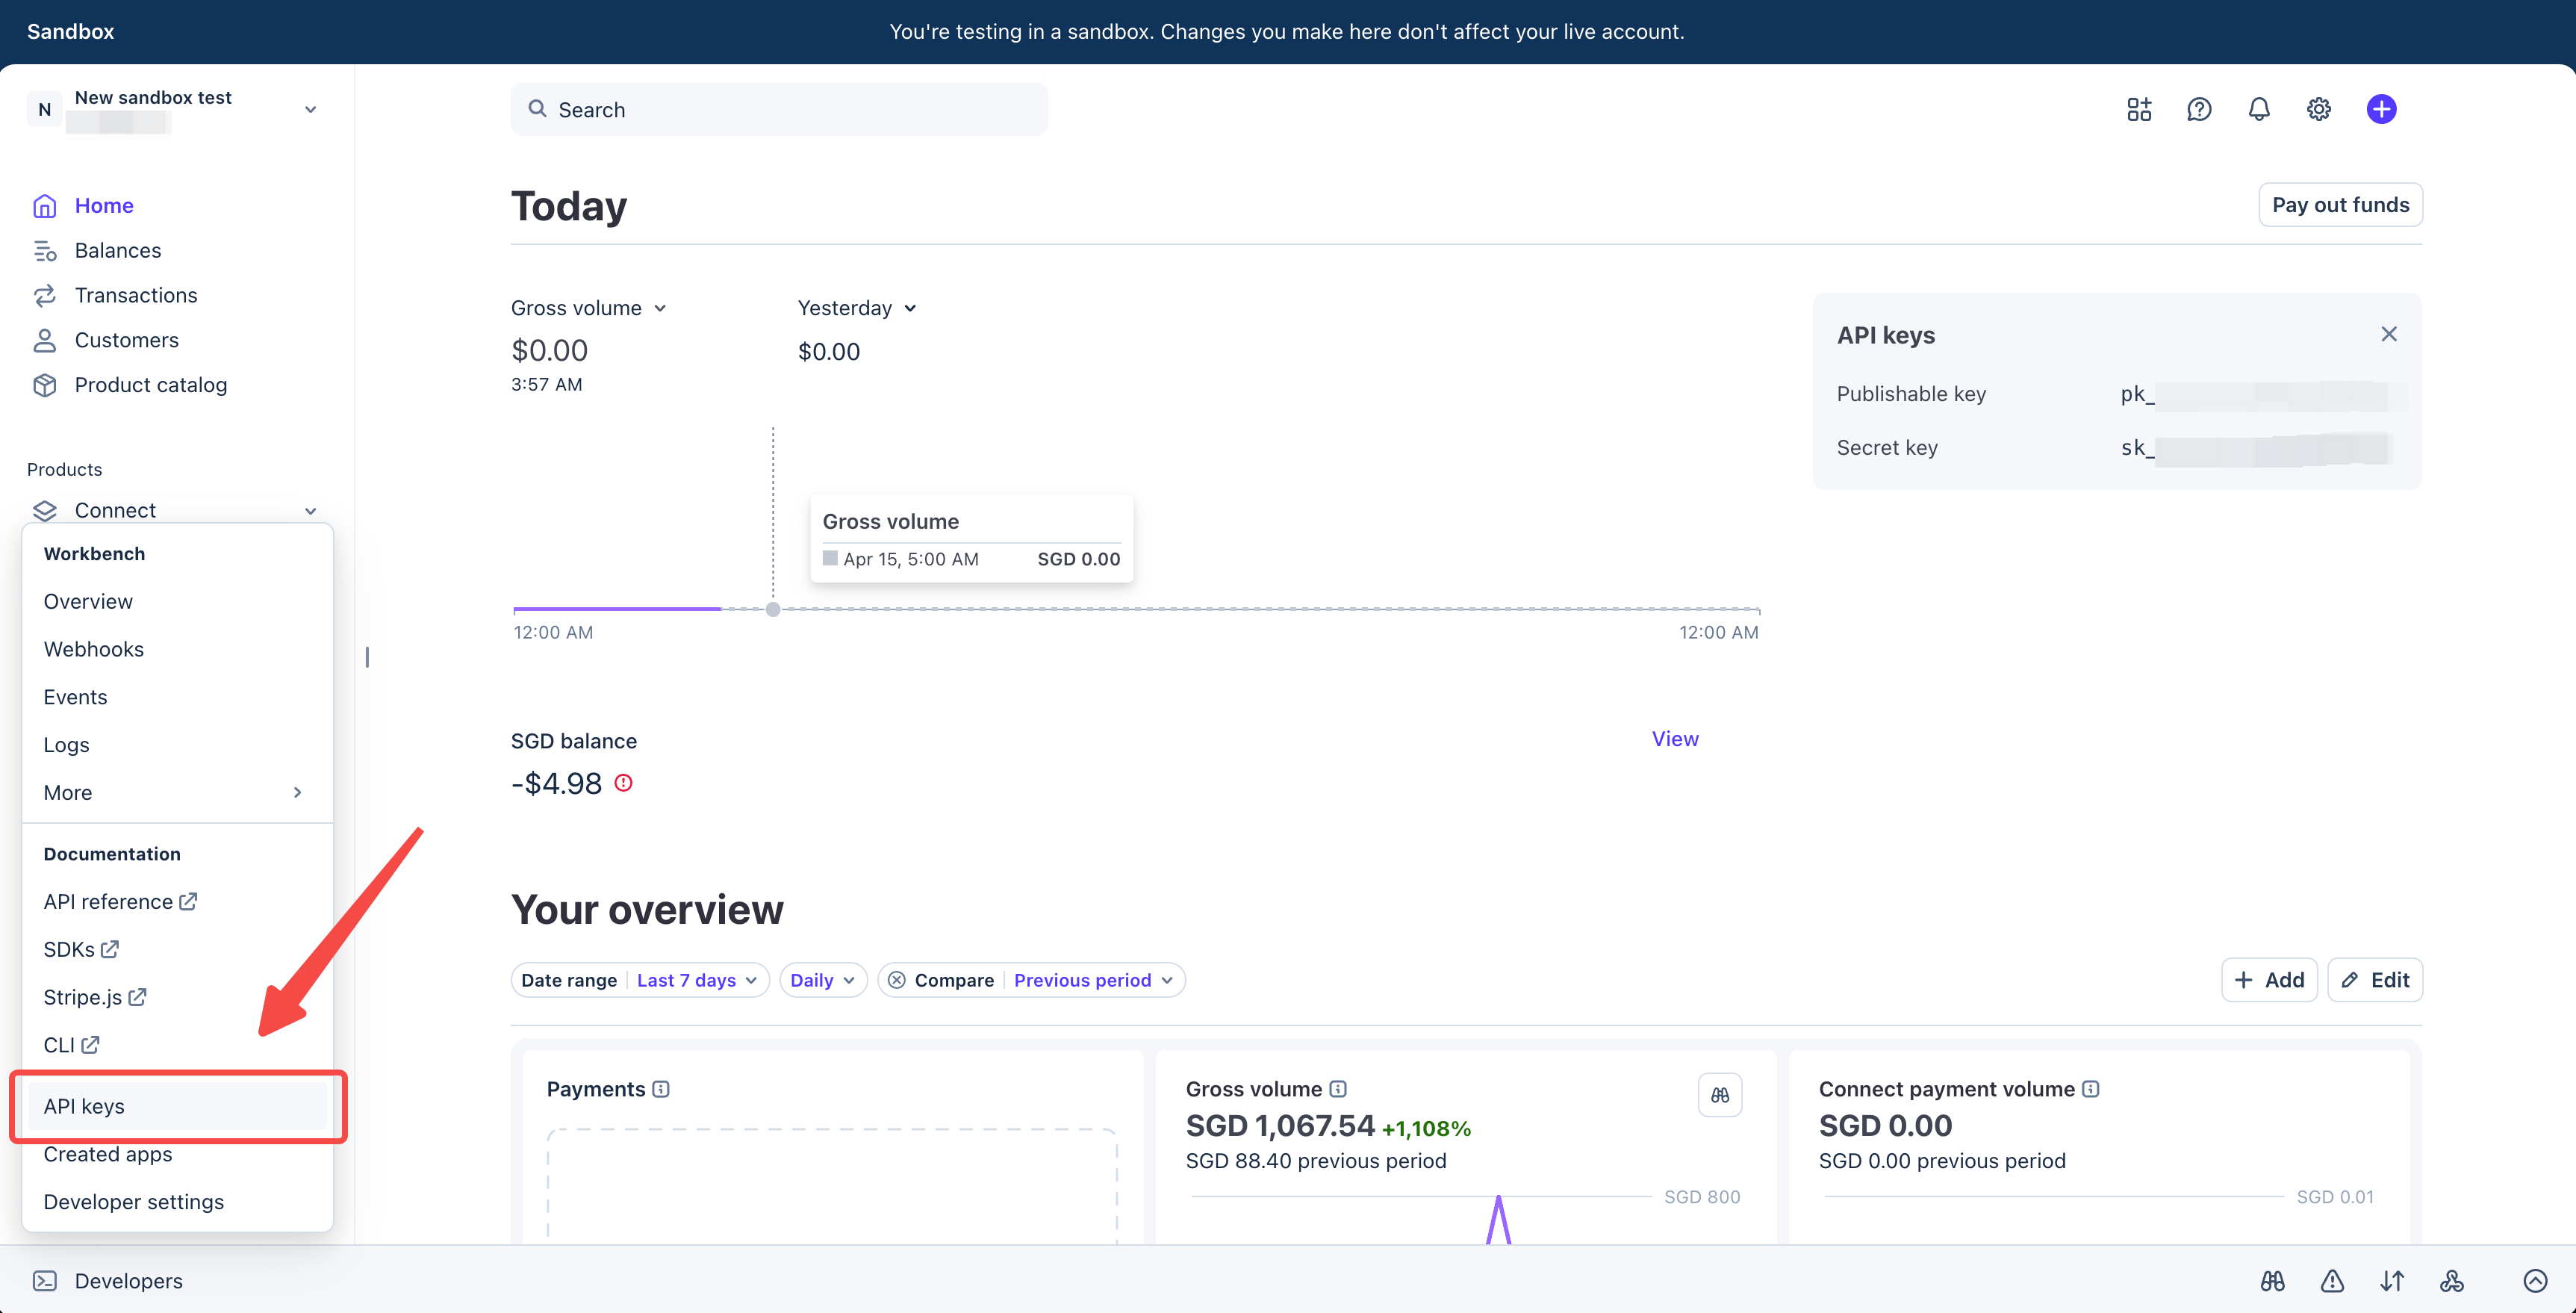
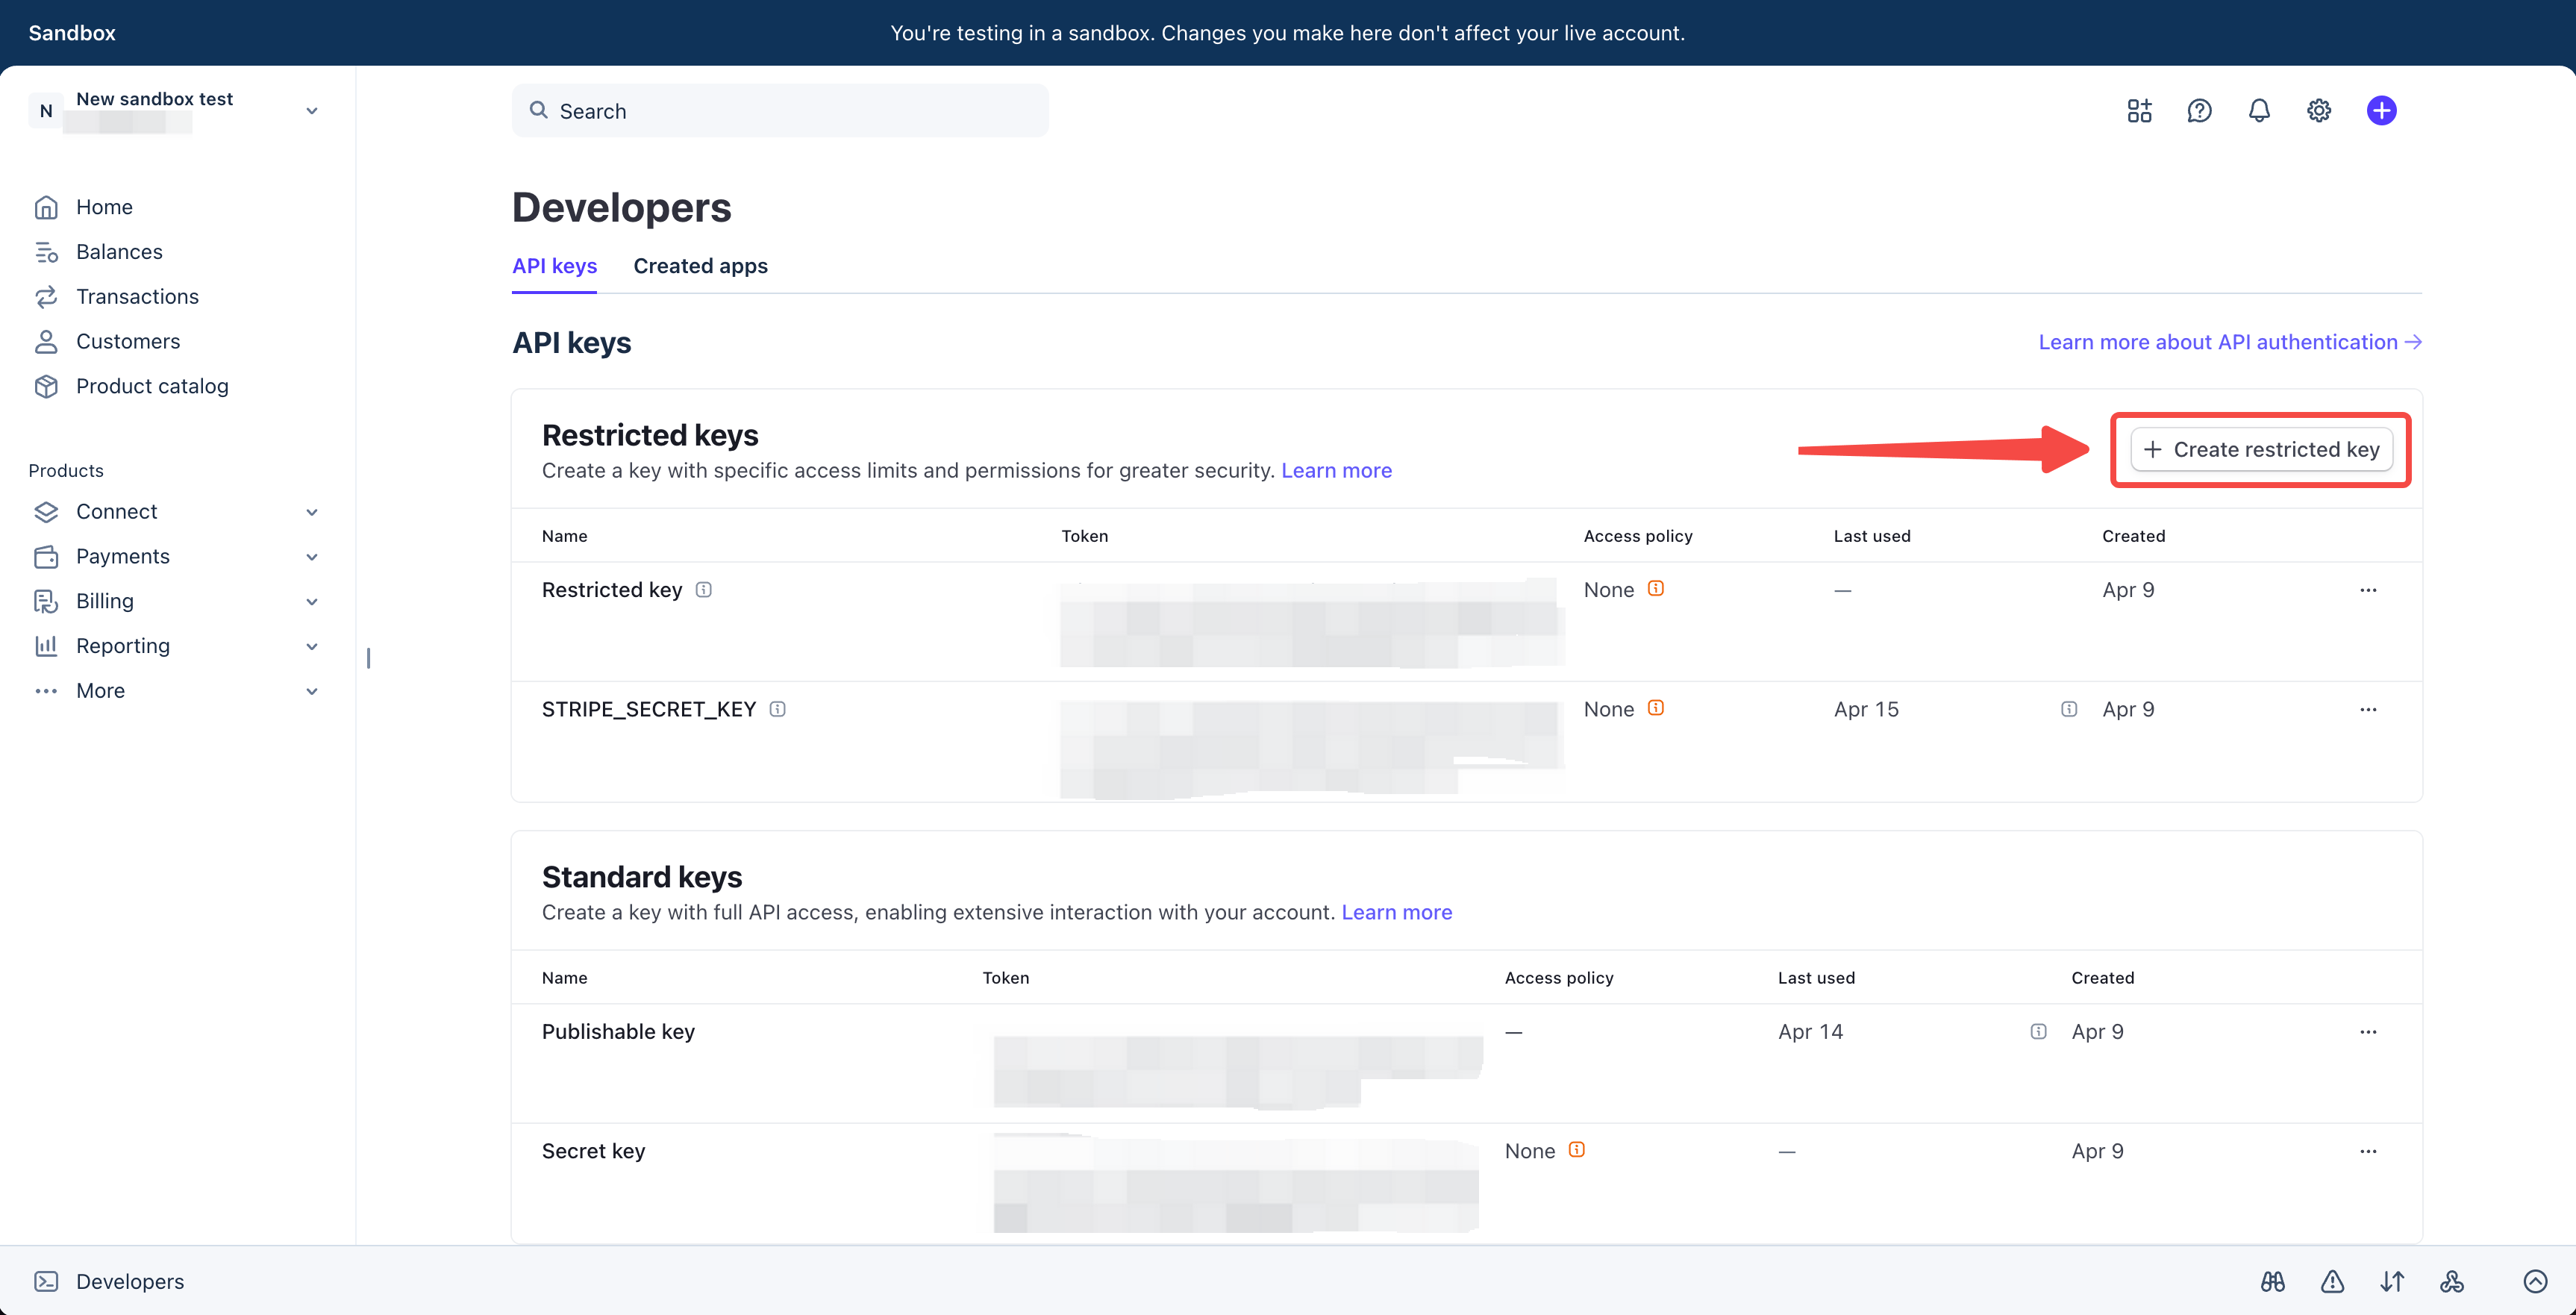
Go to [https://www.stripe.com/](https://www.stripe.com/) and log in. Then, in the left menu, click **Developers** and select **API keys**.
## 4. Get Stripe API
Go to [https://www.stripe.com/](https://www.stripe.com/) and log in. Then, in the left menu, click **Developers** and select **API keys**.
 Click **+ Create restricted key**.
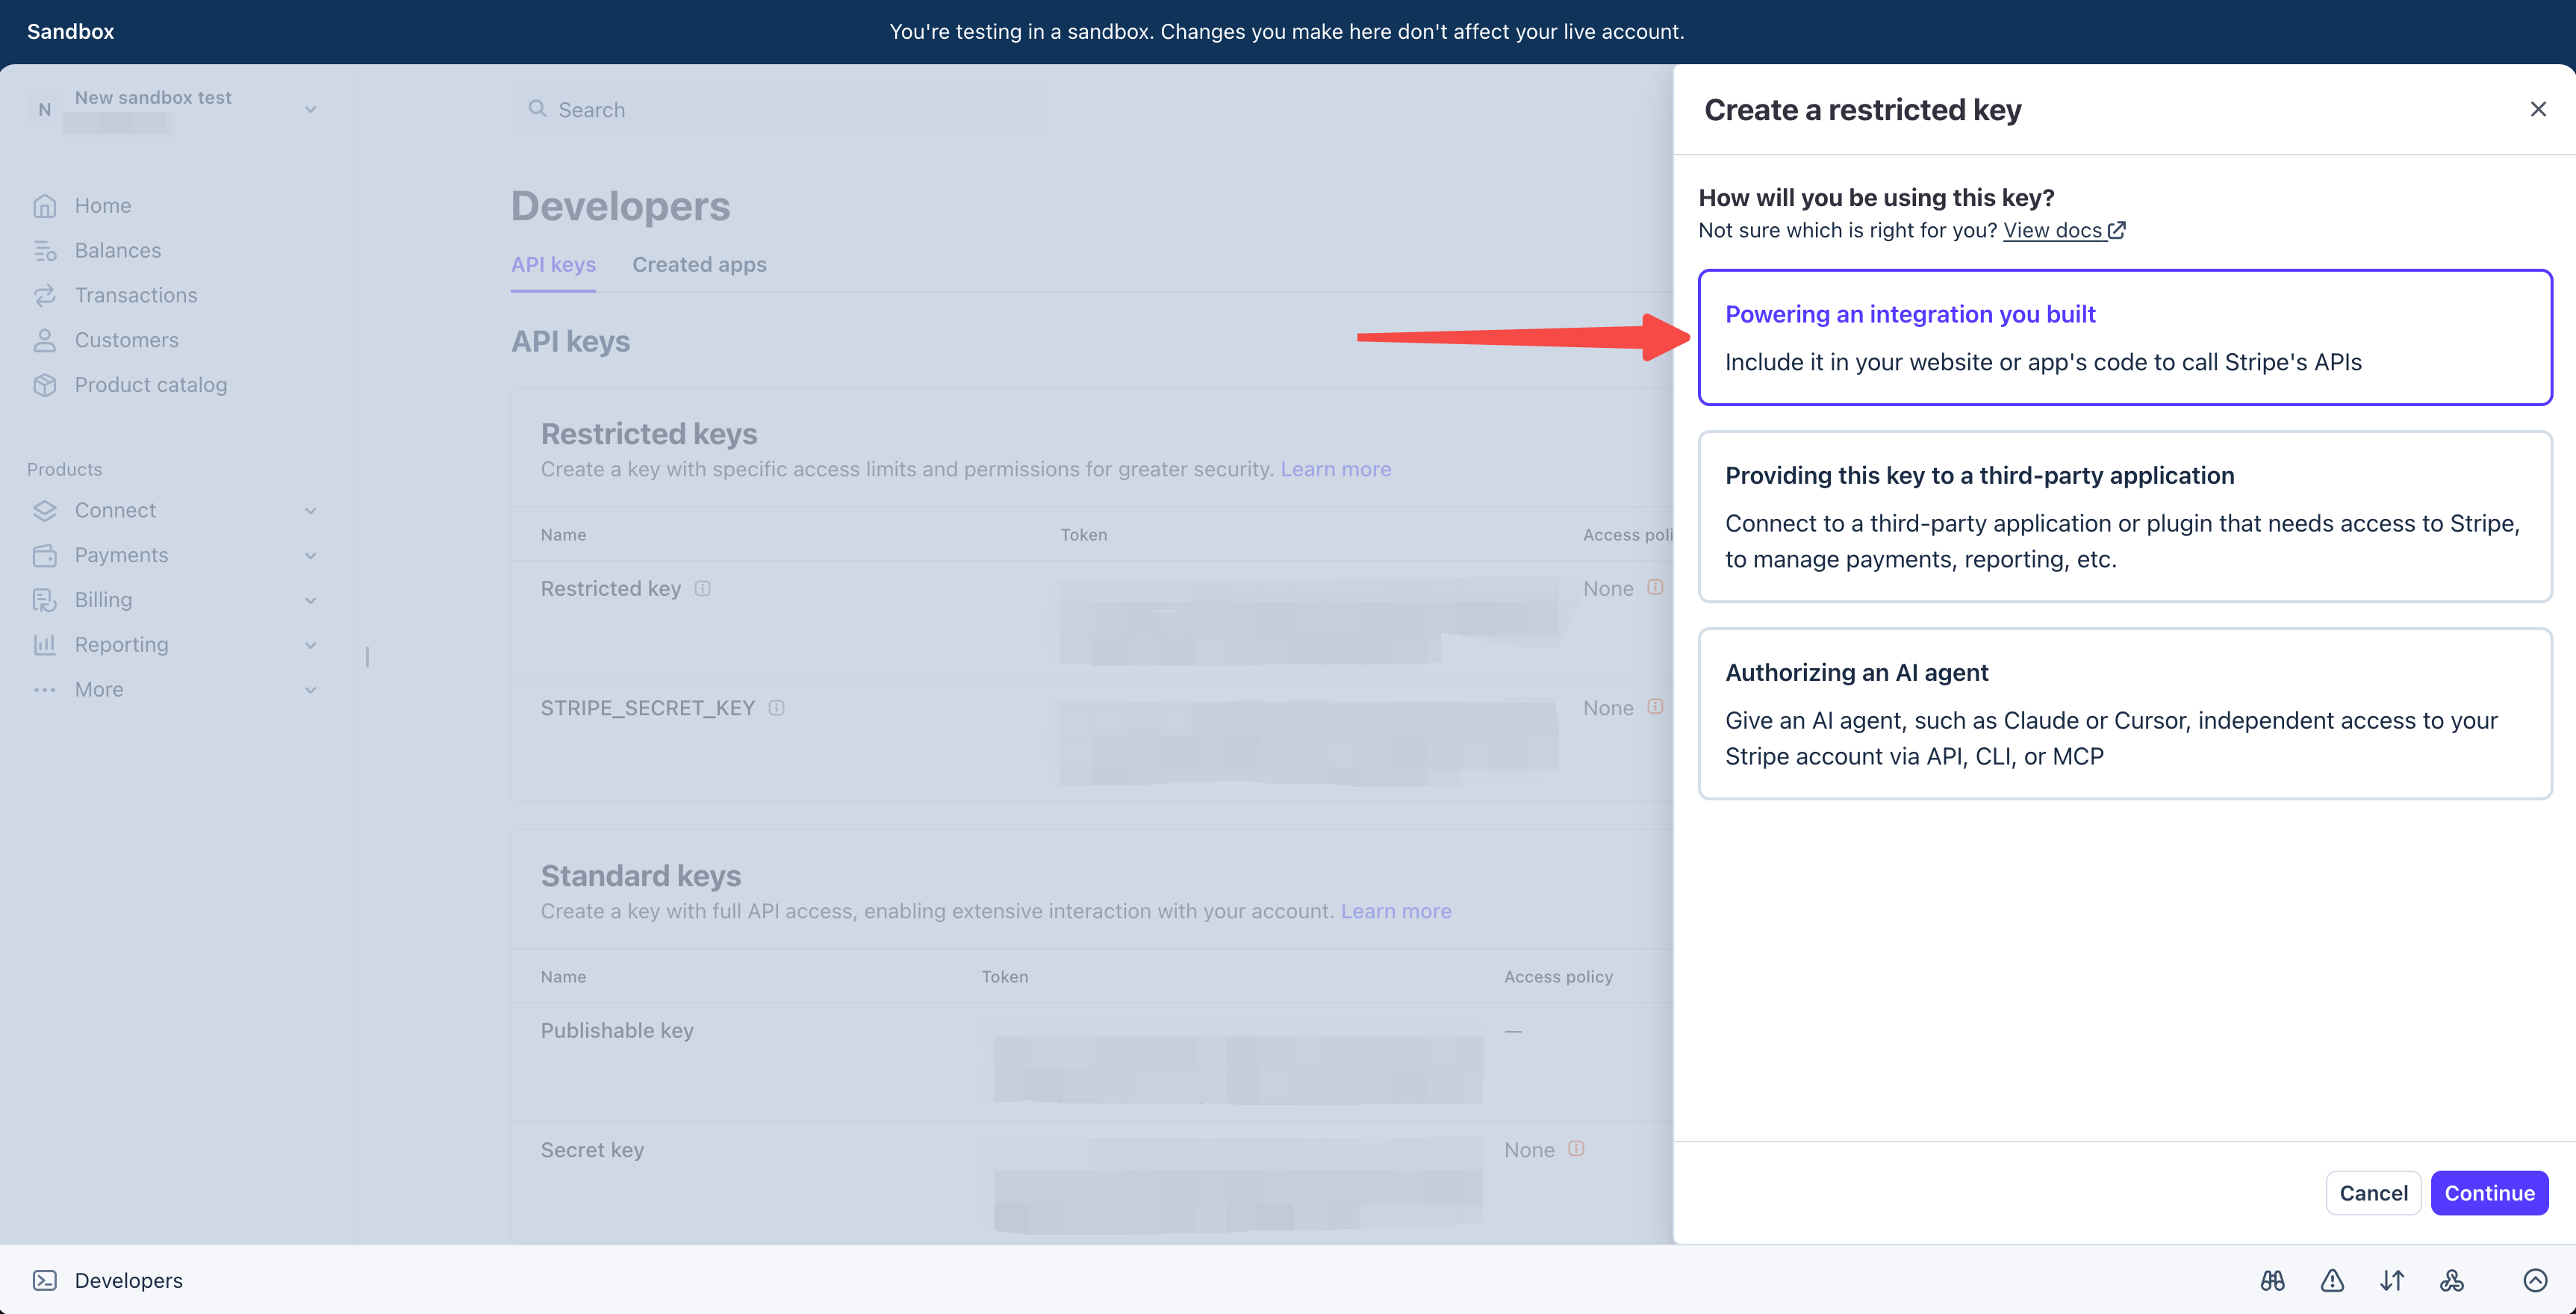
 In the panel, choose **Building your own integration** and click **Continue**.
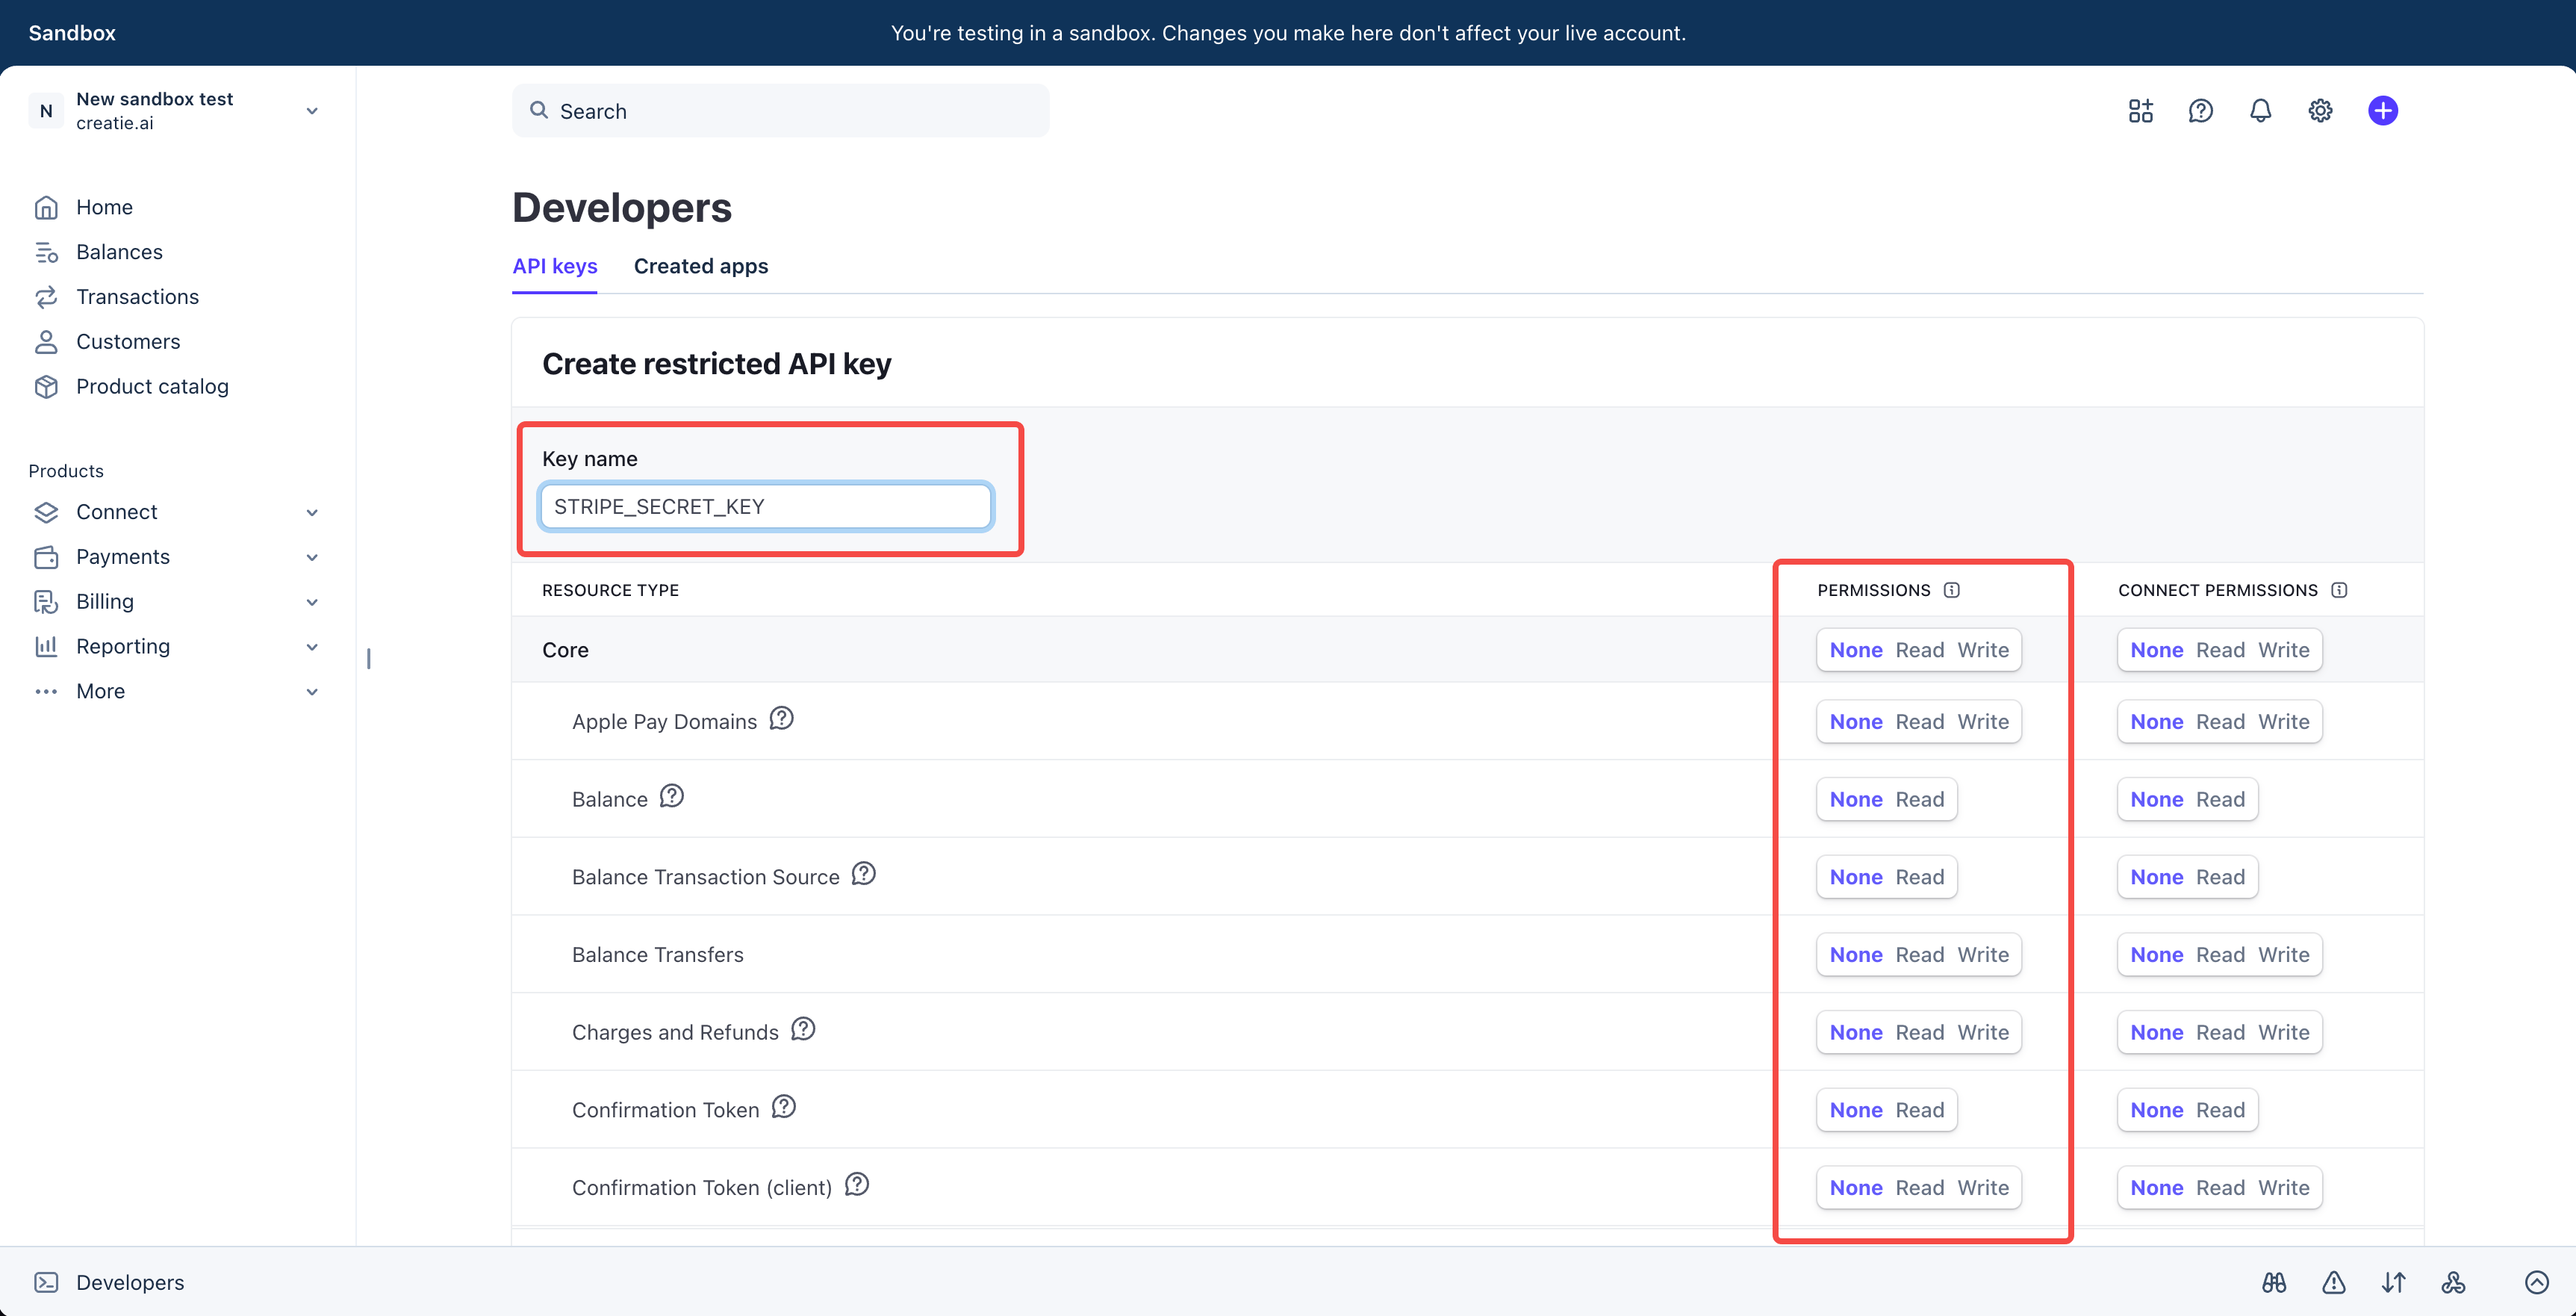
 Enter the key name: **STRIPE\_SECRET\_KEY**.
> case-sensitive, use underscores, no spaces
Enter the key name: **STRIPE\_SECRET\_KEY**.
> case-sensitive, use underscores, no spaces
 Assign permissions as follows:
**For security and proper functionality, strictly follow the permissions below.**
Assign permissions as follows:
**For security and proper functionality, strictly follow the permissions below.**
Resource Type |
Permissions |
| Charges and Refunds |
Read |
| Customers |
Write |
| Payment Intents |
Read |
| Products |
Write |
| Shipping Rates |
Write |
| Coupons |
Write |
| Invoices |
Write |
| Prices |
Write |
| Promotion Codes |
Write |
| Subscriptions |
Write |
| Tax Rates |
Write |
| Checkout Sessions |
Write |
| Orders |
Write |
| SKUs |
Read |
| Webhook Endpoints |
Write |
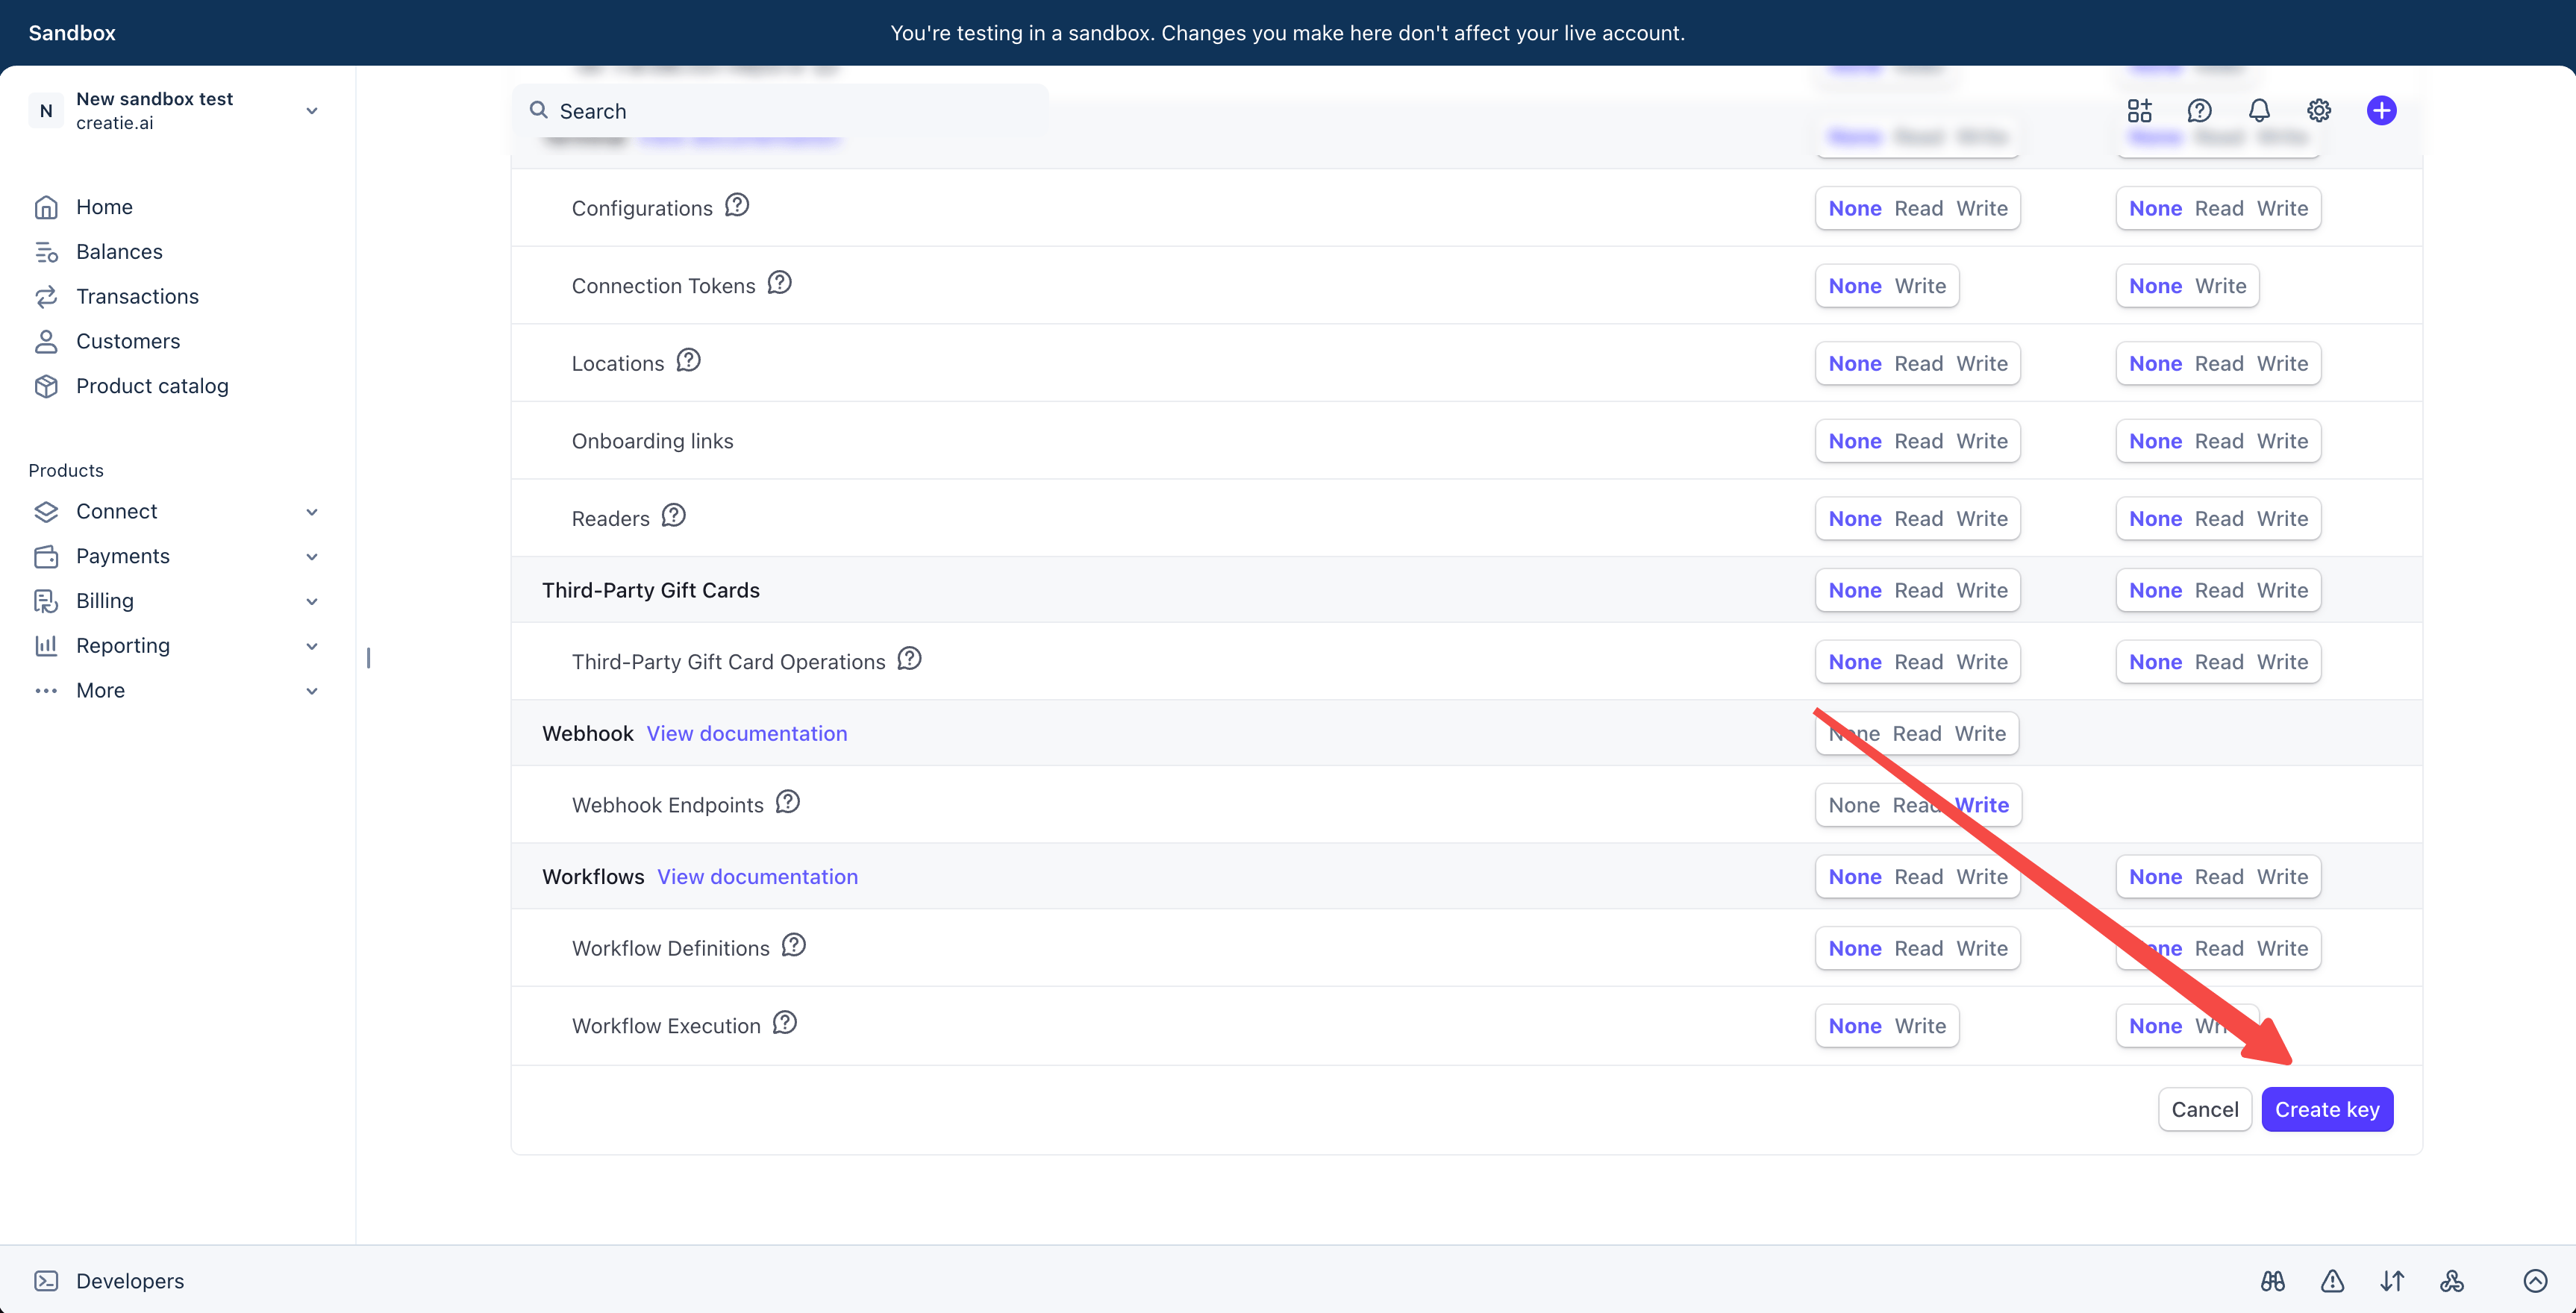
After configuring, click **Create key** at the bottom of the page to generate your API key.
 Once created, you have got the API key (rk\_live\_...).
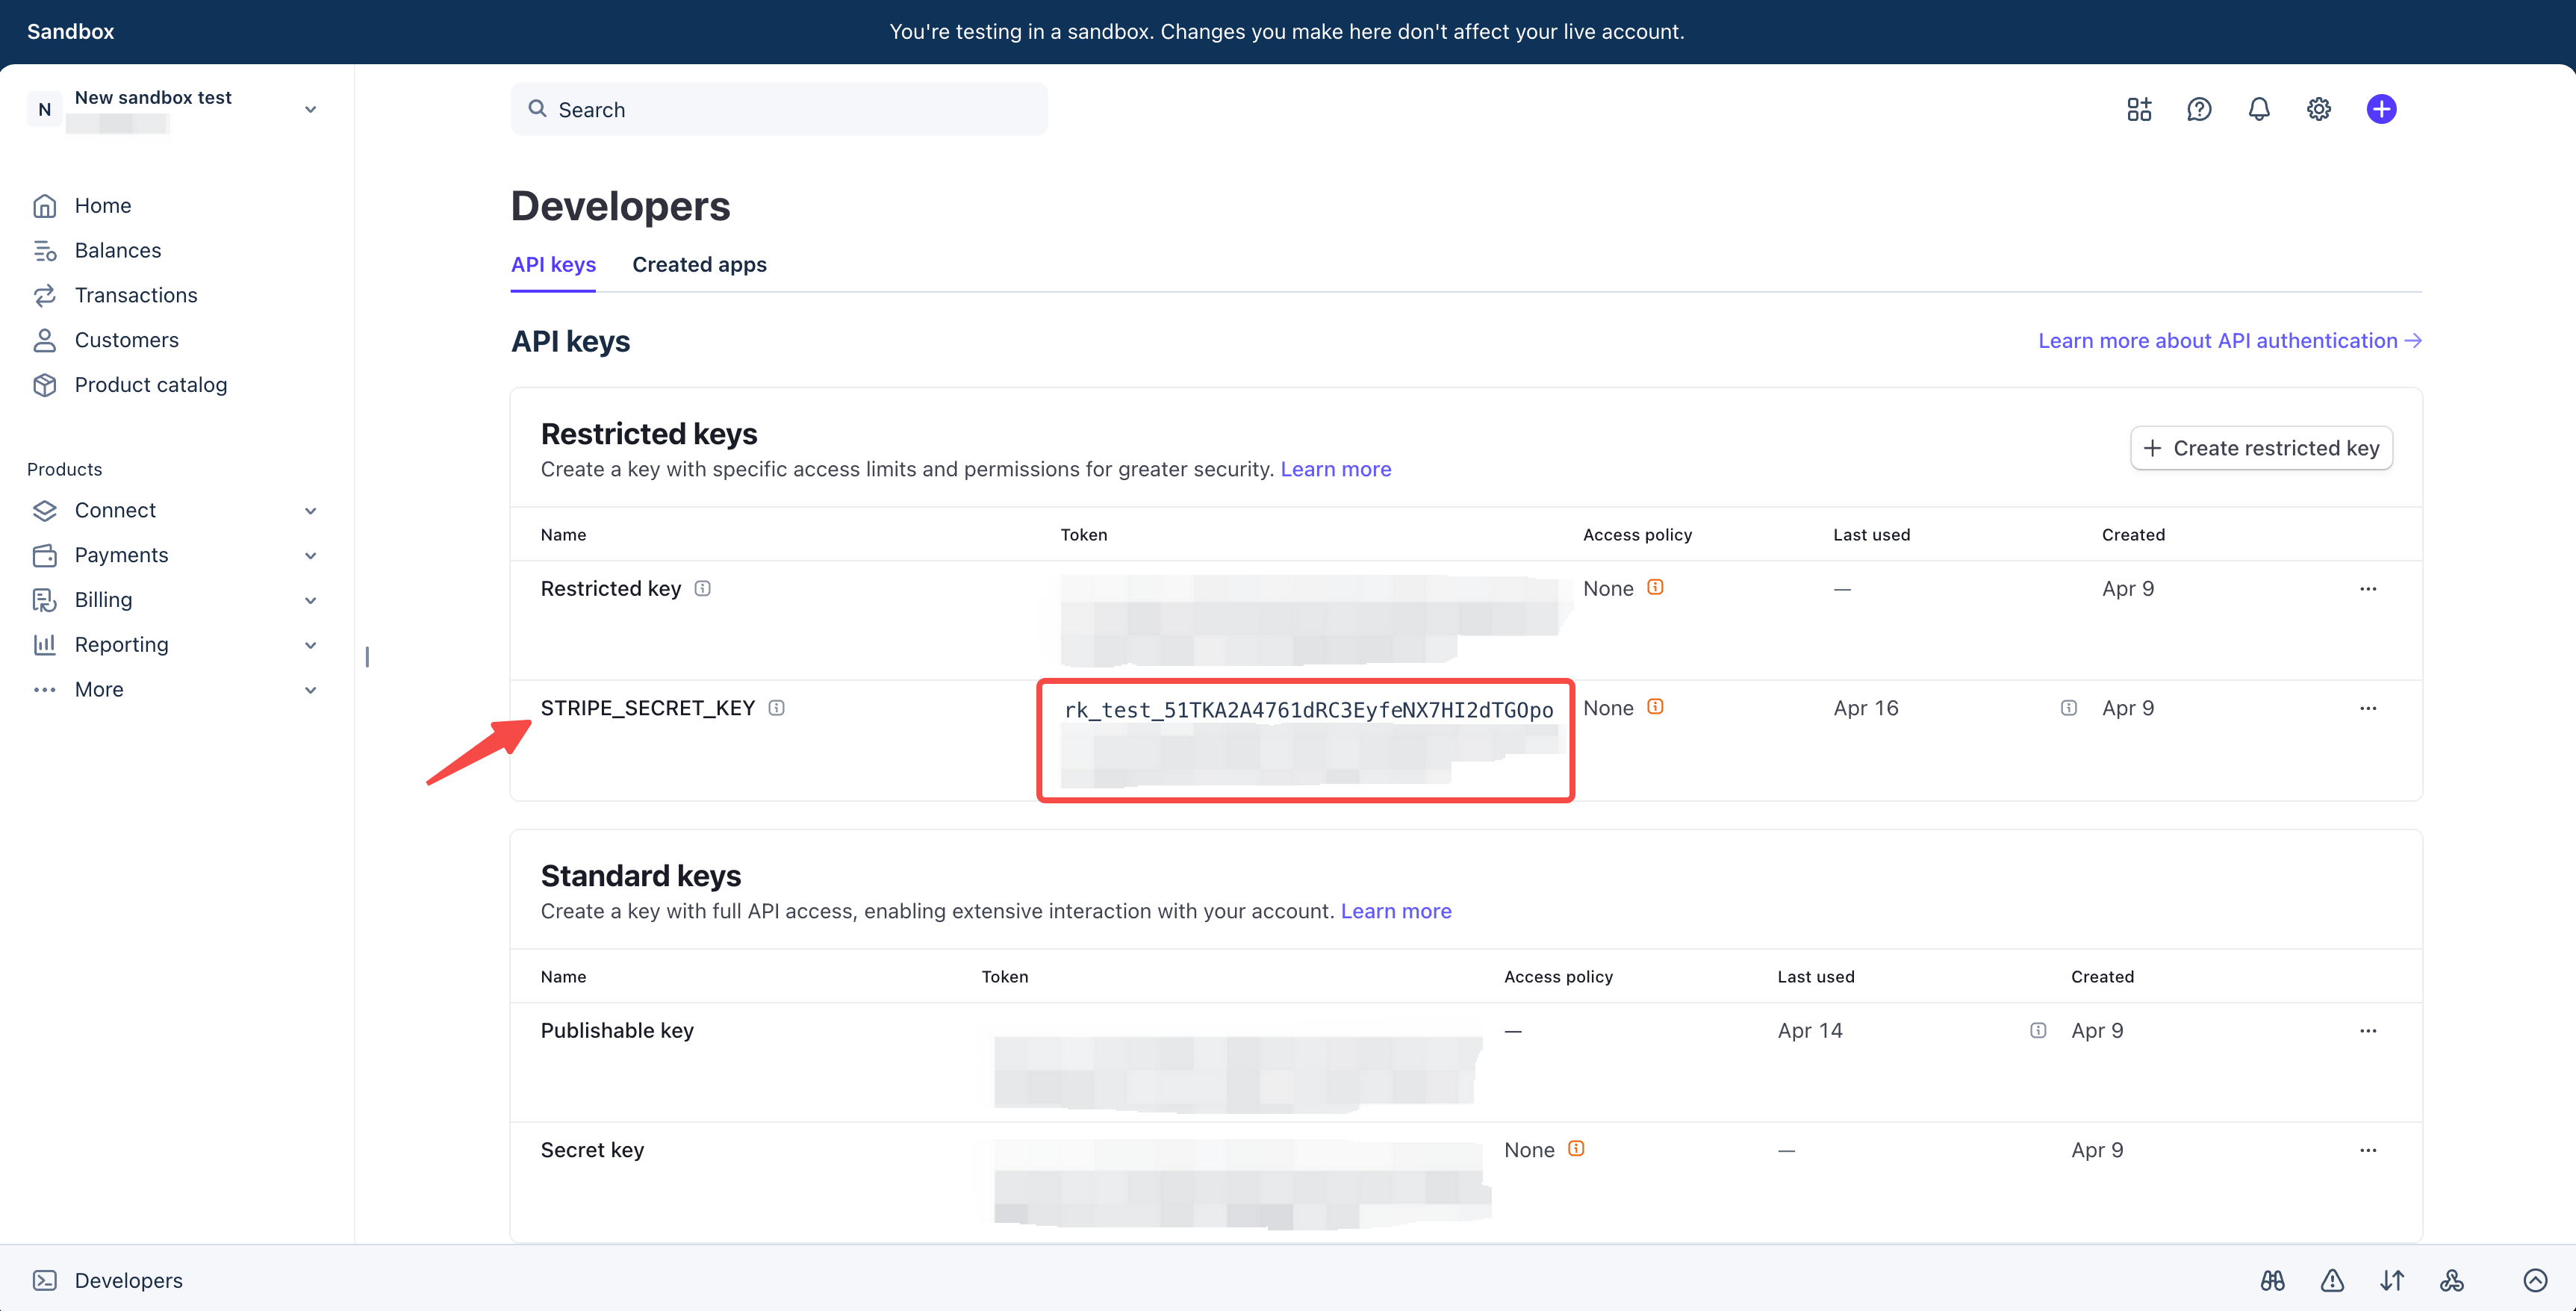 **Please save and store this key to a secure place**, such as a password manager or secret store. You won't be able to see it again. Then return to Readdy to proceed with the integration.
## 5. Connect Your Stripe
In the Stripe panel, paste your API key and click **Connect**.
**Please save and store this key to a secure place**, such as a password manager or secret store. You won't be able to see it again. Then return to Readdy to proceed with the integration.
## 5. Connect Your Stripe
In the Stripe panel, paste your API key and click **Connect**.
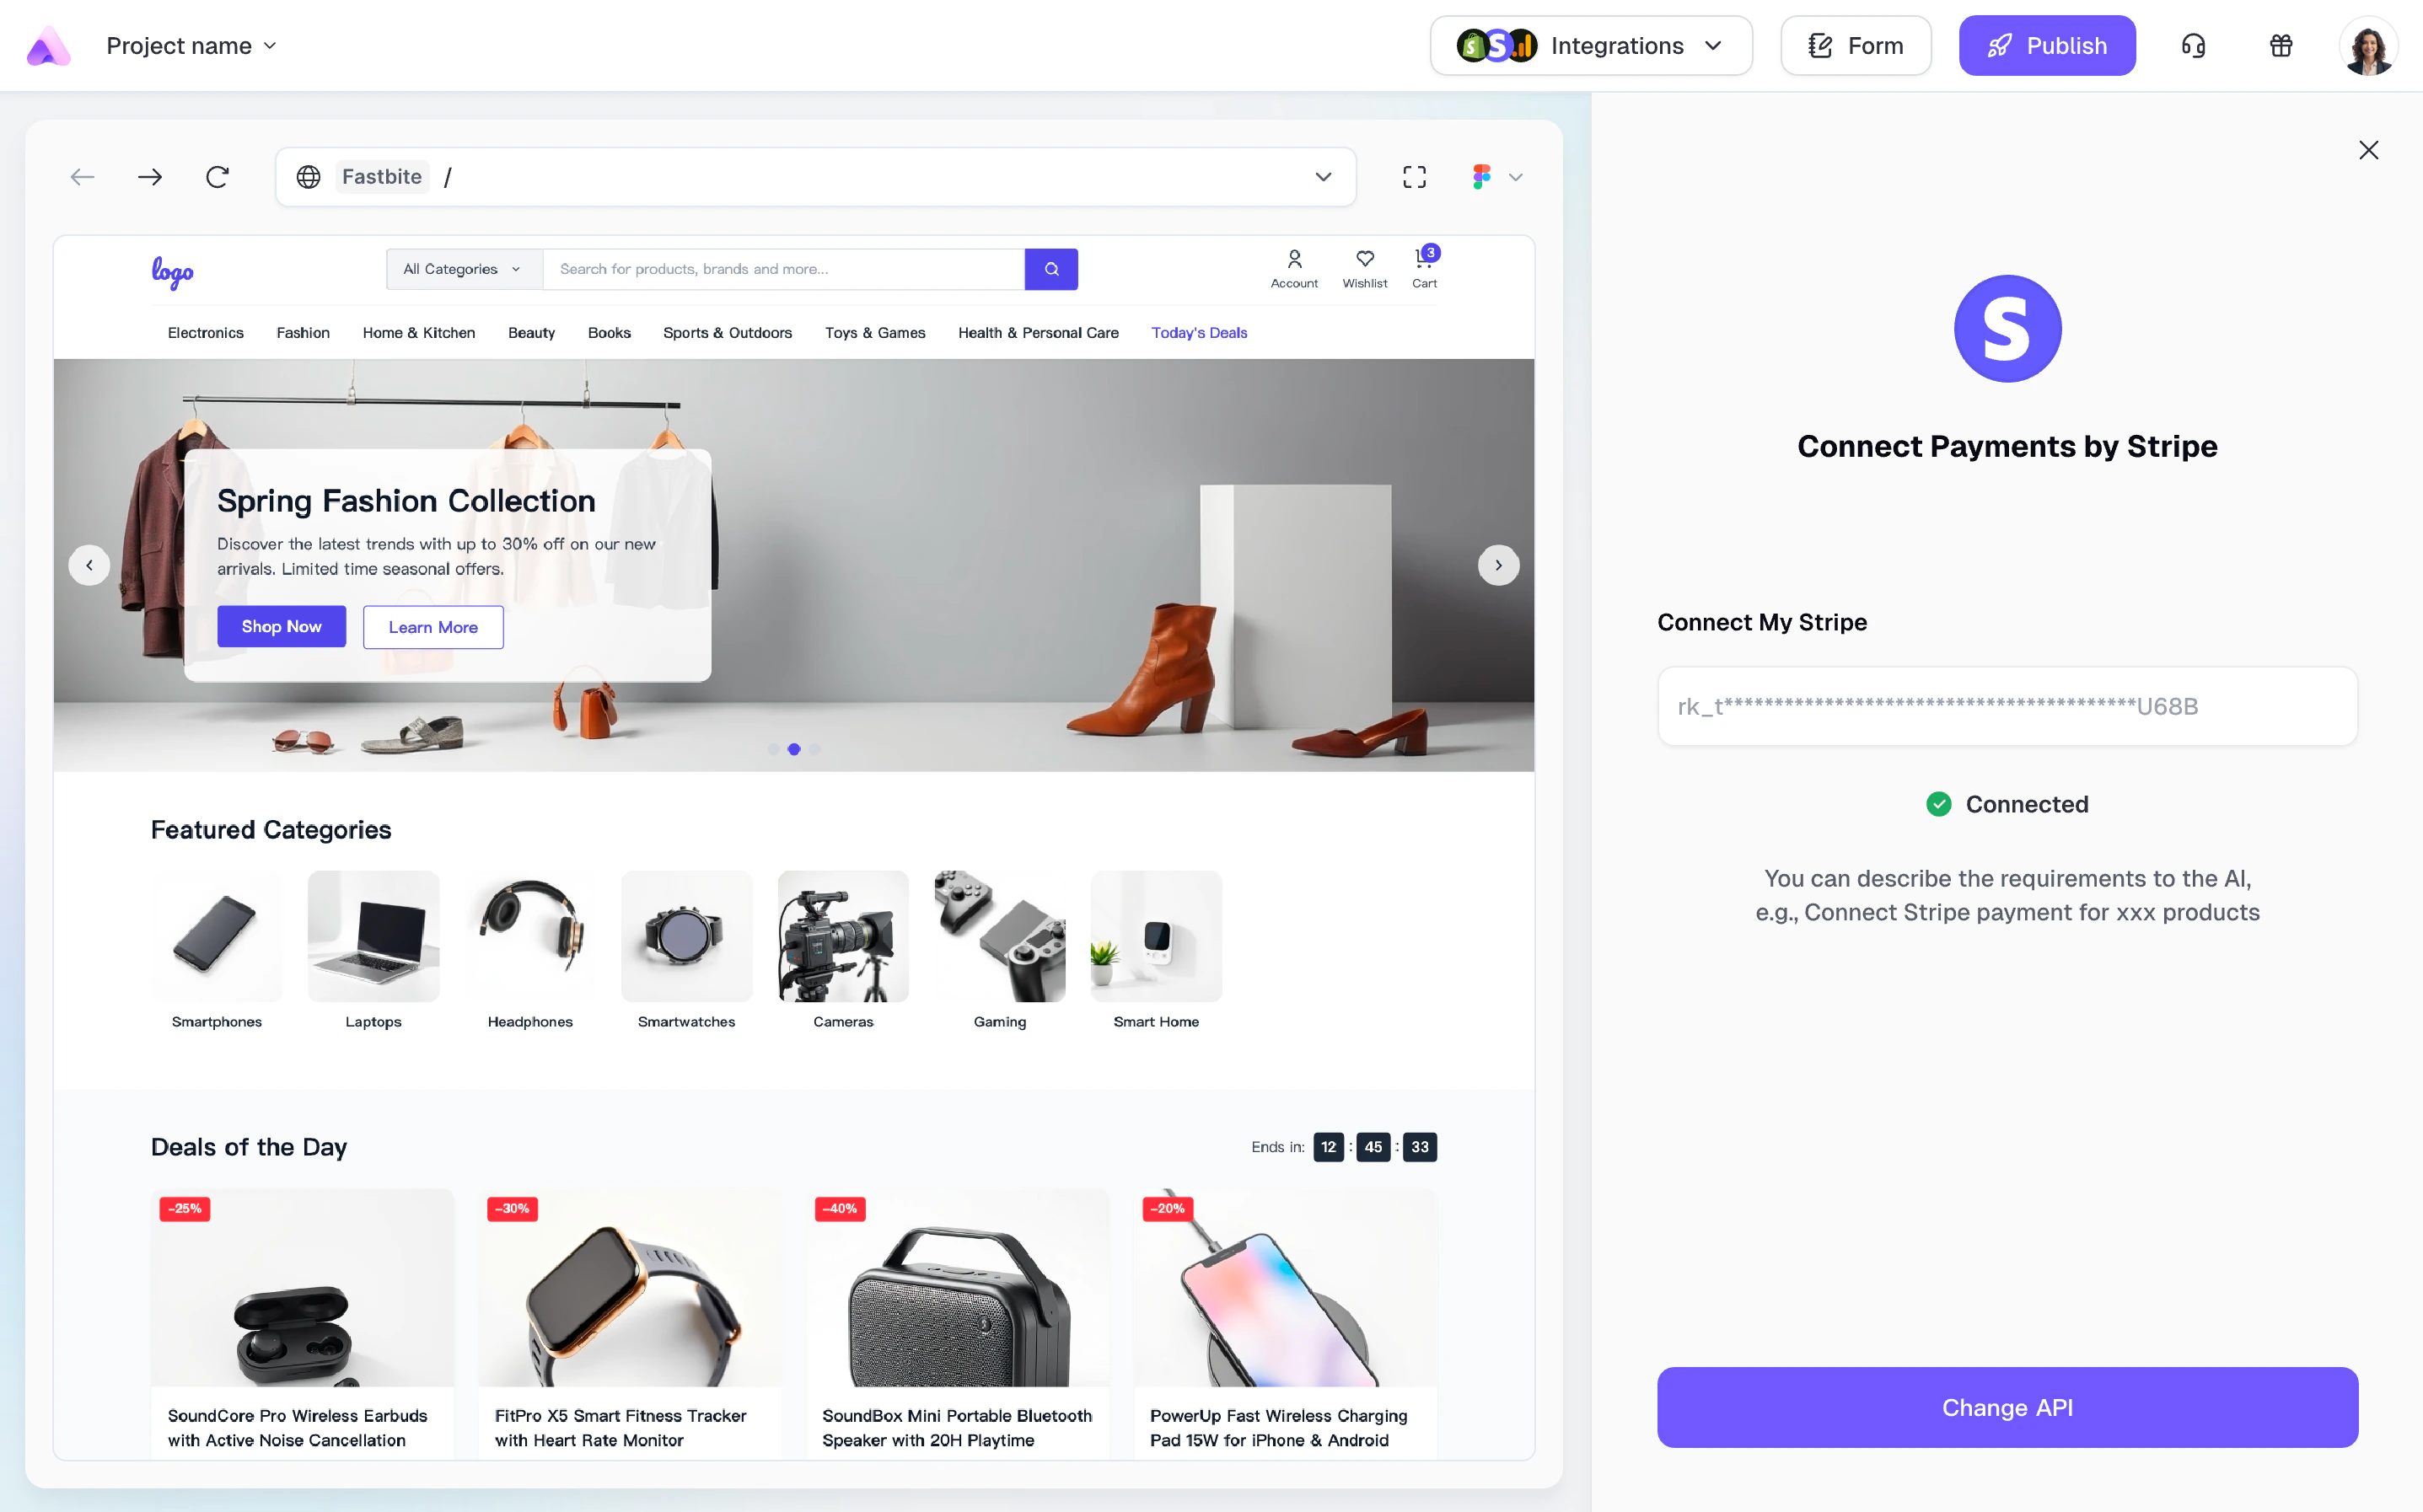
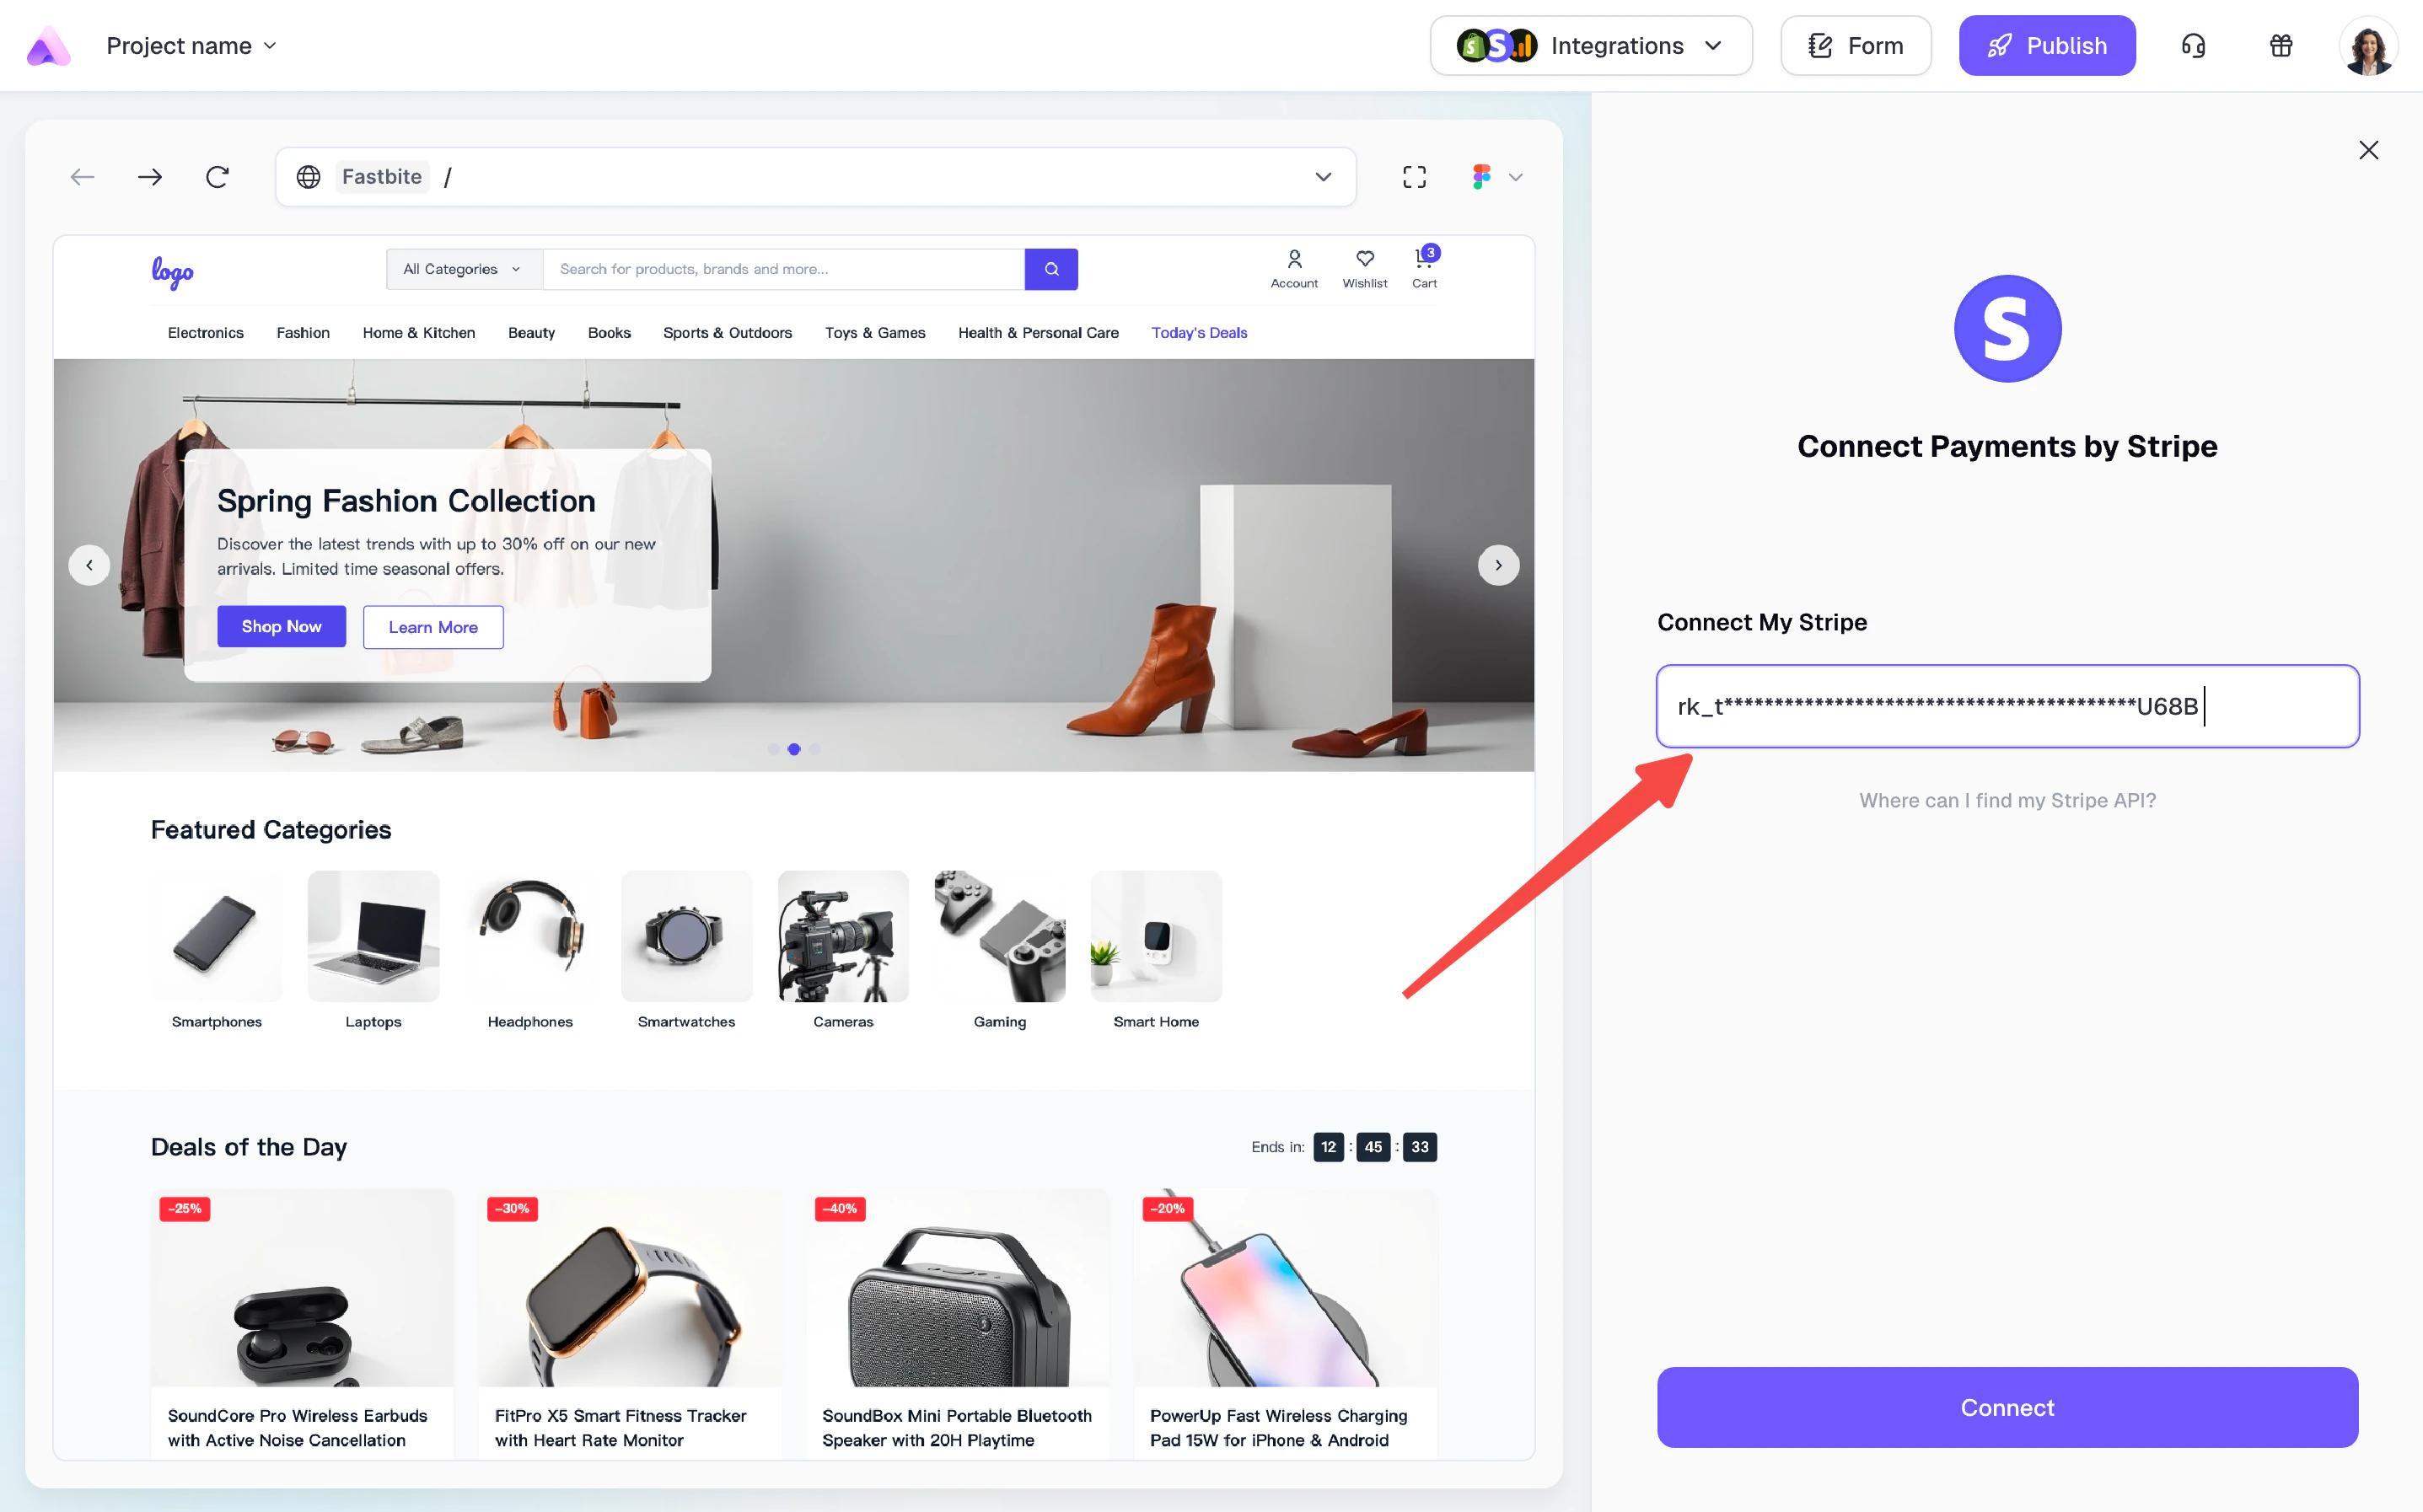 Once connected, the panel will close, and Readdy shows that Stripe is connected. You can now describe your payment requirements to the AI.
* Example: Select a product and tell the AI: "Use Stripe to process payment when this product is purchased."
* Tip: For best results, use only Stripe or Shopify per page—mixing them may reduce AI code generation quality.
Once connected, the panel will close, and Readdy shows that Stripe is connected. You can now describe your payment requirements to the AI.
* Example: Select a product and tell the AI: "Use Stripe to process payment when this product is purchased."
* Tip: For best results, use only Stripe or Shopify per page—mixing them may reduce AI code generation quality.
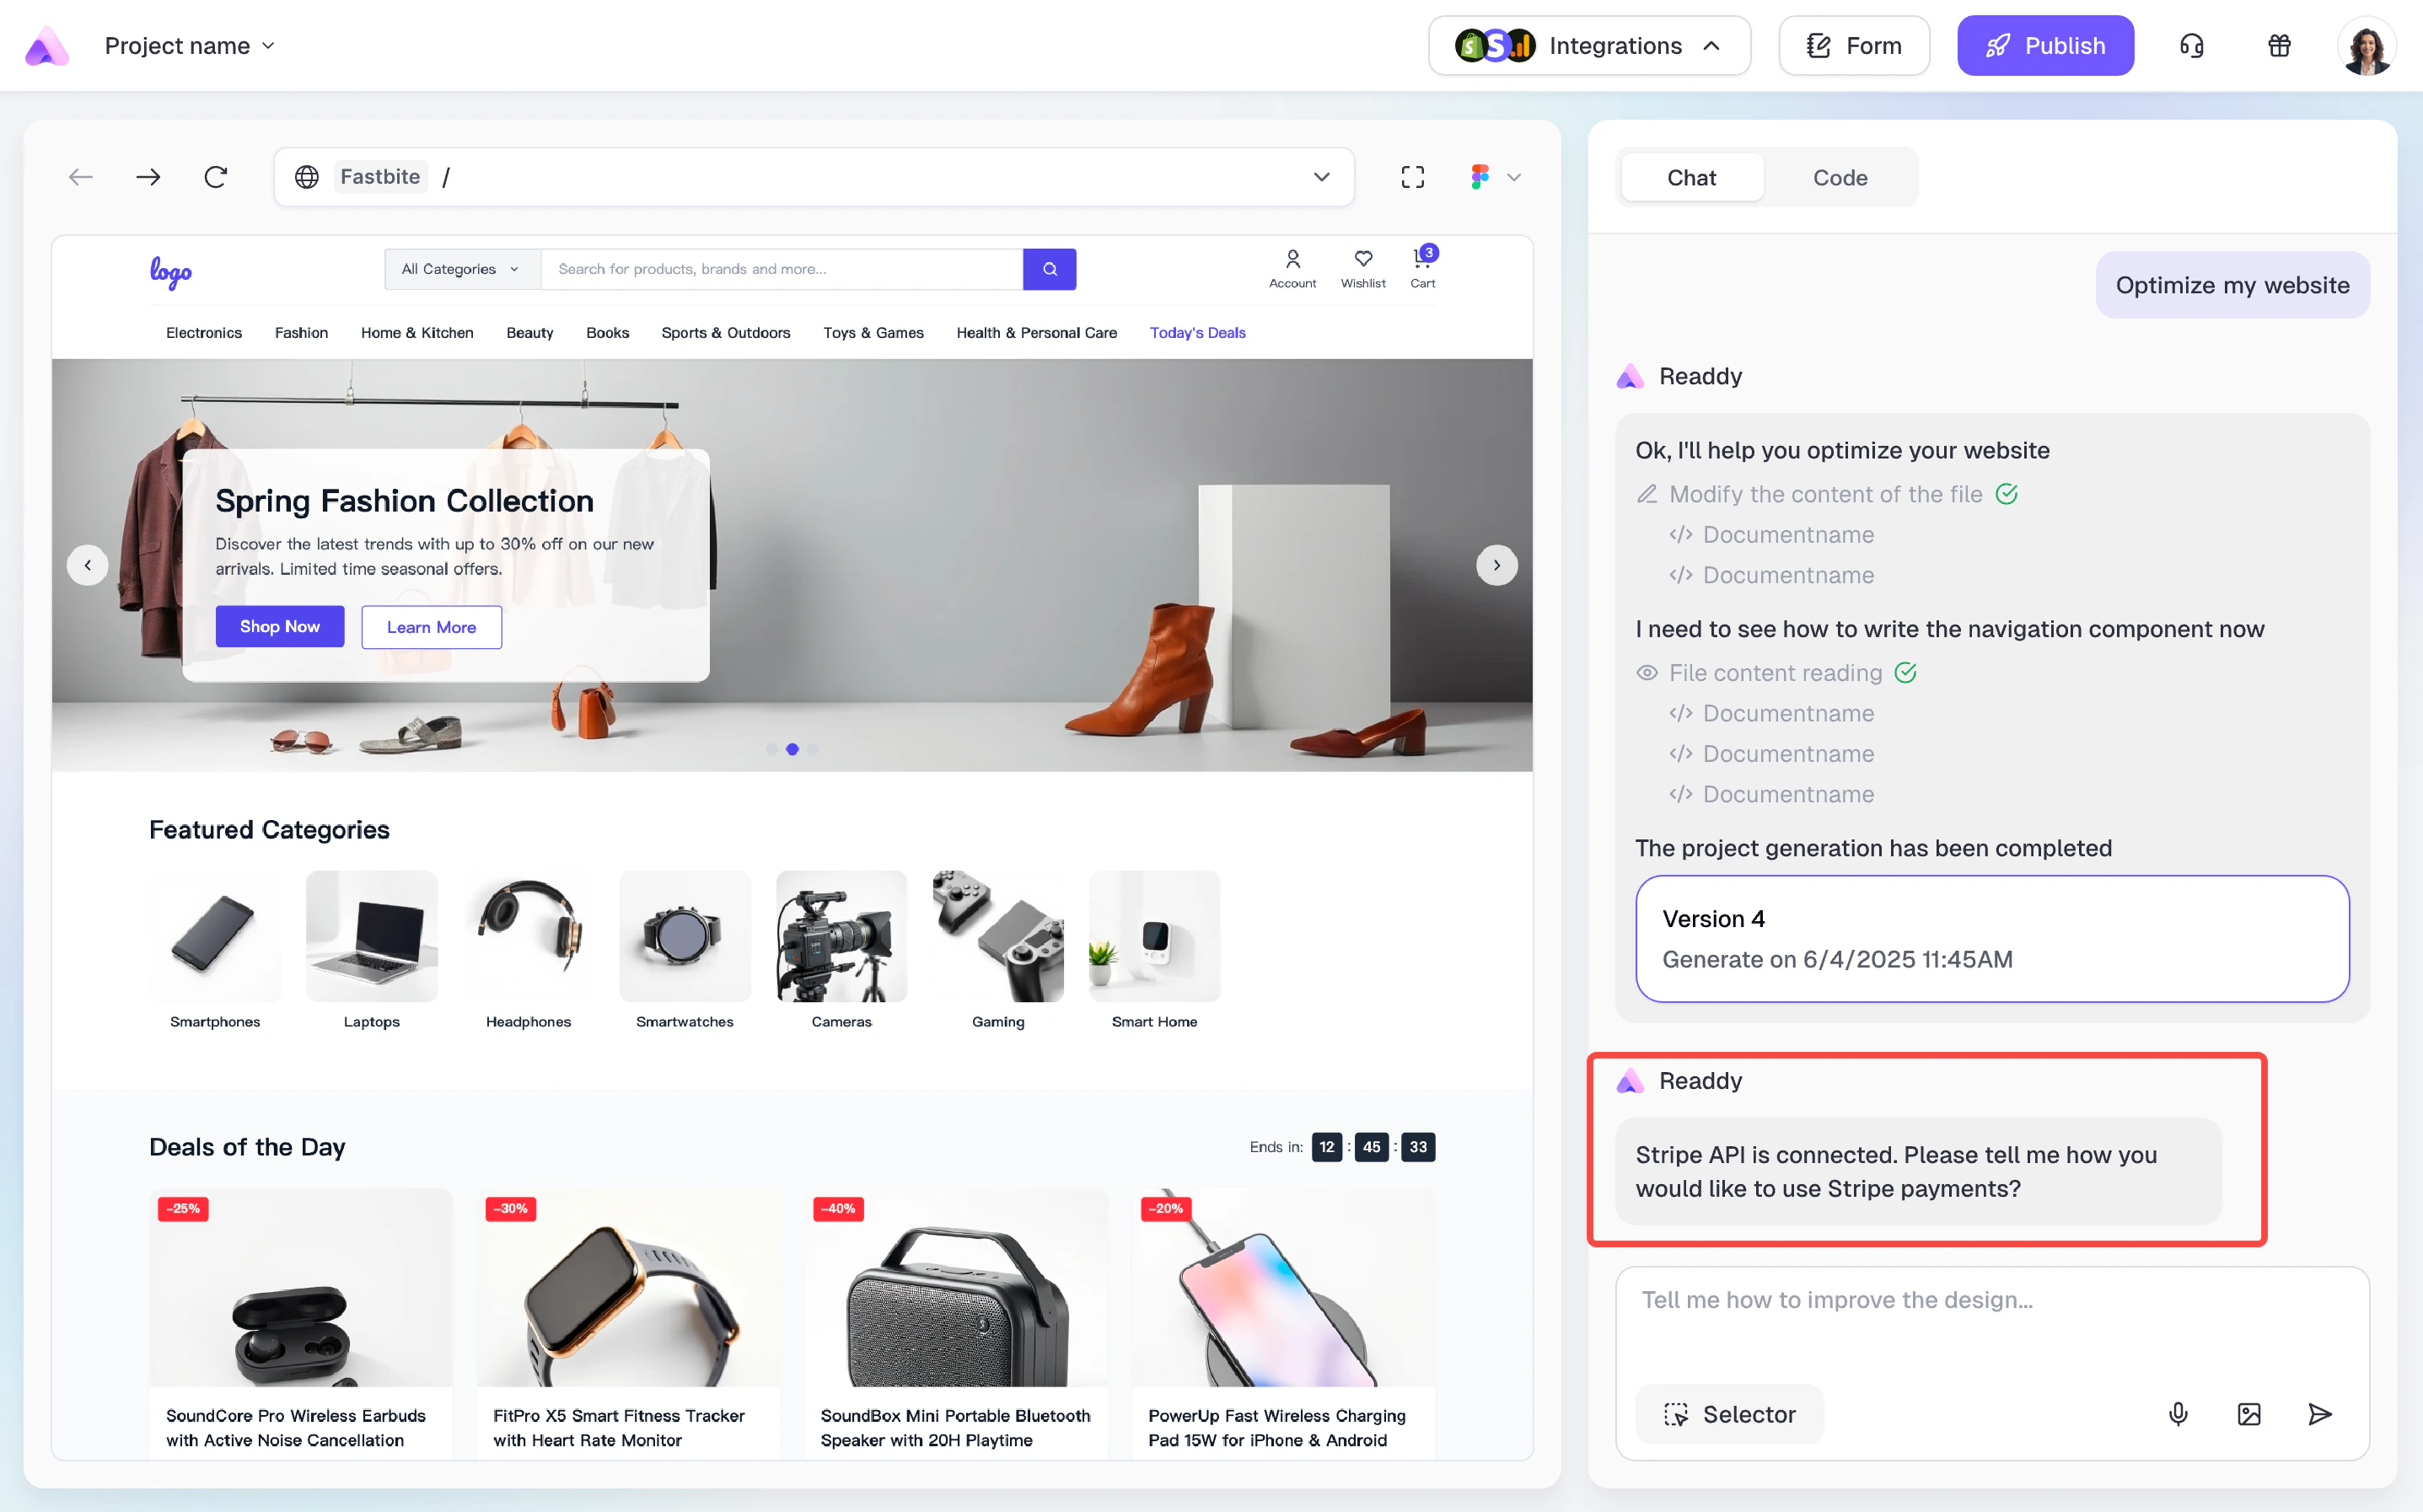 When you reopen the Stripe feature, you'll see a “Connected” label—this means your Stripe account is now linked to the project. If you need to switch your API key (e.g., when changing to a different Stripe account), click **Change API**. Please note: Updating the API key will invalidate any products previously connected to Stripe on this page. This may cause unexpected issues, so proceed with caution.
 Tips for Using Stripe Integration
* After connecting your Stripe API key, you can describe your payment requirements directly to the AI.
* To ensure optimal results, use clear and concise instructions. For example:
* "Connect the products on the page to Stripe so users can complete payment via Stripe when clicking the purchase button."
* "Import the products from the page into Stripe and create matching products in Stripe."
* "I’ve already created products in Stripe, import them into the XX section on the page."
* Before publishing your project, ensure your products are properly connected to Stripe and all product information displays correctly.
* Stripe payment pages cannot be accessed directly from Readdy's editor. Please publish your website first, and the payment process will work on your online website.
***
## Need Help?
If this guide doesn't resolve your issue, [submit a support ticket](https://readdy.ai/feedback). We're here to help!
Tips for Using Stripe Integration
* After connecting your Stripe API key, you can describe your payment requirements directly to the AI.
* To ensure optimal results, use clear and concise instructions. For example:
* "Connect the products on the page to Stripe so users can complete payment via Stripe when clicking the purchase button."
* "Import the products from the page into Stripe and create matching products in Stripe."
* "I’ve already created products in Stripe, import them into the XX section on the page."
* Before publishing your project, ensure your products are properly connected to Stripe and all product information displays correctly.
* Stripe payment pages cannot be accessed directly from Readdy's editor. Please publish your website first, and the payment process will work on your online website.
***
## Need Help?
If this guide doesn't resolve your issue, [submit a support ticket](https://readdy.ai/feedback). We're here to help!