> ## Documentation Index
> Fetch the complete documentation index at: https://docs.readdy.ai/llms.txt
> Use this file to discover all available pages before exploring further.
# Google Sign-In Integration
> Step-by-step guide to add Google Sign-In to your Readdy project using Supabase
## What you need before you start
**Accounts & project info**
1. A [**Google Cloud**](https://console.cloud.google.com) account (to create the OAuth app)
2. A [**Supabase**](https://supabase.com/) project (you can create a new one; the free tier is fine)
3. A **Readdy** project (to build and publish your site)
4. Before going live, prepare links to your **Privacy Policy** and **Terms of Service** to add to the Google consent screen.
## Create and configure OAuth in Google Cloud
**Goal:** Obtain the **Client ID** and **Client Secret**, allow sign-in from your site, and hand off the OAuth callback to **Supabase**.
Open [**Google Cloud Console**](https://console.cloud.google.com) and sign in to your Google account.
Click the project selector at the top → click **"New Project"** → enter a **Project name** → **Create**.
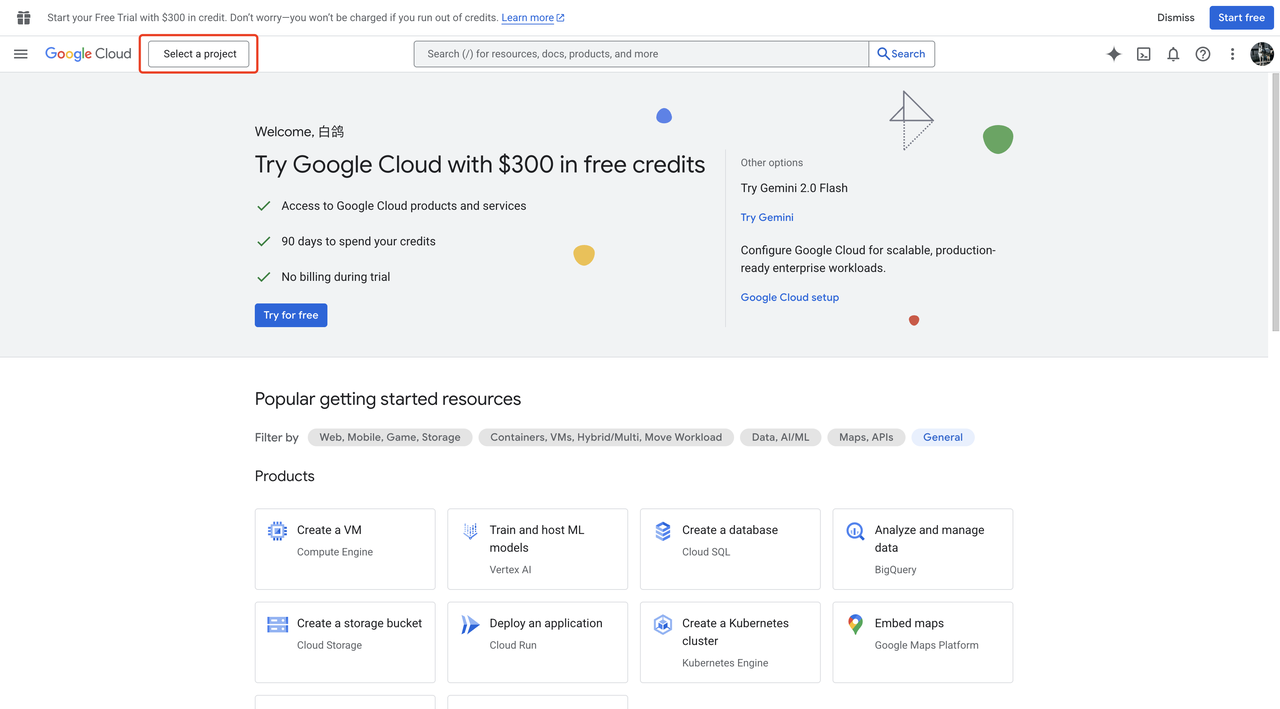 Enter a project name and click **Create**.
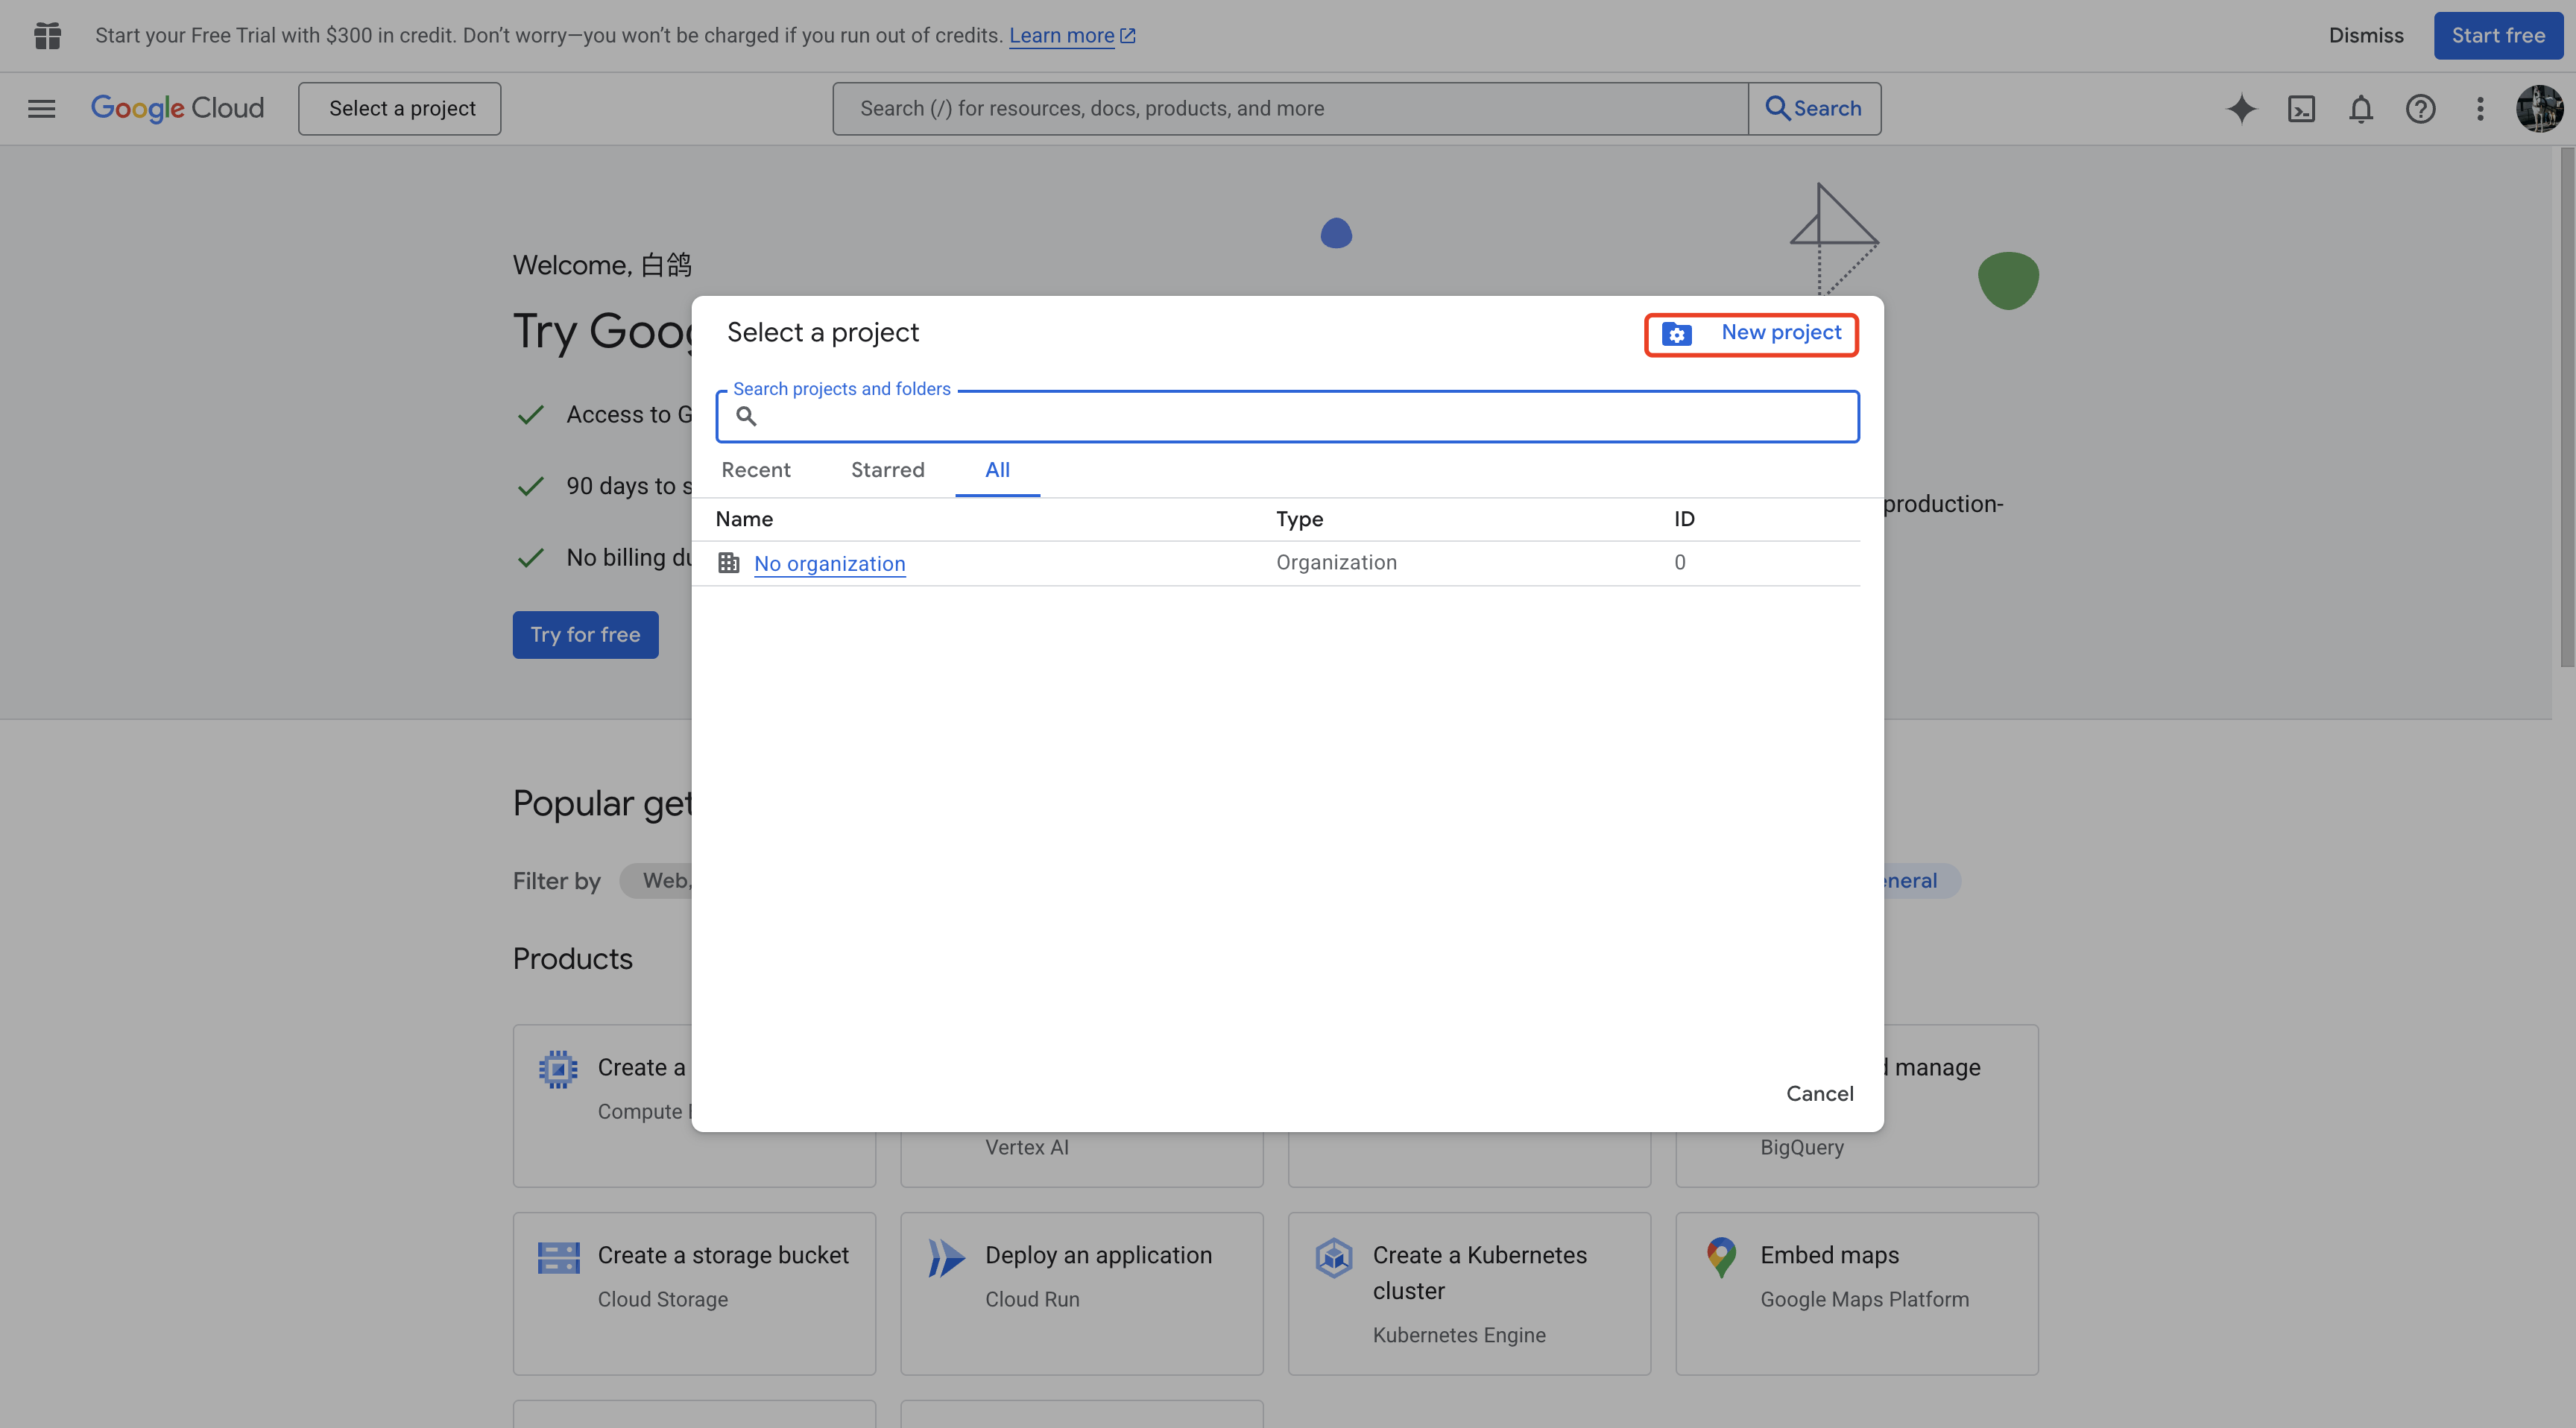 Enter a project name.
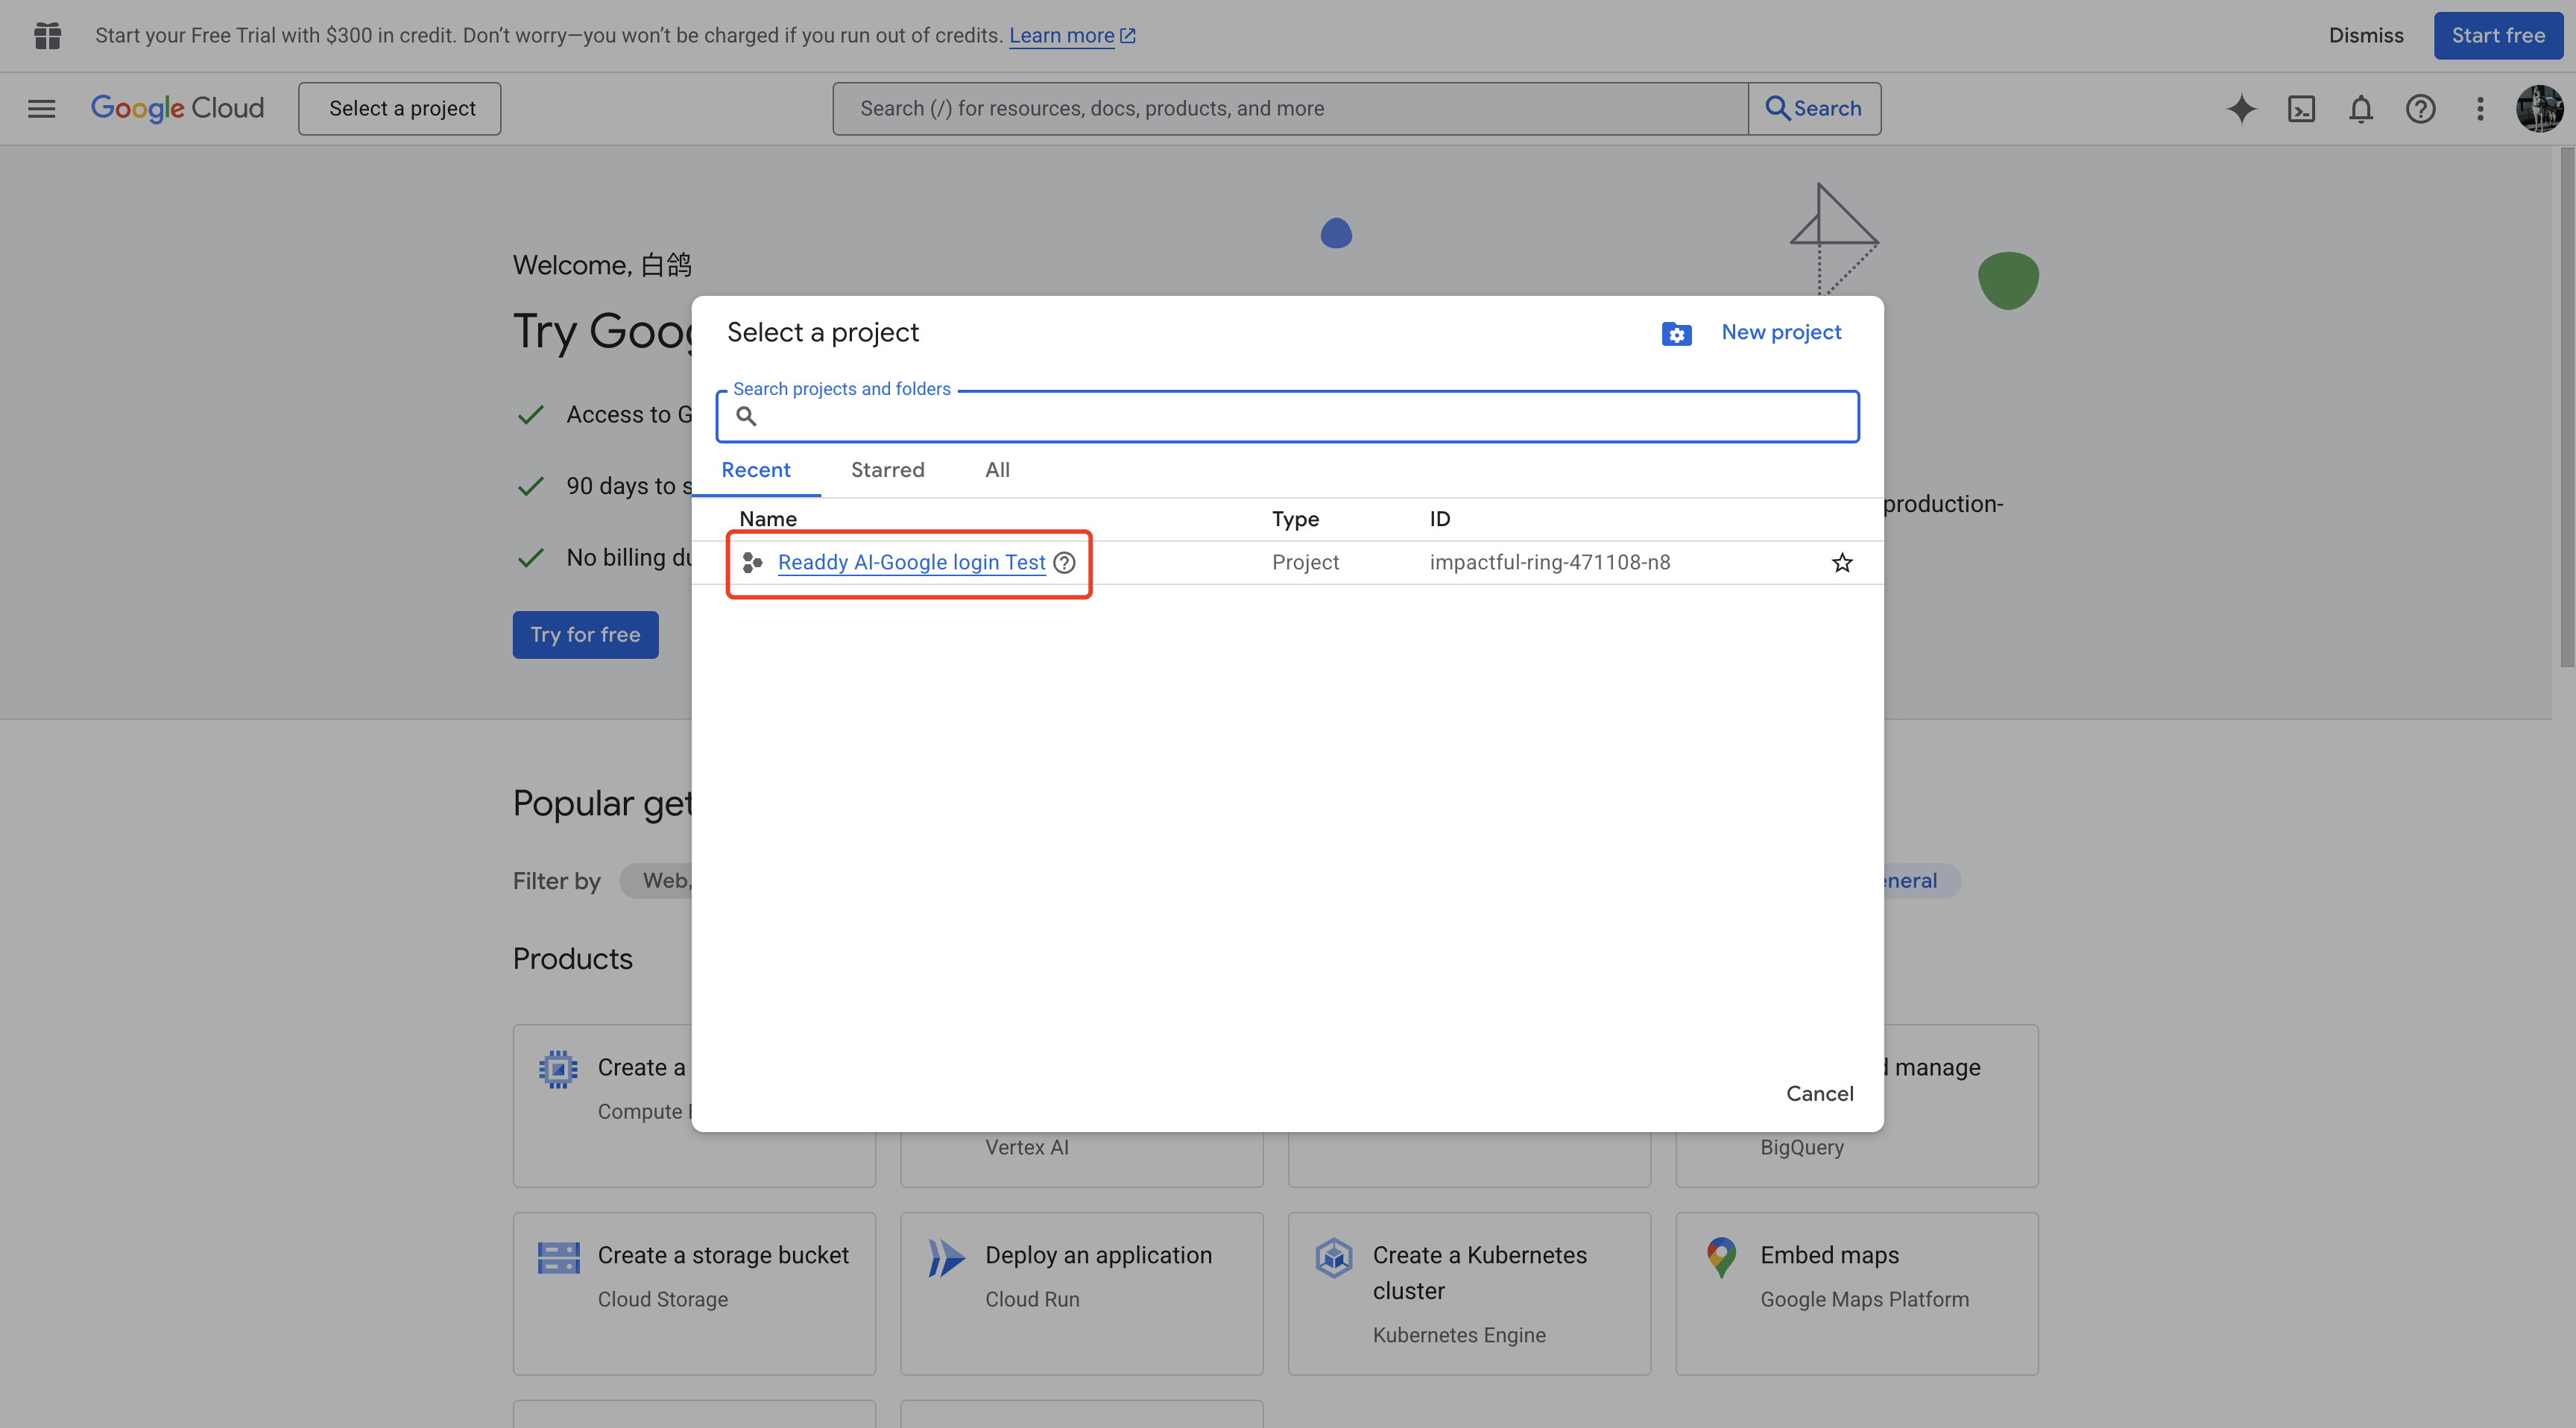
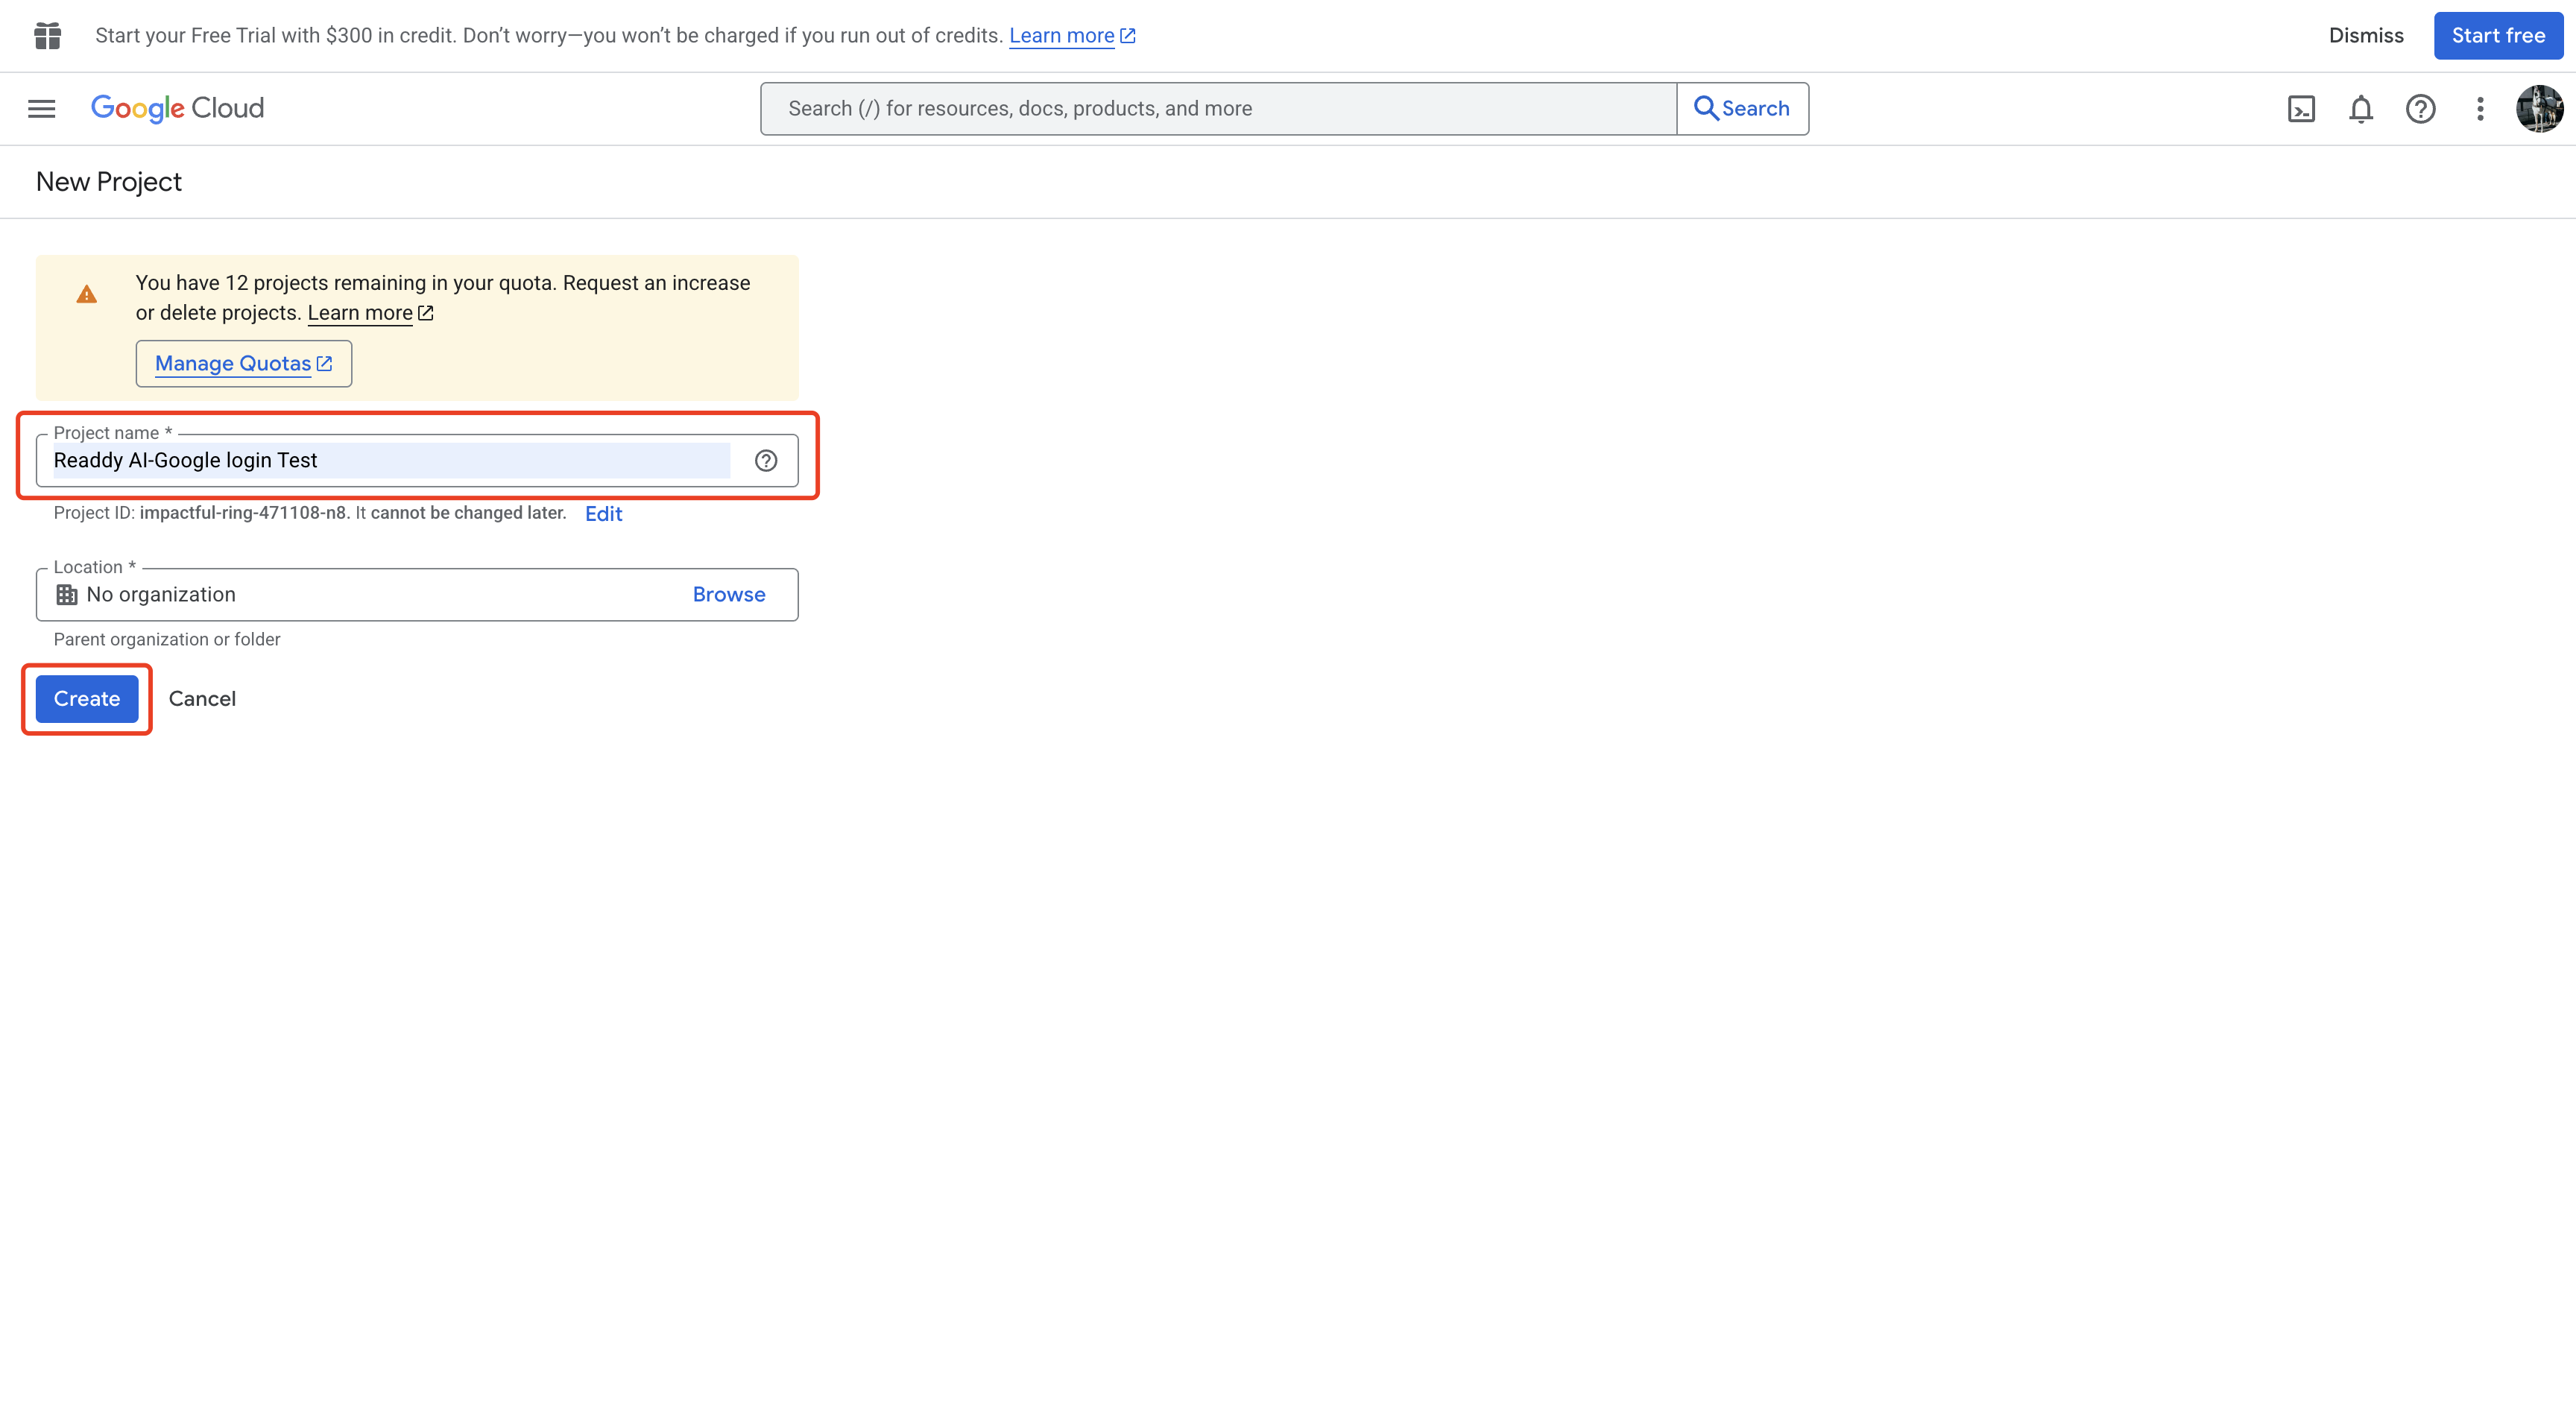 Click **Select project**.
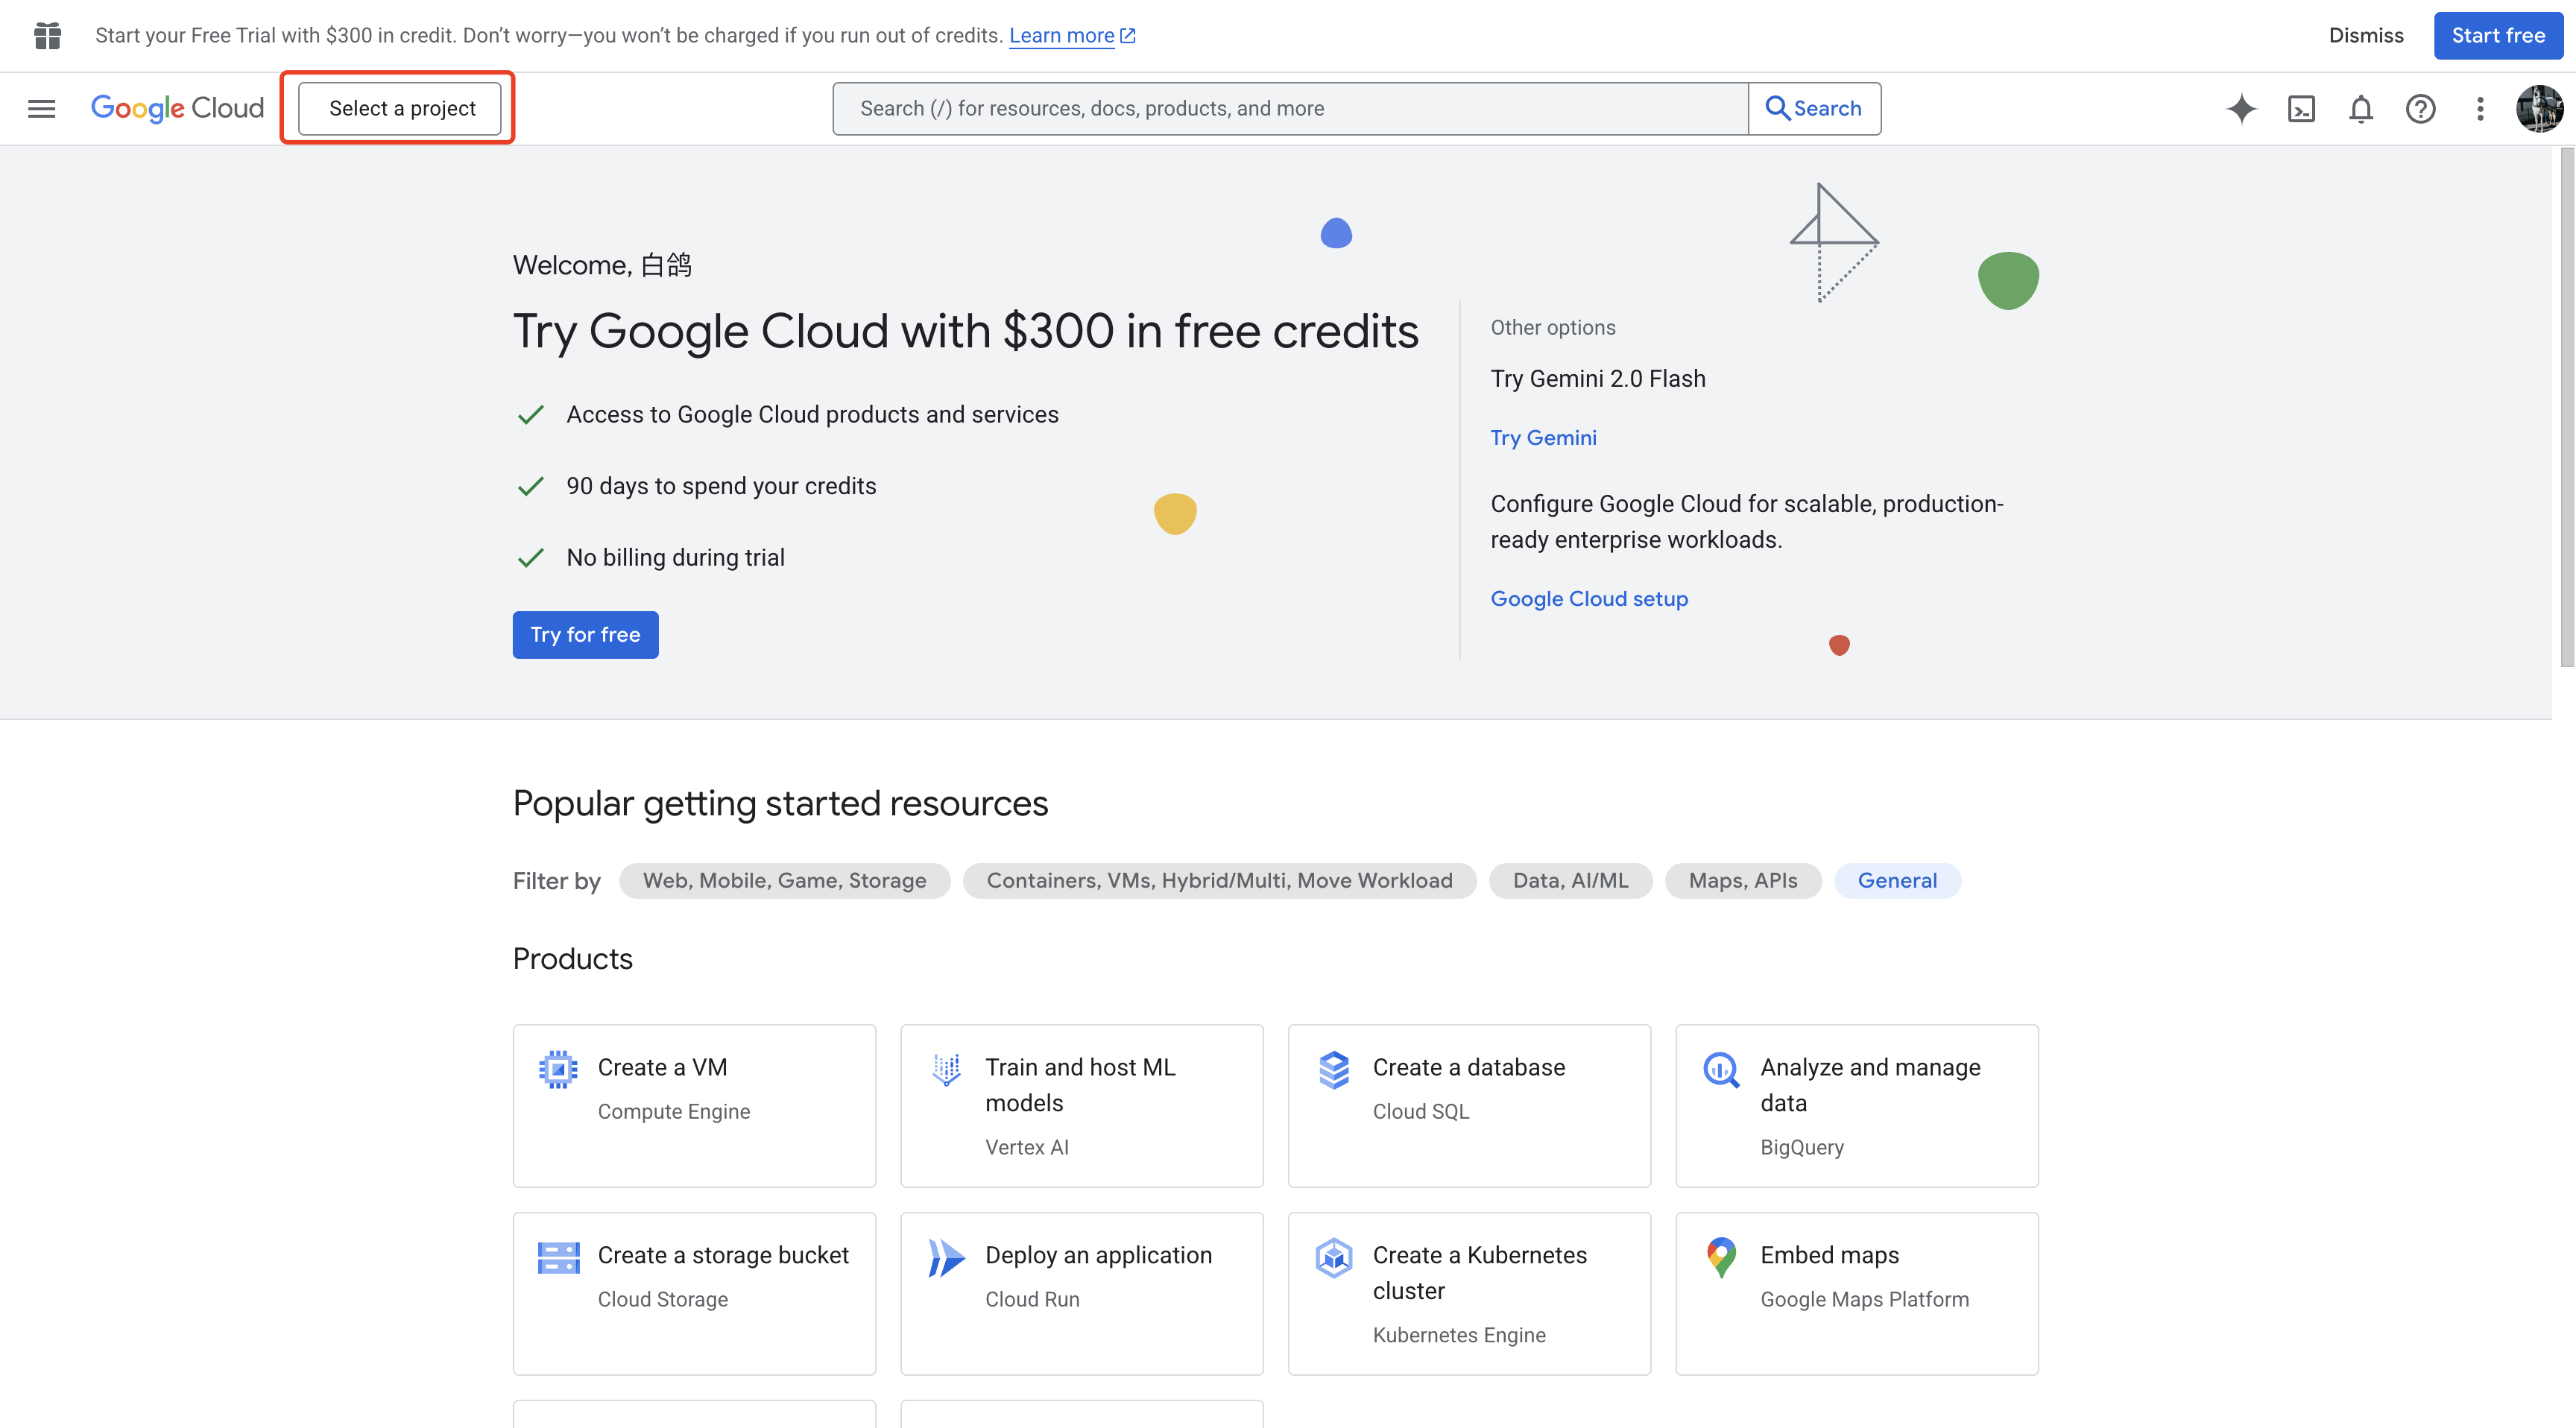 Click your project name to select it.
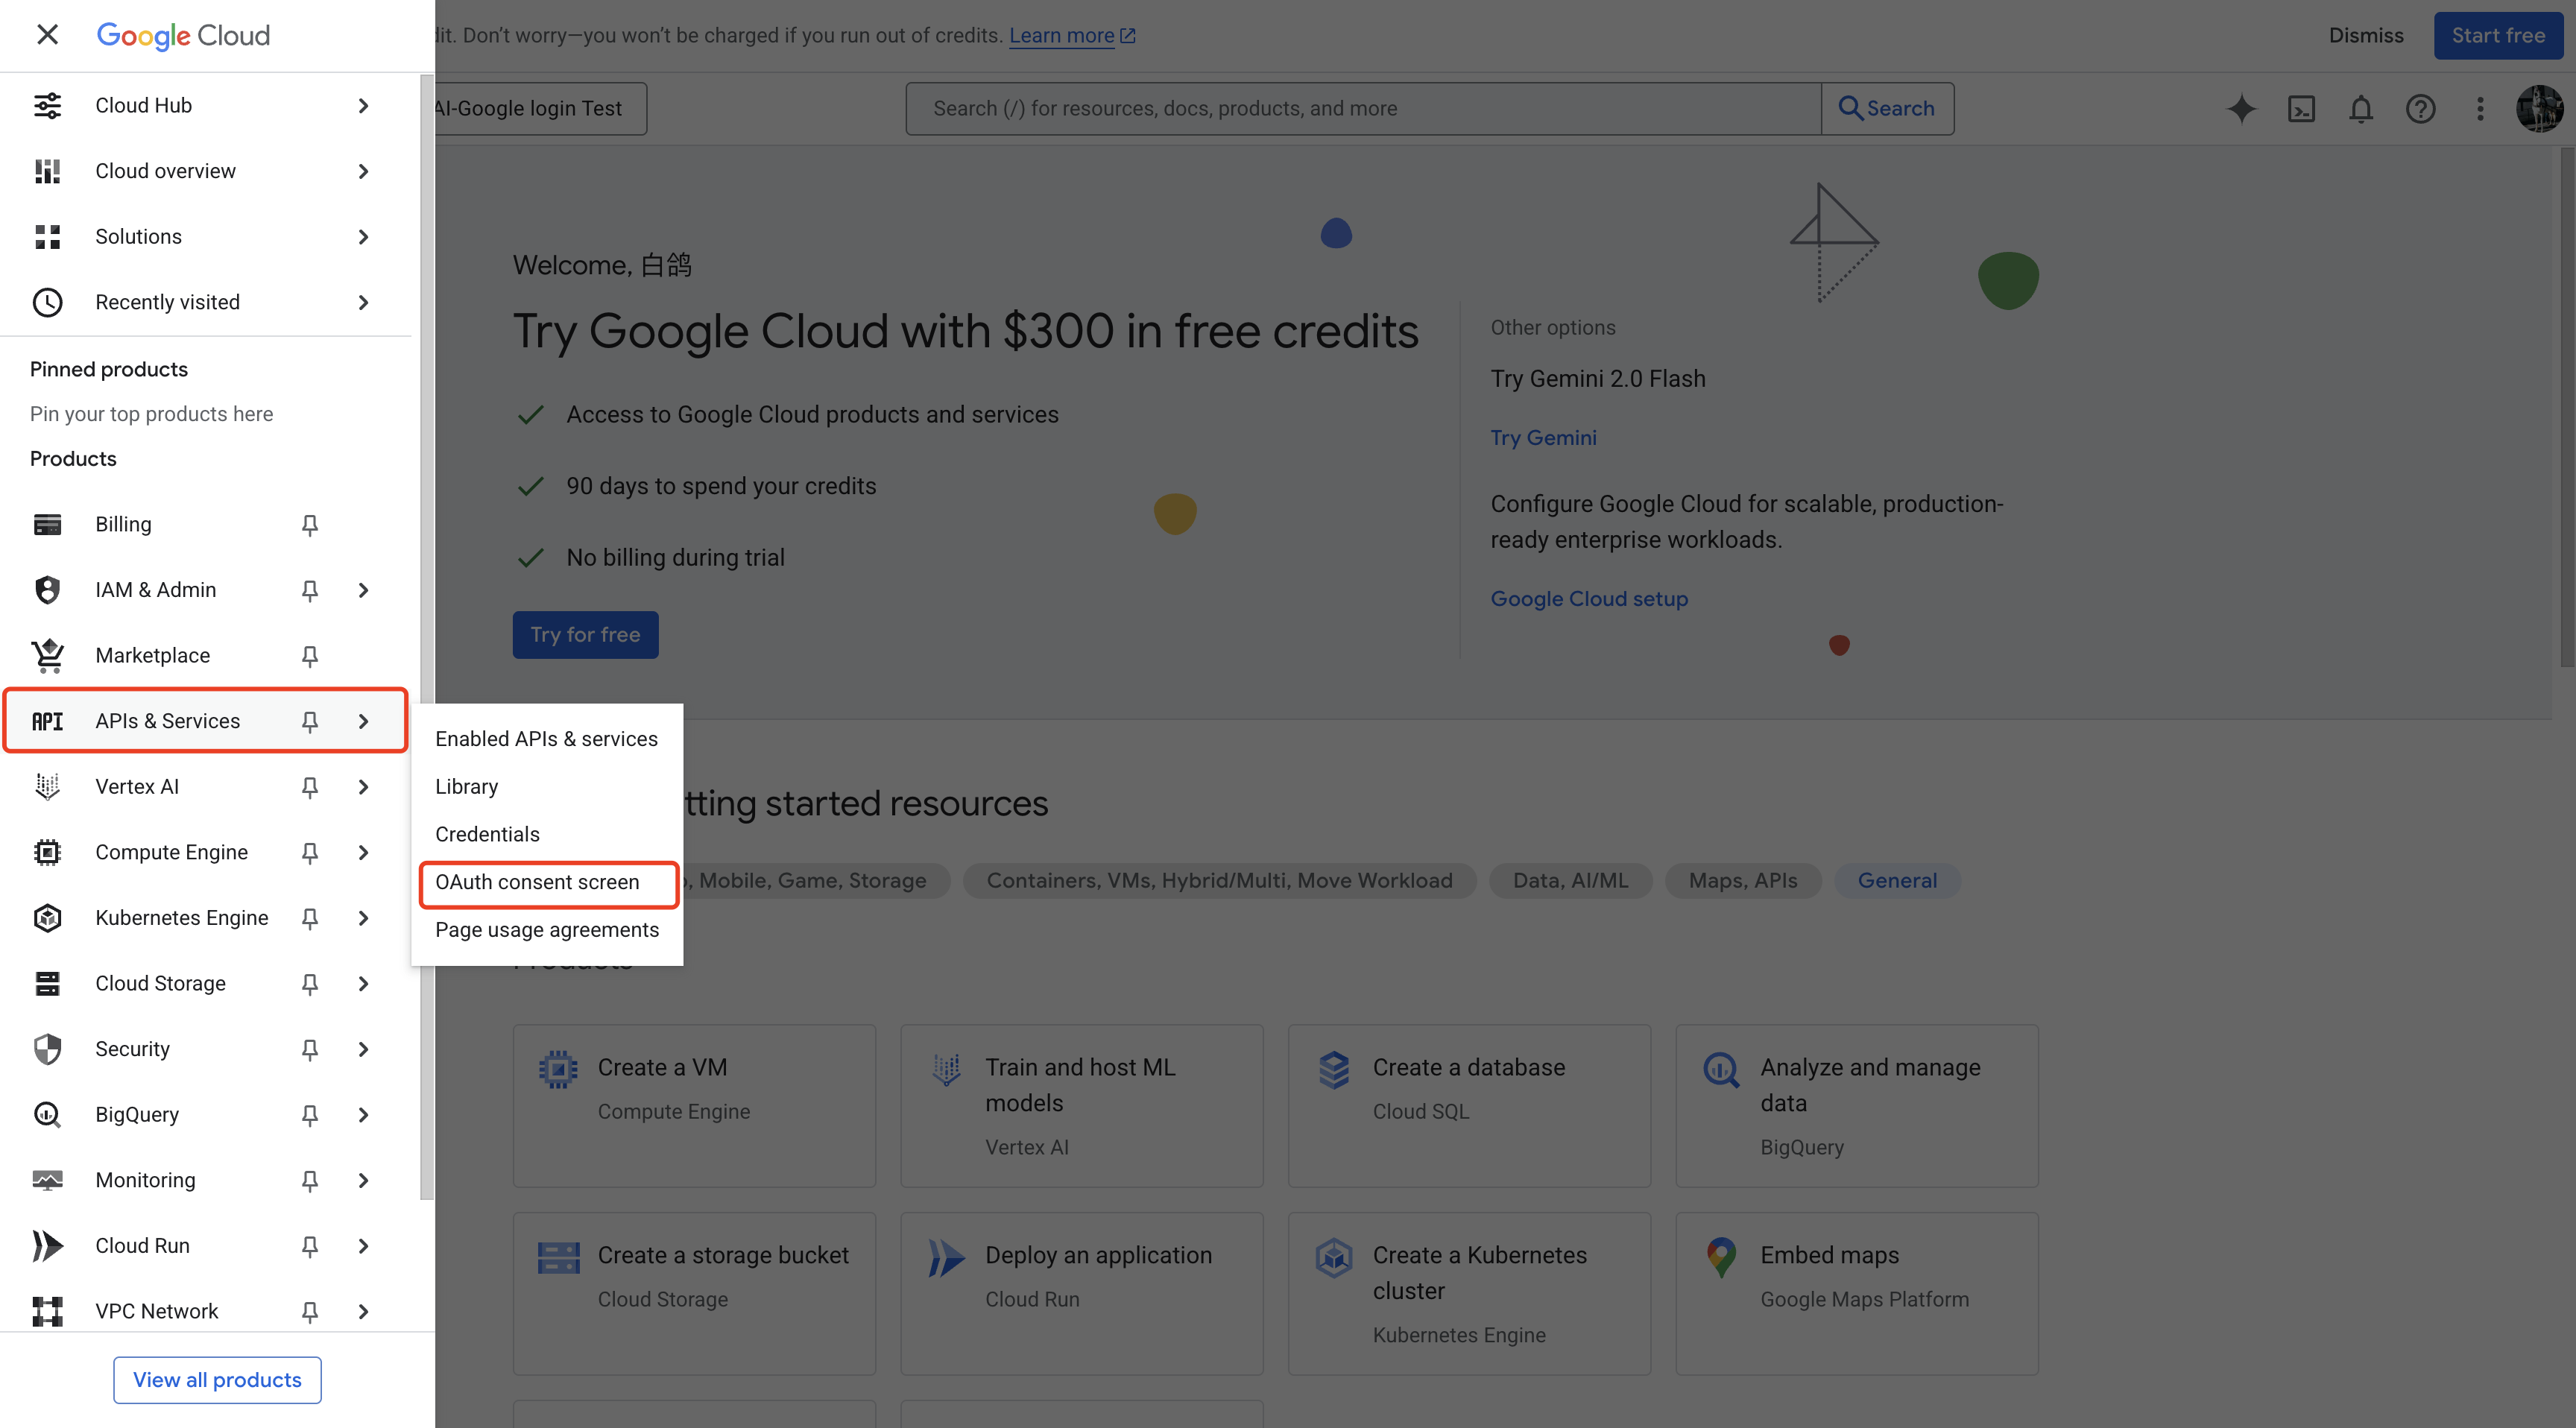
 Click the hamburger menu (top-left). Hover **APIs & Services**, then click **OAuth consent screen**.
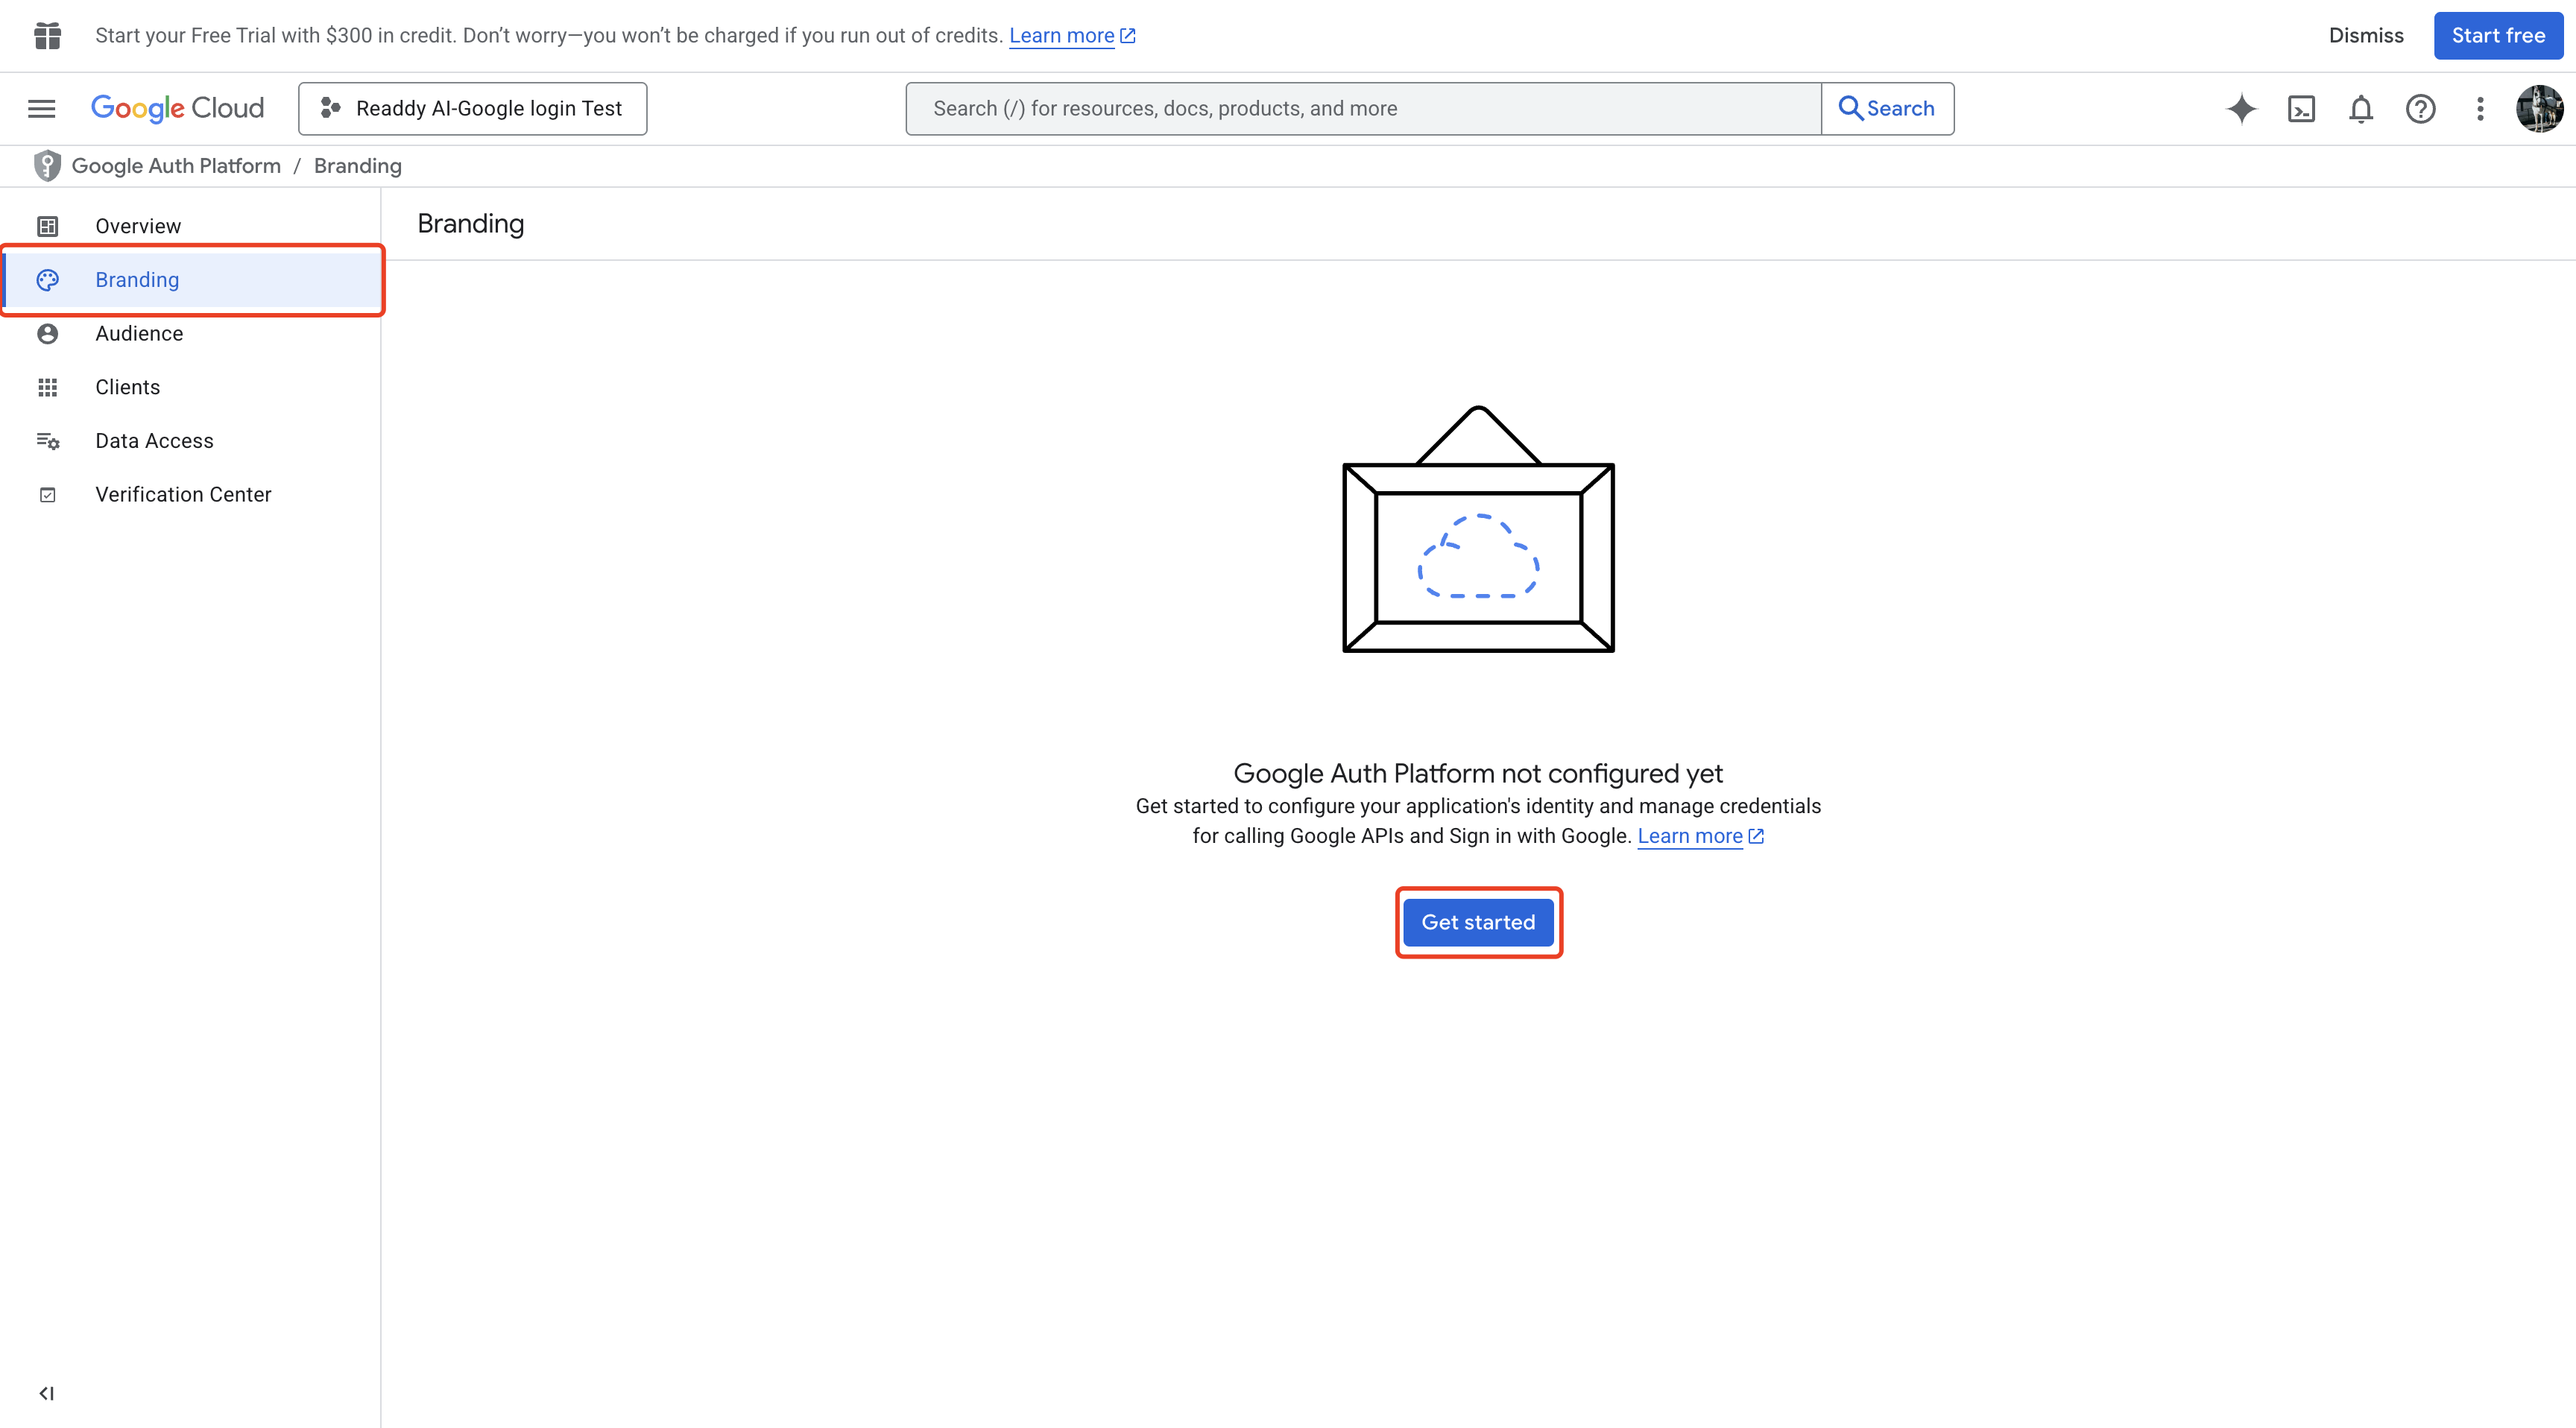
 Click **Branding**, then **Get started**.
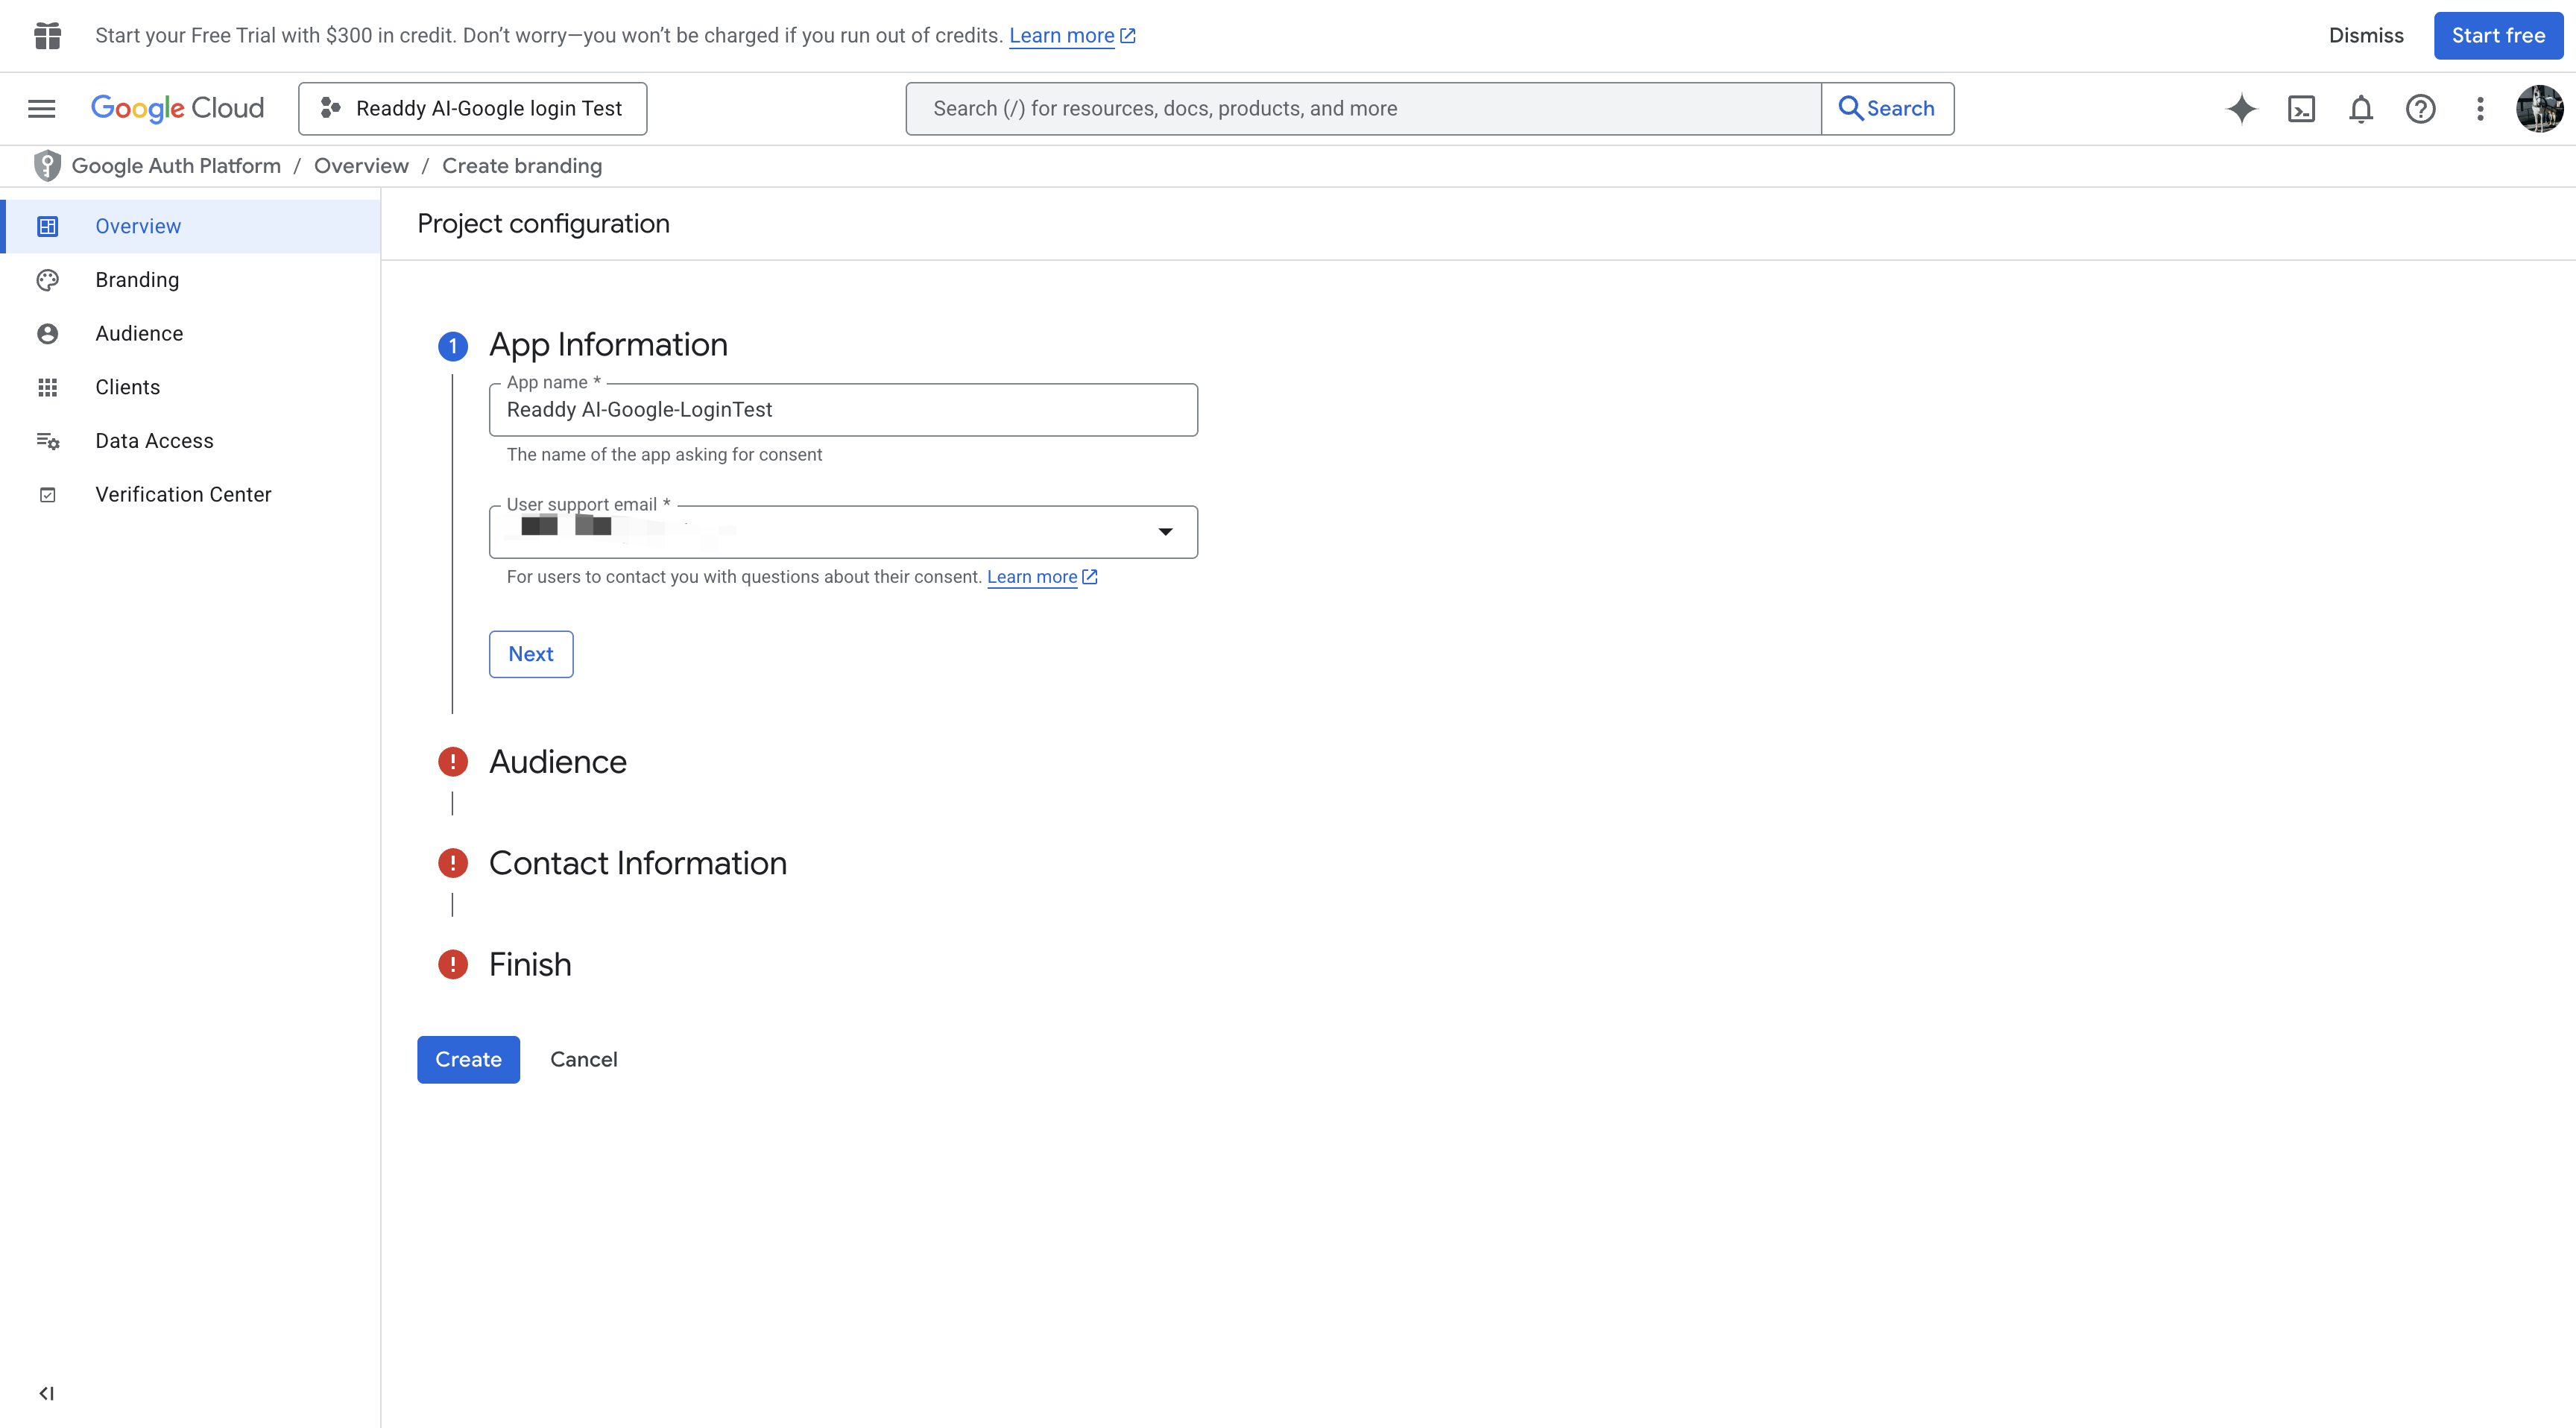
 Fill in: **App name**, **User support email**, **Audience**, **Contact information**, then click **Create**.
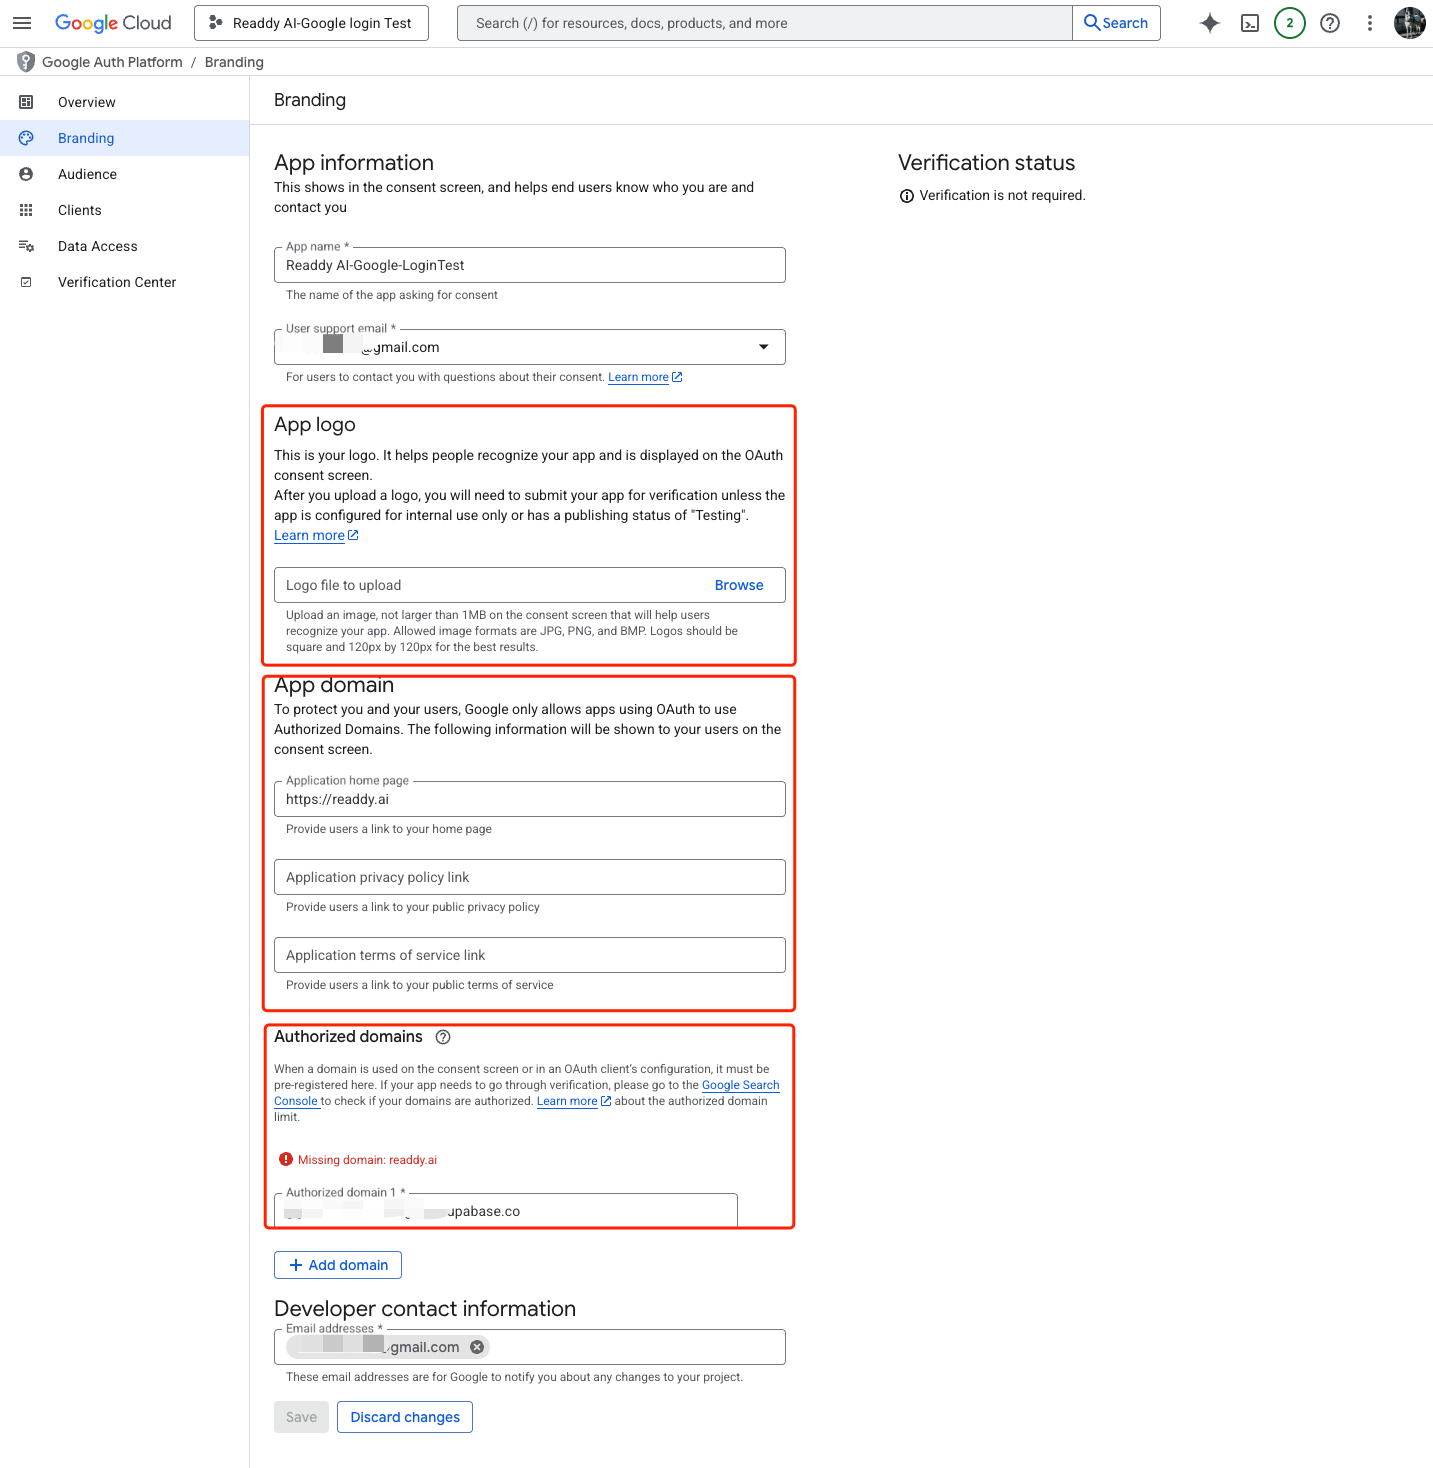
 Add a **Logo**, your **domain**, and the **Authorized domains**.
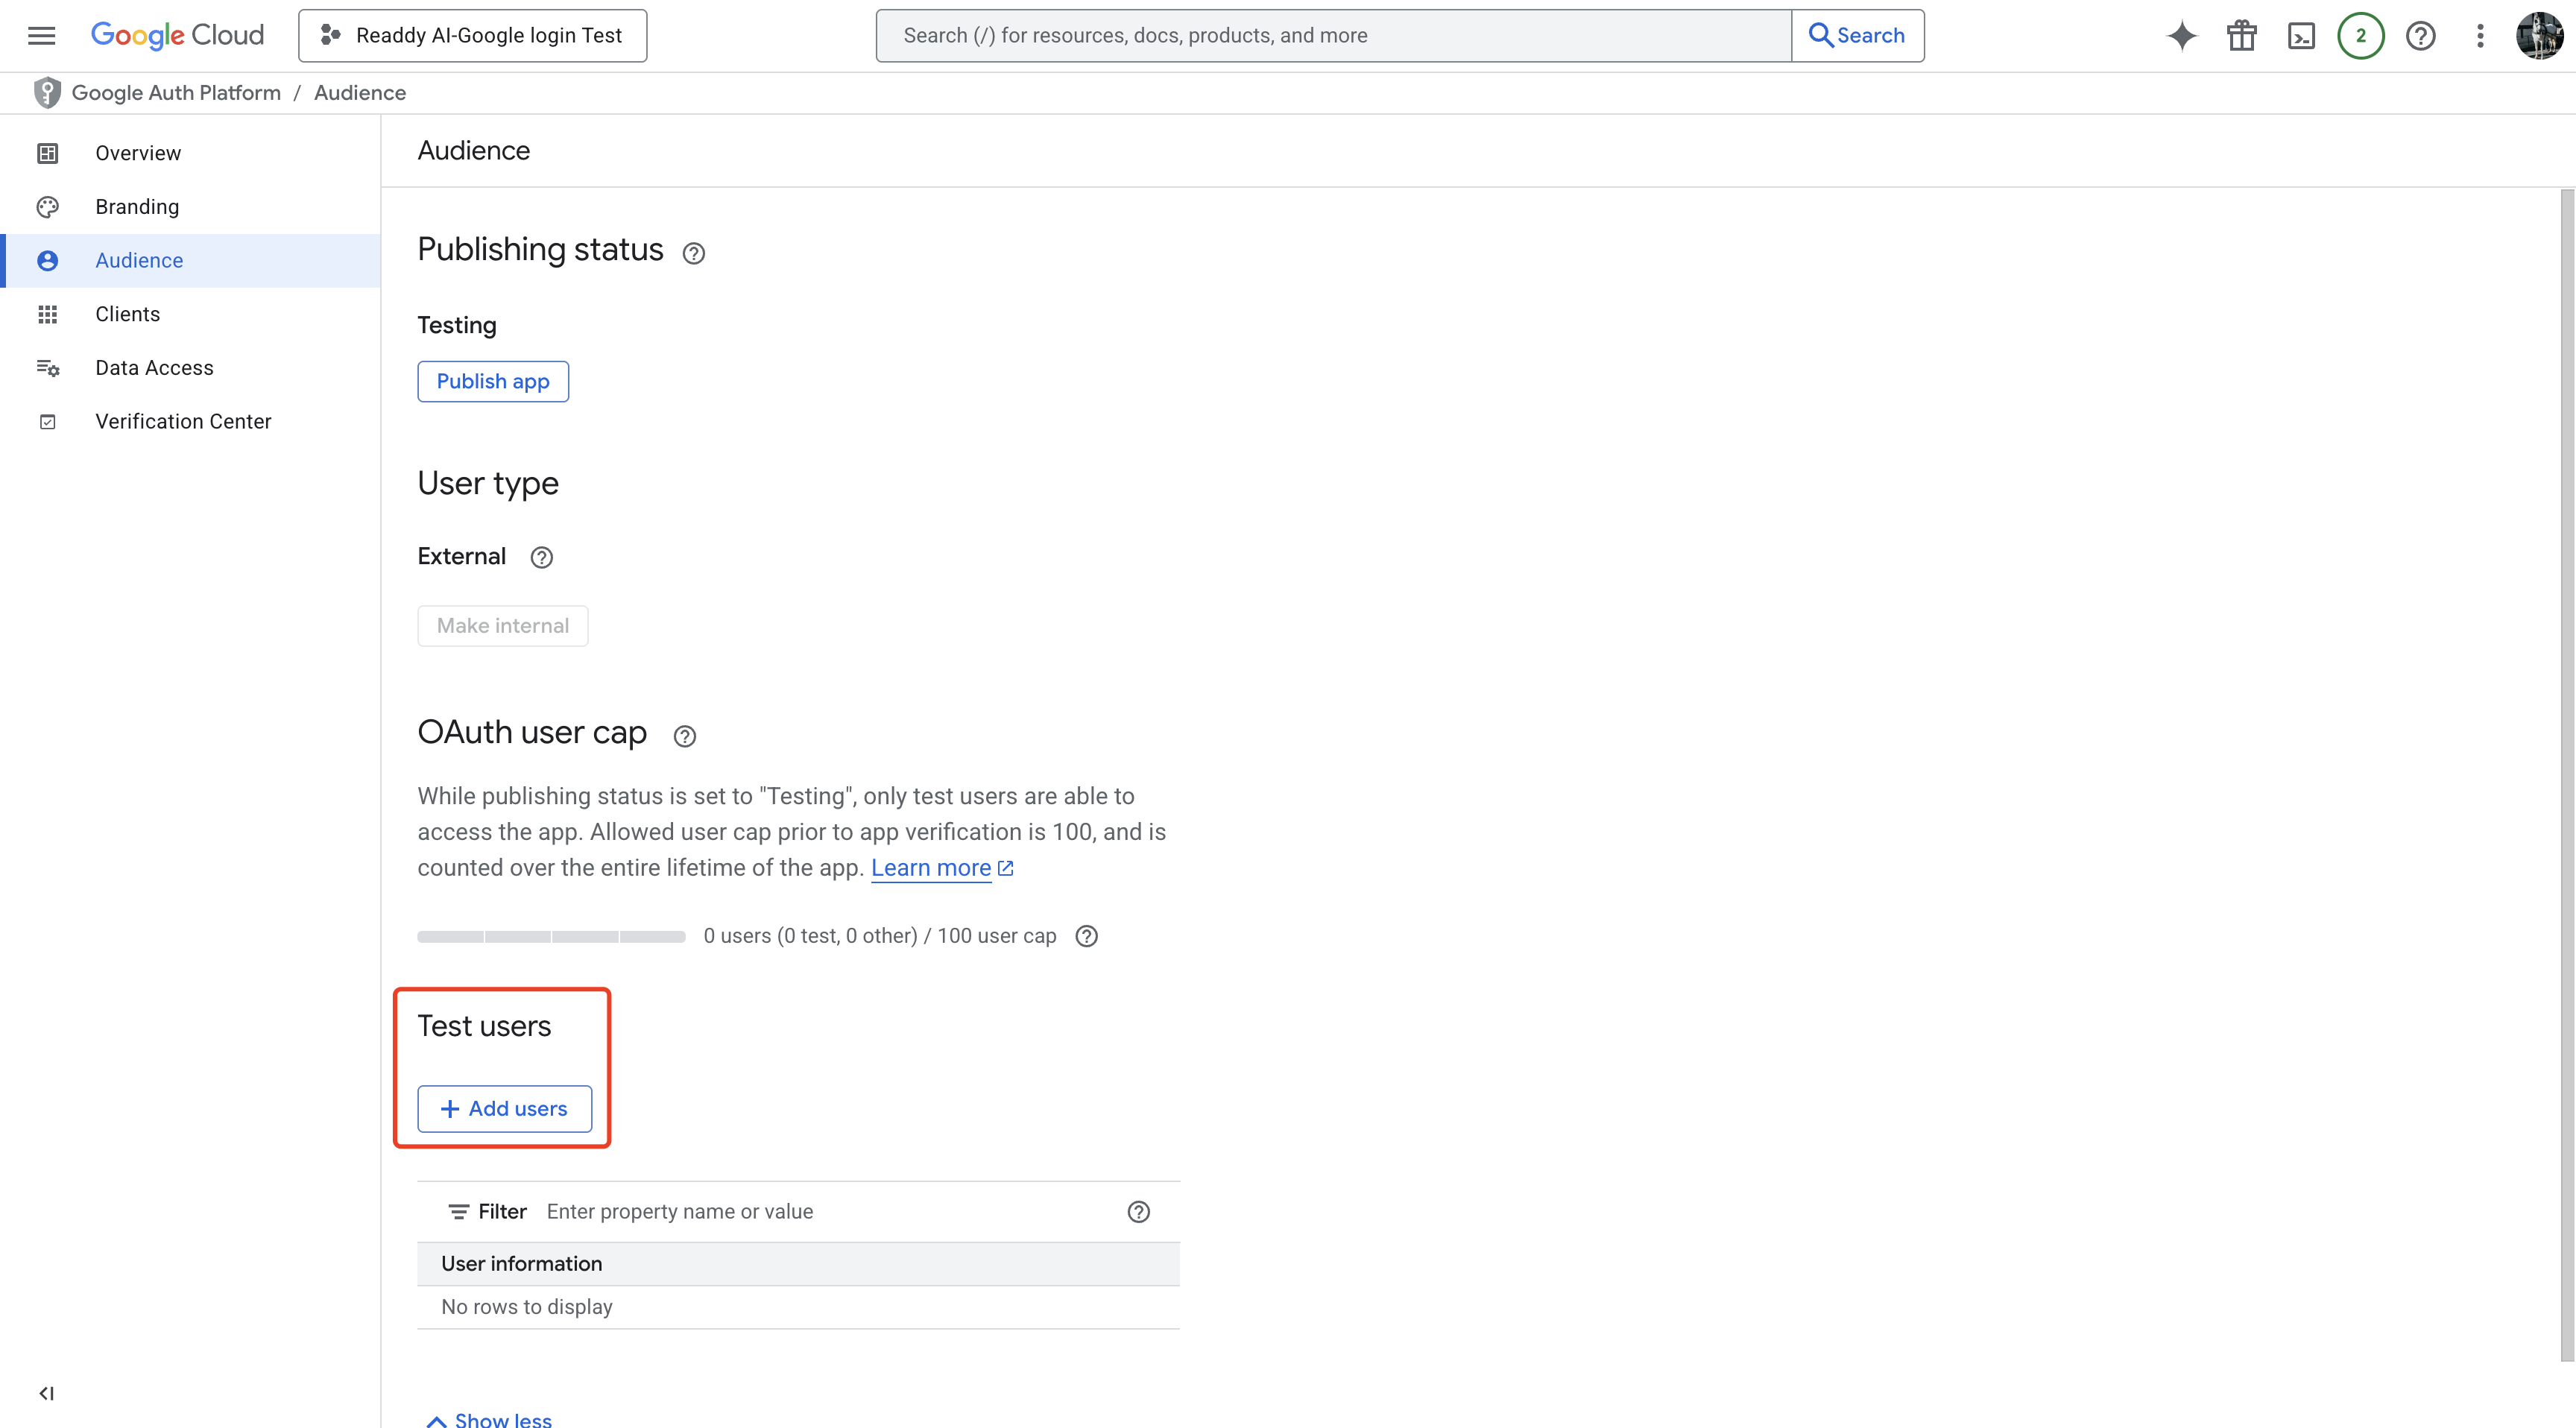
 Click **Add user** to add test users. When testing is complete, you can click **Publish app** to move to production.
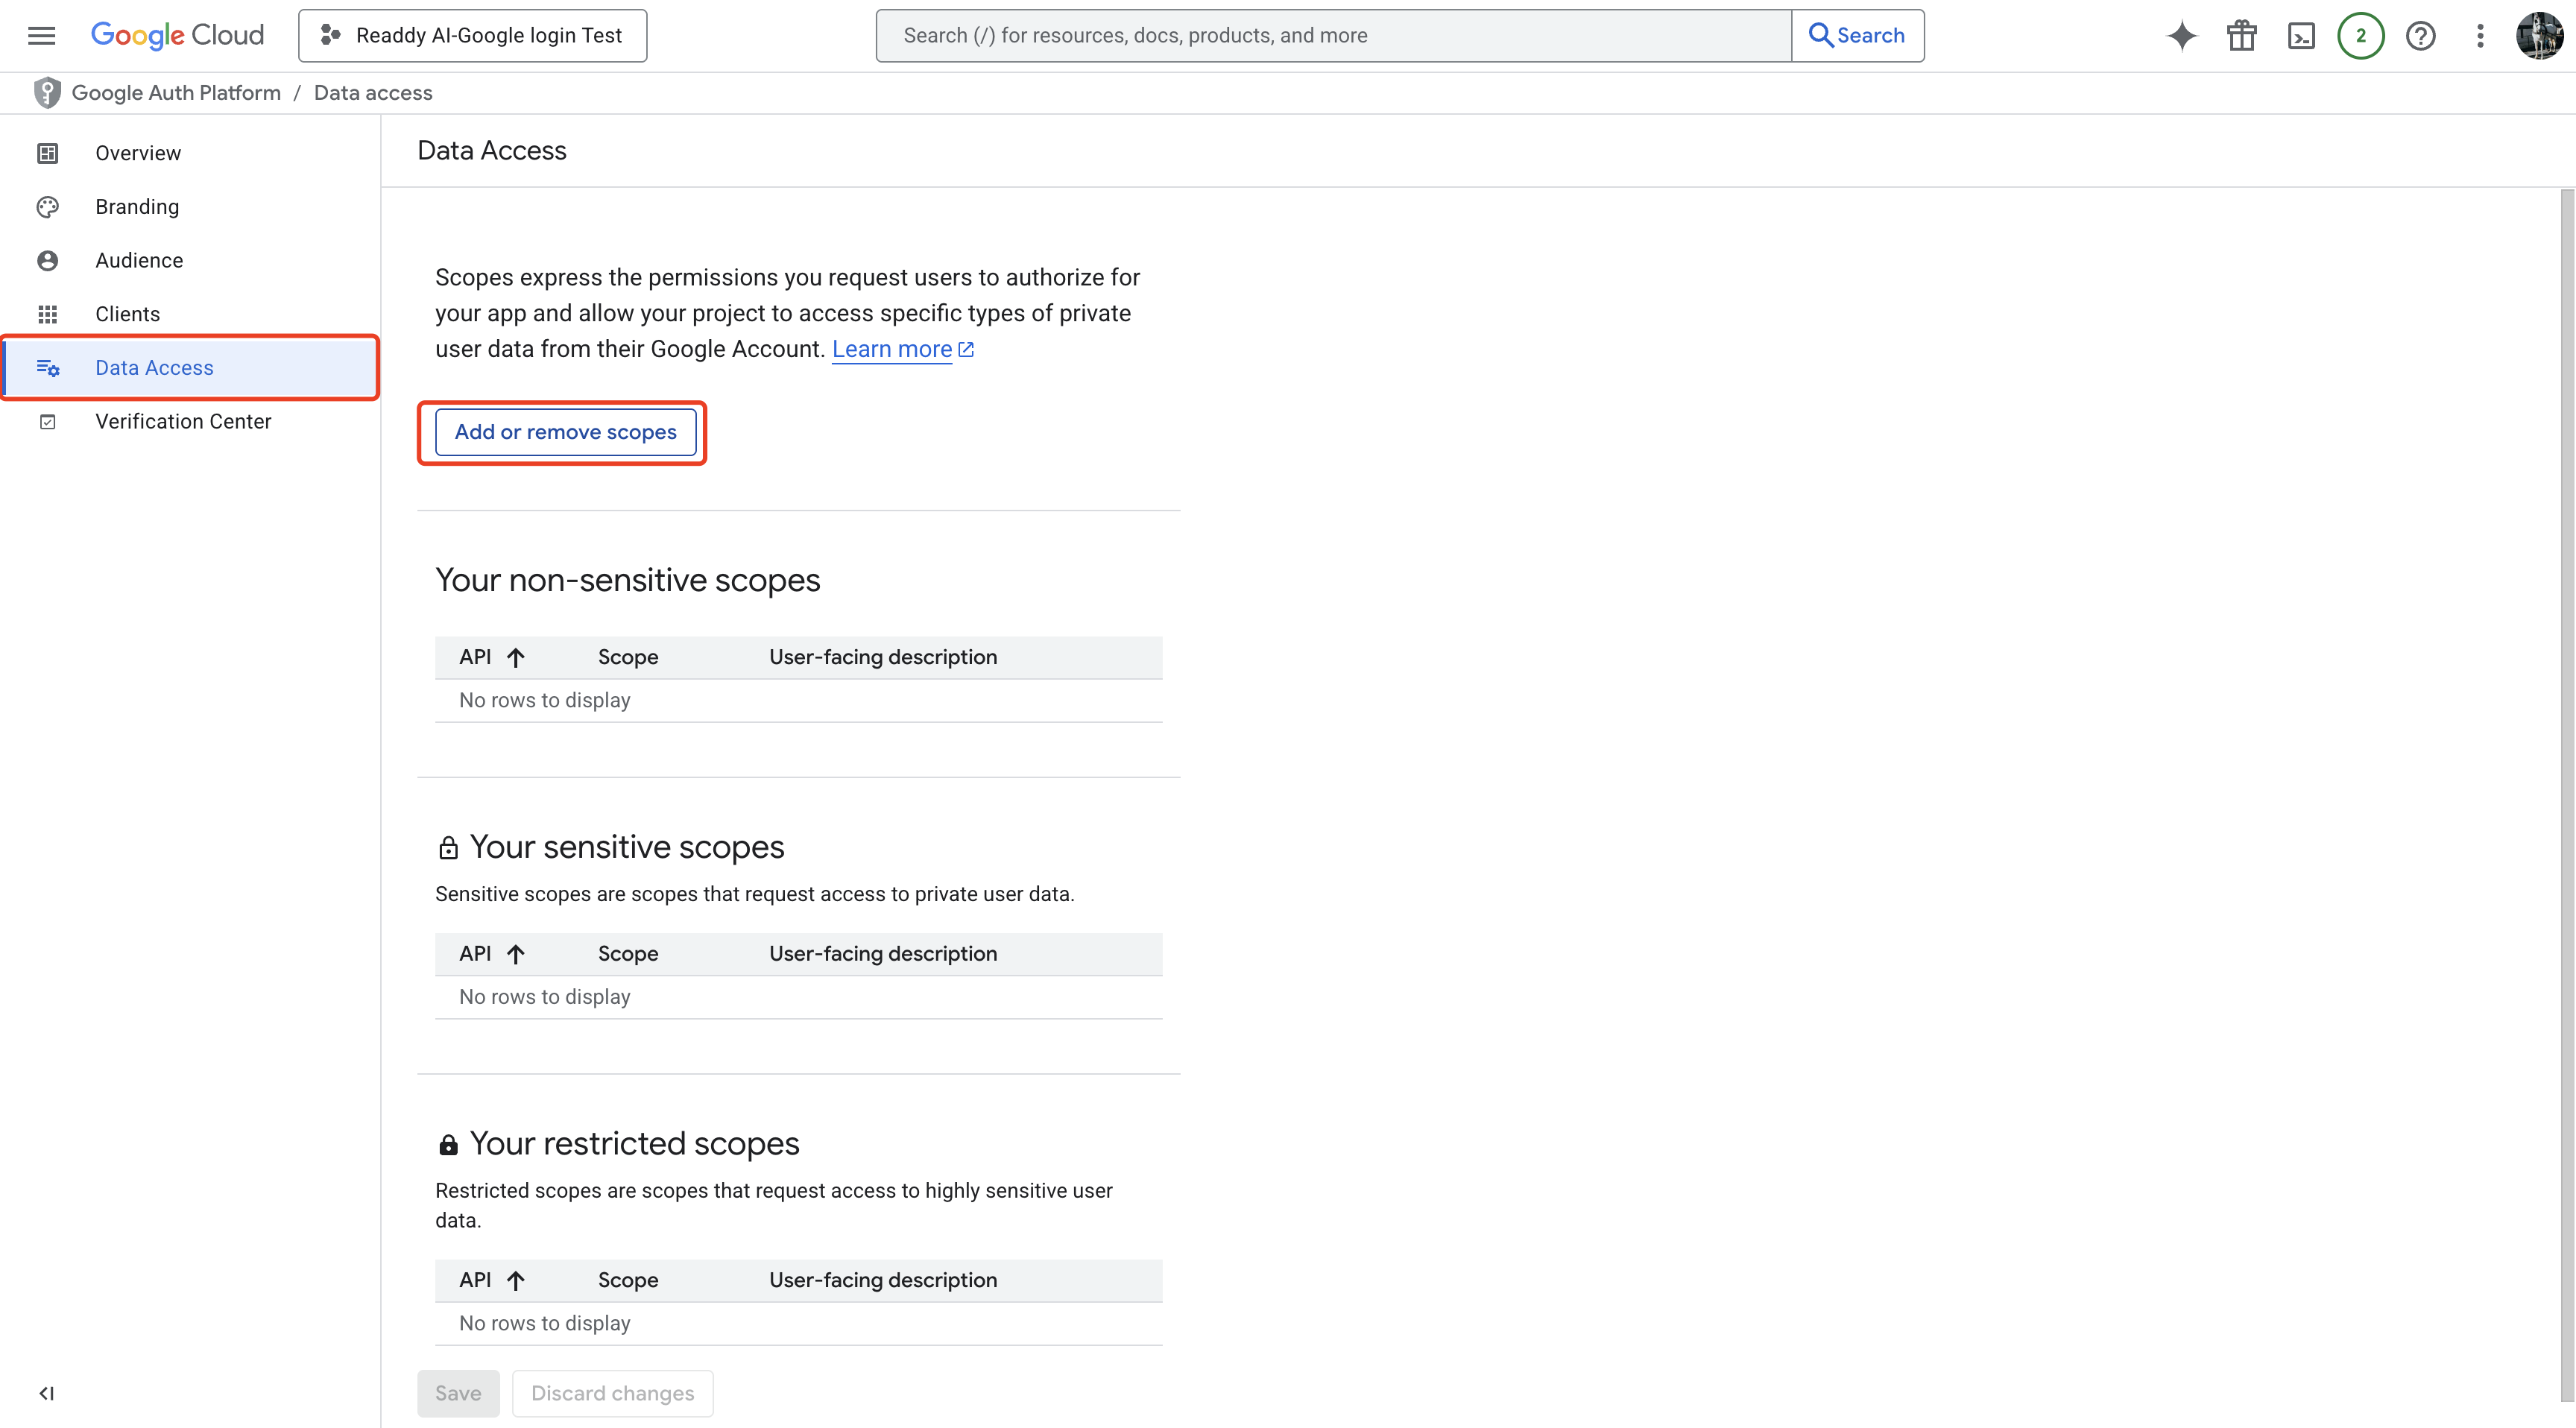
 Click **Data Access**, then **Add or remove scopes**.
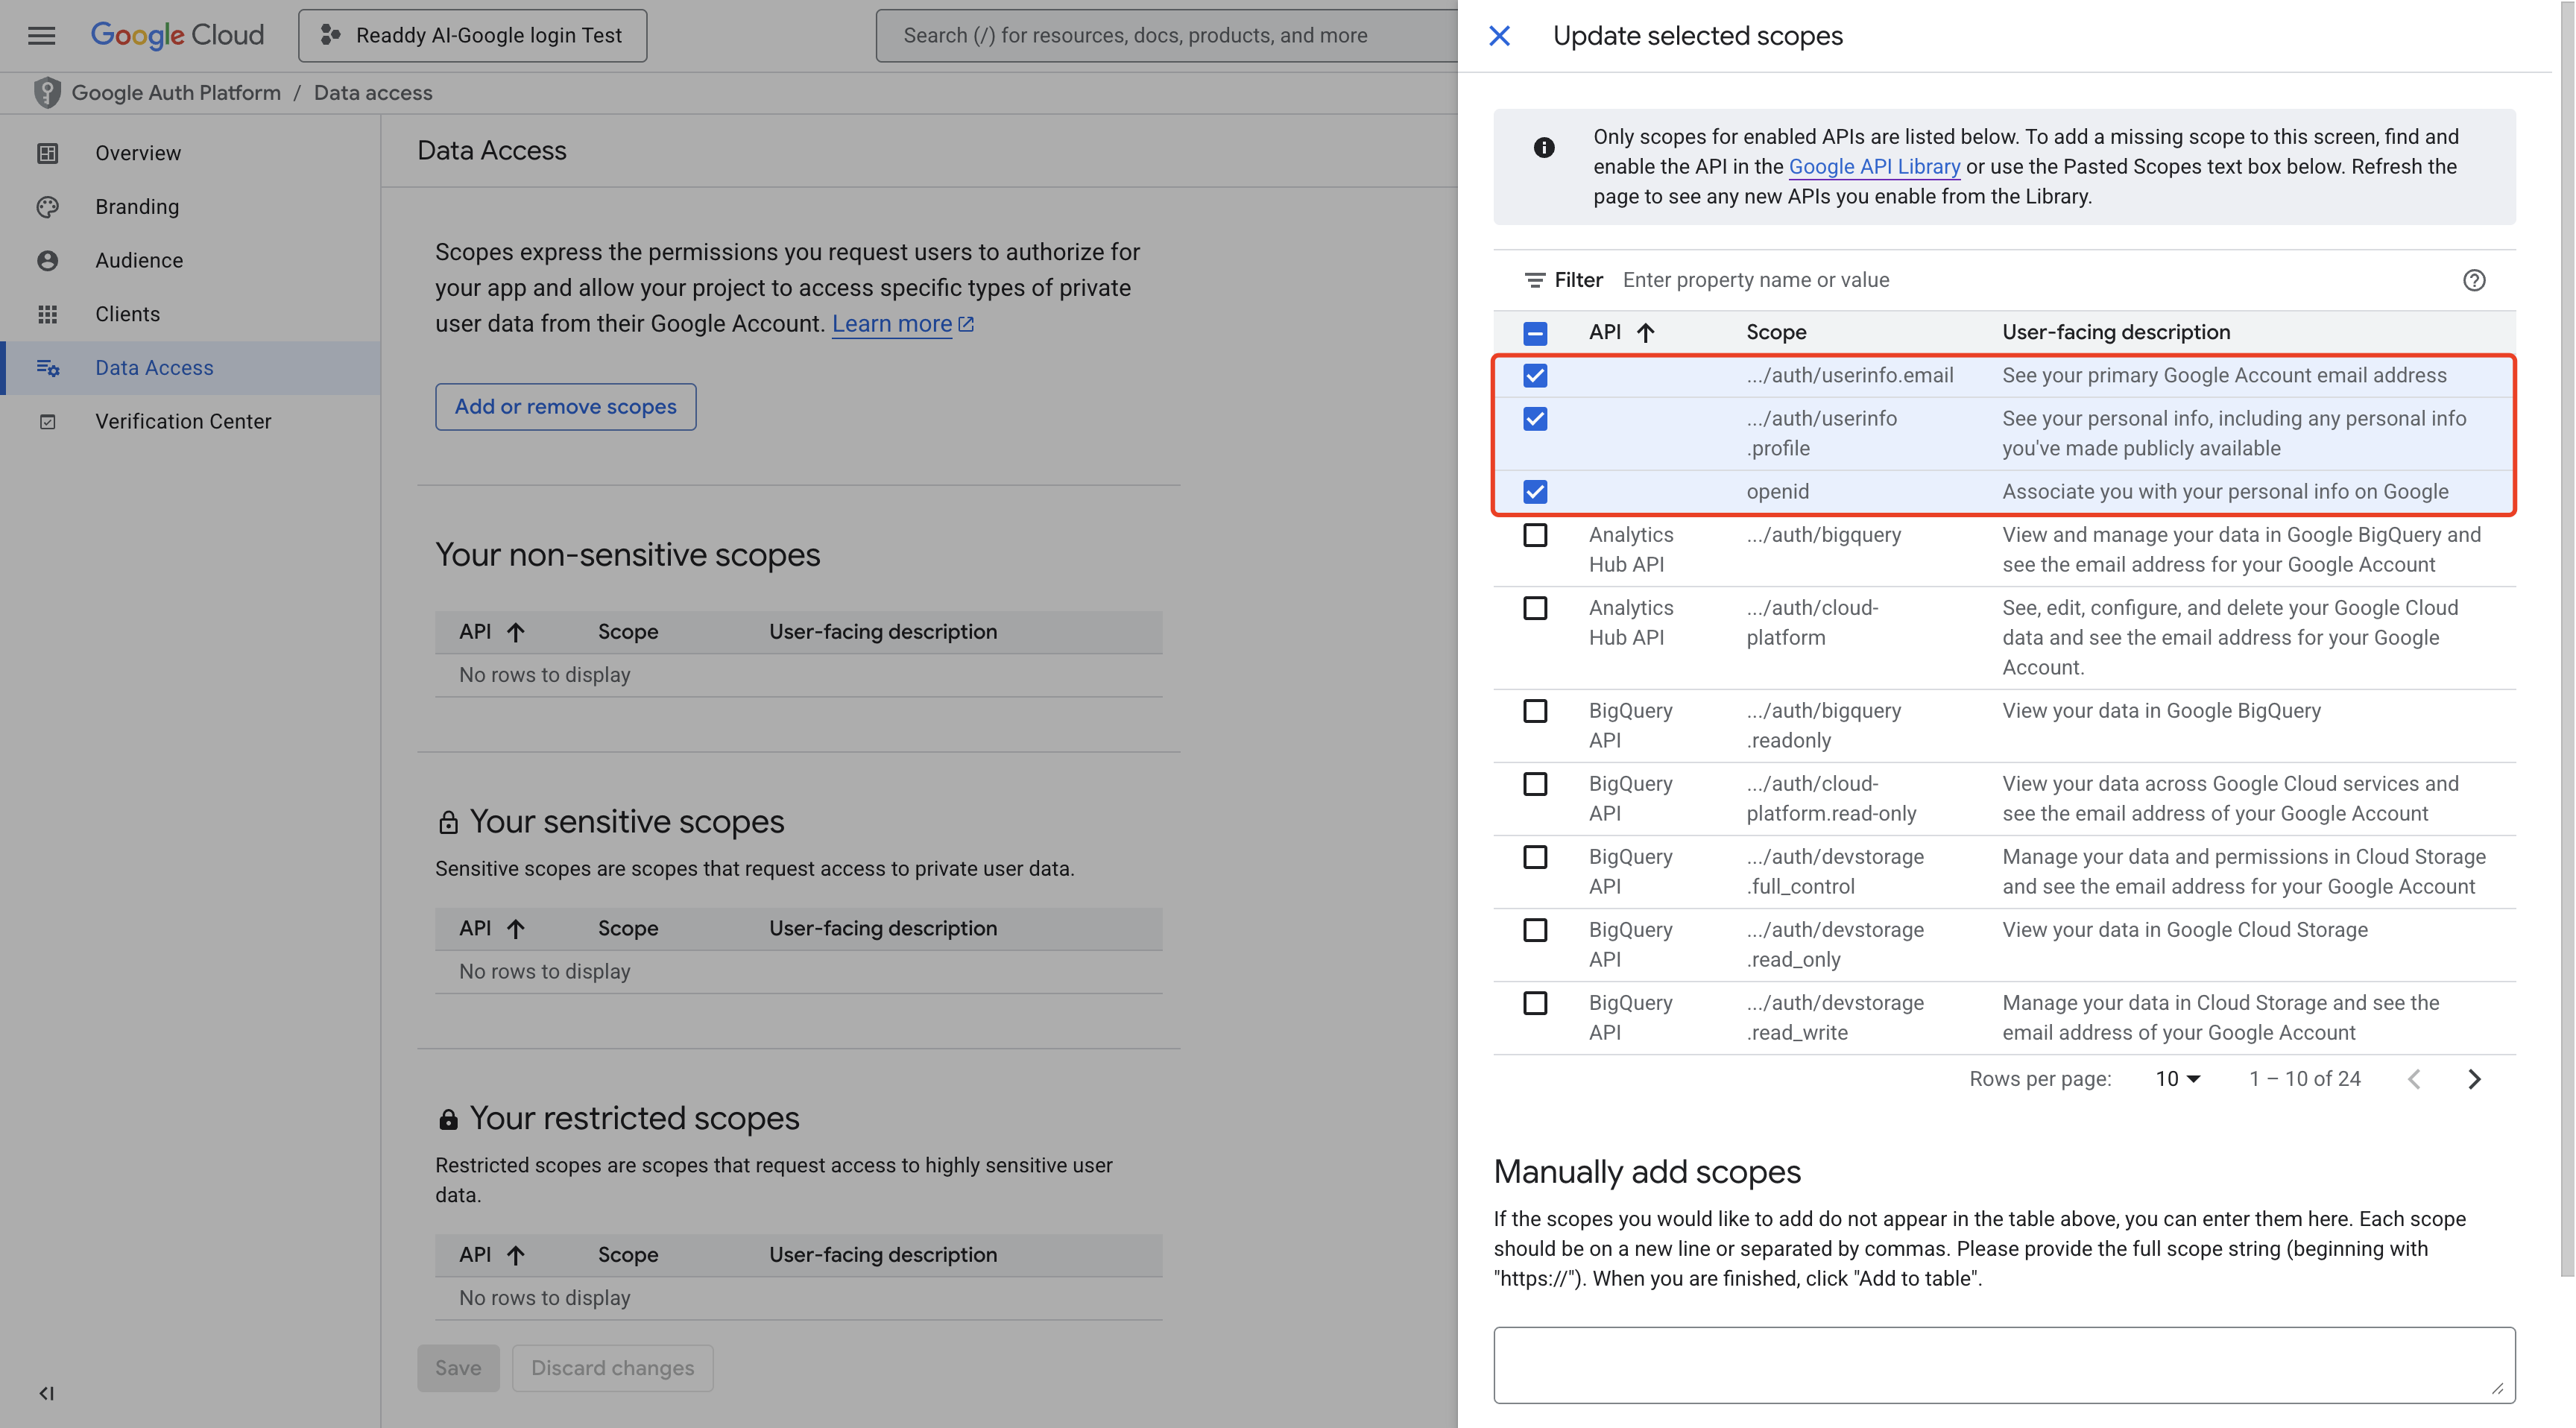
 Choose the scopes your app needs. In most cases, only **email**, **profile**, and **openid** are required. Select any others as needed.
 Click **Clients**, then **Create client**.
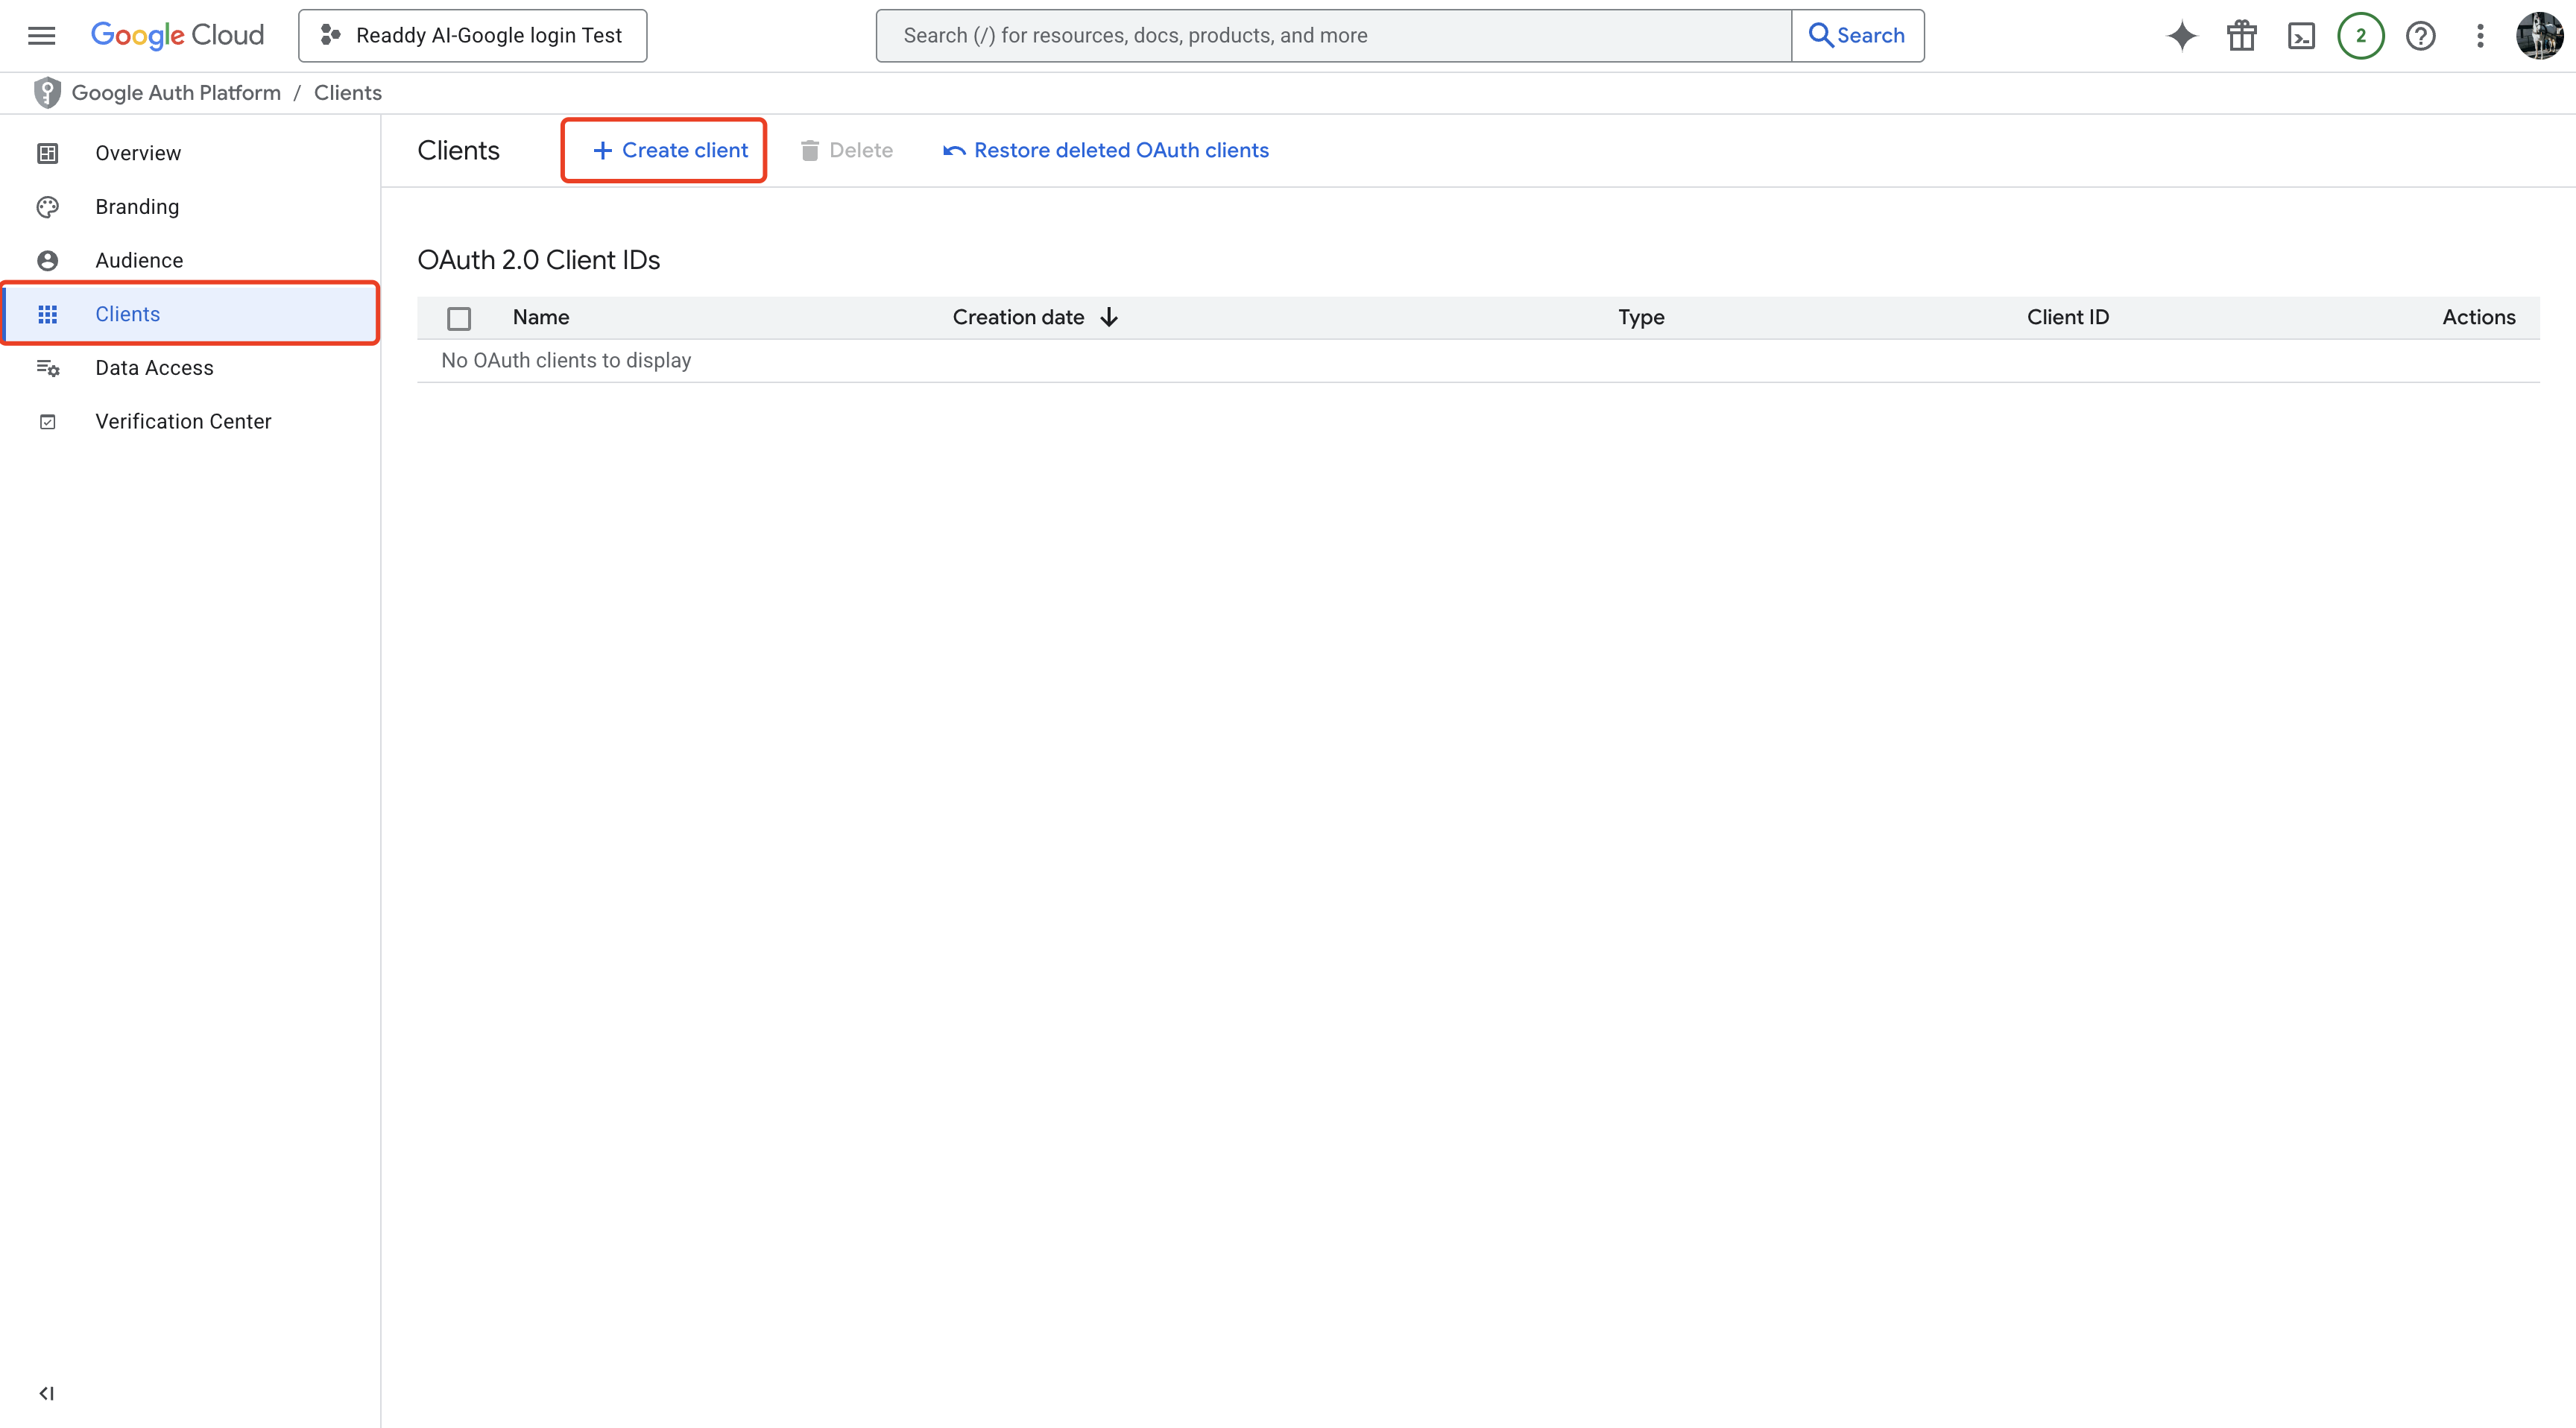 For **Application type**, choose **Web application**. Enter a **Name**, and add **Authorized redirect URIs**.
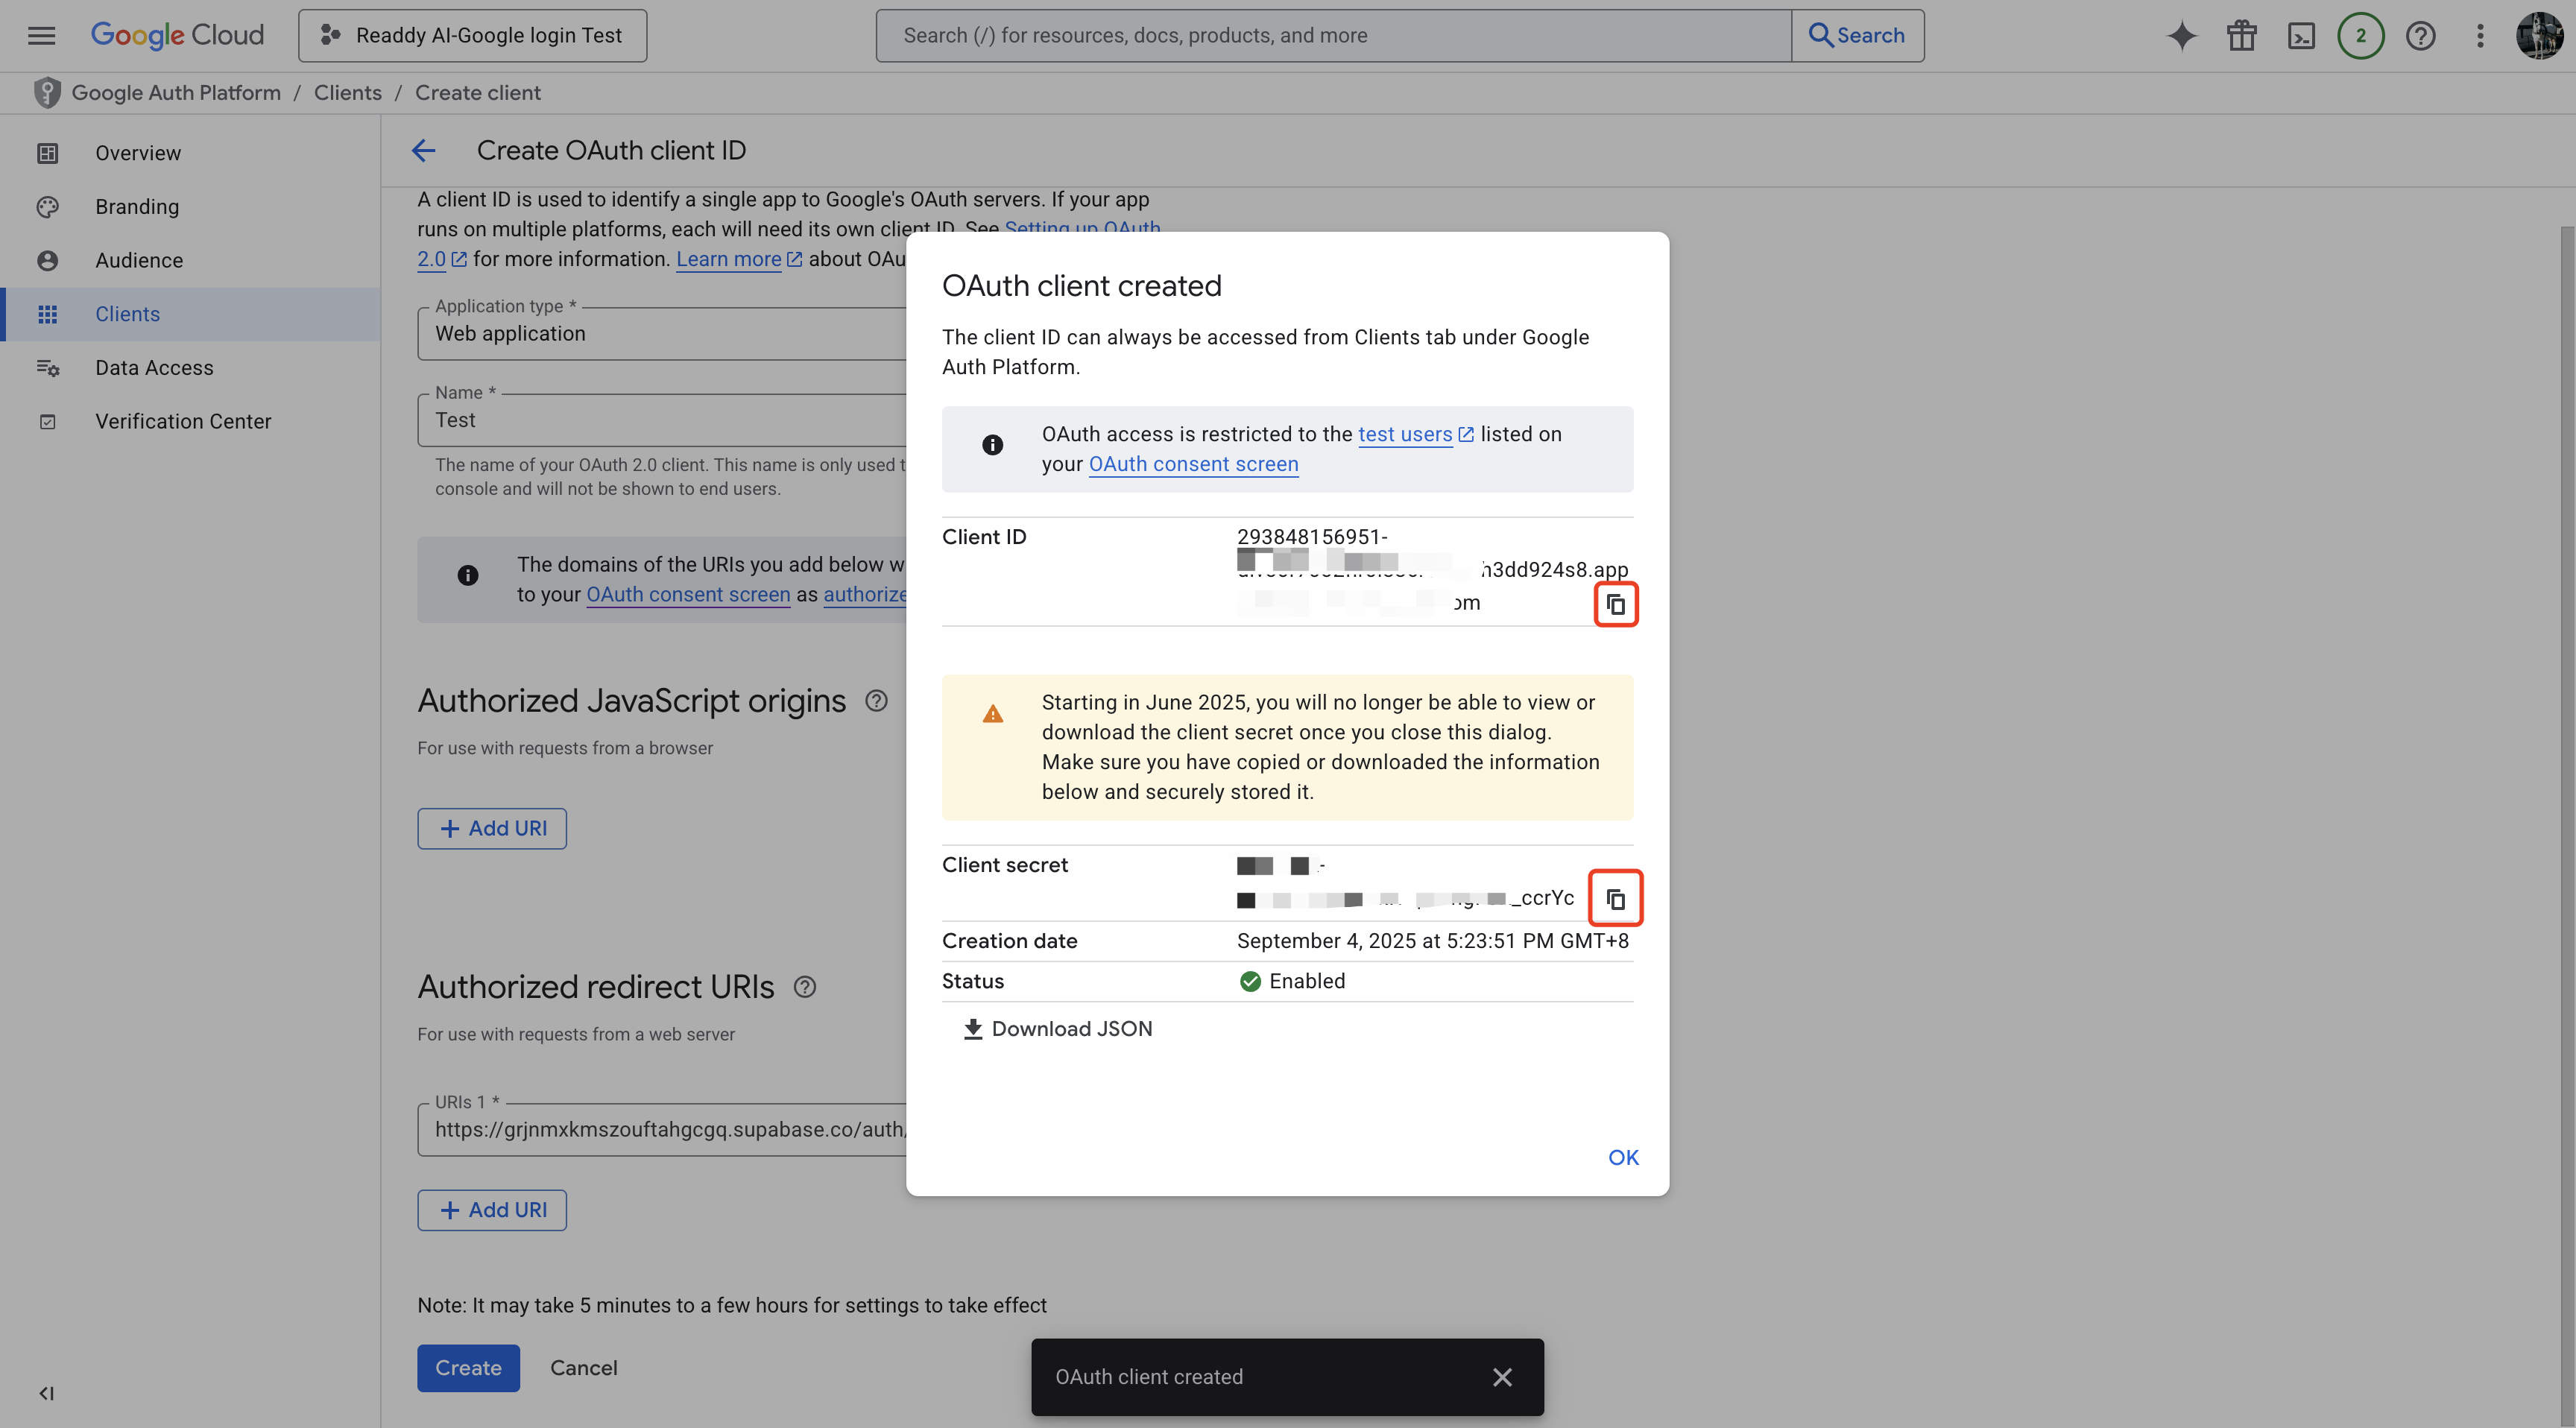
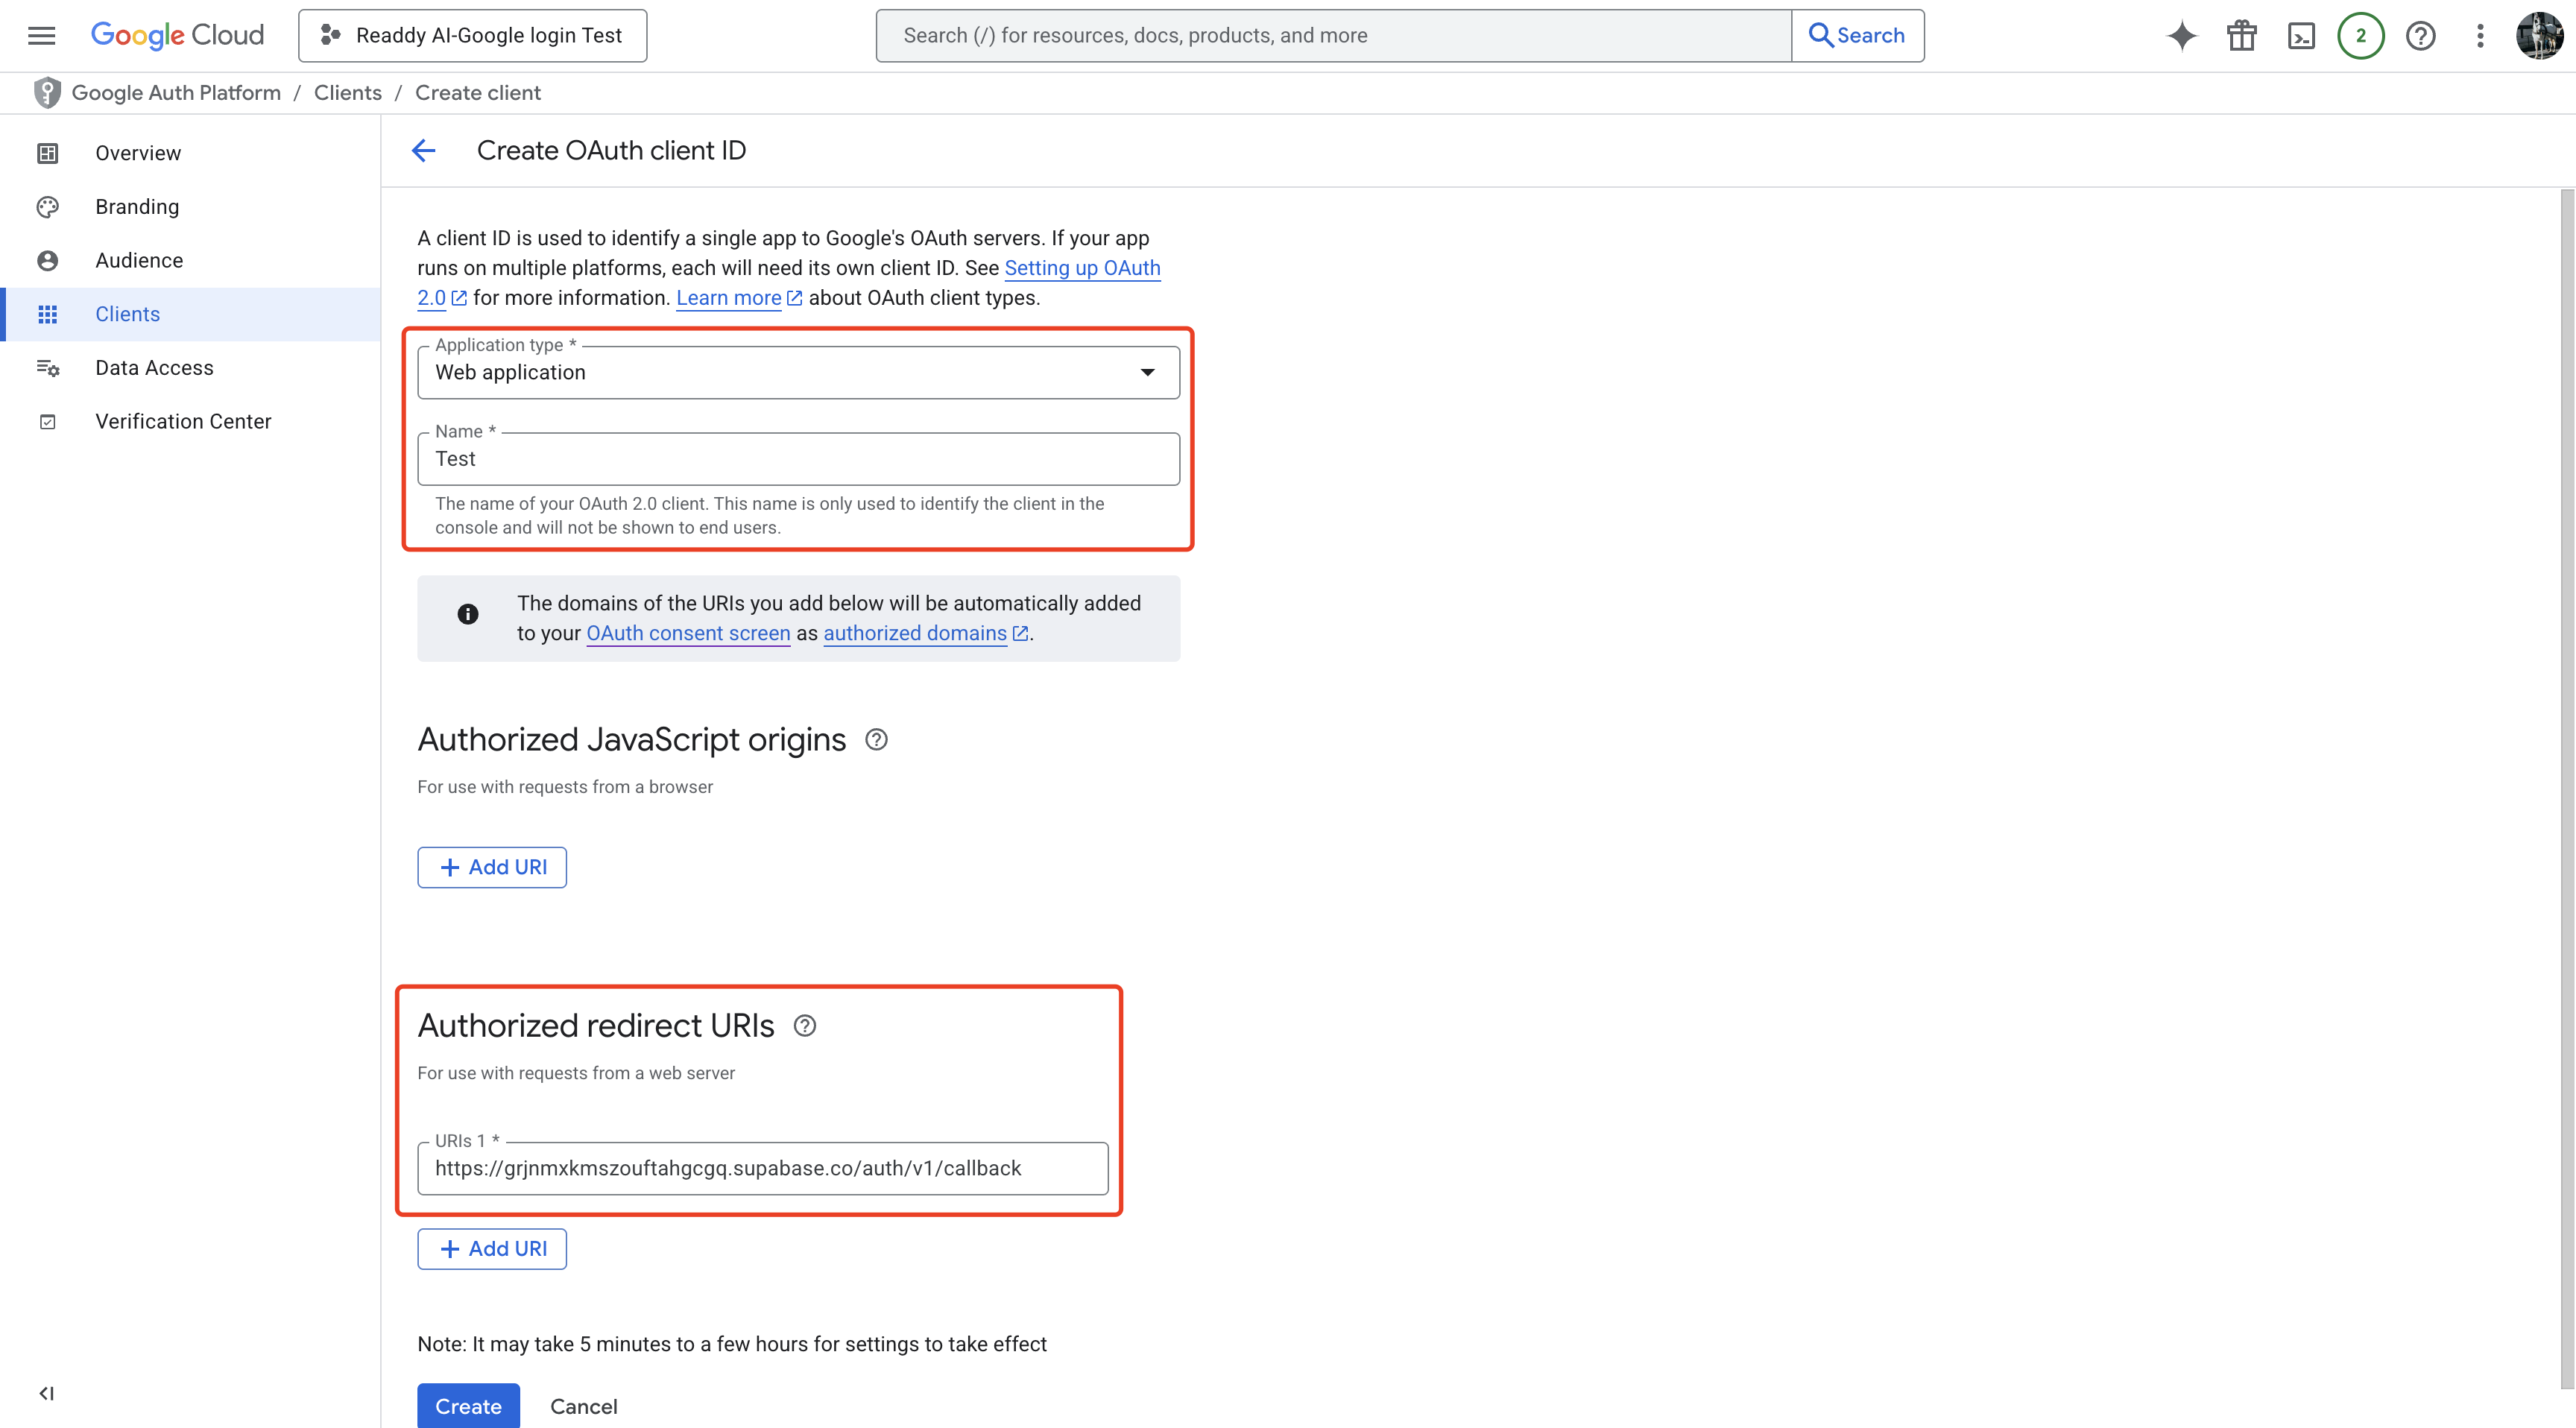 Click **Create**. Your OAuth client is created—save the **Client ID** and **Client secret**.
 ### How to get the Authorized redirect URIs
Sign in to **Supabase** and create a project.
In the left sidebar, click **Authentication**.
### How to get the Authorized redirect URIs
Sign in to **Supabase** and create a project.
In the left sidebar, click **Authentication**.
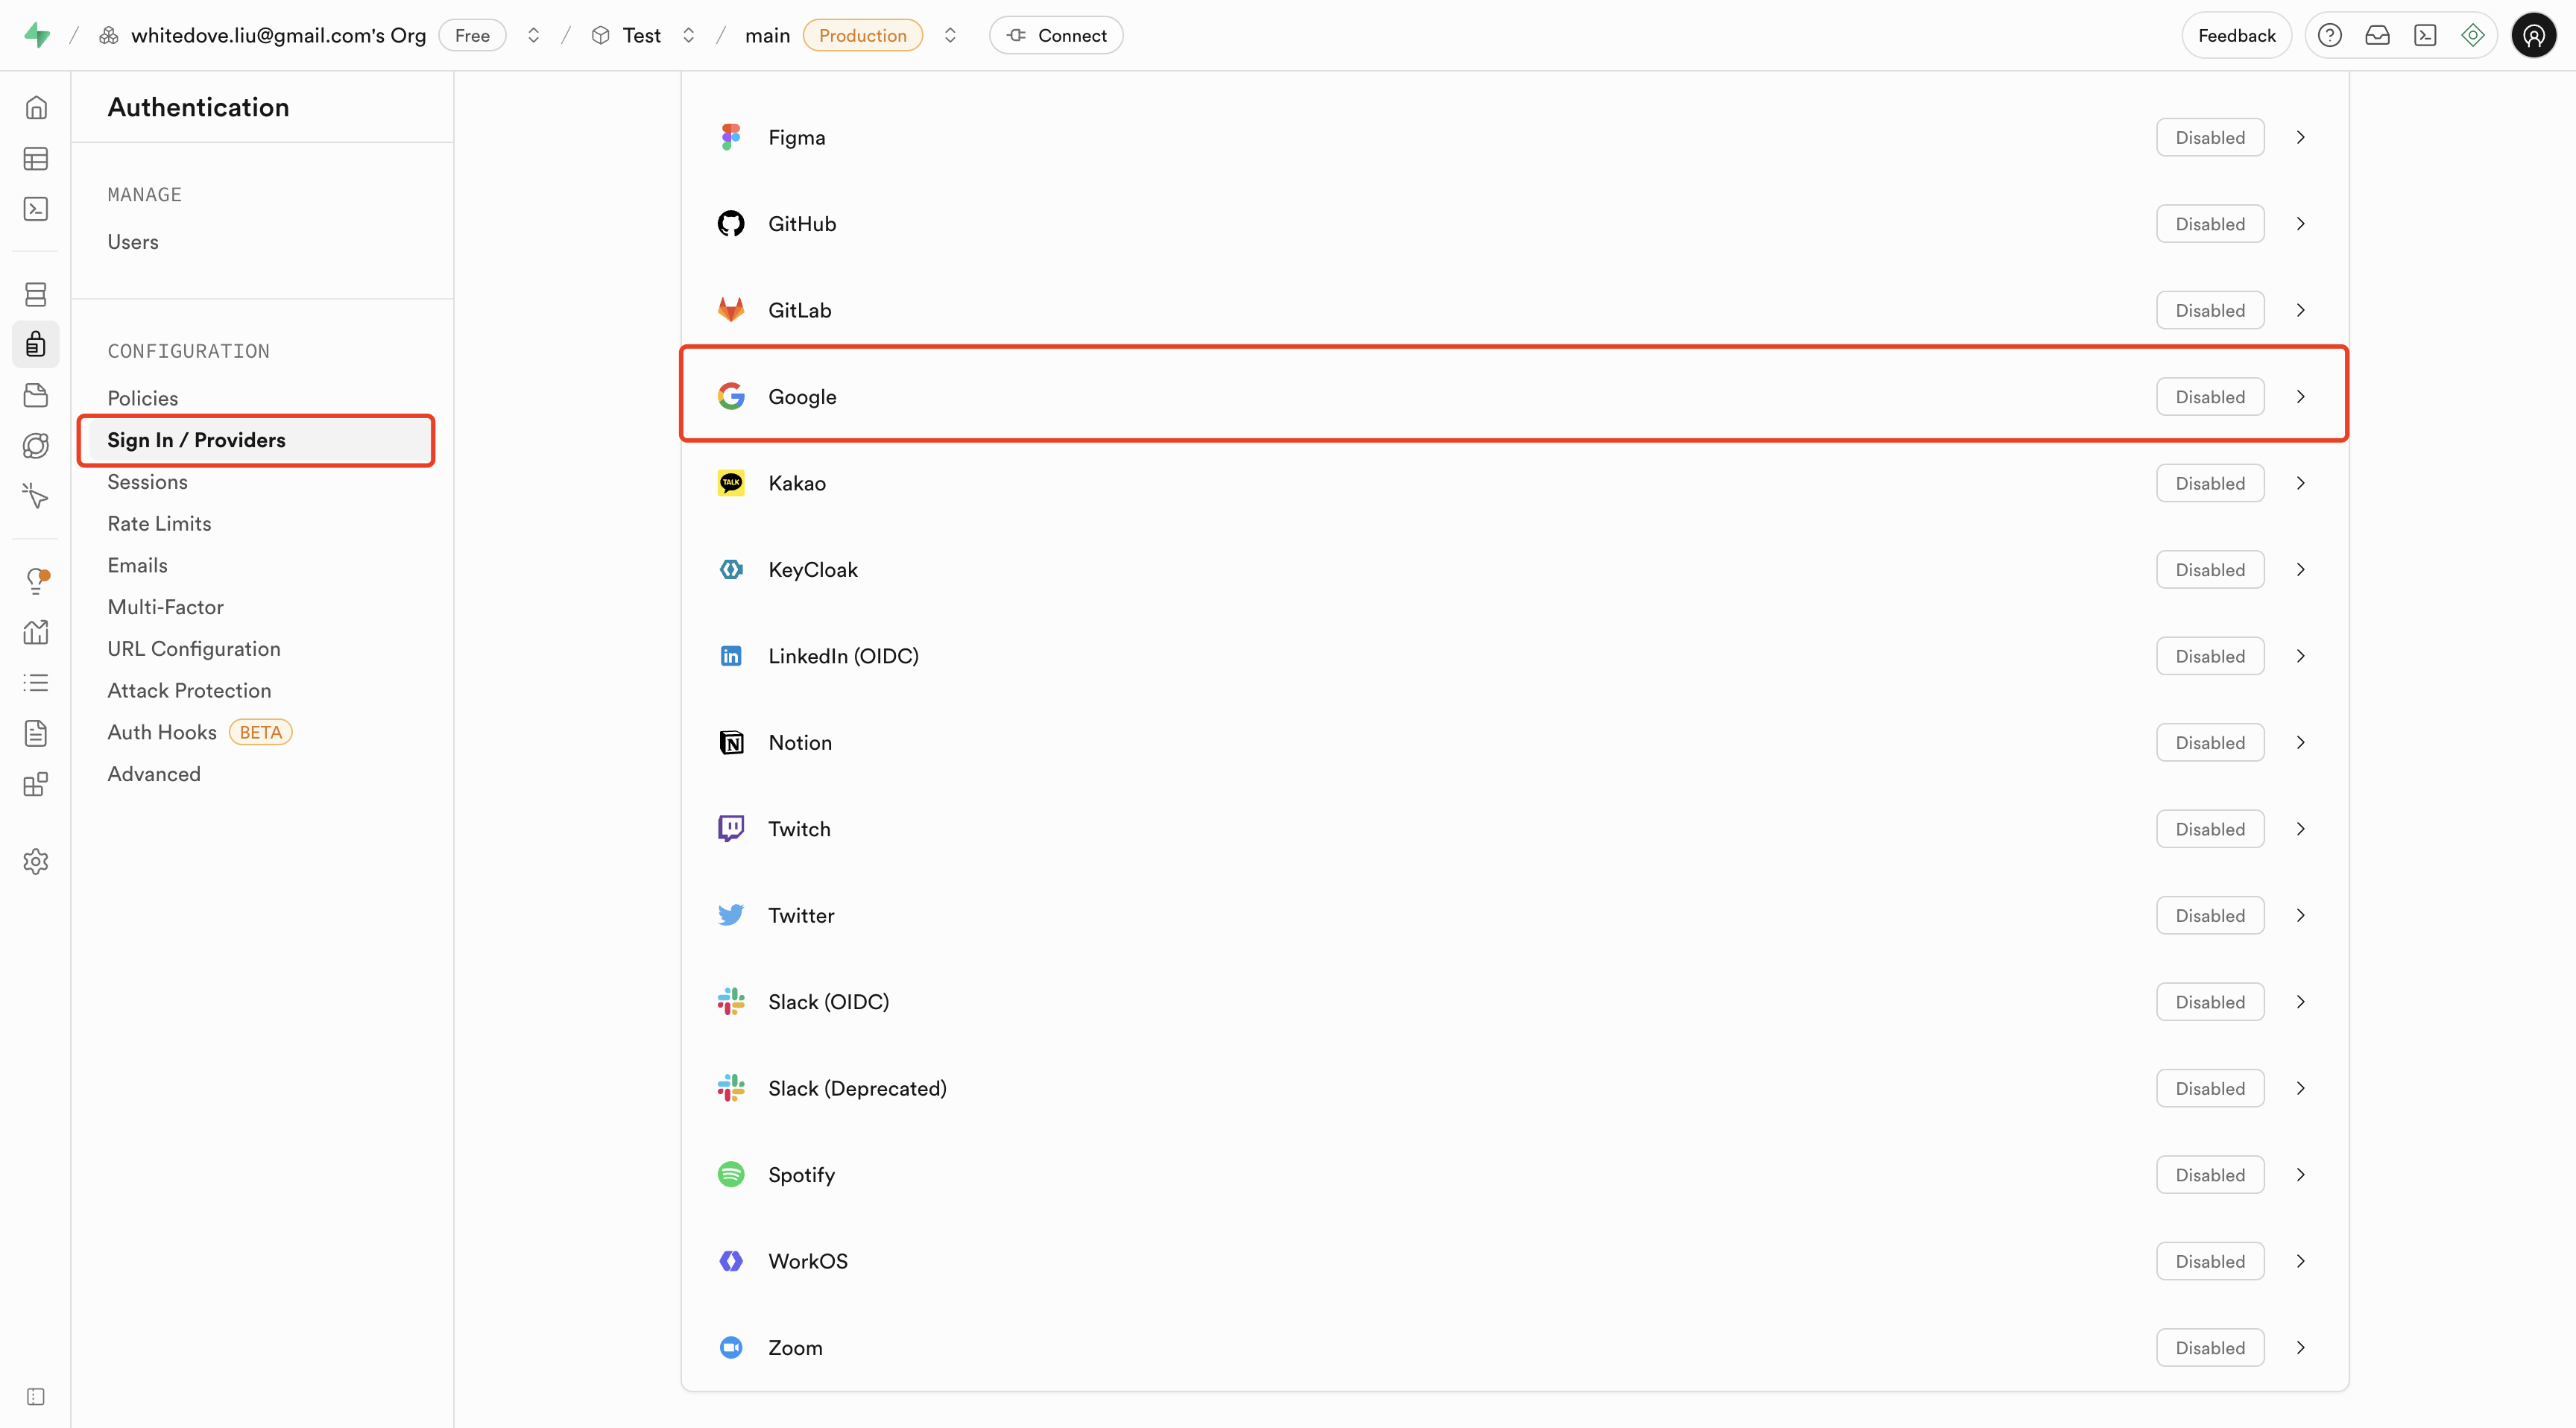
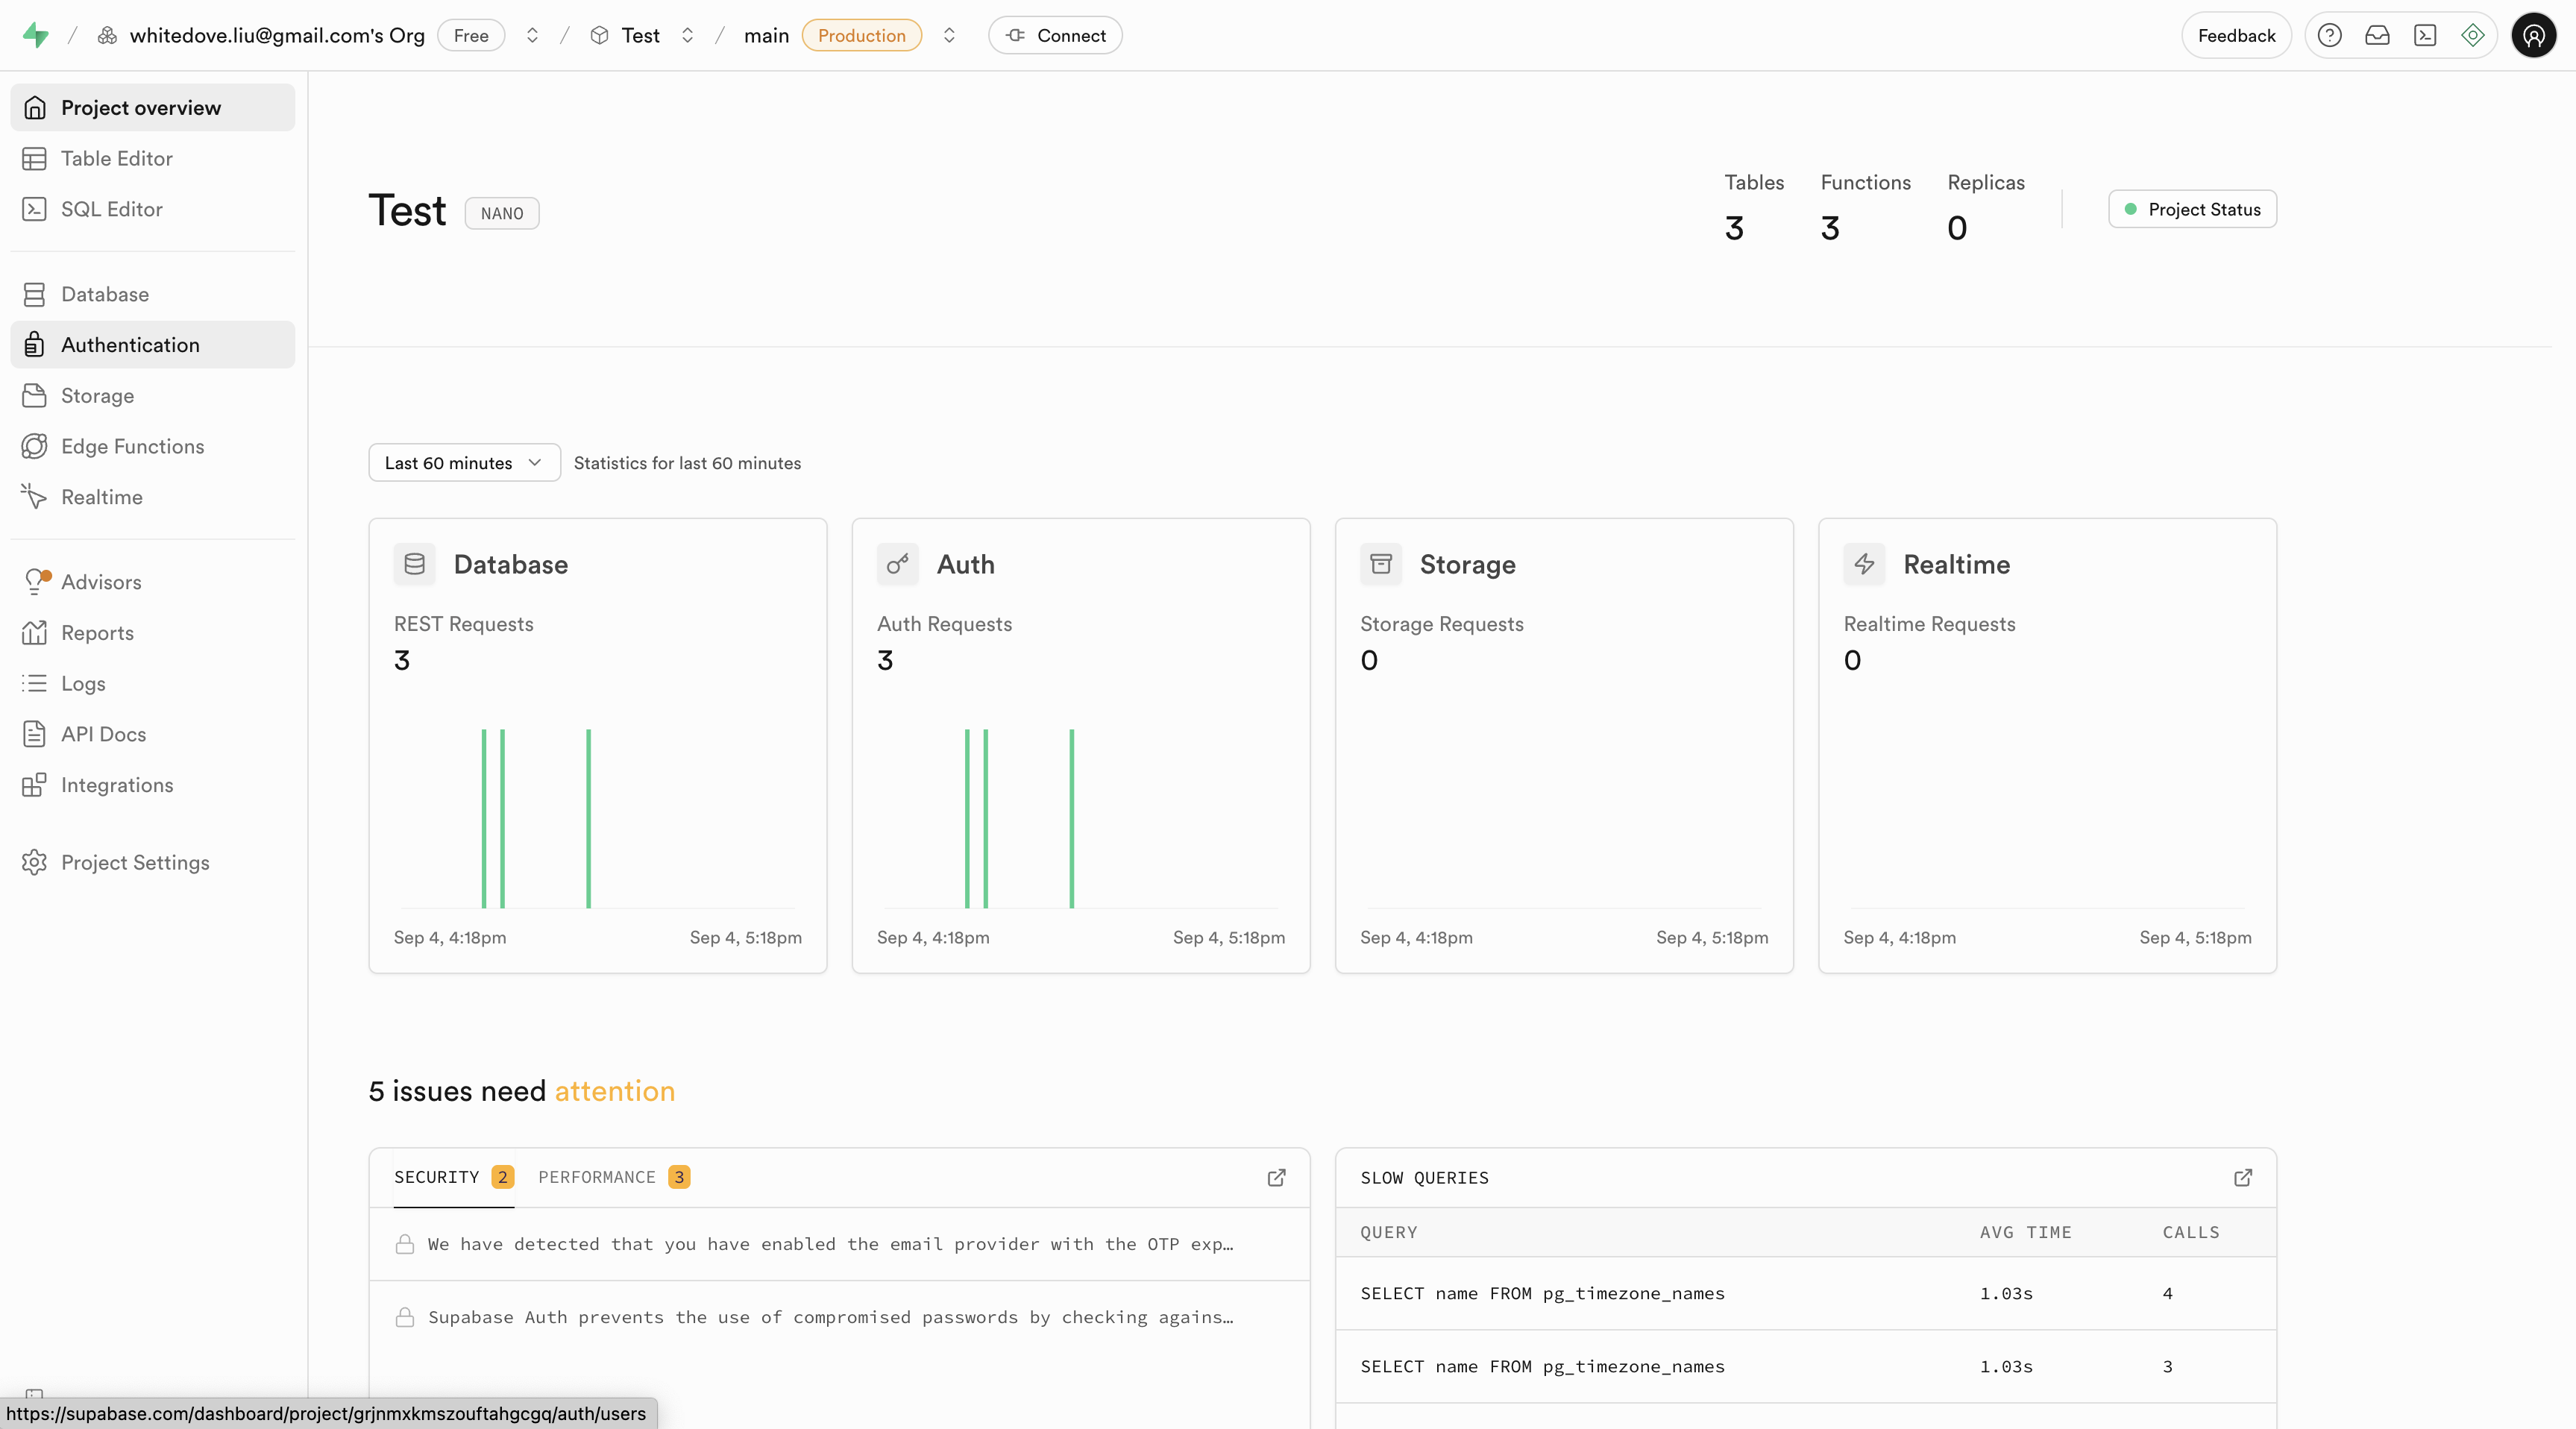 Click **Sign In / Providers**, then on the right click **Google**.
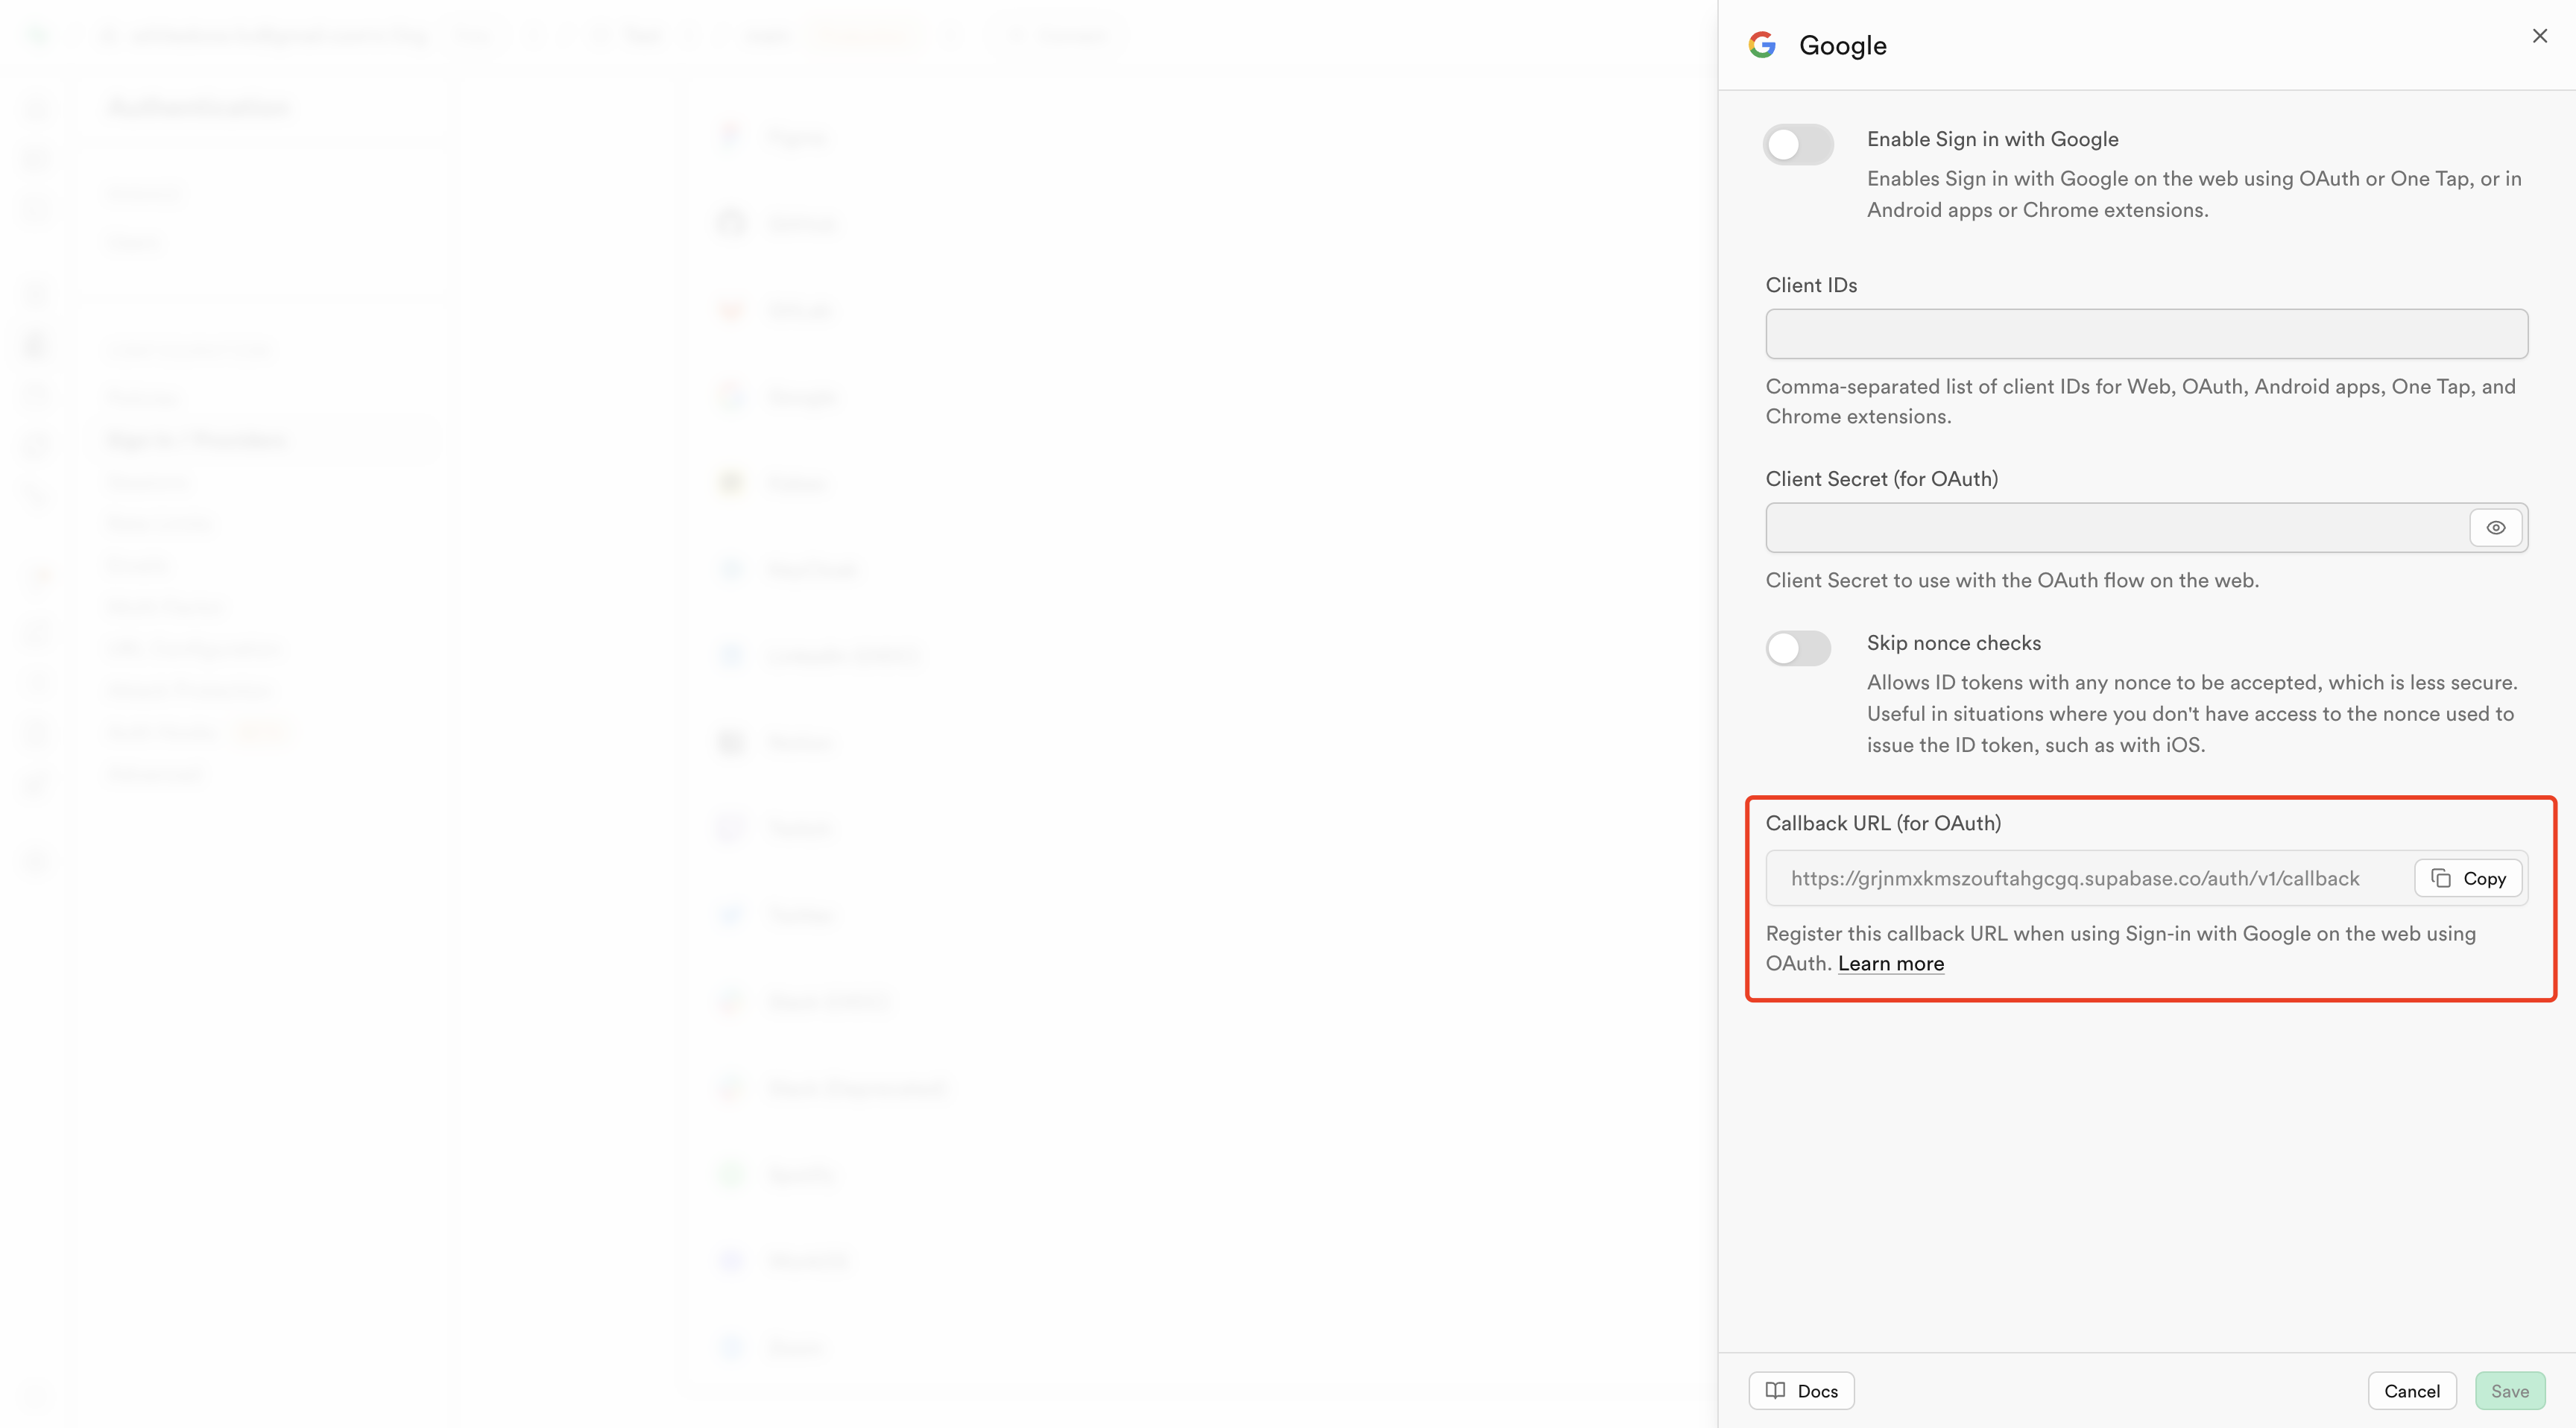
 Copy the **Callback URL** and paste it into **Authorized redirect URIs** in Google Cloud.
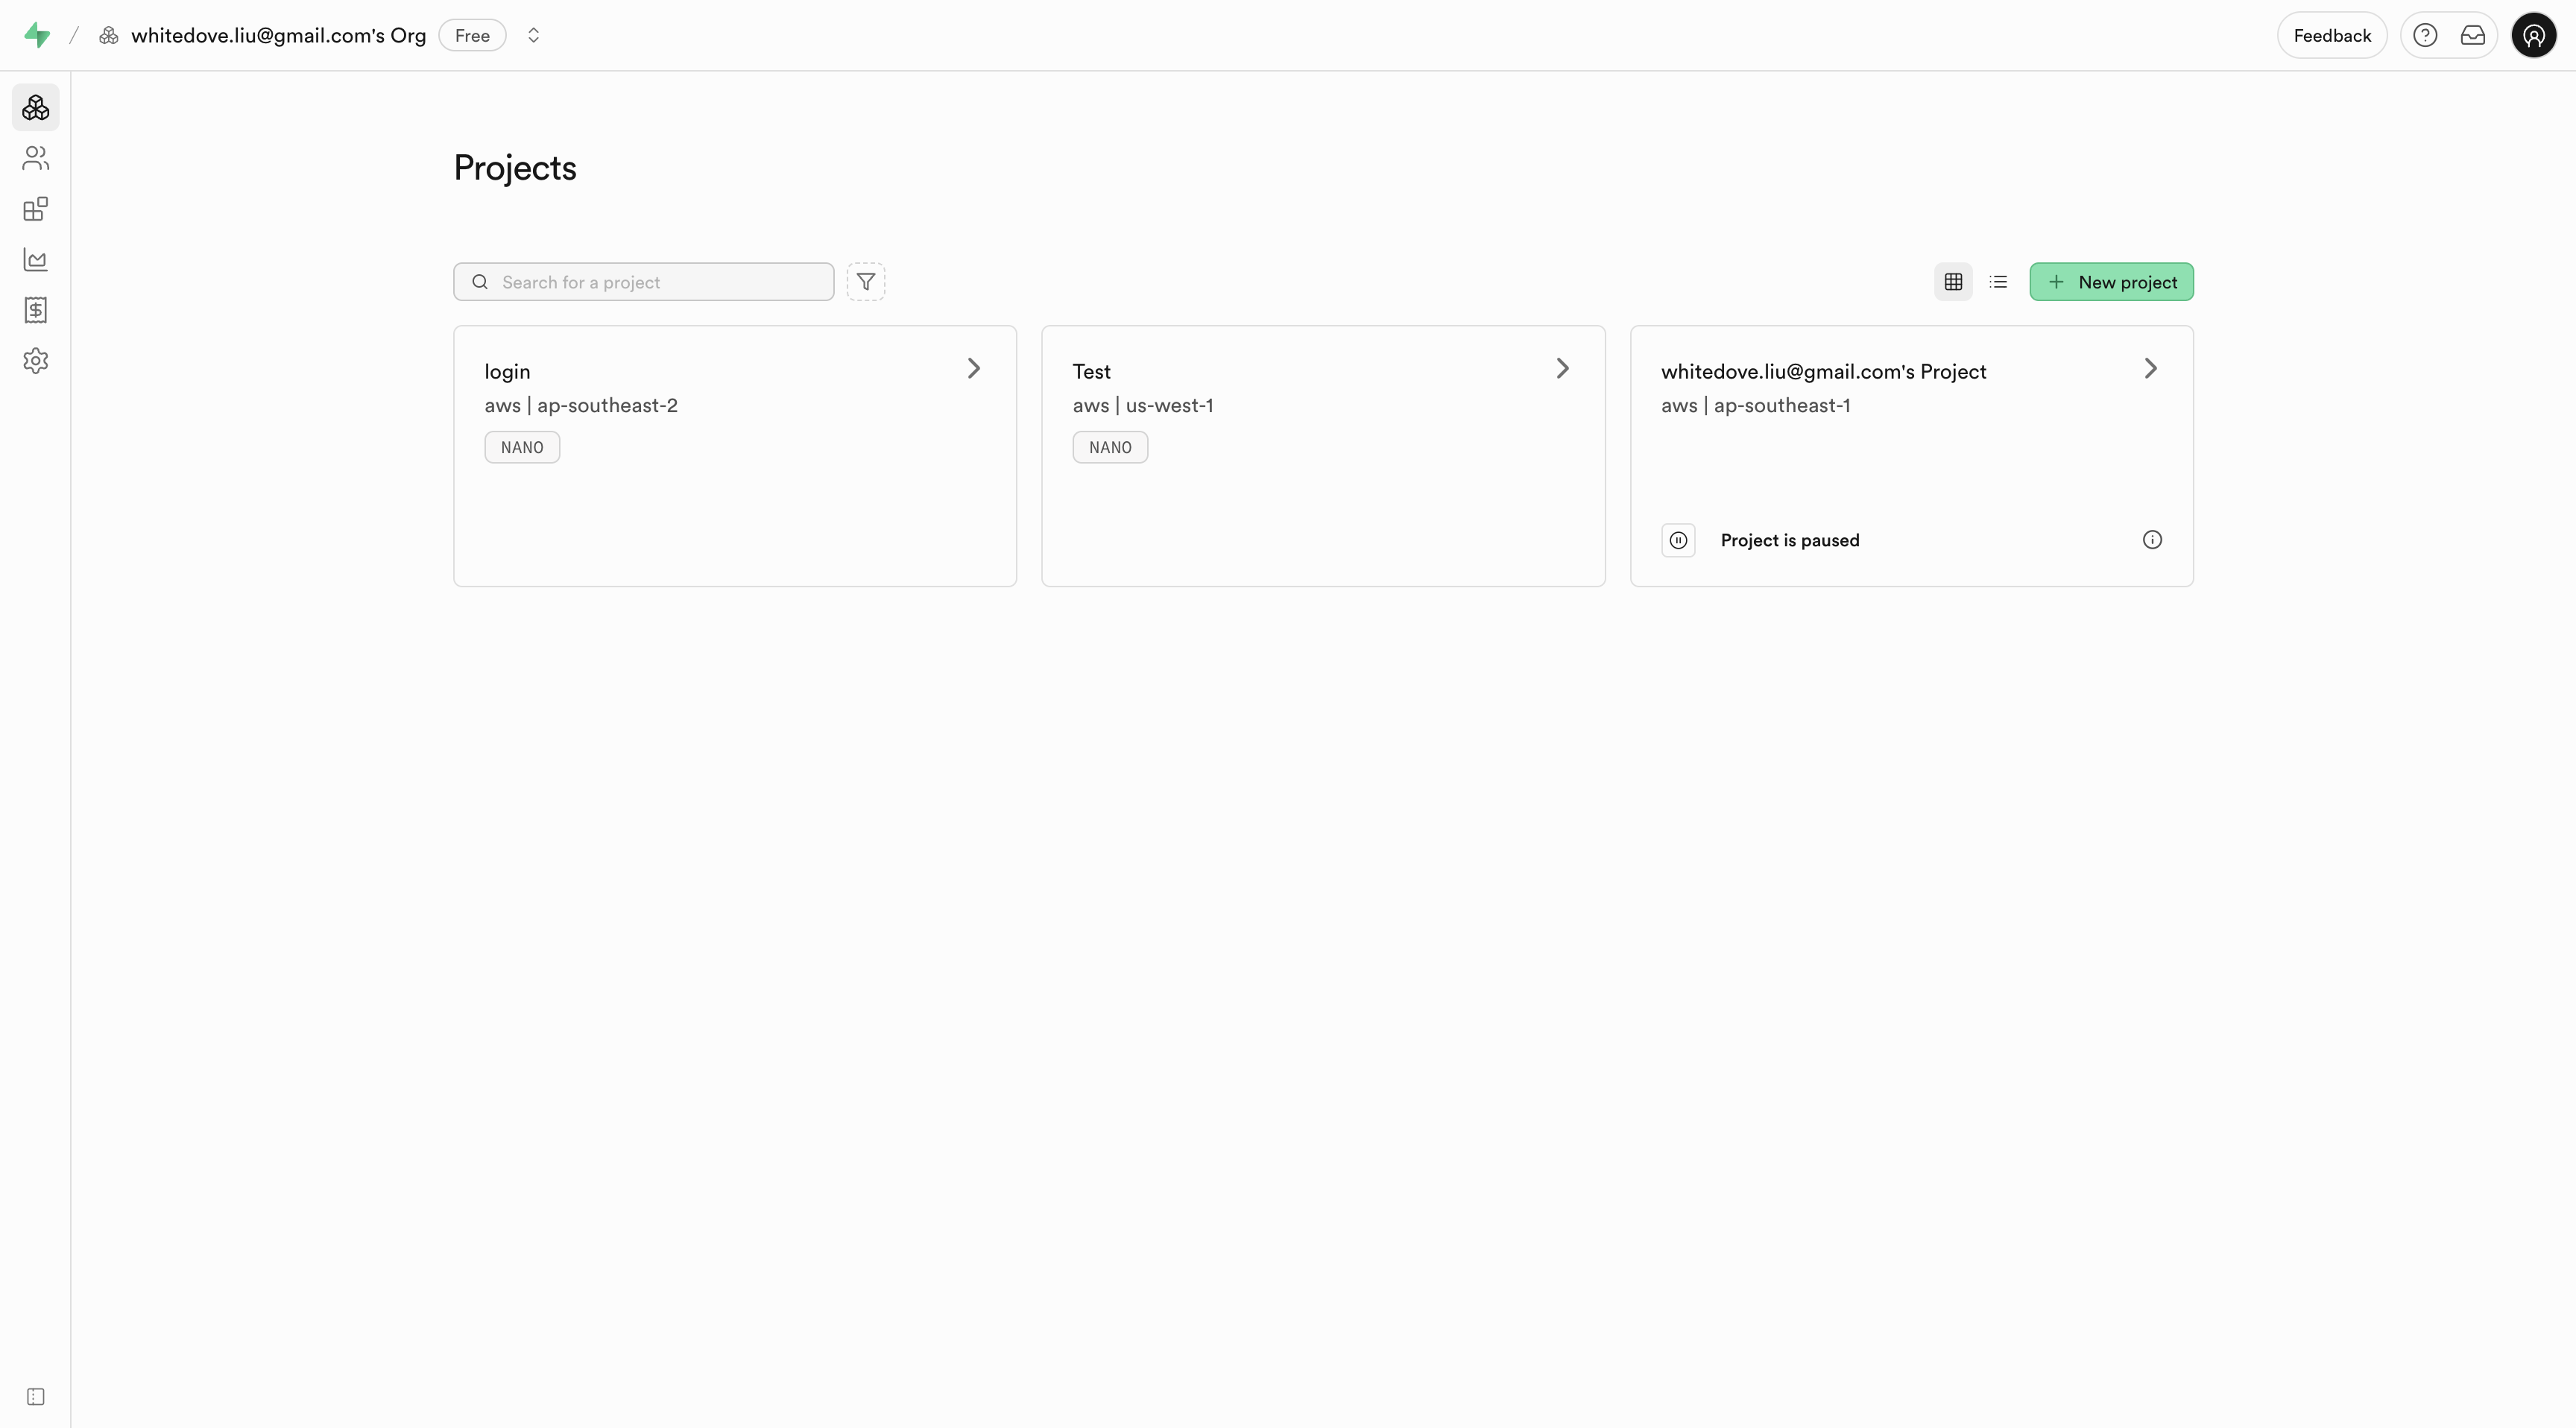
 ## Enable Google Sign-In in Supabase
Open the [**Supabase Dashboard**](https://supabase.com/) and enter your project.
## Enable Google Sign-In in Supabase
Open the [**Supabase Dashboard**](https://supabase.com/) and enter your project.
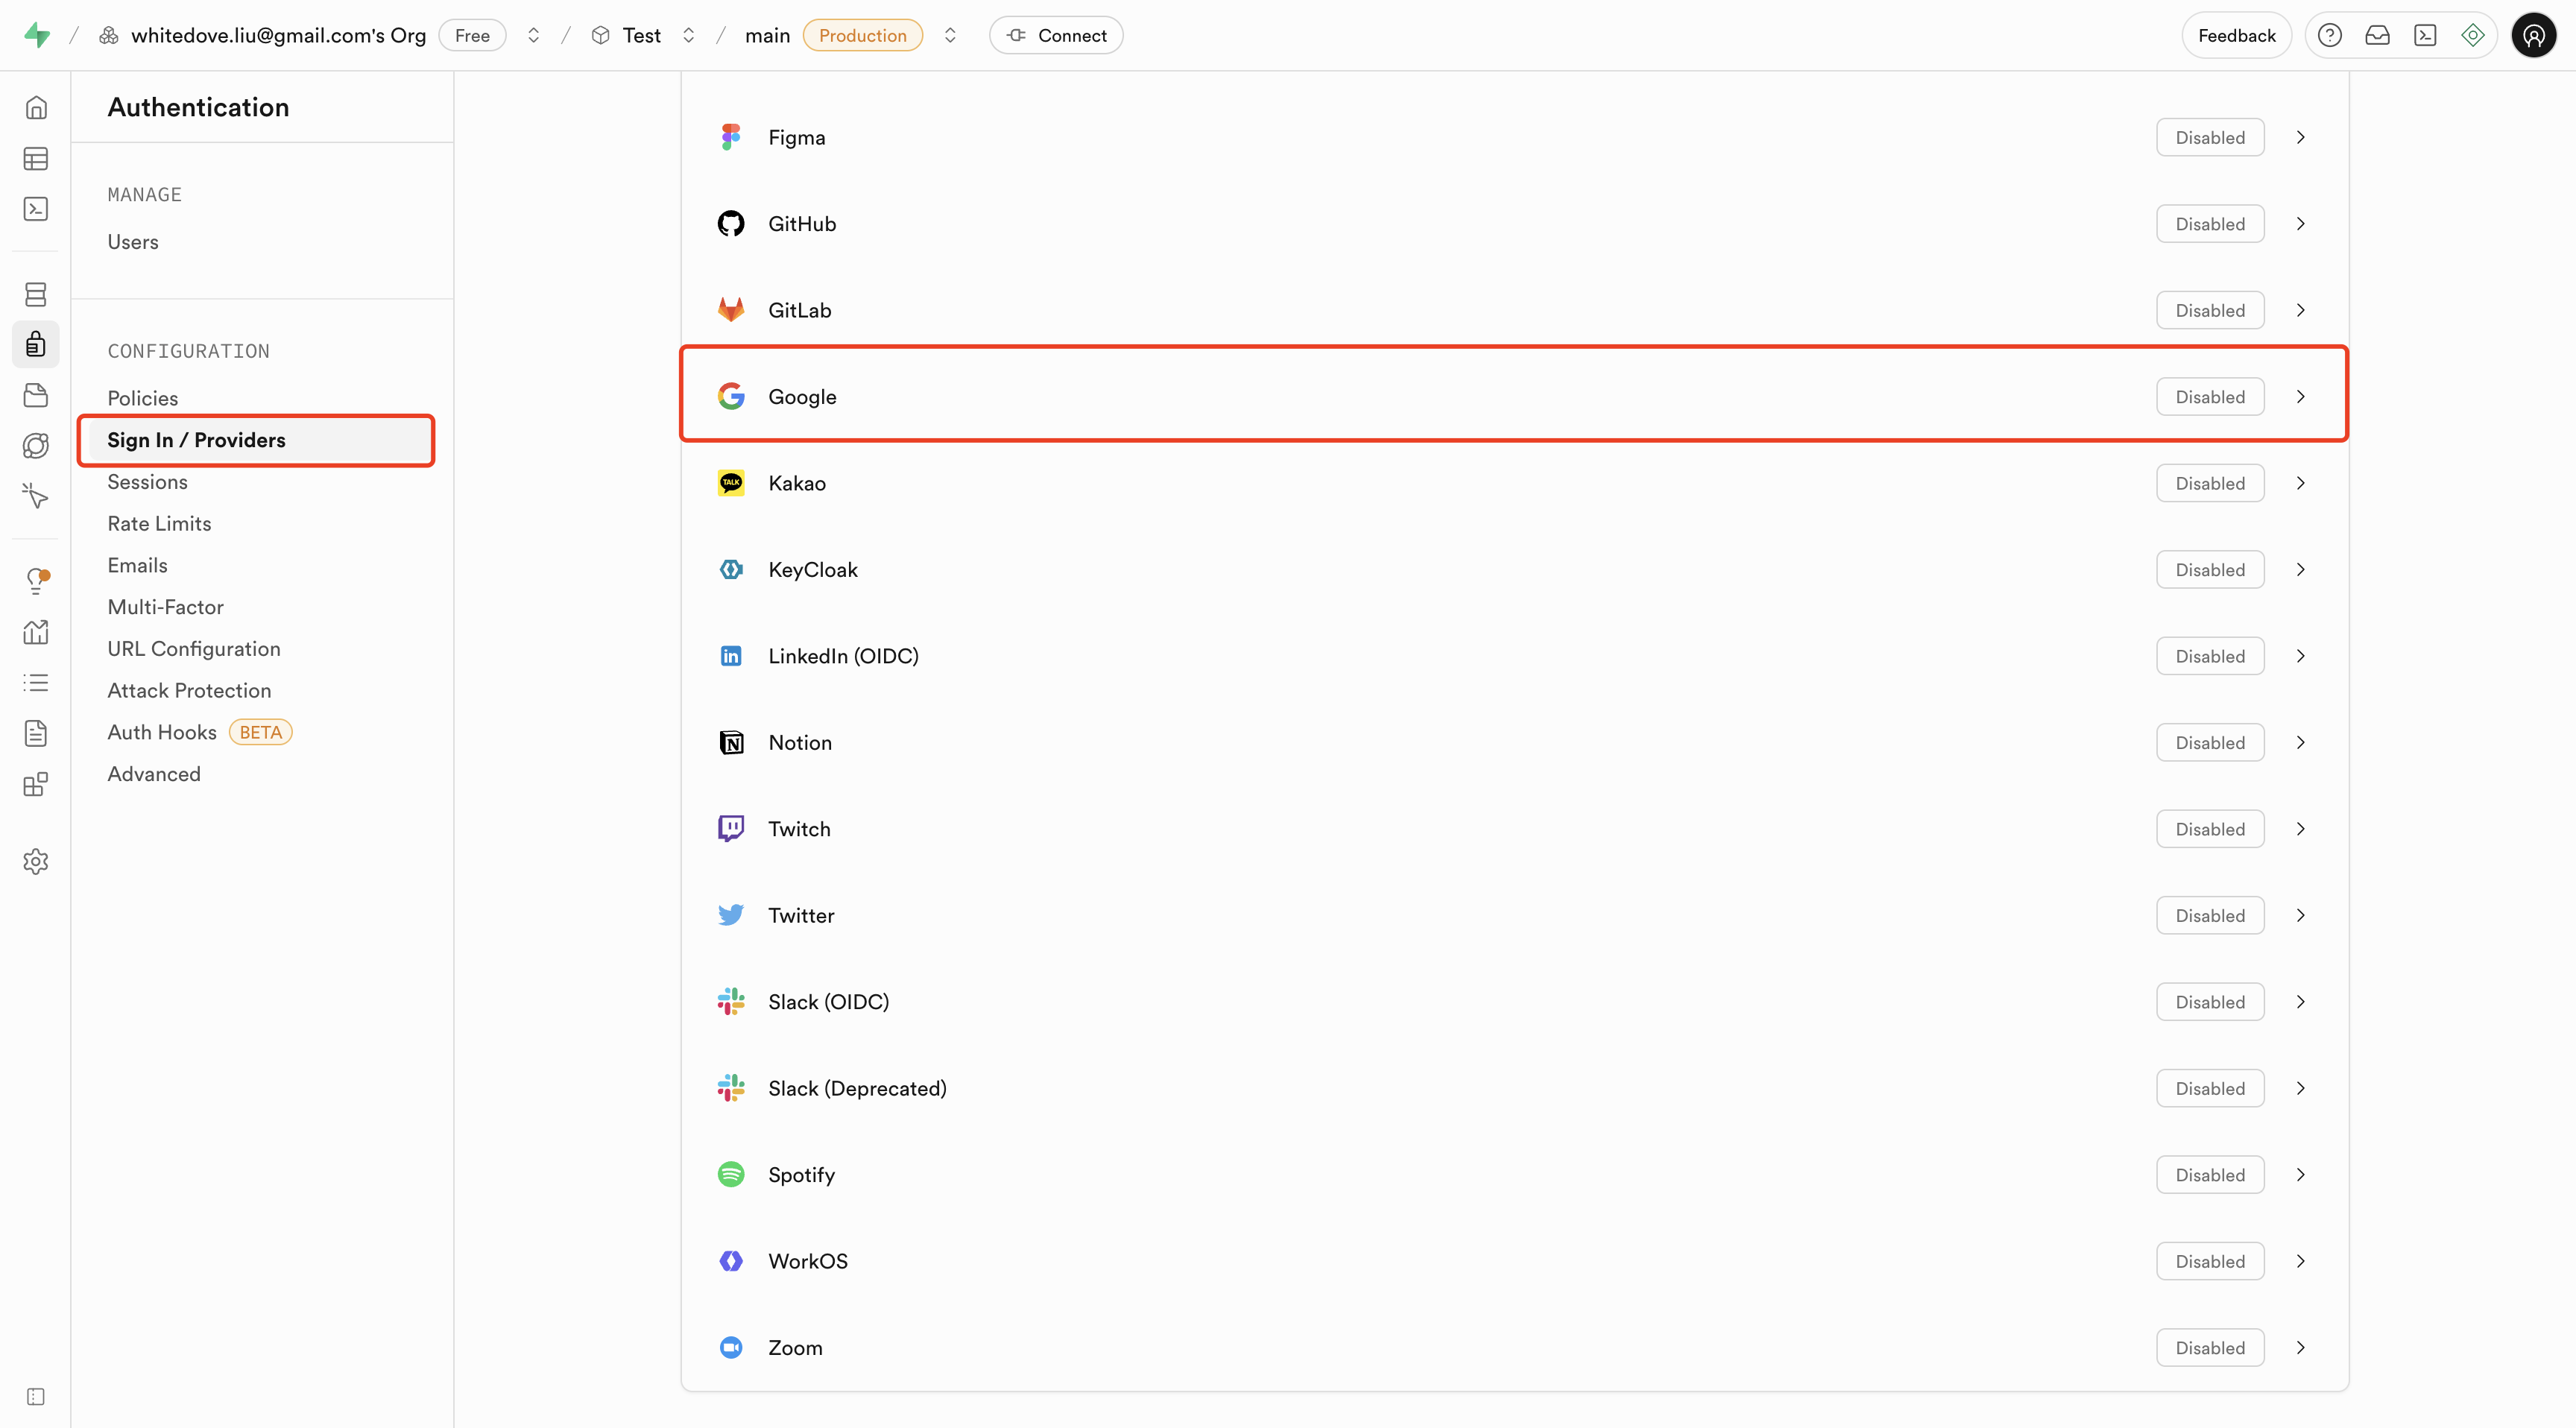
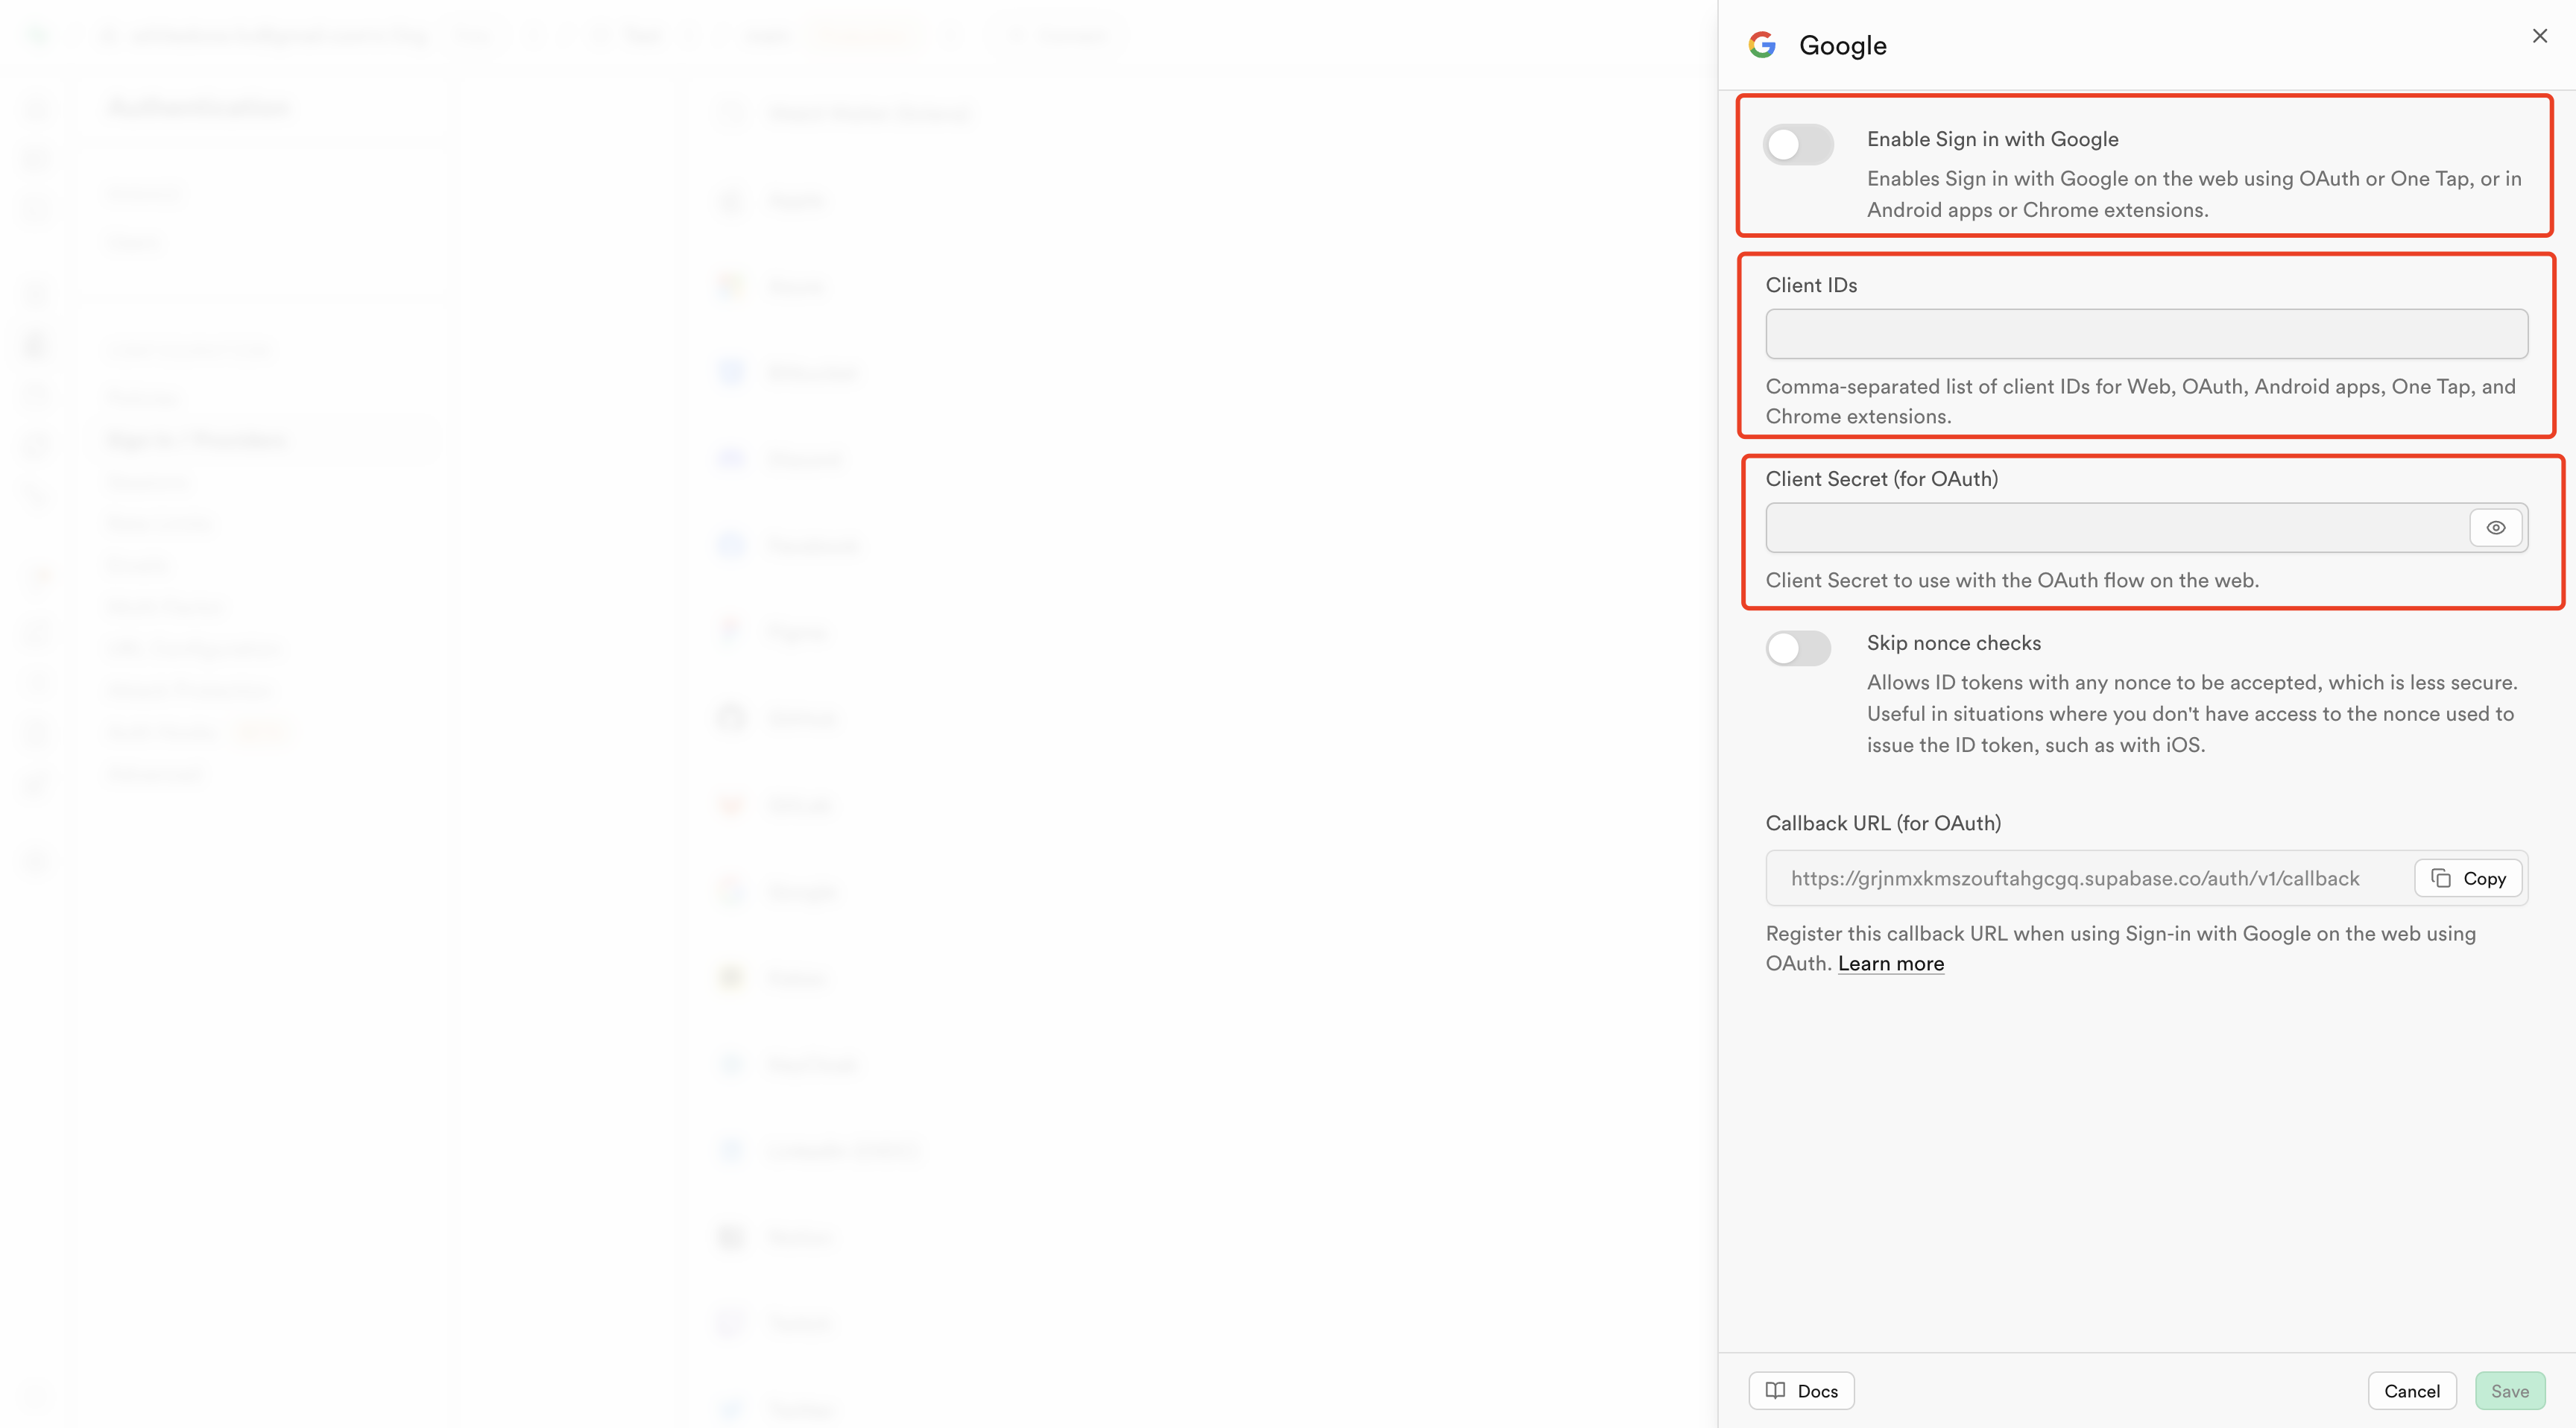
 In the left sidebar, click **Authentication** → **Sign In / Providers**, then on the right click **Google**.
 In **Client ID** / **Client Secret**, paste the values you copied from Google → click **Save**.
 ## Connect Supabase inside Readdy
**Goal:** Link your Readdy project to your Supabase project and generate a page with Google Sign-In.
Connect your Supabase project to Readdy. See "How to connect Supabase" in Readdy for detailed instructions.
Make sure you connect the **same Supabase project** where you enabled **Google Authentication**.
In Readdy, enter the following prompt:
```
To make a login and registration function, need to connect to Google Login.
```
This will generate the necessary UI components for Google Sign-In.
In Readdy, click **Share Link** and open the site's login page → click **"Continue with Google"** → choose an account and authorize.
After a successful login, you should be redirected back to the **SITE URL**.
In **Supabase → Authentication → Users**, you should see the newly created user record.
## Troubleshooting
**Issue:** "Error 400: redirect\_uri\_mismatch"
* **Solution:** Make sure the callback URL in Google Cloud exactly matches the one in Supabase (including https/http and trailing slashes)
**Issue:** "This app isn't verified"
* **Solution:** This is normal during development. Click "Advanced" → "Go to \[app name] (unsafe)" to continue testing
**Issue:** Users not appearing in Supabase
* **Solution:** Check that you're using the same Supabase project in both the Google Cloud configuration and Readdy connection
Once Google Sign-In is working:
1. **Add user profile management** - Allow users to update their profile information
2. **Implement role-based access control** - Set up different user permissions
3. **Set up email notifications** - Send welcome emails and notifications
4. **Configure additional OAuth providers** - Add Facebook, Twitter, or other login options
Choose the features that best fit your application's needs.
## Connect Supabase inside Readdy
**Goal:** Link your Readdy project to your Supabase project and generate a page with Google Sign-In.
Connect your Supabase project to Readdy. See "How to connect Supabase" in Readdy for detailed instructions.
Make sure you connect the **same Supabase project** where you enabled **Google Authentication**.
In Readdy, enter the following prompt:
```
To make a login and registration function, need to connect to Google Login.
```
This will generate the necessary UI components for Google Sign-In.
In Readdy, click **Share Link** and open the site's login page → click **"Continue with Google"** → choose an account and authorize.
After a successful login, you should be redirected back to the **SITE URL**.
In **Supabase → Authentication → Users**, you should see the newly created user record.
## Troubleshooting
**Issue:** "Error 400: redirect\_uri\_mismatch"
* **Solution:** Make sure the callback URL in Google Cloud exactly matches the one in Supabase (including https/http and trailing slashes)
**Issue:** "This app isn't verified"
* **Solution:** This is normal during development. Click "Advanced" → "Go to \[app name] (unsafe)" to continue testing
**Issue:** Users not appearing in Supabase
* **Solution:** Check that you're using the same Supabase project in both the Google Cloud configuration and Readdy connection
Once Google Sign-In is working:
1. **Add user profile management** - Allow users to update their profile information
2. **Implement role-based access control** - Set up different user permissions
3. **Set up email notifications** - Send welcome emails and notifications
4. **Configure additional OAuth providers** - Add Facebook, Twitter, or other login options
Choose the features that best fit your application's needs.